

Page 1
Instruction Manual
ICRRFTSMRN'I
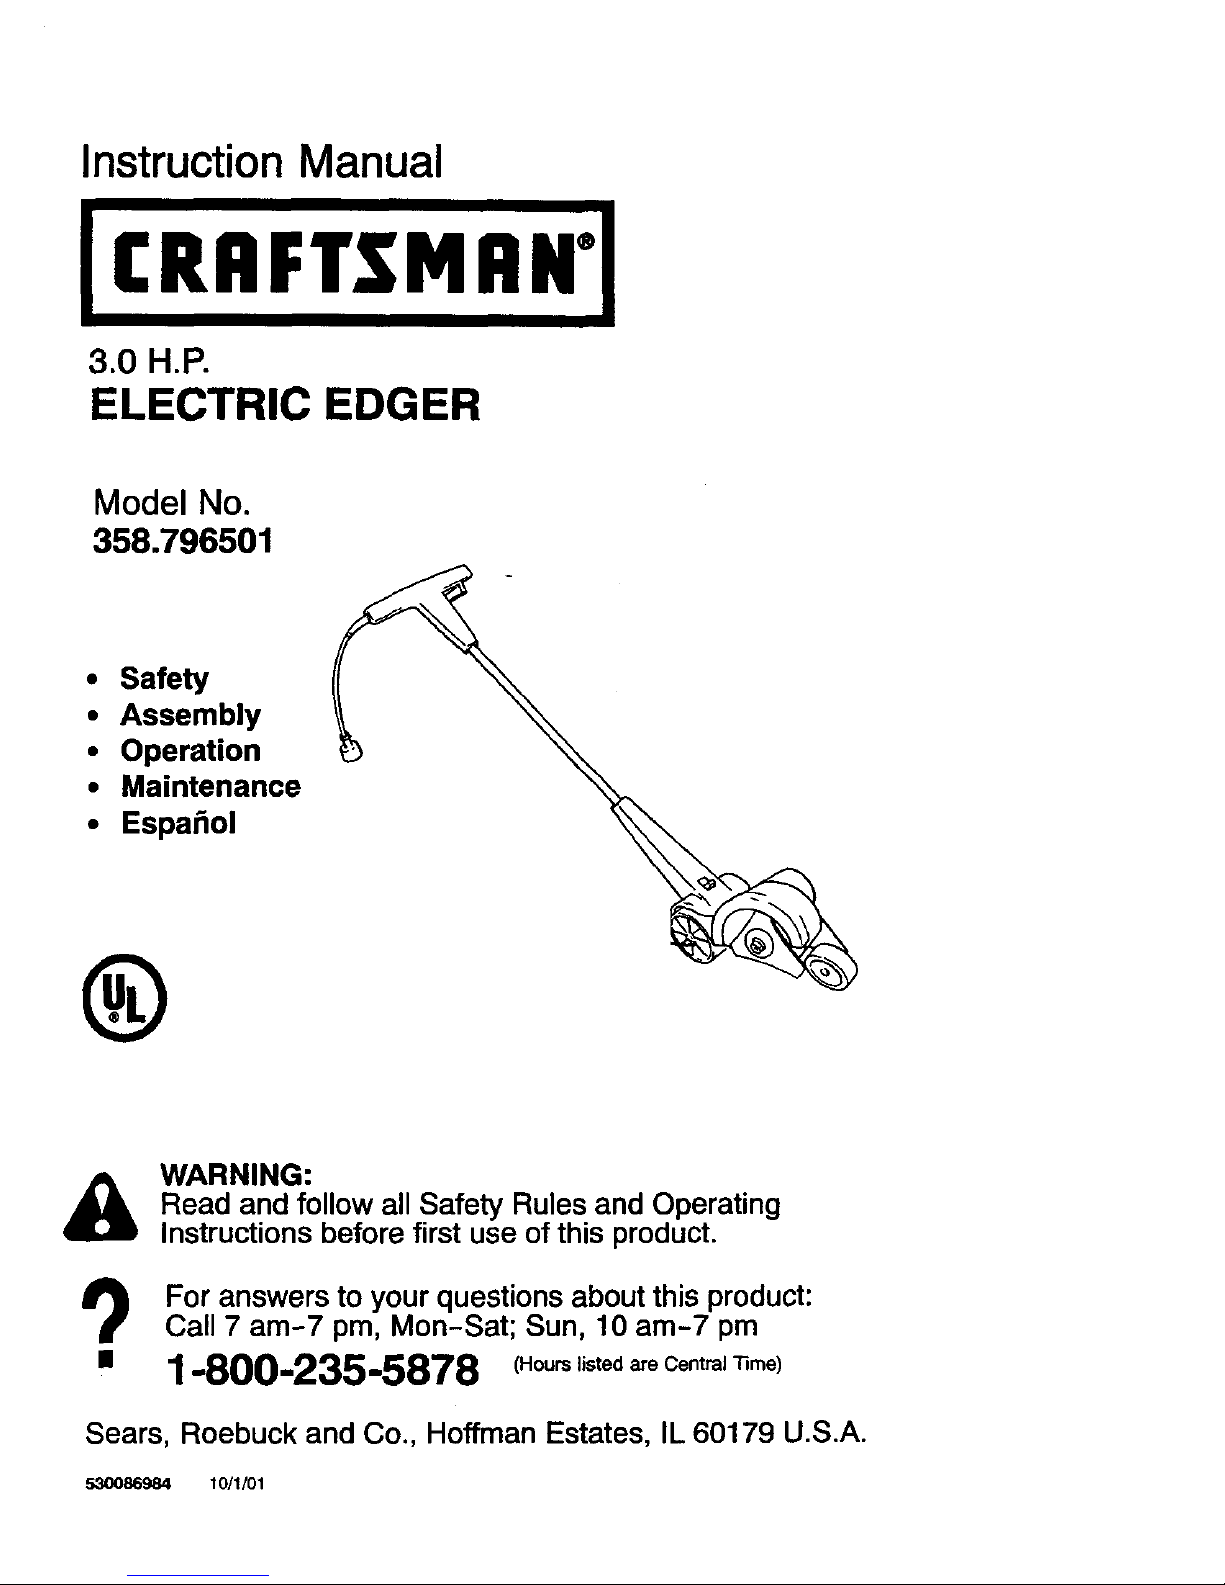
3.0 H.P.
ELECTRIC EDGER
Model No.
358.796501
• Safety
• Assembly
• Operation
• Maintenance
• Espahol
®
WARNING:
Read and follow all Safety Rules and Operating
Instructions before first use of this product.
For answers to your questions about this product:
Call 7 am-7 pm, Mon-Sat; Sun, 10 am-7 pm
[] 1-800-235-5878 (.ou=listed are Central'rime)
Sears, Roebuck and Co., Hoffman Estates, IL 60179 U.S.A.
530086984 1_1_1
Page 2
Warranty Statement
Safety Rules
Assembly
Operation
Maintenance
2
2
5
6
8
Service & Adjustments 8
Storage 9
Troubleshooting Chart 9
Spanish 10
Parts Ordering Back Cover
FULL ONE YEAR WARRANTY ON CRAFTSMAN ELECTRIC EDGER
If this Craftsman Electdc Edger falls to perform properly due to a defect in material or
workmanship within (1) one year from the date of purchase, Sears will replace it free
of charge.
If this edger is used for commercial purposes, this warranty applies for only 90
days from the date of purchase.
If this edger is used for rental purposes, this warranty applies for only 30 days
from the date of purchase.
This warranty does not cover the blade.
WARRANTY SERVICE IS AVAILABLE BY RETURNING THE CRAFTSMAN ELECTRIC
EDGER TO THE NEAREST SEARS STORE OR SERVICE CENTER IN THE UNITED
STATES.
This warranty gives you specific legal rights, and you may also have other rights
which vary from state to state.
Sears, Roebuck and Co., D/817 WA, Hoffman Estates, IL 60179
,t_ ____
41SWARNING: When using electric
edgers, basic safety precautions
should always be followed to reduce
the risk of fire, electric shock, and per-
sonai injury. Read all instructions and
safety information throughout this
manual.
DANGER: TH_SPOWERUNITCAN
BE DANGEROUS! This unit can cause
serious injury including amputation or
blindness to the operator and others.
The warnings and safety instructions in
this manual must be followed to provide
reasonable safety and efficiency in using
this unit. The operator is responsible for
following warnings and instructions in
this manual and on unit. Read entire in-
struction manual before assembling and
using this unit! Restrict use of this power
tool to persons who read, understand,
and follow warnings and instructions in
this manual and on the unit. Never al-
low children to operate this unit.
_ SAFETY INFORMATIONON THE UNIT
OPERATOR SAFETY
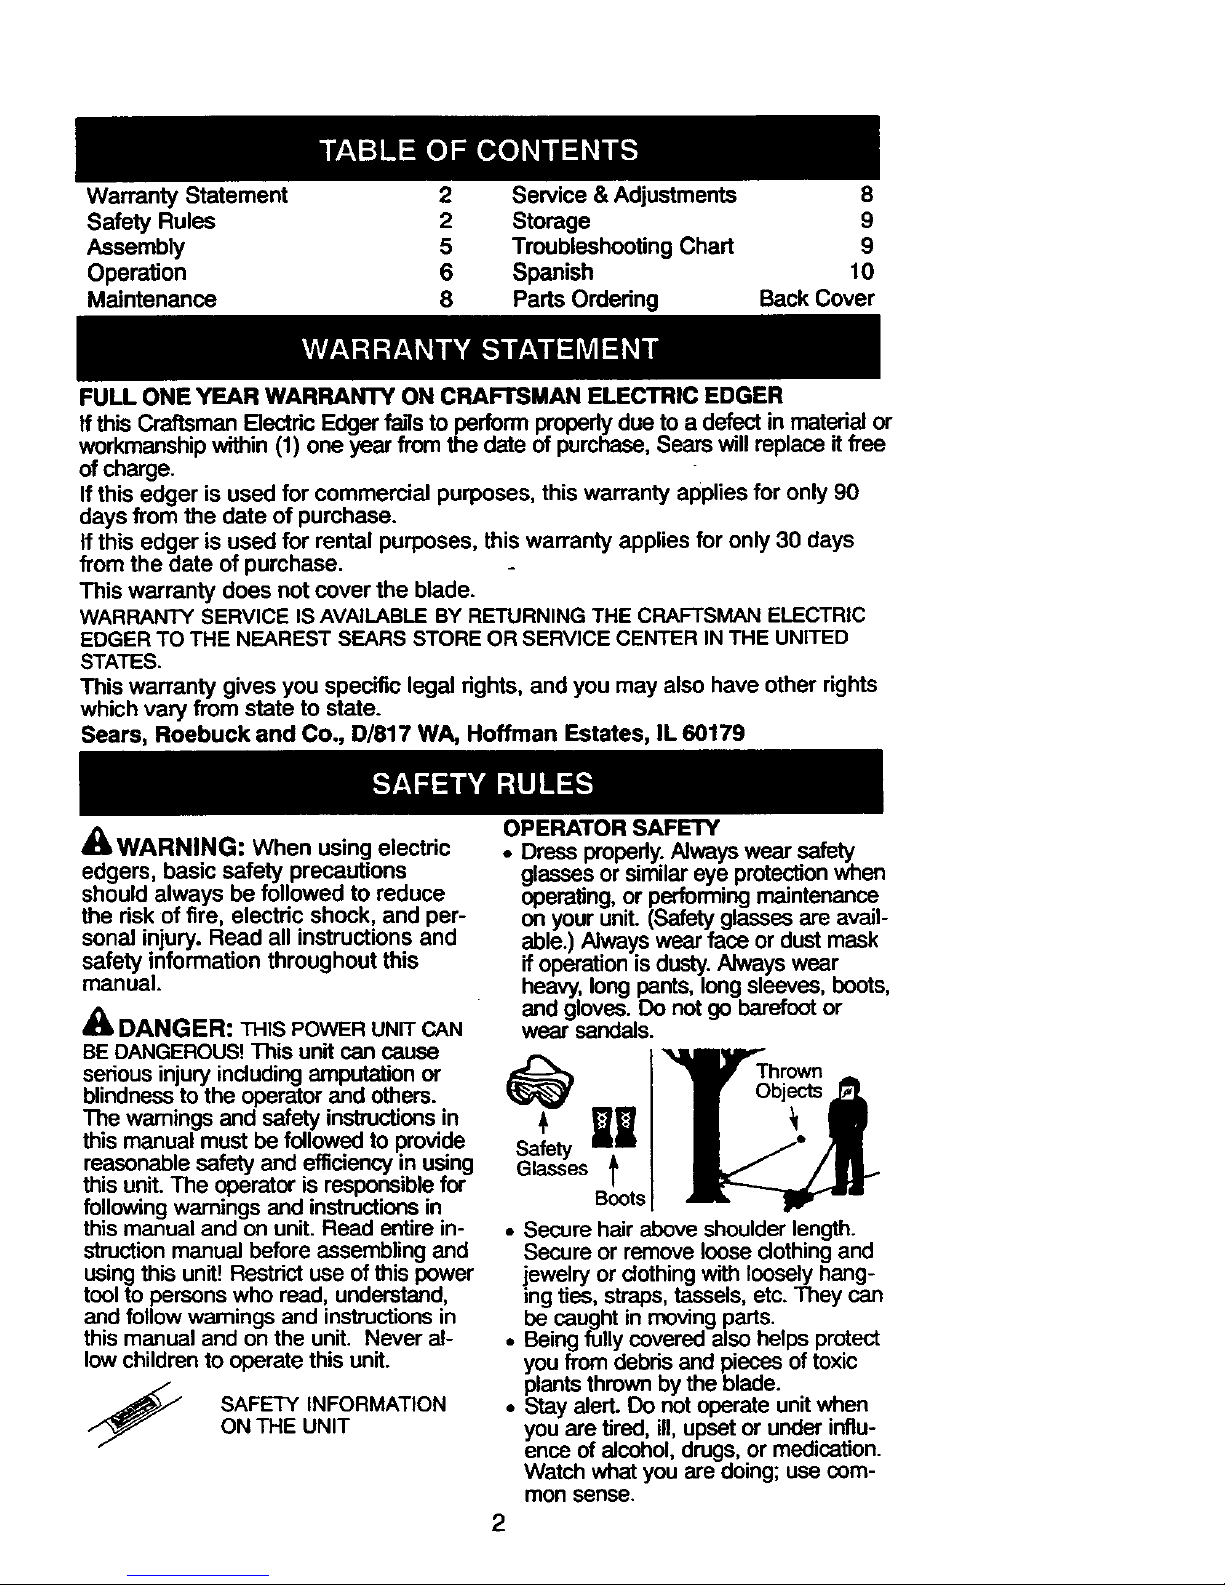
• Dress properly.Always wear safety
glasses or similar eye protection when
operating,or performingmaintenance
onyour unit. (Safety glasses are avail-
able.) Always wear face or dustmask
ifoperation isdusty.Always wear
heavy,long pants, longsleeves, boots,
and gloves. Do not go barefoot or
wear sandals.
_l_Thrown
1
Boots
• Secure hair above shoulder length.
Secure or remove loose clothing and
jewelry or clothing with loosely hang-
ing ties, straps, tassels, etc. They can
be caught in moving parts.
• Being fully covered also helps protect
you fTom debris and pieces of toxic
plants thrown by the blade.
• Stay alert. Do not operate unit when
you are tired, ill, upset or under influ-
ence of alcohol, drugs, or medication.
Watch what you are doing; use com-
mon sense.
2
Page 3
• Avoid unintentionalstarting of the unit.
Never carrythe unitwithyour finger on
the switch. Be sure the switch isnot in
the on positionwhen connectingthe
extension cord.
A __..___
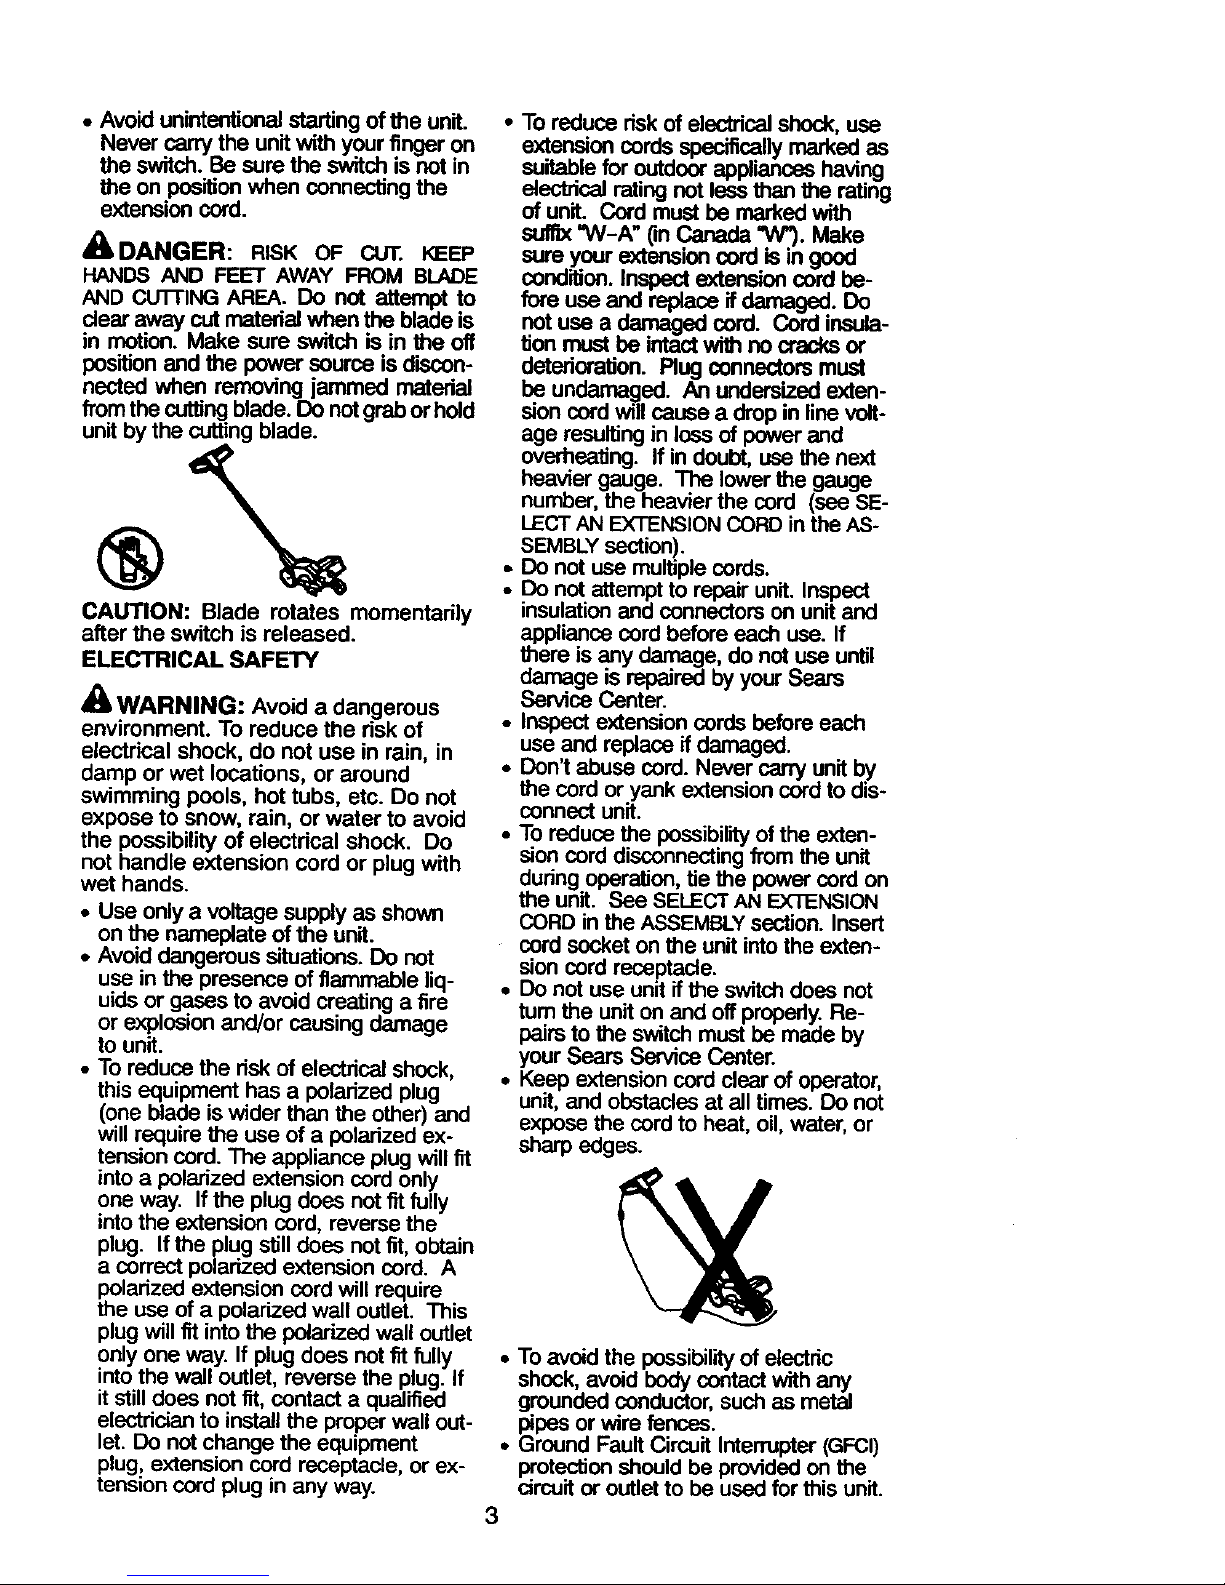
a IJANGleR: RISK OF CUT. KEEP
HANDS AND FEET AWAY FROM BLADE
AND CU'I-nNG AREA. Do not attempt to
clear away cut material when the blade is
in motion. Make sure switch is in the off
position and the power source is discon-
nected when removing jammed material
from the cutting blade. Do not grab or hold
unit by the cutting blade.
.%
CAUTION: Blade rotates momentarily
after the switch is released.
ELECTRICAL SAFETY
'_ WARNING: Avoid a dangerous
environment. To reduce the risk of
electrical shock, do not use in rain, in
damp or wet locations, or around
swimming pools, hot tubs, etc. Do not
expose to snow, rain, or water to avoid
the possibility of electrical shock. Do
not handle extension cord or plug with
wet hands.
• Use only a voltage supply as shown
on the nameplate of the unit.
• Avoid dangerous situations. Do not
use in the presence of flammable liq-
uids or gases to avoid creating a fire
or explosion and/or causing damage
to unit.
• To reduce the risk of electrical shock,
this equipment has a polarized plug
(one blade is wider than the other) and
will require the use of a polarized ex-
tension cord. The appliance plug will fit
into a polarized extension cord only
one way. If the plug does not fit fully
into the extension cord, reverse the
plug. If the plug still does not fit, obtain
a correct polarized extension cord. A
polarized extension cord will require
the use of a polarized wall outlet. This
plug will fit into the polarized wall outlet
only one way. If plug does not fit fully
into the wall outlet, reverse the plug. If
it still does not fit, contact a qualified
electrician to install the proper wall out-
let. Do not change the equipment
plug, extension cord receptacle, or ex-
tension cord plug in any way.
• To reduce risk of electrical shock, use
extension cords specifically marked as
suitable for outdoor appliances having
electrical rating not less than the rating
of unit. Cord must he marked with
suffix =W-A" (in Canada "W"). Make
sure your extension cord is in good
condition. Inspect extension cord be-
fore useand replaceif damaged.DO
not use a damaged cord. Cord insula-
tion must be intact with no cracks or
detedoraUon. Plug connectors must
he undama_]ed. An undersized exten-
sion cord witl cause a drop in line volt-
age resulting in loss of power and
overheating. If in doubt, use the next
heavier gauge. The lower the gauge
number, the heavier the cord (see SE-
LECT AN EXTENSION CORD in the AS-
SEMBLY section).
o Do not use multiple cords.
• Do not attempt to repair unit. Inspect
insulation and connectors on unit and
appliance cord before each use. If
there is any damage, do not use until
damage is repaired by your Sears
Service Center.
• Inspect extension cords before each
use and replace if damaged.
• Don't abuse cord. Never carry unit by
the cord or yank extension cord to dis-
connect unit.
• To reduce the possibility of the exten-
sion cord disconnecting from the unit
dudng operation, tie the power cord on
the unit. Bee SELECT AN EXTENSION
CORD in the ASSEMBLY section. Insert
cord socket on the unit into the exten-
sion cord receptacle.
• DO not use unit if the switch does not
tum the unit on and off properly. Re-
pairs to the switch must be made by
your Sears Service Center.
• Keep extension cord clear of operator,
unit, and obstacles at all times. DO not
expose the cord to heat, oil, water, or
sharp edges.
• To avoid the possibility of electdc
shock, avoid body contact with any
grounded conductor, such as metal
pipes or wire fences.
• Ground Fault Circuit Interrupter (GFCI)
protection should be provided on the
circuit or outlet to be used for this unit.
3
Page 4
Receptadasareavailablehavingbuilt-
inGFCIprotectionendmaybeused
forthismeasureofsafety.
UNITSAFETY
• Do not attempt to repair unit. Inspect
entire unit and extension cord before
each use. Have damaged parts re-
paired or replaced by your Sears Ser-
vice Center. Make sure all fasteners,
handles, end guards are inplace end
securely fastened. A guard or other
part that is damaged should be prop-
edy repaired or replaced by a Sears
Service Center.
• Replace blades that are bent, warped,
cracked, broken, or damaged in any
other way:
• Before usmg your unit, have your
Sears Service Center repair or replace
parts that are cracked, chipped, bro-
ken, or damaged in any other way.
• Use only Craftsman replacement
blades end acceesories as recom-
mended for this unit. Never use wire,
rope, string, etc. Use of any other
accessory or attachment may increase
the risk of injuryorcause damage to
the unit.
• Keep blade guard in place and in
good working order.
EDGING SAFETY
• Inspectthe area to be edged before
each use. Remove objects (rocks, bro-
ken glass, nails,wire, string, etc.)
which can be thrown by blade or can
wrap around blade shaft.
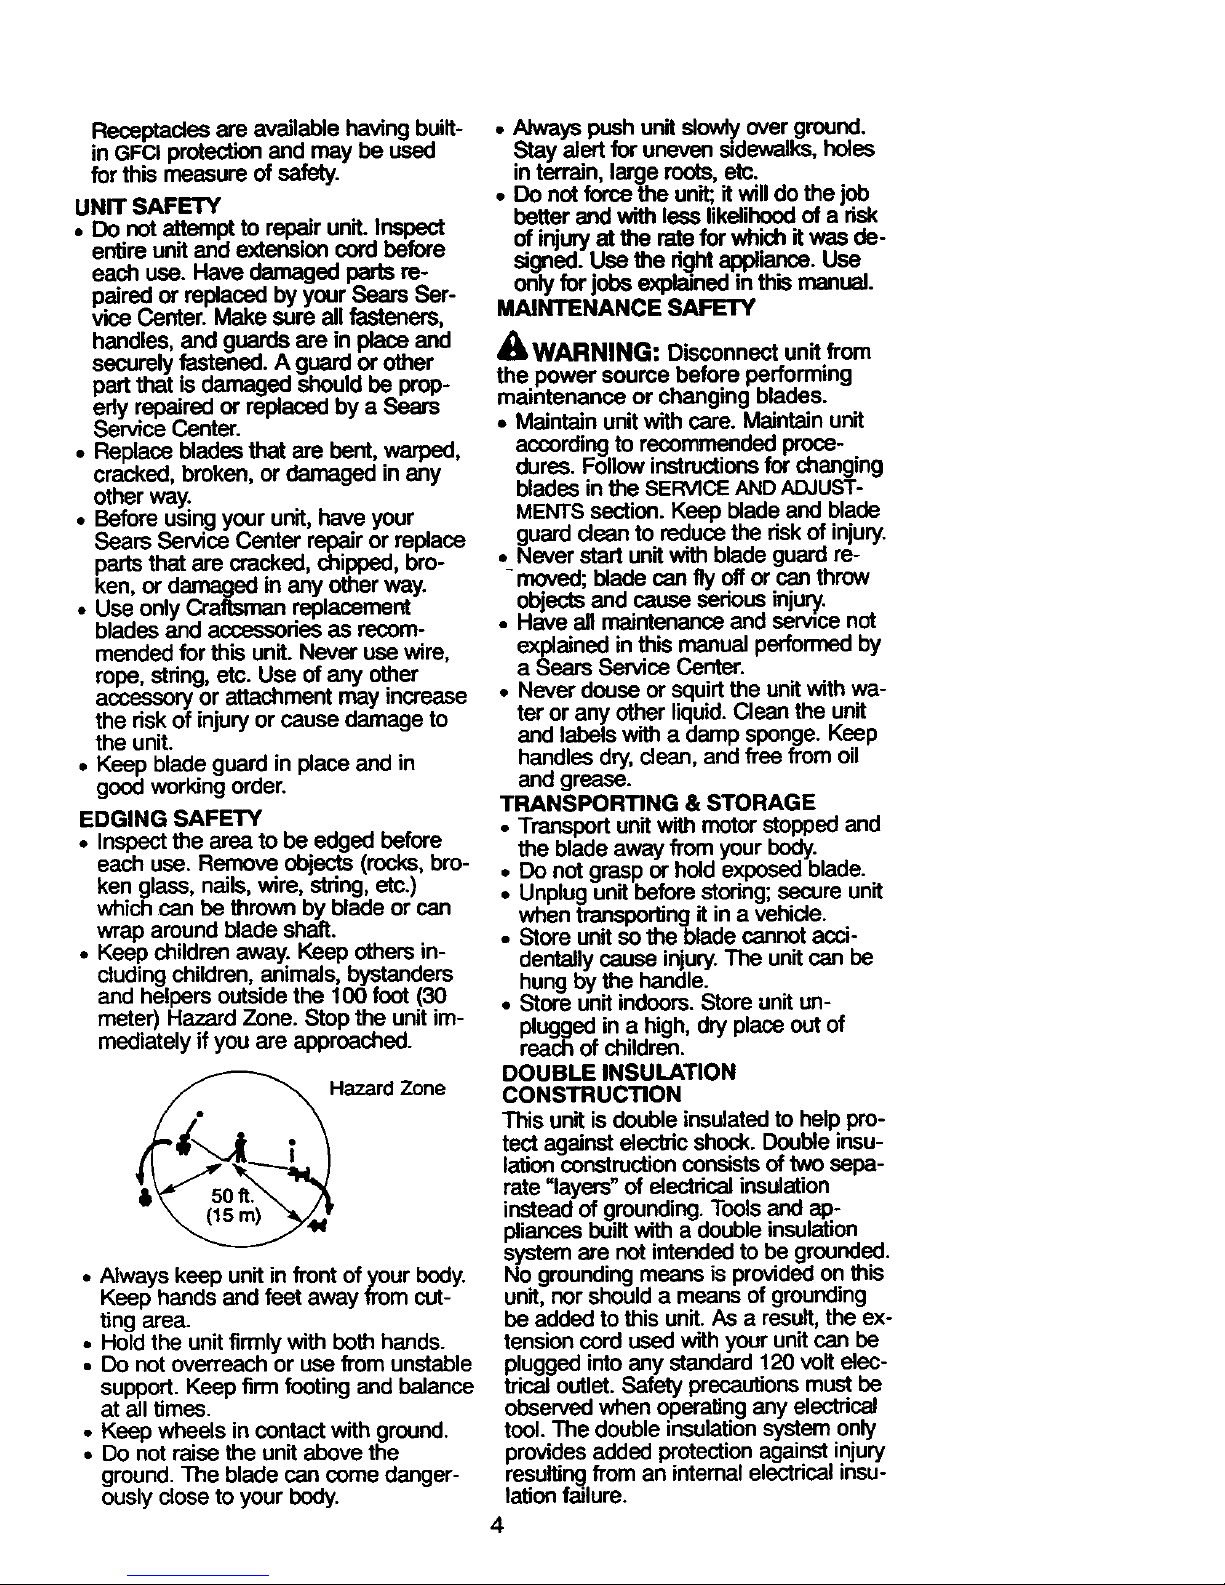
• Keep children away. Keep others in-
cludingchildren,animals, bystenders
and helpers outside the 100 foot (30
meter) Hazard Zone. Stop the unit im-
mediately ifyou are approached.
azard Zone
• Always keep unit in front ofyour body.
Keep hands end feet away trom cut-
ting area.
• Hold the unit firmly with both hands.
• Do not overreach or use from unstable
support. Keep firm footing and balance
at all times.
• Keep wheels in contact with ground.
• Do not raise the unit above the
ground. The blade can come danger-
ously close to your body.
• Always push unitslowlyover ground.
Stay alertfor uneven sidewalks, holes
in terrain, large roots, etc.
• Do not force the unit;itwill do the job
better and with less likelihoodof a risk
of injury at the rate for which it wes de-
signed. Use the rightappliance. Use
onlyfor jobs explained in thismanual.
MAINTENANCE SAFETY
WARNING: Disconnect unit from
the power source before performing
maintenance or changing blades.
,, Maintain unit with care. Maintain unit
according to recommended proce-
dures. Follow instructions for changing
blades in the SERVICE AND ADJUST-
MENTS section. Keep blade and blade
guard dean to reduce the risk of injury.
• Never start unit with blade guard re-
- moved; blade can fly off or can throw
objects end cause serious injury.
• Have all maintenance end sennce not
explained in this manual performed by
a Sears Service Center.
• Never douse or squirt the unit with wa-
ter or any other liquid. Clean the unit
end labels with a damp sponge. Keep
handles dry, cleen, and free from oil
and grease.
TRANSPORTING & STORAGE
• Transport unit with motor stopped and
the blade away fi'om your body.
• Do not grasp or hold exposed blade.
• Unplug unit before storing; secure unit
when transporting it in a vehicle.
• Store unit so the blade cannot acci-
dentally cause injury. The unit can be
hung by the handle.
• Store unit indoors. Store unit un-
plugged in a high, dry place out of
reach of children.
DOUBLE INSULATION
CONSTRUCTION
This unit is double insulated to help pro-
tect against eleckic shock. Double insu-
lation construction consists of two sepa-
rate "layers" of electrical insulation
instead of grounding. Tools and ap-
pliances built with a double insulation
system are not intended to be grounded.
No grounding means is provided on this
unit, nor should a means of grounding
be added to this unit. As a result, the ex-
tension cord used with your unit can be
plugged into any standard 120 volt elec-
trical outlet. Safety precautions must be
observed when operetJng any electrical
tool. The double insulation system only
provides added protection against injury
resulting from an internal electricaJ insu-
lation failure.
4
Page 5

• ILWARNING: All electdcal repairs
to this unit, including housing, switch,
motor, etc., must be diagnosed and re-
paired by qualified service personnel.
Replacement parts for a double insu-
lated appliance must be identical to the
parts they replace. A double insulated
appliance is marked with the words
DOUBLE INSULATION or DOUBLE INSU-
LATED.The symbolrS"l(square within a
square) may also be marked on the
appliance. Failure to have the unit re-
paired by Sears service personnel can
cause the double insulation construc-
tion to become ineffective and result in
sedous injury.
SAVE THESE INSTRUCTIONS
CARTON CONTENTS
Check carton contents against the fol-
lowing list.
Model 358.796501
Edger
'Screws
• Locknuts
• Extra Blade
Examine parts for damage. Do not use
damaged parts.
NOTE: If you need assistance or find
that parts are missing or damaged, call
1-800-235-5878.
ASSEMBLY
='% __ _
_WARNING: If received as-
sembled, repeat all steps to ensure
your unit is properly assembled and all
fasteners are secure.
This instruction manual has been de-
veloped to help you assemble the unit
and to provide its safe operation. It is
important that you read the entire man-
ual to become familiar with the unit be-
fore you begin assembly.
Read your instruction manual.
Tools you will need:
• Phillips screwdriver
TUBE ASSEMBLY
1. Insert tube into motor housing as
shown. Align the screw holes.
2. Insert Iocknuts into the pockets in
the motor housing.
3. Insert screws through aligned holes.
4. Thread screws into Iocknuts; tighten
securely.
Screws
Locknuts
'F
o
EXTENSION CORD
Use only a 120 A.C. voltage supply as
shown on nameplate of the unit to
power your edger.
The extension cord used to reach the
power source must be:
• Specifically marked as suitable for
outdoor use. The cord must be
marked with the suffix "W-A".
• Heavy enoughto carrycurrentfrom
the power source thefull lengthof the
extensioncordto the unit.Otherwise,
lossof power and overheatingcan oc-
cur causing damage to unit. Refer to
chart for minimumwire gauge recom-
mendations.The cord must be
marked with the properwire gauge.
(Appropriate extensioncords are avail-
able at Sears.) Do not use mul_ple
cords.
• In good condition. Cord insulation
must be intact with no cracks or
deterioration. Plug connectors must
be undamaged.
MINIMUM WIRE GAUGE
RECOMMENDATIONS
VOLTS 25FT. 50FT. 100FT 150FT.
120 16 16 14 12
A.W.G.* A.W.G.* A.W.G.* A.W.G.*
*AmericanW-=reGauge
Secure extension cord to unit:
• "13ethe power plug on the unit to the
extension cord as shown.
• Insert plug into cord socket.
Power Plug on Extension
Unit_ Cord
5
Page 6
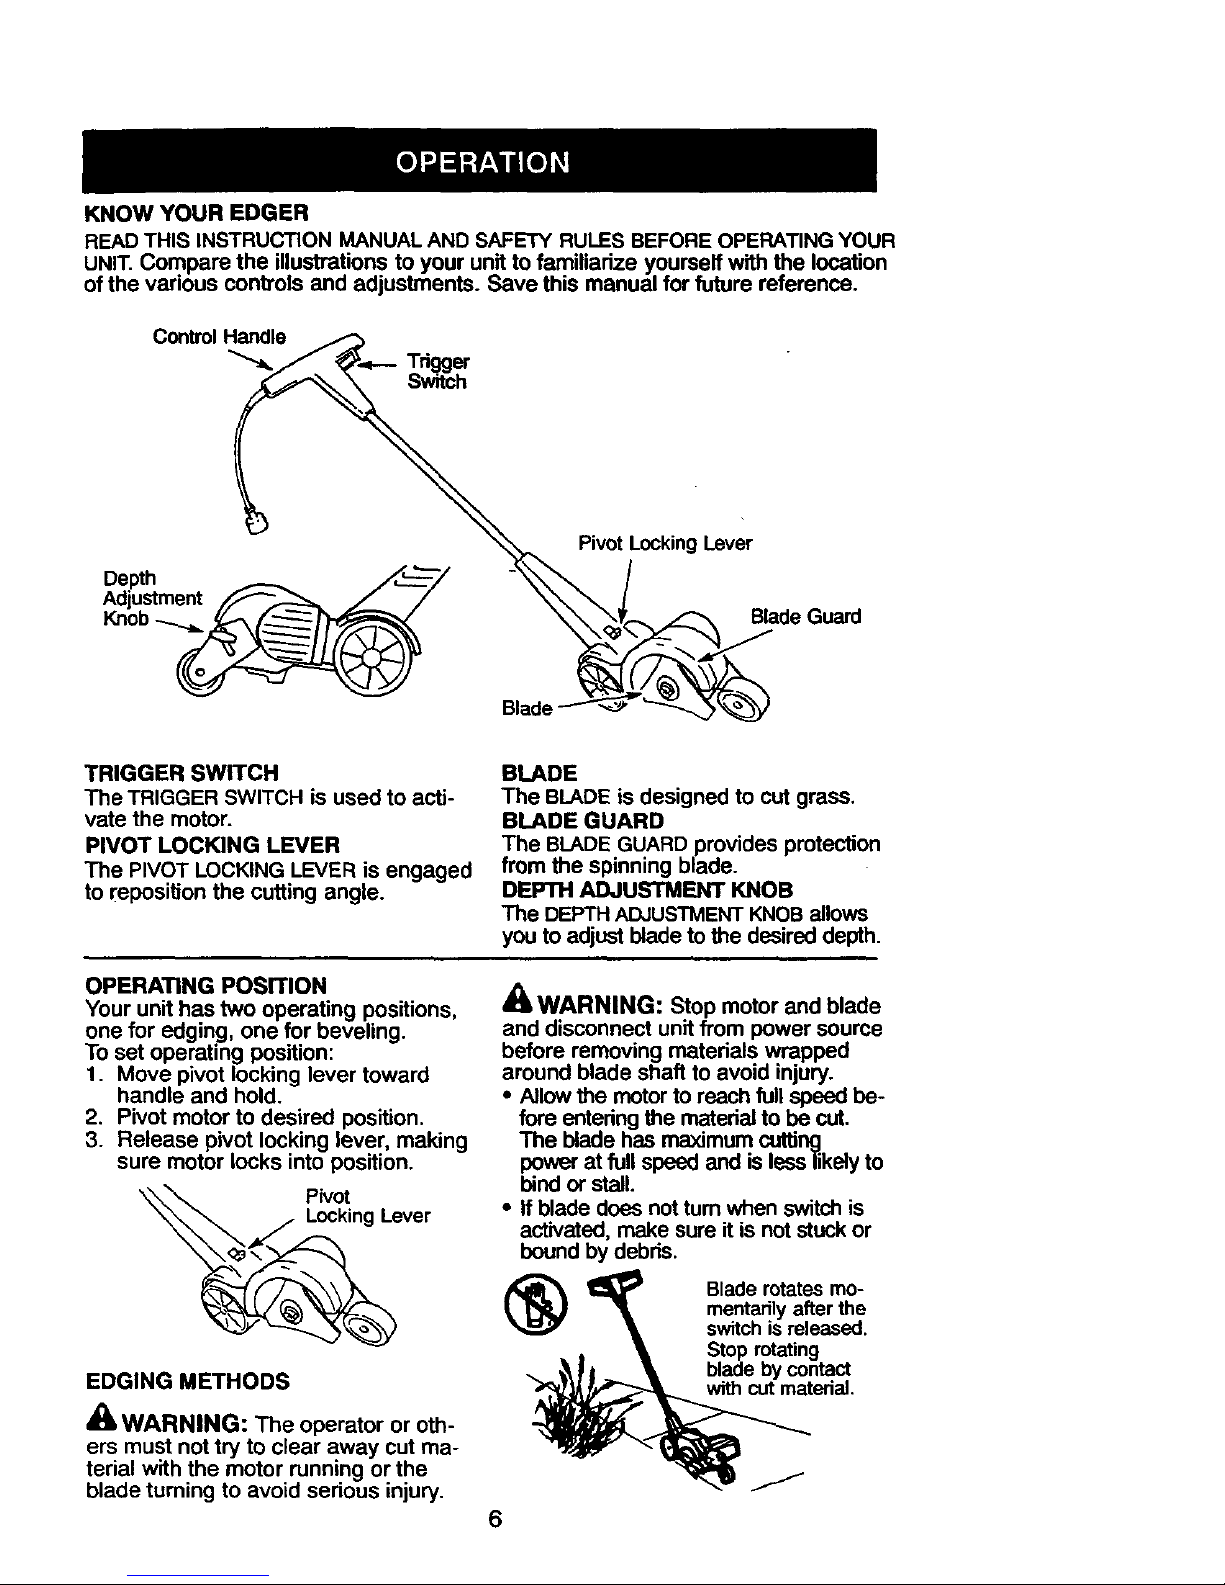
KNOW YOUR EDGER
READ THIS INSTRUCTION MANUAL AND SAFETY RULES BEFORE OPERATING YOUR
UNIT. Compare the illustrations to your unit to familiarize yourself with the location
of the various controls and adjustments. Save this manual for future reference.
Depth
Adjustment
Knob
Pivot Locking Lever
Blade Guard
Blade
TRIGGER SWITCH
The TRIGGER SWITCH is used to acti-
vate the motor.
PIVOT LOCKING LEVER
The PIVOT LOCKING LEVER is engaged
to reposition the cutting angle.
BLADE
The BLADE is designed to cut grass.
BLADE GUARD
The BLADE GUARD provides protection
from the spinning blade.
DEPTH ADJUSTMENT KNOB
The DEPTH ADJUSTMENT KNOB allows
yOu to adjust blade to the desired depth.
OPERATING POSITION
Your unit has two operating positions,
one for edging, one for beveling.
To set operating position:
1. Move pivot locking lever toward
handle and hold.
2. Pivot motor to desired position.
3. Release pivot locking lever, making
sure motor locks into position.
EDGING METHODS
_' WARNING: The operator or oth-
ers must not try to clear away cut ma-
terial with the motor running or the
blade turning to avoid serious injury.
WARNING: Stop motor and blade
and disconnect unit from power source
before removing materials wrapped
around blade shaft to avoid injury.
• Allow the motor to reach full speed be-
fore entedng the matedal to be cut.
The blade has maximum cutting
power at full speed and is less likely to
bind or stall.
• If blade does not tum when switch is
activated, make sure it is not stuck or
bound by debds.
(_ Blade rotates mo-
mentarily after the
switch is released.
Stop rotating
blade by contact
with cut material.
6
J
Page 7

• Always release the switchand allow
motorto stop when not cutting.
• To stop the motor, release the switch;
allow blade to stop turningbefore re-
movingit from the cut.
As you become familiar with your
edger, you will be able to determine
your own operating pace. Conditions
such as depth of cut, angle of cut, and
matedal being cut will regulate the
speed and time required for your edg-
ing job.
EDGING--yields precise, close cutting
around sidewalks, driveways, patios,
etc.
Edging
BEVEUNG--provides a wider cut or
trench around sidewalks, driveways, pa-
tios, etc. Beveling removes more mated-
al and therefore increases motor load.
Be careful to cut slowly to avoid motor
stalling or overload, which may damage
motor. The width of the bevel cut can be
changed by adjusting the depth of the
front wheel (see DEPTH ADJUSTMENT).
Beveli _ng
k
DEPTH ADJUSTMENT
The front wheel can be adjusted to allow
for a deeper or shallower cut. Move the
wheel up for a deeper cut, down for a
shallowercut. When the wheel is ad-
j.ust.ecl,al.Ithe way down (travel position),
me olaee is lifteddear of the ground.
Adjustas _lows:
• Loosenthe knobon the frontwheet
assemb .
* Adjust the wheel to set the blade
depth. Use a higherwheel setting for
deep edging, a lower wheel seffingfor
shalloweagJngand trenching.
• Tighten knob securely.
Knob
Edge Guide
OPERATING TIPS
• Allow the blade to reach full speed be-
fore placingthe blade in the cut. Be
careful to cut slowlyto avoid motor
stallingor overload,which may dam-
age the motor.
• Keep your edging pathstraight by
keeping the edge guide in contactwith
the edge of the walkway.
• Alwayswork goingaway from people
and solid objectssuch as walls, large
stones, trees, automobiles,etc.
• Be carefulwhen edgingnear trees or
valuable plants.The highspeed metal
blade may cut rootsand cause dam-
age to the plants.
• Always keep blade area clean. Stop
the unit, make sure blade has com-
pletely stoppedtuming, and discon-
nect unit from the power source before
cleaning.
• If blade stalls,immediatelyraisethe
blade fromthe cut by loweringthe
handle. If blade continuesto stall
when raised, stop the unit,disconnect
the powersource, and inspectthe
blade area for blockage or damage.
Clean the blade area ofdebris.
7
Page 8

CUSTOMER RESPONSIBILITIES
CARE & MAINTENANCE TASK WHEN TO PERFORM
Before each use
Before each use
After each use
Check for loose fasteners and parts
Check for damaged or wom parts
Inspect and clean unit and labels
|ENERAL RECOMMENDATIONS
The warranty on this unit does not cover
items that have been subjected to oper-
ator abuse or negligence. To receive full
value from the warranty, the operator
must maintain unit as instructed in this
manual. Various adjustments will need
to be made periodically to properly
maintain your unit,
CHECK FOR DAMAGED OR
WORN PARTS
Contact your Sears Service Center for
replacement of damaged or wom parts.
• Trigger Switch - Ensure trigger switch
functions properly by releasing the
switch. Make sure motor stops and
blade stops tuming; then restart motor
and continue.
CHECK FOR LOOSE
FASTENERS AND PARTS
• Blade
• Blade Guard
_ Housing Screws
Handle Screws
• Wheels
• Blade Guard - Discontinue use of unit
_=blade guard is damaged.
INSPECT AND CLEAN UNIT AND
LABELS
• After each use, inspect complete unit
for loose or damaged parts. Clean
the unit using a damp cloth with a
mild detergent.
• Wipe off unit with a dean dry cloth.
BLADE MAINTENANCE
/kWARNING: The blade will spin
momentarily after the motor stops. Make
sure blade has stopped turning and dis-
connect unit from the power source be-
fore performing work on the blade.
CAUTION: Wear protective gloves
when handling or performing mainte-
nance on blade to help avoid injury.
• Use the proper replacement blade.
Contact your Sears store for replace-
ment blade #71-85718.
• The blade is reversible. When the cut-
ting edge on one side becomes wom,
turn the blade over.
• Check blade for flatness periodically.
Lay the blade on a fiat surface and in-
spect the blade for flatness. Throw
away a blade that is not fiat.
_WARNING: Always replace a
blade that is bent, warped, cracked,
broken, or damaged in any other way.
Never attempt to straighten and reuse
a damaged blade. Use only the speci-
fied replacement blade.
To reverse or replace blade:
1. Disconnect unit from power source.
2. Fit a wrench onto the shaft behind
the blade.
3. Usinganother wrench remove hex
nut,cupwasher, and springwasher.
4. Remove the blade.
5. Clean all parts and check for dam-
age. Replace damaged parts.
6. Reverse or replace blade. Reinstall
blade onto shaft.
7. Install the spring washer, making
sure the outer, notched edge con-
tacts the blade.
8. Install the cup washer, making sure
the lip of the washer is facing to-
ward the spring washer.
9. Install the hex nut; tighten securely.
Spring
Washer
Hex
Nut
"_ _ Cup Washer
Loosen_ "nghten
8
Page 9

ACCESSORIES
Safety Glasses ........... 71-85707
Extension Cord ........... 71-5702
CUSTOMER SERVICEABLE PARTS
Blade .................. .71-85718
Spring washer (blade) .. 530402971
Hex Nut (blade) ....... 530402954
Lock Nut (tube) ........ 530403094
Rear wheel ........... 530095088
Front wheel ........... 530095087
Blade Guard .......... 530402859
Edge guide ........... 530402865
Rear axle ............. 530403071
Front axle ............ 530402875
Washer (axle) ......... 530403136
Cup Washer (axle) ..... 530016276
Locknut (axle) ......... 530016245
Lockwasher (axle) ..... 530016255
Spacer (axle) ......... 530403109
Screw (edge guide) .... 530016227
Screw (tube) .......... 530402888
Washer (T-handle) ..... 530402887
_]I, WARNING: Perform the following
steps after each use:
• Secure the unit before storing or
transporting.
• Store unit with all guards in place.
Position unit so that any sharp object
cannot accidentally cause injury.
• Store unit well out of reach of children.
SEASONAL STORAGE
Prepare unit for storage at the end of
the season or if it will not be used for
30 days or more.
If your edger is to be stored for a peri-
od of time:
• Clean the entire unit before lengthy
storage.
• Inspect the blade area and clean any
dirt, grass, leaves, or debris that has
collected. Inspect the blade and blade
guard; rep/ace a blade that is bent,
warped, cracked, broken, or damaged
in any other way.
• Replace a damaged or wom blade
guard.
_. Ughtly oil extemal metal surfaces.
CAUTION: Wear protective gloves
when handling the blade. The blade is
sharp and can cut you even when it is
not moving.
• Apply a coatingof oil to entire surface
of blade; wrap it in heavy paper or
cloth.
• Be sure all handlesand guards are in
place and are securelyfastened, Re-
place any damaged parts.
• Checkentire unit for loosescrews,
nuts,and bolts. Replace any dam-
aged, worn, or broken pads.
• Do not cover with plastic. Plas'dccan-
not breathe and willinducecondensa-
tion and eventual rustor corrosion.
TROUBLESHOOTING TABLE
_, WARNING: Always stop unit and disconnect from the power source be-
fore performing all of the recommended remedies below except remedies
that require unit to be operating.
TROUBLE
Blade stops
under a load
or does not tum
when switch is
pressed.
Blade turns but
willnotcut.
Edger drags
ground or cuts
too deep.
CAUSE REMEDY
1. Forcing blade into material.
2. Blade guard dogged with debris.
3. Edge guide bent toward blade.
4. Unit unplugged.
5. Fuse blown/circuitbreakeroff.
6. Wom spring washer.
7. None of the above.
1. Wheel depth incorrect.
2. Incorrect or worn blade.
3. Worn spdn_]washer.
1. Wheel depth incorrect.
2. Wheel mount(s) broken.
1. Cut at a slower pace.
2. Clean blade guard area.
3. Replace edge guide.
4. Plug unit into a 120 volt outlet.
5. Replace fuse/reset breaker,
6. Replace spring washer.
7. Contact Sears Service (see back
cover).
1. Adjust wheel to proper depth.
2. Replace blade.
3. Replace spring washer.
1. Adjust wheel for proper depth.
2. Contact Sears Service (see back
cover).
9
Page 10

Declaraci6n de Garantia 10 Servicio y Ajustes 17
Reglas de Seguridad 10 Almacenaje 18
Montaje 14
Uso 15 Tabla Diagn6stica 19
Mantenimiento 17 Piezas y Encargos Contratapa
UN ANO DE GARANTIA COMPLETA EN LA CORTADORA DE BORDES
ELECTRICA DE LA MARCA CRAFTSMAN
Siesta cortadora de hordes eldctdca Craftsman ® dejara de funci0nar apropiada-
mente dado a defectos en material o mane de obra, dentro de la (1) un ano, con-
tados desde la fecha original de compra, Sears la repondrd gratuitamente.
Siesta Cortadora de Bordes es usada con fines comerciales, la garantia aplicar&
por 90 dias a partir de la fecha odgnial de compra.
Siesta Cortadora de Bordes es usada con fines alquiler, la garantfa aplicard por
30 dfas a partir de la fecha orignial de compra.
Esta garantfa no incluye la cuchilla.
SE OFRECERA SERVICIO DE GARANTIA DEVOLVIENDO LACORTADORA DE BORDES
ELECTRICA CRAFTSMAN A LA TIENDA DE SEARS O CENTRO DE SERVICIO SEARS MAS
CERCANA EN LOS ESTADOS UNIDOS.
Esta garantfa le confiere erechos juridicos espec|ficos, adem_s usted puede ten-
er otros derechos que varian entre estados.
Sears, Roebuck and Co., D/817 WA, Hoffman Estates, IL 60179
ADVERTENCIA: Siempre que
use cortadoras de hordes electricas,
deben observarse precauciones b_si-
cas de seguridad para reducir el ries-
go de incendio, choque el_ctrico y ac-
cidentes a personas. Lea todas las
instrucciones e informacibn de seguri-
dad que se encoentran a Io largo de
este manual.
PELIGRO: iESTE APARATO DE
FUERZA PUEDE SER PELIGROSO! Este
aparato puede causer graves heridas
incluyendo la amputacibn de miembros
del cuerpo o ceguera al usuario y a
otras personas. Las advertancias e
instrucciones de seguridad an este
manual deben seguirse para proveer
seguridad rP_onable y efidencia al usar
este aparato. El usuario tiene la respon-
sabilidad de seguir todas las adverten-
cias e instrucciones tanto an este manu-
al como en el aparato, iLea el manual
de instrucciones en su totalidad antes
de armar y de usar este aparato! Umite
el uso de este aparato a aquellas perso-
nas que hayan leido, comprendido y
que vayan a seguir las advertencias e
instrucciones tanto en este manual
como en el aparato. Nunca permita a
los ni_os que usen el aparato.
INFORMACIC_N DE
SEGURIDAD EN EL
APARATO
SEGURIDAD DEL USUARIO
• Vistase de forma apropiada. Siempre
u.se anteojos de seguridad o protec-
cion de ojos similar al usar y efectuar
servicio de mantenimiento al aparato.
(Anteojos de seguridad vienen dispo-
nibles). Use siempre mascara de pro-
tecck_n o de filtraci6n cuando tTabaje
con el aparato en ambientes polvo-
rientos. Use siempre pantalones lar-
gos y gruesos, mangas largas, botas
y guantes. No use el aparato descalzo
ni con sandalias.
s%u%
• Mantenga el cabello por encima de
los hombres, atdndolo para tal efecto
10
Page 11

si es necesario. Asegure o remueva
la ropa suelta y joyas o ropa con ti-
ras, borlas, corbatas, etc. Estas pue-
den enredarse en las piezas en mo-
vimiento.
• El estar completamente cubierto, le
protege_ en contra de pedazos de
plantas t6xicas y desechos que pue-
dan ser arrojados al aire por la linea
girante.
• Mant6ngase aierta. No use este apa-
rato cuando est6 cansado, enfermo
o bajo la influencia del alcohol, de
drogas u otros medicamentos. Vigile
bien Io que estA haciendo; use el
sentido comOn.
• Evite los arranques no intencionales
dai aparato. Nunca cargue el apara-
to con el dedo en el interruptor.
Aseg_rese de que el interrupter no
se encuentre en la posicibn =on" al
conectar el cable de extensi6n.
PEMGRO: RIESGO DE CORTADU-
RA - MANTENGA LAS MANOS Y LOS PIES
ALEJADOS DE LAS CUCHILLA Y DEL
AREA DE CORTE - NO intente recoger el
material ya cortado mientras las cuchil-
las se encuentren en movimiento.
AsegOrese que la cuchilla se haya dete-
nido y el aparato estd desconectado
antes de remover el material que se
haya atascado en la cuchilla de corte.
No sostenga ni agarre el aparato por la
cuchilla de corte.
PRECAUCION: La cuchilla gira mo-
ment_neamente despu_s de haber sol-
tado el interruptor.
SEGURIDAD ELECTRICA
_tk ADVERTENCIA: Evite los ambi-
entes peligrosos. Para reducir el riesgo
de choque el_trico, no use los aparatos
en lugares hSmedos o majadns ni osrca
de piscinas, de los hidrornasajes, etc.
No exponga el aparato a la nieve, a la
Iluvia ni al agua para evitar la posibilidad
de choque el_ctrico. No t.ogue el en-
chufe del cable de extension ni el del
aparato con las manos mojadas.
• Use exclusivamente suministro de
voltaje como se muestra en la placa
del aparato.
• Evite situacionespeligrosas. No use el
aparato en presencia de gases o I_qui-
dos inflamables para evitar incendios,
explosiones y/o daf_s al aparato.
• Para reducir el riesgo de choque
el_-trico, este equlpo viene con en-
chufe polarizado (una aieta es mas
ancha que la otra) y requerir& el uso
de un cable de extensibn polarizado.
Este enchufe entrar_l solamente en
una posici6n en el enchufe polariza-
do del cable de extension. Si este
enchufe no entrara completamente
dentro del enchufe del cable de ex-
tensi6n, invierta el enchufe. Si con-
tinOa sin entrar, obtenga el cable de
extensibn polarizado correcto. El
enchufe polarizado del cable de ex-
tensibn requerir& el uso de un toma-
corriente de pared polarizado. El en-
chufe p.o.larizado del cable de
extension entrar_ en el tomacor-
dente de una sola forma. Si el en-
chufe no entra completamente en el
tomacordente de ,p,p,p,p_ed,invierta el
enchufe. Si continua sin entrar, con-
tacte un electdcista autorizado para
que isntale el tomacorriente apropia-
do. No cambie el equipo del en-
chufe, el recept&culo del cable de
extensibn o el enchufe del cable de
extensibn de ninguna manera.
• Para reducir el riesgo de choque
elf._.,--trico,use cables de extensibn que
vengan especificamente rnarcados
como apropiados para aparatos de
uso en exteriores y que tengan una
dasificaci6n elL_ica no menor que la
del aparato. El cable deber& venir
marcado con el sujifo "W-A" ("W" en
CanadA)..AsegQrese de que el cable
de extension este en buenas condi-
clones. Inspeccione el cable de exten-
si6n antes de usado y si est& dafiado,
c&mbielo. No utilice una cable de ex-
tension dafiada. El aislante del cable
de la extensi6n debe ser intacto sin
las grietas o la deterioraci6n. Los con-
ectores del enchufe deben ser in-
demnes. Los cables demasiado finos
causar&n una baja en el voltaje de
linea, Io que provocar_ falta de poten-
ciay excoso de temperatura. En caso
de duda entre dos cables, use el rn&s
grueso. Cuanto _ pequefio es el
n_mero de clasificaci6n, _ grueso
es el cable (vea SELECCION DEL
CABLE DE EXTENSI6N erl la secci6n
MONTAJE).
11
Page 12

• No utilice rn_s de uno los cables de
extensibn.
• No intente reparar el aparato. In-
speccione el aislamiento y los con-
ectores en el aparato yen el cable
del aparato antes de cada uso. Si
encuentra cualquier da_o, no use el
aparato hasta despu_s de haber
sido reparado por de Centro de Ser-
vicio Sears.
• Inspeccione el cable de extensi6n
antes de cada uso y c_mbielo si este
se encuentra dar]ado.
• No use el cable indebidamente. Nun-
ca Ileve el aparato por el cable de
extensi6n ni la desconecte del en-
chufe tirando del cable.
• Para reducir la posibilidad de que el
cable de extensibn se desconecte
del aparato durante el uso, ate el
cable del aparato al cable de exten-
sibn como se ilustrado en SELEC-
CI6N DEL CABLE DE EXTENSION en
la secci6n MONTAJE. Conecte el
cable de extensi6n al enchufe embu-
tido en el cable del aparato.
• No use el aparato si el interruptor no
Io enciende o apaga correctamente.
Todas las reparaciones al interruptor
deber&n ser provistas pot de Centro
de Servicio Sears.
• Mantenga el cable de extensibn ale-
jado del usuario, de el aparato, y de
obst_culos en todo momento. No ex-
ponga los cables al calor, al aceite,
al agua o a hordes con filo.
• Evite todo contacto del cuerpo con
los conductores a tierra, tales como
tuberfas de metal o cercas de
alambre, para evitar Io posibilidad de
choque el_ctrico.
• El circuito o el tomacorriente que se
use con este aparato deber_ estar
provisto con protecci6n de Interrup-
tor de Fallas en el Circuito a l]erra
(Ground Fault Circuit Interruptor -
GFCI). Vienen disponibles, re-
cept_culos con la proteccibn GFCI
incorporada y estos pueden set usa-
dos para esta medida de seguridad.
SEGURIDAD DEL APARATO
• No intents reparar su aparato. In-
speccione el aparato y el cable de
extensibn completamente antes de
cada uso. Permita que sea de Cen-
tro de Servicio Sears quien repare o
camb!e las piezas da_adas.
Asegurese de que todos los fija-
dores, mangos y protectores est_n
en su lugar y bien fijos. Un Centro de
Servicio Sears debera reparar o
cambiar el protector, si est_ dafiado,
o cualquier otra pieza que se en-
cuentre dafiada.
• Cambie las cuchillas que se encuen-
tren dobladas, deformes, astilladas,
rotas o da_adas de cualquier otro
modo.
• Antes de usar su aparato, permita
que un Centro de Servicio Sears re-
pare o reemplace todas las piezas
que se encuentren rotas, quebradas,
astilladas o dafiadas de cualquier
otro forma.
: Use tinicamente cuchillasde repues-
to y los accesorios recomendados
de la marca Craftsman para este
aparato. Nunca use alambre, cuer-
da, hilo, etc. El uso de cualquier otro
accesorio podria incrementar el ries-
go de accidente o podria causar
da_os al aparato.
• Mantenga el protector de la cuchilla
en su lu_]aryen buenas condiciones
de trabalo.
12
SEGURIDAD AL CORTAR
• Inspeccione el brea a ser cortada
antes de cada uso. Retire los obietos
[piedras, viddo roto, alambre, hilo,
etc.) que pueden ser arrojados al
airs por la cuchilla o se pueden enre-
dar en el aparato.
• Mantenga alejados a los nifios. Man-
tenga a otros incluyendo nihos, ani-
males, espectadores y ayudantes
alejados 30 metros (100 pies) de la
Zona de Peligro. Detenga el aparato
de inmediato si alguien se le acerca.
a2ona de Peli_'o
• Mantenga siempre el aparato en
fTente a su cuerpo. Mantenga pies y
manos aleiados del brea de corte.
• Sostenga el aparato firmemente con
las dos manos.
• No se incline excesivamente ni se
pare en superficies inestables. Man-
tenga el equilibrio y el balance en
todo momento.
Page 13

• Mantenga las ruedas en contacto
con el suelo.
• No levante el aparato mds arriba del
suelo. La cuchilla podria acercarse
peligrosamente a su cuerpo.
• Siempre empuje el aparato lenta-
mante sobre el suelo. Mant_ngase
alerta en ca,so de aceras desiguales,
hoyos en el terreno, raices grandes,
etc.
• No sobrecargue su aparato; serd
m_s efectivo y con menor riesgo de
accidentes si maneja el aparato al
ritmo para el coal fue disefiado. Use
el aparato correcto. Use unicamente
para los trabajos que se especifican
en este manual.
SEGURIDAD EN EL
MANTENIMIENTO
'_ ADVERTENClA: Desconecte el
aparato del tomacorriente antes de
efectuar mantenimianto o al cambiar
las cuchillas.
• Mantanga su aparato cuidadosa-
mente. Mantenga su aparato de
acuerdo con los procedimientos re-
comendados. Siga las instrucciones
para cambiar las cuchillas bajo la
secci6n de SERVIClO Y AJUSTES.
Mantenga la cuchilla y su protector
limpios todo el tiempo para evitar el
riesgo de accidentes.
• Nunca ponga en marcha su aparato
sin tener unido el protector de la cu-
chilla. La cuchilla podna salir despedi-
da o podria arrojar objetos al aire cau-
sando accidentes graves.
• Use tinicamente piezas de reempla-
zo recomendadas.
• Permita que todo mantenimiento y
servicio no especificado en este
manual sea desempefiado por un de
Centro de Servicio Sears.
• Nun ca sumerja o riegue con agua o
con ningSn otro llquido. Umpie el apa-
rato y sus etiquetas con una esponja
hSmeda. Mantenga los mangos se-
cos, limpios y libres de aceite y grasa.
TRANSPORTACION Y ALMACENAJE
• Transporte el aparato con el motor
detenido y la cuchilla alejada de su
cuerpo.
• No agarre o sostenga la parte ex-
puesta de la cuchilla.
• Desenchufe el aparato antes de al-
macenario; asegure el ap_ato antes
de transportarlo en un vehmulo.
• Guarde el aparato de modo quela
cuchilla no pueda causar hendas ac-
cidentales. El aparato puede ser col-
gado por el mango.
• Guarde el aparato al abrigo de la in-
terperie. Guarde el aparato descon-
nectado en un lugar alto, seco y
fuera del alcance de los nifios.
CONSTRUCClON CON DOBLE AIS-
LAMIENTO
Este aparato tiene aislamiento doble
para incrementar la protecci6n contra
el choque el6ctdco. El aislamiento
doble consiste de dos"capas" separa-
das de aislamiento electrico en vez de
cable a tierra. Las herramientas y los
electrodom_sticos con aislamiento
doble no necesitan cable a tierra. No
se le-ha provisto ning(m medio de con-
exi6n a tierra a este aparato, tampoco
se le debe agregar ningun medio de
conexion a tierra. Como resultado, el
cable de extensi6n usado con su apara-
to puede set enchufado en cualquier
tomacorriente eldctrico normal de 120
voltios. Deben observarse precau-
clones de seguridad al trabajar con
toda herramienta el_ctdca. El sistema
de aislamiento doble solamente pro-
vee una proteccibn adicional contra
las heridas provocadas por una falla
en el aislamiento el_ctrico interne.
ADVERTENClA: Todo diagnbs-
tico y reparaci6n de indole eldctrica a
este aparato, incluyendo a la caj.a, el
interruptor, el motor, etc., deberan ser
efectuados por personal de servicio
capacitado. Los repuestos para un
aparato con aislamiento doble deben
ser recomendados por el fabricante.
Los aparatos con aislamiento doble
vienen marcados con las palabras
"double insulation" (aislamiento doble)
o "double insulated" (doblemente aisla-
do). Tambi6n puede aparecer el
sfmbolo c_adroado dentro de un cua-
droado) I_ en el aparato. El aparato
debe ser reparado por un personal de
servicio cualificado; de 1ocontrario el
sistema de aislamiento doble puede
quedar inutilizado, acarreando graves
heridas.
GUARDE ESTAS INSTRUCCIONES
13
Page 14

CONTENIDODELA CAJA
Veriflclueelcontenidode lacajaporla
listastguiente.
Modelo358.796501
• Cortadom de Bordes
• Tomillos
• Tuercas Aseguradoras
• Cuchilla Adicional
Examine las piezas por si hay alguna
que viene dar3ada. No use piezas
da_adas.
AVISO: Si necesita ayuda o encuentra
piezas dafiadas o perdidas, Ilame al
n_mem 1-800-235-5878.
MONTAJE
ADVERTENCIA: Si el aparato rue
entregado ya armado, repita todos los
pasos en esta secci6n para asegu-
rarse de que el montaje haya sido he-
cho correctamente y que todos los su-
jetadores se encuentren fijos.
Este manual de instrucciones fue ela-
borado para ayudarle a armar el apa-
rato y a usarlo en conformidad con las
precauciones de seguridad. Es impor-
tante que lea el manual en su totalidad
para familiarizarse con el aparato
antes de comenzar a armarlo.
Lea su manual de instrucciones.
Herramienta que necesitar_:
• Destomillador Phillips
MONTAJE DEL TUBO
1. Introduzca el tubo dentro de la cu-
bierta del unidad como se ilustra a
continuaci6n. Alinee los huecos
para los tomillos.
2. Introduzca las tuercas de cierre
dentro de los bolsillos en la cubier-
ta del unidad.
3. Introduzca los tornillos a travds de
los huecos ya lineados.
4. Enrosque los tornillos dentro de las
tuercas de cierre y apridtelas firme-
mente.
Tuercas
Aseguradoras
f
!
Tornillos
Cubierta
SELECCION DEL CABLE DE EXTEN-
SION
Use Onicamente suministro de voltaje
de 120 A.C. como se muestra en la
placa del apamto.
El cable de extensi6n utilizado para
alcanzar el recurso de energ,a debe:
• Estar marcado especificamente para
uso exterior. El cable debe estar
marcado con el sufijo "W-A'.
• Tener la fuerza suficiente para trans-
portar la energla desde el tomacor-
riente todo Io largo del cable hasta
Ilegar al aparato. De otra manera,
perdida de energla y recalentamieno
to podrlan occurir, causando dafio al
aparato. Vea la tabla para las recom-
_ endaciones mfnimas de calibre del
cable. (Cables de extensi6n apropia-
dos estan, disponibles). No utilice
cables multiples.
• Estar en buena condicion. El aisla-
miento del cable debe estar intacto
sin grietas y sin deterioro. Los en-
chufes no deben tener ninguna
serial de dafio.
RECOMENDACIONES PAPA
CAUBRE MINIMO DE CABLE
Voltios25 pies 50 pies 100 pies 150 pie=
120 16 16 14 12
A.W.G.* A.W.G.= A.W.G.* A.W.G.*
*Calibre de Cable Arnedcano
Amarre el cable de extensi6n al aparato:
• Ate el enchufe del aparato al cable
de extensi6n como se ilustra a conti-
nuacibn.
• Introduzca el enchufe del aparato
dentro del receptor del cable de ex-
tensi6n.
Enchufe del Cable de
Aparato "_ Extensibn
14
Page 15

CONOZCA SU APARATO
LEA ESTE MANUAL DE INSTRUCCIONES O Y I_AS REGLAS DE SEGURIDAD ANTES
DE COMENZAR A USAR SU APARATO. Compare las ilustraciones a continuaci6n
con las piezas de su aparato para familiadzarse con la Iocalizaci6n de los varios
controles y ajustes. Guarde este manual para uso futuro.
Mango de _ . . .
Control _ / _ interrupmr
/_"_\ _, en torrna
_ Palanca de
"J _",,,,_ Ajuste del Eje
_,._ / Cubierta
\_ / Protectora de
_chilla
Cuchilla/- _,v,
INTERRUPTOR EN FORMA DE GA-
TILLO
El INTERRUPTOR EN FORMA DE GATIL-
LO es usado para actibar el motor.
PALANCA DE ADJUSTE DEL EJE
La PALANCA DE AJUSTE DEL EJE se
usa para poner en posicibn el _,ngulo
de corte.
CUCHILLA
La CUCHILLA ha sido dese_ada para
cortar c_sped.
PROTECTOR DE LA CUCHILLA
El PROTECTOR DE LA CUCHILLA pro-
tege al usuario de la cuchilla girante.
PERILLA DE AJUSTE DE PROFUN-
DIDAD
La PERILLA DE AJUSTE DE PROFUNDI-
DAD le permite a usted ajustar la cu-
chilla la profundidad deseada.
POSlClON DE USO
Su aparato tiene dos posiciones de
uso, una para cortar los hordes y la
otra para biselar.
Para fijar la posicibn de uso:
1. Mueva la palanca de ajuste del eje
hacia el mango.
2. Gire el motor a la posicibn deseada.
3. Suelte la palanca de ajuste del eje,
asegur&ndose que el motor quede
en posicion.
Palanca de
Ajuste del Eje
METODOS PARA CORTAR BORDES
ADVERTENClA: El usuado u
otras personas no deben tratar de re-
coger el material ya cortado con el mo-
tor en marcha y la cuchilla girando,
para evitar accidentes.
_& ADVERTENClA: Detenga el mo-
tor y la cuchilla y desconecte el apara-
to antes de remover el material en-
vuelto alrededor del eje de la cuchilla,
para evitar serios accidentes.
• Permita que el motor alcance mdxi-
ma velocidad antes de empezar a
cortar. La cuchilla tiene maximo pod-
er de corte a la m&s alta velocidad y
serd menos propensa a calarse.
• Si la cuchilla no marcha cuando el
interru,ptor se activa, aseg_rese que
no este atascada con desechos.
15
Page 16

La cuchifla girar_
moment_neamente
despu6s de soltar el
interruptor.Detenga
lacuchilla girante
haciendo contecto
con el material ya
• Siempre suelte el interruptor y deje
que el motor se detenga cuando no
est_ cortando.
• Para detener el motor, suelte el inter-
ruptor; permita que la cuchilla se de-
tenga antes de removerla de la zona
de code.
AI familiarizarse con su cortadora,
usted podrd determinar su propio ritmo
de trabajo. Condiciones como Io son la
profundidad de code, angulo de corte
y material a cortar regulardn la veloci-
dad y el tiempo requerido para su tra-
bajo.
CORTAR BORDES-produce un preci-
so, corte cercano alrededor de aceras,
caminos de entrada, patios, etc.
CORTAR
BORDES
BISELAR - provee un corte m_s an-
cho o hace zanjas alrededor de acer-
as, caminos de entrada, patios, etc. AI
biselar, usted remover& m:_s material,
por Io tanto incrementar& la oarga del
motor. Sea cuidadoso y corte lenta-
mente para evitar que el motor se so-
brecargue o se cale, Io que puede
daRar el motor.
BISELAR
AJUSTE DE PROFUNDIDAD
La rueda delantera puede ser ajustada
para permiUr un corte mas o menos
profundo. Mueva la rueda hacia arriba
para un corte m&s profundo, o mueva
la rueda hacia abajo para un corte con
menor profundidad. Cuando la rueda
es ajustada al m_,ximo haci abajo (po-
sicion de code), la cuchilla se levanta
por completo del suelo.
• Afloje la perilla en el montaje de la rue-
da delantera.
• Ajuste la rueda para fijar la profundi-
dad de la cuchilla. Fije la rueda rods
aria para mayor profundidad de code y
flje la rueda m_s baja para un code
menos profundo o para hacer zanjas.
• Apriete la perilla firmemente.
Perilla de _/
ajuste de _ J _/
4Qrolund__
Guia para hacer hordes
CONSEJOS DE USO
• Perrnita que la cuchilla alcance la
velocidad mdxima antes de empezar
a cortar. Sea cuidadoso y corte len-
tamente para evitar que el aparato
se sobrecaugue o se cale, Io que
puede causar que el motor se dar_e.
• Mantenga un ritmo de corte de sen-
dero recto, dirigiendo la gula de para
hacer hordes al costado de la acera,
patio, camino de entrada, etc.
• Trabaje siempre _ejado de perso-
nas, de objetos solidos como son
paredes, piedras grandes, drboles,
autom6viles, etc.
• Sea cuidadoso cuando corte cerca
de &rboles o plantas valiosas. La cu-
chilla de metal a alta velocidad
podda cortar las ralces o causar
daho alas plantas.
• Mantenga siempre el _.rea de la cu-
chilla.limpia. Detenga el aparato,
asegurese de que la cuchilla est_
completamente detenida, y descon-
necte el aparato del tomacorriente,
antes de limpiar.
• Si la cuchilla se cala, de inmediato
levante la cuchifla del drea de corte
haciendo baiar el mango. Si la cu-
chilla continua calandose al levantar-
la, detenga el aparato, descon_ctelo
del tornacorriente e inspeccione el
drea de la cuchilla en caso de blo-
queo o alg_n daSo. Limpie el &rea
de la cuchilla de desechos que pue-
dan haberse acumulado.
16
Page 17

RESPONSIBlUDADDELCUENTE
TAREADECUIDADOY MANTENIMIENTO QUANDO HACER
Verificar que no haya fijadores flojos ni piezas suelta_ Antes de cada uso
Vedficar que no haya piezas da_adas o gastadas Antes de cada uso
Inspeccione y limpiar el aparato y sus placas Despu_s de cada use
RECOMENDAClONESGENERALES VERIFIQUE QUE NO HAYA PIEZAS
La garanfia en este aparato no aplica
al los art=culossometidos al abuso o a
la negligencia del usuario. Para recibir
el valor completo de la garantia, el
usuario deberd mantener el aparato
segt_nlas instrucciones en este
manual. Serd necesario hacer varios
ajustes peribdicamente para mantener
el aparato debidamente. El mantenimi-
ento incorrecto puede causar dafios al
aparato y posibles accidentes al usua-
rio o a espectadores.
VERIFIQUE QUE NO HAYA
FIJADORES FLOJOS
NI PIEZAS SUELTAS
• Cuchilla
• Protector de la Cuchilla
• Tornillos de la Caja
- Tornillos del Mango
• Ruedas
DANADAS O GASTADAS
Entre encontactocon el Centro de Ser-
vicio Sears para el reemplazo de piezas
daSadas o desgastadas.
• Interruptor en forma de Gatillo -
Aseguerse que el interruptor en for-
ma de gatillo funciona apropiada-
mente soltando el interruptor.
Aseqt3resque el motor se detenga y
la cuchilla pare de girar; entonces
vuelva a porter en marcha el motor y
continde.
• Protector de la Cuchilla - No use su
ap.arato si el protector de la cuchilla
esta dafiado.
UMPIE EL APARATO Y SUS PLACAS
• Despu_s de que cada uso, inspec-
clone la aparato completa para saber
si hay piezas flojas o daftadas. Umpie
el ap=2ratoy las places usandountra-
po humedo con detergente suave.
• S_quelo con un trapo limpio y seco.
MANTENIMIENTO DE LA CUCHILLA
,_ ADVERTENCIA: La cuchilla girard
momentdneamente despu_s que el
motor se detiene. Asegurese que la
cuchilla haya parado de girar y des-
connecte el aparato del tomacorriente
antes de hacer cualquier tipo de traba-
jo en la cuchilla
PRECAUClON: Use guantes protec-
tores cuando maneje o efectt_e man-
tenimiento a la cuchilla para asi ayu-
dara evitar accidentes
• Use la cuchilla de reemplazo apro-
piada. Contacte su tienda para la cu-
chilla de repuesto #71-85718.
• La cuchilla es reversible. Cuando un
lado de la cuchilla se gaste al cortar
bordes, vu_lvala del reves.
• Verifique peri6dicamente el estado
de la cuchilla. Ponga la cuchilla en
una superficie liana y verifique que la
cuchilla est_ completamente plana.
Deseche la cuchilla si _sta no se en-
cuentra completamente plana.
ADVERTENCIA: Siempre reem-
place la cuchillaque estd doblada,de-
forme, astillada, rota o da_ada de cual-
quier otto modo. Nunca trate de
enderezar y reusar la cuchillasi se en-
cuentradar3ada.Use tlnicamentela cu-
chillade reemplazo especificadaen este
manual.
17
Para volver al rev6s la cuchilla o para
cambiarla:
1. Desconecte el aparato del toma-
corriente.
2. Ajuste una llave en el eje que se
encuentra detrds de la cuchilla
3. Usando otra Ilave, remueva la tuerca
hexagonal, la arandela en forma de
COl)a, y la arandela semi-abierta.
4. Remueva la cuchilla.
5. Limpie todas las piezas y verifique
dafios. Cambie todas las piezas
daf_adas.
6. Vuelva la cuchilla del rev6s o
c&mbiela; luego, vu_lvala a montar
en el eje.
Page 18

7. Instale la arandela asegur'&ndosela
parte de afuera, con bordes en
muescas, haga contacto con la cu-
china.
8. Instale la arandela en forma de
copa, asegurdndose de que el
borde de la misma quede mirado
hacia la arandela tipo rnuelle.
9 Instale la tuerca hexagonale y
apri6te la flrmemente.
Arandela _"._'_ L _,_'X \
se ,
Tuerca "k, "_ "_ Cuchilla
.exa,on,
_"_ Ara_dela en
ACCESORIOS
Anteojos de Seguridad .... 71-85707
Cable de Extension ....... 71-5702
PIEZAS DE SERVIClO PAPA EL
CUENTE
Cuchilla ............... 71-85718
Arandela Semi-abierta (cuchilla)
...................... 530402971
Tuerca Hexagonal (cuchilla)
...................... 530402954
Tuerca Asegumdom (tubo)530403094
Rueda Trasera ......... 530095088
Rueda Delantera ....... 530095087
Protector de la Cuchilla 530402859
Gu/a para Cortar Bordes. 530402865
Eje Trasero ...... : ..... 530403071
Eje Delantero .......... 530402875
Arandela (eje) .......... 530403136
Arandela in Forma de Copa
....................... 530016276
Tuerca Aseguradora (eje) 530016245
Arandela de cierre (eje). 530016255
Espaciador. (eje) ....... 530403109
Tomillo (gu=a de bordes) 530016227
Tornillo (tubo) ......... 530402888
Arandela (mango en forma de T)
...................... 530402887
,_ ADVERTENClA: Realice los si-
guientes pasos despu6s de cada uso:
• Asegure el aparato antes de trans-
portarlo o almacenarlo.
• Guarde el aparato con todos sus
protectores en su lugar. Coloque el
aparato en una posicibn tal que no
pueda causar ningun accidente.
• Guarde el aparato completamente
fuera del alcance de los ni_5os.
ESTAClONAL ALMACENAJE
Prepare el aparato para el almacenaje
at final de ta temporada o si va a estar
sin usar por mas de 30 dias.
Siva a guarder el aparato durante un
periodo largo:
• Limpie el aparato por cornpleto antes
del almacenaje.
• Inspeccione el &rea de la cuchilla y
limpie la suciedad, hierba, hojas, o de-
sechos que se hayan acumulado. In-
speccione la cuchilla y su protector;
cambie la cuchilla que se encuentre
doblada, deforme, astillada, rota o
daSada de cualquierotro modo.
• Cambie el protector de la cuchilla si
esta da_ado o gastado.
• Levemente, aplique aceite en las su-
perficies exteriores de metal.
PRECAUClON: Use gantes protec-
tores al manejar la cuchilla. La cuchilla
tiene fllo y le puede causar cortaduras
adn sin estar en movirniento.
• Aplique una capa de aceite a la su-
perficie entera de la cuchilla. Envu61-
vala con papel grueso o en tela.
• Asegurese que el mango y los pro-
tectores se encuentren en su lugar y
se_uramente fijos. Cambie las pieza
danadas.
• Examine todo el a.paratoy verifique
que no haya ninguntornillo, tuerca, o
pemo suelto. Cambie las piezas que
se encuentren daSadas, rotas o gas-
tadas.
• No cubra con pldstico. El pl&stieono
respira y puede causar condensa-
c=ony eventualrnente corrosi6n o en-
rnohecimiento.
18
Page 19

TABLA DIAGNOSTICA
ADVERTENClA: Siempre desconecte la unidad antes de hacer cual-
quiera de las reparaciones recomendadas que estan listadas siguiente-
mente que no requieran que la aparato este en operaci6n.
PROBLEMA SOLUCION
1. Corte a un ritmo rn&slento.
La cuchilla se
detiene bajo
carga o no
gira cuando
el interruptor
se enciende.
La cuchilla
girapero no
corta
La codadora
de bordes
arrastra
tieEa o corta
muy profundo.
CAUSA
1. Forzar la cuchilla en el material
a cottar.
2. El protectorde la cuchilla se
encuentTaatascado con
desechos.
3. La gu[a de corte de hordes
esta doblada hacia la cuchilI_L
4. Aparato desconectado.
5. El fusible estd quemado/el
interruptorautom_tico se
encoentra apagado.
6. La arandela semi-abierta est&
gastada.
7, Ninguna de la antedores,
1. Profundidad de la rueda
incorrecta.
2. Cuchilla incorrecta o gastada.
3. La arandela semi-abierta estd
daRada.
1. Profundidad de la rueda est_
incorrecta.
2. La montur(s) de la rueda est_n
rotas.
2. Umpie el _ea del protectorde
la cuchilla.
3. Cambie la guia para cortar
bordes.
4. Enchufe el aparato en un
tomacordente de 120 voltios.
5. Cambie el fusible/vuelva a fijar
el interruptorautomz_tico.
6. Cambie la arandela semi-abierta.
7. Entre en contacto con el Sewicio
Sears (vea parte trasera del
manual).
1. Ajuste la rueda a la profundidad
correcta.
2, Cambie la cuchilla.
3. Cambie la arandela semi-abierta.
1. Ajuste la rueda a la profundidad
corrE_.a.
2. Entre en contacto con el Sen_ido
Sears (vea parte trasera del
manual).
19
Page 20

1-800-4-MY-HOME _
0_o.469-Aa_)
Ar_, dayor_ght
(u.sA andCanada)
i:_•i
i_i!;¸
Forrepairofcarry-inproductslikeva_cuums,lawnequipment,and
electronics, callfor the nearestSears Parts and Repair Center.
1-800-488-1222 AnyS'ne,dayornight(U.SAorgy)
_lM_P,N.se_rs.corn
Forthe replacementparts, accessoriesand owner'smanuals
that youneedtodo-it-youmelf,callSears PartsDirectSM!
1-800-366-PART 6a.m.-11 p.m., 7days aweek
(1-800366-7278) (U.S.A.only)
www.sears.com/partsdire_
To purchaseorinquireabouta Sears ServiceAgreement
orSears Maintenance Agreement:
1-800-827-6655 (u.sJ_) 1-800-361-6665 (Canada)
7 a.m.-5 p.m.,CST, Mort.-Sat. 9 a.m.-8 p.m.EST, M-F, 4p.m. Sat
_i_ ¸
Parapedirservicioda reparacidna
domictio,y paraordanarpiezas:
1-888-SLFHOGARsu
(1-888-784-6427)
Au Canadapourse_ce enfran_:
1-800-LE-FOYER Mc
0-ax)-533-6037)
WWW.Se_lrs.ca
....
HomeCentral®
©Sea_ RoebuckandCo.
® Registered Trademark / TMTrademark / su Service Mark of Sears, Roebuck and Co.
® Mama Registrada / TMMama de FSbrica/ su Marca de Servicio de Sears, Roebuck and Go.
Marque de commerce / MOMarque ddpos_e de Sears, Roebuck and Co.
 Loading...