

Page 1

PERATOR'S MANUAL
MANUAL DEL OPERADOR
19,2 VOLT STRING TRIMMER
19,2 V RECORTADORA DE HILO
MODEL NO.
315.CR2000
NOMERO DE MODELO
315.CR2000
A
WARNING: To reduce the risk
of injury, the user must read and
understand the operator's manual
before using this product.
A
ADVERTENCIA: Para reducir el
riesgo de lesiones, el usuario debe leer
y comprender el manual del operador
antes de usar este producto.
Customer Help Line: 1-800-932-3188
Tel_fono de atenci6n al consumidor: 1-800-932-3188
Sears Brands Management Corporation, 3333 Beverly Rd., Hoffman Estates, IL 60179 USA
Visit the Craftsman web page: www.sears.com/craftsman
Visite elsitio web de Craftsman: www.sears.com/craftsman
988000-012
3-9-10 (REV:02)
Save this manual for future reference
Guarde este manual para futuras consulta
C
Page 2
ENGLISH ESPAI_OL
[] Warranty ...................................................................... 2
[] Introduction ................................................................. 2
[] Garant[a ...................................................................... 2
[] Introducci6n ................................................................ 2
[] Important Safety Instructions ................................. 3-4
[] Symbols ...................................................................... 5
[] Features ...................................................................... 6
[] Assembly ................................................................ 6-7
[] Operation ................................................................ 7-9
[] Maintenance ......................................................... 9-10
[] Troubleshooting ........................................................ 10
[] Illustrated View and Parts List .................................. 11
[] Figure Numbers (Illustrations) ................................... i-ii
[] Instrucciones de seguridad importantes ................ 3-4
[] S[mbolos ..................................................................... 5
[] Caracter[sticas ............................................................ 6
[] Armado ................................................................... 6-7
[] Funcionamiento ...................................................... 7-9
[] Mantenimiento ...................................................... 9-10
[] Correcci6n de problemas ......................................... 10
[] Figura numeras (ilustraciones) .................................. i-ii
[] Pedidos de piezas / Servicio ................. P_g. posterior
[] Parts Ordering / Service .............................. Back Page
CRAFTSMAN ®TWO YEAR FULL WARRANTY
FOR TWO YEARS from the date of purchase, this string trimmer is warranted against any defects in material or work-
manship. The battery and charger are warranted against such defects for one year from the purchase date. Defective
product will be replaced free of charge.
For warranty coverage details to obtain free replacement, visit the web site: www.craftsman.com.
This warranty does not cover trimmer line and spool, which are expendable parts that can wear out from normal use
within the warranty period.
This warranty is void if this product is ever used while providing commercial services or if rented to another person.
This warranty gives you specific legal rights, and you may also have other rights which vary from state to state.
Sears Brands Management Corporation, Hoffman Estates, IL 60179
GARANT|A COMPLETA DE DOS ANOS CRAFTSMAN ®
Este recortadora de hilo tiene garantfa pot cuatquier defecto en material o mano de obra DURANTE DOS ANOS desde la fecha de
compra. Las baterias y el cargador tienen garantfa pot cualquier defecto durante un a5o desde la fecha de compra. Los productos
defectuosos se remptazar&n sin cargo.
Para conocer los detalles sobre la cobertura de la garant(a para obtener un remplazo gratuito, visite el sitio web:
www.craftsman.com.
Esta garant(a no cubre el hilo de la recortadora ni el carrete. Estas son piezas consumibtes que se pueden desgastar con el uso
normal durante el periodo de la garant[a.
La garant[a pierde validez si este producto se utiliza mientras se prestan servicios comerciates o si se atquila a otra persona.
Esta garant[a le otorga derechos legates especificos y es posible que tambien tenga derechos que varian seg0n el estado.
Sears Brands Management Corporation, Hoffman Estates, IL 60179
This tool has many features for making its use more pleasant and enjoyable. Safety, performance, and dependability
have been given top priority in the design of this product making it easy to maintain and operate.
Esta herramienta ofrece numerosas caracteristicas para hacer mb.sagradable y ptacentero su uso. En el dise_o de este producto se
ha conferido prioridad a la seguridad, el desempe_o y la fiabilidad, pot Io cual se facilita su manejo y mantenimiento.
Page 3
A
WARNING! When using electric gardening ap-
pliances, basic safety precautions should always
be followed to reduce the risk of fire, electric
shock and personal injury.
READ ALL INSTRUCTIONS
[] For safe operation, read and understand all instructions
before using this product. Follow all safety instructions.
Failure to follow all safety instructions listed below, can
result in serious personal injury.
[] Do not allow children or untrained individuals to use
this unit.
[] Check the work area before each use. Remove all
objects such as rocks, broken glass, nails, wire, or
string which can be thrown or become entangled in the
machine.
[] Always wear eye protection with side shields marked to
comply with ANSI Z87.1. Following this rule will reduce
the risk of serious personal injury.
[] Use Safety Glasses - Always wear safety glasses with
side shields. Everyday glasses have only impact resis-
tant lenses. They are NOT safety glasses. Following
this rule will reduce the risk of eye injury.
[] Protect your lungs. Wear a face or dust mask if the op-
eration is dusty. Following this rule will reduce the risk
of serious personal injury.
[] Dress Properly - Use of rubber gloves and substantial
footwear is recommended when working outdoors.
Wear heavy, long pants, long sleeves, boots, and gloves.
Do not wear loose fitting clothing, short pants, sandals,
or go barefoot. Do not wear jewelry of any kind.
[] Secure long hair above shoulder level to prevent en-
tanglement in moving parts.
[] Keep children away - Keep all bystanders, children,
and pets at least 50 ft. away.
[] Stay alert - Do not operate this unit when you are tired,
ill, or under the influence of alcohol, drugs, or medica-
tion.
[]
Do not operate in poor lighting.
[]
Keep all parts of your body away from any moving part.
[]
Do not operate power tools in explosive atmospheres,
such as in the presence of flammable liquids, gases, or
dust. Power tools create sparks which may ignite the
dust or fumes.
[] Avoid body contact with grounded surfaces such as
pipes, radiators, ranges, and refrigerators. There is an
increased risk of electric shock if your body is grounded.
[] Avoid Dangerous Environments - Don't expose appli-
ance or string trimmer to rain or wet conditions. Water
entering an appliance or string trimmer will increase the
risk of electric shock.
[] Use Right Appliance - Do not force tool. Use the
correct tool for your application. The correct tool will
do the job better and safer at the rate for which it is
designed.
[] Don't Force Appliance - It will do the job better and
with less likelihood of a risk of injury at the rate for
which it was designed.
[] Do not operate the equipment while barefoot or when
wearing sandals or similar lightweight footwear. Wear
protective footwear that will protect your feet and im-
prove your footing on slippery surfaces.
[] Do Not Overreach - Keep firm footing and balance.
Overreaching can result in loss of balance.
[] Avoid Accidental Starting - Be sure switch trigger is in
the locked or off position before inserting battery pack.
Carrying tools with your finger on the switch trigger or
inserting the battery pack into a tool with the switch on
invites accidents.
[] Do not use tool if switch trigger does not turn it on or
off. Any tool that cannot be controlled with the switch
trigger is dangerous and must be repaired.
[] Disconnect Appliance - Disconnect battery pack from
the appliance before storing, servicing, or changing ac-
cessories such as cutting line. Such preventive safety
measures reduce the risk of starting the tool acciden-
tally.
[] Use only identical manufacturer's replacement parts
and accessories. Use of any other parts may create a
hazard or cause product damage.
[] Maintain appliance with care - Replace string head if
cracked, chipped, or damaged in any way. Be sure the
string head is properly installed and securely fastened.
Failure to do so can cause serious injury. Keep handles
dry, clean and free from oil and grease.
[] Check for Damaged Parts - Before further use of the
tool, any part that is damaged should be carefully
checked to determine that it will operate properly and
perform its intended function. Check for alignment
of moving parts, binding of moving parts, breakage
of parts, mounting, and any other conditions that
may affect its operation. A guard or other part that is
damaged should be properly repaired or replaced by
an authorized service dealer.
[] Make sure all guards, straps, deflectors and handles
are properly and securely attached.
[] Use only the manufacturer's replacement string in the
cutting head. Do not use any other cutting attachment,
for example, metal wire, rope, or the like. To install any
other brand of cutting head to this string trimmer can
result in serious personal injury.
[] Never operate unit without the grass deflector in place
and in good condition.
3 - English
Page 4
[] Maintainafirmgriponbothhandleswhiletrimming.
Keepstringheadbelowwaistlevel.Nevercutwith
thestringheadlocatedover30in.ormoreabovethe
ground.
[] Storeidleappliancesindoors- Whennotinuse,string
trimmershouldbestoredindoorsinadry,lockedplace
outofthereachofchildren.
[] Neveruseblades,flailingdevices,wireorrope.Unit
isdesignedforlinetrimmeruseonly.Useofanyother
accessoriesorattachmentswillincreasetheriskof
injury.
[] Inspectareato becut.Removeobjects(rocks,broken
glass,nails,wire,string,etc.)whichcanbethrownor
becomeentangledincuttinghead.
[] Keeptheairventscleanandfreeofdebristo avoid
overheatingthemotor.Cleanaftereachuse.
[] Stoptheunitanddisconnectthepowersourcewhen
notinuse.Carrytheunitwiththemotorstopped.
[] Storeoutofthereachofchildren.
[] Donothangunitsothattheswitchtriggerisde-
pressed.
[] Batterytoolsdonothaveto bepluggedintoanelec-
tricaloutlet;therefore,theyarealwaysinoperating
condition.Beawareofpossiblehazardswhennot
usingyourbatterytoolorwhenchangingaccessories.
Followingthisrulewillreducetheriskofelectricshock,
fire,orseriouspersonalinjury.
[] Donotchargebatterytoolinrain,ordamporwetloca-
tion.Followingthisrulewillreducetheriskofelectric
shock.
[] Donotusebattery-operatedapplianceinrain.
[] Removeordisconnectbatterybeforeservicing,clean-
ingorremovingmaterialfromthegardeningappliance.
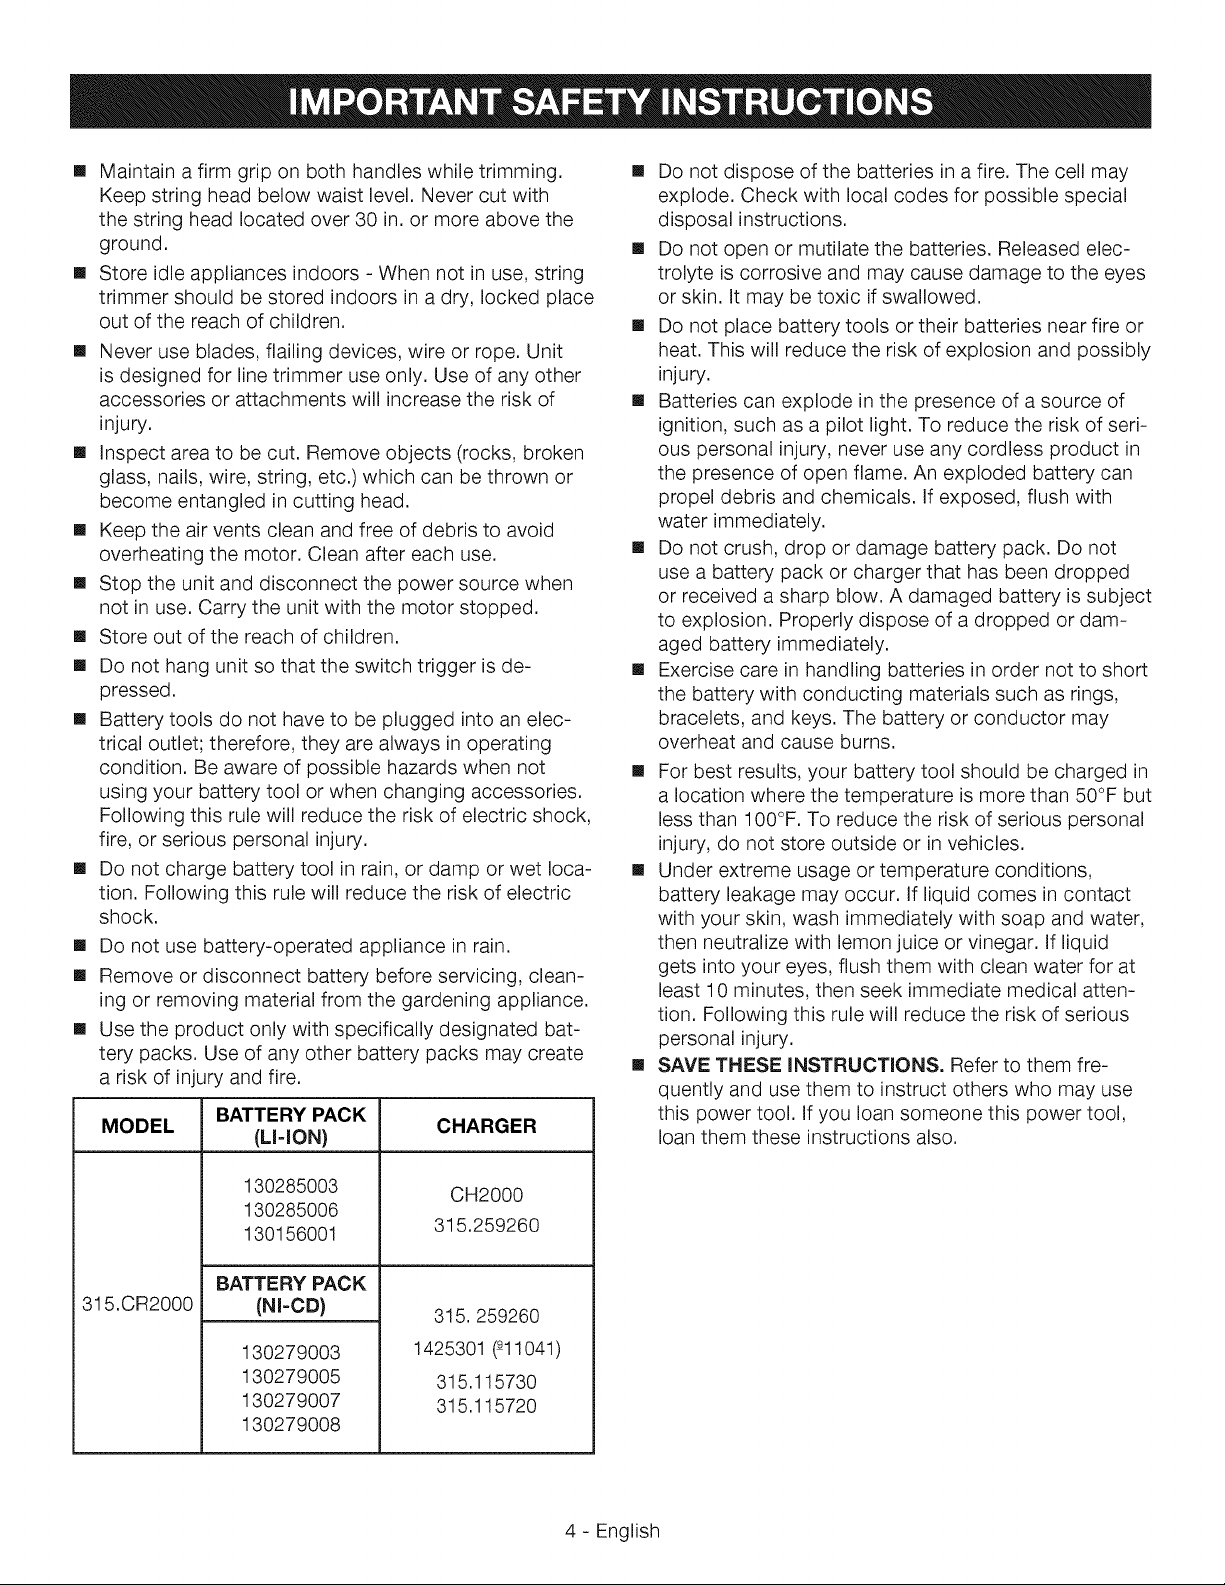
[] Usetheproductonlywithspecificallydesignatedbat-
terypacks.Useofanyotherbatterypacksmaycreate
ariskofinjuryandfire.
MODEL CHARGER
BATTERY PACK
(M-ION)
[] Do not dispose of the batteries in a fire. The cell may
explode. Check with local codes for possible special
disposal instructions.
[] Do not open or mutilate the batteries. Released elec-
trolyte is corrosive and may cause damage to the eyes
or skin. It may be toxic if swallowed.
[] Do not place battery tools or their batteries near fire or
heat. This will reduce the risk of explosion and possibly
injury.
[] Batteries can explode in the presence of a source of
ignition, such as a pilot light. To reduce the risk of seri-
ous personal injury, never use any cordless product in
the presence of open flame. An exploded battery can
propel debris and chemicals. If exposed, flush with
water immediately.
[] Do not crush, drop or damage battery pack. Do not
use a battery pack or charger that has been dropped
or received a sharp blow. A damaged battery is subject
to explosion. Properly dispose of a dropped or dam-
aged battery immediately.
[] Exercise care in handling batteries in order not to short
the battery with conducting materials such as rings,
bracelets, and keys. The battery or conductor may
overheat and cause burns.
[] For best results, your battery tool should be charged in
a location where the temperature is more than 50°F but
less than 100°F. To reduce the risk of serious personal
injury, do not store outside or in vehicles.
[] Under extreme usage or temperature conditions,
battery leakage may occur. If liquid comes in contact
with your skin, wash immediately with soap and water,
then neutralize with lemon juice or vinegar. If liquid
gets into your eyes, flush them with clean water for at
least 10 minutes, then seek immediate medical atten-
tion. Following this rule will reduce the risk of serious
personal injury.
[] SAVE THESE iNSTRUCTiONS. Refer to them fre-
quently and use them to instruct others who may use
this power tool. If you loan someone this power tool,
loan them these instructions also.
315.CR2000
130285003
130285006
130156001
BATTERY PACK
(NI-CD)
130279003
130279005
130279007
130279008
CH2000
315.259260
315.259260
1425301 _11041)
315.115730
315.115720
4- English
Page 5
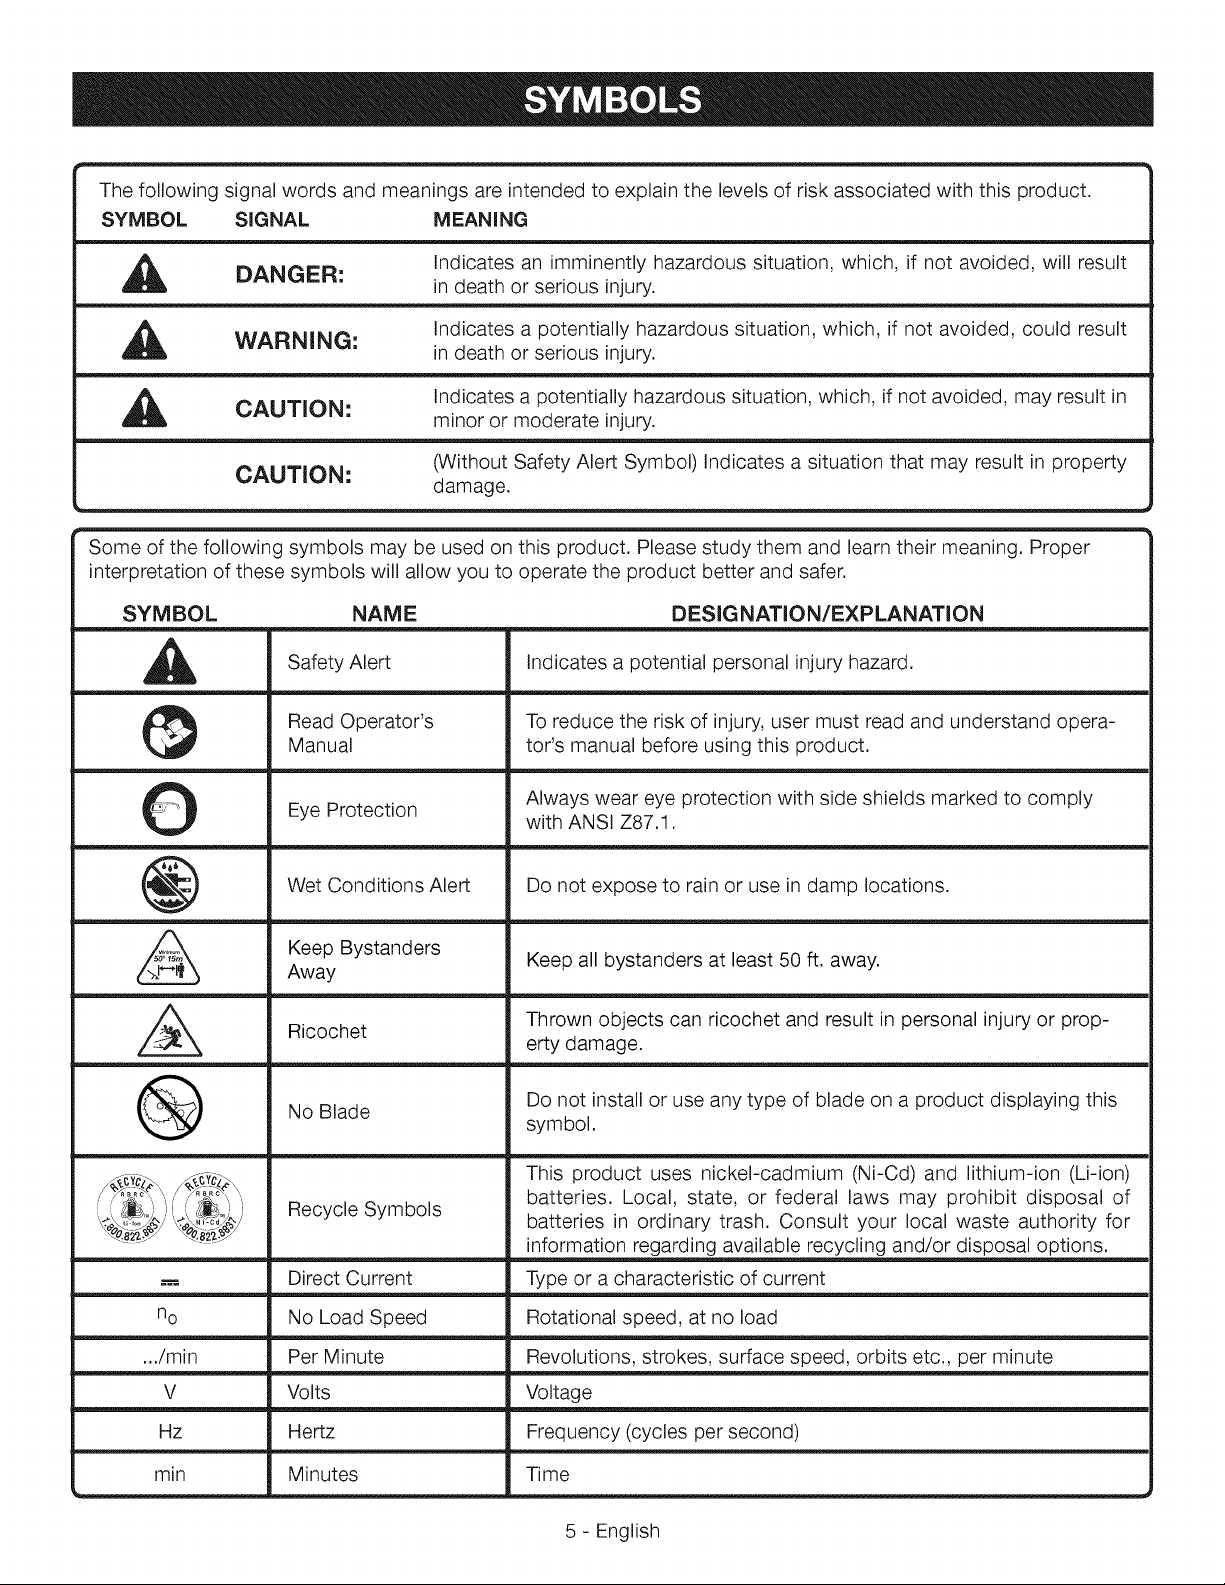
Thefollowingsignalwordsandmeaningsareintendedtoexplainthelevelsofriskassociatedwiththisproduct.
SYMBOL SIGNAL MEANING
,_ DANGER:
,_ WARNING:
,_ CAUTION:
CAUTION: (Without Safety Alert Symbol) Indicates a situation that may result in property
Some of the following symbols may be used on this product. Please study them and learn their meaning. Proper
interpretation of these symbols will allow you to operate the product better and safer.
SYMBOL
A
0
Safety Alert
Read Operator's
Manual
Eye Protection
NAME DESIGNATION/EXPLANATION
Indicates an imminently hazardous situation, which, if not avoided, will result
in death or serious injury.
Indicates a potentially hazardous situation, which, if not avoided, could result
in death or serious injury.
Indicates a potentially hazardous situation, which, if not avoided, may result in
minor or moderate injury.
damage.
Indicates a potential personal injury hazard.
To reduce the risk of injury, user must read and understand opera-
tor's manual before using this product.
Always wear eye protection with side shields marked to comply
with ANSI Z87.1.
@
&
®
n o
.../min
V
Hz
Wet Conditions Alert
Keep Bystanders
Away
Ricochet
No Blade
Recycle Symbols
Direct Current
No Load Speed
Per Minute
Volts
Hertz
Do not expose to rain or use in damp locations.
Keep all bystanders at least 50 ft. away.
Thrown objects can ricochet and result in personal injury or prop-
erty damage.
Do not install or use any type of blade on a product displaying this
symbol.
This product uses nickel-cadmium (Ni-Cd) and lithium-ion (Li-ion)
batteries. Local, state, or federal laws may prohibit disposal of
batteries in ordinary trash. Consult your local waste authority for
information regarding available recycling and/or disposal options.
Type or a characteristic of current
Rotational speed, at no load
Revolutions, strokes, surface speed, orbits etc., per minute
Voltage
Frequency (cycles per second)
min
Minutes
Time
5 - English
Page 6
PRODUCTSPECIFICATIONS
Motor...................................................................19.2VDC
CuttingSwath..............................................................12in.
LineSize.................................................................0.065in.
Weight(withoutbatterypack)...................................5.3Ibs.
ReplacementSpoolPartNumber....................3110382AG
ReplacementSpoolCapPartNumber.............3411546CG
KNOWYOUR STRING TRIMMER
See Figure 1, page L
The safe use of this product requires an understanding of
the information on the tool and in this operator's manual
as well as a knowledge of the project you are attempt-
ing. Before use of this product, familiarize yourself with all
operating features and safety rules.
ADJUSTABLE FRONT HANDLE
The front handle assembly can be adjusted for ease of
operation and to help prevent loss of control.
EDGER GUIDE
The edger guide assists when using the unit as an edger
and helps prevent cutting of flower beds, etc., when using
as the unit as a trimmer.
UNPACKING
This product requires assembly.
[] Carefully remove the product and any accessories from
the box. Make sure that all items listed in the packing
list are included.
GRASS DEFLECTOR
The trimmer includes a grass deflector that helps protect
from flying debris.
LOCK=OUT BUTTON
The lock-out button prevents accidental starting.
ROTATING REAR HANDLE
The rotating rear handle can be locked in two different
positions for ease of use when edging and trimming.
TELESCOPING BOOM
The string trimmer can be adjusted to different extension
points for ease of use.
THREE=POSITION PIVOTING HEAD
The trimmer head can be adjusted with the pivot button.
PACKING LIST
String Trimmer
Grass Deflector Assembly with Screws
Operator's Manual
_h, WARNING: Do not use this product if it is not
completely assembled or if any parts appear to be
missing or damaged. Use of a product that is not
properly and completely assembled could result in
serious personal injury.
[] Inspect the product carefully to make sure no breakage
or damage occurred during shipping.
[] Do not discard the packing material until you have
carefully inspected and satisfactorily operated the
product.
[] If any parts are damaged or missing, please call
1-800-932-3188 for assistance.
6 - English
A
WARNING: If any parts are damaged or miss-
ing do not operate this product until the parts are
replaced. Use of this product with damaged or
missing parts could result in serious personal injury.
WARNING: Do not attempt to modify this product
or create accessories not recommended for use
with this product. Any such alteration or modifica-
tion is misuse and could result in a hazardous con-
dition leading to possible serious personal injury.
A
WARNING: To prevent accidental starting that
could cause serious personal injury, always remove
the battery pack from the product when assembling
parts.
Page 7
ATTACHINGGRASSDEFLECTOR
See Figure 2 - 3, page L
_IL WARNING: The line cut-off blade on the grass
deflector is sharp. Avoid contact with the blade.
Failure to avoid contact can result in serious per-
sonal injury.
[]
Remove supplied screws with a phillips screwdriver
from the trimmer head.
[]
Fit the grass deflector onto the raised posts on the
trimmer head.
NOTE: The deflector should be flush to the trimmer
head.
[]
Install supplied screws and tighten by turning clock-
wise with a phillips screwdriver.
A
WARNING: Do not allow familiarity with this
product to make you careless. Remember that a
careless fraction of a second is sufficient to inflict
serious injury.
A
WARNING: Always wear eye protection with side
shields marked to comply with ANSI Z87.1. Failure
to do so could result in objects being thrown into
your eyes, resulting in possible serious injury.
A
WARNING: Never use blades, flailing devices,
wire, or rope on this product. Do not use any
attachments or accessories not recommended by
the manufacturer of this product. The use of attach-
ments or accessories not recommended can result
in serious personal injury.
This product will accept Craftsman _ 19.2 V lithium-ion
battery packs and Craftsman _ 19.2 V nickel-cadmium
battery packs.
For complete charging instructions, refer to the Operator's
Manual for the battery packs and chargers listed in the
IMPORTANT SAFETY INSTRUCTIONS.
BATTERY PROTECTION FEATURES
Craftsman _°19.2 V lithium-ion battery packs are designed
with features that protect the lithium-ion cells and
maximize battery life.
If the tool stops during use, release the trigger to reset
and resume operation. If the tool still does not work, the
battery needs to be recharged.
STARTING/STOPPING THE STRING TRIMMER
See Figure 4, page L
[] To start the string trimmer, push the lock-out button to
either the right or left side and pull the switch trigger.
[] To stop the string trimmer, release the switch trigger.
TO INSTALL BATTERY PACK
See Figure 5, page i.
[] Insert the battery pack into the product as shown.
[] Make sure the latches on each side of the battery pack
snap into place and the battery pack is secured before
beginning operation.
TO REMOVE BATTERY PACK
See Figure 5, page i.
[] Depress the latches on each side of the battery pack.
[] Remove the battery pack.
TELESCOPING BOOM
See Figure 6, page i.
The boom can be extended or shortened for ease of use.
[] Remove the battery pack.
[] Loosen thetelescoping boom coupler byturning it coun-
terclockwise. Slide the boom to the desired position.
[] Tighten the coupler by turning clockwise. Make sure the
boom issecurely tightened before reinstalling the battery
pack.
ADJUSTABLE FRONT HANDLE
See Figure 7, page ii.
The angle of the front handle can be adjusted 180°.
[] Remove the battery pack.
[] Set the trimmer on aflat surface and turn the knob coun-
terclockwise to loosen the handle.
[] For trimming, adjust the handle upward.
[] For edging, adjust the handle downward.
[] Turn the knob clockwise until the handle is securely
tightened before reinstalling the battery pack.
7 - English
Page 8
THREE=POSITION PIVOTING HEAD
See Figure 8, page iL
The trimmer head can be adjusted to three different posi-
tions.
[] Remove the battery pack.
[] Depress the pivot button and move the trimmer head up
or down to one of the three positions indicated by the
notches.
NOTE: Adjust the trimmer head to the first and second
notches for trimming and edging. Adjust to thethird notch
for storage only.
[] Make sure the trimmer head is securely locked into place
before reinstalling the battery pack.
OPERATING THE TRIMMER
See Figure 9, page ii.
Follow these tips when using the string trimmer:
[] Hold the trimmer with your right hand on the rear handle
and your left hand on the front handle.
[] Keep a firm grip with both hands while in operation.
[] Trimmer should be held at a comfortable position with
the rear handle about hip height.
[] Cut tall grass from the top down. This will prevent grass
from wrapping around the boom housing and string
head which may cause damage from overheating.
If grass becomes wrapped around the string head:
[] Remove the battery pack from the trimmer.
[] Remove the grass.
_ WARNING: Always hold the string trimmer away
from the body keeping clearance between the body
and the string trimmer. Any contact with the string
trimmer cutting head while operating can result in
serious personal injury.
CUTTING TIPS
See Figure 10, page ii.
[] Keep the trimmer tilted toward the area being cut; this is
the best cutting area.
[] The string trimmer cuts when passing the unit from right
to left. This will avoid throwing debris at the operator.
Avoid cutting in the dangerous area shown in figure 10.
[] Use the tip of the string to do the cutting; do not force
string head into uncut grass.
[] Wire and picket fences cause extra string wear, even
breakage. Stone and brick walls, curbs, and wood may
wear string rapidly.
[] Avoid trees and shrubs. Treebark, wood moldings, siding,
and fence posts can easily be damaged by the string.
ADVANCING STRING
NOTE: The trimmer is equipped with an auto-feed head.
Bumping the head to try to advance the line will damage
the trimmer and void the warranty.
[] With the trimmer running, release the switch trigger.
[] Wait two seconds, and press the switch trigger.
NOTE: The string will extend approximately 1/4 in. with
each stop and start of the switch trigger until the string
reaches the length of the grass deflector cut-off blade.
[] Resume trimming.
ADVANCING THE STRING MANUALLY
See Figure 11, page ii.
[] Remove the battery pack.
[] Push the black button located on the string head while
pulling on string to manually advance the string.
LINE CUT-OFF BLADE
See Figure 12, page ii.
This trimmer is equipped with a line cut-off blade on the
grass deflector. For best cutting, advance line until it is
trimmed to length by the line cut-off blade. Advance line
whenever you hear the motor running faster than normal,
or when trimming efficiency diminishes. This will maintain
best performance and keep line long enough to advance
properly.
ROTATING REAR HANDLE
See Figure 13, page iL
The rotating rear handle is used in combination with the
edger guide.
[] Remove the battery pack.
[] Push down on the edging coupler and turn handle end
[] Release the edging coupler.
8 - English
clockwise until the edging coupler locks into place.
Page 9

EDGING
See Figures 12 - 14, page iL
[] Remove the battery pack.
Rotate the rear handle when using the edger guide for
edging sidewalks and walkways. To use the edger guide,
flip down from its stored position.
Always hold the string trimmer away from the body keep-
ing clearance between the body and the string trimmer.
Any contact with the string trimmer cutting head while
operating can result in serious personal injury.
A
WARNING: When servicing, use only identical re-
placement parts. Use of any other parts may create
a hazard or cause product damage.
A
WARNING: Always wear eye protection with side
shields marked to comply with ANSI Z87.1. Failure to
do so could result in objects being thrown into your
eyes, resulting in possible serious injury.
A
WARNING: To avoid serious personal injury, always
remove the battery pack from the product when
cleaning or performing any maintenance.
GENERAL MAINTENANCE
Before each use, inspect the entire product for damaged,
missing, or loose parts such as screws, nuts, bolts, caps,
etc. Tighten securely all fasteners and caps and do not
operate this product until all missing or damaged parts
are replaced. Please call 1-800-932-3188 or contact an
authorized service center for assistance.
Avoid using solvents when cleaning plastic parts. Most
plastics are susceptible to damage from various types of
commercial solvents and may be damaged by their use.
Use clean cloths to remove dirt, dust, oil, grease, etc.
_IL WARNING: Do not at any time let brake fluids,
gasoline, petroleum-based products, penetrating oils,
etc., come in contact with plastic parts. Chemicals
can damage, weaken or destroy plastic which may
result in serious personal injury.
Only the parts shown on the parts list are intended to
be repaired or replaced by the customer. All other parts
should be replaced at an Authorized Service Center.
BATTERY PACK REMOVAL AND PREPARATION
FOR RECYCLING
_IL WARNING: Upon removal, cover the battery pack's
terminals with heavy-duty adhesive tape. Do not at-
tempt to destroy or disassemble battery pack or re-
move any of its components. Lithium-ion and nickel-
cadmium batteries must be recycled or disposed of
properly. Also, never touch both terminals with metal
objects and/or body parts as short circuit may result.
Keep away from children. Failure to comply with these
warnings could result in fire and/or serious injury.
SPOOL REPLACEMENT
See Figure 15, page ii,
Use only round type .065 in. diameter monofilament
string. Use original manufacturer's replacement string for
best performance.
[] Remove the battery pack.
[] Push in tabs on side of spool retainer.
[] Pull spool retainer up to remove.
[] Remove the old spool.
[] To install the new spool, make sure the string is captured
in the slot on the new spool. Make sure the end of the
string is extended approximately 6 in. beyond the slot.
[] Install the new spool so that the string and slot align with
the eyelet in the string head. Thread the string into the
eyelet.
[] Pull the string extending from the string head so the string
releases from the slot in the spool.
[] Reinstall the spool retainer by depressing tabs into slots
and pushing down until spool retainer clicks into place.
STRING REPLACEMENT
See Figures 15 - 16, page iL
[] Remove the battery pack.
[] Remove the spool from the string head.
NOTE: Remove any old string remaining on the spool.
[] Cut a piece of string approximately 9 ft. long. Use only
.065 in. diameter monofilament string.
9 - English
Page 10

[] Insertthestringintotheanchorholeintheupperpartof
thespool.Windthestringaroundtheupperpartofthe
spoolclockwise,asshownbythearrowsonthespool.
Placestringinthesloton upperspoolflange,leaving
about6 in.extendedbeyondthe slot.Donotoverfill.
Afterwindingthestring,thereshouldbeatleast1/4in.
betweenthewoundstringandtheoutsideedgeofthe
spool.
[] Replacetheplasticretainer,spool,andthespoolretainer.
RefertoSpoolReplacementearlierinthismanual.
PROBLEM POSSIBLE CAUSE SOLUTION
STORINGTHE TRIMMER
[] Remove the battery pack from the string trimmer be-
fore storing.
[] Clean all foreign material from the trimmer.
[] Store it in a place that is inaccessible to children.
[] Keep away from corrosive agents such as garden
chemicals and de-icing salts.
Replacement Spool Part Number .................... 3110382AG
Replacement Spool Cap Part Number ............. 3411546CG
String will not advance when using
the auto-feed head:
Grass wraps around boom
housing and string head
Motor fails to start when switch
trigger is depressed.
String is welded to itself.
Not enough string on spool.
String is worn too short.
String is tangled on spool. Remove string from spool and rewind. Refer
Cutting tall grass at ground
level.
Battery is not secure.
Battery is not charged.
Lubricate with silicone spray.
Install more string. Refer to String Replace-
ment earlier in this manual.
Pull string while pressing button.
to String Replacement earlier in this man-
ual.
Cut tall grass from the top down to prevent
wrapping.
To secure the battery pack, make sure the
latches on each side of the battery pack
snap into place.
Charge the battery pack according to the
instructions included with your model.
10 - English
Page 11

CRAFTSMAN19.2VOLT STRING TRIMMER = MODEL NUMBER 315.CR2000
number in all correspondence regarding your STRING TRIMMER or when ordering repair parts.
I he model number will be found on a label attached to the motor housing. Always mention the model
SEE BACK PAGE FOR PARTS ORDERING INSTRUCTIONS
1 3
4
Key Part
No. Number
1 099932001902
2 3220313G
3 31104349G
4 3110282BG
5 3110418lAG
6 3290205G
7 099959001907
8 3330182AG
9 099934001900
10 099934001901
11 099934001903
12 31102349G
PARTS LIST
Description Qty.
Logo Label (Handle) .................. 2
Screw (M4 x 14 mm) .................. 3
Front Handle .............................. 1
Knob (M6) .................................. 1
Clamp ........................................ 1
Hex Nut (M6).............................. 1
Warning Label (Icon) .................. 1
Edger Guide ............................... 1
Data Label (Left) ........................ 1
Data Label (Right) ...................... 1
Pivoting Head Label .................. 1
Grass Deflector Assembly ......... 1
11 - English
Part
Key
NO.
Number
13
099934001902
15
3110382AG
16
3411546CG
NOT SHOWN
130279003
130279005
130279007
103279008
1425301
988000012
8
Description Qty.
Auto Line Feed Label ................. 1
Spool w/Line .............................. 1
Spool Cap .................................. 1
Battery ....................................... 1
Charger ...................................... 1
Operator's Manual ..................... 1
Page 12

12- English
Page 13

See this section for all the figures referenced
in the operator's manual.
Vea esta secci6n de la pagina para todas
las figuras mencion6 en el manual del operador.
A
A-Lock-out button (bot6n de seguro de
seguro)
B- Switch trigger (gatillo del interruptor)
A- Switch trigger (gatillo del interruptor)
B- Grassdeflector (deflector de hierba)
C-Lock-out button (bot6n de seguro de
seguro)
D-Adjustable front handle (mango delantero
ajustable)
E-Rotating rear handle (mango delantero
ajustable)
F - Telescopingboom (brazotelescopico)
G- 3-Position pivoting head(cabezalpivotante)
H- Edger guide (guia para recortar bordes)
A- Grassdeflector (deflector de hierba)
B-Slide over string head and turn counter-
clockwise (deslizarlo sobreel cabezaldel hilo
y girarlo en sentido antihorario)
C- Line cut-off blade (cuchilla de corte del hilo)
A- Screw holes (agujerosdel tornillo)
B- Screws (tornillos)
A- Latches (pestillos)
A- Telescopingboom (brazo telescopico)
B- Loosen (aflojar)
C- Tighten (asegurar)
D-Telescoping boom coupler (acoplador del
brazotelescopico)
i
Page 14

A-Knob(perilla)
B
PROPEREDGINGOPERATINGPOSITION
POSICIONCORRECTAPARAELIVlANEJO
A_
x,." I.
DELACORTARBORDES
B
A- Direction of rotation (sentido de larotacion)
B- Bestcutting area (area decorte optima)
C-Dangerous cutting area (_rea de corte
peligrosa)
Fi__.11
c
A- Black button (boton negro)
B- String (hilo)
A- Pivot button (boton del pivote)
B-Notches 1 and 2: trimming and edging
(muescas 1y 2: rocartar y cortar bordes)
C- Notch 3: storage position only (muesca 3:
posicion solamente)
PROPERTRIMMEROPERATING
POSiTiON
POSICIONCORRECTAPARAELMANEJO
DELACORTADORA
13
A- Edgerguide (guia parael recorte de bordes)
B- Line cut-off blade (cuchilla de corte)
A
A- Spool retainer (reten del carrete)
B- Spool (carrete)
C- Tabs(pesta_as)
D- Slots (ranuras)
E- Eyelet (agujero)
F - Slots in spool (ranuras en el carrete)
WIND CLOCKWISE
ENROLLEHAClALADERECHA
A-Rotating rear handle (mango delantero
ajustable)
B-Edging coupler (acoplador para cortar
bordes)
ii
A- Spool (carrete)
B- Anchor hole (orificio desujecion)
C- Slots in spool (ranuras en el carrete)
Page 15

A
iADVERTENClA! AI utilizar herramientas el_ctricas
para el cuidado del jard[n, con el fin de reducir el
riesgo de incendio, descargas el_ctricas y lesiones
corporales, siempre deben seguirse ciertas medidas
b_.sicas de precauci6n.
LEA TODAS LAS INSTRUCCIONES
[] Para la operaci6n segura, lea y entienda todas las
instrucciones antes de usar este producto. Siga todas las
instrucciones de seguddad. La inobservancia de todas las
instrucciones de seguddad seSaladas abajo puede causar
lesiones corporales graves.
[] No permita que utilicen esta unidad ni_os ni personas
carentes de la debida instrucci6n para su manejo.
[] Limpie el _.rea de trabajo cada vez antes de usar la
unidad. Retire todos los objetos tales como piedras,
vidrios rotos, clavos, alambre o cuerdas que pudiesen
resultar lanzados o enredados en el hilo de corte o
cuchilla, segL_n sea el caso.
[] Para utlizar este producto p6ngase anteojos de
seguridad o gafas protectoras marcados con el sello de
cumplimiento de la norma ANSI Z87.1.
[] Use gafas de seguridad - Siempre use gafas de
seguridad con protecci6n lateral. Los anteojos comunes
s61o tienen lentes resistentes a los impactos. NO son
anteojos de seguridad. Con el cumplimiento de esta regla
se reduce el riesgo de posibles lesiones oculares.
[] Prot_jase los pulmones. Use una careta o mascarilla
contra el polvo si la operaci6n genera mucho polvo. Con
el cumplimiento de esta regla se reduce el desgo de
lesiones serias.
[] V[stase adecuadamente - Se recomienda el uso de
guantes de goma y un calzado resistente cuando se
trabaja a la intempede. P6ngase pantalones largos de tela
gruesa, mangas largo, botas y guantes. No se ponga ropa
holgada o pantalones cortos, ni ande descalzo. No se
ponga joyas de ninguna clase.
[] Rec6jase el cabello largo arriba del nivel de los hombros
para evitar que se enrede en las piezas m6viles.
[] Mantenga alejados a los ni_os - Mantenga alejados a
todos los circunstantes, ni_os y animales a una distancia
minima de 15 m (50 pies).
[] Permanezca alerta - No use esta unidad cuando se
encuentre fatigado, enfermo o bajo los efectos del
alcohol, drogas o medicamentos.
[] No utilice la unidad en condiciones deficientes de
iluminaci6n.
[] Mantenga todas las partes del cuerpo alejadas de toda
pieza en movimiento.
[] No utilice herramientas motodzadas en atm6sferas
explosivas, como las existentes alrededor de I[quidos,
gases y polvos inflamables. Las herramientas el_ctricas
generan chispas que pueden encender el polvo y los
vapores inflamables.
[] Evite el contacto del cuerpo con objetos conectados
a tierra, como las tuber[as, radiadores, estufas y
refdgeradores. Existe un mayor riesgo de descargas
el_ctricas si el cuerpo est,. en contacto con tierra.
[] Evite los entornos de trabajo peligrosos - No exponga las
aparato or herramienta el_ctricas a la Iluvia ni a condiciones
de humedad. La introducci6n de agua en una herramienta
el_ctrica aumenta el desgo de descargas el_ctricas.
[] V[stase adecuadamente- No fuerce la herramienta. Utilice
la herramienta adecuada para cada tarea. El uso de la
herramienta adecuada a la velocidad para la que estb.
dise_ada, efectuar_, el trabajo de mejor y m_.s segura
manera.
[] No fuerce la herramienta - El uso de la herramienta
adecuada a la velocidad para la que ester dise_ada,
efectuar_, el trabajo de mejor y m_.s segura manera.
[] No accione el equipo cuando est_ descalzo o al Ilevar
puestas sandalias o calzado liviano similar. Use calzado
de seguddad que le proteja sus pies y mejore su postura
en superficies resbaladizas.
[] No estire el cuerpo para alcanzar mayor distancia -
Mantenga los pies bien afirmados y el equilibrio. No
trate de alcanzar demasiado lejos. Se puede perder el
equilibrio al tratar de alcanzar demasiado lejos.
[] Evite un arranque accidental de la unidad - Aseg0rese de
que el interruptor est_ en la posici6n de aseguramiento
o de apagado antes de instalar el paquete de bater[as.
Llevar las herramientas con el dedo en el interruptor o
instalar el paquete de bater[as en la herramienta con el
interruptor puesto es causa comL_n de accidentes.
[] No utilice la herramienta si el interruptor no enciende o no
apaga. Una herramienta que no pueda controlarse con el
interruptor es peligrosa y debe repararse.
[] Desconecte el aparato - Desconecte la clavija de la
toma de corriente antes de guardar la herramienta. Tales
medidas preventivas de seguridad reducen el riesgo de
poner en marcha accidentalmente la herramienta.
[] S61o utilice piezas de repuesto id_nticas y accesorios del
fabricante original. El empleo de piezas diferentes puede
causar un peligro o da_ar el producto.
[] Proporcione mantenimiento con cuidado al aparato -
Cambie el cabezal del hilo, si est_ agrietado, desportillado
o da_ado de cualquier forma. Aseg0rese de que el
cabezal del hilo, o cuchilla, seg0n sea el caso, est_
debidamente instalado y flrmemente asegurado. La
inobservancia de esta advertencia puede causar lesiones
corporales serias.Mantenga la producto y el mango
secos, limpios y sin aceite ni grasa.
[] Revise para ver si hay piezas dafiadas - Antes de seguir
utilizando la herramienta, es necesado inspeccionar
cuidadosamente toda protecci6n o pieza da_ada para
determinar si funcionar_, correctamente y desempe_ar_.
la funci6n a la que est,. destinada. Verifique la alineaci6n
de las partes m6viles, que no haya atoramiento de partes
m6viles, que no haya piezas rotas, el montaje de las
piezas y cualquier otra condici6n que pudiera afectar su
funcionamiento. Toda protecci6n o pieza que est_ da_ada
debe repararse apropiadamente o reemplazarse en un
centro de servicio autorizado para evitar todo desgo de
lesiones.
[] Aseg0rese de que todas las protecciones, correas,
mangos y defiectores de hierba est_n acoplados
debidamente y de manera segura.
3- Espa_ol
Page 16

[] En el cabezal de corte use L_nicamente hilo de repuesto
del fabricante original. No use ning0n otto aditamento de
corte, pot ejemplo, cable met_tlico, cuerda o producto
similar. Instalar cualquier otra marca de hilo de corte
en esta recortadora de hilo puede producir lesiones
corporales serias.
[] Nunca utilice la unidad si el deflector de pasto no
est,. montado en su lugar yen buenas condiciones de
funcionamiento.
[] AI usar la recortadora, suj_tela firmemente pot ambos
mangos. Mantenga el cabezal del hilo pot debajo del nivel
de la cintura. Nunca corte con el cabezal del hilo a m_.s
de 762 mm (30 pulg.) del suelo.
[] Guarde en el interior los artefactos que no est_ usando -
Mientras no se est_ utilizando, la recortadora de hilo debe
almacenarse en el interior, en un sitio seco y bajo Ilave,
lejos del alcance de los ni_os.
[] Nunca use hojas, dispositivos movibles, alambre ni
cuerdas. Esta unidad se dise_6 para usar con recortadora
de hilo L_nicamente. El uso de cualquier otto accesodo o
aditamento aumenta el riesgo de lesiones.
[] Inspeccione el _.rea pot cortar. Retire todos los objetos
(piedras, vidrio roto, clavos, alambre, hilo, etc.) que puedan
salir disparados o enredarse en el cabezal de corte.
[] Mantenga las rejillas de ventilaci6n limpias y sin desechos
para evitar que se recaliente el motor. L[mpielas cada vez,
despu6s de usar la herramienta.
[] Apague la unidad y desconecte el suministro de cordente
cuando no est_ en uso. Traslade la unidad con el motor
apagado.
[] Guarde la unidad desenchufada y fuera del alcance de los
ni_os.
[] No cuelgue la unidad de modo que el gatillo del
interruptor quede presionado.
[] Las herramientas de baterfas no se necesitan conectar
a una toma de corriente; pot Io tanto, siempre est_.n en
condiciones de funcionamiento. Est_ consciente de los
posibles peligros cuando no est_ usando la herramienta
de baterfas o cuando est_ cambiando los accesorios de
la misma. Con el cumplimiento de esta regla se reduce
el riesgo de una descarga el_ctrica, incendio o lesi6n
corporal seria.
[] No cargue herramientas de baterfas en lugares mojados o
hOmedos. Con el cumplimiento de esta regla se reduce el
riesgo de una descarga el_ctrica.
[] No use aparatos accionados pot baterfas en la Iluvia.
[] Quite o desconecte la baterfa antes de proporcionade
servicio, realizade una limpieza o quitar material del
aparato para el cuidado del jard[n.
[] Use el producto solamente con baterfas espec[ficamente
dise_adas. El uso de cualquier otto tipo de batefia puede
crear riesgo de lesiones o incendio.
PAQUETE DE
MODELO
315.CR2000
[] No deseche las bater[as en el fuego. Las baterfas pueden
estallar. Verifique los c6digos de la Iocalidad para conocer
posibles instrucciones especiales para desechadas.
[] No desarme el paquete de bater[as. El electrolito emitido
es corrosivo y puede causar da_os en los ojos yen la piel.
Puede set t6xico si se ingiere.
[] No coloque herramientas de bater[as ni las bater[as
mismas cerca del fuego o del calor. De esta manera se
reduce el riesgo de explosiones y de lesiones.
[] Las baterfas pueden explotar en presencia de una
fuente de inflamaci6n, como una luz guia. Para reducir
el riesgo de lesiones corporales serias, nunca use un
producto inal_.mbrico en presencia de llamas expuestas.
La explosi6n de una pila puede lanzar fragmentos y
compuestos quimicos. Si ha quedado expuesto a la
explosi6n de una pila, I_.vese de inmediato con agua.
[] No aplaste, deje caer o da_e la pila. Nunca utilice una pila
o cargador que se ha caido, aplastado, recibido un golpe
contundente o ha sido da_ado(a) de alguna manera. Las
bater[as da_adas pueden sufrir explosiones. Deseche
de inmediato toda pila que haya sufrido una caida o
cualquier da_o.
[] Tenga cuidado cuando maneje bater[as a fin de no
realizar un cortocircuito en la bater[a con matedales
conductores como anillos, brazaletes y Ilaves. La
bater[a o el conductor pueden recalentarse y provocar
quemaduras.
[] Para obtener resultados 6ptimos, debe cargar la
herramienta de batefias en un lugar donde la temperatura
est_ entre 50 °F y 100°F. No guarde la herramienta a la
intemperie ni en el interior de veh[culos.
[] En condiciones extremas de uso o temperatura las
bater[as pueden emanar I[quido. Si el I[quido Ilega a
tocarle la piel, I_.vese de inmediato con agua y jab6n,
y despu_s neutralice los efectos con jugo de lim6n o
vinagre. Si le entra I[quido en los ojos, I_veselos con agua
limpia pot Io menos 10 minutos, y despu_s busque de
inmediato atenci6n m_dica. Con el cumplimiento de esta
regla se reduce el riesgo de lesiones corporales serias.
[] GUARDE ESTAS INSTRUCCIONES. ConsL_ltelas con
frecuencia y empl_elas para instruir a otras personas que
puedan utilizar esta herramienta. Si presta a alguien esta
herramienta, facil[tele tambi_n las instrucciones.
BATERiAS
(LHON)
130285003
130285006
130156001
PAQUETE DE
BATERiAS (NI-CD)
130279003
130279005
130279007
130279008
CARGADOR
CH2000
315.259260
315.259260
1425301 _11041)
315.115730
315.115720
4 - Espa_ol
Page 17

Las siguientes palabras de se_alizaci6n y sus significados tienen el objeto de explicar los niveles de riesgo relacionados
con este producto.
SiMBOLO SENAL SIGNIFICADO
PELIGRO:
ADVERTENClA"
DD=r'^l |_l_M: Indica una situaci6n peligrosa posible, la cual, si no se evita, podr[a causar
rr_,-v_v_v_,__D=r'^lmt_l_l: (Sin el s[mbolo de alerta de seguddad) Indica una situaci6n que puede pro-
Es posible que se empleen en este producto algunos de los siguientes dmbolos. Le suplicamos estudiarlos y aprender su
significado. Una correcta interpretaci6n de estos dmbolos le permitirA utilizar mejor y de manera mAs segura el producto.
SiMBOLO
A
0
NOMBRE
Alerta de seguridad
Lea manual del
operador
Protecci6n ocular
Indica una situaci6n peligrosa inminente, la cual, si no se evita, causar_, la
muerte o lesiones serias.
Indica una situaci6n peligrosa posible, la cual, si no se evita, podrfa causar
la muerte o lesiones serias.
lesiones menores o leves.
ducir daSos matedales.
DENOMI NACIC)N/EXPLICACIC) N
Indica un peligro posible de lesiones personales.
Para reducir el riesgo de lesiones, el usuario debe leer y comprender el manual
del operador antes de usar este producto.
Siempre p6ngase protecci6n ocular con la marca de cumplimiento de la norma
ANSI Z87.1.
@
&
®
r]o
.../min
V
Hz
min
Alerta de condiciones
hOmedas
Mantenga alejadas a
las personas presentes
Rebote
No instale hoja de
corte
Simbolos de reciclado
Corriente continua
Velocidad en vacio
Por minuto
Volts
Hertz
Minutos
No exponga la unidad a la Iluvia ni la use en lugares hOmedos.
Mantenga a los circunstantes a una distancia minima de 15 m (50 pies).
Cualquier objeto lanzado puede rebotar y producir lesiones personales o da5os
fisicos.
No instale ni utilice ningOn tipo de hoja de corte en ningQn producto con este
simbolo.
Este producto contiene baterias de niquel-cadmio (Ni-Cd) o iones de litio (Li-
ion). Es posible que algunas leyes municipales, estatales o federales prohiban
desechar las baterias de niquel-cadmio en la basura normal. Consulte alas
autoridades reguladoras de desechos para obtener informaci6n en relaci6n con
las alternativas de reciclado y desecho disponibles.
Tipo o caracteristica de corriente
Velocidad de rotaci6n, en vacio
Revoluciones, carreras, velocidad superficial, 6rbitas, etc., por minuto
Voltaje
Frecuencia (ciclos por segundo)
Tiempo
5- EspaSol
Page 18

ESPECIFICACIONES
Motor..................................................................19,2V c.c.
Anchodecorte.......................................305mm(12pulg.)
Diametrodelhilo..............................] ,65mm(0,065pulg.)
Peso(sinpaquetedebater[as)......................2,4kg(5,3lb.)
NOm.piezadelcarretederepuesto.................3110382AG
N0m.piezadelatapadelcarretederepuesto..3411546CG
FAMILIARiCESECONSURECORTADORADE
HILO
Vea la figura 1,pagina L
El uso seguro que este producto requiere la comprensi6n
de la informaci6n impresa en la producto yen el
manual del operador as[ como ciertos conocimientos
sobre el proyecto a realizar. Antes de usar este
producto, familiar[cese con todas las caracter[sticas de
funcionamiento y normas de seguridad.
MANGO DELANTERO AJUSTABLE
El conjunto del mango delantero se puede ajustar para
facilidad de uso y para ayudar a evitar la p_rdida de
control.
RUEDA GUiA PARA RECORTAR BORDES
La gu[a de la recortadora de bordes Io ayuda cuando
utilice la unidad como una recortadora e impide que corte
canteros de fiores, etc.
DEFLECTOR DE HIERBA
La recortadora incorpora un deflector de hierba que
ayuda a proteger al operador de los desechos lanzados
por la producto.
BOT()N DEL SEGURO
El bot6n del seguro evita los arranques accidentales.
MANGO TRASERO GIRATORIO
El mango trasero puede bloquearse en dos distintas
posiciones para facilitar su uso durante el cortar bordes y
recortar.
BRAZO TELESCOPICO
La recortadora de hilo puede ajustarse a diferentes
extensiones para facilitar su manejo.
CABEZAL PIVOTANTE DE TRES POSICIONES
Ei cabezal de ia recortadora se puede ajustar en tres
posiciones diferentes.
DESEMPAQUETADO
Este producto requiere armarse.
[] Extraiga cuidadosamente de la caja la herramienta
y los accesorios. Aseg0rese de que est_n presentes
todos los art[culos enumerados en la lista de
empaquetado.
,l_l_ ADVERTENOIA: No use este producto si no est_
totalmente ensamblado o si alguna pieza falta o est_
daSada. Si utiliza un producto que no se encuentra
ensamblado de forma correcta y completa, puede
sufrir lesiones graves.
[] Inspeccione cuidadosamente la herramienta para
asegurarse de que no haya sufrido ninguna rotura o
daSo durante el transporte.
[] No deseche el material de empaquetado hasta que
haya inspeccionado cuidadosamente la herramienta y
la haya utilizado satisfactoriamente.
[] Si hay piezas da5adas o faltantes, le suplicamos Ilamar
al 1-800-932-3188, donde le brindaremos asistencia.
MSTA DE EMPAQUETADO
Conjunto de la recortadora
Conjunto del deflector de hierba con tornillo
Manual del operador
,_L ADVERTENOIA: Si hay piezas daSadas o faltantes,
no utilice esta herramienta sin haber reemplazado
las piezas daSadas o faltantes. Usar este producto
con partes daSadas o faltantes puede causar
lesiones serias al operador.
A
ADVERTENClA: No intente modificar esta
herramienta ni hacer accesorios no recomendados
para la misma. Cualquier alteraci6n o modificaci6n
constituye maltrato el cual puede causar una
condici6n peligrosa, y como consecuencia posibles
lesiones corporales serias.
6- EspaSol
Page 19

_k ADVERTENClA:Paraevitarunarranqueaccidental
quepodr[acausarlesionescorporalesserias,
siempredesmontedelaherramientaelpaquetede
bater[asalmontarlepiezasaaqu_lla.
ACOPLAMIENTODEL DEFLECTOR DE HIERBA
Vea las figuras 2 y 3, pagina i.
,_, ADVERTENClA: La cuchiila de cortar el hilo
dei deflector de pasto est_ afilada. Evite tocar la
cuchilla. Si no evita tal contacto puede originarse
lesiones corporales serias.
[] Quite el tornillo incluido con un destornillador phillips
del cabezal de la recortadora.
[] Ajuste el deflector de c_sped en los postes elevados
del cabezal de la recortadora.
NOTA: El deflector debe estar nivelado con el cabezal
de la recortadora.
[] Instale el tornillo incluido y apri_telo gir_ndolo en
sentido horario con un destornillador phillips.
,a,
ADVERTENClA: No permita que su familarizaci6n
con las herramientas Io vuelva descuidado. Tenga
presente que un descuido de un instante es
suficiente para causar una lesi6n grave.
A
ADVERTENClA: Siempre p6ngase protecciOn
ocular con protecci6n lateral con la marca
de cumplimiento de la norma ANSI Z87.1. La
inobservancia de esta advertencia puede permitir
que los objetos lanzados hacia los ojos puedan
provocarle lesiones graves.
A
ADVERTENClA: Nunca use hojas, dispositivos
movibles, alambre ni cuerdas en este producto.
No utilice ningOn aditamento o accesorio no
recomendado por el fabricante de esta herramienta.
El empleo de aditamentos o accesorios no
recomendados podr[a causar lesiones serias.
Este producto acepta bater[as de Jones de litio
Craftsman _ de 19,2 V y de n[quel-cadmio de 19,2 V.
Para ver las instrucciones de carga completas, consulte
el manual del operador de los paquetes de bater[as y
cargadores enumerados en las INSTRUCClONES DE
SEGURIDAD IMPORTANTES.
CARACTERiSTICAS DE PROTECClON DE LAS
BATERJAS
Las bater[as de iones de litio Craftsman _ 19,2 V est_n
diseSadas con caracter[sticas que protegen las celdas de
iones de litio y maximizan la duraci6n de las bater[as.
Si la herramienta se detiene durante el uso, suelte el
gatillo para reiniciarla y reanude el funcionamiento. Si aun
as[ no funciona, se debe recargar la bater[a.
ENCENDIDO Y APAGADO DE LA RECORTADORA
Vea la figura 4, pagina i.
[] Para arrancar la recortadora de hilo, presione el bot6n
de bloqueo hacia la derecha o la izquierda y tire del
gatillo del interruptor.
[] Para detener la recortadora de hilo, suelte el gatillo del
interruptor.
INSTALACION DEL PAQUETE DE BATERiAS
Vea la figura 5, pagina i.
[] Introduzca el paquete de bater[as en el recept_culo
para bater[as.
[] Aseg0rese de que los pestillos situados en
ambos lados del paquete de bater[as se deslicen
completamente en su lugar y de que el paquete quede
bien fijo en el producto antes de empezar a utilizarlo.
EXTRACCION DEL PAQUETE DE BATERiAS
Vea la figura 5, pagina i.
[] Oprima los pestillos laterales del paquete de bater[as.
[] Retire el paquete de bater[as.
BRAZO TELESC(')PICO
Vea la figura 6, pagina i.
El brazo puede extenderse o acortarse para facilitar su
manejo.
[] Retire el paquete de bater[as.
[] Afloje el acoplador para cortar bordes girAndolo hacia
la izquierda. Deslice el brazo a la posici6n deseada.
[] Aflojar el acoplador para cortar bordes. AsegOrese de
que el brazo est_ firmemente apretado antes de volver
a instalar el paquete de bater[as.
7- EspaSol
Page 20

MANGO DELANTERO AJUSTABLE
Vea la figura 7, p#gina ii.
El angulo del mango delantero puede ajustarse a 180°.
[] Retire el paquete de bater[as.
[] Coloque la recortadora en una supefficie plana y gire la
perilla hacia la izquierda para afiojar el mango.
[] Para recortar, ajuste el mango hacia arriba.
[] Para cortar bordes, ajuste el mango hacia abajo.
[] Gire la perilla hacia la derecha hasta que el mango
est_ firmemente apretado antes de volver a instalar el
paquete de bater[as.
CABEZAL PIVOTANTE DE TRES POSICIONES
Vea la figura 8, pagina ii.
El cabezal de la recortadora se puede ajustar en tres
posiciones diferentes.
[] Retire el paquete de bater[as.
[] Optima el bot6n del pivote y mueva el cabezal de la
recortadora hacia arriba o hacia abajo hasta una de las
tres posiciones indicadas pot las muescas.
NOTA: Ajuste el cabezal de la recortadora en la
primera y segunda muesca para recortar y cortar
bordes. Aj0stelo en la tercera muesca 0nicamente para
almacenar la unidad.
[] Aseg0rese de que el cabezal de la recortadora est_
firmemente fijo en su lugar antes de volver a instalar el
paquete de bater[as.
MANEJO DE LA RECORTADORA
Vea la figura 9, pagina ii.
Siga las siguientes recomendaciones a manejar la
recortadora de hilo:
[] Sujete la recortadora con la mano derecha en el
mango trasero y la izquierda en el delantero.
[] Sujete firmemente la unidad con ambas manos durante
la operaci6n.
[] Se recomienda sujetar la recortadora en una posici6n
c6moda, con el mango trasero a la altura de la cadera
aproximadamente.
[] Corte la hierba alta desde arriba hacia abajo.
Esto evitara que la hierba se enrolle alrededor del
alojamiento del eje y del cabezal del brazo, Io que
puede causar da_os por calentamiento excesivo.
Si la hierba se enrolla en el cabezal del hilo:
[] Desenchufe la recortadora de hilo.
[] Quite la hierba.
A
ADVERTENClA: Siempre sujete la recortadora de
hilo lejos de su cuerpo, manteniendo un espacio
entre ambos. El contacto con el cabezal de corte
de la recortada de hilo durante su operaci6n puede
causar lesiones personales graves.
RECOMENDAClONES DE CORTE
Vea la figura 10, pagina ii.
[] Mantenga la recortadora inclinada hacia el area de
corte; _sa es el area Optima.
[] La recortadora de hilo efect0a el corte al pasar la
unidad de derecha a izquierda. De esta manera se
evita el lanzamiento de desechos hacia el operador.
Evite recortar en el area peligrosa mostrada en la figura
10.
[]
Haga que el recorte sea efectuado por la punta del
hilo; no fuerce el cabezal del hilo en la hierba sin
cortar.
[] Las cercas de alambre y de estacas causan desgaste
adicional del hilo, incluso su ruptura. Los muros de
piedra y de ladrillo, as[ como las banquetas (aceras) y
la madera pueden desgastar rapidamente el hilo.
[] Evite el contacto con arboles y arbustos. La
corteza de los arboles, las molduras de madera, los
revestimientos de las paredes y los postes de las
cercas pueden resultar da_ados facilmente por el hilo.
AVANCE DEL HILO
NOTA: La recortadora es equipado con una cabeza de
auto-comida. Golpear la cabeza para tratar de avanzar la
I[nea da_ara la garant[a de trimmer y vado.
[] Haga funcionar la recortadora, suelte el gatillo del
interruptor.
[] Espere dos segundos y oprima el gatillo del interruptor.
NOTA: El hilo se extiende aproximadamente 6,35 mm
(1/4 pulg.) cada vez que se apaga y enciende el gatillo
del interruptor hasta que el hilo alcanza la Iongitud de
la cuchilla de corte del deflector de pasto.
[] Reanude el recorte.
AVANCE MANUAL DEL HILO
Vea la figura 11, pagina ii.
[] Retire el paquete de bater[as.
[] Oprima el bot6n negro ubicado en el cabezal del hilo
mientras tira del hilo para avanzar manualmente el hilo.
CUCHILLA DE CORTE DEL HILO
Vea la figura 12, pagina ii.
Esta recortadora est& equipada con una cuchilla de corte
instalada en el protecci6n. Para obtener mejores resultados
en el recorte, avance el hilo hasta que la cuchilla Io corte a
la Iongitud apropiada. Avance el hilo siempre que escuche
que el motor est,. funcionando m_tsr_pido de Io normal, o
cuando disminuya la eficiencia del recorte. Esto mantendr_.
un desempe_o 6ptimo y mantendr_ el hilo a la suficiente
Iongitud para que avance correctamente.
8- Espa_oi
Page 21

MANGO TRASERO GIRATORIO
Vea la figura 13, pagina ii.
El mango trasero giratorio se utiliza junto con la gu[a para
cantos.
[] Retire el paquete de baterfas.
[] Empuje el bot6n del recorte de bordes y gire el mango a
la izquierda.
[] Suelte el bot6n del brazo telesc6pico y gire el mango a la
izquierda hasta que el bot6n del recorte de bordes quede
asegurado en su lugar.
RECORTE DE BORDES
Vea las figuras 12 a 14, pagina ii.
[] Retirer le bloc de piles.
El mango trasero giratorio puede usarse en combinaci6n con
la gu[a para el recorte de bordes en banquetas (aceras)y
veredas de entrada. Para utilizar la guia para el recorte de
bordes, el golpe hacia abajo de Io ha almacenado la posici6n.
Siempre sujete la recortadora de hilo lejos del cuerpo,
manteniendo un espacio entre el cuerpo y la herramienta.
Cualquier contacto del cuerpo con la armaz6n o el
cabezal de corte de la recortadora de hilo puede producir
quemaduras y/o otras lesiones serias.
A
ADVERTENClA: AI dar servicio a la unidad, s61o
utilice piezas de repuesto id6nticas. El empleo de
piezas diferentes puede causar un peligro o da_ar el
producto.
A
ADVERTENClA: Siempre p6ngase protecci6n ocular
con protecci6n lateral con la marca de cumplimiento
de la norma ANSI Z87.1. La inobservancia de esta
advertencia puede permitir que los objetos lanzados
hacia los ojos puedan provocarle lesiones graves.
A
ADVERTENClA: Para evitar lesiones corporales
serias, siempre retire el paquete de bater[as de la
herramienta al limpiarla o darle mantenimiento.
MANTENIMIENTO GENERAL
Antes de cada uso, inspeccione todo el producto para
detectar algL_n daSo, partes faltantes o sueltas, como
tornillos, tuercas, pernos, tapas, etc. Ajuste firmemente todos
los sujetadores y las tapas y no active este producto hasta
que todas las partes faltantes o daSadas sean reemplazadas.
Llame al 1-800-932-3188 o comun[quese con un centro de
servicio autorizado para recibir asistencia.
Evite el empleo de solventes al limpiar piezas de pl_.stico. La
mayor[a de los pl_.sticos son susceptibles a diferentes tipos
de solventes comerciales y pueden resultar daSados. Utilice
paSos limpios para eliminar la suciedad, el polvo, el aceite, la
grasa, etc.
A
ADVERTENClA: No permita en ningOn momento
que fiuidos para frenos, gasolina, productos a base de
petr61eo, aceites penetrantes, etc., Ileguen a tocar las
piezas de pl_.stico. Las sustancias qufmicas pueden
daSar, debilitar o destruir el pl&stico, Io cual a su vez
puede producir lesiones corporales serias.
piezas restantes deben set reemplazadas en un centro de
servicio autorizado.
REMOClON Y PREPARAClON DEL PAQUETE DE
BATERiAS PARA EL REClCLADO
_ ADVERTENCIA: AI retirar el paquete de bater[as,
cubra las terminales del mismo con cinta adhesiva
reforzada. No intente destruir o desarmar el
paquete de bater[as, ni de desmontar ninguno de
sus componentes. Las bater[as deben reciclarse o
desecharse debidamente. Asimismo, nunca toque
ambas terminales con objetos met_.licos y partes del
cuerpo, ya que puede producirse un corto circuito.
Mant_ngase fuera del alcance de los niSos. La
inobservancia de estas advertencias puede causar
incendios y lesiones corporales sedas.
REEMPLAZO DEL CARRETE
Vea la figura 15, pbgina iL
Use L_nicamente hilo monofilar redondo de 1,65 mm (0,065
pulg.) de di&metro. Use el hilo de repuesto del fabricante
original para obtener el mejor desempe5o.
[] Retire el paquete de bater[as.
[] Presione hacia dentro las pestaSas laterales del ret_n del
carrete.
[] Empuje el ret_n del carrete hacia arriba para extraerlo.
[] Extraiga el cabezal de hilo.
[] Para instalar el nuevo carrete, aseg0rese de que se
capturen los dos hilo en las ranuras opuestas entre s[ en
el nuevo carrete. AsegL_rese de que los extremos de cada
hilo sobresalgan aproximadamente 152 mm (6 in.) de
cada ranura.
[] Instale el nuevo carrete de manera que el hilo y las
ranuras queden alineados con el ojillo m&s cercano del
cabezal del hilo. Pase los hilo pot los ojales.
[] Tire de los hilo desde el cabezal del hilo para que el hilo
se suelte de las ranuras del carrete.
Solamente las piezas mostradas en la lista de piezas pueden [] Vuelva a instalar el ret_n del carrete presionando las
set reparadas o cambiadas pot el consumidor. Todas las pesta_as en sus ranuras y empuj_.ndolas hacia abajo
9 - Espa_ol
hasta que el ret_n quede sujeto en su lugar.
Page 22

REEMPLAZO DEL HILO
Vea las figuras 15 y 16, pagina ii.
[] Retire el paquete de baterias.
[] Quite el carrete del cabezal del hilo.
NOTA: Retire todo el hilo sobrante en el carrete.
[]
Corte una pieza de hilo de aproximadamente 2,7 m
(9 pies) de largo. Use Onicamente hilo monofilar de
1,65 mm (0,065 pulg.) de di_metro.
[]
Introduzca el hilo en el orificio de sujeci6n de la parte
superior del carrete. Enrolle hacia la derecha el hilo
alrededor de la parte superior del carrete, segOn Io
indican las fiechas en el carrete. Coloque el hilo en la
ranura de la pesta_a superior del carrete, y deje que
sobresalga aproximadamente 152 mm (6 pulg.) de
la ranura. No Io Ilene en exceso. Despu_s de enrollar
el hilo, debe haber una separaci6n minima de 6 mm
(1/4 pulg.) entre el hilo enrollado y el borde exterior del
carrete.
[] Vuelva a colocar el ret_n de pl_stico, el carrete y el
ret_n de _ste. Consulte la secci6n Reemplazo del
carrete previamente expuesta en este manual.
ALMACENAMIENTO DE LA RECORTADORA
[] Retire el paquete de baterias de la recortadora de hilo
antes de almacenarla.
[] Limpie todos los desechos presentes en la recortadora.
[] AImacene la unidad en un espacio inaccesible a los nHos.
[] Mantenga la unidad alejada de agentes corrosivos
como los productos qu[micos para el jard[n y las sales
para derretir el hielo.
NOm. pieza del carrete de repuesto ................. 3110382AG
N0m. pieza de la tapa del carrete de repuesto .. 3411546CG
PROBLEME
El hilo no avanza cuando se
POSSIBLE CAUSE
El hilo se peg0 a s[ mismo.
SOLUTION
Lubrique con rociador de silic6n.
usa el cabezal con alimentaci6n
autom_tica:
No hay suficiente hilo en el
carrete
El hilo se desgast6 hasta quedar
muy corto.
El hilo est_ enredado en el
carrete.
Instale m_s hilo. Vea la secci6n Reemplazo
del hilo arriba en este manual.
Tire de hilo secuencias mientras que
presiona el bot6n.
Retire el hilo del carrete y vuelva a enrollarlo.
Yea la secci6n Reemplazo del hilo arriba
en este manual.
El c_sped se enrolla alrededor del
alojamiento del eje y del cabezal
Se estA cortando la hierba alta a
nivel del suelo.
Corte la hierba alta desde la parte superior
hacia abajo.
del hilo:
Le moteur ne d_marre pas. La bater[a no est_ fija. Para fijar el paquete de bater[as,
asegOrese de que los pestillos situados
a ambos lados del paquete de bater[as
entren completamente en su lugar con un
chasquido.
La bater[a no est_ cargada. Cargue el paquete de bater[as segOn las
instrucciones incluidas con su modelo.
10-Espa_ol
Page 23

11- Espa_ol
Page 24

® Registered Trademark / TM Trademark / SMService Mark of Sears Brands, LLC
® March Registrada / TM March de Fabrica / SM March de Servicio de Sears Brands, LLC
MCMarque de commerce / MDMarque deposce de Sears Brands, LLC © Sears Brands, LLC
 Loading...