

Page 1
Owner’s Manual
CRAFTSMAN
6.5 Horse Power
Self-Propelied
CHIPPER-SHREDDER VACUUM
Model No.
247.77763
CAUTION: Before using this product,
read this manual and follow all Safety
Rules and Operating Instructions.
Sears, Roebuck and Co., Hoffman Estates, IL 60179, U.S.A.
Printed in U.S.A.
i
i
I
E
770-i0034
(8/98)
Page 2
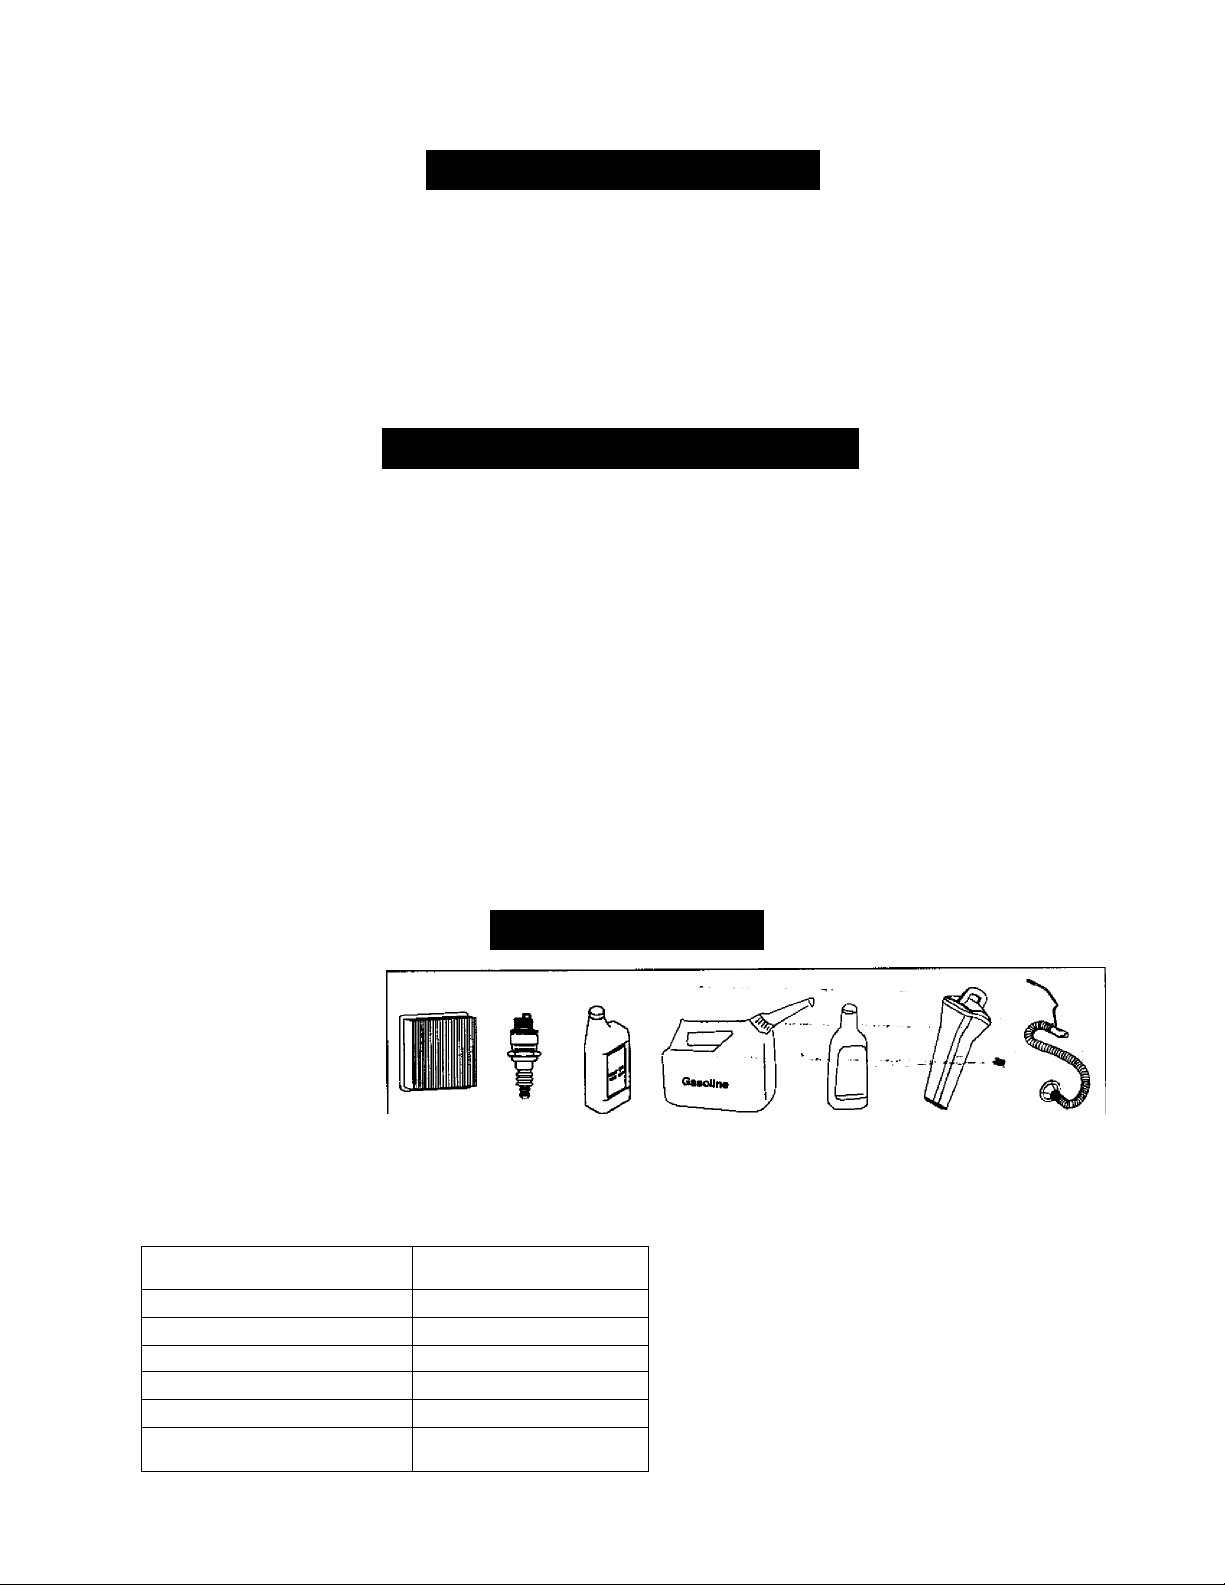
TABLE OF CONTENTS
Content
Warranty Information
Safe Operation Practices
Assembly
Operation
Maintenance
Page
2
3
5
8
13
Content
Sen/ice & Adjustment
Off-Season Storage
Trouble-Shooting
Parts List
Page
15
17
18
■ 19
WARRANTY INFORMATION
One-Year Warranty on Craftsman Chipper-Shredder Vacuum
For one year from the date of purchase, when this Craftsman chipper-shredder vacuum is maintained, lubricated,
and tuned up according to the operating and maintenance instructions in the owner’s manual, Sears will repair,
free of charge, any defect in material or workmanship.
This warranty excludes blades, chipper blades, flails, air cleaners, spark plugs, catcher bags and tires which are
expendable parts and become worn during normal use.
If this chipper-shredder vacuum is used for commercial or rental purposes, this warranty applies for only 30 days
from the date of purchase.
WARRANTY SERVICE IS AVAILABLE BY CONTACTING THE NEAREST SEARS SERVICE CENTER IN THE
UNITED STATES. THIS WARRANTY APPLIES ONLY WHILE THIS PRODUCT IS IN USE IN THE UNITED
STATES. '
This warranty gives you specific legal rights, and you may also have other rtghts'which vary^rom-state to state.
Sears, Roebuokand Co., D/817WA, Hoffman Estates, II60179
ACCESSORIES
These accessories are
available where the unit was
purchased. They are also
available at most Sears retail
outlets, and service centers.
Most Sears stores can order
repair parts tor you when you
provide the model number of
your Craftsman chipper
shredder vacuum.
Horsepower;
Engine Oil Type
Engine Oil Capacity
Fuel Capacity:
Spark Plug
Spark Plug Gap
Tire Pressure
Air
Filter
Spark Engine Gas
Plug Oil Can
PRODUCT SPECIFICATION
6.5 Horse Power
SAE30
20 Ounces
Approx. 3 Quarts
Champion RN4C
.030"
24 P.S.l.
Model Number
Serial Number.............................
Date of Purchase
Record both serial number and date of purchase and
keep in a safe place for future reference.
Fuel Tamper
Stabilizer Plug
.....
.247.7.7763,
.......................
10-foot
Hose Kit
Page 3

A
A
A
SAFE OPERATION PRACTICES
This symbol points out important safety instructions wtiicti, if not followed, could endanger the per
sonal safety and/or property of yourself and others. Read and follow all instructions in this manual before
attempting to operate your chipper-shredder vacuum. Failure to comply with these Instructions may result in
personal injury. When you see this symbol—heed its warning.
Your chipper-shredder vacuum was built to be operated according to the rules for safe opera-
DANGFR- manual. As with any type of power equipment, carelessness or error on the part of
UANutn. operator can result in serious injury. If you violate any of these rules, you may cause seri
ous injury to yourself or others.
This unit is equipped with an internal combustion engine and should not be used on or near any unimproved
forest-covered, brush-covered or grass-covered land unless the engine's exhaust system is equipped with a
spark arrester meeting applicable local or state laws (if any), if a spark arrester is used, it should be
maintained in effective working order by the operator.
in the State of Caiifornia the above is required by law (Section 4442 of the California Public Resources
Code). Other states may have similar laws. Federal laws apply on federal lands. A spark arrester for the
muffler is available through your nearest Sears Authorized Service Center (See the REPAIR PARTS section
of this manual.)
General Operation
• Read this owner's guide carefully in its entirety before
attempting to assemble this machine. Read,
understand, and follow all instructions on the machine
and in the manual(s) before operation. Be completely
familiar with the controls and the proper use of the
machine before operating it. Keep this manual in a
safe place for future and regular reference and for
ordering replacement parts.
• Your chipper-shredder vacuum is a powerful tool, not a
plaything. Therefore, exercise extreme caution at all
times. Your unit has been designed to perform two
jobs: to chip and vacuum vegetation found in a normal
yard. Do not use it tor any other purpose.
• Never allow children under 16 to operate the unit.
Children 16 years and older should only operate under
close parental supervision. Only responsible
individuals who are familiar with these rules of safe
operation should be allowed to use your unit.
• Keep the area of operation clear of all persons,
particularly small children and pets. Stop the engine
when they are in the vicinity of the unit.
• When feeing material into this equipment, be
extremely careful that pieces of metal, rocks, bottles,
cans or other foreign objects are not included.
Personal injury or damage to the machine could result.
• Always wear safety glasses or safety goggles, during
operation and while performing an adjustment or
repair, to protect eyes from foreign objects that may be
thrown from the machine.
• Wear sturdy, rough-soled work shoes and close fitting
slacks and shirt. Shirt and slacks that cover the arms
and tegs and steel-toed shoes are recommended. Do
not wear loose fitting clothes or jewelry, and secure
hair above shoulder length. They can be caught in
moving parts. Never operate a unit in bare feet,
sandals or sneakers. Wear gloves when feeding
material in the chipper chute.
Do not operate the unit while under the influence of
alcohol or drugs.
Do not over-reach. Keep proper footing and balance at
all times.
Never place your hands or any part of your body or
clothing near or under rotating parts. Keep clear of the
discharge opening at all times Never insert your
hands or any part of your body or clothing into the
nozzle, chipper chute or discharge opening as the
rotating impeller can cause serious injury.
If it is necessary for any reason to unclog the feed
intake or discharge openings or to inspect or repair any
part of the machine where a moving part can come in
contact with your body or cipthintg- sUiP the machine,
allow it to cool, disconnect the spark plug wire from the
spark plug and move it away from the spark plug
before attempting to unclog, inspect or repair.
Never operate unit without vacuum bag and discharge
chute properly affixed to unit. Large zippered end of
bag must be closed to prevent objects from being
blown out.
Never operate unit without either the inlet nozzle or
optional hose attachment properly affixed to unit.
These devices shield the operator from accidental
contact with the rotating impeller. Never attempt to
convert the unit from nozzle to hose mode or vice versa
with the engine running.
Never attempt to remove or empty vacuum bag when
engine is running. Shut the engine off and wait for the
impeller to come to a complete stop before removing
the bag. The impeller continues to rotate for a tew
Page 4

• seconds after the engine is shut off. Never piece any
part of the body In the impelier area until you are sure
the impeller has stopped rotating.
• Keep all guards and safety devices in place and
operating properly.
• Do not allow an accumulation of processed material
to build up in the discharge area as this will prevent
proper discharge and can result in kick-back from the
chipper chute.
• - Keep your face and body back from chipper chute to
avoid accidental bounce back of any material.
• If the cutting mechanism strikes a foreign object or if
your machine should start making an unusual noise
or vibration, immediately stop the engine, disconnect
the spark plug wire and move the wire away from the
spark plug. Allow the machine to stop and take the
following steps:
a. I nspect for damage
b. Repair or replace any damaged parts.
c. . Check for any loose parts and tighten to assure
continued safe operation.
• Muffler and engine become hot and can cause a burn.
Do not touch.
• Do not allow leaves or other debris to build up on
engine's muffler. The debris could ignite and cause a
fire.
• Do not ope rate engine if aircleaneror cover over
carburetor air-intake is removed, except for
adjustment. Removal of such parts could create a fire
hazard.
Children
Tragic accidents can occur if the operator is not alert to the
presence of small children. Children are often attracted to
the chipping and vacuuming activity. Never assume that
children will remain where you last saw them.
• Keep children out of the work area and under the
watchful eye of a responsible adult other than the
operator.
• Be alert and turn the unit off if a child enters the area.
• Never allow children under the age of 16 to operate
the chipper-shredder vacuum.
• Che<^ and add fuel before starting the engine. Never
remove gas cap or add fuel while the engine is
running. Allow engine to cool at least two minutes
before refueling,
• Replace gasoline cap securely and wipe off any
spilled gasoline before starting the engine as It may
cause a fire or explosion.
• Extinguish all cigarettes, cigars, pipes and other
sources of ignition.
• Never refuel unit indoors because flacnrnable vapors
will accumulate in the area.
• Never store the machine or fuel container inside
where there is an open flame or spark such as a gas
hot water heater, clothes dryer or furnace.
• Never run your machine in an enclosed area as the
exhaust from the engine contains carbon monoxide,
which Is a odorless, tasteless and deadly poisonous
gas.
• To reduce fire hazard, keep engine and muffler free of
leaves, grass, and other debris build-up. Clean up
fuel and oil spillage. Allow unit to cool at least 5
minutes before storing.
• Before cleaning, repairing, or inspecting, make certain
the impeller and all moving parts have stopped.
Disconnect the spark plug wire and keep wire away
from spark plug to prevent accidental starting. Do not
use flammable solutions to clean air filter.
• Keep all nuts, bolts, and screws tight to be sure the
equipment is in safe working condition.
• Never tamper with safety devices. Check their proper
operation regularly.
• After striking a foreign object, immediately stop the
engine, disconnect the spark plug wire from the spark
plug, and thoroughly inspect the unit for any damage.
Repair damage before starting and operating unit.
• Do not alter or tamper with the engine’s governor
setting. The governor controls the maximum safe
operating speed of the engine. Over-speeding the
engine is dangerous and will cause damage to the
engine and to other moving parts of the machine.
• Check the vacuum bag frequently for wear. Replace if
worn or damaged.
• Keep vacuum bag free of debris when njt in use.
Service
• Use extreme care in handling gasoline and other
fuels. They are extremely flammable and the vapors
are explosive.
• Store fuel and oil in approved containers, away from
heat and open flame, and out of the reach of children.
SAVE THESE INSTRUCTIONS FOR FUTURE REFERENCE.
Your Responsibility
Restrict the use of this power machine to
persons who read, understand and follow the
A
warnings and instructions in this manual and on
the machine.
Page 5

ASSEMBLY
iMPORTANT: This unit is shipped without gasoiine
or oii in the engine. After assembly, see
OPERATION section of this manual for proper fuel
and engine oil fill-up.
NOTE: To determine right ar)d left hand sides of your
chipper-shredder vacuum, stand behin^the unit with
the engine farthest away from you.
Your chipper-shredder vacuum has been completely ’
assembled at the factory, except for the nozzle, the
chipper chute with support bracket and the catcher bag.
These parts are shipped loose in the carton. A pair of
safety glasses and a 20-oz. bottle of engine oil are also
included in the carton.
I
m
1
Removing From Carton
• Cut the corners of the carton.
• Remove all packing inserts.
• Remove all loose parts. See Figure 1.
• Push down on handle to lift front of chipper
shredder vacuum and roll unit out of the carton.
• Make certain all parts and literature have been
removed before the carton is discarded.
Loose Parts
with Support Bracket
N
(See Figure 1.)
1. Nozzle
2. Chipper Chute with Support Bracket
3. Catcher Bag
4. Safety Glasses (Not Shown in Figure 1 }
5. A 20-oz. Bottle of Engine Oil
20-oz. Bottle
of Engine Oii
Figure 1
Tools Required
1. 1 /2" or adjustable wrenches
2. 7/16" or adjustable wrenches
3. Funnel (Recommended)
4. Pliers ' ,
___
..7 - *
Disconnecting Spark Plug
(See Figure 2.)
• Before proceeding with assembly of your new
chipper-shredder vacuum unit, disconnect the
spark plug wire from the spark plug on the
engine and move it away. This will prevent
accidental starting of the engine in any way.
Page 6

Attaching the Nozzle
(See Figure 3.)
• Remove the three plastic wing nuts from the
front of the chipper-shredder vacuum.
• Place the nozzle over the three weld studs.
• Secure with the plastic wing nuts just removed.
Attaching the Chipper Chute
• Loosen, but do NOT remove, the two hex bolts,
Plastic
Wing Nuts
Plastic
Wing Nuts
Figure 4
flat washers, and flange nuts which are secured
to the support bracket. See Figure 5,
Tighten
Securely
Figure 3
NOTE: The metal tab in the nozzle must depress the
safety switch on the front of the chipper-shredder
vacuum or the engine will not start. See Figure 4.
Figure 5
Remove the two flange nuts, hex bolts and
saddle washers which secure the right side of
the upper handle to the right side of the lower
handle. See Figure 6.
Next, remove the three hex nuts and bell
washers from the weld studs found beside the
opening on the right side of the chipper-shredder
vacuum. See Figure 6.
Page 7

• Align the support bracket with the holes in the
• Replace the hex bolts, saddle washers and
• Follow by tighten! ng al I hardware'securely fi rst
Attaching the Catcher Bag
• Place the catcher bag inside of handle
Place the chipper chute over the weld studs
keeping the slotted side towards the bottom.
Loosely secure with the three hex nuts and bell
washers that were removed earlier. Do not fuliy
tighten the hex nuts at this point in the assembly.
See Figure 7.
• Place the four straps on the top of the bag over
• Squeeze the clamp on the drawstring and pull
right side of the upper and lower handles where
the hex bolts were just removed. Push up
slightly on the chipper chute in order to better
align the holes in the support bracket with the
holes in the handles.
flange nuts.to affix the support bracket to the
handle assemblies. See Figure 7.
on the chipper chute, then on the support
bracket, and finally on the handle.
assembly. Slip the opening on the bag over the
discharge chute, making certain it is over the rib
on the discharge chute.
the upper handle, hooking them on the studs.
the drawstring tight. Release the clamp. See
Figure 8.
Page 8

OPERATION
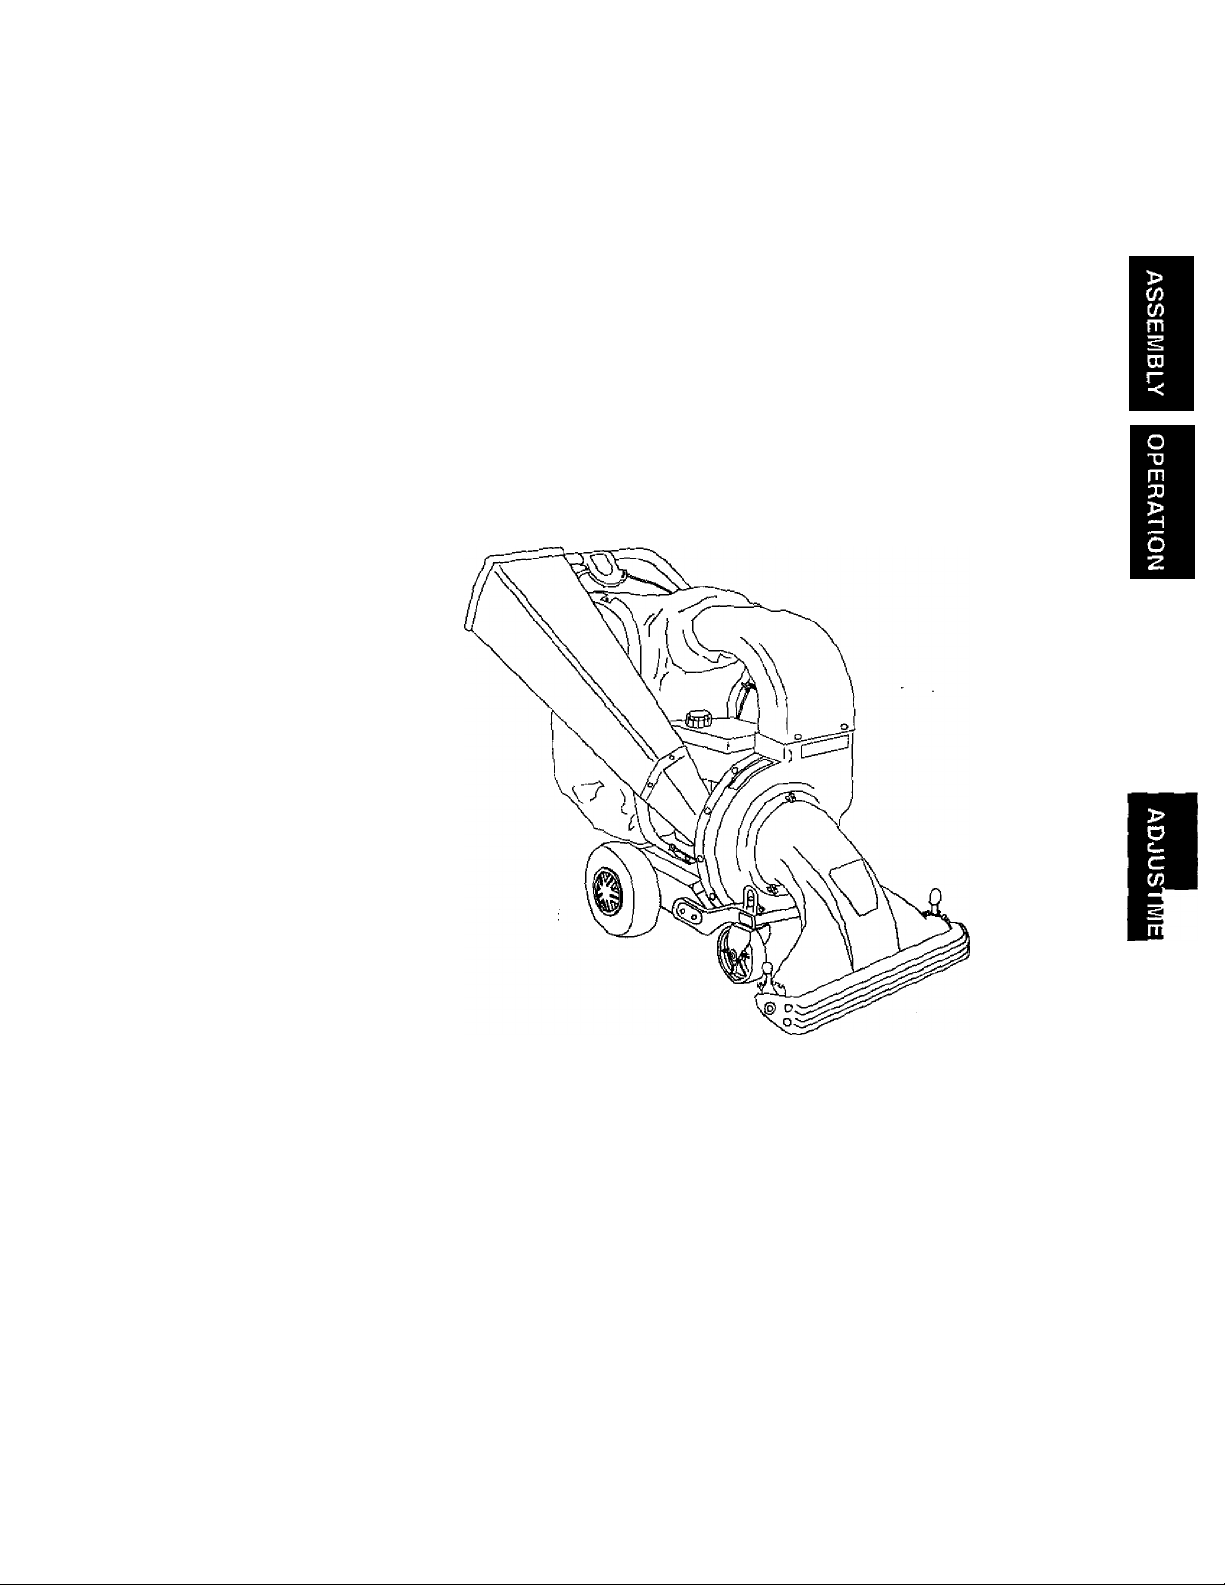
Know Your Chipper-Shredder Vacuum
Read this owner’s manual and safety rules before operating your chipper-shredder vacuum. Compare the
illustrations below with your equipment to familiarize yourself with the location of various controls and
adjustments. Save this manual for future reference.
The operation of any chipper-shredder vacuum can result in foreign objects being thrown into
FET^^sEsm gygg vvhich can result in severe eye damage. Always wear safety glasises, provided with
file Craftsman chipper-shredder vacuum, for operating this equipment or while performing any
adjustments or repairs on it.
Drive Clutch Control
Chipper
Chute
Nozzle Door Height
Adjustment Levers
Catcher Bag
Air Filter
Front Caster Wheel
Nozzle Door
Figure 9
Operating Controls
Front Caster Wheels
Allows for a choice in the manueverability of the
Chipper Chute
Allows twigs and small branches up to three inches in
diameter to be fed into the impeller for shredding.
Nozzle
Yard waste such as leaves and pine needles can be
vacuumed up through the nozzle.
Catcher Bag
Collects shredded material fed in through the chipper
chute or vacuumed in through the noiizie.
Drive Clutch Control
Squeezing the drive clutch control causes the
chipper-shredder vacuum to self-propel.
Nozzle Door
Nozzle ground clearance can be adjusted with the
chipper-shredder vacuum.
Primer
The primer is u^ed to assist in starting a cold engine
or restarting of a engine after a'short sttErtdown.
Starter Handle
This is used to start the engine.
Throttle Control
Controls the engine speed and stops the engine.
Stopping the Engine
• Move throttle control lever to STOP position.
• Disconnect spark plug wire and move away from
the spark plug to prevent accidental starting while
the equipment is unattended.
nozzle door.
Starter
Handle
Primer
View from rear of
chipper-shredder vacuum
Meets ANSI safety standards
Craftsman chipper-shredder vacuums conform to the safety standard of the American National Standards Institute (Af
Page 9

Gas And Oil Fill-up
Oil (one 20-oz. bottle shipped with unit)
Only use high quality detergent oil rated with API
service classification SF, SG or SH. Select the oil’s
viscosity grade according to the expected operating
temperature. Follow the chart below.
NOTE: Although multi-viscosity oils (5W30, 10W30,
etc.) improve starting in cold weather, these
multiviscosity oils will result in increased oil
consumption when used above 32°F. Check engine
oil level more frequently to avoid possible engine
damage from running low on oil.
Colder
32°F
Warmer
A
A
A
WARNING: Never fill the fuel tank indoors.
Gasoline produces noxious fumes. Always
be certain to fill the fuel tank in a welt
ventilated area to avoid inhalation of
gasoline fumes.
WARNING: Never smoke while fueling
your chipper-shredder vacuum. Gasoline
produces cumbustable fumes which can
ignite and cause personal injury.
WARNING: Do not fill closer than 1/2 inchfrom the top of the fuel tank to prevent
spills and to allow for fuel expansion. If
gasoline is accidently spilled, move
chipper-shredder vacuum away from area
of spill. Avoid creating any source of
ignition until gasoline vapors have
disappeared.
5W30 SAE30
Oil Viscosity Chart
• Check the fuel level periodically to avoid running
• Remove oil fill dipstick.
• With the chipper-shredder vacuum on level
ground, use a funnel to fill engine with oil to
FULL mark on dipstick. Capacity is
approximately 20 oz. Be careful not to overfill.
Overfilling will cause the engine to smoke
profusely and will result in poor engine
performance. The oil bottle packaged with your
Starting The Engine
IMPORTANT: If your unit shows any sign of motion
with the drive dutch control in the disengaged
position, shut the engine off immediately. Readjust
following the instructions on page 16.
chipper-shredder vacuum contains 20 oz. of oil.
• Tilt chipper-shredder vacuum toward the left,
then re-level. Check the oil level making certain
A
■ not to rub the dipstick along the inside walls of
the oil fill tube. This would result in a false
dipstick reading. Refill to FULL mark on dipstick,
if necessary. Replace dipstick and tighten.
• Check oil level three times prior to starting
A
engine to be certain you’ve gotten an accurate
dipstick reading. Running the engine with too
little oil can result in permanent engine damage.
Gasoline
• Remove fuel cap from the fuel tank.
• Make sure the container from which you will
pour the gasoline is clean and free from rust or
foreign particles. Never use gasoline that may
be stale from long periods of storage in its
container. Gasoline that has been sitting for any
period longer than four weeks should be
considered stale.
• Fill fuel tank with approximately 3 quarts of
clean, fresh, lead-free grade automotive
gasoline. DO NOT use Ethyl or high octane
gasoline. Replace fuel cap.
out of gasoline while operating the chipper
shredder vacuum. If the unit runs out of gas as it
is chipping, it may be necessary to unclog the
unit before it can be restarted. Refer to
Removing the Flail Screen on page 15.
WARNING: Make sure that no one other
than the operator is standing near the
chipper-shredder vacuum unit while starting
or operating.
Do not operate this unit unless the nozzle,
discharge chute, and the bag have been
propqrly installed.
Attach spark plug wire and rubber boot to spark
plug if not already attached.
Place the throttle control lever in FAST position.
Depress the primer three to four times slowly.
Wait about two seconds between each push.
When temperature is at or below 50“F/10“C, it
may be necessary to depress the primer five to
six times. You may have to use the primer to
restart a warm engine after a short shutdown.
Place one foot on the left rear wheel to prevent
the unit from skidding while starting.
Grasp starter handle and pull rope out slowly
until engine reaches start of compression cycle.
The rope will pull slightly harder at this point. Let
the rope rewind slowly.
Page 10

NOTE: V\fi}ile the engine is reaching №te compressk>n
cycle, you may hear a “clanking“ ncHse. Thisnaseis
caus^ by the impeller flails («voting and falling into
place and IS normal. This noise will continue untill the
impeller reaches full speed.
• Pull the rope with a rapid, continuous, full arm
stroke while keeping a firm grip on the starter
handle.
•' Continuing to keep a firm grip on the starter
handle, let the rope rewind slowly. Do not let the
starter handle snap back against the eye bolt on
the handle. Repeat, if necessary, until engine
starts. Additional priming may be necessary.
• Move throttle control to IDLE position for a few
minutes to warm up the engine. Move it back to
fast when running.
• ALWAYS keep the throttle control in the Fast
postion when operating the chipper-shredder
vacuum.
NOTE: Engine may run very slowly for the first five to
ten seconds after it has been started until the impeller
gains momentum and allows the engine to reach its
top RPM.
NOTE: To idle smoothly, a new engine may require 3
to 5 minutes of running at above the slow idle speed.
The idle speed has been adjusted for proper running
after this break-in period.
Stopping the Engine
• Move throttle control lever to STOP position.
• Disconnect spark plug wire and move away from
the spark plug to prevent accidental starting while
the equipment is unattended.
NOTE: Raise the nozzle height to vacuum a thick
layer of leaves; lower the nozzle height for smoother
lawns.
Operation of your Chipper-Shredder Vacuum
Your chipper-shredder vacuum is designed to chip
small tree branches and twigs, shred leaves and
vacuum foliage and other lawn debris. For
convenience in operation, your Craftsman chipper
shredder vacuum is equipped with a drive clutch
control allowing it to "self-propel."
A
A
Adjusting Nozzle Height
• The nozzle door height adjustment levers have
five position settings and are found each side of
the nozzle door. See Figure 10. The nozzle door
height should be adjusted according to the
conditions.
• Slide the height adjustment lever forward or
backward for adjusting the nozzle door upwards
or downwards. See Figure 10.
WARNING: Keep your hands, feet and
any loose clothing clear of the nozzle any
A
A
time the engine is running. When the
engine Is running, a vacuum Is being
created in the nozzle which can draw in
loose clothing.
WARNING: Never make any adjustments
on the nozzle while the engine is running.
IMPORTANT: Your chipper-shredder vacuum is
equipped with a safety switch at the front left portion
of the impeller housing. The metal fab bn'the nozzle
must depress this switch for the engine to start. Be
certain the nozzle is properly in place before
attempting to start the unit. See Figure 4 on page 6.
A
WARNING: The impeller (chipping/
shredding mechanism) is rotating at all
times when the engine is running.
WARNING: Keep your hands away from
the nozzle opening and NEVER place your
hands or arms inside Of the chipper chute
when the engine is running. Doing so could
result in serious personal injury.
WARNING: Always survey the area to be
vacuumed thoroughly before operating the
chipper-shredder vacuum. Clear the area
of any obstructions such as toys, dog
chains, etc. Running over such an
obstruction can result in personal injury as
well as damage to the chipper-shredder
vacuum.
Do not vacuum up anything other than normal
yard waste such as leaves or pine needles.
10
 Loading...