

Page 1
1-888-266-7096
1-888-266-7096
www.craftsman.com
www.craftsman.com
Model No.
138.37097
Número de modelo
138.37097
OPERATOR'S MANUAL
MANUEL DEL OPERADOR
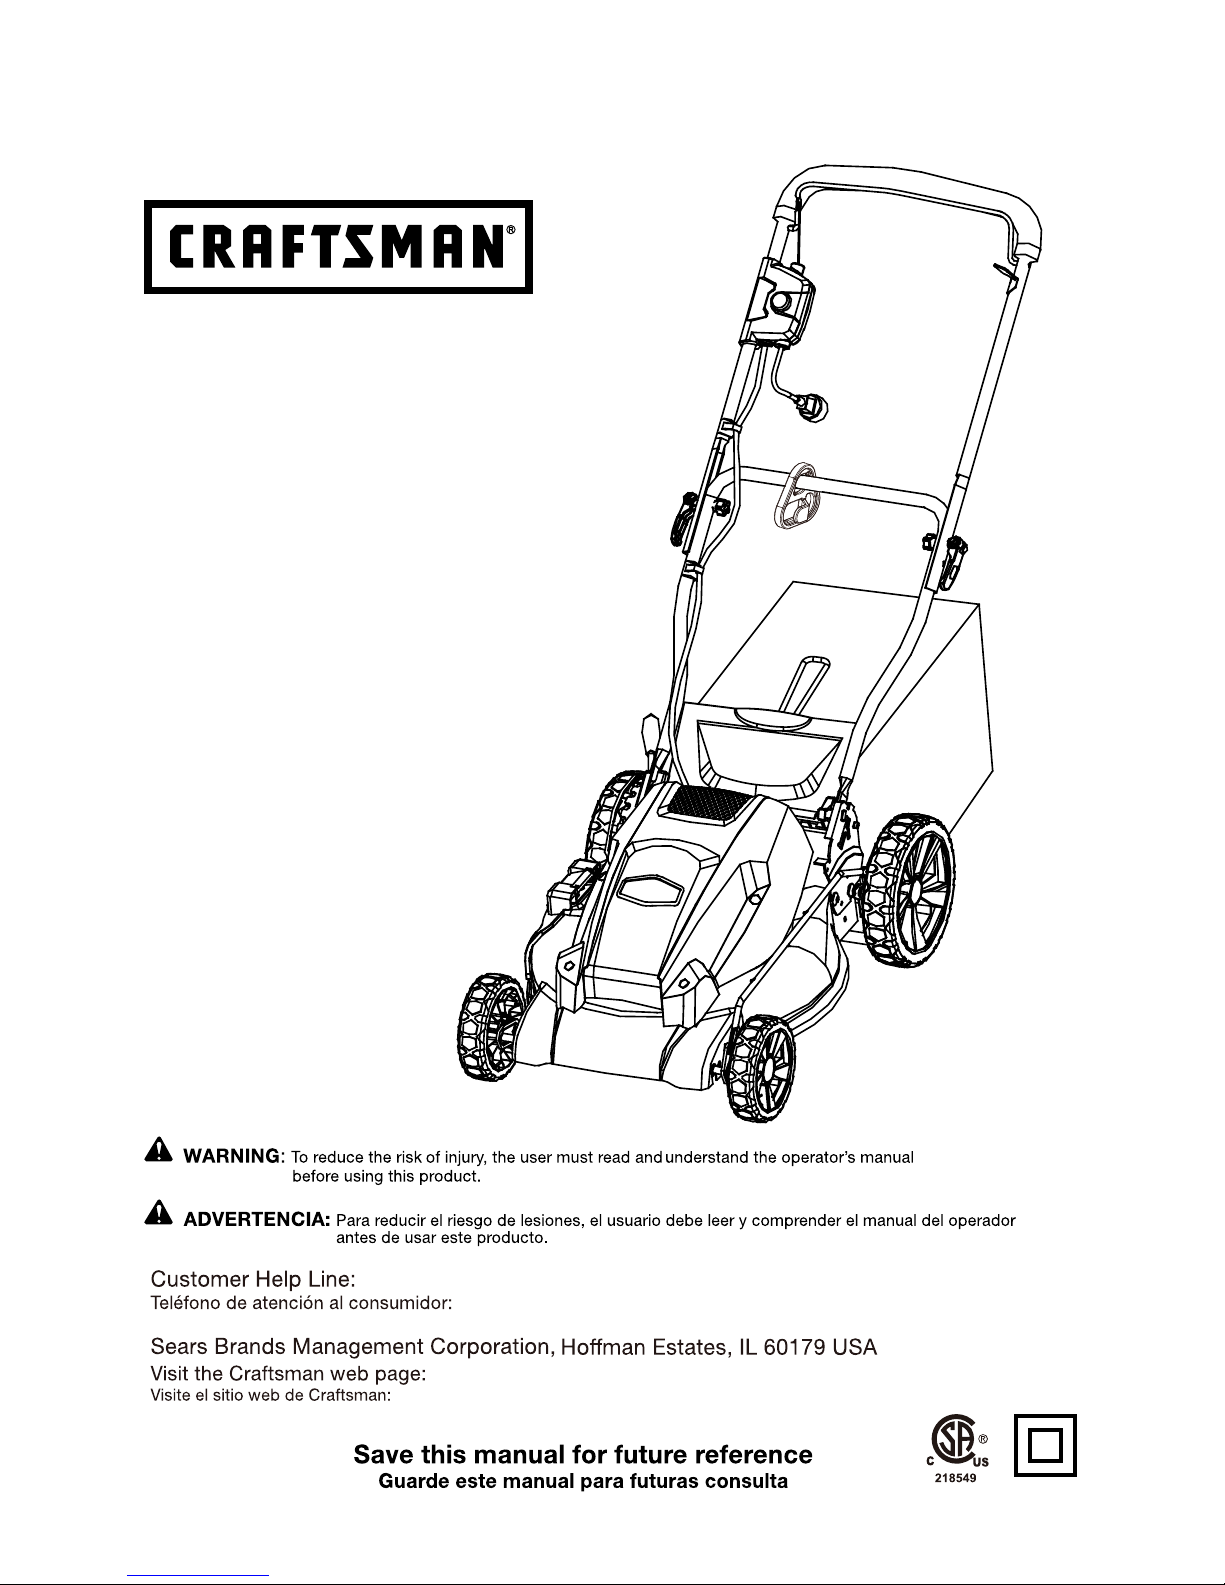
21 in. 13 Amp
ELECTRIC LAWN MOWER
533 mm (21 pulg.) 13 A
PODADORA DE PASTO ELÉCTRICA
Page 2

TABLE OF CONTENTS / ÍNDICE DE CONTENIDO
INTRODUCTION / INTRODUCCIÓN
ENGLISH ESPAÑOL
■ Warranty.................................................................. 2
■ Introduction..............................................................2
■ General Safety Rules...........................................3-4
■ Specic Safety Rules...............................................5
■ Symbols................................................................6-7
■ Features...................................................................7
■ Electrical .................................................................8
■ Assembly..................................................................9
■ Operation..........................................................10-11
■ Maintenance.....................................................12-13
■ Illustrated parts list...........................................14-16
■ Garantía............................Sección de Inglés pág. 2
■ Introducción......................Sección de Inglés pág. 2
■ Reglas de seguridad generales...........................3-4
■ Reglas de seguridad especícas............................5
■ Símbolos............................................................. 6-7
■ Características........................................................7
■ Aspectos eléctricos ................................................8
■ Armado...................................................................9
■ Funcionamiento...............................................10-11
■ Mantenimiento.................................................12-13
■ Figura numeras (ilustraciones).............................i-vi
CRAFTSMAN
®
FOUR YEAR LIMITED WARRANTY
FOR TWO YEARS from the date of purchase this power tool is warranted against any defects in material or
workmanship.
For warranty coverage details to obtain free replacement, visit the web page: www.craftsman.com/warranty
This warranty does not cover blades, which are expendable parts that can wear out from normal use within the
warranty period.
This warranty is void if this product is ever used while providing commercial services or if rented to another person.
This warranty gives you specic legal rights, and you may also have other rights which vary from state to state.
Sears Brands Management Corporation, Hoffman Estates, IL 60179
GARANTÍA DE CUATRO AÑOS CRAFTSMAN
®
DURANTE CUATRO AÑOS a partir de la fecha de adquisición, esta herramienta eléctrica cuenta con garantía frente
a defectos de material o mano de obra.
Para detalles sobre la cobertura de la garantía para el reemplazo gratuito, visite la página web: www.craftsman.com/
warranty
Esta garantía no cubre las hojas, que son piezas consumibles que pueden desgastarse con el uso normal durante el
período de garantía.
Esta garantía se anula si se utiliza este producto durante la prestación de servicios comerciales o si se alquila a otra
persona.
Esta garantía le otorga derechos legales especícos y también puede tener otros derechos que varían de estado a
estado.
Sears Brands Management Corporation, Hoffman Estates, IL 60179
This tool has many features for making its use more pleasant and enjoyable. Safety, performance, and
dependability have been given top priority in the design of this product making it easy to maintain and operate.
Esta herramienta ofrece numerosas características para hacer más agradable y placentero su uso. En el
diseño de este producto se ha conferido prioridad a la seguridad, el desempeño y la abilidad, por lo cual se
facilita su manejo y mantenimiento.
2 — English
* * *
* * *
Page 3

GENERAL SAFETY RULES
READ AND UNDERSTAND ALL
INSTRUCTIONS.Failure to follow all instructions
listed below and on the machine may result in electric
shock, re, and/or serious personal injury.
WARNING!
READ ALL INSTRUCTIONS
■ This cutting machine is capable of amputating hands
and feet and throwing objects. Failure to observe all
safety instructions could result in serious injury or death.
■ Do not operate power tools in explosive
atmospheres, such as in the presence of ammable
liquids, gases, or dust. Power tools create sparks
which may ignite the dust or fumes.
■ Avoid body contact with grounded surfaces such as
pipes, radiators, ranges, and refrigerators. There is an
increased risk of electric shock if your body is grounded.
■ Do not use the lawn mower in damp or wet
conditions or operate in the rain.
■ Never allow adults to operate the product without
proper instruction.
■ Keep the area clear of all bystanders, children, and pets
while mowing. Stop machine if anyone enters the area.
■ Tragic accidents can occur if the operator is not alert
to the presence of children. Children are often attracted
to the machine and the mowing activity. Never assume
that children will remain where you last saw them.
• Keep children out of the mowing area and under
the watchful care of a responsible adult other than
the operator.
• Be alert and turn mower off if a child enters the
area.
• Never allow children to operate the machine.
• Use extra care when approaching blind corners,
shrubs, trees, or other objects that may block your
view of a child.
■ Do not wear loose clothing or jewelry. They can be
caught in moving parts.
■ Keep firm footing and balance. Do not overreach.
Overreaching can result in loss of balance.
■ Do not operate the equipment while barefoot or
when wearing sandals or similar lightweight footwear.
Wear protective footwear that will protect your feet and
improve your footing on slippery surfaces.
■ Do not leave the mower unattended while running.
■ Keep hands and feet away from cutting area. Keep
clear of the discharge opening at all times.
■ Operate the lawn mower only in daylight or good
articial light.
■ Always wear safety glasses with side shields marked
to comply with ANSI Z87.1. Everyday glasses have only
impact resistant lenses. They are NOT safety glasses.
Following this rule will reduce the risk of eye injury. Use
face mask if operation is dusty.
■ Wear safety glasses or goggles that are marked to comply
with ANSI Z87.1 standard when operating this product.
■ Use the right appliance. Do not use the lawn mower
for any job except that for which it is intended.
■ Do not force the lawn mower. It will do the job better
and safer at the rate for which it was designed.
■ Stay alert, watch what you are doing, and use
common sense when operating the lawn mower.
Do not operate the mower while tired or under the
inuence of drugs, alcohol, or medication. A moment
of inattention while operating the lawn mower may
result in serious personal injury.
■ Keep machine in good working condition. Keep
blades sharp and guards in place and in working order.
■ Check all nuts, bolts, and screws at frequent
intervals for proper tightness to be sure the equipment
is in safe working condition.
■ Stop the motor and wait until the blade comes to a
complete stop and remove power cord before cleaning
the lawn mower, removing the grass catcher, or
unclogging the discharge guard.
■ When not in use, the mower should be stored
indoors in a dry, locked up place—out of the reach of
children.
■ To reduce the risk of electric shock, this product has
a polarized plug (one blade is wider than the other)
and will require the use of a polarized extension cord.
The plug will fit into a polarized extension cord only
one way. If the plug does not t fully into the extension
cord, reverse the plug. If the plug still does not fit,
obtain a correct polarized extension cord. A polarized
extension cord will require the use of a polarized wall
outlet. This plug will fit into the polarized wall outlet
only one way. If the plug does not t fully into the wall
outlet, reverse the plug. If the plug still does not fit,
contact a qualied electrician to install the proper wall
outlet. Do not change the equipment plug, extension
cord receptacle, or extension cord plug in any way.
■ Do not abuse the cord. Never use the cord to pull
the lawn mower or to disconnect the plug from an
outlet. Keep cord away from heat, oil, sharp edges, or
moving parts. Replace damaged cords immediately.
Damaged cords increase the risk of electric shock.
■ Make sure your extension cord is in good condition.
When using an extension cord, be sure to use one
heavy enough to carry the current your product will
draw. A wire gauge size (A.W.G.) of at least 14 is
3 — English
Page 4

recommended for an extension cord 50 feet or less
in length. If in doubt, use the next heavier gauge.
The smaller the gauge number, the heavier the cord.
An undersized cord will cause a drop in line voltage
resulting in loss of power and overheating.
■ WARNING: Use outdoor extension cords marked
SW-A, SOW-A, STW-A, STOW-A, SJW-A, SJTW-A, or
SJTOWA. These cords are rated for outdoor use and
reduce the risk of electric shock.
■ Ground Fault Circuit Interrupter (GFCI) protection
should be provided on the circuit(s) or outlet(s) to be
used for the lawn mower. Receptacles are available
having builtin GFCI protection and may be used for
this measure of safety.
■ Inspect extension cords periodically and replace if
damaged. Keep handles dry, clean, and free from oil
or grease.
4 — English
GENERAL SAFETY RULES
Page 5

■ Do not operate the mower without the entire grass
catcher, discharge guard, rear guard, or other safety
protective devices in place and working.
■ Follow manufacturer’s instructions for proper
operation and installation of accessories. Only use
accessories approved by the manufacturer.
■ Clear the work area before each use. Remove all
objects such as rocks, sticks, wire, bones, toys, or
other objects which can be thrown by the blade. Stay
behind the handle when the motor is running.
■ Avoid holes, ruts, bumps, rocks, or other hidden
objects. Uneven terrain could cause a slip and fall
accident.
■ Do not mow near drop-offs, ditches, or
embankments.
■ Mow across the face of slopes, never up and down.
Exercise extreme caution when changing direction on
slopes.
■ Plan your mowing pattern to avoid discharge of
material toward roads, sidewalks, bystanders, and the
like. Also, avoid discharging material against a wall or
obstruction, which may cause the material to ricochet
back toward the operator.
■ Do not mow on wet grass or excessively steep
slopes. Poor footing could cause a slip and fall
accident. Walk, never run.
■ Use extra care when approaching blind corners,
shrubs, trees, or other objects that may block your
view.
■ Do not pull the mower backward unless absolutely
necessary. If you must back the mower away from a
wall or obstruction, rst look down and behind to avoid
tripping.
■ Never direct discharged material toward anyone.
Avoid discharging material against a wall or
obstruction. Material may ricochet back toward
the operator. Stop the blade when crossing gravel
surfaces.
■ Objects struck by the lawn mower blade can cause
severe injuries to persons. The lawn should always be
carefully examined and cleared of all objects prior to
each mowing.
■ If the lawn mower strikes a foreign object, follow
these steps:
• Stop the lawn mower and release the switch control
lever.
• Disconnect the power cord.
• Thoroughly inspect the mower for any damage.
• Repair any damage before restarting and continuing
to operate the mower.
■ Stop the motor, disconnect the power cord, and
wait until the blade comes to a complete stop before
removing the grass catcher or unclogging the chute.
The cutting blade continues to rotate for a few
seconds after the motor is shut off. Never place any
part of the body in the blade area until you are sure
the blade has stopped rotating.
■ Disconnect the plug from power source before
making any adjustments, changing accessories,
or storing the lawn mower. Such preventive safety
measures reduce the risk of starting the product
accidentally.
■ If the mower should start to vibrate abnormally, stop
the motor and check immediately for the cause.
■ Service on the product must be performed
by qualified repair personnel only. Service or
maintenance performed by unqualified personnel
could result in injury to the user or damage to the
product.
■ Use only identical replacement parts when
servicing the product. Use of non-identical parts may
create a risk of serious injury to the user, or damage
to the product.
■ If the power supply cord is damaged, it must be
replaced only by the manufacturer or by a qualied
service center to avoid risk.
■ Save these instructions. Refer to them frequently
and use them to instruct others who may use this
product. If you loan someone this tool, loan them
these instructions also.
SPECIFIC SAFETY RULES
5 — English
SAVE THESE INSTRUCTIONS
Page 6
SYMBOLS
6 — English
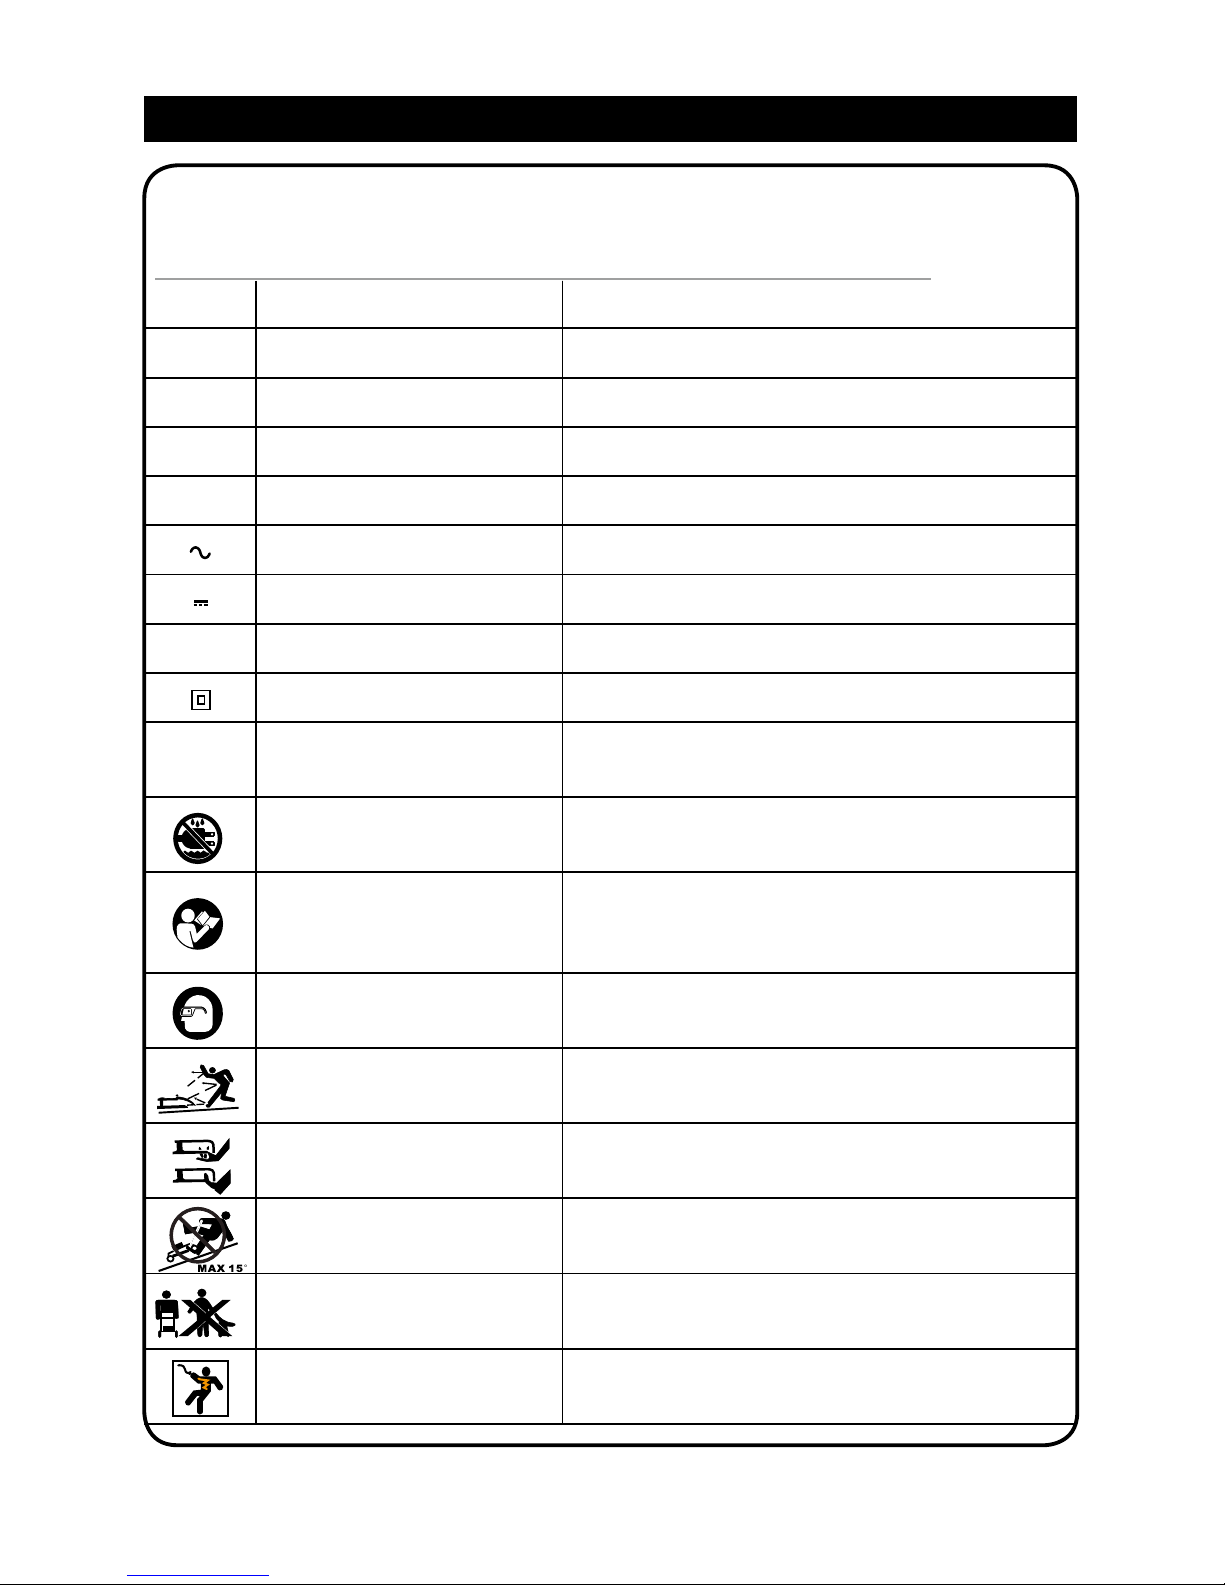
Some of the following symbols may be used on this product. Please study them and learn their meaning.
Proper interpretation of these symbols will allow you to operate the product better and safer.
n
o
SYMBOL NAME DESIGNATION/EXPLANATION
V Volts Voltage
A Amperes Current
Hz Hertz Frequency (cycles per second)
W Watts Power
min Minutes Time
Alternating Current Type of current
Direct Current Type or a characteristic of current
No Load Speed Rational speed, at no load
Class II Construction Double-insulated construction
/min Per Minute Revolutions, strokes, surface speed, orbits etc.,
per minute
Wet Conditions Alert Do not expose to rain or use in damp locations
Read The Operator’s Manual To reduce the risk of injury user must read and
understand operator’s manual before using this
product.
Eye Protection Always wear eye protection with side shields marked to
comply with ANSI Z87.1.
Ricochet Thrown objects can ricochet and result in personal
injury or property damage.
Sharp Blade Danger – Keep hands and feet away from blade.
Operating on a slope Do not mow a slope that has an angle of greater
than 15°.
Keep Bystanders Away Keep all bystanders at least 50 ft. away.
Electric Shock Failure to use in dry conditions and to observe safe
practices can result in electric shock.
Page 7
SYMBOLS
FEATURES
7 — English
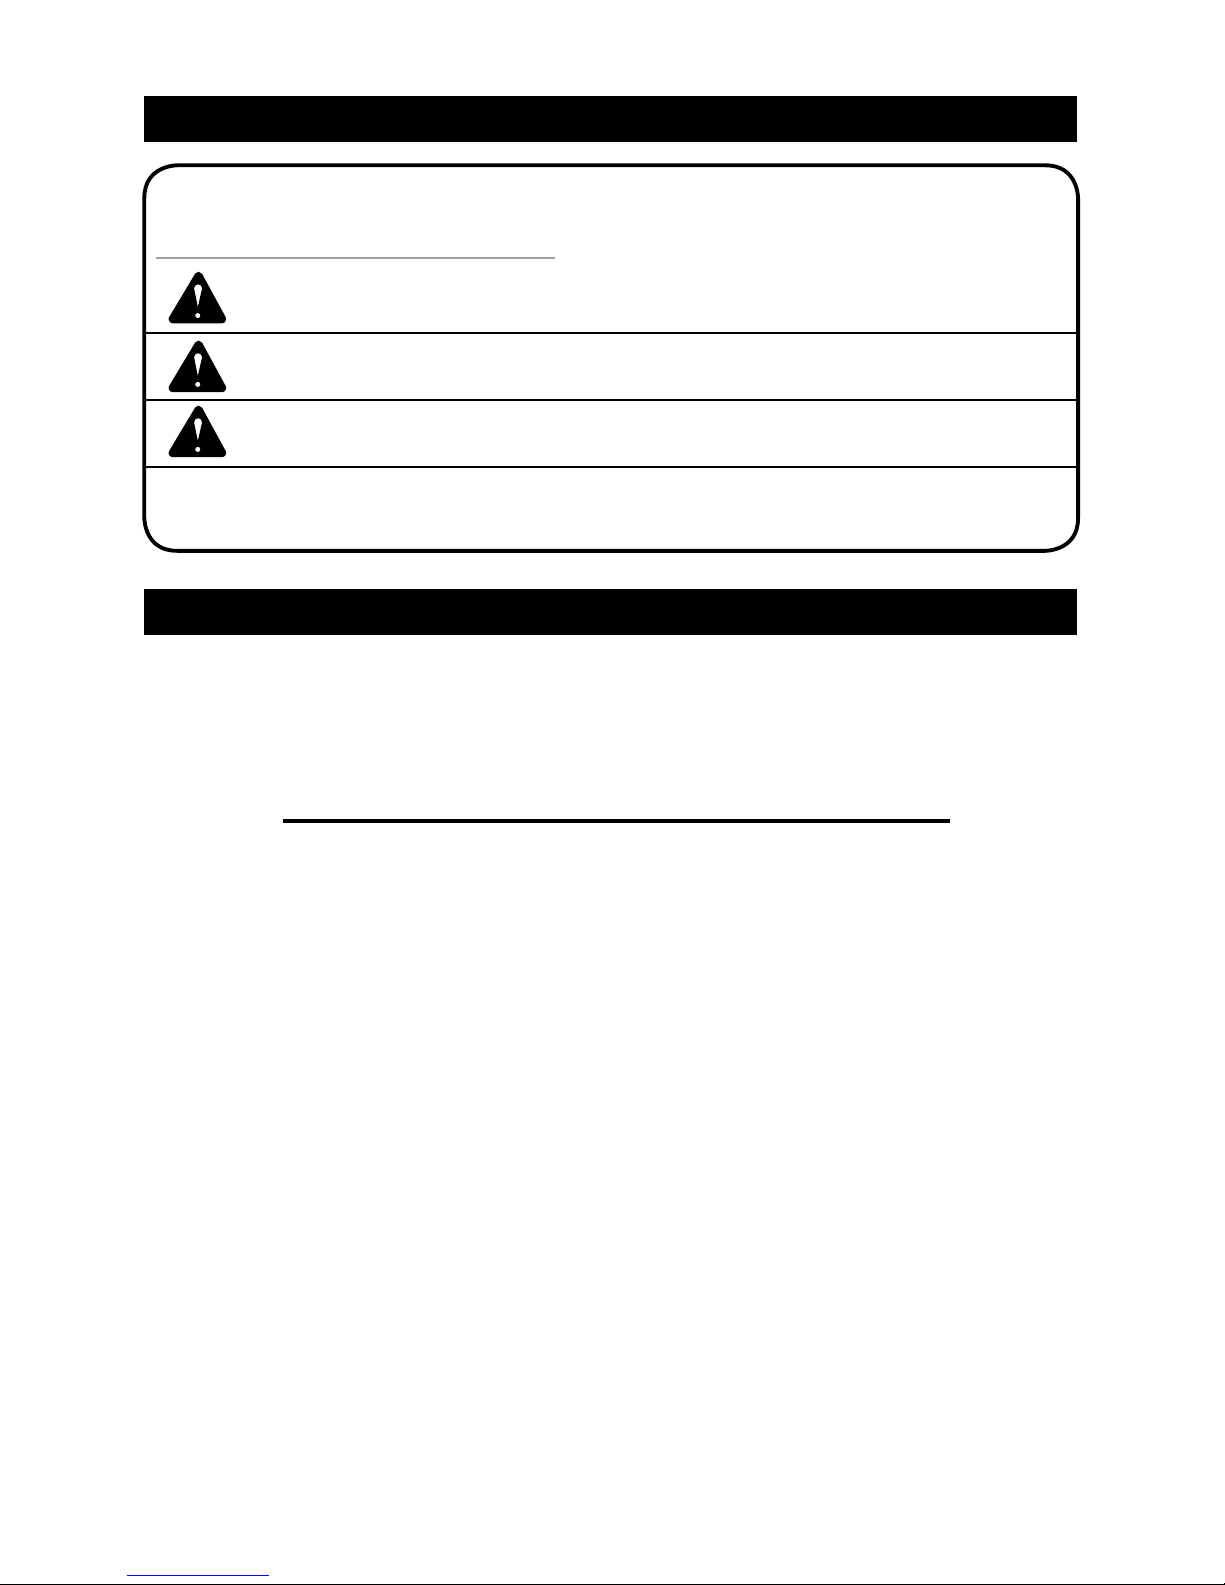
The following signal words and meanings are intended to explain the levels of risk associated with this
product.
SYMBOL SIGNAL MEANING
DANGER
Indicates an imminently hazardous situation, which, if not
avoided, will result in death or serious injury.
WARNING Indicates a potentially hazardous situation, which, if not avoided,
could result in death or serious injury.
CAUTION Indicates a potentially hazardous situation, which, if not avoided,
may result in minor or moderate injury.
CAUTION (Without Safety Alert Symbol) Indicates a situation that may
result in property damage.
PRODUCT SPECIFICATIONS
Input ................................................................................................................... 120 V, 60 Hz, AC only, 13 Amps
No-load Speed ............................................................................................................... 3,600±10% r/min. (RPM)
Cutting Path ................................................................................................................................................. 21 in.
Height Adjustments .................................................................................................................1-3/4 in. to 3-3/4 in.
Weight ..............................................................................................................................................53 lbs (24 kg)
KNOW YOUR LAWN MOWER
See Figure 1.
The safe use of this product requires an understanding
of the information on the product and in this operator’s
manual as well as a knowledge of the project you
are attempting. Before use of this product, familiarize
yourself with all operating features and safety rules.
CORD RETAINER
A convenient cord retainer helps keep the extension
cord connection secure during mower operation.
GRASS CATCHER
The grass catcher prevents grass clippings from being
scattered across your lawn as you mow.
HEIGHT ADJUSTMENT LEVER
The height adjustment lever provides cutting height
adjustments.
MOTOR/BLADE CONTROL ASSEMBLY
The motor/blade control, located on the upper handle
of the mower, engages and disengages the motor and
blade.
MULCHING PLUG
Your mower is equipped with a mulching plug that
cuts and recuts the grass for ner clippings.
SIDE DISCHARGE DEFLECTOR
Use the side discharge deector on your mower when
the grass is too high to mulch or when side discharging
is preferred. The grass clippings produced when using
the side discharge deector are noticeably larger than
those produced when using the mulching plug.
Page 8
ELECTRICAL
8 — English
DOUBLE INSULATION
See Figure 2.
Double insulation is a concept in safety in electric
power tools, which eliminates the need for the usual
threewire grounded power cord. All exposed metal
parts are isolated from the internal metal motor
components with protecting insulation. Double
insulated tools do not need to be grounded.
NOTE: Servicing of a product with double insulation
requires extreme care and knowledge of the system
and should be performed only by a qualied service
technician. Always use original replacement parts as
listed in the Parts List pages of this manual.
ELECTRICAL CONNECTION
This product has a precision-built electric motor. It
should be connected to a power supply that is 120
volts, 60 Hz, AC only (normal household current).
Do not operate this product on direct current (DC).
A substantial voltage drop will cause a loss of power
and the motor will overheat. If the product does not
operate when plugged into an outlet, double-check
the power supply.
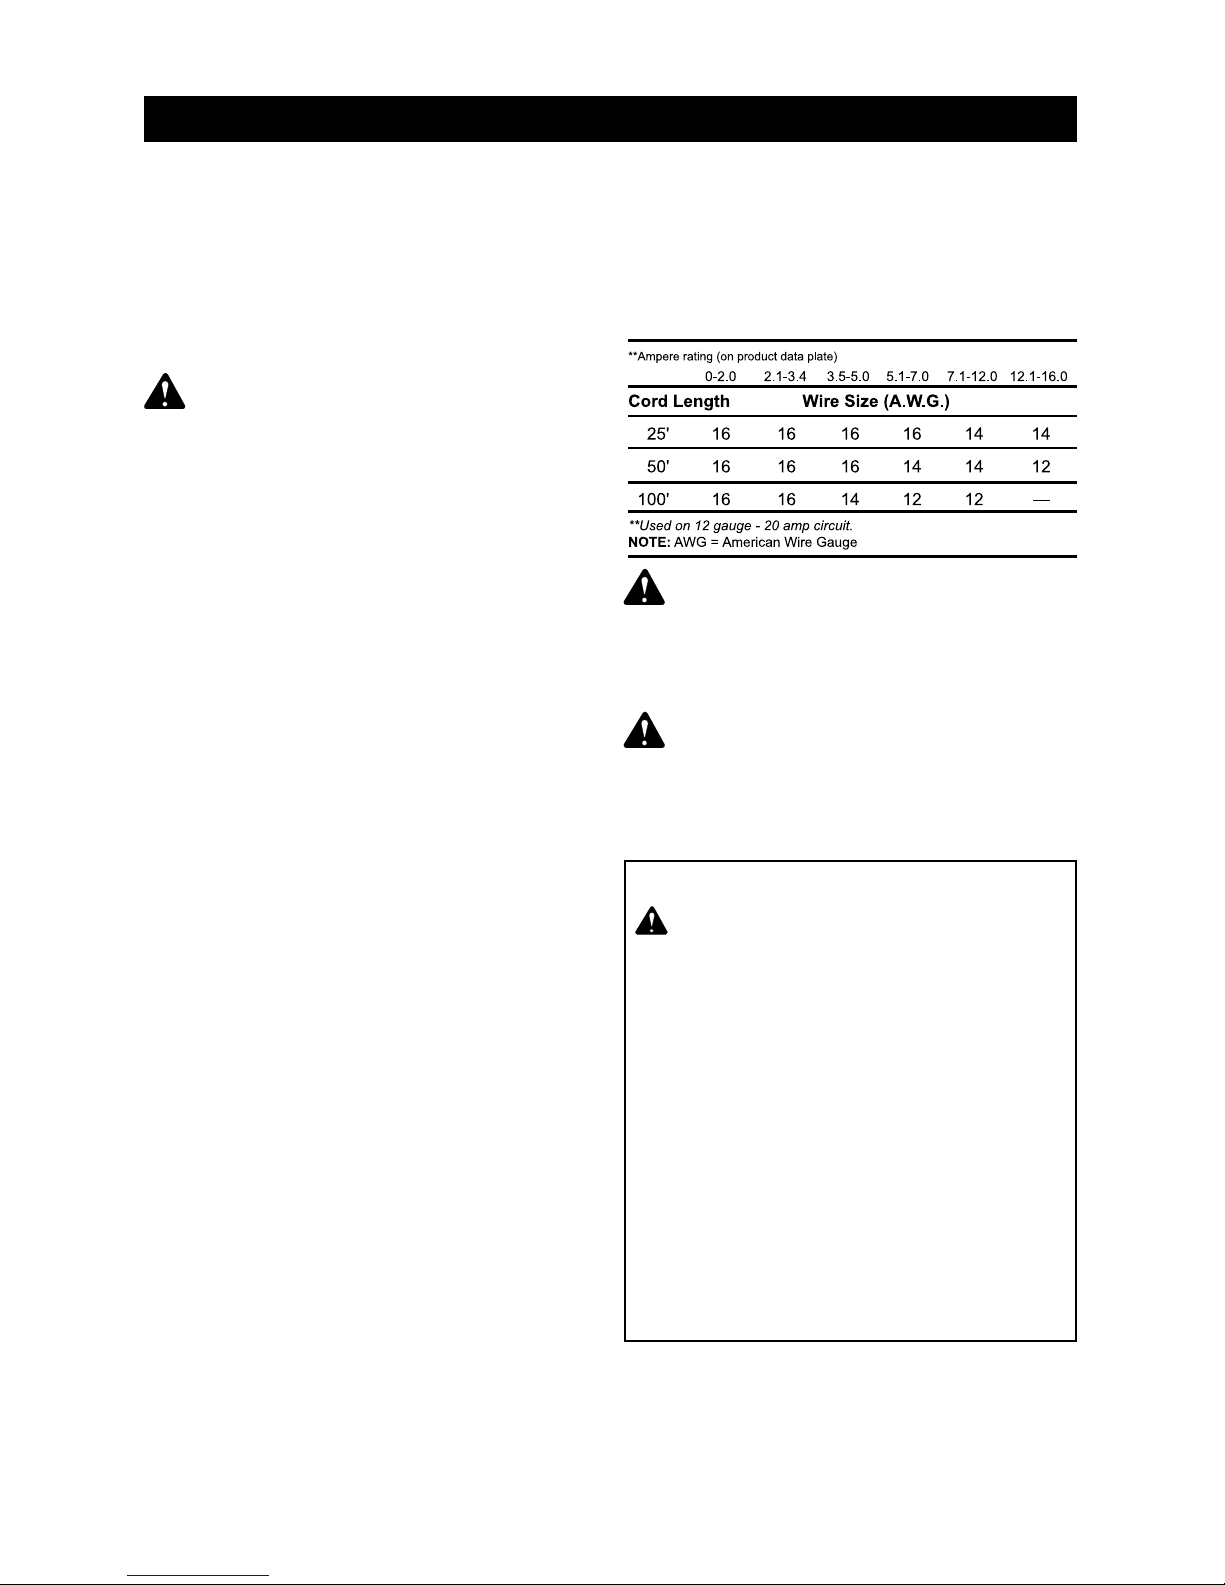
EXTENSION CORDS
See Figure 2.
When using a power tool at a considerable distance
from a power source, be sure to use an extension
cord that has the capacity to handle the current the
product will draw. An undersized cord will cause a
drop in line voltage, resulting in overheating and loss
of power. Use the chart to determine the minimum
wire size required in an extension cord. Only round
jacketed cords listed by Underwriter’s Laboratories
(UL) should be used.
When working outdoors with a product, use an
extension cord that is designed for outside use. This
type of cord is designated with “WA” on the cord’s
jacket.
Before using any extension cord, inspect it for loose
or exposed wires and cut or worn insulation.
It is possible to tie the extension cord and power
cord in a knot to prevent them from becoming
disconnected during use. Make the knot as shown in
gure 2, then connect the plug end of the power cord
into the receptacle end of the extension cord. This
method can also be used to tie two extension cords
together.
READ AND UNDERSTAND ALL
INSTRUCTIONS. Failure to follow all instructions listed
below and on the machine may result in electric shock,
re, and/or serious personal injury.
Keep the extension cord clear of
the working area. Position the cord so that it will not
get caught on lumber, tools, or other obstructions while
you are working with a power tool. Failure to do so can
result in serious personal injury.
Check extension cords before
each use. If damaged replace immediately. Never use
the product with a damaged cord since touching the
damaged area could cause electrical shock resulting in
serious injury.
Some dust created by power
sanding, sawing, grinding, drilling, and other
construction activities contains chemicals known to
cause cancer, birth defects or other reproductive
harm. Some examples of these chemicals are:
• lead from lead-based paints
• crystalline silica from bricks and cement and
other masonry products
• arsenic and chromium from chemically-treated
lumber
Your risk from these exposures varies, depending
on how often you do this type of work. To reduce
your exposure to these chemicals: work in a
well ventilated area, and work with approved
safety equipment, such as those dust masks that
are specially designed to filter out microscopic
particles.
WARNING!
WARNING!
WARNING!
WARNING!
PROPOSITION 65
Page 9
ASSEMBLY
9 — English
UNPACKING
This product requires assembly.
■ Carefully remove the product and any accessories
from the box. Make sure that all items listed in the
packing list are included.
■ Inspect the product carefully to make sure no
breakage or damage occurred during shipping.
■ Do not discard the packing material until you have
carefully inspected and satisfactorily operated the
product.
■ If any parts are damaged or missing, please call
1-888-266-7096 for assistance.
PACKING LIST
Mower
Side Discharge Deector
Mulching Plug
Grass Catcher
Operator’s Manual
UNFOLDING AND ADJUSTING HANDLE
See Figure 3.
■ Pull up and back on the upper handle to raise the
handle into operating position. Make certain the
handles snap into place securely.
■ Tighten the upper handle with the cam locks on
both sides.
■ Tighten the lower handle with the handle knobs on
both sides.
INSTALLING SIDE DISCHARGE DEFLECTOR
See Figure 4.
■ Lift the side discharge door.
■ Align the grooves on the deector with the pins on
the underside of the door.
■ Lower the deector until the hooks on the mower
deck are secured in the openings in the deector.
■ Release the deector and door.
INSTALLING THE MULCHING PLUG
See Figure 5.
NOTE: When using the mulching plug, do not install
either the side discharge deflector or the grass
catcher.
■ Lift the rear discharge door.
■ Grasp the mulching plug by its handle and tilt at an
approximate 15 degree angle.
■ Insert the plug into the rear discharge opening.
■ Lower the rear discharge door.
INSTALLING THE GRASS CATCHER
See Figure 6.
NOTE: When using the grass catcher, do not install
either the side discharge deflector or the mulching
plug.
■ Lift the rear discharge door.
■ Lift the grass catcher by its handle and place under
the rear discharge door so that the hooks on the
grass catcher are seated on the door rod.
■ Release the rear discharge door. When installed
correctly, the hooks on the grass catcher will extend
through the openings on the rear discharge door.
SETTING BLADE HEIGHT
See Figure 7.
When shipped, the wheels on the mower are set to
a lowcutting position. Before using the mower for
the rst time, adjust the cutting position to the height
best suited for your lawn. The average lawn should
be between 1-1/2 in. to 2 in. during cool months and
between 2 in. and 3-1/4 in. during hot months.
To set the blade height:
■ To raise the blade height, grasp the height
adjustment lever and move it toward the back of the
mower.
■ To lower the blade height, grasp the height
adjustment lever and move it toward the front of the
mower.
If any parts are damaged or
missing do not operate this product until the parts are
replaced. Failure to heed this warning so could result
in serious personal injury.
Do not attempt to modify this
product or create accessories not recommended
for use with this product. Any such alteration or
modication is misuse and could result in a hazardous
condition leading to possible serious personal injury.
Do not connect to power supply
until assembly is complete. Failure to comply could
result in accidental starting and possible serious
personal injury.
Never operate the mower without
the proper safety devices in place and working. Never
operate the mower with damaged safety devices.
Failure to heed this warning can result in serious
personal injury.
WARNING!
WARNING!
WARNING!
WARNING!
Page 10

OPERATION
10 — English
APPLICATIONS
You may use this product for the purpose listed
below:
■ Mowing your lawn
STARTING/STOPPING THE MOWER
See Figure 8.
■Attach the outlet end of an extension cord to the
plug on the rear of the mower.
NOTE: Use only an approved outdoor extension cord
as described previously in this manual.
■ Press and hold the start button. Pull the bail switch
towards the handle and release the button to release
the mower.
■ To stop the mower, release the bail switch.
NOTE: A high-pitched noise and sparking may occur
as the electric motor decelerates. This is normal.
MOWING TIPS
See Figure 9 - 10.
■ Make sure the lawn is clear of stones, sticks, wires,
and other objects that could damage the lawn mower
blades or motor. Such objects could be accidentally
thrown by the mower in any direction and cause
serious personal injury to the operator and others.
■ To reduce the likelihood of disconnecting the lawn
mower from the extension cord, be sure to use the
cord retainer provided.
■ Do not mow in circles. Start from the point closest to
the outlet and travel back and forth across the lawn,
moving away from the outlet so the cord remains
behind the mower in the cut portion of the lawn.
■ Do not allow the extension cord to wrap around
trees, shrubs, or other obstacles. When picking up
the extension cord, wind the cord in a series of equal
loops to prevent it from tangling.
■ For a healthy lawn, always cut off one-third or less
of the total length of the grass.
■ When cutting heavy grass, reduce walking speed
to allow for more effective cutting and a proper
discharge of the clippings.
■ Do not cut wet grass. It will stick to the underside
of the deck and prevent proper mulching of grass
clippings.
■ New or thick grass may require a narrower cut.
■ Clean the underside of the mower deck after each
use to remove grass clippings, leaves, dirt, and any
other accumulated debris.
SLOPE OPERATION
See Slope Gauge on page vi.
■ Slopes are a major factor related to slip and fall
accidents that can result in severe injury. Operation
on slopes requires extra caution. If you feel uneasy
on a slope, do not mow it. For your safety, do not
attempt to mow slopes greater than 15 degrees.
■ Mow across the face of slopes, not up and down.
Exercise extreme caution when changing direction on
slopes.
■ Watch for holes, ruts, rocks, hidden objects, or
bumps which can cause you to slip or trip. Tall grass
can hide obstacles. Remove all objects such as
rocks, tree limbs, etc., which could be tripped over or
thrown by the blade.
■ Always be sure of your footing. A slip and fall can
cause serious personal injury. If you feel you are
losing your balance, release the switch control lever
immediately.
■ Do not mow near drop-offs, ditches, or
embankments; you could lose your footing or balance.
Do not allow familiarity with this
type of product to make you careless. Remember that
a careless fraction of a second is sufcient to inict
serious injury.
Always wear safety goggles or
safety glasses with side shields when operating this
product. Failure to do so could result in objects being
thrown into your eyes, resulting in possible serious
injury.
Do not use any attachments or
accessories not recommended by the manufacturer of
this product. The use of attachments or accessories
not recommended can result in serious personal
injury.
WARNING!
WARNING!
WARNING!
Page 11

OPERATION
11 — English
USING THE CORD RETAINER
See Figure 11 - 13.
This lawn mower is equipped with a cord retainer
in order to prevent the extension cord from
disconnecting from the power cord while the mower
is in use. The cord retainer hangs from the cord guide
bar.
NOTE: Do not plug the extension cord into the outlet
until it has been connected to the cord retainer and
plugged into the mower.To use the cord retainer:
• Fold the extension cord in order to forming a tight
loop near the retainer.
• Push the loop through the bottom hole in the
retainer.
• Slide the loop over the retaining clip, and pull down
until the cord is secured.
EMPTYING THE GRASS CATCHER
See Figure 14.
■ Lift the grass catcher by its handle and lift to
remove from mower.
■ Empty grass clippings.
■ Lift the rear discharge door and reinstall the grass
catcher as described earlier in this manual.
Page 12

MAINTENANCE
12 — English
GENERAL MAINTENANCE
Avoid using solvents when cleaning plastic parts.
Most plastics are susceptible to damage from various
types of commercial solvents and may be damaged
by their use. Use clean cloths to remove dirt, dust, oil,
grease, etc.
Periodically check all nuts and bolts for proper
tightness to ensure safe operation of the mower.
Remove any buildup of grass and leaves on or
around the motor cover. Wipe the mower clean with a
dry cloth occasionally. Do not use water.
LUBRICATION
All of the bearings in this product are lubricated with a
sufcient amount of high grade lubricant for the life of
the unit under normal operating conditions. Therefore,
no further bearing lubrication is required.
At the beginning and end of each mowing season:
■ Lubricate the springs on the rear discharge door
with light oil.
■ Lubricate the height adjustment lever and related
hardware with light oil.
■ Remove the wheels and lubricate the surface of the
axle bolt and the inner surface of the wheel with light
oil.
■ Remove the blade and blade hub assembly and
lubricate the motor shaft with light oil or engine oil.
See Replacing the Cutting Blade for instructions on
removing the blade.
REPLACING THE CUTTING BLADE
See Figures 15 - 16.
NOTE: Only use identical replacement blades.
■ Stop the motor and disconnect the power supply.
Allow the blade to come to a complete stop.
■ Turn the mower on its side.
■ Wedge a block of wood between the blade and
mower deck to prevent the blade from turning.
■ Loosen the blade nut using a 15 mm wrench or
socket (not provided).
■ Remove the blade nut, spacer, blade insulator, and
blade.
■ Make certain the fan assembly is pushed
completely against the motor shaft.
■ Place the new blade on the shaft against the fan
assembly. Make sure it is installed with the curved
ends pointing up toward the mower deck and not
down toward the ground.
■ Replace the blade insulator and spacer, then thread
the blade nut on the shaft and nger tighten.
NOTE: Make certain all parts are replaced in the
exact order in which they were removed.
■ Torque the blade nut down using a torque wrench
(not provided) to ensure the bolt is properly tightened.
The recommended torque for the blade nut is 220310 in. lbs.
SHARPENING THE BLADE
See Figure 17.
For best mowing performance, the mower blade
must be kept sharp. A dull blade does not cut grass
evenly and overloads the motor. Under normal
circumstances, sharpening the blade twice during the
mowing season is usually sufcient.
However, if your lawn has sandy soil, more frequent
sharpenings may be required.
■ Following the instructions in the Replacing the
Cutting Blade section, remove the mower blade. DO
NOT attempt to sharpen the blade while it is attached
to the mower.
When servicing, use only identical
replacement parts. Use of any other parts may create
a hazard or cause product damage.
Before performing any
maintenance, make sure the mower is unplugged
from the power supply. Failure to heed this warning
could result in serious personal injury.
Do not at any time let brake uids,
gasoline, petroleumbased products, penetrating oils,
etc., come in contact with plastic parts. Chemicals
can damage, weaken, or destroy plastic which may
result in serious personal injury.
Always wear safety goggles or
safety glasses with side shields during power tool
operation or when blowing dust. If operation is dusty,
also wear a dust mask.
Always protect hands by wearing
heavy gloves and/or wrapping the cutting edges of the
blade with rags and other material when performing
blade maintenance. Failure to heed this warning
could result in serious personal injury.
When removing, inspect the
blade carefully. If blade is bent or damaged, replace
immediately with a new blade. Failure to replace
a bent or damaged blade could cause an accident
resulting in possible serious injury.
WARNING! WARNING!
WARNING!
WARNING!
WARNING!
WARNING!
Page 13

MAINTENANCE
13 — English
■ Using a fine-tooth file or stone, sharpen cutting
edges on both ends of the blade, removing equal
amounts of material from both ends.
BALANCING THE BLADE
See Figure 18.
When sharpening, care should be taken to keep the
blade balanced. An unbalanced blade will cause
excessive vibration. This vibration will eventually
cause damage to the mower, especially the motor.
To check the blade balance:
■ Clamp a screwdriver horizontally in a vise as
shown.
NOTE: If a vise is not available, a straight nail driven
into the side of a work bench can also be used.
■ Place the center hole of blade on the screwdriver (or
nail) shank.
■ If blade is balanced, it will remain in a horizontal
position. If either end of the blade drops downward,
sharpen the heavy side until the blade is balanced.
STORING THE MOWER
■ Disconnect the mower from the power supply.
■ Turn mower on its side and clean grass clippings
that have accumulated on the underside of the mower
deck.
■ Wipe the mower clean with a dry cloth.
■ Check all nuts, bolts, knobs, screws, fasteners, etc.,
for tightness.
■ Inspect moving parts for damage, breakage, and
wear. Have repairs made on any damaged or missing
parts.
■ Store mower indoors in a clean, dry place out of the
reach of children.
■ Do not store near corrosive materials such as
fertilizer or rock salt.
To lower the handle before storing:
■ Lift up the cam locks on the sides of the handle to
unlock, and fold the upper handle down.
■ Loosen the handle knobs, pull inwards on each
side of the lower handle, and lift the sides of the
lower handle past the edges of the handle mounting
brackets. Fold the lower handle forward. Make sure
not to bend or kink the power cord.
Page 14

CRAFTSMAN 21in. 13A LAWN MOWER – MODEL NUMBER 138.37097
The model number will be found on a label attached to the motor housing. Always mention the model
number when calling to order repair parts.
TO PURCHASE REPLACEMENT PARTS, CALL 1-800-469-4663
14 — English
Page 15

The model number will be found on a label attached to the motor housing. Always mention the model
number when calling to order repair parts.
15 — English
TO PURCHASE REPLACEMENT PARTS, CALL 1-800-469-4663
CRAFTSMAN 21in. 13A LAWN MOWER – MODEL NUMBER 138.37097
ITEM NO. PART NO. DESCRIPTION QTY
1 31101489-3 Upper handle assy. 1
2 31101475 Cam lock assy. 2
3 34106467 Handle knob 4
4 34135469A Cord guide 1
5 33301489-1 Lower handle 1
6 34120227 Cord retainer 1
7 3332338 Side discharge axle 1
8 3410438 Side discharge chute 1
9 3420207 Rubber bushing 1
10 3340237 Spring 1
11 3330637 Side discharge bracket 1
12 3410338 Side discharge cover 1
13 3220136 Screw M6x8 2
14 3410403 Wire clip 1
15 3220505D Screw 2
16 3410137 Cord clip 1
17 3220951D Screw 2
18 3290105 Nut M4 1
19 3290675 Washer 1
20 3220439 Nut M5 2
21 33301475 Resistance heat radiator 1
22 36901477 Resistance 1
23 3220511 Screw M4 1
24 3410290-1 Resistance clamp 1
25 3220850D Screw M5x20 2
26 3220505D Screw 2
27 32201489D Screw M5x12 6
28 34101489-5 Motor cover 1
30 3690135 Rectier 1
31 3331035 Radiator rectier 1
32 3220439 Nut M5 3
33 36101489 Motor 1
34 34203227 Rubber bushing 1
36 3220135D Screw M6x25 3
37 32207115 Washer 3
38 31301489-2 Deck 1
39 333071161 Front wheel axle 1
40 33101489 7” wheel 2
41 3320639 Clip 2
Page 16

The model number will be found on a label attached to the motor housing. Always mention the model
number when calling to order repair parts.
16 — English
TO PURCHASE REPLACEMENT PARTS, CALL 1-800-469-4663
CRAFTSMAN 21in. 13A LAWN MOWER – MODEL NUMBER 138.37097
ITEM NO. PART NO. DESCRIPTION QTY
42 3220898 Washer 8
43 32901271 C-clip 4
44 34111498 Wheel cover 4
45 33303227-10 Link bar 1
46 3340137-2 Spring 1
47 3220439 Nut M5 2
48 31103222 Height adjustment handle 1
49 33102489 10” wheel 2
50 31102222 Rear wheel axle 1
51 3290135 Pin 1
52 33401222 Spring 1
53 34114227-1 Height adjustment knob (Upper) 1
54 3221637 Bolt M10x20 4
55 33302222-1 Height adjustment bracket (left) 1
56 3320138-1 Rear cover rod 1
57 33304235 Rear cover spring (left) 1
58 34103236 Rear cover 1
59 33305222-1 Height adjustment bracket (right) 1
60 33302235 Rear cover spring (right) 1
61 3221037 Nut M4 1
62 3331435 Spacer 1
63 3410535 Blade insulator 1
64 33313250 Blade 1
65 3410237 Fan 1
66 3320238A Spindle bushing 1
67 34106236-1 Rear bafe 1
68 3221237 Self-lock nut M4 2
69 33305227-1 Wire clip 2
70 3220511D Screw M4x12 2
71 34127229 Rear shield 1
72 34902237-11 Catcher bag 1
73 34104236 Mulching plug 1
74 33301237-5 Catcher bag frame 1
75 3220737 Nut M10 4
76 3220439 Nut 4
77 32206250D Screw M5x15 4
78 32201235D Screw 6
79 3290506 C-Clip 1
80 34113227-4 Height adjustment knob (Lower) 1
Page 17

i
See this section for all of the gures referenced in the
operator’s manual.
Consulte esta sección para ver todas las guras a las que se hace
referencia en el manual del operador.
Fig. 1
Fig. 2
A - Cord (Cordón)
B - Extension cord (Cordón de extensión)
A - Bail Switch (Interruptor de agarre)
B - Start button (Botón de arranque)
C - Motor/Blade control assembly (Conjunto de
onjunto de control del motor/cuchilla)
D - Cord retainer (Retenedor del cable)
E - Grass catcher (Receptor de césped)
F - Height adjustment lever (Palanca de ajuste
de altura)
G - Side discharge deflector (Deflector de
descarga lateral)
H - Mulching plug (Tapón para trituración)
A
A
B
B
C
F
H
D
E
G
Page 18

Fig. 3
Fig. 4
ii
A
A
A
B
B
A - Handle knobs (Perilla de la manija)
B - Cam locks (Sujetadores de leva)
A -Side discharge cover (Puerta de descarga lateral)
B - Side discharge deflector (Deflector de descarga lateral)
Page 19

Fig. 5 Fig. 7
Fig. 6
iii
A
B
A - Rear discharge cover (Puerta de descarga posterior)
B - Mulching plug (Tapón para trituración)
A - Height adjustment lever (Palanca de ajuste de altura)
A - Rear discharge cover (Puerta de descarga posterior)
B - Hooks (Ganchos)
C - Rod (Varilla)
A
C
B
A
Page 20

Fig. 11
Fig. 12Fig. 10
Fig. 13
iv
Fig. 8 Fig. 9
A
B
A - Start button (Botón de arranque)
B - Power lever (Palanca de arranque)
Page 21

Fig. 15Fig. 14
Fig. 17 Fig. 16
Fig. 18
v
A - Blade nut (Tuerca de la cuchilla)
B - Spacer (Espaciador)
C - Blade insulator (Aislante de cuchilla)
D - Blade (Cuchilla)
E - Fan assembly (Conjunto del ventilador)
F - Shaft (Eje)
A
B
C
D
E
F
Page 22

vi
(OK)
(TOO STEEP)
Figure 2Figure 1
15° Slope
15° Slope
SLOPE GAUGE (MANEJO EN PENDIENTES)
USE THIS SLOPE GAUGE TO DETERMINE
IF A SLOPE IS TOO STEEP FOR SAFE OPERATION!
USE THIS SLOPE GAUGE TO DETERMINE
IF A SLOPE IS TOO STEEP FOR SAFE OPERATION!
To check the slope, proceed as follows:
1. Remove this page and fold along the dashed line.
2. Locate a vertical object on or behind the slope (e.g. a pole,
building, fence, tree, etc.)
3. Align either side of the slope gauge with the object (See Figure
1 and Figure 2 ).
4. Adjust gauge up or down until the left corner touches the slope
(See Figure 1 and Figure 2).
5. If there is a gap below the gauge, the slope is too steep for safe
operation (See Figure 2 above).
15° dashed line (15° dashed line)
Slopes are a major factor related to tip-
over and roll-over accidents which can result in severe injury
or death. Do not operate machine on slopes in excess of 15
degrees. All slopes require extra caution. Always mow across the
face of slopes, never mow up and down slopes.
Slopes are a major factor related
to tip-over and roll-over accidents which can result in severe
injury or death. Do not operate machine on slopes in excess of 15
degrees. All slopes require extra caution. Always mow across the
face of slopes, never mow up and down slopes.
WARNING! ADVERTENCIA!
Page 23

REGLAS DE SEGURIDAD GENERALES
3 — Español
LEA Y COMPRENDA
TODAS LAS INSTRUCCIONES. El incumplimiento
de las instrucciones señaladas abajo y en la máquina
puede causar descargas eléctricas, incendios y/o
lesiones serias.
ADVERTENCIA!
LEA TODAS LAS INSTRUCCIONES
■ Esta máquina de corte es capaz de amputar manos
y pies, y de lanzar objetos. La inobservancia de todas
las instrucciones de seguridad puede causar lesiones
serias o la muerte.
■ No utilice herramientas eléctricas en atmósferas
explosivas, como en la presencia de líquidos
inflamables, gases o polvo. Las herramientas
eléctricas producen chispas que pueden encender el
polvo o humo.
■ Evite el contacto corporal con superficies puestas
a tierra,como tuberías, radiadores, estufas y
refrigeradores. hayun mayor riesgo de descarga
eléctrica si su cuerpo está a tierra.
■ No use la podadora de pasto en condiciones
húmedas o mojadas ni la utilice en la lluvia.
■ Nunca permita que adultos utilicen el producto sin el
debido aprendizaje.
■ Mantenga alejados del área a todos los
circunstantes, niños y mascotas al podar. Detenga la
máquina si alguien entra en el área.
■ Pueden producirse accidentes trágicos si el
operador no está alerta a la presencia de niños. Los
niños suelen sentirse atraídos por la máquina y la
actividad de la podadora. Nunca dé por sentado que
los niños permanecerán donde los vio por última vez.
• Mantenga a los niños alejados del área de
podado y bajo la cuidadosa supervisión de un
adulto responsable que no sea el operador.
• Esté alerta y apague la podadora si un niño
entra en el área.
• Nunca permita que un niño utilice la máquina.
• Tenga cuidado extremo al acercarse a
esquinas ciegas, arbustos, árboles u otros
objetos que puedan impedirle ver a un niño.
■ No use ropas holgadas ni joyas. Pueden
engancharse en las piezas móviles.
■ Mantenga los pies bien armados y el equilibrio. No
se estire demasiado. Al tratar de hacerlo puede perder
el equilibrio.
■ No accione el equipo cuando esté descalzo o al
llevar puestas sandalias o calzado liviano similar. Use
calzado de seguridad que le proteja sus pies y mejore
su postura en supercies resbaladizas.
■ No deje desatendida la podadora de pasto mientras
la tenga encendida.
■ Mantenga las manos y los pies alejados del área de
corte. Manténgase alejado de la abertura de descarga
en todo momento.
■ Utilice la podadora de pasto únicamente a la luz del
día o con buena luz articial.
■ Siempre use anteojos de seguridad con protección
lateral con la marca de cumplimiento de la norma
ANSI Z87.1. Los anteojos comunes sólo tienen
lentes resistentes a los impactos. NO son gafas de
seguridad. Con el cumplimiento de esta regla se
reduce el riesgo de posibles lesiones oculares. Use
una careta si la operación genera mucho polvo.
■ Al utilizar este producto póngase anteojos de
seguridad o gafas protectoras marcados con el sello
de cumplimiento de la norma ANSI Z87.1.
■ Utilice el aparato adecuado para la tarea. No utilice
la podadora de pasto para ninguna función diferente
de las especicadas.
■ No fuerce la podadora de pasto. Efectúa el trabajo
mejor y de manera más segura, si se utiliza a la
velocidad para la que está diseñada.
■ Permanezca alerta, preste atención a lo que
esté haciendo y use el sentido común al utilizar la
podadora de pasto. No utilice la podadora cuando
está cansado o bajo la inuencia de drogas, alcohol o
medicamentos. Un momento de descuido al utilizar la
podadora de pasto puede causar lesiones serias.
■ Mantenga la máquina en buenas condiciones
de trabajo. Mantenga las cuchillas afiladas, y las
protecciones en su lugar y en buenas condiciones de
trabajo.
■ Revise el apriete de todas las tuercas, pernos y
tornillos con frecuencia para vericar la seguridad de
las condiciones de funcionamiento del equipo.
■ Apague el motor y espere hasta que la cuchilla
se detenga completamente y quitar el cable de
alimentación antes de limpiar la podadora de
pasto, retirar el receptor de césped o desatascar la
protección de descarga.
■ Cuando no está en uso, la podadora debe
guardarse en el interior, en un lugar seco y cerrado
con llave, lejos del alcance de los niños.
■ Para reducir el riesgo de una descarga eléctrica,
este producto dispone de una clavija polarizada (una
patilla es más ancha que la otra) y requiere un cordón
de extensión polarizado. La clavija entra sólo de
una forma en el enchufe de un cordón de extensión
polarizado. Si la clavija no entra completamente en el
enchufe del cordón de extensión, invierta la posición
de la misma. Si aún así no entra la clavija, obtenga un
Page 24

REGLAS DE SEGURIDAD GENERALES
cordón de extensión polarizado correcto. Un cordón
de extensión polarizado requiere el uso de una toma
de pared polarizada. Esta clavija entra sólo de una
forma en la toma de pared polarizada. Si la clavija no
entra completamente en la toma de pared, invierta la
posición de la clavija. Si aún así no entra la clavija,
contrate a un electricista calificado para encargarle
la instalación de una toma de pared adecuada. No
cambie de ninguna manera la clavija del equipo, ni el
receptáculo o la clavija del cordón de extensión.
■ No maltrate el cordón. Nunca use el cordón para
tirar de la podadora de pasto ni para sacar la clavija
de una toma. Mantenga el cordón alejado del calor,
del aceite de bordes afilados y de piezas móviles.
Cambie de inmediato todo cordón dañado. Los
cordones dañados aumentan el riesgo de descargas
eléctricas.
■ Asegúrese de que esté en buen estado el cordón
de extensión. Al utilizar un cordón de extensión, utilice
uno del suficiente calibre para soportar la corriente
que consume el producto. Se recomienda que los
conductores sean de calibre 14 (A.W.G.) por lo menos,
para un cordón de extensión de 15,2 m (50 pies)
de largo o menos. Si tiene dudas, utilice un cordón
del calibre más grueso siguiente. Cuanto menor es
el número de calibre, ma Un cordón de un calibre
insuciente causa una caída en el voltaje de línea, y
produce recalentamiento y pérdida de potencia.
■ ADVERTENCIA! Use cordones de extensión para
exteriores que lleven las marcas SW-A, SOW-A,
STW-A, STOW-A, SJW-A, SJTW-A o SJTOWA. Estos
cordones están aprobados para el uso en el exterior y
reducen el riesgo de descargas eléctricas.
■ Los circuitos o las tomas donde se conecta esta
podadora de pasto deben estar protegidos con un
interruptor de circuito accionado por falla de conexión
a tierra (GFCI). Hay receptáculos con la protección
de un GFCI integrado, y pueden utilizarse para contar
con esta característica de seguridad.
■ Inspeccione periódicamente los cordones de
extensión y reemplácelos si están dañados. Mantenga
los mangos secos, limpios y sin aceite ni grasa.
4 — Español
Page 25

GUARDAR ESTAS INSTRUCCIONES
REGLAS DE SEGURIDAD ESPECÍFICAS
5 — Español
■ No utilice la podadora si no tiene el receptor de
césped, la protección de descarga, la protección
posterior y cualquier otro dispositivo de seguridad
colocado y en funcionamiento.
■ Siga las instrucciones del fabricante para el correcto
manejo e instalación de los accesorios. Sólo utilice
accesorios aprobados por el fabricante.
■ Despeje el área de trabajo cada vez antes de
utilizar esta herramienta. Retire todos los objetos
como piedras, palos, alambre, huesos, juguetes u
otros objetos que puedan ser lanzados por la cuchilla.
Permanezca detrás del mango mientras el motor esté
en funcionamiento.
■ Evite pozos, surcos, montículos, rocas u otros
objetos ocultos. El terreno desnivelado puede causar
un accidente por resbalón y caída.
■ No pode el pasto cerca de precipicios, zanjas o
terraplenes.
■ Pode atravesando el frente de las pendientes; nunca
hacia arriba ni hacia abajo. Tenga mucha precaución
al cambiar de dirección en una pendiente.
■ Planifique su patrón de podado para evitar
la descarga de material en caminos, aceras,
circunstantes y demás. Además, evite descargar
material contra una pared u obstrucción que pueda
hacer que el material rebote hacia el operador.
■ No pode el césped cuando esté mojado ni en
pendientes excesivamente empinadas. Una postura
mal armada puede causar un accidente por resbalón
y caída. Camine, no corra nunca.
■ Tenga cuidado extremo al acercarse a esquinas
ciegas, arbustos, árboles u otros objetos que puedan
impedirle ver.
■ No tire de la podadora hacia atrás a menos que sea
absolutamente necesario. Si debe retroceder la podadora
para alejarla de una pared u obstrucción, primero mire
hacia abajo y hacia atrás para evitar tropezar.
■ Nunca dirija el material descargado hacia una
persona. Evite descargar el material contra una
pared u obstrucción. El material puede rebotar hacia
el operador. Detenga la cuchilla cuando cruce por
supercies de grava.
■ Los objetos golpeados por la cuchilla de la
podadora de pasto pueden causar graves heridas a
las personas. Siempre debe examinarse el pasto con
cuidado y despejarlo de cualquier objeto antes de
cada poda.
■ Si la podadora de pasto golpea un objeto extraño,
siga estos pasos:
• Apague la podadora de pasto y suelte la palanca de
control del interruptor.
• Desconecte el cordón eléctrico.
• Inspeccione minuciosamente la podadora para ver si
tiene daños.
• Repare todo daño antes de volver a arrancar la
podadora y continuar utilizándola.
■ Apague el motor, desconecte la clavija de la fuente
de corriente y espere hasta que la cuchilla se detenga
por completo antes de retirar el receptor de césped o
desobstruir el vertedero. La cuchilla continúa girando
durante algunos segundos después de que se apaga
el motor. Nunca coloque ninguna parte del cuerpo en
el área de la cuchilla hasta que esté seguro de que la
cuchilla ha dejado de girar.
■ Desconecte la clavija de la fuente de corriente antes
de efectuar ajustes, cambiar accesorios o guardar la
podadora de pasto. Con tales medidas preventivas
de seguridad se reduce el riesgo de poner en marcha
accidentalmente el producto.
■ Si la podadora comienza a vibrar de manera
anormal, detenga el motor e inspecciónela
inmediatamente para determinar la causa.
■ Sólo personal de reparación calificado debe dar
servicio al producto. Todo servicio o mantenimiento
efectuado por personal no calicado puede signicar
un riesgo de lesiones al usuario, y de daños físicos al
producto.
■ Al dar servicio a este producto, sólo utilice piezas
de repuesto idénticas. El empleo de piezas no
autorizadas puede significar un riesgo de lesiones
serias al usuario, o de daños físicos al producto.
■ Si está dañado el cordón de corriente, debe ser
reemplazado únicamente por el fabricante o en un
centro de servicio autorizado para evitar riesgos.
■ Guarde estas instrucciones. Consúltelas con
frecuencia y empléelas para instruir a otras personas
que puedan utilizar este producto. Si presta a alguien
esta herramienta, facilítele también las instrucciones.
Page 26

SÍMBOLOS
6 — Español
Es posible que se empleen en este producto algunos de los siguientes símbolos. Le suplicamos estudiarlos
y aprender su signicado. Una correcta interpretación de estos símbolos le permitirá utilizar mejor y de
manera más segura el producto.
n
o
SÍMBOLO NOMBRE DENOMINACIÓN/EXPLICACIÓN
V Voltios Voltaje
A Amperios Corriente
Hz Hertz Frecuencia (ciclos por segundo)
W Watts Potencia
min Minutos Tiempo
Corriente alterna Tipo de corriente
Corriente continua Tipo o característica de corriente
Velocidad sin carga Velocidad de giro al no haber carga
Fabricación Clase II Fabricación con doble aislamiento
/min por minuto Revoluciones, carreras, velocidad supercial,órbitas, etc. por minuto.
Moje Condiciones Ponen No exponga la unidad a la lluvia ni la use en lugares húmedos.
sobre aviso
Lea el manual del operador Para reducir el riesgo de lesiones, el usuario debe leer y
comprender el manual del operador antes de usar este producto.
Protección ocular Póngase siempre gafas de seguridad con protección lateral, y en
la medida en que sea necesario, utilice un protector para toda la
cara con la marca de cumplimiento de la norma ANSI Z87.1.
Rebote Cualquier objeto lanzado puede rebotar y producir lesiones
personales o daños físicos.
Hoja Alada Peligro – Para evitar una lesíon grave, no toque la hoja que corta
la cuerda.
Funcionamiento en terrenos No corte la grama en terrenos inclinados mayores de 15°.
inclinados.
Mantenga alejadas a las Mantenga a los circunstantes a una distancia mínima de
personas presentes 15 m (50 pies).
Descarga eléctrica Si no se usa la unidad en condiciones secas y no se observan
prácticas seguras de trabajo, puede producirse una descarga
eléctrica.
Page 27

SÍMBOLOS
CARACTERÍSTICAS
Las siguientes palabras de señalización y sus signicados tienen el objeto de explicar los niveles de riesgo
relacionados con este producto.
SÍMBOLO SEÑAL SIGNIFICADO
PELIGRO
Indica una situación peligrosa inminente, la cual, si no se evita, causará
la muerte o lesiones serias.
ADVERTENCIA Indica una situación peligrosa posible, la cual, si no se evita, podría
causar la muerte o lesiones serias.
PRECAUCIÓN Indica una situación potencialmente peligrosa la cual, si no se evita, puede
causar lesiones leves o moderadas.
PRECAUCIÓN (Sin el símbolo de alerta de seguridad) Indica una situación que puede
producir daños materiales.
ESPECIFICACIONES DEL PRODUCTO
Corriente de entrada.......................................................................................... 120 V, 60 Hz, 13 A, sólo corr. alt.
Velocidad en vacío.......................................................................................................................3,600±10% r/min
(RPM)Trayectoria de corte.........................................................................................................533 mm (21 pulg.)
Ajustes de altura...................................................................................45 mm (1-3/4 pulg.) a 95 mm (3-3/4 pulg.)
Peso..................................................................................................................................................53 lbs (24 kg)
FAMILIARÍCESE CON SU PODADORA DE PASTO
Vea la gura 1.
Para usar este producto con la debida seguridad
se debe comprender la información indicada en
el producto mismo y en este manual, y se debe
comprender también el trabajo que intenta realizar.
Antes de usar este producto, familiarícese con todas
las características de funcionamiento y normas de
seguridad del mismo.
RETÉN PARA EL CORDÓN
Un cómodo retén para el cordón ayuda a mantener el
cordón de extensión seguro durante la operación de
podado.
RECEPTOR DE CÉSPED
El receptor de césped impide que los recortes de
césped se dispersen por el pasto mientras lo poda.
PALANCA DE AJUSTE DE ALTURA
La palanca de ajuste de altura brinda ajustes de la
altura de corte.
CONJUNTO DE CONTROL DEL MOTOR/
CUCHILLA
El control del motor/cuchilla, ubicado en el mango
superior de la podadora, conecta y desconecta el
motor y la cuchilla.
TAPÓN PARA TRITURACIÓN
Su podadora está equipada con un tapón para
trituración que corta y recorta el césped para obtener
recortes más nos.
DEFLECTOR DE DESCARGA LATERAL
Use el deflector de descarga lateral en su podadora
cuando el césped sea demasiado alto como para
triturarlo o cuando se prefiera una descarga lateral.
Los recortes de césped producidos cuando se usa el
deflector de descarga lateral son notoriamente más
grandes que los producidos cuando se usa el tapón
para trituración.
7 — Español
Page 28

ASPECTOS ELÉCTRICOS
DOBLE AISLAMIENTO
Vea la gura 2.
El doble aislamiento es una característica de
seguridad de las herramientas eléctricas, la cual
elimina la necesidad de usar el típico cordón eléctrico
de tres conductores con conexión a tierra. Todas
las partes metálicas expuestas están aisladas de
los componentes metálicos internos del motor por
medio de aislamiento de protección. No es necesario
conectar a tierra las herramientas con doble
aislamiento.
NOTA: El mantenimiento de una herramienta
con doble aislamiento requiere sumo cuidado y
conocimiento del sistema, y únicamente deben
realizarlo técnicos de servicio calificados. Utilice
siempre piezas de repuesto originales que guran en
las páginas de la lista de partes de este manual.
CONEXIÓN ELÉCTRICA
Este producto dispone de un motor eléctrico
fabricado con precisión. Debe conectarse únicamente
a un suministro de corriente de 120 V, 60 Hz, sólo
corr. alt. (corriente normal para uso doméstico). No
utilice este producto con corriente continua (corr.
cont.). Una caída considerable de voltaje causa una
pérdida de potencia y el recalentamiento del motor.
Si el producto no funciona al conectarlo en una toma,
vuelva a vericar el suministro de corriente.
CORDONES DE EXTENSIÓN
Vea la gura 2.
Al utilizar una herramienta eléctrica a una distancia
considerable de la fuente de corriente, asegúrese
de utilizar un cordón de extensión con la suficiente
capacidad para soportar la corriente de consumo
del producto. Un cordón de un calibre insuficiente
causa una caída en el voltaje de línea, la cual a su
vez produce recalentamiento y pérdida de potencia.
Básese en la tabla suministrada para determinar el
grueso mínimo requerido del cordón de extensión.
Solamente deben utilizarse cordones con forro
redondo registrados en Underwriter's Laboratories
(UL). Al trabajar a la intemperie con un producto,
utilice un cordón de extensión fabricado para uso en
el exterior. Este tipo de cordón lleva las letras "WA"
en el forro. Antes de utilizar un cordón de extensión,
inspecciónelo para ver si tiene conductores ojos o
expuestos y aislamiento cortado o gastado.
Se puede hacer un nudo para atar el cordón de
extensión y el cordón eléctrico para impedir que se
desconecten durante el uso. Ate el nudo como se
muestra en la figura 2, luego conecte el extremo
de la clavija del cordón eléctrico en el extremo del
receptáculo del cordón de extensión. Este método
también se puede usar para atar dos cordones de
extensión.
El sistema de doble
aislamiento está destinado a proteger al usuario
contra las descargas eléctricas resultantes de la
ruptura del aislamiento interno de la herramienta.
Observe todas las precauciones de seguridad para
evitar descargas eléctricas.
Mantenga el cordón de
extensión fuera del área de trabajo. Al trabajar con
una herramienta eléctrica, coloque el cordón de
tal manera que no pueda enredarse en la madera,
herramientas o ninguna obstrucción. La inobservancia
de esta advertencia puede causar lesiones corporales
serias.
Inspeccione los cordones
de extensión antes de cada uso. Si están dañados
reemplácelos de inmediato. Nunca utilice el producto
con un cordón dañado, ya que si toca la parte
dañada puede producirse una descarga eléctrica, y
las consecuentes lesiones serias.
ADVERTENCIA!
ADVERTENCIA!
ADVERTENCIA!
8 — Español
Parte del polvo causado
por el lijado eléctrico, el serruchado, la trituración,
la perforación y otras actividades de construcción
contiene químicos que causan cáncer, defectos de
nacimiento u otros daños reproductivos. Algunos
ejemplos de estos químicos son:
• plomo de pinturas con base de plomo
• sílice cristalina de ladrillos, cemento y otros
productos de mampostería
• arsénico y cromo de madera tratada con químicos
El riesgo que corre a la exposición a estos
químicos varía según la frecuencia con que realiza
este tipo de trabajos. Disminuya la exposición a
estos químicos: trabaje en un lugar bien ventilado
y con un equipo de seguridad aprobado, como las
máscaras para polvo que están especialmente
diseñadas para ltrar las partículas microscópicas.
¡ADVERTENCIA!
PROPUESTA 65
Page 29

ARMADO
DESEMPAQUETADO
Este producto requiere armarse.
■ Extraiga cuidadosamente de la caja el producto y los
accesorios. Asegúrese de que estén presentes todos
los artículos enumerados en la lista de empaquetado.
■ Inspeccione cuidadosamente el producto para
asegurarse de que no haya sufrido ninguna rotura o
daño durante el transporte.
■ No deseche el material de empaquetado sin haber
inspeccionado cuidadosamente el producto y haberlo
utilizado satisfactoriamente.
■ Si hay piezas dañadas o faltantes, le suplicamos
llamar al 1-888-266-7096, donde le brindaremos
asistencia.
LISTA DE EMPAQUETADO
Podadora
Deector de descarga lateral
Tapón para trituración
Receptor de césped
Manual del operador
DESPLIEGUE Y AJUSTE DE LA EMPUÑADURA
Vea la gura 3.
■ Tire de la empuñadura superior hacia arriba y hacia
atrás para elevar la empuñadura hasta la posición
de funcionamiento. Asegúrese de que los mangos
encajen en su lugar de forma segura.
■ Apriete la empuñadura superior con los sujetadores
de leva a ambos lados.
■ Apriete la empuñadura inferior con las perilla de la
manija a ambos lados.
INSTALACIÓN DEL DEFLECTOR DE DESCARGA
LATERAL
Vea la gura 4.
■ Levante la puerta de descarga lateral.
Si hay piezas dañadas
o faltantes, no utilice este producto sin haber
reemplazado todas las piezas. La inobservancia de
esta advertencia podría causar lesiones serias.
No intente modicar este
producto ni hacer accesorios no recomendados para el
mismo. Cualquier alteración o modicación constituye
maltrato y puede causar una condición peligrosa, y
como consecuencia posibles lesiones serias.
No conecte la unidad al
suministro de corriente sin haber terminado de
armarla. De lo contrario la unidad puede ponerse en
marcha accidentalmente, con el consiguiente riesgo
de lesiones serias.
ADVERTENCIA!
ADVERTENCIA!
ADVERTENCIA!
9 — Español
■ Alinee las ranuras del deector con los pasadores de
la parte inferior de la puerta.
■ Baje el deector hasta que los ganchos del piso de la
podadora estén asegurados en las aberturas del deector.
■ Suelte el deector y la puerta.
INSTALACIÓN DEL TAPÓN PARA TRITURACIÓN
Vea la gura 5.
NOTA: Al utilizar el tapón para trituración, no se
deben instalar el deflector de descarga lateral ni el
receptor de césped (si lo tiene).
■ Levante la puerta de descarga posterior.
■ Tome el tapón para trituración por el mango e
inclínelo a un ángulo de aproximadamente 15 grados.
■ Introduzca el tapón en la abertura de descarga posterior.
■ Baje la puerta de descarga posterior.
INSTALACIÓN DEL RECEPTOR DE CÉSPED
Vea la gura 6.
NOTA: Al utilizar el receptor de césped, no instale el
deector de descarga lateral ni el tapón para trituración.
■ Levante la puerta de descarga posterior.
■ Levante el receptor de césped por su mango y
colóquelo debajo de la puerta de descarga posterior
de modo que los ganchos del receptor de césped
queden asentados en la barra de la puerta.
■ Suelte la puerta de descarga posterior. Cuando
estén correctamente instalados, los ganchos del
receptor de césped saldrán por las aberturas de la
puerta de descarga posterior.
AJUSTE DE LA ALTURA DE LA CUCHILLA
Vea la gura 7.
Para enviarlas, las ruedas de la podadora se ajustan
en una posición de corte bajo. Antes de usar la
podadora por primera vez, ajuste la posición de corte
a la altura más adecuada para su pasto. El pasto
promedio debe tener una longitud de entre 38,1 mm
(1-1/2 pulg.) y 50,8 mm (2 pulg.) durante los meses
fríos, y entre 50,8 mm (2 pulg.) y 82,5 mm (3-1/4
pulg.) durante los meses calurosos.
Para ajustar la altura de la cuchilla:
■ Para levantar la altura de la cuchilla, tome la
palanca de ajuste de altura y muévala hacia la parte
posterior de la podadora.
■ Para bajar la altura de la cuchilla, tome la palanca
de ajuste de altura y muévala hacia la parte delantera
de la podadora.
Page 30

FUNCIONAMIENTO
USOS
Este producto puede emplearse para el n señalado
abajo:
■ Podar el pasto
ENCENDIDO Y APAGADO DE LA PODADORA
Vea la gura 8.
■ Conecte el extremo de la toma de un cordón de
extensión a la clavija en la parte posterior de la
podadora.
NOTA: Utilice únicamente un cordón de extensión
para intemperie aprobado como se explicó
anteriormente en este manual.
■ Mantenga pulsado el botón de arranque. Tire de la
interruptor de agarre hacia la empuñadura y suelte el
botón para encender el cortacésped.
■ Para detener el cortacésped, suelte la interruptor
de agarre.
NOTA: Puede haber un sonido agudo y chispeo
mientras el motor eléctrico desacelera. Esto es
normal.
SUGERENCIAS PARA EL PODADO
Vea las guras 9 y 10.
■ Asegúrese de que el pasto no tenga piedras, palos,
alambres ni otros objetos que puedan dañar las
cuchillas o el motor de la podadora de pasto. Dichos
objetos podrían ser lanzados accidentalmente por la
podadora en cualquier dirección y provocar lesiones
serias al operador y a otras personas.
■ Para reducir la probabilidad de desconectar la
podadora de pasto del cordón de extensión, asegúrese
de usar el retén para el cordón suministrado.
■ No pode el pasto en círculos. Comience desde el
lugar más cercano a la toma, y desplácese hacia
adelante y hacia atrás por el pasto, alejándose de la
toma de modo que el cordón permanezca detrás de
la podadora en la parte cortada del pasto.
■ No permita que el cordón de extensión se enrolle
en árboles, arbustos ni otros obstáculos. Al levantar
el cordón de extensión, enrosque el cordón en una
serie de lazadas iguales para evitar que se enrede.
■ Para tener un pasto saludable, siempre corte un
tercio o menos de la longitud total del césped.
■ Al cortar césped frondoso, reduzca la velocidad
mientras camina para poder obtener un corte más
ecaz y una descarga adecuada de los recortes.
■ No corte el césped cuando está mojado. Se pegará
a la parte inferior del piso e impedirá que se trituren
correctamente los recortes de césped.
■ El césped nuevo o grueso puede requerir un corte
más bajo.
■ Limpie la parte inferior del piso de la podadora
después de cada uso para eliminar recortes
de césped, hojas, suciedad y otros desechos
acumulados.
MANEJO EN PENDIENTES
See Slope Gauge on Page vi.
■ Las pendientes son una de las causas principales
de accidentes por resbalones y caídas que pueden
provocar lesiones graves. El manejo en pendientes
requiere precaución extra. Si se siente inseguro en
una pendiente, no la pode. Para su seguridad, no
intente podar pendientes de más de 15 grados.
■ Pode atravesando las pendientes; no hacia arriba
ni hacia abajo. Tenga mucha precaución al cambiar
de dirección en una pendiente.
■ Tenga cuidado con los pozos, surcos, piedras,
objetos ocultos o montículos que puedan provocar
que se resbale o tropiece. El césped alto puede
ocultar obstáculos. Retire todos los objetos como
piedras, ramas de árboles, etc., que puedan provocar
tropezones o ser lanzados por la cuchilla.
■ Siempre asegúrese de su postura. Un resbalón
y caída puede provocar lesiones serias. Si siente
que está perdiendo el equilibrio, suelte el mango de
control del motor/cuchilla inmediatamente.
■ No pode el pasto cerca de precipicios, zanjas o
terraplenes; podría perder la rmeza de la postura o
el equilibrio.
No permita que su
familarización con este tipo deproducto lo vuelva
descuidado. Tenga presente que un descuido de un
instante es suciente para causar una lesión grave.
Cuando utilice este
producto, póngase siempre gafas de seguridad
o anteojos protectores con protección lateral. La
inobservancia de esta advertencia puede causar el
lanzamiento de objetos a los ojos, y por consecuencia
posibles lesiones serias.
No utilice ningún aditamento
o accesorio no recomendado por el fabricante de este
producto. El empleo de aditamentos o accesorios no
recomendados puede causar lesiones serias.
ADVERTENCIA!
ADVERTENCIA!
ADVERTENCIA!
10 — Español
Page 31

FUNCIONAMIENTO
USO DEL RETENEDOR DEL CABLE
Vea las guras 11 y 13.
Esta podadora está equipada con un retenedor
de cable para evitar que la extensión eléctrica se
desconecte del cable de alimentación mientras se
encuentra en uso. El retenedor del cable cuelga
desde la barra guía de éste.
NOTA: No enchufe la extensión eléctrica en el
tomacorriente hasta que ésta esté conectada al
retenedor de cable y enchufada en la podadora.
Para usar el retenedor del cable:
• Doble la extensión eléctrica de manera que forme
un bucle rme cerca del retenedor.
• Empuje el bucle a través del oricio inferior del
retenedor.
• Deslice el bucle sobre el sujetador del retenedor y
jale hacia abajo hasta que el cable esté rme.
VACIADO DEL RECEPTOR DE CÉSPED
Vea la gura 14.
■ Levante el receptor de césped por el mango y
levántelo para retirarlo de la podadora.
■ Vacíe los recortes de césped.
■ Levante la puerta de descarga posterior y vuelva
a instalar el receptor de césped. como se explicó
anteriormente en este manual.
11 — Español
Page 32

12 — Español
MANTENIMIENTO
MANTENIMIENTO GENERAL
Evite el empleo de solventes al limpiar piezas de
plástico. La mayoría de los plásticos son susceptibles
a diferentes tipos de solventes comerciales y pueden
resultar dañados. Utilice paños limpios para eliminar
la suciedad, el polvo, el aceite, la grasa, etc.
Revise periódicamente el apriete de todos los pernos
y tuercas para asegurar un manejo seguro de la
podadora.
Elimine el césped y las hojas acumuladas sobre
la cubierta del motor o a su alrededor. Limpie
ocasionalmente la podadora con un paño seco. No
utilice agua.
LUBRICACIÓN
Todos los cojinetes de este producto están lubricados
con suciente cantidad de aceite de alta calidad para
toda la vida útil de la unidad en condiciones normales
de funcionamiento. Por lo tanto, no se necesita
lubricación adicional de los cojinetes.
Al inicio y al nal de cada temporada de podado:
■ Lubrique los resortes en la puerta de descarga
posterior con aceite de baja viscosidad.
■ Lubrique la palanca de ajuste de altura y las
piezas de ferretería relacionadas con aceite de baja
viscosidad.
■ Retire las ruedas y lubrique la supercie del perno
del eje y la supercie interior de la rueda con aceite
de baja viscosidad.
■ Retire el conjunto de la cuchilla y el cubo de la
cuchilla, y lubrique el eje del motor con aceite de baja
viscosidad o aceite para motor. Consulte la sección
Reemplazo de la cuchilla para obtener instrucciones
sobre cómo retirar la cuchilla.
REEMPLAZO DE LA CUCHILLA
Vea las guras 15 y 16.
NOTA: Sólo utilice cuchillas de repuesto idénticas.
■ Apague el motor y desconecte el suministro de
corriente. Permita que la cuchilla se detenga por
completo.
■ Gire la podadora sobre su costado.
■ Introduzca a presión un bloque de madera entre la
cuchilla y el piso de la podadora para evitar que la
cuchilla gire.
■ Afloje la tuerca de la cuchilla usando una llave
de tuercas o de boca tubular de 15 mm (no se
suministra).
■ Retire la tuerca de la cuchilla, el espaciador, el
aislante de cuchilla y la cuchilla.
■ Asegúrese de que el conjunto del ventilador esté
totalmente empujado contra el eje del motor.
■ Coloque la cuchilla nueva en el eje contra el conjunto
del ventilador. Asegúrese de que esté instalada con los
extremos curvos orientados hacia arriba, donde está
el piso de la podadora, y no hacia abajo, donde está el
suelo.
■ Vuelva a colocar el aislante de cuchilla y el
espaciador; luego, enrosque la tuerca de la cuchilla
en el eje y apriétela con los dedos.
NOTA: Asegúrese de volver a colocar todas las
piezas en el orden exacto en que fueron retiradas.
■ Apriete la tuerca de la cuchilla usando una llave
dinamométrica (no suministrada) para asegurar que
el perno esté apretado correctamente. La fuerza de
torsión recomendada para la tuerca de la cuchilla es
de 220-310 lb-pulg.
Al dar servicio a la unidad, sólo
utilice piezas de repuesto idénticas. El empleo de piezas
diferentes puede causar un peligro o dañar el producto.
Antes de efectuar
cualquier tarea de mantenimiento, asegúrese de
que la podadora esté desconectada del suministro
de corriente. La inobservancia de esta advertencia
podría causar lesiones serias.
No permita en ningún
momento que uidos para frenos, gasolina, productos
a base de petróleo, aceites penetrantes, etc., lleguen
a tocar las piezas de plástico. Las sustancias químicas
pueden dañar, debilitar o destruir el plástico, lo cual a
su vez puede producir lesiones corporales serias.
Siempre use gafas de
seguridad o anteojos protectores con protección lateral
al usar herramientas eléctricas o al soplar el polvo con
aire comprimido. Si la operación genera mucho polvo,
también póngase una mascarilla contra el polvo.
Siempre protéjase las
manos usando guantes gruesos y/o envolviendo
los bordes de corte de la cuchilla con paños y otro
material al realizar el mantenimiento de la cuchilla.
La inobservancia de esta advertencia podría causar
lesiones serias.
ADVERTENCIA!
ADVERTENCIA!
ADVERTENCIA!
ADVERTENCIA!
ADVERTENCIA!
Page 33

MANTENIMIENTO
AFILADO DE LA CUCHILLA
Vea la gura 17.
Para lograr un desempeño de podado óptimo, la
cuchilla de la podadora debe mantenerse alada. Una
cuchilla desalada no corta el césped uniformemente
y sobrecarga el motor. En circunstancias normales,
alar la cuchilla dos veces durante la temporada de
podado suele ser suciente. Sin embargo, si su pasto
tiene suelo arenoso, puede ser necesario alarla con
más frecuencia.
■ Siguiendo las instrucciones de la sección Reemplazo
de la cuchilla, retire la cuchilla de la podadora.
NO intente afilar la cuchilla cuando está unida a la
podadora.
■ Usando una lima de diente no o una piedra, ale
los bordes de corte a ambos extremos de la cuchilla,
eliminando igual cantidad de material de ambos
extremos.
EQUILIBRIO DE LA CUCHILLA
Vea la gura 18.
Al afilarla, debe tenerse cuidado de mantener el
equilibrio de la cuchilla. Una cuchilla desequilibrada
causará una vibración excesiva cuando la podadora
esté funcionando.
Esta vibración finalmente dañará la podadora,
especialmente el motor.
Para revisar el equilibrio de la cuchilla:
■ Sujete horizontalmente un destornillador con una
prensa, como se muestra.
NOTA: Si no hay ninguna prensa, un clavo recto
impulsado en el costado de un banco de trabajo
también se puede utilizar.
■ Coloque el oricio central de la cuchilla en el fuste
Al retirarla, inspeccione la
cuchilla con cuidado. Si la cuchilla está doblada o
dañada, reemplácela inmediatamente por una nueva.
No reemplazar una cuchilla doblada o dañada puede
causar un accidente, y como consecuencia posibles
lesiones serias.
ADVERTENCIA!
del destornillador (o clavo).
■ Si la cuchilla está equilibrada, permanecerá en
posición horizontal. Si algún extremo de la cuchilla
se cae, ale el lado más pesado hasta que la cuchilla
esté equilibrada.
GUARDADO DE LA PODADORA
■ Desconecte la podadora del suministro de corriente.
■ Gire la podadora sobre su costado y limpie los
recortes de césped que se acumularon en la parte
inferior del piso de la podadora.
■ Limpie la podadora con un paño seco.
■ Verifique el apriete de todos los pernos, tuercas,
perillas, tornillos, sujetadores, etcétera.
■ Inspeccione las piezas móviles para ver si hay
daños, rupturas y desgaste. Haga que reparen todas
las piezas dañadas o faltantes.
■ Guarde la podadora en el interior, en un lugar
limpio y seco, lejos del alcance de los niños.
■ No la guarde cerca de materiales corrosivos como
fertilizantes o sal gema.
Para bajar el mango antes de guardar la unidad:
■ Afloje enteramente las perillas del mango a los
lados del mango y pliegue el mango superior hacia
abajo.
■ Presione hacia adentro a cada lado del mango inferior
y levante los lados del mango inferior por sobre los
bordes de los apoyos de montaje del mango.
■ Pliegue el mango inferior hacia adelante,
asegurándose de no doblar o torcer el cordón
eléctrico.
13 — Español
Page 34

 Loading...