

Page 1
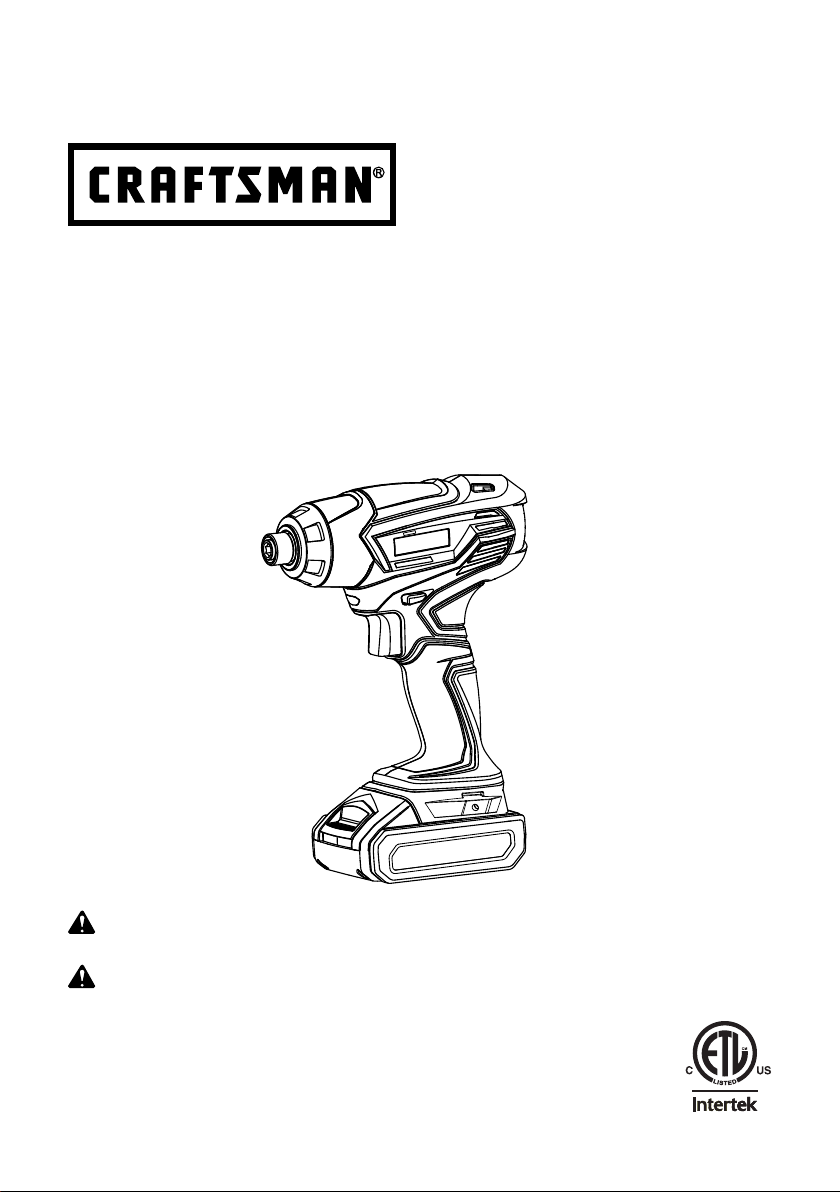
OPERATOR′S MANUAL
MANUAL DEL USUARIO
20V MAX* LITHIUM-ION
CORDLESS IMPACT DRIVER
DESTORNILLADOR DE IMPACTO INALÁMBRICO
CON BATERÍA DE IONES DE LITIO, 20V MÁX*
Model No. 125.ID20A
Número de modelo. 125.ID20A
WARNING:
the Operator’s Manual before using this product.
ADVERTENCIA:
comprender el manual antes de utilizar este producto.
Sears Brands Management Corporation, Hoffman Estates, IL 60179 USA
Save this manual for future reference.
Conserve este manual para futura referencia.
* Maximum initial battery voltage (measured without workload) is 20 volts.
Nominal working voltage is 18 volts.
* La tensión inicial máxima de la batería (medida sin carga) es 20 voltios.
La tensión de trabajo nominal es 18 voltios.
To reduce the risk of injury, the user must read and understand
Para reducir el riesgo de lesiones, el usuario debe leer y
Page 2

TABLE OF CONTENTS / TABLA DE CONTENIDOS
ENGLISH
■ Warranty ................................................................ 2
■ Introduction ............................................................ 2
■ Safety Instructions .............................................. 3-5
■ Symbols .............................................................. 6-7
■ Features ................................................................ 8
■ Assembly ............................................................. 9
■
Operation For
■ Care & Maintenance .............................................12
■ Troubleshooting ................................................... 13
■ Illustrated Parts List ........................................ 14-15
■ Figure Numbers (Illustrations) ............................ i-ii
CRAFTSMAN LIMITED WARRANTY
FOR ONE YEAR from the date of sale this power tool is warranted against defects in material or
workmanship.
WITH PROOF OF SALE a defective product will be replaced free of charge.
For warranty coverage details to obtain free replacement, visit the web page:
www.craftsman.com/warranty
This warranty does not cover the bit, which is an expendable part that can wear out from normal use within
the warranty period.
This warranty applies for only 90 days from the date of sale if this product is ever used while providing
commercial services or if rented to another person.
This warranty gives you specic legal rights, and you may also have other rights which vary from state to
state.
Sears Brands Management Corporation, Hoffman Estates, IL 60179
GARANTÍA LIMITADA CRAFTSMAN
POR UN AÑO a partir de la fecha de venta, esta herramienta eléctrica está garantizada contra defectos de
materiales o mano de obra.
Un producto defectuoso será reemplazado de manera gratuita contra presentación de una PRUEBA DE
VENTA.
Para conocer la cobertura de la garantía y obtener un reemplazo gratuito, visite el sitio Web:
www.craftsman.com/warranty
Esta garantía no cubre la broca, la cual es una pieza desechable que puede desgastarse debido al uso
normal dentro del periodo de garantía.
La garantía se aplica durante un periodo de solo 90 días si el producto se usa para proporcionar servicios
comerciales o si se le arrienda a otra persona.
Esta garantía le entrega derechos legales especícos que pueden variar según su estado (podría tener otros
derechos adicionales).
Sears Brands Management Corporation, Hoffman Estates, IL 60179
Impact Driver ..........................10-11
ESPAÑOL
■ Garantía ............................Sección de Inglés pág. 2
■ Introducción ......................Sección de Inglés pág. 2
■ Instrucciones de seguridad ................................ 3-5
■ Símbolos ............................................................ 6-7
■ Características ....................................................... 8
■ Armado ................................................................ 9
■ Uso del destornillador de impacto.......................10-11
■ Cuidado y mantenimiento......................................12
■ Resolución de problemas..................................... 13
■ Lista de piezas, ilustrada......................... 14-15
■ Números de las guras (ilustraciones)................ i-ii
* * *
INTRODUCTION / INTRODUCCIÓN
This tool has many features for making its use more pleasant and enjoyable. Safety, performance, and
dependability have been given top priority in the design of this product making it easy to maintain and
operate.
* * *
Esta herramienta tiene muchas funciones para hacerla más agradable y cómoda de usar. Se ha dado
máxima prioridad a la seguridad, rendimiento y dependencia en las etapas de diseño de este producto
para que sea fácil de utilizar y mantener.
2 ― English
Page 3

SAFETY INSTRUCTIONS
WARNING
Read and understand all instructions. Failure
to follow all instructions listed below may result
in electric shock, re and/or serious personal injury.
Save all warnings and instructions for future
reference. The term “power tool” in the warnings
refers to your mains-operated
tool or battery-operated (cordless) power tool.
WORK AREA SAFETY
■ Keep work area clean and well lit. Cluttered
or dark areas invite accidents.
■ Do not operate power tools in explosive
atmospheres, such as in the presence of
ammable liquids, gases or dust. Power
tools create sparks which may ignite the dust
or fumes.
■ Keep children and bystanders away while
operating a power tool. Distractions can
cause you to lose control.
ELECTRICAL SAFETY
■ Power tool plugs must match the outlet.
Never modify the plug in any way. Do not
use any adaptor plugs with earthed
(grounded) power tools. Unmodied plugs
and matching outlets will reduce risk of
electric shock.
■ Avoid body contact with earthed or grounded
surfaces such as pipes, radiators, ranges
and refrigerators. There is an increased risk
of electric shock if your body is earthed or
grounded.
■ Do not expose power tools to rain or wet
conditions. Water entering a power tool will
increase the risk of electric shock.
■ Do not abuse the cord. Never use the cord
for carrying, pulling or unplugging the power
tool. Keep cord away from heat, oil, sharp
edges or moving parts. Damaged or
entangled cords increase the risk of electric
shock.
■ When operating a power tool outdoors,
use an extension cord suitable for outdoor
use. Use of a cord suitable for outdoor use
reduces the risk of electric shock.
■ If operating a power tool in a damp location
(corded) power
is unavoidable, use a ground fault circuit
interrupter (GFCI) protected supply. Use of
a GFCI reduces the risk of electric shock.
PERSONAL SAFETY
■ Stay alert, watch what you are doing and
use common sense when operating a
power tool. Do not use tool while tired or
under the inuence of drugs, alcohol, or
medication. A moment of inattention while
operating power tools may result in serious
personal injury.
■ Use personal protective equipment. Always
wear eye protection. Protective equipment
such as dust mask, non-skid safety shoes,
hard hat, or hearing protection used for
appropriate conditions will reduce personal
injuries.
■ Prevent unintentional starting. Ensure the
switch is in the off-position before
connecting to power source and/or battery
pack, picking up or carrying the tool.
Carrying power tools with your nger on the
switch or energizing power tools that have
the switch on invites accidents.
■ Remove any adjusting key or wrench
before turning the power tool on. A wrench
or a key left attached to a rotating part of
the power tool may result in personal injury.
■ Do not overreach. Keep proper footing
and balance at all times. This enables
better control of the power tool in
unexpected situations.
■ Dress properly. Do not wear loose clothing
or jewelry. Keep your hair, clothing and
gloves away from moving parts. Loose
clothes, jewelry or long hair can be caught
in moving parts.
■ If devices are provided for the connection
of dust extraction and collection facilities,
ensure these are connected and properly
used. Use of these devices can reduce dust
related hazards.
POWER TOOL USE AND CARE
■ Use only with compatible Craftsman 20V
Max powered by DieHard slide-type lithiumion battery packs.
3 ― English
Page 4

SAFETY INSTRUCTIONS
■ Do not use the power tool if the switch
does not turn it on and off. Any power tool
that cannot be controlled with the switch is
dangerous and must be repaired.
■ Disconnect the plug from the power source
and/or the battery pack from the power tool
before making any adjustments, changing
accessories, or storing power tools. Such
preventive safety measures reduce the risk
of starting the power tool accidentally.
■ Store idle power tools out of the reach of
children and do not allow persons unfamiliar
with the power tool or these instructions
to operate the power tool. Power tools are
dangerous in the hands of untrained users.
■ Maintain power tools. Check for
misalignment or binding of moving parts,
breakage of parts and any other condition
that may affect the power tool’s operation.
If damaged, have the power tool repaired
before use. Many accidents are caused by
poorly maintained power tools.
■ Keep cutting tools sharp and clean.
Properly maintained cutting tools with sharp
cutting edges are less likely to bind and are
easier to control.
■ Use the power tool, accessories and
tool bits etc. in accordance with these
instructions, taking into account the working
conditions and the work to be performed.
Use of the power tool for operations
different from those intended could result in
a hazardous situation.
■ Hold power tool by insulated gripping
surfaces when performing an operation
where the cutting accessory may contact
hidden wiring. Cutting accessory contacting
a "live" wire may make exposed metal parts
of the power tool "live" and could give the
operator an electric shock.
■ Know your power tool. Read Operator's
Manual carefully. Learn its applications
and limitations, as well as the specic
potential hazards related to this power tool.
Following this rule will reduce the risk of
electric shock, re, or serious injury.
■ Always wear eye protection with side
shields marked to comply with ANSI
Z87.1 when assembling parts, operating
the tool, or performing maintenance.
Following this rule will reduce the risk of
serious personal injury.
■ Protect your lungs. Wear a face or dust
mask if the operation is dusty. Following
this rule will reduce the risk of serious
personal injury.
■ Protect your hearing. Wear hearing
protection during extended periods of
operation. Following this rule will reduce
the risk of serious personal injury.
■ Battery tools do not have to be plugged
into an electrical outlet; therefore, they
are always in operating condition. Be
aware of possible hazards when not
using your battery tool or when changing
accessories. Following this rule will
reduce the risk of electric shock, re, or
serious personal injury.
■ Do not use on an unstable support. Stable
footing on a solid surface enables better
control of the power tool in unexpected
situations.
■ Do not force the power tool. Use the
correct power tool for your application.
The correct power tool will do the job
better and safer at the rate for which it
was designed.
■ Do not touch the bit or the workpiece
immediately after operation. They may be
extremely hot and could burn your skin.
■ Keep hands away from rotating parts.
■
Save these instructions.
Refer to them frequently and use them to
instruct others who may use this product.
If you loan someone this product, loan
them these instructions also.
4 ― English
Page 5

SAFETY INSTRUCTIONS
CALIFORNIA PROPOSITION 65
WARNING
Drilling, sawing, sanding or machining wood
products can expose you to wood dust, a
substance known to the State of California
to cause cancer. Avoid inhaling wood dust
or use a dust mask or other safeguards for
personal protection.
For more information go to:
www.P65Warnings.ca.gov/wood
Wash hands after handling.
5 ― English
Page 6
SYMBOLS
Some of the following symbols may be used on this product. Please study them and
learn their meaning. Proper interpretation of these symbols will allow you to operate
the product better and safer.
SYMBOL NAME DESIGNATION/EXPLANATION
V Volts Voltage
A Amperes Current
Hz Hertz Frequency (cycles per second)
W Watt Power
min Minutes Time
Alternating Current Type of current
Direct Current Type or a c haracteristic of current
Rotational s peed, at no load
Revolutions, strokes, s urface s peed,
orbits, etc., per minute
Do not expose to rain or use in damp
locations.
To reduce the risk of injur
ad and understand operator’s manual
re
before using this product.
y, user must
.../mi n
No-load Speed
Class II Construction Double-insulated construction
Per Minute
Wet Conditions Alert
Read The O perator’s Manual
Eye protection
Safety Alert
No-Hands Symbol
Hot Surface
Recycle Symbol
Always wear eye protection with side
shields marked to comply with ANSI Z87.1.
Prec autions that involve your safety.
Failure to keep your hands away from the
blade will result in serious personal injury.
To reduce the risk of injury or damage,
avoid contact with any hot surface.
This product uses lithium-ion batteries. Local, state,
or federal laws may prohibit disposal of batteries in
ordinary trash. Consult your local waste authority
for information regarding available recycling and/or
disposal options.
6 ― English
Page 7
SYMBOLS
The following signal words and meanings are intended to explain the levels of risk
associated with this product.
SYMBOL SIGNAL MEANING
DANGER
Indicates an imminently hazardous situation, which, if not
avoided, will result in death or serious injury.
WARNING
CAUTION
NOTICE
Indicates a potentially hazardous situation, which, if not
avoided, could result in death or serious injury.
Indicates a potentially hazardous situation, which, if not
avoided, may result in minor or moderate injury.
(Without Safety Alert Symbol) Indicates a situation that may
result in property damage.
7 ― English
Page 8

FEATURES
PRODUCT SPECIFICATIONS
Impact Driver
Model No. ..................................................................................................................125.ID20A
Type...................................................................................................Cordless, battery-powered
Motor.................................................................................................................... 20 V max* d.c.
Quick Release Chuck Size..........................................................................1/4 in (6.35 mm) hex
No-load Speed....................................................................................................... 0-2500 rpm
Impact Frequency.................................................................................................... 0-3100 bpm
Maximum Torque…………....................................................………………………1100 in-lbs
Weight(with included battery)....................................................................................... 2.8 lbs
KNOW YOUR IMPACT DRIVER
See Figure 1, page i
The safe use of this product requires an
understanding of the information on the
product labeling and in this Operator's
Manual as well as knowledge of the project
you are attempting. Before use of this
product, familiarize yourself with all operating
features and safety rules.
VARIABLE SPEED
The variable-speed trigger switch delivers
higher speed with increased trigger pressure
and lower speed with decreased trigger
pressure.
QUICK RELEASE CHUCK
The quick release chuck allows you to quickly
and easily install or remove the driver bit.
DIRECTION-OF-ROTATION SELECTOR
The impact driver has a direction-of-rotation
selector located above the trigger switch for
changing the direction of bit rotation.
Set the selector in the OFF (center-lock)
position to reduce the possibility of accidental
starting when tool is not in use.
LED WORKLIGHT
The LED worklight, located above the trigger
switch of the impact driver, illuminates when
the trigger switch is depressed. This feature
provides extra light for increased visibility.
8 ― English
Page 9

ASSEMBLY
UNPACKING
This product requires assembly.
■ Carefully remove the product and any
accessories from the box. Make sure
that all items listed in the packing list are
included.
Do not use this product
WARNING!
if any parts on the Packing List are already
assembled to your product when you unpack
it. Parts on this list are not assembled to the
product by the manufacturer and require
customer installation. Use of a product that
may have been improperly assembled could
result in serious personal injury.
■ Inspect the product carefully to make sure
no breakage or damage occurred during
shipping.
■ Do not discard the packing material until
you have carefully inspected and
satisfactorily operated the product.
■ If any parts are damaged or missing, do not
operate the product. Return it for
replacement to the retailer from which it
was purchased.
PACKING LIST
(1) 20V Cordless Impact Driver
(1) Driver Bit
(1) Operator's Manual
WARNING:
missing, do not attempt to attach the battery
pack or operate the drill until the broken or
missing parts are replaced. Failure to do so
could result in possible serious injury.
If any parts are broken or
WARNING:
modify this tool or create accessories not
recommended for use with this tool. Any such
alteration or modication is misuse and could
result in a hazardous condition leading to
possible serious injury.
WARNING:
starting that could cause serious personal
injury, always remove the battery pack from
the tool when changing bits.
Do not attempt to
To prevent accidental
9 ― English
Page 10

OPERATION FOR IMPACT DRIVER
This product will accept Craftsman 20V
Max powered by DieHard slide-type lithiumion battery packs. For complete charging
instructions, refer to the Operator’s Manual
for the battery packs and chargers.
WARNING:
starting that could cause serious personal
injury, always remove the battery pack from
the tool when assembling parts, making
adjustments, installing or removing a bit,
cleaning, or when it is not in use.
To prevent accidental
TO ATTACH BATTERY PACK
See Figure 2, page ii
To install the battery pack, align the tongue
on the battery pack with the groove in the
housing and slide it into place. Insert it all the
way until it locks in place with a click.
NOTICE:
battery pack snaps into place and the battery
pack is secured to the tool before beginning
operation. Improper assembly of the
battery pack can cause damage to internal
components.
Make sure that the latch on the
TO DETACH BATTERY PACK
See Figure 2, page ii
To remove the battery pack, slide it from the
tool while pressing the button on the front of
the pack.
WARNING:
operating condition. To prevent accidental
starting, always set the direction-of-rotation
selector to the OFF position when the tool is
not in use or when carrying the tool at your
side. Ordinarily, always carry the tool by its
handgrip. If the tool is tted with a belt hook,
it may be hung from your belt.
Battery tools are always in
VARIABLE-SPEED TRIGGER SWITCH
See Figure 3, page ii
To turn the impact driver ON, depress the
trigger switch. To turn it OFF, release the
trigger switch.
The variable-speed trigger switch delivers
higher speed with increased trigger pressure
and lower speed with decreased trigger
pressure.
DIRECTION-OF-ROTATION SELECTOR
(FORWARD / CENTER-LOCK / REVERSE)
See Figure 4, page ii
The direction of bit rotation is reversible and
is controlled by a selector located above the
trigger switch. With the impact driver held in
normal operating position, as shown in Figure
4:
1. Position the direction-of-rotation selector
to the left of the tool for forward rotation.
2. Position the direction-of-rotation selector
to the right of the tool for reverse.
3. Set the selector in the OFF (centerlock) position to reduce the possibility of
accidental starting when the tool is not in
use.
NOTICE:
allow the impact driver to come to a complete
stop before changing the direction-of-rotation.
NOTICE:
unless the direction-of-rotation selector is
engaged fully to the left or right.
To prevent gear damage, always
The impact driver will not run
ELECTRIC BRAKE
To stop the impact driver, release the trigger
switch and allow the tool to come to a
complete stop. The electric brake quickly
stops the chuck from rotating. This feature
engages automatically when you release the
trigger switch.
LED WORKLIGHT
See Figure 5, page ii
The LED worklight, located above the trigger
switch of the impact driver, will illuminate
when the trigger switch is depressed. This
provides additional light on the surface of the
workpiece. The LED worklight will turn off
when the trigger switch is released.
INSTALLING OR REMOVING BIT
See Figure 6, page ii
To install the driver bit, pull the sleeve in the
direction of the arrow and insert the driver
bit into the sleeve as far as it will go. Then
release the sleeve to secure the driver bit. To
remove the driver bit, pull the sleeve in the
direction of the arrow and pull the driver bit
out.
NOTE:
type supplied with the purchase of this impact
driver. See Figure 6, page ii. The bits have
Use only driver/socket bits of the
10 ― English
Page 11

OPERATION FOR IMPACT DRIVER
grooves near the insertion ends that allow the
sleeve to grip the bit securely. Do not use any
other type of bit.
If the driver bit is not inserted deep
NOTE:
enough into the sleeve, the sleeve will not
return to its original position and the driver
bit will not be secured. In this case, try reinserting the bit according to the instructions
above.
NOTE:
sure that it is rmly secured. If it comes out,
do not use it.
NOTE:
sleeve to use a socket with the impact driver.
After inserting the driver bit, make
Insert a socket adaptor into the
BELT HOOK (AVAILABLE
SEPARATELY)
See Figure 7, page ii
A belt hook is available for separate
purchase. The hook enables you to
conveniently hang the tool from your belt
when tool is not in use.
Install the hook on either side of the tool.
Insert the tab of the hook into the slot in the
tool base. Secure the hook by tightening the
screw through the hole in the hook into the
hole in the base.
To purchase the hook, see Replacement
Parts on page 14 of this manual.
11 ― English
Page 12

CARE & MAINTENANCE
WARNING:
identical replacement parts as listed in this
manual. Use of any other parts may create a
hazard or cause product damage.
WARNING:
injury, always remove the battery pack from
the tool when cleaning or performing any
maintenance.
When servicing, use only
To avoid serious personal
GENERAL MAINTENANCE
Avoid using solvents when cleaning plastic
parts. Most plastics are susceptible to
damage from various types of commercial
solvents and may be damaged by their use.
Use clean clothes to remove dirt, dust, oil,
grease, etc.
WARNING:
uids, gasoline, petroleum-based products,
penetrating oils, etc. come in contact with
plastic parts. Chemicals can damage, weaken
or destroy plastic which may result in serious
personal injury.
WARNING:
identical replacement parts as listed in this
manual. Use of any other parts may create a
hazard or cause product damage. To ensure
safety and reliability, all repairs should be
performed by a qualied service technician.
Do not at any time let brake
When servicing, use only
TRANSPORTATION
■ Set the rotation selector to OFF and
remove battery pack before transporting
tool anywhere.
■ Ordinarily, always carry the tool by its hand
grip. If the tool is tted with a belt hook, it
may be hung from your belt.
■ Protect the tool from any heavy impact or
strong vibrations which may occur during
transportation in vehicles.
CLEANING
Remove the Battery Pack
■ Brush or blow dust and debris out of the air
vents using compressed air or a vacuum.
■ Keep the air vents free of obstructions,
sawdust, and wood chips. Do not spray,
wash, or immerse the air vents in water.
■ Wipe off the housing and the plastic
components using a moist, soft cloth.
■ Do not use strong solvents or detergents
on the plastic housing or plastic
components. Certain household cleaners
may cause damage, and may cause a
shock hazard.
STORAGE
■ Remove the battery pack from the tool
before storing.
■ Clean all foreign material from the tools.
■ Store the tools and its accessories in a dry,
frost free place.
■ Always store the tools in a place that is
inaccessible to children. The ideal storage
temperature is between 40°F (4°C) and
100°F (38°C).
■ Keep tools away from corrosive agents
such as garden chemicals and de-icing
salts.
■ We recommend using the original package
for storage or covering the product with a
suitable cloth to protect it against dust.
12 ― English
Page 13

TROUBLESHOOTING
PROBLEM CAUSE SOLUTION
Battery is defective. Replace with new, charged battery.
Tool will not turn on.
Bit cannot be installed.
Motor overheats.
Switch is dead. Tool must be replaced.
Brushes are worn out. Tool must be replaced.
Sleeve is not released. Release the sleeve.
Bit does not t into the quick-change
chuck.
Cooling vents are clogged with saw
dust or debris, or are being covered
by hand during operation.
Use appropriately sized 1/4 in.
hexagonal quick-change bit.
Clear vents with compressed air.
Do not cover vents with hand during
operation.
13 ― English
Page 14

CRAFTSMAN 20V MAX* LITHIUM-ION CORDLESS IMPACT DRIVER-MODEL NUMBER 125.ID20A
The model number will be found on a label attached to the motor housing.
TO PURCHASE REPLACEMENT PARTS, CALL 1-888-331-4569
2
1
3
4
14 ― English
Page 15

CRAFTSMAN 20V MAX* LITHIUM-ION CORDLESS IMPACT DRIVER-MODEL NUMBER 125.ID20A
The model number will be found on a label attached to the motor housing.
TO PURCHASE REPLACEMENT PARTS, CALL 1-888-331-4569
ITEM NO. PART NO. DESCRIPTION QTY
1 125.ID20A-B
2 411002102
3 411002103
4 411001108
Impact Driver Tool Body
Chuck Sleeve Set
Driver Bit
Belt Hook Set (Available Separately)
1
1
1
0
15 ― English
Page 16

See this section for all of the gures referenced in the
Operator’s Manual.
(Consulte esta sección para ver todas las guras mencionadas
en el manual del usuario.)
Fig. 1
B
D
A
F
E
A. Variable-Speed Trigger Switch (Gatillo de velocidad variable)
B. Quick Release Chuck (Mandril de liberación rápida)
C. Direction-of-Rotation Selector (Selector de la dirección de giro)
D. LED Worklight (Luz de trabajo LED)
E. Battery Pack (Batería)
F. Handgrip (Empuñadura)
C
i
Page 17

Fig. 2
B
A
A. Battery-Release Button
(Botón de liberación de la batería)
Fig. 3
Fig. 4
A. Direction-Of-Rotation Selector
(Selector de la dirección de giro)
Fig. 5
A. LED Worklight (Luz de trabajo LED)
A
A. Variable-Speed Trigger Switch
(Gatillo de velocidad variable)
Fig. 6
A
A
B
12 mm
(15/32”)
9 mm
(3/8”)
A. Bit (Punta)
B. Quick Release Chuck
(Mandril de liberación rápida)
Fig. 7
A
A
B
A
A. Belt Hook (Gancho para cinturón)
B. Screw (Tornillo)
ii
Page 18

INSTRUCCIONES DE SEGURIDAD
ADVERTENCIA
Lea y asegúrese de comprender todas
las instrucciones. El incumplimiento de
las instrucciones indicadas a continuación
puede producir descargas eléctricas,
incendios o lesiones graves. Guarde todas
las advertencias e instrucciones para
usarlas como referencia a futuro. El término
“herramienta eléctrica” en las advertencias
se reere a su herramienta con alimentación
regular (con cable) o con batería (inalámbrica).
SEGURIDAD DEL ÁREA DE TRABAJO
■ Mantenga el área de trabajo limpia y bien
iluminada. Las zonas abarrotadas u oscuras
invitan a que ocurran accidentes.
■ No utilice herramientas eléctricas en
atmósferas explosivas como, por ejemplo,
en presencia de líquidos inamables,
gases o polvo. Las herramientas eléctricas
producen chispas que pueden hacer arder
polvo o gases.
■ Mantenga a niños y transeúntes alejados
cuando esté utilizando una herramienta
eléctrica. Las distracciones pueden provocar
que usted pierda el control.
SEGURIDAD ELÉCTRICA
■ Las herramientas eléctricas deben ser
apropiadas para el tomacorriente a utilizar.
Nunca modique el enchufe de modo
ninguno. No use enchufes adaptadores
con herramientas con conexión a tierra.
Los enchufes no modicados y los
tomacorrientes que les corresponden
reducirán el riesgo de choque eléctrico.
■ Evite el contacto corporal con supercies
conectadas a tierra, como tuberías,
radiadores, hornillos y refrigeradores. Existe
un mayor riesgo de choque eléctrico si su
cuerpo está conectado a tierra.
■ No exponga las herramientas eléctricas a
la lluvia o a condiciones de humedad. Si
entra agua en una herramienta eléctrica, se
incrementará el riesgo de que se produzcan
descargas eléctricas.
3 ― Español
■ No maltrate el cable. Nunca utilice el cable
para transportar la herramienta, jalar de ella
o desenchufarla. Mantenga el cable alejado
del calor, de aceites, bordes alados
o partes móviles. Los cables dañados
o enredados incrementan el riesgo de
sacudidas eléctricas.
■ Cuando maneje una herramienta eléctrica
en espacios exteriores, utilice un cable
alargador que sea adecuado para su
uso al aire libre. La utilización de un
cable adecuado para el uso en espacios
exteriores reduce el riesgo de choque
eléctrico.
■ Si no es posible evitar el uso de una
herramienta eléctrica en un entorno
húmedo, use una toma de alimentación
protegida con un interruptor de circuito para
fallas a tierra. Al usar este sistema reducirá
el riesgo de descargas eléctricas.
SEGURIDAD PERSONAL
■ Manténgase alerta, vigile lo que está
haciendo y haga uso de su sentido común
cuando maneje una herramienta eléctrica.
No use la herramienta cuando esté
cansado o bajo la inuencia de drogas,
alcohol o medicamentos. Un solo momento
de falta de atención mientras maneja
herramientas eléctricas puede derivar en
graves lesiones personales.
■ Utilice equipo protector personal. Lleve
siempre protección para los ojos. El equipo
protector, como máscaras contra el polvo,
calzado antideslizante de seguridad, un
casco duro o protección para los oídos,
utilizado en las condiciones adecuadas,
reducirá las lesiones personales.
■ Evite los arranques accidentales.
Asegúrese de que el interruptor se
encuentra en la posición de apagado antes
de conectar la herramienta a la fuente de
corriente o al paquete de batería, al cogerla
o al transportarla. Transportar herramientas
eléctricas con el dedo en el interruptor
o herramientas eléctricas energéticas
que tengan el interruptor en la posición
de encendido invita a que se produzcan
accidentes.
Page 19

INSTRUCCIONES DE SEGURIDAD
■ Quite cualquier herramienta o llave de
ajuste antes de encender la máquina.
Una herramienta o llave que se haya
quedado adosada a una pieza giratoria
de la máquina puede producir lesiones
personales.
■ No se extralimite. Mantenga los pies
en tierra rme y el equilibrio en todo
momento. Esto posibilita un mejor control
de la herramienta eléctrica en situaciones
imprevistas.
■ Lleve ropa adecuada. No se ponga prendas
anchas o joyas. Mantenga el pelo, la ropa y
los guantes alejados de las piezas móviles.
Las ropas que le queden sueltas, las joyas
o el pelo largo pueden quedar atrapados
en las piezas móviles.
■ Si se suministran dispositivos para la
conexión de extractores de polvo e
instalaciones de recogida, asegúrese de
que están conectados y están siendo
correctamente utilizados. El uso de estos
dispositivos puede reducir los peligros
relacionados con el polvo.
USO Y CUIDADO DE HERRAMIENTAS
ELÉCTRICAS
■ Use solo baterías de iones de litio tipo
deslizable Craftsman de 20 V impulsadas
por DieHard.
■ No utilice la herramienta eléctrica si
el interruptor no se enciende y apaga
correctamente. Cualquier herramienta
eléctrica que no se pueda controlar con
un interruptor es peligrosa y debe ser
reparada.
■ Desconecte el enchufe de la fuente de
corriente o del paquete de batería de la
herramienta eléctrica antes de llevar a
cabo cualquier ajuste, cambiar accesorios
o almacenar las herramientas eléctricas.
Estas medidas preventivas de seguridad
reducen el riesgo de que la herramienta
arranque accidentalmente.
■ Mantenga herramientas eléctricas
apagadas fuera del alcance de los
niños y no permita que personas que
no conozcan la herramienta eléctrica o
estas instrucciones utilicen la herramienta
eléctrica. Las herramientas eléctricas
son peligrosas cuando se encuentran
en manos de usuarios que no han sido
instruidos en su uso.
■ Mantenimiento de las herramientas
eléctricas. Revise la máquina por si
hubiera señales de desalineación,
ligaduras entre piezas móviles,
piezas rotas u otras condiciones que
pudieran afectar el funcionamiento de
la herramienta eléctrica. Si estuviese
dañada, lleve la herramienta eléctrica
a reparar antes de utilizarla. Muchos
accidentes son provocados por
herramientas eléctricas que no se han
sometido a un mantenimiento adecuado.
■ Mantenga las herramientas de corte
aladas y limpias. Las herramientas de
corte con bordes losos, cuando están
bien cuidadas, es menos probable que se
liguen y se controlan mejor.
■ Utilice la herramienta eléctrica, los
accesorios, etc. según dictan estas
instrucciones, teniendo en cuenta las
condiciones de trabajo y la tarea a
realizar. El uso de la herramienta eléctrica
para operaciones diferentes de aquellas
para las que fue diseñada podría derivar
en situaciones peligrosas.
■ Sostenga la herramienta solo desde las
supercies de agarre aisladas al realizar
operaciones en las que el accesorio de
corte pueda tocar cableado oculto. Un
accesorio de corte que toca a un cable
“vivo” puede hacer que piezas metálicas
expuestas de la herramienta eléctrica se
energicen, lo cual ejerce una descarga
eléctrica sobre el operador.
■ Conozca su herramienta eléctrica. Lea
atentamente el manual del usuario.
Aprenda sus aplicaciones y limitaciones,
así como también los posibles peligros
relacionados con esta herramienta.
Siga esta regla y reducirá el riesgo
de descargas eléctricas, incendios o
lesiones graves.
■ Use siempre protección ocular con
escudos laterales para cumplir con la
4― Español
Page 20

INSTRUCCIONES DE SEGURIDAD
normativa ANSI Z87.1 al ensamblar piezas,
operar la herramienta o realizar tareas de
mantenimiento. Siga esta regla y reducirá
el riesgo de sufrir lesiones severas.
■ Proteja sus pulmones. Utilice una
mascarilla o máscara facial si el uso del
equipo genera polvo. Siga esta regla
y reducirá el riesgo de sufrir lesiones
severas.
■ Proteja sus oídos. Use protección auditiva
durante periodos de uso extensos. Siga
esta regla y reducirá el riesgo de sufrir
lesiones severas.
■ Las herramientas con batería pueden
operar sin estar enchufadas a una toma
de corriente, por lo que siempre están
en condiciones operativas. Tenga en
cuenta posibles riesgos mientras no utiliza
su herramienta o cuando cambia sus
accesorios. Siga esta regla y reducirá el
riesgo de descargas eléctricas, incendios o
lesiones severas.
■ No use sobre un soporte inestable. Pisar
sobre una supercie sólida permite un
mejor control de la herramienta eléctrica
bajo situaciones inesperadas.
■ No fuerce la herramienta eléctrica. Utilice
la herramienta correcta para la tarea que
quiere realizar. La herramienta correcta
hará mejor el trabajo y de manera más
segura al ritmo para el que fue diseñada.
■ No toque la broca ni la pieza de trabajo
inmediatamente después de haber
terminado. Podría estar extremadamente
caliente y quemar su piel.
■ Mantenga sus manos alejadas de las
piezas giratorias.
PROPUESTA 65 DE CALIFORNIA
ADVERTENCIA
Perforar, serrar, lijar o manipular productos
de madera puede exponerlo al polvo de
madera, una sustancia conocida en el estado
de California como causante de cáncer.
Evite inhalar el polvo de madera o use una
mascarilla u otras medidas de protección
personal.
Para obtener más información visite:
www.P65Warnings.ca.gov/wood
Lávese las manos después de manipular
el producto.
■
Guarde estas instrucciones.
Consúltelas con frecuencia y úselas para
enseñar a otras personas a utilizar este
producto. Si le presta esta herramienta a
alguien, hágalo junto con estas
instrucciones.
5 ― Español
Page 21

SÍMBOLOS
Algunos de los siguientes símbolos podrían aparecer en este producto. Estúdielos
y aprenda su signicado. La interpretación adecuada de estos símbolos le permitirá
utilizar el producto de mejor manera y con más seguridad.
SÍMBOLO NOMBRE NOMBRE/EXPLICACIÓN
V
Volts Voltaje
A
Amperes Corriente
Hz
Hertz Frecuencia (ciclos por segundo)
W
Vatio Energía
min
.../mi n
Minutos Tiempo
Corriente alterna Tipo de corriente
Corriente continua Tipo o característica de la corriente
Sin velocidad de carga
Construcción clase II Doble aislación
Por minuto Revoluciones, golpes, velocidad de la superficie,
Alerta de condiciones
húmedas
Lea el manual de uso Para reducir el riesgo de lesiones, el usuario
Protección ocular
Alerta de seguridad Precauciones que involucran a su seguridad.
Velocidad de giro, sin carga
órbitas, etc., por minuto
No exponer a la lluvia ni usar en lugares
húmedos.
debe leer el manual de uso antes de utilizar
este producto.
Use siempre protección ocular con escudos
laterales para cumplir con la normativa
ANSI Z87.1.
Símbolo sin manos No mantener sus manos alejadas de la cuchilla
Superficie caliente Para reducir el riesgo de daños o lesiones,
Símbolo de reciclaje Este producto utiliza baterías de iones de litio.
provocará graves lesiones personales.
evite el contacto con cualquier superficie caliente.
Las leyes locales, estatales o federales podrían
prohibir la eliminación de baterías junto con la
basura común.
Consulte a su autoridad de eliminación local para
obtener información sobre la disponibilidad de
opciones de reciclaje o eliminación.
6― Español
Page 22

SÍMBOLOS
Las siguientes palabras y signicados están diseñados para explicar los niveles de
riesgo asociados a este producto.
SÍMBOLO SEÑAL SIGNIFICADO
PELIGRO
Indica una situación peligrosa inminente, la cual, de no
evitarse, causará una muerte o lesiones severas.
ADVERTENCIA
CUIDADO
AVISO
Indica una situación peligrosa potencial, la cual, de no
evitarse, podría causar una muerte o lesiones graves.
Indica una situación peligrosa potencial, la cual, de no
evitarse, podría causar una lesión menor o moderada.
(Sin símbolo de alerta de seguridad) Indica una situación
que podría causar daños a la propiedad.
7 ― Español
Page 23

CARACTERÍSTICAS
ESPECIFICACIONES DEL PRODUCTO
Destornillador de impacto
N° de modelo..............................................................................................................125.ID20A
Tipo.......................................................................................................Inalámbrico, con batería
Motor...................................................................................................................20 V máx.* d.c.
Tamaño del mandril de liberación rápida.........................................6,35 mm (1/4 in) hexagonal
Sin velocidad de carga............................................................................................. 0-2500 rpm
Frecuencia de impacto........................................................................................ 0-3100 bpm
Torque máximo………….........................................……………………...........…1100 in-lbs
Peso (con la batería incluida).............................................................................1,22 Kg (2,8 lbs)
CONOZCA SU DESTORNILLADOR DE
IMPACTO
Consulte la Figura 1, página i
El uso seguro de este producto requiere
que conozca la información etiquetada en la
herramienta y la que aparece en este manual
así como también el proyecto en el que está
trabajando. Antes de usar este producto,
familiarícese con todas las funciones
operativas y reglas de seguridad.
VELOCIDAD VARIABLE
El interruptor de velocidad variable ofrece
una mayor velocidad a una mayor presión
sobre el gatillo y una menor velocidad a una
menor presión sobre el gatillo.
MANDRIL DE LIBERACIÓN RÁPIDA
El mandril de liberación rápida le permite
instalar o quitar de manera rápida y sencilla
las brocas.
SELECTOR DE LA DIRECCIÓN DE GIRO
El destornillador de impacto tiene un selector
de dirección de giro ubicado debajo del
gatillo, el cual permite cambiar la dirección de
giro de la broca.
Mueva el selector hacia la posición OFF
(bloqueo al centro) para reducir la posibilidad
de un encendido accidental de la herramienta
cuando no esté en uso.
LUZ DE TRABAJO LED
La luz de trabajo LED, ubicada debajo
del gatillo del destornillador de impacto,
se enciende al presionar el gatillo. Esta
característica ofrece una mayor visibilidad al
trabajar.
8― Español
Page 24

ARMADO
DESEMBALAJE
Este producto requiere armado.
■ Con cuidado, extraiga el producto y sus
accesorios de la caja. Asegúrese de que
todos los elementos mencionados en la
lista de componentes del empaque estén
incluidos.
¡ADVERTENCIA!
producto si alguna de las piezas mencionadas
en la lista de componentes del empaque
ya está ensamblada en el producto al
desempacarlo. Las piezas mencionadas en
esta lista no vienen ensambladas al producto
y requiere que el cliente las instale. Usar un
producto que podría haberse ensamblado
de manera errónea podría causar graves
lesiones.
■ Inspeccione el producto cuidadosamente
para asegurarse de que no se haya roto o
dañado durante el transporte.
■ No bote el material del empaque hasta
que haya inspeccionado completamente y
utilizado satisfactoriamente el producto.
■ No utilice el producto si alguna de las
piezas está dañada o falta. Devuélvala
para que el vendedor a quien compró la
herramienta la repare.
No utilice este
LISTA DE EMPAQUE
(1) Destornillador de impacto inalámbrico de
20 V
(1) Puntas de destornillador
(1) Manual del usuario
ADVERTENCIA:
rota o ausente, no intente instalar la batería
en la podadora ni usar el taladro sino hasta
haber reemplazado la pieza rota o faltante. El
no seguir estas indicaciones puede provocar
lesiones severas.
Si alguna pieza está
ADVERTENCIA:
esta herramienta o crear accesorios no
recomendados para su uso con esta
herramienta. Cualquier alteración de este tipo
o modicación se considera un uso indebido
que podría causar potenciales lesiones
severas.
ADVERTENCIA:
encendido accidental del producto y lesiones
personales graves, extraiga siempre la
batería de la herramienta al cambiar las
puntas de trabajo.
No intente modicar
Para evitar el
9 ― Español
Page 25

USO DEL DESTORNILLADOR DE IMPACTO
Este producto acepta baterías de iones
de litio tipo deslizable Craftsman de 20
V impulsadas por DieHard. Para ver las
instrucciones de carga completas, consulte el
Manual del usuario en relación a las baterías
y los cargadores.
ADVERTENCIA:
encendido accidental y lesiones personales
graves, extraiga siempre la batería de la
herramienta al desarmar sus piezas, realizar
ajustes, instalar o quitar una punta, limpiar o
cuando no esté en uso.
Para evitar el
CÓMO INSTALAR LA BATERÍA
Consulte la Figura 2, página ii
Para instalar la batería, alinee la lengüeta
de la batería con la ranura de la carcasa y
deslícela. Insértela completamente hasta que
quede ja y suene un “clic”.
AVISO:
batería calce y de que quede asegurada a
la herramienta antes de usarla. Insertar la
batería de manera incorrecta puede provocar
daños a los componentes internos.
Asegúrese de que la pestaña de la
CÓMO EXTRAER LA BATERÍA
Consulte la Figura 2, página ii
Para extraer la batería, deslícela desde la
herramienta mientras presiona el botón de la
parte frontal de la batería.
El interruptor de velocidad variable ofrece
una mayor velocidad a una mayor presión
sobre el gatillo y una menor velocidad a una
menor presión sobre el gatillo.
SELECTOR DE LA DIRECCIÓN DE GIRO
(HACIA ADELANTE / BLOQUEO AL
CENTRO / REVERSA)
Consulte la Figura 4, página ii
La dirección de giro de la punta se puede
revertir y ésta se controla mediante un
selector ubicado sobre el gatillo. Con el
destornillador de impacto en posición de uso
normal, como se indica en la Figura 4:
1. Coloque el selector de la dirección de giro
hacia la izquierda de la herramienta para
aplicar un giro hacia adelante.
2. Coloque el selector de la dirección de giro
hacia la derecha de la herramienta para
aplicar un giro a la inversa.
3. Mueva el selector hacia la posición
OFF (bloqueo al centro) para reducir la
posibilidad de un encendido accidental de
la herramienta cuando no esté en uso.
AVISO:
deje siempre que el destornillador de impacto
se detenga por completo antes de cambiar la
dirección de giro.
AVISO:
funciona a menos que el selector de la
dirección de giro esté completamente en
posición hacia la izquierda o la derecha.
Para evitar daños a los engranajes,
El destornillador de impacto no
ADVERTENCIA:
batería siempre están en estado operativo.
Para evitar un encendido accidental,
coloque siempre el selector de la dirección
de giro en la posición apagado cuando la
herramienta no esté en uso o cuando la esté
transportando. Normalmente, transporte
siempre la herramienta tomándola desde
su empuñadura. Si la herramienta tiene
instalado un gancho para cinturones, puede
transportarla colgando desde su cinturón.
Las herramientas a
GATILLO INTERRUPTOR DE
VELOCIDAD VARIABLE
Consulte la Figura 3, página ii
Para encender el destornillador de
impacto, presione el gatillo. Para apagar la
herramienta, suelte el gatillo.
10― Español
FRENO ELÉCTRICO
Para detener al destornillador de impacto,
suelte el gatillo y deje que la herramienta
se detenga por completo. El freno eléctrico
detiene rápidamente al mandril. Esta
característica se activa inmediatamente al
soltar el gatillo.
LUZ DE TRABAJO LED
Consulte la Figura 5, página ii
La luz de trabajo LED, ubicada debajo
del gatillo del destornillador de impacto,
se enciende al presionar el gatillo. Ofrece
iluminación adicional sobre la zona de
trabajo. La luz de trabajo LED se apaga al
soltar el gatillo.
Page 26

USO DEL DESTORNILLADOR DE IMPACTO
INSTALACIÓN O EXTRACCIÓN DE LAS
PUNTAS
Consulte la Figura 6, página ii
Para instalar una punta de destornillador,
jale la manga en la dirección de la echa e
inserte la punta en la manga hasta el fondo.
Luego, suelte la manga para asegurar la
punta. Para extraer la punta de destornillador,
jale la manga en la dirección de la echa y
jale la punta hacia afuera.
Use solo puntas de destornillador/
NOTA:
puntas de combinación hexagonales del tipo
incluido en la compra de este destornillador
de impacto. Consulte la Figura 6, página
ii. Las puntas tienen ranuras cerca de los
extremos de inserción, los cuales permiten
a la manga asegurarse con rmeza. No use
otro tipo de puntas.
Si la punta de destornillador no está
NOTA:
insertada lo suciente en la manga, ésta
no volverá a su posición original y la punta
no quedará asegurada. En tal caso, intente
reinsertar la punta siguiendo las instrucciones
anteriores.
Tras insertar la punta de
NOTA:
destornillador, asegúrese de que esté
asegurada con rmeza. Si se sale, no la use.
Inserte un adaptador en la manga
NOTA:
para usar una punta combinada hexagonal
con el destornillador de impacto.
GANCHO PARA CINTURONES
(DISPONIBLE POR SEPARADO)
Consulte la Figura 7, página ii
Puede adquirir un gancho para cinturones,
disponible por separado. El gancho le permite
colgar la herramienta en su cinturón cuando
no la esté usando.
Instale el gancho en cualquier lado de la
herramienta. Inserte la lengüeta del gancho
en la ranura de la base de la herramienta.
Asegure el gancho apretando el tornillo a
través del oricio del gancho y hacia el oricio
de la base.
Para comprar el gancho, consulte las Piezas
de repuesto que se mencionan en la página
14 de este manual.
11 ― Español
Page 27

CUIDADO Y MANTENIMIENTO
ADVERTENCIA:
reparaciones, utilice solo piezas de repuesto
idénticas a las indicadas en este manual. El
uso de otras piezas podría generar un peligro
o dañar al producto.
ADVERTENCIA:
lesiones personales, extraiga siempre la
batería de la herramienta al limpiarla o
realizar tareas de mantenimiento.
Al realizar
Para evitar graves
MANTENIMIENTO GENERAL
Evite el uso de solventes al limpiar piezas
plásticas. La mayoría de los plásticos son
susceptibles a daños causados por varios
tipos de solventes comerciales. Utilice paños
limpios para retirar la suciedad, polvo, aceite,
grasa, etc.
ADVERTENCIA:
permita que uidos de frenos, gasolina,
productos derivados del petróleo, aceites
penetrantes, etc. entren en contacto con las
piezas móviles. Los químicos pueden dañar,
debilitar o destruir el plástico, lo cual podría
causar graves lesiones personales.
ADVERTENCIA:
reparaciones, utilice solo piezas de repuesto
idénticas a las indicadas en este manual.
El uso de otras piezas podría generar un
peligro o dañar al producto. Para garantizar
la seguridad y conabilidad, todas las
reparaciones deben ser realizadas por un
técnico de servicio calicado.
En ningún momento
Al realizar
ALMACENAMIENTO
■ Extraiga la batería de la herramienta antes
de almacenarla.
■ Limpie todos los materiales externos de la
herramienta.
■ Almacene las herramientas y sus
accesorios en un lugar seco y libre de
escarcha.
■ Almacene siempre las herramientas en un
lugar alejado del alcance de los niños. La
temperatura de almacenamiento ideal es
entre 40°F (4°C) y 100°F (38°C).
■ Mantenga las herramientas alejadas de
agentes corrosivos como químicos para
jardín y sales descongelantes.
■ Recomendamos guardar el producto en el
embalaje original o cubrirlo con un tejido
adecuado que lo proteja del polvo.
TRANSPORTE
■ Coloque el selector de la dirección de giro
en la posición OFF y extraiga la batería
antes de transportar el producto.
■ Normalmente, transporte siempre
la herramienta tomándola desde su
empuñadura. Si la herramienta tiene
instalado un gancho para cinturones, puede
transportarla colgando desde su cinturón.
■ Proteja la herramienta contra golpes duros
o vibraciones fuertes que pudieran ocurrir
durante el transporte en vehículos.
LIMPIEZA
Extraiga la batería
■ Cepille o sople el polvo y basuras
que pueda haber en las ventilas de
aire utilizando aire comprimido o una
aspiradora.
■ Mantenga las ventilas libres de
obstrucciones, polvo y trozos de manera.
No rocíe, lave o sumerja las ventilas bajo el
agua.
■ Limpie la carcasa y componentes plásticos
utilizando un paño suave y húmedo.
■ No utilice solventes fuertes o detergentes
sobre la carcasa plástica o sobre los
componentes. Ciertos productos de
limpieza domésticos pueden causar daños
y provocar riesgo de descarga eléctrica.
12― Español
Page 28

RESOLUCIÓN DE PROBLEMAS
PROBLEMA PROBLEMA SOLUCIÓN
La herramienta no
enciende.
No se pueden instalar las
puntas.
El motor se sobrecalienta.
La batería está defectuosa. Instale una batería nueva cargada.
El interruptor no funciona. Se debe reemplazar la herramienta.
Los cepillos están gastados. Se debe reemplazar la herramienta.
La manga no se suelta. Suelte la manga.
La punta no calza en el mandril de
cambio rápido.
Las rejillas de ventilación están
tapadas con polvo o sedimentos, o
bien están cubiertas con la mano
durante el uso.
Use una punta de cambio rápido
hexagonal de 1/4 in. adecuada.
Limpie las rejillas usando aire
comprimido.
No cubra las rejillas con la mano
durante el uso.
13 ― Español
Page 29

DESATORNILLADOR DE IMPACTO INALÁMBRICO CRAFTSMAN DE 20 V MÁX* CON PILA DE IÓN DE LITIO / MODELO NÚMERO 125.ID20A
El número de modelo se encuentra en la etiqueta adjunta a la carcasa del motor.
PARA ADQUIRIR PIEZAS DE REPUESTO, LLAME AL 1-888-331-4569
2
1
3
4
14― Español
Page 30

DESATORNILLADOR DE IMPACTO INALÁMBRICO CRAFTSMAN DE 20 V MÁX* CON PILA DE IÓN DE LITIO / MODELO NÚMERO 125.ID20A
El número de modelo se encuentra en la etiqueta adjunta a la carcasa del motor.
PARA ADQUIRIR PIEZAS DE REPUESTO, LLAME AL 1-888-331-4569
N° DE
ARTÍCULO
1 125.ID20A-B
2 411002102
3 411002103
4 411001108
N° DE PIEZA DESCRIPCIÓN CANT.
Cuerpo del destornillador de impacto
Juego de manga del mandril
Punta de destornillador
Juego del gancho para cinturones
(disponible por separado)
1
1
1
0
15 ― Español
Page 31

To order replacement parts
or schedule repair service
Para ordenar piezas
o pedir servicio de reparación
1-888-331-4569
16― Español
 Loading...