

Craftsman 11821541 Owner’s Manual
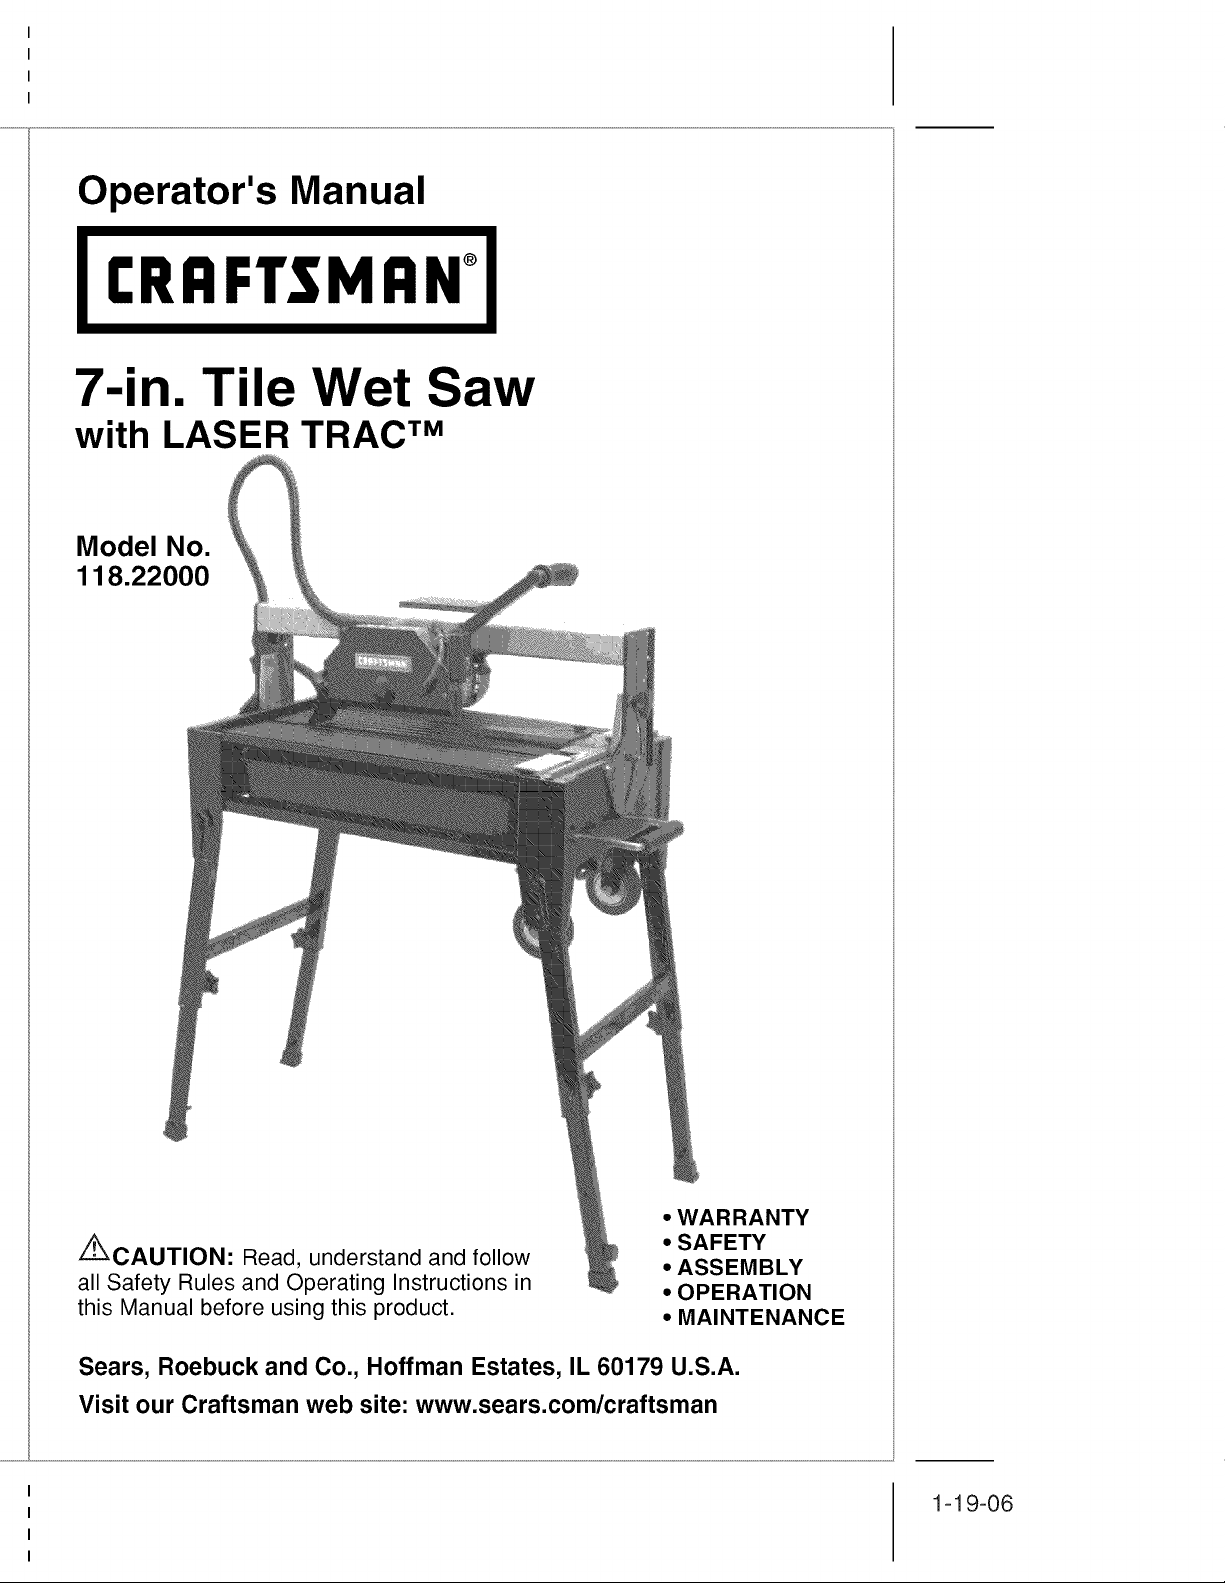
Operator's Manual
I;RRFTSMRN+I
7-in. Tile Wet Saw
with LASER TRAC TM
Model No.
118.22000
• WARRANTY
A
z-_CAUTION: Read, understand and follow
all Safety Rules and Operating Instructions in
this Manual before using this product.
Sears, Roebuck and Co., Hoffman Estates, IL 60179 U.S.A.
Visit our Craftsman web site: www.sears.com/craftsman
• SAFETY
• ASSEMBLY
• OPERATION
• MAINTENANCE
1-19-06
I
I
I
I
Warranty .................................................................... Page 2
Safety Symbols .................................................. Page 3
Safety Instructions ............................................... Pages 3-11
Description ........................................................ Page 12
Unpacking .................................................................. Pages 13-14
Assembly ......................................................... Pages 15-16
Operation .............................................................. Pages 17-18
Maintenance .............................................................. Pages 18-20
Troubleshooting ......................................................... Page 21
Accessories ............................................................... Page 21
Repair Parts .............................................................. Pages
Sears Repair Parts Phone Numbers ......................... Back Cover
ONE YEAR FULL WARRANTY ON CRAFTSMAN PRODUCT
If this Craftsman product fails due to a defect in material or workmanship
within one year from the date of purchase, RETURN IT TO THE NEAREST
SEARS STORE OR PARTS AND REPAIR CENTER OR OTHER
CRAFTSMAN OUTLET IN THE UNITED STATES FOR FREE REPAIR.
This warranty does not include expendable parts such as lamps, batteries,
bits or blades.
If this Craftsman Tool is used for commercial or rental purposes, this
warranty applies for only 90 days from the date of purchase.
This warranty gives you specific legal rights, and you may also have other
rights which vary from state to state.
Sears, Roebuck and Co., Hoffman Estates, IL 60179
The purpose of safety symbols is to attract your attention to possible dangers.
The safety symbols, and the explanations with them, deserve your careful
attention and understanding. The symbol warnings DO NOT by themselves
eliminate any danger. The instructions and warnings they give are no substitutes
for proper accident prevention measures.
z_ WARNING: BE SURE to read and understand all safety instructions in
this manual, including all safety alert symbols such as "DANGER", "WARNING"
and "CAUTION", BEFORE using this saw. Failure to follow all instructions
listed below may result in electric shock, fire and/or serious personal injury.
SYMBOL MEANING
CAUTION. May be used in conjunction with other symbols or
SAFETY ALERT SYMBOL: Indicates DANGER, WARNING, OR
pictographs
Failure to obey this safety warning WILL result in death or
serious injury to yourself or to others. Always follow the
safety precautions to reduce the risk of fire, electric shock
and personal injury.
( Z_WARNING] Failureto obeythis safetywarningCAN result in deathor
i i Failure to obey this safety warning MAY result in personal
CAUTION J injury to yourself or others or property damage. Always
DAMAGE PREVENTION AND iNFORMATiON MESSAGES
These inform user of important information and/or instructions that could lead to
equipment or other property damage if not followed. Each message is preceded by the
word "NOTE:" as in the example below:
serious injury to yourself or to others. Always follow the
safety precautions to reduce the risk of fire, electric shock
and personal injury.
follow the safety precautions to reduce the risk of fire,
electric shock and personal injury.
SAVE THESE iNSTRUCTiONS!
READ ALL iNSTRUCTiONS!
i NOTE: Equipment and/or property damage may result if these instructions are Inot followed.
WEARYOUR _WARNING: The operation of any tool with a circular
blade can result in foreign objects being thrown into
your eyes, which can result in severe eye damage.
Before beginning power tool operation, ALWAYS wear
safety goggles or safety glasses with side shield and a
full-face shield when needed. We recommend a Wide
Vision Safety Mask for use over eyeglasses or standard
safety glasses with side shield, available at Sears
Stores or other Craftsman Outlets.
2 3
I
I
I
I
J
2-2-06
I
I
I
I
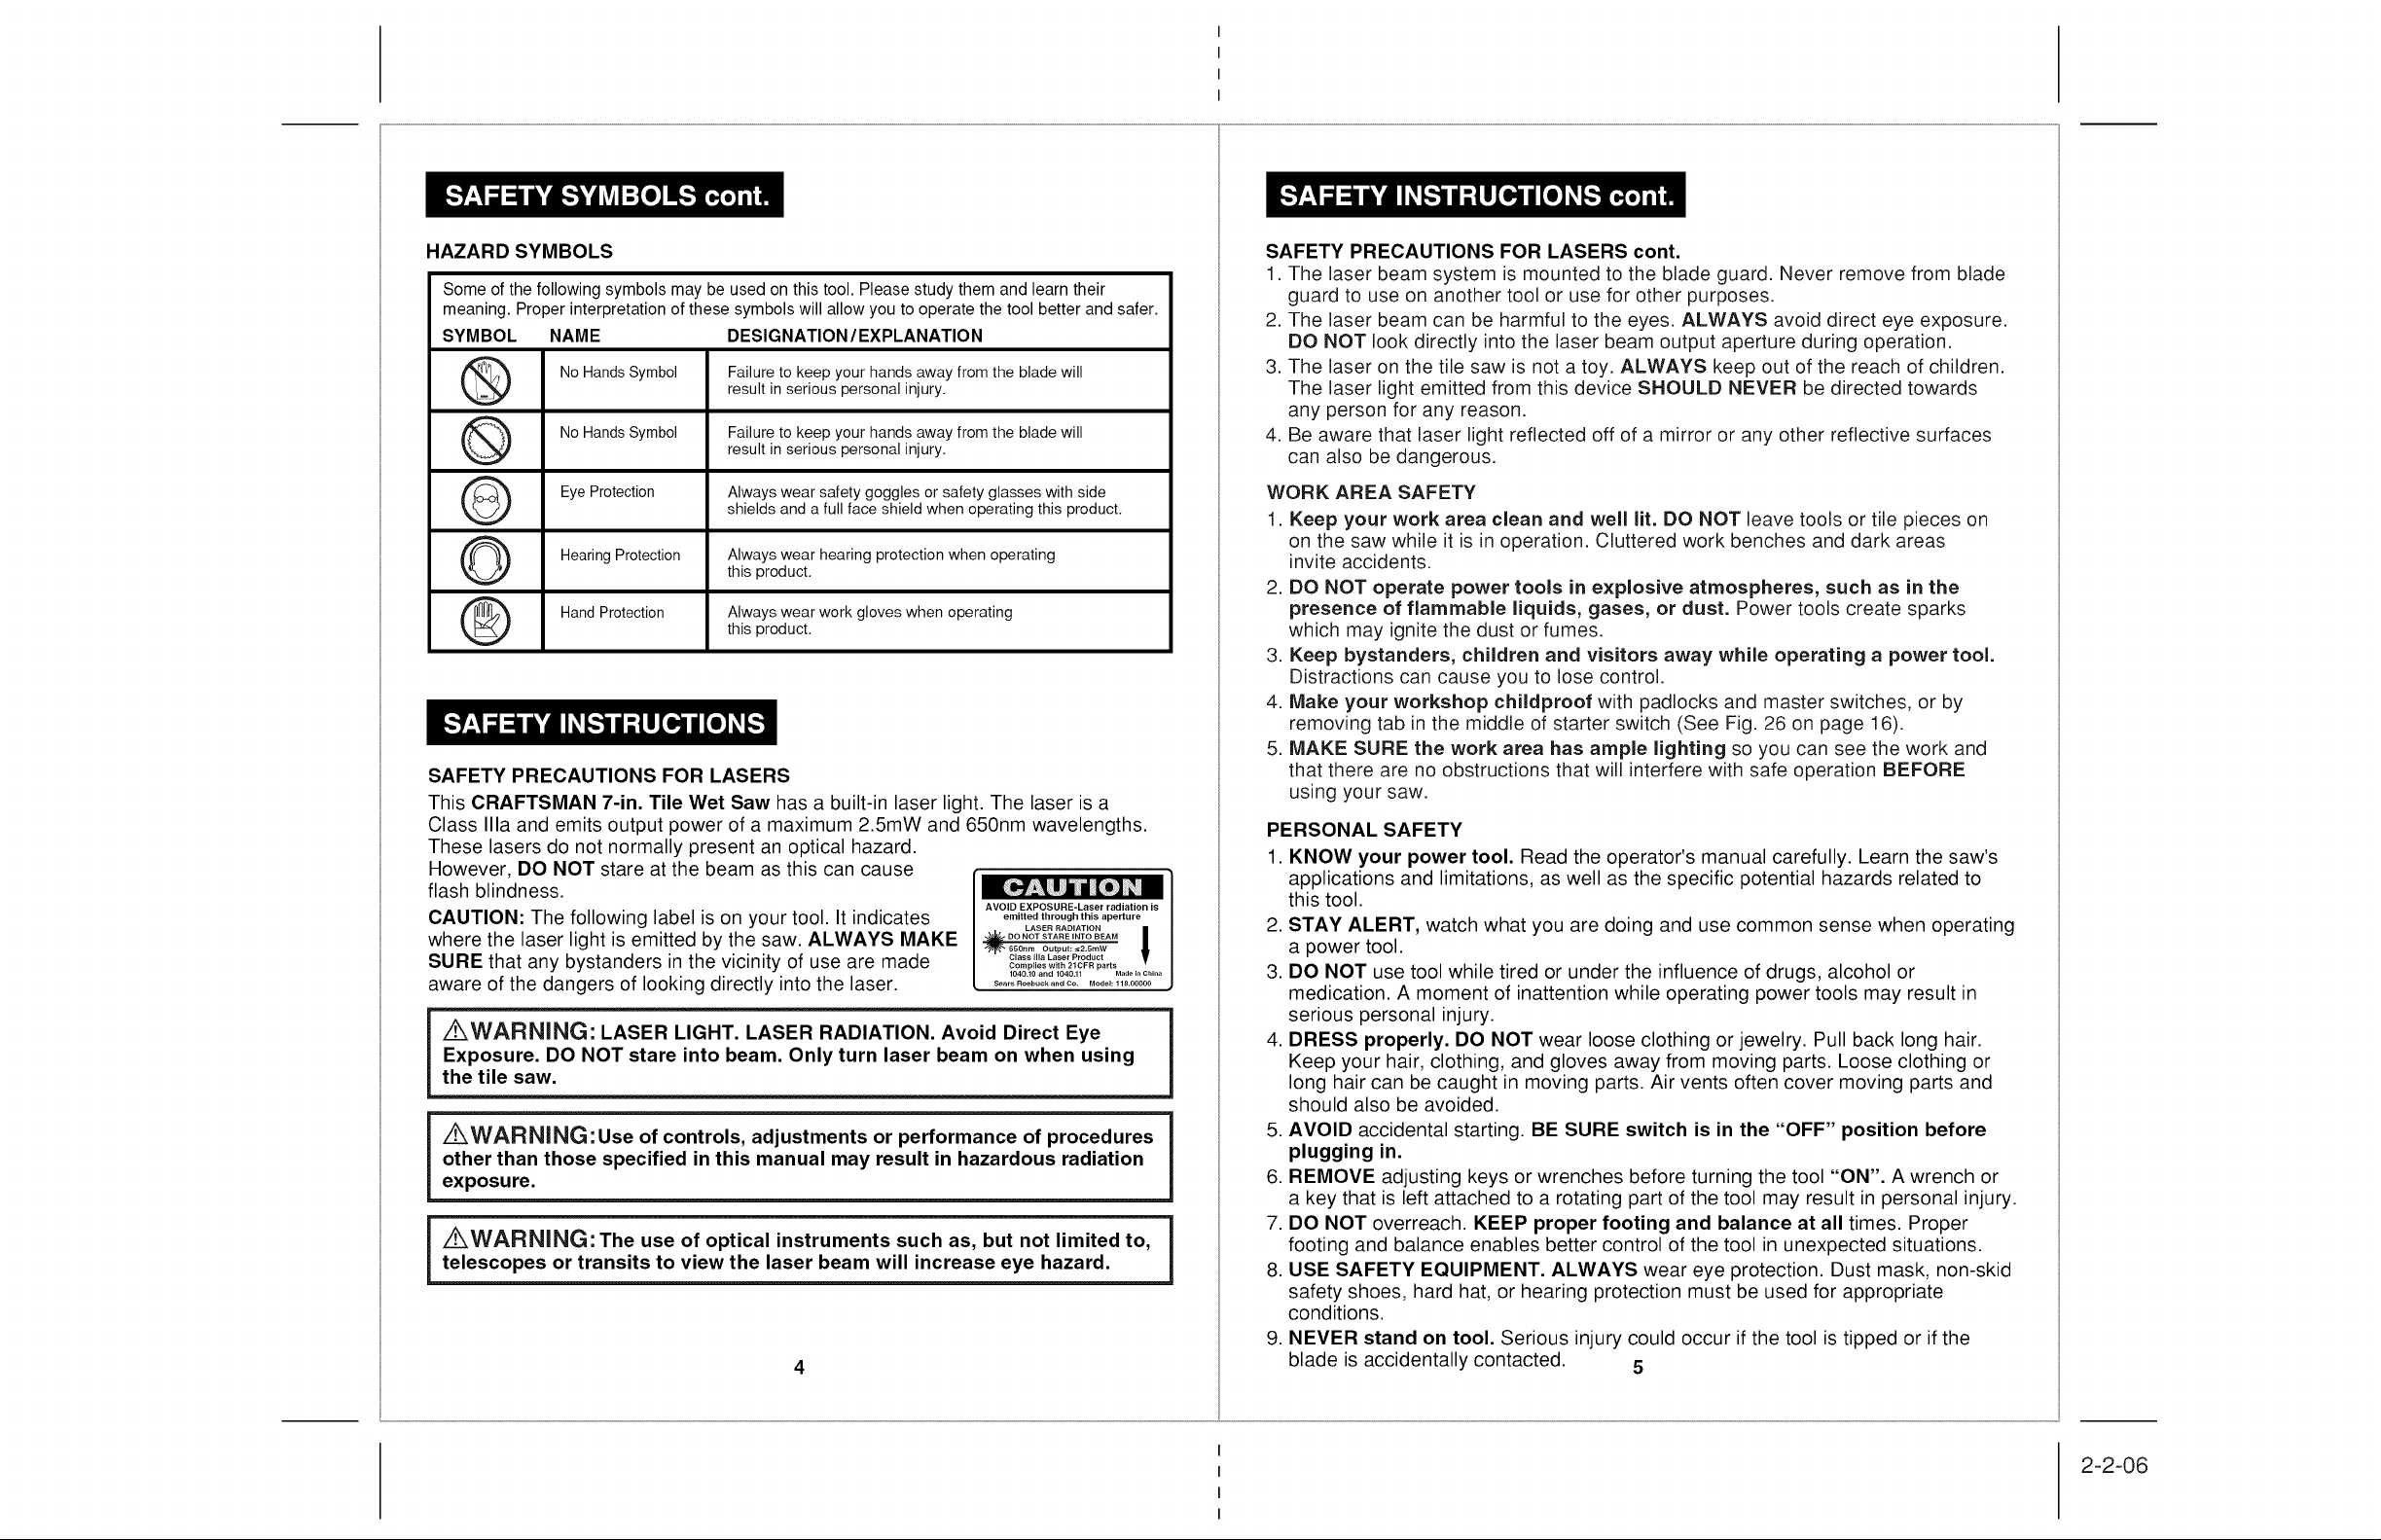
HAZARD SYMBOLS
Someof thefollowingsymbolsmaybe usedonthistool.Pleasestudythemandlearntheir
meaning.Properinterpretationof thesesymbolswill allowyouto operatethetool betterandsafer.
SYMBOL NAME DESIGNATION/EXPLANATION
Q No Hands Symbol Failure to keep your hands away from the blade willresult in serious personal injury.
Q No Hands Symbol Failure to keep your hands away from the blade willresult in serious personal injury.
Q Eye Protection Always wear safety goggles or safety glasses with sideshields and a full face shield when operating this product.
O Hearing Protection Always wear hearing protection when operating
Hand Protection Always wear work gloves when operatingthis product.
this product.
SAFETY PRECAUTIONS FOR LASERS
This CRAFTSMAN 7-in. Tile Wet Saw has a built-in laser light. The laser is a
Class Ilia and emits output power of a maximum 2.5mW and 650nm wavelengths.
These lasers do not normally present an optical hazard.
However, DO NOT stare at the beam as this can cause
flash blindness.
AVOID EXPOSURE-Laser radiation is
CAUTION: The following label is on your tool. It indicates
where the laser light is emitted by the saw. ALWAYS MAKE
SURE that any bystanders in the vicinity of use are made
aware of the dangers of looking directly into the laser.
emitted through this aperture
DO NOT STARE INTO BEAM
_ 650nm Output:_2,SmW
LASER RADIATION
Class Ilia Laser Product
Complies with 21CFR parts
1040.10 and 1040.11 Made in China
Sears Roebuck and Co. Model: 118.00000
/KWARNING: LASER LIGHT. LASER RADIATION. Avoid Direct Eye
Exposure. DO NOT stare into beam. Only turn laser beam on when using
the tile saw.
_WARNING:Use of controls, adjustments or performance of procedures
other than those specified in this manual may result in hazardous radiation
exposure.
AWARNING: The use of optical instruments such as, but not limited to,
telescopes or transits to view the laser beam will increase eye hazard.
4
SAFETY PRECAUTIONS FOR LASERS cont.
1. The laser beam system is mounted to the blade guard. Never remove from blade
guard to use on another tool or use for other purposes.
2. The laser beam can be harmful to the eyes. ALWAYS avoid direct eye exposure.
DO NOT look directly into the laser beam output aperture during operation.
3. The laser on the tile saw is not a toy. ALWAYS keep out of the reach of children.
The laser light emitted from this device SHOULD NEVER be directed towards
any person for any reason.
4. Be aware that laser light reflected off of a mirror or any other reflective surfaces
can also be dangerous.
WORK AREA SAFETY
1. Keep your work area clean and well lit. DO NOT leave tools or tile pieces on
on the saw while it is in operation. Cluttered work benches and dark areas
invite accidents.
2. DO NOT operate power tools in explosive atmospheres, such as in the
presence of flammable liquids, gases, or dust. Power tools create sparks
which may ignite the dust or fumes.
3. Keep bystanders, children and visitors away while operating a power tool.
Distractions can cause you to lose control.
4. Make your workshop childproof with padlocks and master switches, or by
removing tab in the middle of starter switch (See Fig. 26 on page 16).
5. MAKE SURE the work area has ample lighting so you can see the work and
that there are no obstructions that will interfere with safe operation BEFORE
using your saw.
PERSONAL SAFETY
1. KNOW your power tool. Read the operator's manual carefully. Learn the saw's
applications and limitations, as well as the specific potential hazards related to
this tool.
2. STAY ALERT, watch what you are doing and use common sense when operating
a power tool.
3. DO NOT use tool while tired or under the influence of drugs, alcohol or
medication. A moment of inattention while operating power tools may result in
serious personal injury.
4. DRESS properly. DO NOT wear loose clothing or jewelry. Pull back long hair.
Keep your hair, clothing, and gloves away from moving parts. Loose clothing or
long hair can be caught in moving parts. Air vents often cover moving parts and
should also be avoided.
5. AVOID accidental starting. BE SURE switch is in the "OFF" position before
plugging in.
6. REMOVE adjusting keys or wrenches before turning the tool "ON". A wrench or
a key that is left attached to a rotating part of the tool may result in personal injury.
7. DO NOT overreach. KEEP proper footing and balance at all times. Proper
footing and balance enables better control of the tool in unexpected situations.
8. USE SAFETY EQUIPMENT. ALWAYS wear eye protection. Dust mask, non-skid
safety shoes, hard hat, or hearing protection must be used for appropriate
conditions.
9. NEVER stand on tool. Serious injury could occur if the tool is tipped or if the
blade is accidentally contacted. 5
I
I
I
I
2-2-06

I
I
I
I
TOOL USE AND CARE SAFETY
z:_WARNING: BE SURE to read and understand all instructions before
operating this saw. Failure to follow all instructions listed below may result
in electric shock, fire and/or serious personal injury.
1. BE SURE the splash guard is intact and in good condition.
2. DO NOT wash or allow water to come in direct contact with the bottom of the motor.
3. NEVER leave the tool running unattended. ALWAYS turn it off. DO NOT leave
until the tool comes to a complete stop.
4. DO NOT force the tool. Slowly and smoothly pull the blade assembly as you cut
through the tile. Use the correct tool for your application. The correct tool will
do the job better, safer, and at the rate for which it is designed.
5. DO NOT use the tool if the switch does not turn it "ON" or "OFF". Any tool that
cannot be controlled with the switch is dangerous and must be repaired.
6. DISCONNECT the plug from the power source before making any
adjustments, changing accessories or storing the tool. Such preventive safety
measures reduce the risk of starting the tool accidentally.
7. KEEP blade guards in place and in good working order.
8. DO NOT use in dangerous environments. DO NOT use in damp or wet locations,
or expose to rain.
9. STORE idle tools out of the reach of children and other untrained persons.
Tools are dangerous in the hands of untrained users.
10. MAINTAIN tools with care. Keep cutting tools sharp and clean. Properly
maintained tools with sharp cutting edges are less likely to bind and are easier
to control.
11. BEFORE using this saw, CHECK for damaged parts, including guards for
proper operation and performance, misalignment or binding of moving
parts, breakage of parts, or and any other condition that may affect the tool's
operation. If damaged, have the tool serviced before using. Many accidents are
caused by poorly maintained tools.
12. USE ONLY accessories that are recommended for this tool. Accessories that
may be suitable for one tool may become hazardous when used on another tool.
Z_ CAUTION" Use of accessories that are not recommended for use with
this tool may create a hazardous condition.
ELECTRICAL SAFETY AND GROUNDING INSTRUCTIONS cont.
2.
Grounded corded tools are
intended for use on supply circuits
having a nominal rating of less
than 150 volts. The plug may not
fit your outlet.
In the event of a malfunction or
.
(A) Gru_lUe_dBedx \Grounding
_ Cover of __"
breakdown, grounding provides a
path of least resistance for electric
current to reduce the risk of
Metal Screw [_-_ I
electric shock.
.
This tool is equipped with an
(B) Means "I II
electric cord having an
equipment-grounding
conductor and a grounding plug
(Fig.1-A). The plug must be
plugged into a GFCl protected
GFCI-protected
Adapter
matching outlet that is properly
installed and grounded in accordance with all local codes and ordinances.
5. Your local electrical code may require a slightly different plug connection. IF these
differences exist, refer to and make the proper adjustments per your local code
BEFORE your tool is plugged in and turned on.
6. A temporary GFCI protected adapter may be used to connect this plug to a
2-prong outlet if a properly grounded 3-prong outlet is not available (Fig.1 -B).
7. The temporary equipment grounding adapter SHOULD ONLY BE used until a
properly grounded 3-prong outlet can be installed by a qualified electrician.
8. The green colored rigid ear or lug extending from the adapter (Fig. l-B) is the
equipment grounding conductor and MUST be connected to a permanent
ground, such as a properly grounded outlet box.
9. If repair or replacement of the electric cord or plug is necessary, DO NOT connect
the equipment grounding adapter to a live terminal.
10. Repair or replace damaged or worn cord immediately.
NOTE: If you do not fully understand the grounding instructions or if you
are in doubt as to whether the tool is properly grounded, check with a
qualified electrician or service person.
ELECTRICAL SAFETY AND GROUNDING INSTRUCTIONS
CAUTION: ALWAYS use a GFCI (Ground Fault Circuit Interrupter)
protected receptacle since the blade of this saw is used in close proximity
to water.
.
This tool is equipped with an electrical cord having a 3-prong electrical plug
(Fig. 1-A). DO NOT alter the plug or use in a 2-prong receptacle. DO NOT modify
the plug provided. If it will not fit the outlet, have the proper outlet installed by a
qualified electrician.
6
z_ WARNING" Do not permit fingers to touch the terminal or plug when
installing or removing the plug from an outlet.
A WARNING" If not properly grounded and GFCI protected, this tool can
cause an electrical shock, particularly when used in damp locations, in
proximity to plumbing, or out of doors. If an electrical shock occurs there
is the potential of a secondary hazard, such as your hands contacting the
saw blade.
7
I
I
I
I
2-2-06
I
I
I
I
EXTENSION CORDS
1. USE ONLY 3-wire extension cords that have 3-prong grounding plugs and 3-pole
receptacles that will accept the tool's plug.
2. Use a proper extension cord. ONLY use cords listed by Underwriters
Laboratories (UL). Other extension cords can cause a drop in line voltage,
resulting in a lossof power and overheating of tool. For this tool, an AWG
(American Wire Gauge) size of a least 14-gauge is recommended for an extension
cord of 25- ft. or less in length. Use 12-gauge for extension cords of 50-ft.
Extension cords 100=ft. or longer are not recommended. Remember, a smaller
wire gauge size has greater capacity than a larger number (12-gauge wire has
more capacity than 14-gauge). When in doubt use the smaller number. When
operating a power tool outdoors, use an outdoor extension cord marked "W-A" or
"W". These cords are rated for outdoor use and reduce the risk of electric shock.
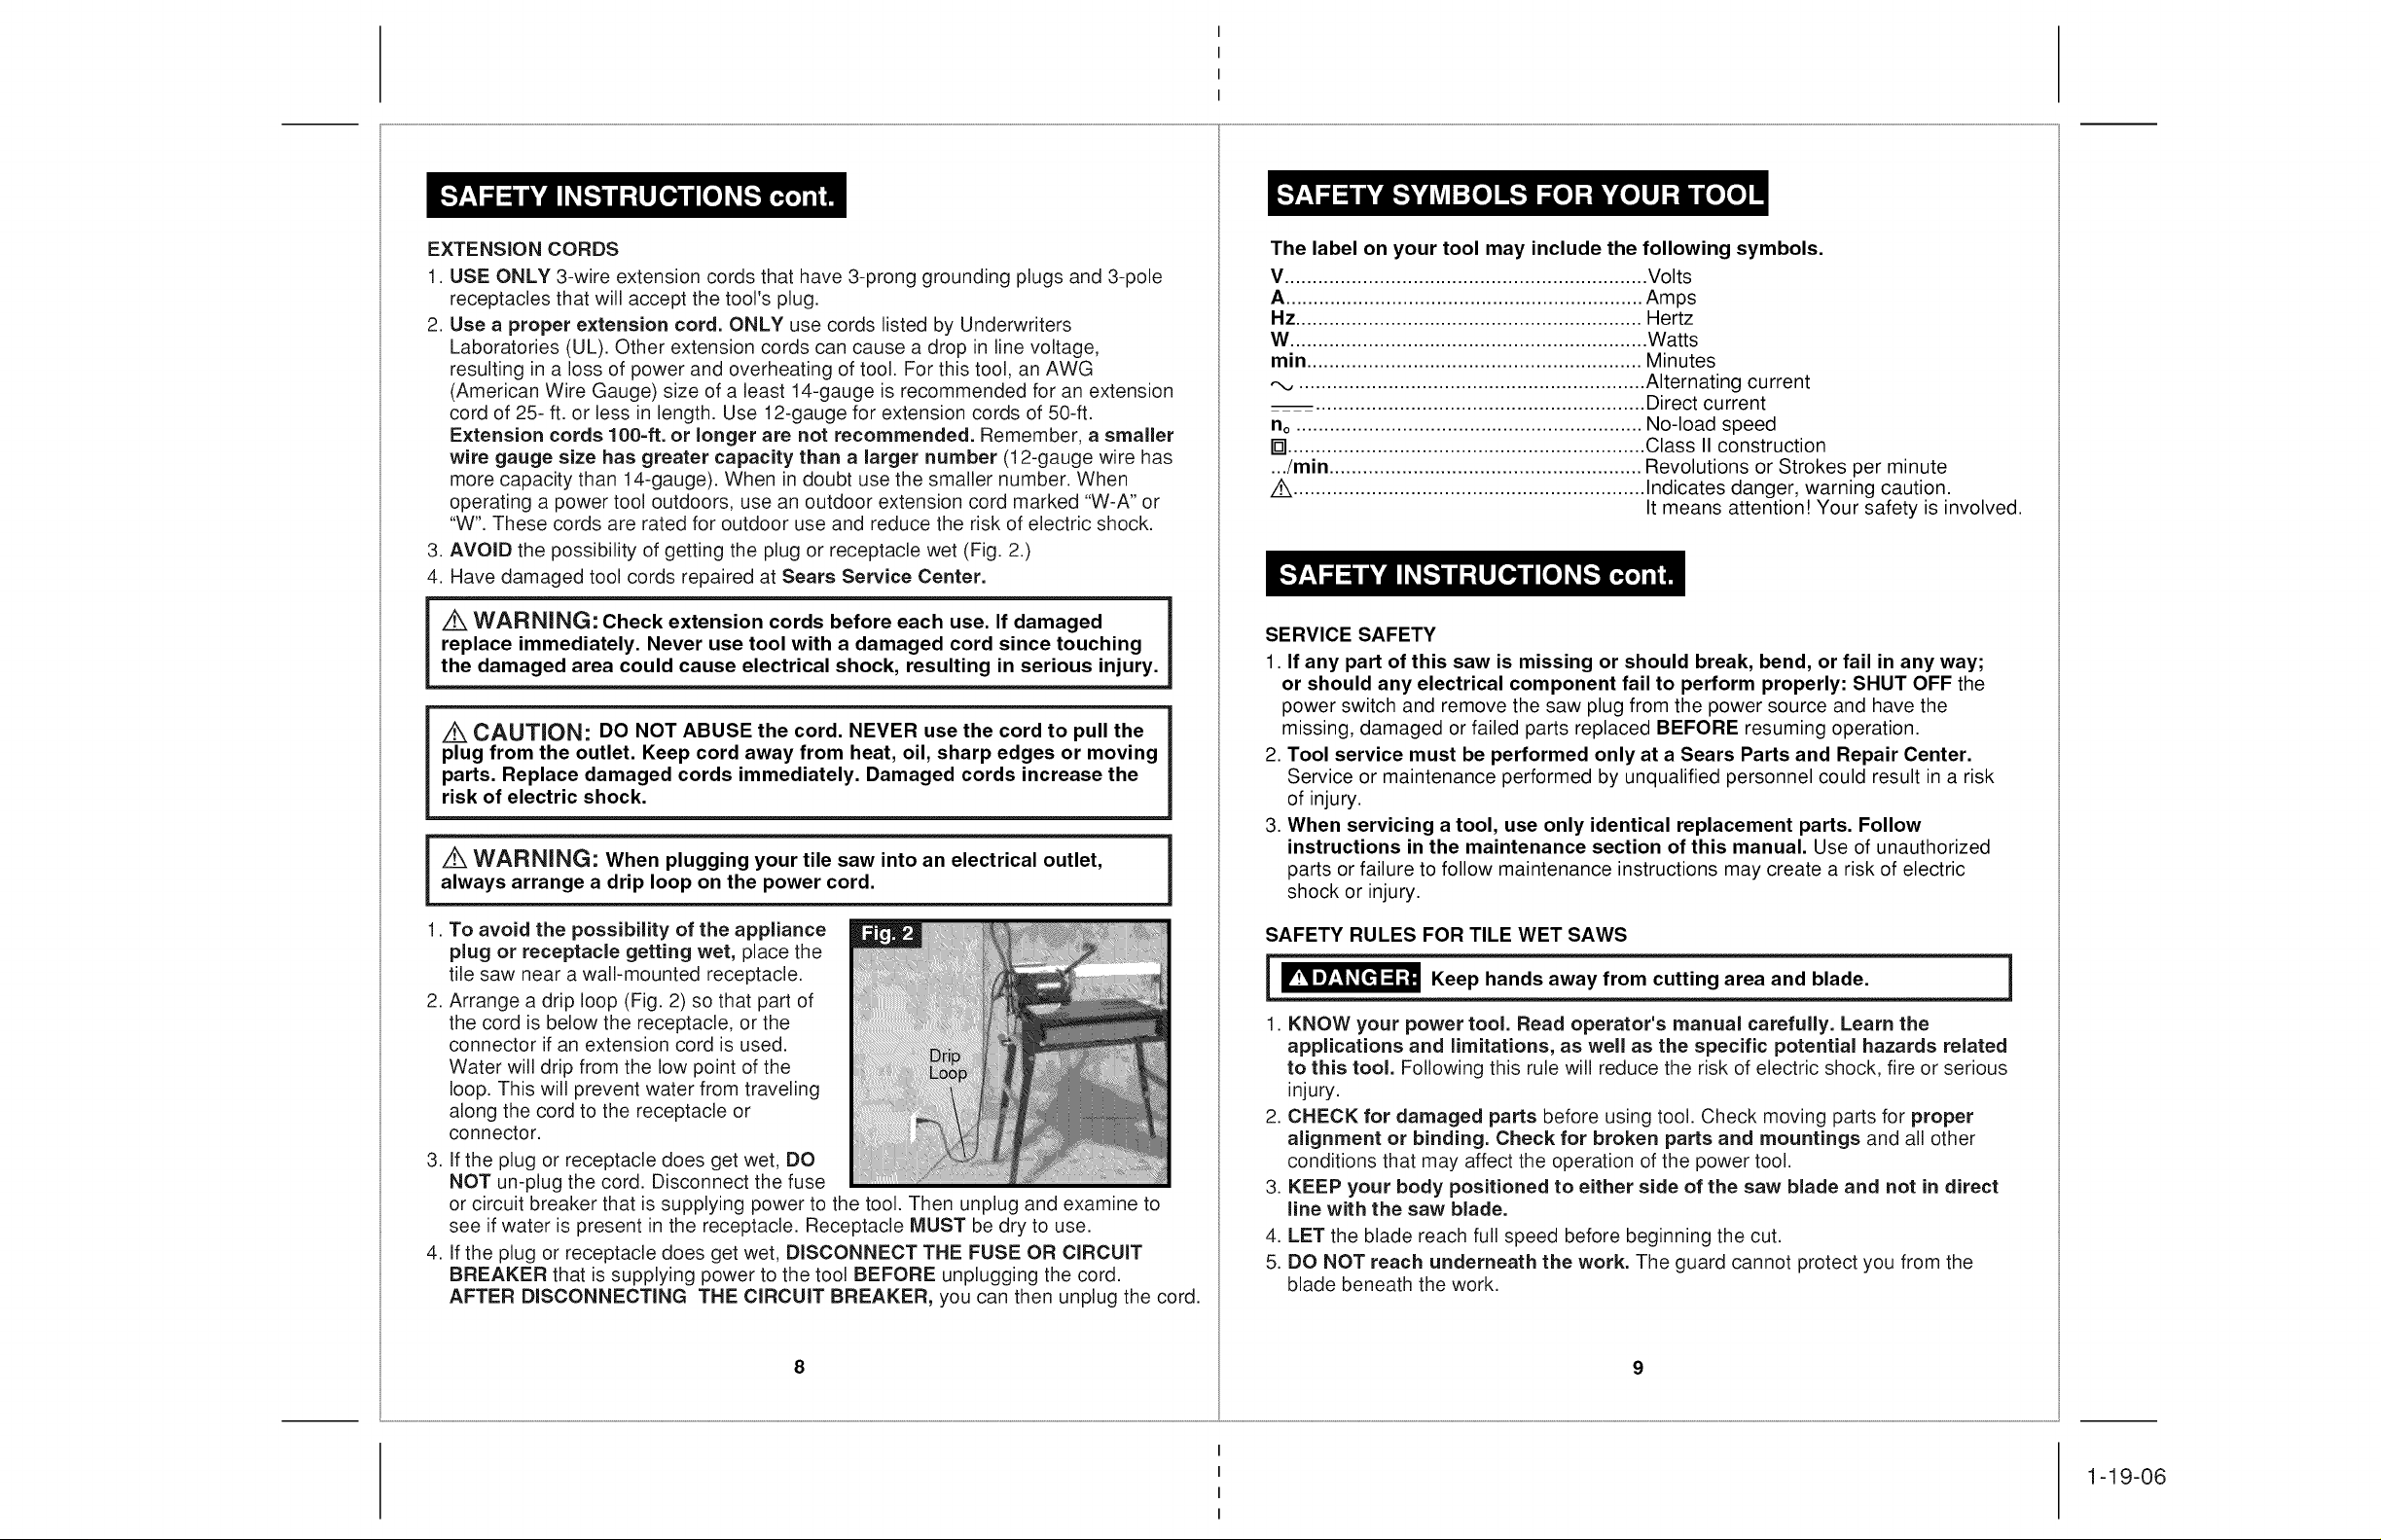
3. AVOID the possibility of getting the plug or receptacle wet (Fig. 2.)
4. Have damaged tool cords repaired at Sears Service Center.
Z_ WARNING: Check extension cords before each use. If damaged
replace immediately. Never use tool with a damaged cord since touching
the damaged area could cause electrical shock, resulting in serious injury.
A CAUTION: DO NOT ABUSE the cord. NEVER use the cord to pull the
plug from the outlet. Keep cord away from heat, oil, sharp edges or moving
parts. Replace damaged cords immediately. Damaged cords increase the
risk of electric shock.
A WARNING: When plugging your tile saw into an electrical outlet,
i
always arrange a drip loop on the power cord. i
The label on your tool may include the following symbols.
V................................................................. Volts
A................................................................ Amps
Hz .............................................................. Hertz
W................................................................ Watts
min ............................................................ Minutes
,-_ .............................................................. Alternating current
........................................................... Direct current
no .............................................................. No-load speed
[] ................................................................ Class II construction
.../min ........................................................ Revolutions or Strokes per minute
,,_ ............................................................... Indicates danger, warning caution.
It means attention! Your safety is involved.
SERVICE SAFETY
1. If any part of this saw is missing or should break, bend, or fail in any way;
or should any electrical component fail to perform properly: SHUT OFF the
power switch and remove the saw plug from the power source and have the
missing, damaged or failed parts replaced BEFORE resuming operation.
2. Tool service must be performed only at a Sears Parts and Repair Center.
Service or maintenance performed by unqualified personnel could result in a risk
of injury.
3. When servicing a tool, use only identical replacement parts. Follow
instructions in the maintenance section of this manual. Use of unauthorized
parts or failure to follow maintenance instructions may create a risk of electric
shock or injury.
1
. To avoid the possibility of the appliance
plug or receptacle getting wet, place the
tile saw near a wall-mounted receptacle.
.
Arrange a drip loop (Fig. 2) so that part of
the cord is below the receptacle, or the
connector if an extension cord is used.
Water will drip from the low point of the
loop. This will prevent water from traveling
along the cord to the receptacle or
connector.
.
If the plug or receptacle does get wet, DO
NOT un-plug the cord. Disconnect the fuse
or circuit breaker that is supplying power to the tool. Then unplug and examine to
see if water is present in the receptacle. Receptacle MUST be dry to use.
.
If the plug or receptacle does get wet, DISCONNECT THE FUSE OR CIRCUIT
BREAKER that is supplying power to the tool BEFORE unplugging the cord.
AFTER DiSCONNECTiNG THE CIRCUIT BREAKER, you can then unplug the cord.
8
SAFETY RULES FOR TILE WET SAWS
i_ Keep hands away from cutting area and blade.
1.
KNOW your power tool. Read operator's manual carefully. Learn the
applications and limitations, as well as the specific potential hazards related
to this tool. Following this rule will reduce the risk of electric shock, fire or serious
injury.
2. CHECK for damaged parts before using tool. Check moving parts for proper
alignment or binding. Check for broken parts and mountings and all other
conditions that may affect the operation of the power tool.
3. KEEP your body positioned to either side of the saw blade and not in direct
line with the saw blade.
4. LET the blade reach full speed before beginning the cut.
5. DO NOT reach underneath the work. The guard cannot protect you from the
blade beneath the work.
I
I
I
I
i
1-19-06
 Loading...