

Page 1
Nail Gun
Spikpistol
Spikerpistol
Naulain
Important!
Read the entire instruction manual carefully
and make sure that you fully understand
it before you use the equipment. Keep the
manual for future reference.
Viktig information:
Läs hela bruksanvisningen noggrant och
försäkra dig om att du har förstått den innan
du använder utrustningen och spara den för
framtida bruk.
Viktig informasjon:
Les disse anvisningene nøye og forsikre deg
om at du forstår dem før du bruker enheten
og oppbevar dem for senere bruk.
Tärkeätä tietoa:
Lue nämä ohjeet huolellisesti ja varmista
että olet ymmärtänyt ne, ennen kuin alat
käyttää laitetta. Säilytä ohjeet myöhempää
tarvetta varten.
ENGLISH
SVENSK A
NORSKSUOMI
Art.no. Model
30-9548 F50
Original instructions
Ver. 201006
Bruksanvisning i original
Original bruksanvisning
Alkuperäinen käyttöohje
Page 2

2
Page 3
Nail Gun
Article number: 30-9548 Model: F50
Please read the entire instruction manual before using and save it for future use. We apologise for any text
or photo errors and any changes of technical data. If you have any questions concerning technical problems
please contact our Customer Service Department (see address on reverse).
Contents
Safety instructions 4
Product description 5
Loading 6
Use 6
Technical data 8
Trouble shooting 8
ENGLISH
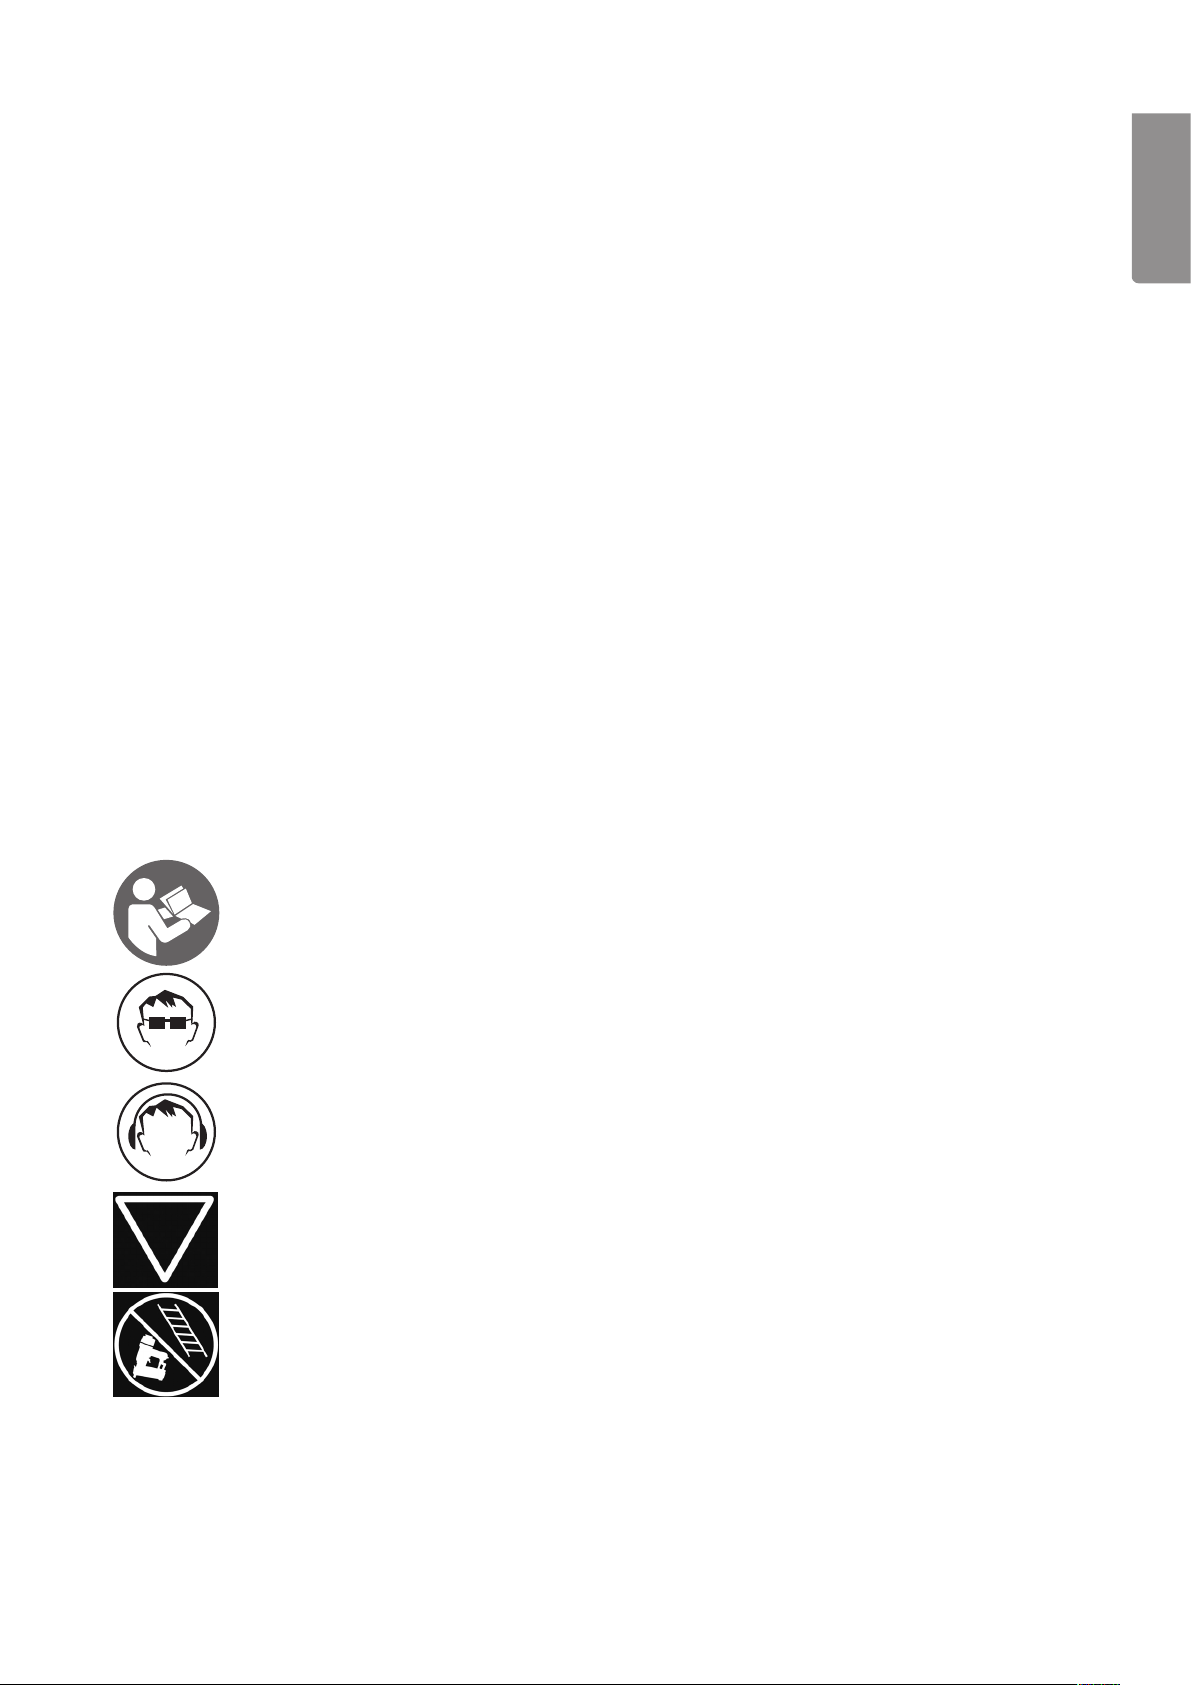
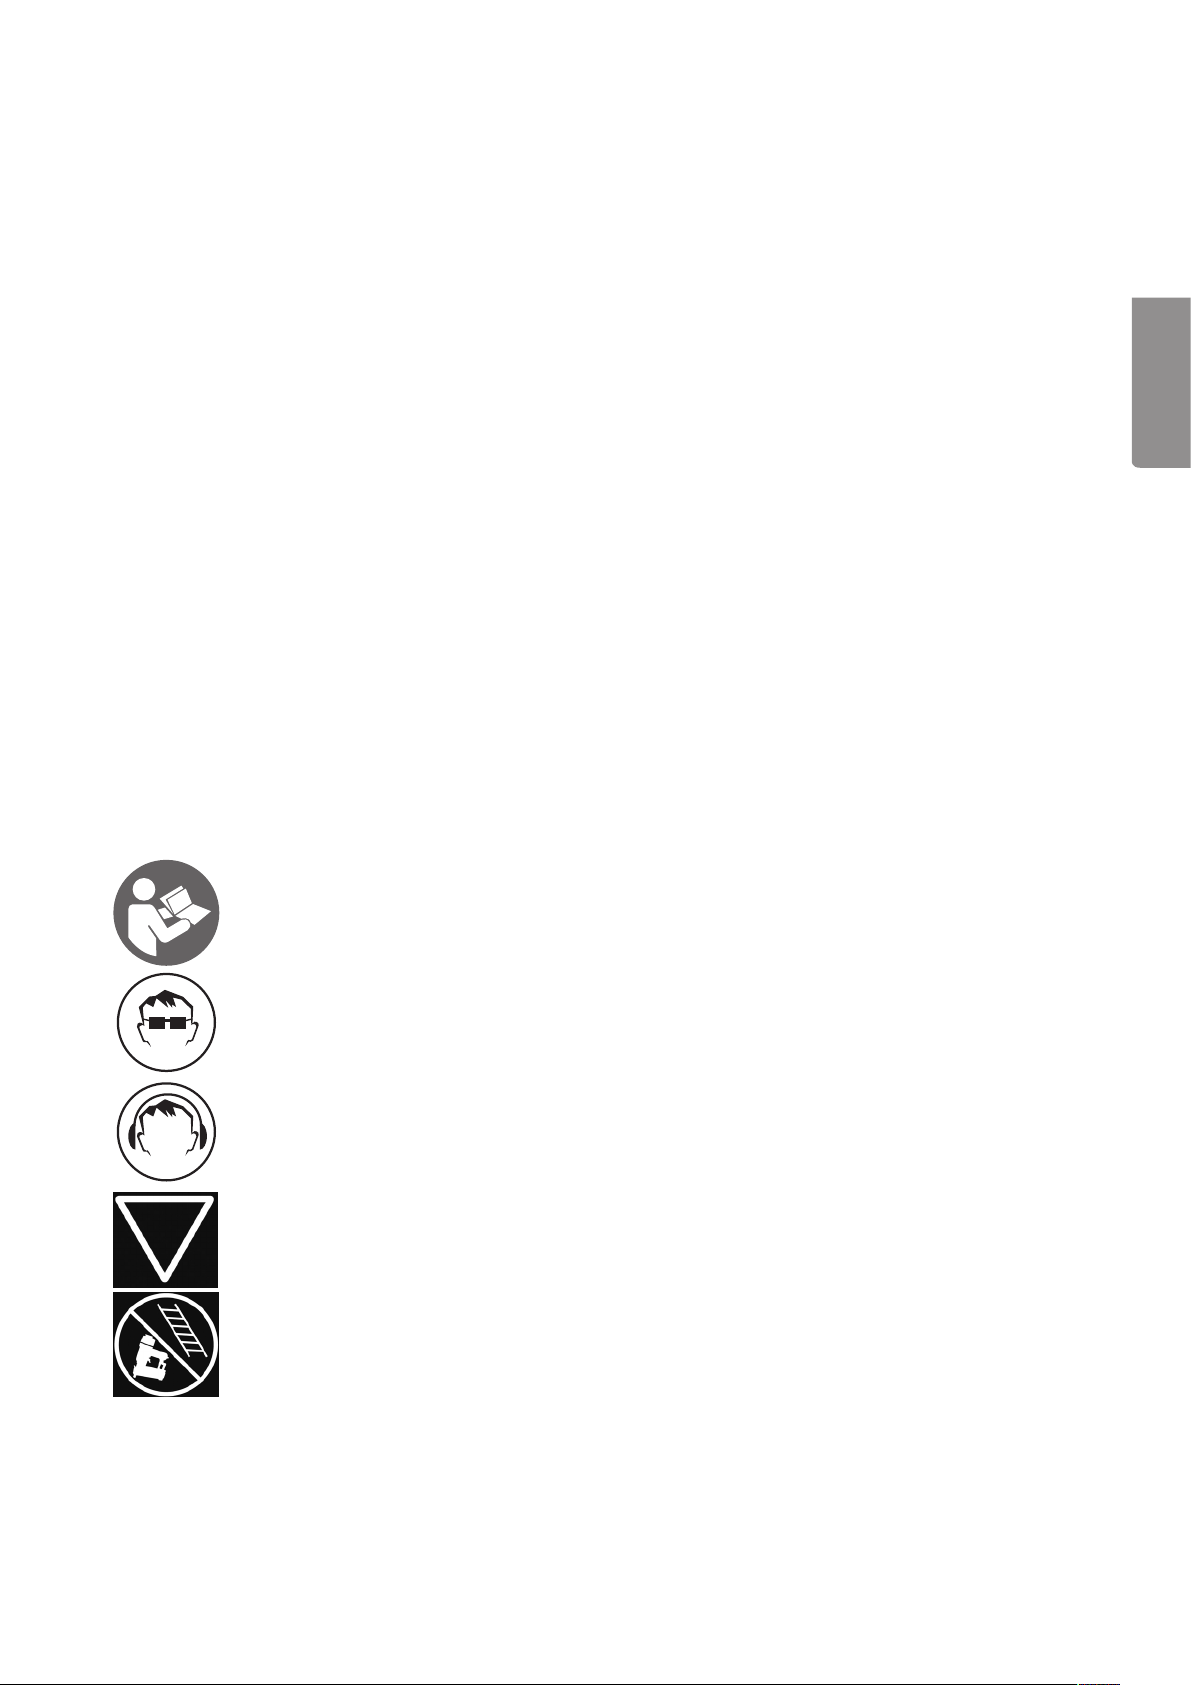
Product markings with safety symbols
Read the entire instruction manual!
Always wear safety goggles.
Always wear ear protection.
The gun is equipped with a safety trigger.
Do not use the nail gun while on a ladder or industrial scaffolds.
3
Page 4

Safety instructions
Warning!
• Never hold your hand or other parts of your body close to the muzzle of the nail gun when the tool is
ENGLISH
connected to the compressed air supply.
• Never point the nail gun at anyone.
• Do not play with this nail gun, it is not a toy.
• Never pull the trigger unless the muzzle is pointed at the workpiece.
• Always handle the nail gun with care.
• Never pull the trigger or depress the safety trigger whilst reloading the nail gun.
Follow these instructions for safety reasons
• Remember that the nail gun is not a toy but a tool. Do not play with this tool.
• Only use the nail gun in the intended manner.
• Never use the tool in a way where the muzzle is pointed at yourself or anyone else in the working area.
• Do not use the nail gun as a hammer.
• Carry the tool by its handle and not by the air hose.
• Never carry the tool with your nger on the trigger.
• Never modify the nail gun in any way.
• Always be aware that misuse and wrongful handling of this tool may result in injuries to yourself or others.
• Never x/tape the safety trigger and/or the trigger in active mode.
• Never leave a nail gun, which is connected to the air supply, unattended.
• Never use this nail gun if it does not have a readable warning label.
• Do not continue using a nail gun which leaks air or does not function properly. Contact us if your nail gun
is not functioning properly.
• When using the nail gun, hold it in such a manner that no injuries can occur to your body or head if the
nail gun’s recoil should increase due to a drop in air pressure or changes in the hardness of the workpiece.
• Do not nail too close to the edge of the workpiece. The nail could pass through the workpiece and
cause injuries.
• Disconnect the air before transporting the nail gun.
• Make regular checks on the trigger and safety trigger to make sure they work properly.
• Do not disassemble any part of the nail gun, especially not the safety trigger (the contact-operation).
• Do not make temporary repairs without the right equipment.
• Avoid weakening the housing by engraving etc.
• Make sure you know where all electrical wiring etc. in walls, oors and ceilings are located
before you start using the nail gun.
Compressed Air Supply
Warning! To avoid the gun going off accidentally and injuring someone, the user should always disconnect
the air supply:
1. Before making adjustments.
2. When servicing the nail gun.
3. When removing jammed fasteners.
4. When the nail gun is not in use.
5. When moving to a new work area.
Warning! Only use compressed air as the propellant for pneumatically operated tools. Do not use oxygen or
ammable gases as propellants because they might cause an explosion.
• The compressor must be capable of providing enough pressure and air ow for the intended purpose.
A pressure drop in the system can reduce the power of the nail gun. Read Technical Data to nd out the
correct pressure setting for the nail gun in question.
4
Page 5
• Use connectors that release the pressure in the nail gun when the air hose is disconnected, so the nail
gun is pressureless.
• Industrial pressurized air-line systems should be installed with a gradient, and the highest point should
be closest to the compressor. Easily accessible water separators should be installed at the lowest points.
The water separators should be emptied at least once a day, more if needed. Dirt and water in the compressed air system are the most common causes of wear in pneumatic tools.
• The nail gun’s air couplings should be equipped with a pressure regulator and water separator at the point
of connection. A lter will help provide the maximum effect and minimize wear. The lter must be able
to cope with the air ow at the respective connection point. The lter must be kept clean if it is to deliver
clean air to the tool. See the manufacturer’s directions for correct lter maintenance. A dirty and clogged
lter results in a drop in pressure, reducing the power of the tool.
• The pressure regulator must be adjustable from 0 to 7 bar.
• The air-lines should be able to withstand a working pressure of 10.5 bar or 150% of the maximum pressure capable of being delivered by the respective compressed air system. The feeder line should have a
quick-connector so that it can be disconnected quickly from the nipple on the nail gun.
• Make sure that the pressure delivered to the nail gun does not exceed the maximum working pressure
(8.3 bars). To begin with, set the working pressure to the lowest recommended, see Technical Data.
• Check that the nail gun is working properly by carrying out a function test and safety test each time you
start using it.
ENGLISH
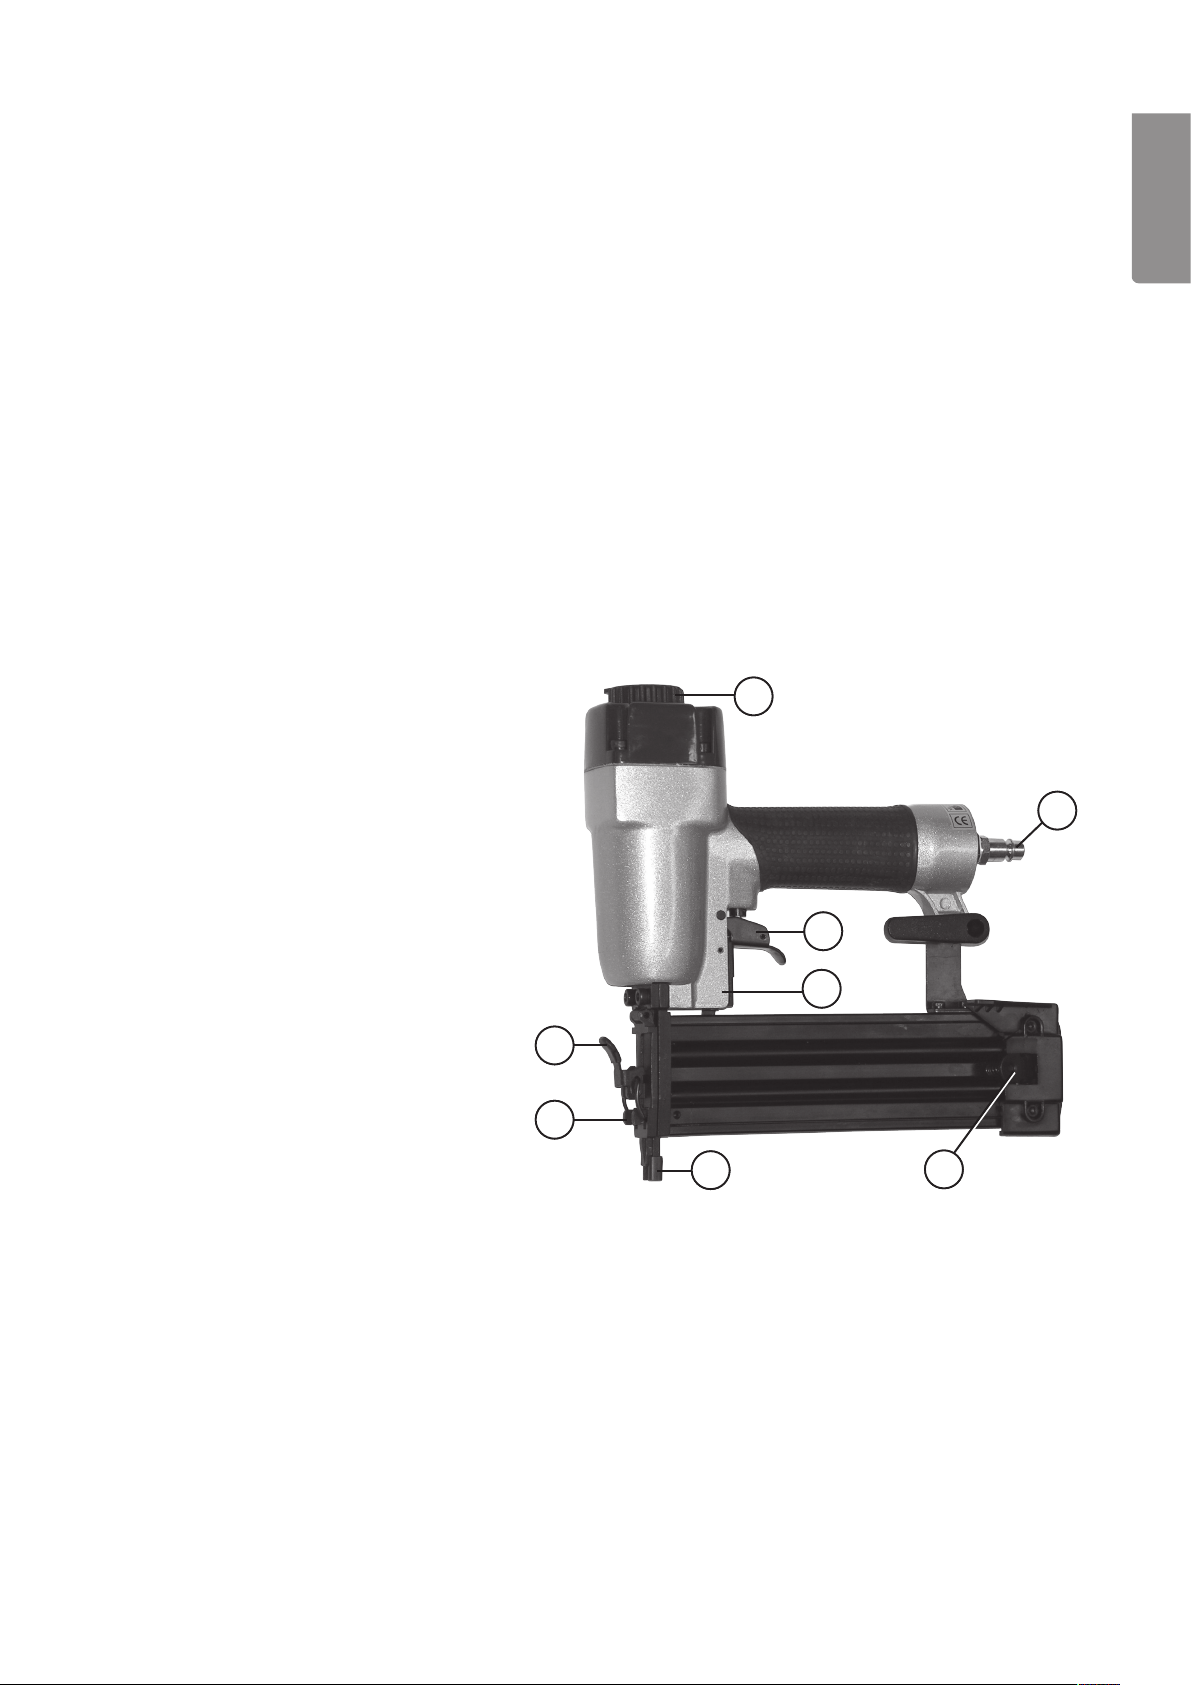
Product Description
1. Trigger
2. Safety trigger
3. Cover plate release catch
4. Cover plate
107
106
101
5. Magazine lock
6. Quick connector nipple
7. Directable exhaust 360˚
8. Depth adjuster
103
108
104
102
105
Lubrication
Note!
Lubricate the nail gun with a few drops of oil in the air-line connection before using the tool for the rst time.
• For best results, lubricate regularly but sparingly. Oil entering the air-lines will lubricate the internal components. Do not use ushing oil or additives because such lubricants wear out the seals and o-rings, reducing the power output and creating the need for more maintenance.
• If a mist oiler is not connected to the air supply, apply a few drops of oil to the nail gun’s air inlet nipple
once or twice a day. Only a few drops (1-2) of oil are needed at a time. If too much oil is used it will just
gather in the air line and appear when air is released.
• Cold Weather Operation If the ambient temperature drops to around zero degrees Celsius, moisture can
freeze in the tool and render it inoperable. We recommend that you use an air lubricator or permanent
anti-freeze (ethylene glycol) as a lubricant. N.B. In order to prevent the build up of frost or ice in the nail
gun’s valves and mechanisms, which can lead to malfunctions, one should avoid storing the nail gun in a
cold place.
5
Page 6
Loading Safety Instructions
When servicing the nail gun
ENGLISH
1) never hold your hand or other part of your body within the ring radius of the nail gun;
2) never point the nail gun at anyone;
3) do not pull the trigger or depress the safety trigger because the nail gun might re accidentally
and injure someone.
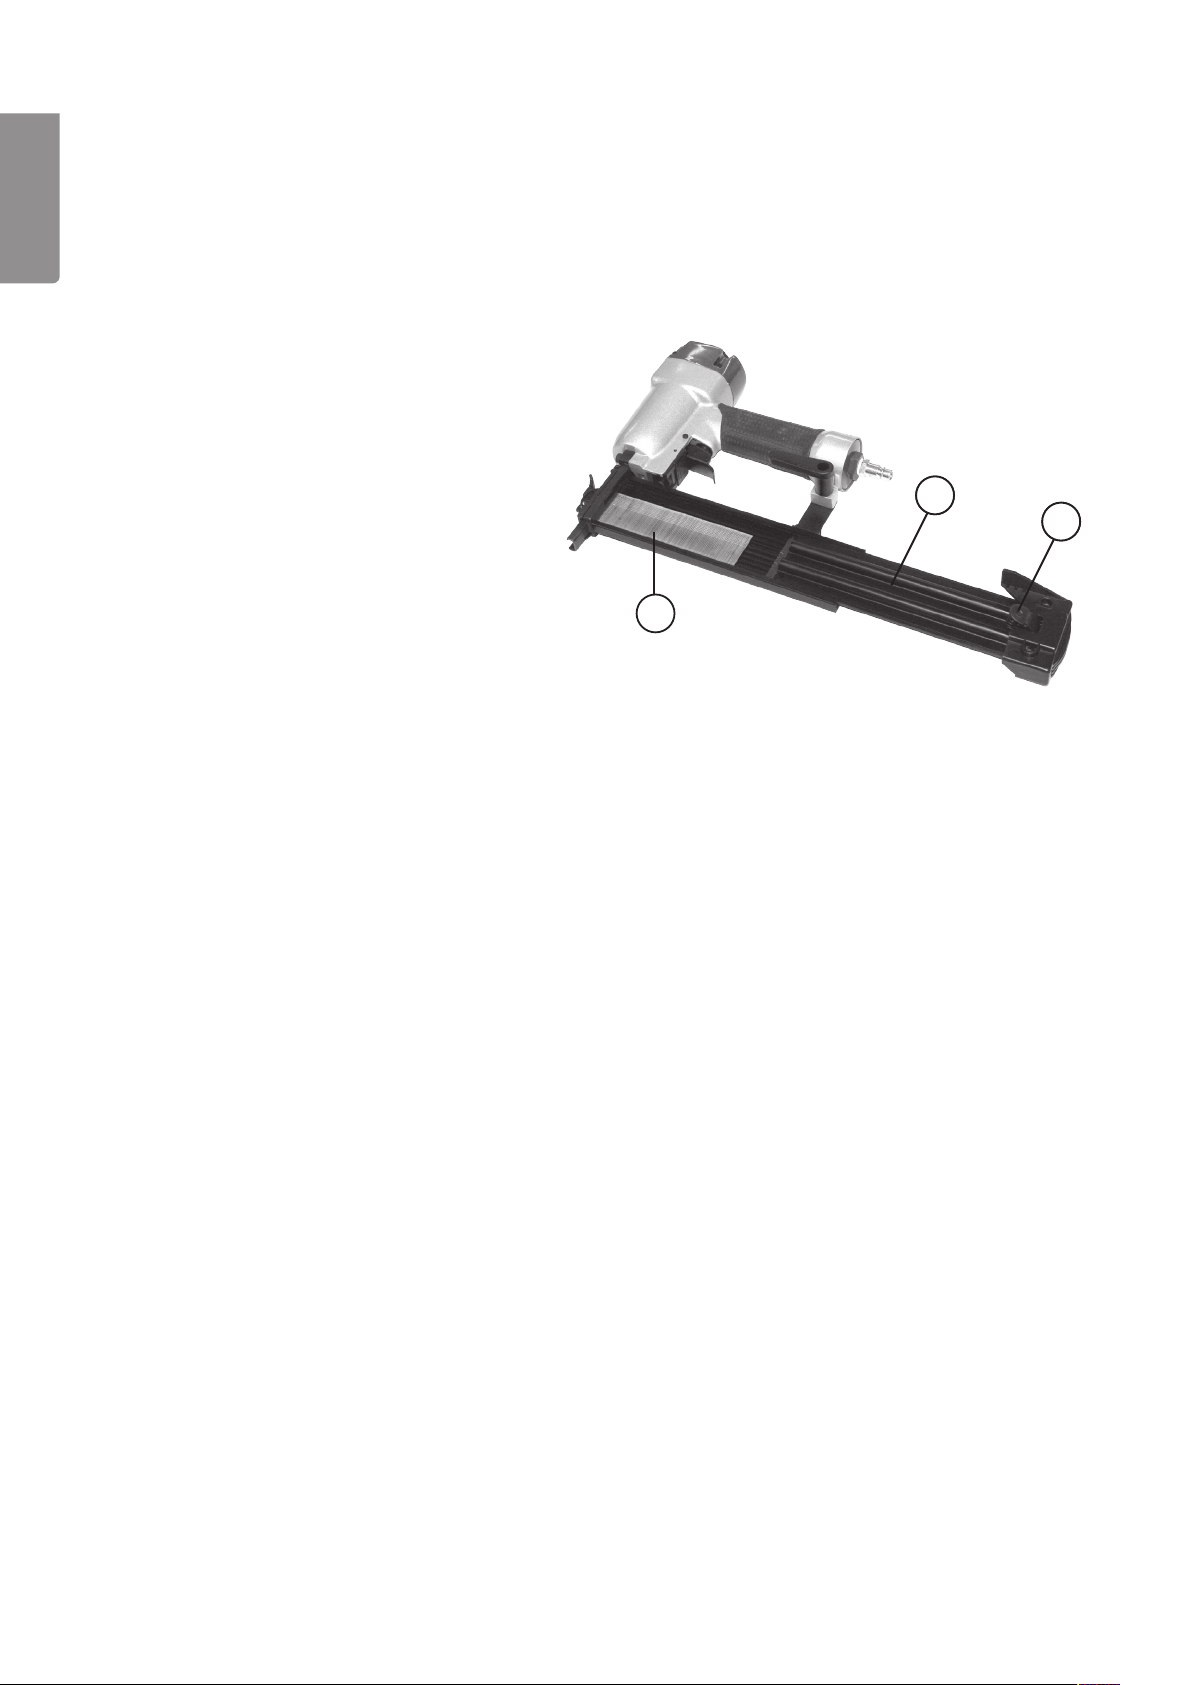
Loading
18-Gauge Brads:
1. Press in the magazine lock (5) on the end
of the magazine and slide out the
magazine (9).
2. Hold the magazine open. Insert the nails
(10). The points must locate in the groove
in the bottom of the xed magazine.
3. Slide the magazine back in.
4. Push the magazine all the way in until the
lock “clicks” into place.
Warning!
In order to prevent ying nails or waste from causing serious eye injuries, the user of the nail gun and anyone else within range of it should wear safety goggles conforming to standards laid down by the Health and
Safety Commission: (they should protect the user from the front and sides when he/she loads, services or
uses the nail gun). Glasses without side guards and visors do not provide enough protection.
10
109
105
Use
Before using it, check that the nail gun is undamaged and that all the parts are attached and that the
warnings on the nail gun are legible.
Warning! Always disconnect the nail gun from the air supply. Empty the magazine and pull the trigger to
release any air inside the nail gun before loading, servicing or troubleshooting.
1. Disconnect the air hose from the nail gun.
2. Load the magazine.
3. Set the correct air pressure (4-7 bars) using the pressure regulator.
4. Connect the nail gun to an air hose with a quick-connector (female).
5. a. Push the nail gun against the workpiece so that the safety trigger is pushed in, then pull the
trigger to re one nail.
b. Pull the trigger and then push the safety trigger against the workpiece to re one nail.
Function and Safety Test
Warning! Remove all nails/staples before testing the tool’s functions.
A) Do not touch the trigger. Press the safety trigger against the workpiece. THE NAIL GUN MUST NOT FIRE.
B) Without pressing the safety trigger against anything and without pointing the tool at yourself or anyone
else; pull the trigger. THE NAIL GUN MUST NOT FIRE.
C) Without pressing the safety trigger against anything; pull the trigger. Press the safety trigger against the
workpiece. THE NAIL GUN HAS TO FIRE.
D) Do not touch the trigger. Press the safety trigger against the workpiece and then pull the trigger.
THE NAIL GUN HAS TO FIRE.
6
Page 7
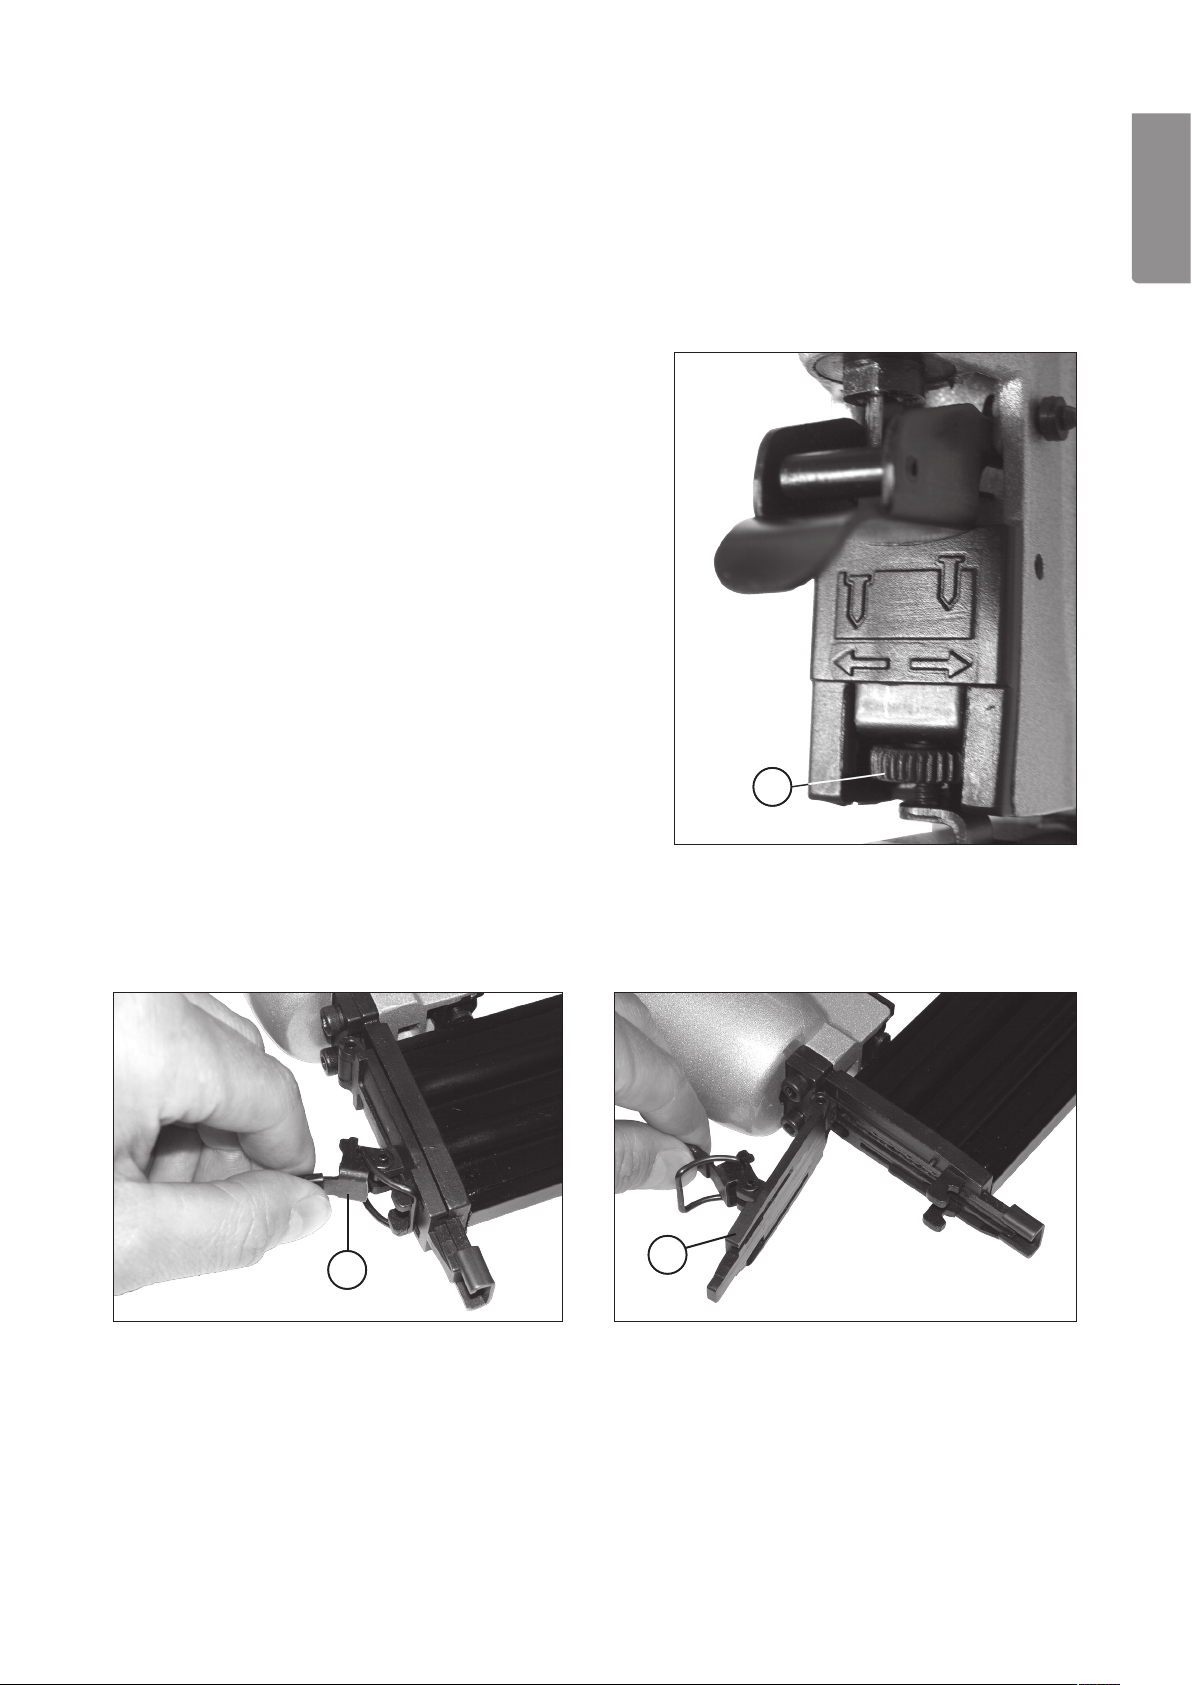
Set the power using the pressure regulator
• If the nail has not been driven in deep enough, you should increase the air pressure in 0.5 bar increments
and check the depth after each increase. Do not exceed the tool’s maximum working pressure (8.3 bars).
• Always use the lowest possible working pressure. It keeps the noise and vibration level to
a minimum and the internal components last longer.
Set the depth of penetration
• You can set how deep you want the nail to be driven
using the depth adjuster (8).
108
ENGLISH
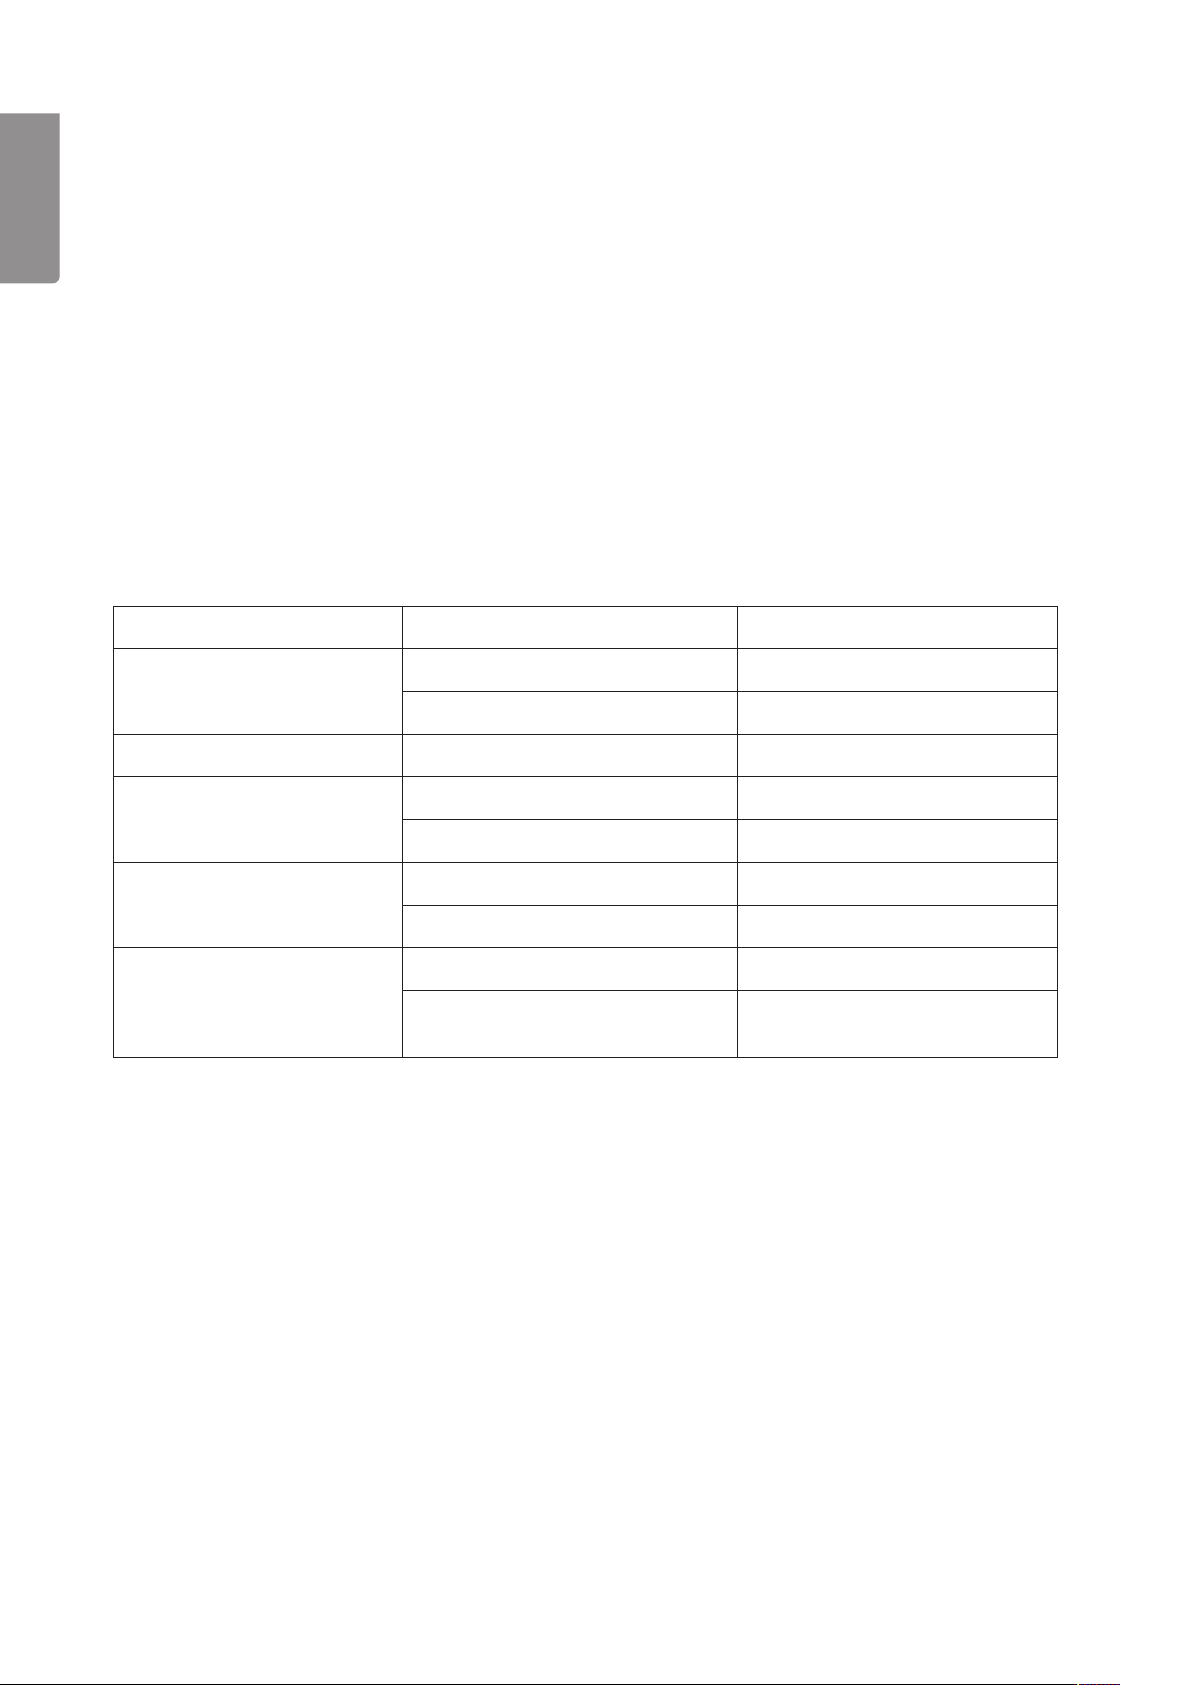
Removing nails that have jammed in the nail gun
103
1. Disconnect the nail gun from the air supply.
2. Open the magazine and remove any nails. See Loading.
3. Undo the catch (3) and lift the front cover plate (4).
4. Remove any nails that might have jammed.
5. Lower the front cover again and lock it using the catch.
104
6. Reload the magazine with nails. See Loading.
7
Page 8
Technical data
Model: F50
Weight (excluding nails): 1.5 kg
ENGLISH
Air coupling: Quick connector nipple
Max air pressure: 8.3 bars
Recommended air pressure: 4-7 bars
Fasteners: 18-Gauge Brad, 20-50 mm
Vibration: 1,7 m/s2
Sound level: LpA=86.2 dB(A), LwA=92.7 dB(A)
Magazine capacity: 100
Troubleshooting
Problem: Possible cause: Correction:
Air leak between main body
and cylinder cap.
Fastener driven in too deep. Air pressure to high. Adjust the air pressure.
Slow, low power. Poor lubrication. Lubricate as directed.
Fastener not driven in. Foreign body behind cover plate. Clean behind the cover plate.
Fastener jams. Wrong type of fastener. Use the right type.
Loose screw. Tighten the screws.
Damaged seal. Inspect and replace.
Air pressure/ow to low. Check and adjust the air supply
Not enough airow to the tool. Check the air supply.
Loose magazine screws
or cover plate.
Tighten screws.
Disposal
Follow local ordinances when disposing of this product. If you are unsure about how to dispose
of this product contact your municipality.
8
Page 9
Spikpistol
Artikelnummer: 30-9548 modell: F50
Läs igenom hela bruksanvisningen före användning och spara den sedan för framtida bruk. Vi reserverar oss
för ev. text- och bildfel samt ändringar av tekniska data. Vid tekniska problem eller andra frågor, kontakta vår
kundtjänst (se adressuppgifter på baksidan).
Innehållsförteckning
Säkerhetsinstruktioner 10
Produktbeskrivning 11
Laddning 12
Användning 12
Tekniska data 14
Felsökning 14
SVENSK A
Produktmärkning med säkerhetssymboler
Läs hela bruksanvisningen!
Använd alltid skyddsglasögon.
Använd alltid hörselskydd.
Pistolen är utrustad med säkerhetsspärr.
Spikningsverktyget får ej användas på byggnadsställningar och stegar.
9
Page 10

Säkerhetsinstruktioner
Varning!
• Håll aldrig en hand eller någon annan kroppsdel inom spikpistolens utskjutningsområde när det är
anslutet till tryckluftsledningen.
• Rikta aldrig spikpistolen mot någon annan.
• Lek inte med spikpistolen.
• Tryck aldrig in avtryckaren om inte verktygsnosen är riktad mot arbetsstycket.
• Hantera alltid spikpistolen varsamt.
• Tryck aldrig in avtryckaren eller utlös säkerhetsspärren medan du laddar spikpistolen.
SVENSK A
För säkerhets skull följ även dessa instruktioner
• Kom ihåg att spikpistolen inte är någon leksak utan ett verktyg. Lek inte med det.
• Använd spikpistolen endast på avsett sätt.
• Använd aldrig spikpistolen på ett sådant sätt att ett fästdon riktas mot dig själv eller någon
annan inom arbetsområdet.
• Använd inte spikpistolen som hammare.
• Bär spikpistolen med fattning om dess handtag, inte i luftslangen.
• Bär aldrig spikpistolen med intryckt avtryckare.
• Ändra inte spikpistolen från originalutförande till något annat.
• Var alltid medveten om att missbruk och felaktig hantering av den här spikpistolen kan skada dig
själv och andra.
• Fixera/tejpa aldrig fast säkringsspärr och/eller avtryckare i aktiverat läge.
• Lämna aldrig spikpistolen, som är kopplad till luftslang, utan uppsikt.
• Använd inte den här spikpistolen om det inte är försett med läsbar varningsdekal.
• Fortsätt inte att använda en spikpistol som läcker luft eller inte fungerar riktigt. Kontakta oss istället
om din spikpistol fortfarande inte fungerar riktigt.
• Håll vid användning spikpistolen på ett sådant sätt att inga skador kan uppstå på huvud eller kropp om
spikpistolens rekyl ökar i styrka på grund av tryckfall eller hårda ställen i arbetsstycket.
• Spika inte för nära kanten på arbetsstycket. Spiken kan passera genom arbetsstycket och vålla skador.
• Koppla från tryckluften före transport av spikpistolen.
• Kontrollera ofta att både avtryckare och säkerhetsspärren fungerar korrekt.
• Ta inte isär någon del av spikpistolen, framför allt inte säkerhetsspärren (för kontaktutlösningen).
• Gör inga provisoriska lagningar utan rätt utrustning.
• Undvik att försvaga kåphalvorna genom gravering etc.
• Ta reda på var elledningar etc. går i väggar, golv och tak innan du börjar använda spikpistolen.
Tryckluftstillförsel och kopplingar
Varning! För att förhindra olycksfall på grund av oavsiktlig utlösning av arbetsmoment skall
operatören alltid koppla från tryckluften:
1. Före justering.
2. Vid vård av spikpistolen.
3. Vid borttagning av fastklamrat fästdon.
4. När spikpistolen ej används.
5. Vid föryttning till annat arbetsområde.
Varning! Använd endast komprimerad luft som drivkälla för pneumatiskt drivna verktyg. Använd inte syre
eller brännbara gaser som drivkraft eftersom dessa medför explosionsrisk.
• Kompressorer måste ha tillräcklig kapacitet för att säkerställa tillräckligt tryck och luftöde för avsedd
användning. Tryckfall i systemet kan minska spikpistolens drivkraft. Se "Tekniska data" för inställning av
korrekt tryck för spikpistolen ifråga.
10
Page 11

• Använd anslutningskopplingar som släpper ut trycket från spikpistolen när den kopplas från så att spikpistolen blir trycklös.
• Tryckluftsledningar för industriellt bruk bör läggas med lutning med den högsta punkten närmast kompressorn. Lätt åtkomliga vattenavskiljare bör installeras på de lägst belägna punkterna. Vattenavskiljarna
bör tömmas minst en gång om dagen eller vid behov oftare. Smuts och vatten i tryckluftledningarna är de
huvudsakliga orsakerna till slitage i pneumatiskt drivna verktyg.
• Anslutningarna för spikpistolen bör förses med en reduceringsventil med vattenavskiljare direkt vid själva
anslutningspunkten. Ett lter hjälper till med att ge max. effekt och minimera slitaget. Filtret måste ha tillräcklig ödeskapacitet för avsedd monteringsplats för resp. anslutningspunkt. Filtret måste hållas rent för
att kunna leverera ren tryckluft för resp. verktyg. Se tillverkarens instruktioner för korrekt lterskötsel. Ett
smutsigt och igentäppt lter resulterar i tryckfall som minskar spikpistolens effekt.
• Tryckregulatorn måste kunna ställas in från 0 till 7 bar.
• Luftslangarna bör tåla minst 10.5 bar arbetstryck eller 150 % av det maximala lufttryck som systemet
skulle kunna ge. Matarslangen bör ha snabbkoppling för snabb lossning från nippeln på spikpistolen.
• Se till att den tryckluft som levereras till spikpistolen inte överskrider max. tillåtet arbetstryck
(8,3 bar). Ställ i början matartrycket på lägsta rekommenderade arbetstryck, se "Tekniska data".
• Kontrollera att spikpistolen fungerar korrekt genom att göra ett funktions och säkerhetsprov före
varje arbetstillfälle.
SVENSK A
Produktbeskrivning
1. Avtryckare
2. Säkerhetsspärr
3. Snäppe till frontplattan
4. Frontplatta
107
106
101
5. Magasinspärr
108
6. Snabbkopplingsnippel
7. Ställbart utblås 360°
8. Vred för inslagsdjup
103
104
102
105
Smörjning
Obs! Smörj med några droppar olja i luftanslutningen innan spikpistolen används första gången.
• För bästa effekt krävs regelbunden men måttlig smörjning. Olja som införs i ledningarna smörjer inre
komponenter. Använd inte sköljolja eller tillsatser eftersom sådana smörjmedel ger snabbare slitage på
spikpistolens packningar och gummikuddar, vilket ger sämre effekt och kräver mer vård.
• Om ingen dimsmörjare används för tryckluften fyller man på olja i spikpistolens tryckluftsnippel en eller
två gånger per dag. Det behövs bara några droppar olja (1-2 st.) per gång. För mycket olja hopar sig bara
inne i ledningen och syns när man släpper ut luft.
• Användning i kyla. Vid kall väderlek i närheten av eller under noll grader Celsius kan fukten i ledningarna
frysa till och omintetgöra användningen. Vi rekommenderar användning av luftsmörjare eller permanent
frostskydd (etylenglykol) som smörjmedel.
Obs! För att förhindra frost- eller isbildning på spikpistolens ventiler och mekanismer, vilket kan leda till
att spikpistolen fungerar på fel sätt, bör man undvika att förvara spikpistolen på ett kallt ställe.
11
Page 12

Säkerhetsföreskrifter vid laddning
Vid laddning av spikpistolen
1) håll aldrig en hand eller någon annan kroppsdel inom spikpistolens utskjutningssektor;
2) rikta aldrig spikpistolen mot dig själv eller någon annan person;
3) tryck inte in avtryckaren eller för säkerhetsspärren nedåt eftersom spikpistolen då kan aktiveras oavsiktligt
med risk för skador.
Laddning
SVENSK A
T-dyckert 18:
1. Tryck in magasinspärren (5) längst bak på
magasinet och dra magasinsliden (9) bakåt.
2. Håll magasinet helt öppet. Sätt in spikarna
(10). Spetsarna måste ta stopp mot botten
på magasinets fasta del.
3. Skjut magasinsliden framåt.
4. Tryck framåt tills magasinspärren snäpper
in i läge.
Varning!
För att förhindra svåra ögonskador av kringygande spikar och/eller skräp bör en operatör och
övriga inom arbetsområdet alltid bära skyddsglasögon som uppfyller Arbetarskyddsstyrelsens krav (med
skydd både framifrån och på sidorna när man laddar, använder eller servar spikpistolen). Glasögon utan
ögonskydd på sidorna samt ansiktsskärmar ger inte tillräckligt skydd.
10
109
105
Användning
Kontrollera innan användning att spikpistolen är oskadat och att alla delar sitter fast samt att
varningstexten på spikpistolen är läsbar.
Varning! Koppla alltid bort spikpistolen från luftledningen. Töm magasinet och tryck på avtryckaren för att
tömma spikpistolen på luft innan laddning, service eller felsökning.
1. Ta bort tryckluftsslangen från spikpistolen.
2. Ladda magasinet.
3. Ställ in lämpligt tryck (4~7 bar) med tryckregulatorn.
4. Anslut spikpistolen till en tryckluftsslang med snabbkoppling (hona).
5. a. Sätt spikpistolen mot arbetsstycket så att säkerhetsspärren trycks in, tryck sedan in avtryckaren
för att spika.
b. Håll in avtryckaren och tryck sedan säkerhetsspärren mot arbetsstycket för att spika.
Funktions- och säkerhetsprov
Varning! Ta bort alla spikar innan du gör en funktionskontroll.
A) Vidrör inte avtryckaren. Tryck säkerhetsspärren mot arbetsytan. SPIKPISTOLEN FÅR EJ SPIKA.
B) Tryck inte säkerhetsspärren mot någonting och tryck in avtryckaren utan att rikta verktyget mot dig själv
eller någon annan. SPIKPISTOLEN FÅR EJ SPIKA.
C) Tryck inte säkerhetsspärren mot någonting och tryck in avtryckaren. Tryck säkringsspärren mot arbetsytan.
SPIKPISTOLEN MÅSTE SPIKA.
D) Vidrör inte avtryckaren. Tryck säkerhetsspärren mot arbetsytan och sedan trycker du in avtryckaren.
SPIKPISTOLEN MÅSTE SPIKA.
12
Page 13

Ställ in slagstyrkan med tryckregulatorn
• Om spiken inte har drivits in djupt nog ökar du lufttrycket med 0.5 bar åt gången med spikningskontroll
efter varje ökning. Överskrid inte tillåtet max. arbetstryck (8,3 bar).
• Arbeta alltid med lägsta möjliga arbetstryck. Det minimerar buller- och vibrationsnivån och
de inre komponenterna håller längre.
Ställ inslagsdjupet
• Med vredet (8) justeras hur långt in spiken skall
drivas i arbetsstycket.
SVENSK A
108
Ta bort spik som har fastnat i spikpistolen
103
104
1. Koppla bort spikpistolen från luftledningen.
2. Öppna magasinet och ta bort spiken som ligger i magasinet (se ”Laddning”).
3. Öppna snäppet (3) och vik upp frontplattan (4).
4. Ta bort eventuell spik som fastnat.
5. Vik tillbaka frontplattan igen och lås den med snäppet.
6. Ladda magasinet med spik igen (se ”Laddning”).
13
Page 14

Tekniska data
Modell: F50
Vikt (utan spikar): 1,5 kg
Luftanslutning: Snabbkopplingsnippel
Max lufttryck: 8,3 bar
Rekommenderat lufttryck: 4-7 bar
Fästdon: T-dyckert 18, 20-50mm (spik)
Vibration: 1,7 m/s2
SVENSK A
Ljudnivå: LpA=86,2 dB(A), LwA=92,7dB(A)
Magasinkapacitet: 100 st.
Felsökning
Problem Möjlig orsak Åtgård
Luftläckage mellan huvudkropp och cylindertopp.
Slår i fästdonet för långt. För högt lufttryck. Justera lufttrycket.
Fungerar långsamt eller svag. Dåligt smord. Smörj enligt instruktionerna.
Missar att slå i fästdon. ”Skräp” bakom frontplattan. Gör rent bakom frontplattan.
Fästdonet fastnar. Fel modell av fästdon används. Byt till rätt modell.
Skruv lös. Dra åt skruvarna.
Skadad packning. Inspektera och byt ut.
För lågt lufttryck eller öde. Kontrollera och justera
lufttillförseln.
Otillräckligt luftöde till verktyget. Kontrollera lufttillförseln.
Skruvarna till magasinet eller
frontplattan lösa.
Dra åt skruvarna.
Avfallshantering
När du ska göra dig av med produkten ska detta ske enligt lokala föreskrifter.
Är du osäker på hur du ska gå tillväga, kontakta din kommun.
14
Page 15

Spikerpistol
Artikkelnummer: 30-9548 modell: F50
Les igjennom hele bruksanvisningen grundig og ta vare på den til senere bruk. Vi reserverer oss for ev.
tekst- og bildefeil, samt forandringer av tekniske data. Ved tekniske problemer eller andre spørsmål,
ta kontakt med vår kundetjeneste (se opplysninger på baksiden).
Innholdsfortegnelse
Sikkerhet 16
Produktbeskrivelse 17
Ladning 18
Bruk 18
Tekniske data 20
Feilsøkingsskjema 20
NORSK
Produktmerking med sikkerhetssymboler
Les hele bruksanvisningen!
Bruk alltid vernebriller.
Bruk alltid hørselsvern.
Pistolen er utstyrt med sikkerhetssperre.
Spikerpistolen må ikke brukes på stillaser eller i stiger.
15
Page 16

Sikkerhet
Advarsel!
• Hold aldri hånden eller andre kroppsdel innenfor spikerpistolens utskytingsområde, mens lufttrykket
er tilkoblet.
• Rett aldri spikerpistolen mot noen.
• Ikke lek med spikerpistolen.
• Ikke trykk på avtrekkeren, dersom ikke verktøyet er rettet mot et arbeidsemne.
• Spikerpistolen må håndteres med varsomhet.
• Trykk ikke på avtrekkeren eller utløs sikkerhetssperren, mens du lader spikerpistolen.
Følg disse sikkerhetsinstruksene for din sikkerhets skyld
• Husk at spikerpistolen ikke er et leketøy, men et verktøy. Lek ikke med den.
• Bruk spikerpistolen til det den er beregnet til.
• Vær varsom ved bruk av spikerpistolen og påse at du aldri utfører en arbeidsoperasjon
med den, hvor den er rettet mot deg eller andre på arbeidsplassen.
NORSK
• Spikerpistolen må ikke brukes som hammer (til å slå med).
• Bær spikerpistolen i bærehåndtaket og ikke i luftslangen.
• Spikerpistolen må ikke bæres med avtrekkeren inntrykt.
• Du må ikke endre på eller modisere spikerpistolen.
• Feilaktig håndtering og misbruk av spikerpistolen kan føre til alvorlige personskader.
• Sikkerhetssperren må ikke festes eller tapes i aktivert posisjon.
• Forlat ikke spikerpistolen, mens den er tilkoblet luftslangen.
• Ikke bruk spikerpistolen, dersom den ikke er utstyrt med låsbar sikkerhetsanordning.
• Spikerpistolen må ikke brukes, dersom den lekker luft eller har andre skader. Kontakt forhandler dersom
den ikke fungerer som den skal.
• Bruk spikerpistolen på en slik måte, at du ikke skades av en ev. rekyl. Rekyl kan forekomme
når spikeren treffer et hardt arbeidsstykke, ved trykkfall etc.
• Ikke spikre for nærme kanten på arbeidsstykket. Spikeren kan gå gjennom arbeidsstykket
og forårsake skader.
• Koble fra trykkluften før ytting av spikerpistolen.
• Kontroller regelmessig at avtrekker og sikkerhetssperren er i orden.
• Ikke demonter spikerpistolen. Sikkerhetssperren må ikke tukles med, og den må alltid være intakt.
• Bruk kun originaldeler, ikke lag provisoriske løsninger på spikerpistolen.
• Påse at du ikke ødelegger dekselets styrke ved f.eks. å gravere/merke det.
• Orienter deg om hvor strømkabler, rør etc. går i veggen/gulvet/taket, før du starter arbeidet.
Trykklufttilførsel og koblinger
Advarsel!
For å forhindre ulykker på grunn av uventet utløsning av spikerpistolen, skal brukeren alltid koble fra trykkluften:
1. Før justeringer.
2. Ved vedlikehold av spikerpistolen.
3. Ved fjerning av fastklemte spikre i utløpet.
4. Når spikerpistolen ikke er i bruk.
5. Ved ytting til annet arbeidsområde.
Advarsel! Bruk kun komprimert luft som drivkilde for pneumatisk drevede verktøy.
Ikke bruk syre eller brennbare gasser som drivkraft, da disse medfører stor fare for eksplosjon.
• Kompressoren må ha tilstrekkelig kapasitet for å få stort nok trykk og luft til det formål spikerpistolen er
beregnet for. Trykkfall i systemet kan redusere spikerpistolens drivkraft.
Se ”Tekniske data” for innstilling av riktig trykk for spikerpistolen.
16
Page 17

• Bruk tilkoblingsstykker, som slipper ut trykket fra spikerpistolen når den kobles fra, slik at spikerpistolen
blir trykkløs.
• Trykkluftsledninger, for industrielt bruk, bør legges med helling, med det høyeste punktet nærmest kompressoren. Lett tilgjengelige vannutskillere bør installeres på de lengste strekkene. Vannutskillerne bør
tømmes minst en gang per dag (eller oftere ved behov). Smuss og vannansamling i trykkluftsledningene
er hovedårsak til slitasje i pneumatisk drevede verktøy.
• Tilkoblingsstykkene, for spikerpistolen, bør utstyres med en reduksjonsventil med vannutskiller, direkte
ved selve tilslutningspunktet. Et lter hjelper til med å gi maks. effekt og redusert slitasje. Dette lteret må
ikke redusere lufttilførselen. Filteret må holdes rent, for å kunne levere den ønskede mengde trykkluft.
Se produsentens instruksjoner for riktig vedlikehold av lteret.
Et lter, tildekket med smuss, resulterer i trykkfall, som reduserer spikerpistolens effekt.
• Trykkregulatoren må kunne stilles inn på fra 0 til 7 bar.
• Luftslangene må kunne tåle et arbeidstrykk på minst 10,5 bar, eller 150 % av det maksimale lufttrykket, som
systemet skal kunne gi. Mateslangen bør ha en hurtigkobling for raskt å kunne kobles fra spikerpistolen.
• Påse at den trykkluften som leveres til spikerpistolen ikke overstiger maksimalt tillatt arbeidstrykk
(8,3 bar). I starten bør matetrykket ligge på det laveste anbefalte arbeidstrykket, se ”Tekniske data”.
• Sjekk at spikerpistolen fungerer korrekt, ved å utføre en funksjons- og sikkerhetstest, ved
hvert arbeidstilfelle.
NORSK
Produktbeskrivelse
1. Avtrekker
2. Sikkerhetssperre
3. Snepplås til frontplaten
4. Frontplate
5. Magasinsperre
6. Nippel for hurtigkobling
7. Justerbar utblåsing 360°
8. Justeringsskrue for å justere
dybde på innslag
103
104
102
107
106
101
108
105
Smøring
Obs! Smør med noen dråper olje i lufttilkoblingen før spikerpistolen tas i bruk første gang.
• For å oppnå best mulig effekt må verktøyet smøres regelmessig. Oljen som føres inn i ledningene smører
ikke verktøyets indre komponenter. Ikke bruk spillolje eller tilsetningsstoffer, da disse gir raskere slitasje på
spikerpistolens pakninger og gummiputer. Dette vil igjen gi dårligere effekt og mer krevende vedlikehold.
• Dersom man ikke bruker dampsmøring for trykkluften, fyller man olje i spikerpistolens trykkluftsnippel, en
til to ganger daglig. Det er kun nødvendig med et par dråper (1 – 2 stk.) av gangen. Når man bruker for
mye olje, vil dette hope seg opp i ledningen, og komme tilsyne når luften slippes ut.
• Bruk ved kalde temperaturer. Ved kaldt vær (rundt null grader Celsius og kaldere) kan kondens og vann
i ledningene fryse til is og stengebegrense lufttilførselen. Vi anbefaler da å bruke luftsmørende eller permanent frostbeskyttet smøremiddel (f.eks. etylenglykol). Vær oppmerksom på at spikerpistolens ventiler
og mekanismer også må frostbeskyttes. Dersom man ikke gjør det kan det føre til at spikerpistolen ikke
fungerer som ønsket. Unngå å oppbevare spikerpistolen kaldt.
17
Page 18

Sikkerhet ved lading
Ved lading av spikerpistolen
1) Hold aldri hendene eller andre kroppsdeler foran spikerpistolens utskytingssektor.
2) Rett aldri spikerpistolen mot deg selv eller andre personer.
3) Ikke trykk inn avtrekkeren eller løsne på sikkerhetssperren ved lading, da dette kan føre til uventet
utløsing av spikre, og dermed også skader.
Lading
T-dykkert 18:
1. Trykk inn magasinsperren (5) lengst bak
på magasinet, og skyv magasinholderen
(9) bakover.
2. Åpne opp magasinet helt og sett inn spikrene (10). Pass på at spissene stopper
NORSK
mot magasinbunnens faste del.
3. Skyv magasinholderen framover.
4. Press framover til magasinsperren festes
i låst posisjon.
Advarsel!
For å forhindre skader, bør operatøren og andre som er i nærheten av arbeidsområdet, bruke hodevern og
øyevern, som oppfyller Arbeidstilsynets krav. (Vær oppmerksom på at øynene også må beskyttes fra siden.)
10
109
105
Bruk
Før oppstart må du forsikre deg om at spikerpistolen er i orden, at alle deler er riktig montert
og sitter fast, og at advarselteksten er leselig.
Advarsel! Husk å alltid koble spikerpistolen fra luftledningen, tøm magasinet og trykk på avtrekkeren
(for å tømme spikerpistolen for luft), før lading, service, feilsøking og vedlikehold.
1. Koble fra trykkluftslangen fra spikerpistolen.
2. Lad magasinet.
3. Still inn trykket (4 – 7 bar) med trykkregulatoren.
4. Spikerpistolen må kobles til en trykkluftslange som har hurtigkobling.
5. a. Plasser spikerpistolen mot arbeidsstykket, slik at sikkerhetssperren blir presset inn.
Deretter kan du trykke på avtrekkeren, for å spikre.
b. Hold avtrekkeren inne, og trykk siden sikkerhetssperren mot arbeidsstykket, for å spikre.
Funksjons- og sikkerhetstesting
Advarsel! Fjern alle spikre, før du utfører funksjonstesten.
A) Ikke trykk på avtrekkeren. Press sikkerhetssperren mot en arbeidsoverate.
SPIKERPISTOLEN SKAL NÅ IKKE SPIKRE.
B) Forsøk å presse inn avtrekkeren uten at sikkerhetssperren er presset inn. Spikerpistolen MÅ IKKE være
rettet mot deg eller andre personer! SPIKERPISTOLEN SKAL NÅ IKKE SPIKRE.
C) Forsøk å presse inn avtrekkeren uten at sikkerhetssperren er presset inn. Press nå sikkerhetssperren
mot et arbeidsstykke. SPIKERPISTOLEN SKAL NÅ IKKE SPIKRE.
D) Ikke trykk på avtrekkeren. Press sikkerhetssperren mot et arbeidsemne og trykk så på avtrekkeren.
NÅ SKAL SPIKERPISTOLEN SPIKRE.
18
Page 19

Still inn slagstyrken med trykkregulatoren
• Dersom spikeren ikke har blitt presset langt nok inn, kan du øke lufttrykket med 0,5 bar av gangen.
Ta en spikringskontroll mellom hver økning. Husk å ikke overskride det maksimalt tillatte arbeidstrykket
(8,3 bar).
• Arbeid alltid med lavest mulig arbeidstrykk. Det minimerer støy- og vibrasjonsnivået,
og beskytter de indre komponentene i spikerpistolen, slik at de varer lengre.
Still inn dybden på anslaget
• Med vrideren (8) kan du justere hvor langt spikeren
skal drive inn i arbeidsstykket.
NORSK
108
Fjerning av spiker, som har satt seg fast i spikerpistolen
103
1. Koble lufttrykkslangen fra spikerpistolen.
104
2. Åpne magasinet og ta ut alle spikrene som ligger der (se under ”Lading”).
3. Åpne snepplåsen (3) og vipp ut frontplaten (4).
4. Fjern spikeren/spikrene som har satt seg fast.
5. Plasser frontplaten på plass igjen og lås den.
6. Lad magasinet med spiker igjen (se under ”Lading”).
19
Page 20

Tekniske data
Modell: F50
Vekt: 1,5 kg
Lufttilkobling: Hurtikoblingsnippel
Maks. lufttrykk: 8,3 bar
Anbefalt lufttrykk: 4 – 7 bar
Spiker: T-dykkert 18, 20 – 50 mm
Magasinkapasitet: 100 stk.
Vibrasjon: 1,7 m/s2
Lydnivå: LpA=86,2 dB(A), LwA=92,7 dB(A)
NORSK
Feilsøkingsskjema
Problem: Mulig årsak Tiltak
Luftlekkasje mellom hovedkropp og sylindertopp.
Slår spikeren for langt inn. For høyt lufttrykk. Juster lufttrykket.
Går sakte eller svakt. Dårlig smurt. Smør som beskrevet ovenfor.
Hopper over å skyte ut
spiker enkelte ganger.
Spikeren setter seg fast
i spikerpistolen.
Skrue løs. Dra til skruen.
Skadet pakning. Skrift ut.
For lavt lufttrykk. Sjekk og juster lufttilførselen.
”Smuss” bak frontplaten. Rengjør bak frontplaten.
For lite luft til verktøyet. Kontroller lufttilførselen.
Feil type spikre. Skift til riktig type spikre.
Løse skruer til frontplaten
eller magasinet.
Dra til skruene.
Avfallshåndtering
Når du skal kvitte deg med produktet, skal dette skje i henhold til lokale forskrifter.
Er du usikker på hvordan du går fram, ta kontakt med lokale myndigheter.
20
Page 21

Naulain
Tuotenumero: 30-9548 malli: F50
Lue käyttöohje huolellisesti ennen tuotteen käyttöä ja säilytä se vastaisuuden varalle. Emme vastaa
mahdollisista teksti- tai kuvavirheistä, emme myöskään teknisten tietojen muutoksista. Ongelmien ilmetessä
ota meihin yhteyttä (yhteystiedot takasivulla).
Sisällysluettelo
Turvallisuusohjeet 22
Tuotekuvaus 23
Lataus 24
Käyttö 24
Tekniset tiedot 26
Vianhaku 26
Tuotteen merkinnät ja turvallisuussymbolit
Lue käyttöohjeet kokonaan!
Käytä aina suojalaseja.
Käytä aina kuulosuojaimia.
Naulaimessa on turvalukitus.
Naulainta ei saa käyttää rakennustelineillä tai tikkailla.
SUOMI
21
Page 22

Turvallisuusohjeet
Varoitus!
• Älä pidä kättä tai muuta ruumiinosaa ulostuloalueella laitteen ollessa liitettynä paineilmaan.
• Älä osoita laitetta muita henkilöitä kohti.
• Älä leiki laitteella.
• Älä paina liipaisimesta, ellei ulostuloaukko osoita kohti työkappaletta.
• Käsittele naulainta varoen.
• Älä paina liipaisimesta äläkä vapauta lukitsinta (varmistinta) työkalua ladatessasi.
Noudata seuraavia ohjeita
• Pidä mielessä, että laite ei ole lelu, vaan työkalu. Älä leiki laitteella.
• Käytä laitetta vain sille tarkoitettuihin toimintoihin.
• Älä käytä laitetta niin, että naula tai hakanen kohdistuu itseäsi tai muita kohti.
• Älä käytä laitetta vasarana.
• Älä kanna laitetta ilmaletkusta.
• Älä kanna laitetta sormi liipaisimella.
• Älä koskaan muunna koneen osia tai toimintaa.
• Muista, että väärinkäyttö ja ohjeiden vastainen käyttö aiheuttaa vaaran käyttäjälle ja muille lähistöllä oleville.
• Älä kiinnitä/teippaa varmistinta ja/tai liipaisinta aktivoidussa tilassa.
• Älä jätä ilmaletkuun liitettyä laitetta ilman valvontaa.
• Älä käytä laitetta, ellei siinä ole luettavaa varoitustarraa.
SUOMI
• Keskeytä työskentely, jos laite vuotaa ilmaa, tai jos se ei toimi kunnolla. Jos laitteesi ei toimi kunnolla,
ota yhteys myymäläämme.
• Pidä laitetta niin, ettei pääsi tai ruumiisi vahingoitu, mikäli laitteen rekyyli kasvaa painehäviön tai
työkappaleessa olevan kovan kohdan takia.
• Älä naulaa liian lähellä työkappaleen reunaa. Naula voi mennä työkappaleen läpi ja aiheuttaa vahinkoa.
• Kytke paineilma pois laitetta siirrettäessä.
• Tarkista säännöllisin väliajoin, että sekä lukitus että liipaisin toimivat moitteettomasti.
• Älä irrota laitteen osia, erityisesti varmistinta.
• Älä tee tilapäiskorjauksia ilman kunnollisia varusteita.
• Älä heikennä koteloa esim. kaivertamalla sitä.
• Selvitä sähköjohtojen ym. sijainti seinässä, lattiassa ja katossa ennen naulauksen aloittamista.
Paineilman tulo ja kytkennät
Varoitus! Tahattoman laukeamisen estämiseksi tulee paineilma kytkeä pois päältä:
1. Ennen säätöjä.
2. Laitetta huollettaessa.
3. Kiinnittynyttä hakasta/naulaa irrotettaessa.
4. Kun laitetta ei käytetä.
5. Laitetta siirrettäessä toiseen paikkaan.
Varoitus! Käytä ainoastaan puristettua ilmaa pneumaattisten työkalujen kanssa. Älä käytä happea tai
palavia kaasuja työpaineena. Räjähdysvaara!
• Kompressorissa tulee olla riittävä suorituskyky, jotta varmistetaan käyttötarkoitukseen riittävä paineilma ja
tuotto. Järjestelmän painehäviö saattaa vaikuttaa laitteen käyttövoimaan. Katso kohta "Laitteen tekniset
tiedot" oikean paineen säätämiseksi.
• Käytä liittimiä, jotka päästävät paineen pois naulaimesta letkua irrotettaessa.
22
Page 23

• Paineilmaletkuissa tulee teollisuuskäytössä olla kallistus niin, että korkein piste on kompressorin vieressä.
Alimpiin pisteisiin tulee asentaa helposti saatavilla olevat vedenerottimet. Vedenerottimet tulee tyhjentää
vähintään kerran päivässä tai tarpeen tullen useammin. Paineilmaletkuissa oleva lika ja vesi ovat yleisimmät syyt pneumaattisten laitteiden kulumiseen.
• Laitteiden liittämisessä tulee käyttää vedenerottimella varustettua paineenvähennysventtiiliä suoraan
liitäntäkohdassa. Suodatin edesauttaa saamaan parhaan tehon ja estämään kulumista. Suodattimen suorituskyvyn tulee olla asennuskohtaan tai liitoskohtaan riittävä. Suodattimen tulee olla puhdas jotta taataan
riittävä paineilma kullekin laitteelle. Noudata valmistajan antamia suodattimen huolto-ohjeita. Likainen ja
tukkoinen suodatin johtaa painehäviöön, mikä vähentää laitteen tehoa.
• Paineensäätimen tulee olla säädettävissä 0 – 7 baarin välillä.
• Ilmaletkujen tulee kestää vähintään 10,5 baarin paine tai 150 % järjestelmän tuottamasta maksimipaineesta. Syöttöletkussa tulee olla pikaliitäntä, jotta nipan saa nopeasti irrotettua laitteesta.
• Varmista, että laitteeseen tuleva paineilma ei ylitä suurinta sallittua työpainetta (8,3 baaria). Säädä
syöttöpaine aluksi alimmalle suositellulle työpaineelle, katso kohta ”Tekniset tiedot”.
• Tee naulaimelle ja sen turvalaitteille koekäyttö aina ennen uuteen työhön ryhtymistä.
Tuotekuvaus
1. Liipaisin
2. Varmistin
3. Etulevyn varmistin
4. Etulevy
5. Lipaslukko
6. Pikaliitosnippa
7. Säädettävä puhallus 360°
8. Syvyyssäätövipu
Voitelu
103
104
102
107
106
SUOMI
101
108
105
Huom.! Voitele ilmaliitäntä muutamalla öljytipalla ennen laitteen ensimmäistä käyttöönottoa.
• Paras teho saadaan säännöllisellä, mutta maltillisella voitelulla. Letkuissa oleva öljy ei voitele komponentteja. Älä käytä huuhteluöljyä tai lisäaineita, sillä nämä kuluttavat nopeammin laitteen tiivisteitä ja kumiosia, mikä heikentää tehoa ja lisää huollon tarvetta.
• Jos paineilmalle ei käytetä sumuvoitelua, lisätään öljyä laitteen paineilmanippaan kerran tai kahdesti päivässä. Lisää vain muutama (1-2 ) tippa kerrallaan. Liiallinen öljynkäyttö johtaa öljyn kasautumiseen letkuihin ja näkyy ilmaa päästettäessä.
• Käyttö alhaisissa lämpötiloissa: Jos laitetta käytetään lähellä pakastumispistettä, saattaa letkuissa oleva
kosteus jäätyä ja estää laitteen käytön. Suosittelemme öljyäjän tai pysyvän pakkassuojan (etyleeniglykooli)
käyttöä voitelussa. Huom! Laitteen säilyttämistä kylmässä paikassa tulee välttää. Näin estetään jään muo-
dostuminen laitteen mekanismeihin ja venttiileihin, mikä saattaa johtaa laitteen virheelliseen toimintaan.
23
Page 24

Latauksen turvallisuusohjeita
Lataus:
1) Älä pidä kättä tai muuta ruumiinosaa laitteen ulostulosektorilla.
2) Älä osoita laitteella itseäsi tai muita henkilöitä.
3) Älä paina liipaisinta tai vie lukitsinta alaspäin, sillä laite saattaa aktivoitua tahattomasti ja aiheuttaa vaaran.
Lataus
T-dyckert-naula 18:
1. Paina lipaslukkoa (5) aivan lippaan taakse
ja vedä lippaan luisti (9) taakse.
2. Pidä lipas täysin auki. Aseta naulat (10).
Kärkien tulee pysähtyä lippaan
pohjaa vasten.
3. Työnnä lipasluistia eteenpäin.
4. Työnnä eteenpäin kunnes lipaslukko
naksahtaa paikoilleen.
Varoitus!
Lentelevien naulojen aiheuttamien vahinkojen estämiseksi käyttäjän ja muiden työalueella olevien tulee
käyttää viranomaisten vaatimukset täyttäviä suojalaseja: (lasien tulee suojata edestä ja sivuilta, kun laitetta
ladataan, käytetään tai huolletaan). Silmälasit, joissa ei ole suojia sivuilla eikä kasvosuojaa, eivät anna
SUOMI
riittävää suojaa.
10
109
105
Käyttö
Tarkista ennen käyttöä, että laite ei ole vioittunut, kaikki osat ovat kiinni ja että naulaimen varoitusteksti
on luettavissa.
Varoitus! Kytke laite aina pois ilmaletkusta. Tyhjennä lipas ja paina liipaisimesta useita kertoja
tyhjentääksesi ilman ennen latausta, huoltoa tai vianetsintää.
1. Irrota paineilmaletku laitteesta.
2. Lataa lipas.
3. Säädä sopiva paine (4~7 baaria) paineensäätimellä.
4. Liitä laite paineilmaletkuun pikaliitännällä (naaras).
5. a. Aseta naulain työkappaletta vasten, siten että varmistin painuu sisään. Tämän jälkeen
naulaus tapahtuu liipasinta vetämällä.
b. Pidä liipasinta pohjassa ja naulaa painamalla naulaimen varmistinta työkappaletta kohti.
Toiminta- ja turvallisuustarkastus
Varoitus! Poista kaikki naulat/hakaset ennen tarkastusta.
A) Älä koske liipaisimeen. Paina varmistinta työkappaletta vasten. LAITE EI SAA NAULATA.
B) Älä paina laitteen suuosalla (varmistimella) mihinkään ja paina liipaisimesta osoittamatta laitteella itseäsi
tai muita. LAITE EI SAA NAULATA.
C) Älä paina lukitusta mitään vasten ja paina liipaisimesta. Paina lukitus (varmistin) työkappaletta vasten.
LAITTEEN TULEE NAULATA.
D) Älä koske liipaisimeen. Paina varmistin työkappaletta vasten, jonka jälkeen painat liipaisimesta.
LAITTEEN TULEE NAULATA.
24
Page 25

Säädä iskuvoima paineensäätimellä
• Mikäli naula ei painu tarpeeksi syvälle, lisää ilmanpainetta 0,5 baarilla kerrallaan ja kokeile uudelleen
jokaisen lisäyskerran jälkeen. Älä ylitä suurinta sallittua työpainetta (8,3 baaria).
• Työskentele aina pienimmällä mahdollisella työpaineella. Se pienentää melua ja tärinää, ja laitteen
komponentit kestävät pidempään.
Säädä iskusyvyys
• Vivulla (8) säädetään naulan uppouma
työkappaleeseen.
108
Juuttuneiden naulojen poistaminen naulaimesta
103
104
SUOMI
1. Kytke laite pois ilmaletkusta.
2. Avaa lipas ja poista lippaassa olevat naulat. Katso ”Lataus”.
3. Avaa etulevyn varmistin (3) ja taita etulevy ylös (4).
4. Poista mahdollisesti kiinnijäänyt naula.
5. Taita etulevy takaisin ja lukitse varmistimella.
6. Täytä lipas jälleen nauloilla. Katso ”Lataus”.
25
Page 26

Tekniset tiedot
Malli: F50
Paino (ilman nauloja): 1,5 kg
Ilmaliitäntä: Pikaliitosnippa
Suurin ilmanpaine: 8,3 baaria
Suositeltu ilmanpaine: 4-7 bar
Naula: T-dyckert-naula 18, 20-50 mm
Tärinä: 1,7 m/s2
Melutaso: LpA=86,2 dB(A), LwA=92,7 dB(A)
Lippaan kapasiteetti: 100 kpl
Vianetsintä
Ongelma Mahdollinen syy
Ilmavuoto rungon ja
sylinterin välistä.
Lyö naulan liian syvälle. Liian korkea ilmanpaine. Säädä ilmanpaine.
SUOMI
Toimi hitaasti tai heikosti. Huono voitelu. Voitele ohjeiden mukaisesti.
Ei lyö naulaa. Roska etulevyn takana. Puhdista etulevy.
Naulat juuttuvat. Naulat/hakaset ovat
Ruuvi löysällä. Kiristä ruuvit.
Tiiviste vioittunut Tarkasta ja vaihda.
Liian matala ilmanpaine
tai vuoto.
Riittämätön ilmantuotto työkalulle. Tarkasta ilmansyöttö.
väärän tyyppisiä
Lippaan tai etulevyn ruuvit
ovat löysällä.
Toimenpiteet
Tarkasta ja säädä ilmantuottoa.
Vaihda oikeaan tyyppiin
Kiristä ruuvit.
Kierrätys
Kierrätä tuote asianmukaisesti, kun poistat sen käytöstä.
Ota yhteys kuntasi jäteneuvontaan, mikäli olet epävarma.
26
Page 27

Declaration of Conformity
Hereby, Clas Ohlson AB, declares that the machinery:
Nail Gun Cotech
30-9548/F50
Complies with the provisions of the following Directives:
2006/42/EC MACHINERY DIRECTIVE
Complies with the provisions of the following hamonized standards:
EN 792-13:2000+A1:2008
Insjön, Sweden, June 2010
Klas Balkow
President
Clas Ohlson, 793 85 Insjön, Sweden
27
Page 28

SVERIGE
KUNDTJÄNST Tel: 0247/445 00
Fax: 0247/445 09
E-post: kundtjanst@clasohlson.se
INTERNET www.clasohlson.se
BREV Clas Ohlson AB, 793 85 INSJÖN
NORGE
KUNDESENTER Tlf.: 23 21 40 00
Faks: 23 21 40 80
E-post: kundesenter@clasohlson.no
INTERNETT www.clasohlson.no
POST Clas Ohlson AS, Postboks 485 Sentrum, 0105 OSLO
SUOMI
ASIAKASPALVELU Puh: 020 111 2222
Faksi: 020 111 2221
Sähköposti: info@clasohlson.fi
INTERNET www.clasohlson.fi
OSOITE Clas Ohlson Oy, Annankatu 34–36 A, 00100 HELSINKI
UNITED KINGDOM
For consumer contact, please visit
www.clasohlson.co.uk and click on
customer service.
INTERNET www.clasohlson.co.uk
 Loading...