

Page 1

Cosmed does not assume the liability for interpretation mistakes of this
documentation or for casual or consequential damages in connection with the
provision, representation or use of this documentation.
No parts of this manual may be reproduced or transmitted in any form without
the express permission of COSMED Srl.
COSMED Software can be installed only in one device.
Excel is a registered trademark of Microsoft Corporation.
DBIII is a registered trademark of Bordland International Inc.
Lotus 123 is a registered trademark of Lotus Development Corporation .
Pony FX User manual, II Edition
March 2004
Copyright © 2003 COSMED
Copyright © 2004 COSMED
COSMED Srl - Italy
http://www.cosmed.it
Part N. C02361-02-91
Page 2

Table of contents
Getting started 9
Important notices...................................................................10
Intended use ..........................................................................................10
Warnings ...............................................................................................10
Contraindications...................................................................13
Contraindications for the Spirometer tests ............................................13
Absolute contraindications..............................................................13
Relative contraindications...............................................................13
Contraindications for Bronchial provocation tests ................................13
Absolute contraindications..............................................................14
Relative contraindications...............................................................14
Environmental condition of use.............................................15
Safety and conformity............................................................16
Safety ..............................................................................................16
EMC................................................................................................16
Quality Assurance...........................................................................16
Medical Device Directive (CE mark)..............................................16
Keynotes.................................................................................17
Typographic keynotes ...........................................................................17
Graphic keynotes...................................................................................17
Systems Overview ..................................................................18
Before starting .......................................................................19
Checking the packing contents..............................................................19
Pony FX standard packaging...........................................................19
Warranty registration ............................................................20
Register the product via software....................................................20
How to contact COSMED...............................................................20
Complain, feedback and suggestions ..............................................20
PC configuration required .....................................................21
Technical features..................................................................22
Measurements 23
Measured parameters ...........................................................24
2 - Pony FX User Manual
Page 3

FVC - Forced Vital Capacity................................................................ 24
VC/IVC - Slow Vital Capacity and Ventilatory pattern........................ 25
MVV - Maximum Voluntary Ventilation ............................................. 25
Bronchoprovocation Response .............................................................25
Installation 27
Preparing Pony FX................................................................. 28
Pony FX unit......................................................................................... 28
The display ..................................................................................... 28
The keyboard.................................................................................. 28
The printer ...................................................................................... 29
The connectors................................................................................29
Battery charger......................................................................................30
Connect the flowmeter to the Pony FX................................................. 31
The turbine flowmeter ....................................................................31
The pneumotachograph ..................................................................32
Connect the Pony FX to the PC ............................................................ 32
Connect the Pony FX to an external printer.......................................... 32
Software installation .............................................................33
Installing the software........................................................................... 33
Run the software................................................................................... 33
PC port configuration............................................................................33
Software main features ......................................................... 34
Display.................................................................................................. 34
Tool bar.................................................................................................34
Show/hide the toolbar..................................................................... 34
Dialog windows.................................................................................... 34
Use of the keyboard........................................................................ 34
Use of the mouse ............................................................................ 34
Scroll bars............................................................................................. 35
On-line help .......................................................................................... 35
Software version................................................................................... 35
Calibration 37
The calibration program ....................................................... 38
Running the Calibration program .........................................................38
Log file ................................................................................................. 38
Index - 3
Page 4

Turbine calibration ................................................................39
Calibrating the turbine without a PC.....................................................39
Calibrating the turbine by means of a PC..............................................39
Checking the system signals .................................................41
The control panel...................................................................................41
Using the control panel ...................................................................41
Using Pony FX 43
Main functions of the Pony FX ...............................................44
Turning on/off the Pony FX ..................................................................44
Using the menu .....................................................................................44
Accessing the menu ........................................................................44
Using the keyboard................................................................................45
Logic of the keyboard .....................................................................46
Patient database management ............................................47
Create a new patient..............................................................................47
Search a patient in archive.....................................................................48
Performing the spirometric tests...........................................49
Recommendations for spirometry tests .................................................49
Forced Vital Capacity (pre)...................................................................49
Test encouragement ........................................................................50
Slow Vital Capacity ..............................................................................50
Maximum Voluntary Ventilation ..........................................................51
Bronchial Provocation Test ...................................................................51
Bronchodilators test ........................................................................51
Bronchoconstrictor test ...................................................................52
Performing the oximetry test (option)...................................54
Recommendations for oximetry tests ....................................................54
Performing the test................................................................................54
Viewing results.......................................................................56
View a test in archive............................................................................56
Printing results.......................................................................57
Replace the printer paper.......................................................................57
Printing tests by means of the internal printer .......................................57
Printing tests by means of an external printer........................................57
Options...................................................................................58
General settings.....................................................................................58
4 - Pony FX User Manual
Page 5

Spirometry options................................................................................58
FVC Post options.................................................................................. 59
Printout options.....................................................................................60
Advanced options ................................................................................. 60
Environmental data............................................................................... 61
Restore of initial settings ...................................................................... 61
Other functions of Pony FX .................................................... 62
Calibration ............................................................................................62
Control panel ........................................................................................62
LCD contrast.........................................................................................62
Paper feed ............................................................................................. 63
Memory deletion................................................................................... 63
Firmware version information ..............................................................63
Reset.......................................................................................64
Reset of the unit.................................................................................... 64
Formatting the unit................................................................................64
Database Management 65
Settings ..................................................................................66
Graphs ............................................................................................66
Interface.......................................................................................... 66
Units of measurements ...................................................................67
Using extra fields............................................................................ 67
Customise the fields........................................................................ 67
Patient's database................................................................. 68
Patient Card .................................................................................... 68
Visit Card .......................................................................................69
Test Card ........................................................................................69
Import/export a Tests card .................................................................... 69
Diagnosis Database............................................................................... 69
Receiving data from the unit................................................. 71
Archive maintenance.............................................................72
Reorganise the archive.......................................................................... 72
Delete the archive ................................................................................. 72
Backup and restore................................................................................72
Backup............................................................................................ 72
Restore............................................................................................ 73
Index - 5
Page 6

Spirometry 75
Setting spirometry options ....................................................76
Spirometry.............................................................................................76
Automatic Interpretation.................................................................76
Quality control ................................................................................77
Parameters manager ..............................................................................77
Predicted values manager......................................................................78
Predicteds set ..................................................................................78
Set the current predicted..................................................................79
Formula definition...........................................................................79
Page set-up ............................................................................................80
Spirometry tests .....................................................................82
Recommendations for spirometry tests .................................................82
Forced Vital Capacity (pre) ....................................................83
Perform a FVC (pre) test.......................................................................83
Test encouragement...............................................................................84
Perform the FVC test with the encouragement ...............................84
Slow Vital Capacity ................................................................85
Perform a SVC test................................................................................85
Maximum Voluntary Ventilation ...........................................87
Perform a MVV test..............................................................................87
Bronchial Provocation Test ....................................................88
Bronchodilator test................................................................................88
Methacholine and Histamine Bronchial provocation Tests...................88
Perform the test .....................................................................................89
Bronchial Provocation protocols Database............................................90
Enter a new Bronchial provocation protocol in the
archive.............................................................................................91
Viewing results.......................................................................92
Tests of the current patient..............................................................92
Delete a test.....................................................................................92
Printing results.......................................................................93
Printing Reports ....................................................................................93
Printing the active window....................................................................94
Printing a series of reports.....................................................................94
Electronic reports (*.pdf) ......................................................................94
Export data ............................................................................................95
Export a test ....................................................................................95
6 - Pony FX User Manual
Page 7

System maintenance 97
System maintenance .............................................................98
Cleaning and disinfection .....................................................................98
Cleaning the turbine flowmeter ......................................................99
Precautions during the cleaning of the turbine................................ 99
Suggested disinfection solutions...................................................100
Inspections.......................................................................................... 100
Appendix 101
Service - Warranty............................................................... 102
Warranty and limitation of liability.....................................................102
Return goods policy for warranty or non warranty repair................... 103
Repair Service Policy..........................................................................103
Privacy Information .............................................................105
Personal data treatment and purposes ................................................. 105
How your personal data are treated.....................................................105
The consent is optional, but… ............................................................ 105
Holder of the treatment ....................................................................... 105
Customer rights................................................................................... 106
Converting factors configuration ........................................107
ATS 94 recommendations.................................................... 108
ATS recommendations ....................................................................... 108
Predicted values ..................................................................109
ERS93................................................................................................. 109
Reference Adult:........................................................................... 109
Reference Paediatric:.................................................................... 109
KNUDSON 83.................................................................................... 109
Reference Adult/ Paediatric:......................................................... 109
ITS (White race) ................................................................................. 109
Reference Adult/ Paediatric:......................................................... 109
ITS (Black race).................................................................................. 109
Reference Adult/ Paediatric:......................................................... 109
LAM ................................................................................................... 110
Reference Adult/ Paediatric:......................................................... 110
Multicéntrico de Barcelona................................................................. 110
Reference Adult/ Paediatric:......................................................... 110
NHANES III....................................................................................... 110
Index - 7
Page 8

Reference Adult/ Paediatric: .........................................................110
Automatic diagnosis (algorithm).........................................................110
Quality Control Messages ...................................................................111
References........................................................................... 112
8 - Pony FX User Manual
Page 9

Getting started
Page 10

Important notices
Intended use
Pony FX is an electrical medical device designed to perform
pulmonary function tests. It is to be used by physicians or by
trained personnel on a physician responsibility.
Caution: Federal law restricts this device to sale by or on the
order of a physician.
This equipment has been conceived with the aim of providing an
auxiliary instrument allowing:
• the formulation of lung pathology diagnosis;
• important studies concerning human physiology;
• the collection of important information in sport medicine.
No responsibility attaches COSMED Srl for any accident
happened after a wrong use of the device, such as:
• use by non qualified people;
• non respect of the device intended use;
• non respect of the hereunder reported precautions and
instructions.
Warnings
The device, the program algorithms and the presentation of
measured data have been developed according to the
specifications of ATS (American Thoracic Society) and ERS
(European Respiratory Society). Other international references
have been followed when these were not available. All
bibliography references are reported in Appendix.
The present handbook has been developed with respect of the
European Medical Device Directive requirements which sort
Pony FX within Class II a.
It is recommended to read carefully the following precautions
before putting the device into operation.
The precautions reported below are of fundamental importance to
assure the safety of all COSMED equipment users.
1. This user manual is to be considered as a part of the medical
device and should always be kept on hand.
2. Safety, measure accuracy and precision can be assured only:
10 - Pony FX User Manual
Page 11

• using the accessories described in the manual or given
with the device. Actually non recommended accessories can
affect safety unfavourable. Before using non recommended
accessories it is necessary to get in touch with the
manufacturer;
• ordinary equipment maintenance, inspections,
disinfection and cleaning are performed in the way and with
the frequency described;
• any modification or fixing is carried out by qualified
personnel;
• the environmental conditions and the electrical plants
where the device operates are in compliance with the
specifications of the manual and the present regulations
concerning electrical plants. In particular grounding
reliability and leakage current suppression can only be
assured when the device three – wire receptacle is connected
to a yellow - green return connected to earth ground.
Attempting to defeat the proper connection of the ground
wire is dangerous for users and equipment.
3. Before powering the system, check the power cables and the
plugs. Damaged electrical parts must be replaced
immediately by authorised personnel.
4. The battery charger sold with Pony FX must be used only to
re-charge the battery. If you would like to perform test with
Pony FX connected to the mains, use the medical version
battery charger (see Installation chapter).
5. Cleaning residue, particulates, and other contaminates
(including pieces of torn or broken components) in the
breathing circuit pose a safety risk to the patient during
testing procedures. Aspiration of contaminates can
potentially be life-threatening. You must follow all the
cleaning procedures in System Maintenance, and you must
thoroughly inspect the components after cleaning and before
each patient test.
6. This device is not suitable for use in presence of flammable
anaesthetics. It is not an AP nor an APG device (according to
the EN 60 601-1 definitions).
7. Keep the device away from heat and flame source,
flammable or inflammable liquids or gases and explosive
atmospheres.
Chapter 1 - Getting started - 11
Page 12
8. In accordance with their intended use Pony FX is not to be
handled together with other medical devices unless it is
clearly declared by the manufacturer itself.
9. It is recommended to use a computer with electromagnetic
compatibility CE marking and with low radiation emission
displays.
10. It is necessary to make the PC, connected to the
Pony FX,
compliant with EN 60601-1 by means of an isolation
transformer.
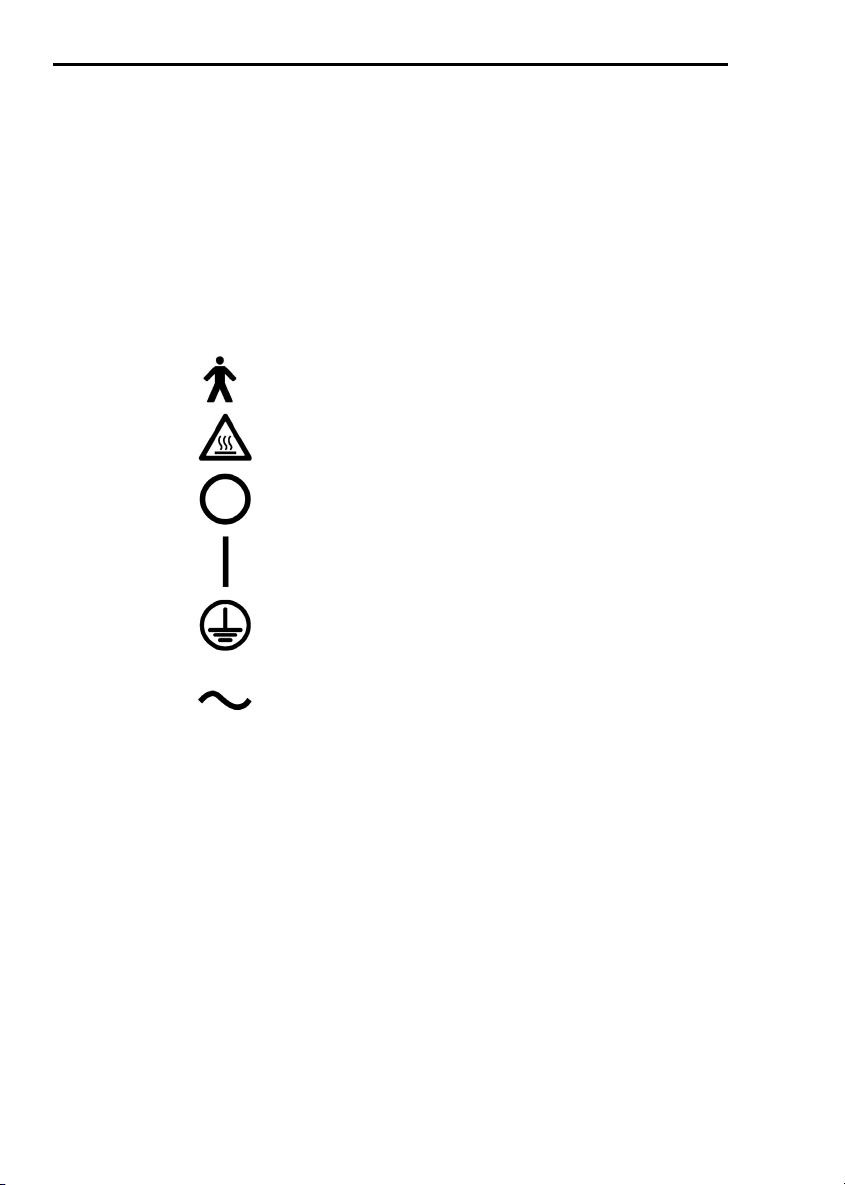
11. Graphical symbols used in accordance to present
specifications are described here below:
Equipment type B (EN60601-1)
Danger: high temperature
OFF
ON
12 - Pony FX User Manual
Protective earth ground
Alternating current
Page 13

Contraindications
The physical strain to execute the respiratory manoeuvre is
contraindicated in case of some symptoms or pathology. The
following list is not complete and must be considered as a piece
of mere information.
Contraindications for the Spirometer tests
Absolute contraindications
For FVC, VC and MVV tests:
• Post-operating state from thoracic surgery
For FVC tests:
• Severe instability of the airways (such as a destructive
bronchial emphysema)
• Bronchial non-specific marked hypersensitivity
• Serious problems for the gas exchange (total or partial
respiratory insufficiency)
Relative contraindications
For FVC tests:
• spontaneous post-pneumothorax state
• arterial-venous aneurysm
• strong arterial hypertension
• pregnancy with complications at the 3
For MVV test:
• hyperventilation syndrome
rd
month.
Contraindications for Bronchial provocation tests
The bronchial provocation tests must be executed according to
the doctor’s discretion. There are not data that reveal specific
contraindication for the bronchial provocation test through
inhalation.
The modern standard processes have been revealing secure in
several clinical studies. However it is recommendable to respect
the following contraindications:
Chapter 1 - Getting started - 13
Page 14

Absolute contraindications
• Serious bronchial obstruction (FEV1 in adults)
• Recent myocardium infarct
• Recent vascular-cerebral accident
• Known arterial aneurysm
• Incapacity for understanding the provocation test procedures
and its implications.
Relative contraindications
• Bronchial obstruction caused by the respiratory manoeuvre.
• Moderate or serious bronchial obstruction. For ex. Predicted
value FEV1 less than 1.51 in men and predicted value FEV1
in women less than 1.21.
• Recent infection in the superior air tracts
• During the asthmatic re-acuting
• Hypertension
• Pregnancy
• A pharmacology treatment epilepsy
14 - Pony FX User Manual
Page 15

Environmental condition of use
COSMED units have been conceived for operating in medically
utilised rooms without potential explosion hazards.
The units should not be installed in vicinity of x-ray equipment,
motors or transformers with high installed power rating since
electric or magnetic interferences may falsify the result of
measurements or make them impossible. Due to this the vicinity
of power lines is to be avoided as well.
Cosmed equipment are not AP not APG devices (according to
EN 60601-1): they are not suitable for use in presence of
flammable anaesthetic mixtures with air, oxygen or nitrogen
protoxide.
If not otherwise stated in the shipping documents, Cosmed
equipment have been conceived for operating under normal
environmental temperatures and conditions [IEC 601-1(1988)/EN
60 601-1 (1990)].
• Temperature range 10°C (50°F) and 40°C (104°F).
• Relative humidity range 20% to 80%
• Atmospheric Pressure range 700 to 1060 mBar
• Avoid to use it in presence of noxious fumes or dusty
environment and near heat sources.
• Do not place near heat sources.
• Cardiopulmonary resuscitation emergency equipment
accessible.
• Adequate floor space to assure access to the patient during
exercise testing.
• Adequate ventilation in the room.
Chapter 1 - Getting started - 15
Page 16

Safety and conformity
Safety
IEC 601-1 (1988) /EN 60 601-1 (1990);
Find reported below the complete classification of the device:
• Internally powered equipment type BF device (used stand
alone), class II type BF device (used connected to mains)
• Protection against water penetration: IP00, ordinary
equipment unprotected against water penetration
• Non sterile device
• Device not suitable in the presence of flammable
anaesthetics;
• Continuous functioning equipment;
EMC
The system meets the EMC Directive 89/336
EN 60601-1-2
EN 55011 Class B (emission), IEC 1000-4-2, IEC 1000-4-3, IEC
1000-4-4
Quality Assurance
UNI EN ISO 9001:2000 (Registration n° 387-A Cermet)
Medical Device Directive (CE mark)
MDD 93/42/EEC (Notified Body 0476).
Class IIa
16 - Pony FX User Manual
Page 17
Keynotes
Here are the keynotes used to make the manual easier to read.
Typographic keynotes
These are the typographic keynotes used in the manual.
Style Description
Bold indicates a control or a key to be pressed.
“Italic” indicates a messages shown by the firmware.
Graphic keynotes
These are the graphic keynotes used in the manual.
Illustration Description
shows the button to click in the software to
activate the related feature.
Chapter 1 - Getting started - 17
Page 18

Systems Overview
Pony FX is a device designed for lung function screening; the
core of the system is the “intelligent” flowmeter, connected to the
main unit, with graphical colour display. It can be considered a
complete portable spirometric laboratory.
Pony FX can be connected to a PC in order to transfer and store
the performed tests, to view the tests and, if it is used the medical
grade battery charger, to perform the tests and display them on
the PC monitor.
The system is composed by the turbine flowmeter, the
measurement and data elaboration device, the communication
cable, the battery charger and by the Software pack.
18 - Pony FX User Manual
Page 19

Before starting
Before operating the Pony FX system we strongly recommend to
check the equipment and register you as a customer.
Checking the packing contents
Make sure that the package contains the items listed below. In
case of missing or damaged parts, please contact Cosmed
technical assistance.
Pony FX standard packaging
Code Qty Description
C00962-01-04 1 Pony FX Unit
C02235-01-05 1 Turbine
C02364-01-05 1 Reader
A 362 100 001 1 Turbine cable
A 662 100 001 2 Nose clips
C01788-02-36 1 PC Software
C00137-01-20 20 Paediatric paper mouthpieces
C00136-01-20 20 Adult paper mouthpieces
C00063-01-20 1 Conic mouthpiece
C00214-01-20 1 Paediatric mouthpiece adapter
A 362 315 001 1 USB cable
A 182 300 004 5 Bacterial filter
C02388-01-05 1 Pony FX battery charger
A 196 056 001 2 Thermic paper
C00067-02-94 1 Registration card
C01999-02-DC 1 Conformity declaration
C02361-04-91 1 User Manual
Chapter 1 - Getting started - 19
Page 20

Warranty registration
Before using the system, please take a moment to fill in the
registration form and the warranty and return them to COSMED,
by doing this you are eligible to the customers assistance service.
For further information, please refer to the enclosed registration
and warranty form. If the form is not enclosed in the packaging,
please contact directly COSMED.
Register the product via software
Together with the PC software, a registration software is
supplied. With this software it is possible to fill in an electronic
form with the customer information.
1. To run the software, double click on the icon Registration or
select Registration… from ? menu.
2. Type the requested information and click Send… to send the
form via e-mail to COSMED.
How to contact COSMED
For any information you may need, please contact the
manufacturer directly at the following address:
COSMED S.r.l.
Via dei Piani di Monte Savello, 37
P.O. Box n. 3
00040 - Pavona di Albano
Rome - ITALY
Voice: +39 (06) 931.5492
Fax: +39 (06) 931.4580
email: customersupport@cosmed.it
Internet: http: //www.cosmed.it
Complain, feedback and suggestions
If you have any complain, feedback information or suggestion,
please inform us at complain@cosmed.it.
20 - Pony FX User Manual
Page 21

PC configuration required
• Pentium II 350 MHz.
• Windows 98, XP.
• 64 Mb RAM .
• CD drive.
• VGA, SVGA monitor.
• USB or RS232 port.
• Any Mouse and Printer compatible with the MS Windows™
operative system.
• PC conform to European Directive 89/336 EMC
If you use an external printer, it must support the PCL language
and have an USB port for data transmission.
The USB connection works properly only with Windows XP.
Otherwise, use the serial RS232 connection.
Chapter 1 - Getting started - 21
Page 22

Technical features
Flowmeter Bidirectional digital turbine
Flow Range: 0.03 - 20 l/s
Volume Range: 12 l
Accuracy: ± 3% or 50 ml
Resistance @12 l/s: < 0.7 cmH2O/l/sec
Mouthpieces: Ø 31 and Ø22 mm
Internal temperature sensor: 0-50°C (32-122°F)
Dimensions: 198 x 238 x 76 mm
Weight: 1.2 kg
Supply: 4 Ni-Mh rechargeable batteries
Power supply AC/DC 220/110 VAC in, 12 VDC 1A out
Interface RS232, USB-A, USB-B (for the
LCD 320x240 STN colour backlighted
In-built printer Thermo sensitive, 832 pixel per
Printer paper 112 cm, standard sensibility,
(standard), disposable
pneumotachograph (option)
1.3V, 2300 mAh, no memory
effect
(class II according to EN 60 601-1 standard)
external printer)
line
good stability , image duration 15
years
22 - Pony FX User Manual
Page 23

Measurements
Page 24

Measured parameters
FVC - Forced Vital Capacity
Note: Some
parameters are
computed only by
the PC software.
Symbol UM Parameter
FVC l Forced Expiratory Vital Capacity
FEV1 l Forced Expiratory Volume in 1 sec
FEV1/FVC% % FEV1 as a percentage of FVC
PEF l/sec Peak Expiratory Flow
FEV0.5 l Forced Expiratory Volume in 0.5 sec
FEV6 l Forced Expiratory Volume in 6 sec
FEV1/FEV6 % FEV1 as a percentage of FEV6
FEV6/FVC% % FEV6 as a percentage of FVC
Best FVC l Best Forced Expiratory Vital Capacity
Best FEV1 l Best Forced Expiratory Volume in 1 sec
Best PEF l/sec Best Peak Expiratory Flow
Vmax25% l/sec Expiratory Flow @25% of the FVC
Vmax50% l/sec Expiratory Flow @50% of the FVC
Vmax75% l/sec Expiratory Flow @75% of the FVC
FEF25-75% l/sec Mid-exp flow between 25-75%FVC
FET100% sec Forced expiratory time
FEV2 l Forced Expiratory Volume in 2 sec
FEV3 l Forced Expiratory Volume in 3 sec
FEV2/FVC% % FEV2 as a percentage of FVC
FEV3/FVC% % FEV3 as a percentage of FVC
FEV1/VC% % Tiffenau index
FEF50-75% l/sec Mid-exp flow between 50-75%FVC
FEF75-85% l/sec Mid-exp flow between 75-85%FVC
FEF0.2-1.2% l/sec Mid-exp flow between 0.2 l - 1.2 l
FiVC L Inspiratory Forced Vital Capacity
FiF25-75% l/sec Forced mid-inspiratory flow
FiV1 l/sec Forced Inspiratory Volume in 1 sec
PIF l/sec Peak Inspiratory Flow
VEXT ml Extrapolated Volume (back extrapolation)
PEFT msec Time to PEF (10% - 90%)
24 - Pony FX User Manual
Page 25

VC/IVC - Slow Vital Capacity and Ventilatory pattern
Symbol UM Parameter
EVC l Expiratory Vital Capacity
IVC l Inspiratory Vital Capacity
ERV l Expiratory Reserve Volume
IRV l Inspiratory Reserve Volume
IC l Inspiratory Capacity
VE l/min Expiratory Minute Ventilation
Vt l Tidal Volume
Rf 1/min Respiratory Frequency
Ti sec Duration of Inspiration
Te sec Duration of Expiration
Ttot sec Duration of Total breathing cycle
Ti/Ttot —- Ti/Ttot ratio
Vt/ti l/sec Vt/ti ratio
MVV - Maximum Voluntary Ventilation
Symbol UM Parameter
MVV l/min Maximum Voluntary Ventilation
MVt l Tidal Volume (during MVV)
MRf 1/min Maximum Respiratory frequency
MVVt sec MVV duration time
Bronchoprovocation Response
Symbol UM Parameter
FallFEV1 % Fall in FEV1 from baseline or post diluent
FallVmax50% % Fall in Vmax50% from ref.
P10 —- Provocative dose causing FEV1 to fall 10%
P15 —- Provocative dose causing FEV1 to fall 15%
P20 —- Provocative dose causing FEV1 to fall 20%
Chapter 2 - Measurements - 25
Page 26

26 - Pony FX User Manual
Page 27

Installation
Page 28
Preparing Pony FX
Pony FX is mainly made of:
• Pony FX unit
• Battery charger
• Flowmeter (pneumotachograph or turbine, depending on the
version)
Let us see an overview of the parts and their assembly.
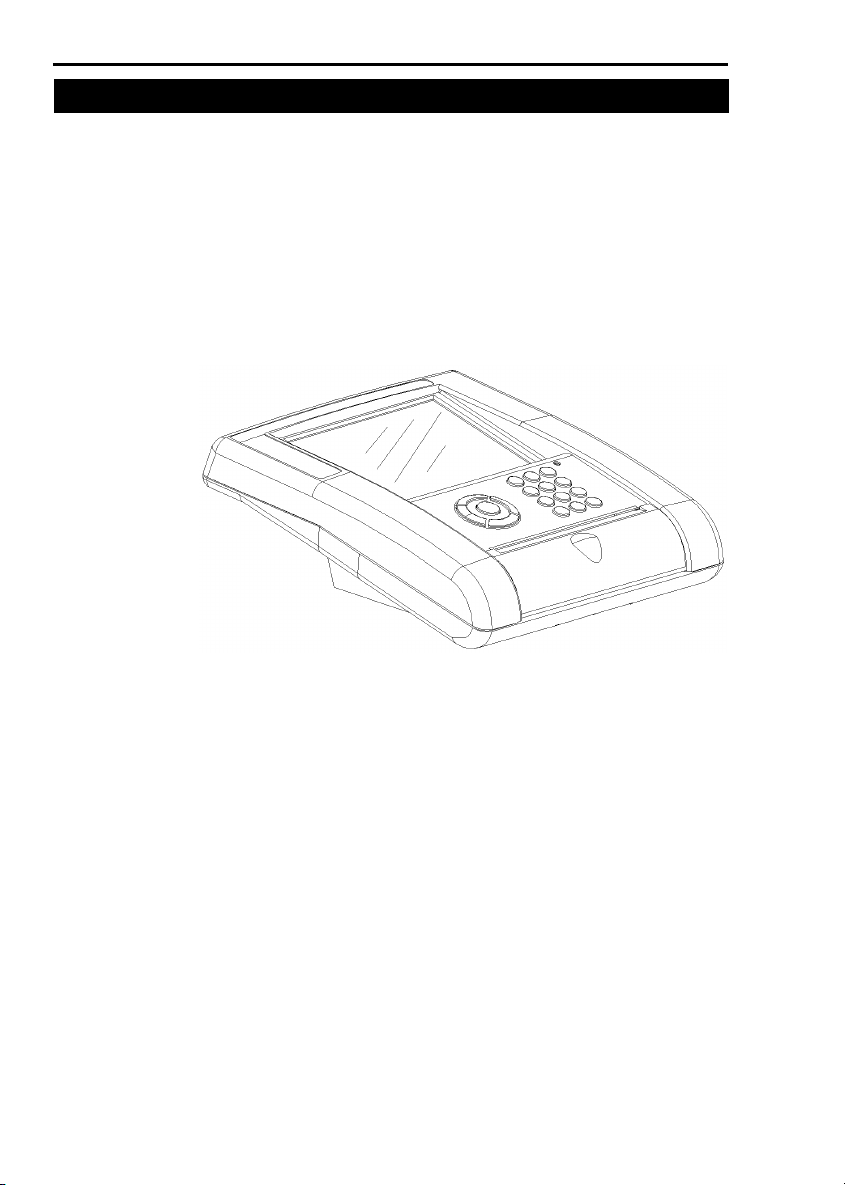
Pony FX unit
The main elements a user can detect in the Pony FX unit are the
following:
• A colour display
• A keyboard
• An internal printer
• Some connectors on the bottom side of the device.
The display
The colour display interfaces the device with the user, allowing
the user to access to the functions of the device and to display the
performed tests.
The keyboard
Pony FX has a keyboard (see the next picture), which allows the
user to interact with the device.
28 - Pony FX User Manual
Page 29
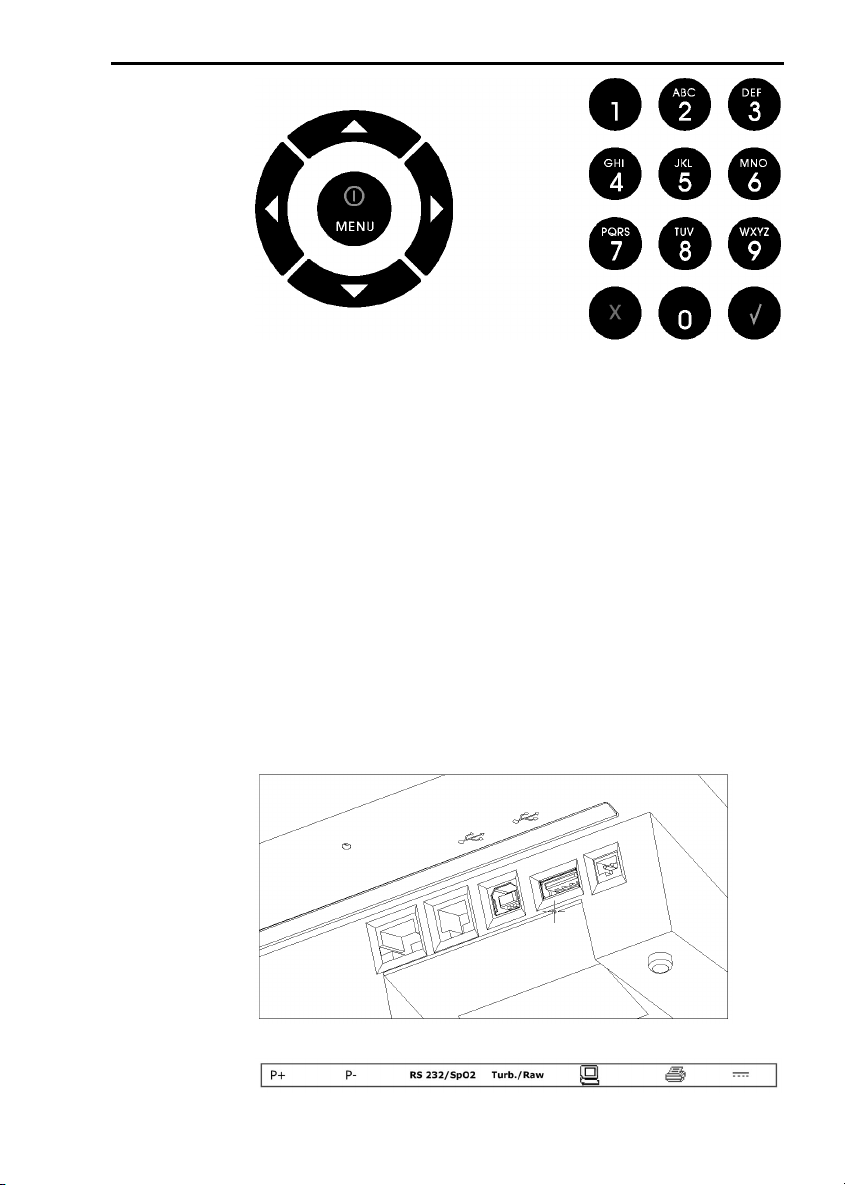
The keyboard is divided into two groups. In the left one there are
the on/off-menu key (at the centre) and four direction keys.
In the right group there are 10 alphanumeric keys, the confirm
and the delete keys.
A more detailed description of the keys functions, of the
keyboard logics and of the menus, see the chapter Using Pony
FX.
The printer
It is a thermal printer, which allows the printing of the test
performed.
For more information about the use of the internal (or an
external) printer, see the chapter Using Pony FX.
The connectors
On the bottom side of the device there are 7 connectors, as shown
in the following picture.
A label details the connection type:
Chapter 3 - Installation - 29
Page 30

From the left to the right, in order:
• 2 pneumatic connectors for pneumotachograph, if you do not
• Connector for the RS232 cable, if the PC doesn’t have an
• Connector for the turbine flowmeter or for the airway
• USB connector for the PC.
• USB connector for an external printer.
• Battery charger connector.
Battery charger
Pony FX is powered by a battery pack, rechargeable by means of
a battery charger. There exist two types of battery chargers:
Code Description
C02388-01-05 Pony FX battery charger*
C02383-01-05 Pony FX battery charger, medical grade*
* Other battery charger with different plugs (Australia, UK,
USA) available on request.
The standard packaging of the Pony FX contains the first charger.
This one can be used only to charge the device battery. It is not
allowed performing tests with Pony FX connected to the mains.
In order to perform tests also when the device is connected to the
mains, use the medical grade battery charger (C02383-01-05),
compliant with the medical devices Standard.
Connect the battery charger to the Pony FX unit through the
connector with the symbol by side.
Near the keyboard, a led indicates the battery status:
Green led In charge
Orange led Full charged
Red led Error.
The red led can be due to:
• Battery temperature <5°C. The red led should switch off
• Battery temperature >45°C. The red led should switch off
use the turbine flowmeter.
USB port, or for the oxymeter (option).
resistance measurement module (option).
when the temperature falls again in the range 5-45°C.
when the temperature falls again in the range 5-45°C.
30 - Pony FX User Manual
Page 31

• Very low battery, because of the unit has been not used for a
long time. The led switches to green after some time of
charging. Please fully charge the unit.
• Failed battery. Please contact the technical support.
Note: The first time you use the device, charge the battery for at
least 12 hours, even if the led indicates the completion of the
charge before the time elapsed.
Connect the flowmeter to the Pony FX
The Pony FX can operate with two types of flowmeters:
• Turbine flowmeter
• Pneumotachograph (disposable)
The turbine flowmeter
It is made of a handle (the reader)
with a hole, in which it is placed the
turbine.
The air passing through the helical
conveyors, takes a spiral motion
which causes the rotation of the
turbine rotor. The rolling blade
interrupts the infrared light beamed
by the two diodes of the reader.
Every interruption represents 1/4
turn of the rotor, this allows to
measure the number of turn in the
time.
It is connected to the unit through
the Turbine connector.
For hygienic reasons, we strongly
recommend the use of a bacterial
filter, to be connected as in the
picture by side.
Note: While inserting the turbine, be sure to push the turbine up
to touch the end of the reader.
Chapter 3 - Installation - 31
Page 32

The pneumotachograph
It is disposable, and measures the flow detecting the difference of
pressure at the two sides of a membrane.
It is connected to the unit connecting the two tubes to the P+ e Pconnectors.
Connect the Pony FX to the PC
The Pony FX can be connected to the PC in order to transfer and
store the performed tests, to back-up the data on a different unit
(HD, floppy, CD ROM), to analyse the tests or to perform the
tests sending the controls directly from the PC.
If the PC connected to the Pony FX is placed within the patient
area (according to the IEC 60601-1-1 norm), the PC has to be
made compliant with the IEC 60601-1-1 norm by means of an
isolation transformer.
The PC is connected to the Pony FX unit, through an USB
connection, to the USB port with the symbol by side.
If the PC does not have an USB port, it is possible to use a
RS232 serial connection.
The first time you connect the Pony FX to the PC through an
USB connection, you will be requested for the drivers. Install
them from the installation CD.
Connect the Pony FX to an external printer
The Pony FX can be directly connected to an external printer in
order to print the performed tests on a different paper.
If the printer connected to the Pony FX is placed within the
patient area (according to the IEC 60601-1-1 norm), it has to be
made compliant with the IEC 60601-1-1 norm by means of an
isolation transformer.
The printer is connected to the Pony FX unit, through an USB
connection, to the USB port with the symbol by side.
32 - Pony FX User Manual
Page 33

Software installation
Installing the software
1. Select Run... from Windows Start menu.
2. Insert the disk in the proper drive.
3. In the Command line, type <name of the drive>:\install.
4. Click on OK (or press ENTER key).
5. The program will load up a dialog box and ask for a
directory where to be installed.
6. When the installation is over, the program will advise you
with a message indicating that the installation has been
successfully completed, click on End.
Notice: The software is copy-protected. Install the software from
the original disk.
Run the software
1. In the Windows Start menu, open the Program Group in
which the software was installed.
2. Click the Quark PFT icon.
PC port configuration
The first time the software is used, it is necessary to configure the
communication port with the PC (USB, COM1, COM2,…).
For further details, see the chapter Database management.
Chapter 3 - Installation - 33
Page 34

Software main features
Display
The program may contain several windows. The active window
is highlighted with a different colour of the caption. Some
functions of the program are "active window" sensitive (Print,
right key of the mouse).
Tool bar
Many of the functions that may be selected from the menu can be
activated more rapidly by clicking with the mouse on the
corresponding icon in the tool bar.
Positioning the mouse cursor on one of the buttons of the toolbar
(if the option Hints is enabled), the description of the
corresponding function is shown in a label.
Show/hide the toolbar
Select Toolbar from Options menu in order to show or hide the
toolbar.
Dialog windows
The typical operating environment of Microsoft Windows is the
Dialog box. This window is provided with a series of fields in
which input the information.
Use of the keyboard
• To move the cursor among fields, press the Tab key until
you reach the desired field.
• Press the Enter key to confirm the information input on the
dialog box or press the Esc key to cancel changes.
Use of the mouse
• To move the cursor among fields, move the mouse on the
desired field and left-click.
• Click on the OK button with the Left button of the mouse to
confirm the information input on the dialog box or click on
Cancel button to cancel changes.
34 - Pony FX User Manual
Page 35

Scroll bars
Some windows are provided with scroll bars that help to see data
exceeding the window space available.
• To move the scroll bar row by row click the scroll arrows at
• To move the scroll bar page by page click on the grey area at
On-line help
COSMED Help is a complete on-line reference tool that you can
use at any time. Help is especially useful when you need
information quickly or when the user manual is not available.
Help contains a description of each command and dialog box,
and explains many procedures for accomplishing common tasks.
To get the Help on line, press the F1 key.
Software version
To know the software version and the serial number of the
software, select About… from Help menu.
the end of the scroll bars
both sides of the scroll fields
Chapter 3 - Installation - 35
Page 36

36 - Pony FX User Manual
Page 37

Calibration
Page 38

The calibration program
Running the Calibration program
Start the program and choose Calibration from the Test Menu.
The software runs the Calibration software and the main menu
changes accordingly.
Log file
The program creates and updates as default the calibration log
file, containing the conditions and the results of all the
calibrations performed by the user.
To access the file select File/Report File... from the calibration
program.
38 - Pony FX User Manual
Page 39

Turbine calibration
Pony FX is calibrated by COSMED. ATS recommends a daily
calibration of the turbine. However if it is correctly maintained,
turbine retains its precision for longer periods. We advice to
calibrate the turbine daily to detect malfunctioning.
Note: if you are using a slow PC, we recommend to set an higher
refresh time.
Calibrating the turbine without a PC
In order to calibrate the turbine by means of the Pony FX unit:
1. Connect the turbine flowmeter to the calibration syringe.
2. Select the menu item 3.Utilities/1.Calibration.
3. Move the piston in and out for 10 strokes (IN and EX).
The 3 litres calibration syringe can be purchased directly from
COSMED (P/N: C00600-01-11).
Note: If a bacterial filter is used for the tests, do use it also
during the turbine calibration.
Calibrating the turbine by means of a PC
In order to calibrate the turbine by means of the PC software:
1. Connect the turbine flowmeter to the calibration syringe.
2. Select Calibration from Test menu.
3. Select Reference values from the Calibration menu and
enter the syringe volume, if different to the displayed one.
4. Select Turbine from the Calibration menu.
5. When the Calibration Turbine dialog box appears with the
syringe piston initially pushed all the way in, move the
piston in and out for 5 inspiratory strokes and 5 expiratory
strokes in order to get the first values appearing on the
screen. Then move the syringe piston for other 10 strokes
(IN and EX).
6. At each of the 10 steps the software displays the results of
the manoeuvre and the percentage error in the reading.
Chapter 4 - Calibration - 39
Page 40

7. At the end of this operation, the software displays the new
calibration factors. Press OK to store the new value.
The 3 litres calibration syringe can be purchased directly from
COSMED (P/N: C00600-01-11).
Note: If a bacterial filter is used for the tests, do use it also
during the turbine calibration.
40 - Pony FX User Manual
Page 41

Checking the system signals
The control panel
The Control Panel, which can be activated from the
Calibration/Control panel… menu item, is a useful tool to
check the main hardware functions of Pony FX.
By using the controls on Control Panel you are able to read the
signals acquired by the system both as voltages and processed
data.
Using the control panel
edit parameters
(name, unit,…)
mV / real values
display
Signal refresh
time
Select all
channels
Deselect all
channels
Chapter 4 - Calibration - 41
Page 42

42 - Pony FX User Manual
Page 43

Using Pony FX
Page 44

Main functions of the Pony FX
All the Pony’s functions are controlled by means of the keyboard
(see the following picture).
Turning on/off the Pony FX
In order to turn on or off the device, hold the MENU key pressed
for few seconds.
Pony FX has two automatic turning-off functions:
• of the display. If you don’t use the unit for at least the time
set in configuration (see later, Options), the display turns off
automatically. In order to avoid this, press any key.
• of the device. If you don’t use the unit for at least 5 minutes,
the unit turns off automatically. In order to turn on the
device, press the MENU key.
Using the menu
The menu bar is displayed in the upper part of the screen, and it
appears different, depending on the context.
In the lower part of the display, a status bar indicates useful
information and short Help messages.
Accessing the menu
You can access the menu in two ways:
• Press shortly the MENU key, and then change menu by
means of the direction keys. Confirm the selected item by
means of the key .
44 - Pony FX User Manual
Page 45

• Press the key on the alphanumeric keyboard corresponding
to the selected menu item, until the desired function is
highlighted.
The two methods (direction keys and alphanumeric keyboard) are
fully interchangeable.
To exit the menu, press the MENU key.
Using the keyboard
Please find in the following a brief description of the functions of
the keys, and then a description of the keyboard logic.
Key Description
Turns on/off the Pony FX, accesses the menus.
Goes to the upper menu item or (in input data
Goes to the lower menu item or (in input data
Goes to the menu item on the right. In input data
Goes to the menu item on the left. In input data
Enters the digit 1 or a character . , ; : # @ - = ! ? $
Enters the digit 2 or a character A B C
mode) to the previous field.
mode) to the next field.
mode, adds a blank space to the right or (in multioptions fields) scrolls forwards the available
options.
mode, deletes the last character entered or (in
multi-options fields) scrolls backwards the
available options.
& / ( )
, , , , , , as the key
Enters the digit 0
Cancels the operation.
Confirms the operation or the selected menu item.
Chapter 5 - Using Pony FX - 45
Page 46

Logic of the keyboard
The logic of the keyboard follows these rules:
• If the current input field (the one with the cursor) allows an
alphanumeric input (for example, name, company,…), you
have to follow these instructions in order to enter the
characters:
⇒ A repeated pressure of a key scrolls the available
characters for that key until another key is pressed or it
elapses 1 second.
⇒ If you wait more than 1 second or if you press another
key, you confirm the input and the cursor moves 1 place
towards right.
For example, in order to enter the string “BB4” you have to
press the following keys:
<wait>
The keys will enter the character first (letter or signs), and
then the digit.
• Pressing the Left key, the cursor moves towards left, deleting
the characters.
For some fields, you have to select an option from a
predefined list. In these cases, this key allows scrolling
backwards the list.
• Pressing the Right key, the cursor moves towards right,
adding blank spaces.
For some fields, you have to select an option from a
predefined list. In these cases, this key allows scrolling
forwards the list.
46 - Pony FX User Manual
Page 47

Patient database management
Create a new patient
In order to create a new patient, select the menu item
1.Patients/1.New and enter the required data.
In the following you will find some useful notes for proper data
entry.
• ID is an alphanumeric sequence, which identifies the patient.
It is assigned automatically by the unit, but can be modified
as you want. The maximum length is 16 chars.
• The birth date must be entered as month-day-year. The year
must be four-digit format.
• The height has to be entered in the two fields: the first one
for metres, the second one for centimetres.
Chapter 5 - Using Pony FX - 47
Page 48

Search a patient in archive
In order to search a patient stored in the archive, select the menu
item 1.Patients/2.View/Search. It will open a window with the
patient list.
Scroll the list by means of the arrows and confirm the selected
patient with the key by side.
If necessary, cancel the operation with the key by side.
48 - Pony FX User Manual
Page 49

Performing the spirometric tests
Note: Read
carefully the
contraindications
in Chapter 1.
Once completed the phase of the introduction of the patient’s
data (or selection of an already archived patient), it is possible to
carry out the spirometric tests.
For a complete description of the tests and of the measured
parameters, see the chapter Spirometry.
Recommendations for spirometry tests
• If you are using the Pony FX connected to the mains, use the
medical grade battery charger (see Installation).
• The patient should wear the nose clip
• The turbine has been recently calibrated (ATS recommends a
daily calibration)
• If you are using the pneumotachograph, do not breathe into
the flowmeter, until the proper message appears.
• The paper mouthpiece or the antibacterial filter is properly
connected to the flowmeter through the corresponding
adapter
For hygienic reasons, we strongly recommend the use of a
bacterial filter.
If a kid must perform the test it is recommended to enable the
encouragement function which shows exactly the manoeuvre of
the FVC test.
Forced Vital Capacity (pre)
1. Explain the manoeuvre to the patient (breathe at rest for
some time, perform a maximal inspiration and then a
maximal forced exhalation).
2. Select the menu item 1.Test/1.FVC Pre.
3. Wait until the program is ready for the test.
4. After having performed the test, press 2.Stop or wait for the
automatic end (5 seconds without flow), so that the device
displays the F/V graph, the main parameters, and the
predicteds values.
5. Press 0.Abort in order to abort the test and discard the
results. Press 1.Redo in order to restart the test.
6. Repeat the test until it is correctly performed (ATS
recommends 3 times) , by pressing 1.Redo.
Chapter 5 - Using Pony FX - 49
Page 50

7. The three best tests will be displayed superimposed each to
the other, identified by different colours. On the right side of
the display, the three best tests, their colours and the
measured parameters are reported, ordered from the best to
the worst. The best and the last test performed are
highlighted.
8. Press 2.Save & Exit in order to exit saving a test. You will
be ask to select the test to store: press the digit corresponding
to the test to be stored.
9. Otherwise, press 0.Exit without saving in order to exit the
test mode without saving the tests.
Test encouragement
During FVC manoeuvre you might experience some lack of
collaboration with kids or with other patients. In this case you
may find a good help in using the encouragement tool.
1. Select the menu item 1.Test/6.Encouragement.
2. Perform the test as described in the previous paragraph.
Slow Vital Capacity
1. Explain the manoeuvre to the patient (breathe at rest for
some time, perform a maximal inspiration, then a slow
forced exhalation, and finally a deep inspiration).
2. Select the menu item 1.Test/1.SVC.
3. Wait until the program is ready for the test.
4. After having performed the test, press 2.Stop or wait for the
automatic end (5 seconds without flow), so that the device
displays the V/T graph, the main parameters, and the
predicteds values.
5. Press 0.Abort in order to abort the test and discard the
results. Press 1.Redo in order to restart the test.
6. Repeat the test until it is correctly performed (ATS
recommends 3 times), by pressing 1.Redo.
7. The three best tests will be displayed superimposed each to
the other, identified by different colours. On the right side of
the display, the three best tests, their colours and the
measured parameters are reported, ordered from the best to
the worst. The best and the last test performed are
highlighted.
50 - Pony FX User Manual
Page 51

8. Press 2.Save & Exit in order to exit saving a test. You will
be ask to select the test to store: press the digit corresponding
to the test to be stored.
9. Otherwise, press 0.Exit without saving in order to exit the
test mode without saving the tests.
Maximum Voluntary Ventilation
1. Explain the manoeuvre to the patient (breathe as deep and
fast as possible for about 12 seconds).
2. Select the menu item 1.Test/1.MVV.
3. Wait the program is ready for the test.
4. After having performed the test, the device displays the V/T
graph, the main parameters, and the predicteds values.
5. Press 0.Abort in order to abort the test and discard the
results. Press 1.Redo in order to restart the test.
6. Repeat the test until it is correctly performed (ATS
recommends 3 times), by pressing 1.Redo.
7. The three best tests will be displayed superimposed each to
the other, identified by different colours. On the right side of
the display, the three best tests, their colours and the
measured parameters are reported, ordered from the best to
the worst. The best and the last test performed are
highlighted.
8. Press 2.Save & Exit in order to exit saving a test. You will
be ask to select the test to store: press the digit corresponding
to the test to be stored.
9. Otherwise, press 0.Exit without saving in order to exit the
test mode without saving the tests.
Bronchial Provocation Test
The program refers to the FVC pre which is selected
(highlighted) at the test start.
The name of the drug, the quantity and unit of measurement, and,
only for bronchoconstrictor tests, the delivery protocol, can be
customised from the Utility menu (see later in this document).
Bronchodilators test
The manoeuvre is identical to the FVC test.
1. Select the menu item 1.Test/1.FVC Post BD.
Chapter 5 - Using Pony FX - 51
Page 52

2. Wait until the program is ready for the test.
3. After having performed the test, press 2.Stop or wait for the
automatic end (5 seconds without flow), so that the device
displays the V/T graph, the main parameters, and the
predicteds values.
4. Press 0.Abort in order to abort the test and discard the
results. Press 1.Redo in order to restart the test.
5. Repeat the test until it is correctly performed (ATS
recommends 3 times), by pressing 1.Redo.
6. The three best tests will be displayed superimposed each to
the other, identified by different colours. On the right side of
the display, the three best tests, their colours and the
measured parameters are reported, ordered from the best to
the worst. The best and the last test performed are
highlighted.
7. Press 2.Save & Exit in order to exit saving a test. You will
be ask to select the test to store: press the digit corresponding
to the test to be stored.
8. Otherwise, press 0.Exit without saving in order to exit the
test mode without saving the tests.
Bronchoconstrictor test
The manoeuvre is identical to the FVC test.
1. Select the menu item 1.Test/1.FVC Post BD.
2. A window with bronchoconstrictor name, quantity and
measurement unit, as set in 2.Options/3.FVC Post, will be
displayed.
3. If you accept the protocol, confirm, otherwise modify the
values and confirm.
4. Wait until the program is ready for the test.
5. After having performed the test, press 2.Stop or wait for the
automatic end (5 seconds without flow), so that the device
displays the V/T graph, the main parameters, and the
predicteds values.
6. Press 0.Abort in order to abort the test and discard the
results. Press 1.Redo in order to restart the test.
7. Repeat the test until it is correctly performed (ATS
recommends 3 times), by pressing 1.Redo.
8. The three best tests will be displayed superimposed each to
the other, identified by different colours. On the right side of
52 - Pony FX User Manual
Page 53

the display, the three best tests, their colours and the
measured parameters are reported, ordered from the best to
the worst. The best and the last test performed are
highlighted.
9. Press 2.Save & Exit in order to exit saving a test. You will
be asked to select the test to store: press the digit
corresponding to the test to be stored.
10. Otherwise, press 0.Exit without saving in order to exit the
test mode without saving the tests.
11. Repeat all the FVC Post until the FEV1 falls down by more
than 20% of the FVC Pre value.
Chapter 5 - Using Pony FX - 53
Page 54

Performing the oximetry test (option)
The oximetry test measures the haemoglobin saturation, i.e. the
percentage of the blood haemoglobin bearing oxygen. The test
can be performed at rest or during/after a light exercise phase
(cycling, jogging).
The test is completely automatic.
The measured parameters are:
SpO
Haemoglobin saturation
2
HR Heart rate
Recommendations for oximetry tests
• If you are using the Pony FX connected to the mains, use the
medical grade battery charger (see Installation).
• Be sure that the sensor has been properly disinfected.
• Use only the original COSMED sensor.
• Operation and accuracy of the measurement may be affected
by the following:
− high ambient light
− fingernail polish or artificial fingernail
− excessive motion
Performing the test
1. Connect the sensor to the Pony FX unit through the
RS232/SpO
2. Connect the probe to patient’s index finger and affix with
adhesive tape if necessary.
3. Select the menu item 1.Test/7.SpO2.
4. In the first part of the test the HR and SpO
with a plethysmographic graph, are displayed. The graph
monitors the quality of the signal.
5. Wait for an acceptable quality of the real-time trace and
verify that the Perfusion indicator is green. Press:
− 1.Rest to store the rest value.
− 2.Exercise to store the exercise value.
− 3.O2 Suppl. to store the value with inspired oxygen
supplement.
54 - Pony FX User Manual
port.
2
values, together
2
Page 55

It is not necessary to store all the three values during a single
test.
Chapter 5 - Using Pony FX - 55
Page 56

Viewing results
View a test in archive
After having selected a patient, highlight the desired test by
means of the arrow keys. The graph of the selected test will
appear on the right side of the display.
56 - Pony FX User Manual
Page 57

Printing results
Replace the printer paper
You need thermic paper (P/N A 196 056 001, 10 pcs.).
1. Open the azure paper cover.
2. Lift up the green lever.
3. Insert the paper into the slot with the two light grey stripes
under the green lever.
4. Lift down the green lever.
5. Select the menu item 3.Utility/4.Paper Feed and wait the
paper exit above the green lever. If the paper does not exit,
and the printer generates strange noises, check that the paper
is properly inserted.
6. Close the paper cover.
Printing tests by means of the internal printer
1. View the desired test.
2. Select the menu item 2.Print/1.Selected Test in order to
print this test. Select the menu item 2.Print/2.Report in
order to print a report for the selected patient.
Printing tests by means of an external printer
When an external printer is connected through an USB
connection to the Pony FX unit, the test will be printed on the
external printer.
Note: If the printer connected to the Pony FX is placed within the
patient area (according to the IEC 60601-1-1 norm), it has to be
made compliant with the IEC 60601-1-1 norm by means of an
isolation transformer.
Note: The printer must support the PCL language and have an
USB port for data transmission.
Chapter 5 - Using Pony FX - 57
Page 58

Options
The Pony FX unit allows the configuration of some options, by
means of the 2.Options menu.
General settings
Select the menu item 2.Options/1.Settings.
You can set:
• Date and time. The date must be entered as month-day-year.
• Language.
• Measurement unit (cm/kg or in/lb)
• Amount of time after which the display turns off
The year must be expressed in 4-digit format.
automatically, if the unit was not used.
Spirometry options
Select the menu item 2.Options/2.Spirometry.
You can set:
• The equation set used for the predicteds values calculation.
• If the test quality control visualisation is enabled.
• If the BTPS correction is applied.
• The flowmeter temperature.
58 - Pony FX User Manual
Page 59

FVC Post options
Select the menu item 2.Options/3.FVC Post.
You can set:
• Name, measurement unit and quantity of the bronchodilator.
• Reversibility threshold for the airways obstruction (as %
increment of the FEV1).
• Name and measurement unit of the bronchoconstrictor.
• Protocol for the use of the bronchoconstrictor (quantity to be
delivered to the patient in the steps of the FVC Post test).
Chapter 5 - Using Pony FX - 59
Page 60

Printout options
Select the menu item 2.Options/4.Printouts.
You can set:
• If the unit prints the SVC and MVV tests, the test quality
• A page header for the printout.
controls and the automatic diagnosis.
Advanced options
Select the menu item 2.Options/5.Advanced.
60 - Pony FX User Manual
Page 61

You can set:
• The flowmeter type (turbine or pneumotachograph).
• The airway resistance option (enabled or not).
• The oximetry option (enabled or not).
• The mode of the spirometer (ATS-ERS Standard or Office
Spirometer, a simplified and less detailed version).
Environmental data
Select the menu item 2.Options/6.Environment.
You can set:
• Pressure
• Relative humidity
Restore of initial settings
Select the menu item 2.Options/7.Defaults.
With this option you can reset the option and restore the original
factory settings.
Chapter 5 - Using Pony FX - 61
Page 62

Other functions of Pony FX
There are other general functions, in order to operate at the best.
You can access to these functions by means of the 3.Utilities
menu.
Calibration
The calibration procedure allows exact measurements of flows,
volumes and so on, correcting errors due to climatic changes, use
of the device, wear, etc.
Select the menu item 3.Utilities/1.Calibration.
For further details, see the chapter Calibration.
Control panel
The control panel allows to monitor the device status.
Select the menu item 3.Utilities/2.Control panel. The display is
divided into 3 zones.
Sensors
Temperature inside the unit and the flowmeter, and the battery
charge in mV.
Controls
Pushing the key 1 the Charger relais activates. It simulates
disconnection or connection between unit and battery charger
cable.
Pushing the key 2, the Printer relais activates. It activates or
deactivates the internal printer.
Embedded Printer
The Heads icon shows if the green lever is lifted or not.
The Paper icon shows if there is paper charged or not.
The Termistor value is the temperature of the printer.
LCD contrast
In order to modify the contrast of the Pony FX display:
1. Select the menu item 3.Utilities/3.LCD Contrast.
2. Adjust the contrast by means of the right and left arrow keys.
3. Press the confirm key.
62 - Pony FX User Manual
Page 63

Paper feed
This function is useful mainly during the paper replacement.
Select the menu item 3.Utilities/4.Paper Feed.
Memory deletion
It erases all the memory contents.
1. Select the menu item 3.Utilities/5.Erase Memory.
2. Confirm by pressing the key by side.
Firmware version information
In order to get information about the installed firmware version,
select the menu item 3.Utilities/6.Information.
Chapter 5 - Using Pony FX - 63
Page 64

Reset
Reset of the unit
If the Pony FX does not run its firmware (the program of the unit,
not the PC software), it can be rebooted by pressing, with a
sharpened tool, a button inside a little hole on the rear side of the
unit.
With this operation the data will not be lost.
Formatting the unit
If, for serious reasons, it is needed to erase all the archive and the
memory of the Pony FX (also the firmware program), it is
possible to format the unit.
Turn on the Pony FX keeping pressed the Cancel key. Release
the Menu key, then the Cancel key.
It will be necessary retransmit the firmware from the PC software
(selecting, from the Calibration program, the menu item
Calibration/Transmit program…).
Warning: All the memory will be erased, and you’ll are not able
to retrieve any data or program.
64 - Pony FX User Manual
Page 65

Database
Management
Page 66

Settings
The software allows to configure some options selecting
Configure from the Option menu.
Graphs
All the graphs visualised and/or printed can be customised in
colours and appearance.
1. Select the desired colours of the curves (5 curves max can be
overlapped on the same graph).
2. Enable or disable the Grid option.
3. Enable or disable the Show Info Test option.
Interface
The port used for data transfer between Pony FX and the PC.
If the Pony FX is connected through USB, select USB from the
list, otherwise select the serial port of the PC to which the unit is
connected (COM1, COM2,…).
66 - Pony FX User Manual
Page 67

Units of measurements
It is possible to configure the units of measurements, weight and
height, for printing and viewing.
To select the units of measurement click on cm/Kg or in/lb
according to the desired format.
Using extra fields
The Patient’s database is organised in 3 different cards (Patient
card, Visit Card and Test card.) where it is possible to store the
information about patients and visits .
Besides the standard information, it is possible to customise some
fields (user free fields), entering and labelling measurements
coming from other devices.
The customisable free fields are:
• 3 fields in the Patient Card (Patient’s information)
• 3 fields in the Visit Card (information about the visits)
• 3 fields (2 numeric) in the Test card information about Test)
Customise the fields
In the group User free fields type the desired text in the 9 fields
available.
Chapter 6 - Database Management - 67
Page 68

p
Patient's database
The Patients database consists of a Patient Card, a Visit Card and
a Test Card in which are listed all tests performed by the patient.
Select Patients… from the File menu or press the button by
side.
Note: after having
deleted a record
(patient, visit or
test), it is
recommended to
reorganize the
archive in order to
free disk s
ace.
Patient Card
It collects all the information of a patient (first name, last name,
date of birth) which remain the same for each visit. For each
patient there is only one Patient Card, which is created the first
time the Patient performs a test.
To move within the database use the following buttons:
Move to the first patient in the archive
Move to the previous patient in the archive
Move to the next patient in the archive
Move to the last patient in the archive
Find a patient in the archive
Enter a new patient in the archive
Delete current patient from the archive
Edit the current patient card
68 - Pony FX User Manual
Page 69

Visit Card
It collects all information relative to the visit (diagnosis, visit
description...) and to the patient information subject to change
between one visit and another (height, weight, smoke). Each
patient can be related to several Visit Cards provided they have
been created in different days. Before carrying out any
spirometric test it is necessary to create a new Visit Card or to
open the today’s Visit Card.
To move within the database use the following buttons:
Move to the first visit in the archive
Move to the previous visit in the archive
Move to the next visit in the archive
Move to the last visit in the archive
Find a visit in the archive
Enter a new visit card in the archive
Delete current visit card from the archive
Edit the current visit card
Test Card
It contains all the information about the test.
To move within the database use the following buttons:
Delete current test from the archive.
Edit the current test
Import/export a Tests card
This function allows to import /export a test card with the
respective visit and patient card.
1. Select the patient.
2. Choose the tests to be exported and press the key by side. All
data will be imported/exported in the XPO file format
(Cosmed proprietary).
Diagnosis Database
The program allows to manage a diagnosis database, whose
records are composed by a diagnosis ID code and a string of text.
Chapter 6 - Database Management - 69
Page 70

The report of the visits can be done either by typing the desired
text in the field “Diagnosis” of the Visit Card or, more quickly,
retrieving from the diagnosis database the desired one.
If you want to insert, modify or delete a diagnosis from the
database select Diagnosis Database... from the File menu.
70 - Pony FX User Manual
Page 71

Receiving data from the unit
In order to download the tests performed and stored on the Pony
FX unit, please do the following:
1. Connect the unit to the PC (through serial or USB
connection, depending on the settings)
2. Select Receive test… from the Test menu.
3. In the left side of the window, you have the patient list of the
Pony FX archive, in the right side there is a list of the
patients in the PC archive.
4. You can link the selected patient tests to a patient already
present in the PC archive (Existing) or to a new patient
(New). In this case, it will be created a new patient with the
data stored in the Pony FX unit.
5. Press Existing or New to start the transmission.
Chapter 6 - Database Management - 71
Page 72

Archive maintenance
The software allows to manage files selecting Archive from the
File menu.
It is advisable to perform the archive reorganisation every month,
in order to free space on the hard disk and/or to correct possible
errors present within the database.
It is possible also that your have no more hard disk space. So,
you have to delete all the data. In this case, it is useful to perform
the initialising.
Reorganise the archive
1. Select Reorganize archive from the File menu.
2. Wait for the end of the operation before performing any
other function.
Delete the archive
1. Select Initialize Archive from the File menu.
2. Wait for the end of the operation before performing any
other function.
Backup and restore
It is strongly recommended to backup files, a warning message
will be displayed monthly. This function allows the user to
restore the data if the PC or the HD will not work anymore.
Backup
1. Select Backup archive from the File menu.
2. Selecting the destination path with the Browse key or press
New to create a new directory. Press OK to confirm.
72 - Pony FX User Manual
Page 73

3. In the dialog box it will appear an estimate of the number of
floppy you need in order to back up the archives. Press OK.
Restore
1. Select Restore archive from the File menu.
2. On the Restore dialog box specify the drive source and press
OK, a dialog box will appear indicating all data of the
backup processed.
Chapter 6 - Database Management - 73
Page 74

74 - Pony FX User Manual
Page 75

Spirometry
Page 76

Setting spirometry options
The software allows to configure some options selecting
Configure from the Option menu.
Spirometry
Automatic Interpretation
Pony FX has the function of interpreting each test performed by a
patient visualising an automatic diagnosis. The algorithm has
been calculated basing on “Lung Function Testing: selection of
reference values and interpretative strategies, A.R.R.D. 144/
1991:1202-1218”. The automatic diagnosis is calculated at the
end of the FVC if:
• the automatic diagnosis option is enabled.
• the patient’s anthropometric data allow the calculation of the
LLN (Lower Limit of Normal range).
• at least one FVC test has been performed.
To enable/disable the automatic diagnosis:
1. Click on Enable Automatic Interpretation.
2. Select the LLN (Lower Limit of Normal Range) criteria
among the ATS (LLN=Pred-0.674*SD), ERS (LLN=Pred-
1.647*SD) or 80%Pred (LLN=Pred*0.8) specifications.
76 - Pony FX User Manual
Page 77

Quality control
Pony FX allows a quality test control. The calculation has been
carried out referring to “Spirometry in the Lung Health Study:
Methods and Quality Control, A.R.R.D. 1991; 143:1215-1223”.
The messages concerning the quality control are shown at the end
of the test.
To enable/disable the quality control, click on Enable Quality
Control checkbox.
Parameters manager
The program allows to calculate a huge number of parameters; it
is advisable, in order to simplify the analysis of the results, to
view, to print and to sort the desired parameters only. Select the
menu item Options/Parameters...
View
Move the parameters to view into the Selected parameters list.
Print
Move the parameters to print into the Selected parameters list.
Sort
Drag the parameter up or down with the mouse.
Customise
Add, modify and delete custom parameters.
If it is necessary to restore the default parameters press the button
in the left corner of the window to initialise the parameters
database.
Chapter 7 - Spirometry - 77
Page 78

Predicted values manager
The program contains a preset of predicted equations, but the
user is allowed to customise its own predicted sets. Select
Predicteds... from Options menu.
The window is divided into two forms: Predicteds set and
Formula definition.
Predicteds set
This form allows the user to manage the set of predicteds. The
following information define a set:
Name: identifies the set and cannot be duplicated;
Description: free field;
Age: the adult predicteds start since this age.
To enter a new set of predicteds click on the New button. The
field Name must be filled and must be unique. To stop without
saving click on the Cancel button. To save the set, click on the
Save button.
To delete a set of predicteds click on the Delete button. If a set is
deleted, also the associated formulae are deleted.
It is possible to generate a new set of predicteds with the same
attributes and the same formulae of the selected one. To do this
click on the Copy... button and specify a new Name.
To import a set of predicteds click on the Import... button and
select a file of Predicteds files type.
To export a set of predicteds click on the Export... button.
78 - Pony FX User Manual
Page 79

In the list Set current predicteds choose the current predicteds
for printing and viewing.
Set the current predicted
Pony FX allows to calculate the predicted values according to the
following configurable sets:
Adults Paediatrics
ERS 93 Zapletal
Knudson83 Knudson83
ITS white ITS white
ITS black ITS black
LAM LAM
MC Barcelona MC Barcelona
Nhanes III Nhanes III
Select the desired choice in the group Predicteds.
Formula definition
This form allows the user to manage the formulae associated to a
set of predicteds.
Select the set of predicteds from the list Predicteds set.
To insert a new parameter click on the New... button.
The parameter formulae can be:
• calculated according to the predicteds in the list Use the
predicteds formulae;
Chapter 7 - Spirometry - 79
Page 80

Page set-up
• customised by the user with the option ...or the customised
formulae.
The Delete button deletes the selected parameter.
The Copy button stores the selected parameter in memory.
The Paste button inserts a new parameter from the one copied. If
the name is not unique, the user is asked whether to specify a
new name or to replace the existing parameter.
Select Page Setup... from the File menu.
Header All the printouts carried out by the
program are preceded by 3 rows of
customisable header (usually they contain
the name and the address of the Hospital
using the spirometer).
Data Patient and visit information are printed
below the header. These data are reported
on 3 columns and 5 rows. the user may
configure the disposition, change and
eventually cancel the fields, as he prefers.
Margins Configures the print margins from the
borders of the paper. The unit of measure
is decided in Units of measurements.
Footer Configures information at the bottom of
the page.
80 - Pony FX User Manual
Page 81

Printed file name Defines the automatic name to be
asssigned to the pdf file, if the report will
be printed in this format.
In the example it has been set to create a
filename composed by <date of the test>
followed by <last name> and <first
name>.
Chapter 7 - Spirometry - 81
Page 82

Spirometry tests
Once completed the phases of the introduction of the patient’s
data and the visit data, it is possible to carry out the spirometric
Note: Read
carefully the
contraindications
in Chapter 1.
Recommendations for spirometry tests
tests.
Pony FX allows to perform the following tests:
Key Test
FVC pre Forced Vital Capacity
FVC post Forced Vital Capacity after bronchial stimulation
SVC Slow Vital Capacity
MVV Maximum Voluntary Ventilation
Before performing any test make sure that:
1. Pony FX is properly connected to your PC and the selected
serial port (COM1, COM2) corresponds to the one
effectively use.
2. The name shown on the status bar corresponds to the patient
who is to carrying out the tests.
3. The today’s visit card exists.
• The patient should wear the nose clips
• The turbine has been recently calibrated (ATS recommends a
daily calibration)
• The paper mouthpiece or the antibacterial filter is properly
connected to the flowmeter through the corresponding
adapter
For hygienic reasons, we strongly recommend the use of a
bacterial filter.
If a kid must perform the test it is recommended to enable the
encouragement function which shows exactly the manoeuvre of
the FVC test.
82 - Pony FX User Manual
Page 83

Forced Vital Capacity (pre)
FVC is a reference test to verify obstructive (airflow limitations)
and restrictive disorders (lung volume limitations). To achieve
good test results it is fundamental a good manoeuvre (quality
control messages, real time plots …)
The main parameters measured during FVC tests are:
FVC Forced Vital Capacity
FEV1 Forced Expiratory Volume in 1 second
FEV1/FVC% FEV1 as a percentage of FVC
PEF Peak Expiratory Flow
FEF25-75% Forced mid-Expiratory Flow
The two representative plots are the Flow/Volume and
Volume/Time loops.
By comparing FVC, FEV1 and FEV1/FVC% values the software
allows an automatic interpretation concerning the levels of
obstructive and/or restrictive disorders.
Perform a FVC (pre) test
1. Select Forced Vital Capacity pre from the Test menu and
wait for the green led is prompted on the right side of the
screen.
2. Explain the manoeuvre to the patient and press the F2 key.
3. Wait some seconds and perform the test.
4. After having performed the test, press F3 or wait for the
automatic end (5 seconds without flow), so that the software
displays the F/V and V/t graphs, the main parameters, and
the predicteds values.
5. In order to visualise the F/V and V/t graph and the main
parameters press the following buttons:
view Flow Volume graph
view Volume Time graph
view data of the test
6. Press Alt+F3 to stop the acquisition discarding the results.
7. Repeat the test until it is correctly performed (ATS
recommends 3 times).
Chapter 7 - Spirometry - 83
Page 84

8. Press Exit to visualise the test list carried out during current
session together with the results of the main parameters.
9. Select the test that you want to save (the Best Test according
to the ATS criteria is highlighted as default) and press OK.
Test encouragement
During FVC manoeuvre you might experience some lack of
collaboration with kids or with other patients. In this case you
may find a good help in using the encouragement software tool.
Perform the FVC test with the encouragement
1. Select Encouragement from View menu.
2. Perform the test as explained in the previous paragraph.
84 - Pony FX User Manual
Page 85

Slow Vital Capacity
Important test for assessing COPD (chronic obstructive
pulmonary disease) patients affected by this disease might
present a the Slow Vital Capacity could be higher than the Forced
one (FVC).
The main parameters measured during SVC tests are:
EVC Expiratory Slow Vital Capacity
IVC Inspiratory Slow Vital Capacity
ERV Expiratory Reserve Volume
IRV Inspiratory Reserve Volume
If the inspiratory/expiratory maximal manoeuvre is preceded by a
some breaths at tidal volume the software allows to measure the
Respiratory Pattern, represented by the following parameters:
VE Ventilation per minute
Vt Tidal volume
Rf Respiratory frequency
Ttot Breath time
Ti/Ttot Inspiratory time/Ttot
Vt/Ti Vt/Ti
Perform a SVC test
1. Select Slow Vital Capacity from the Test menu and wait
for the green led is prompted on the right side of the screen.
2. Press F2 and instruct the Patient to breath normally until the
message “carry out…” is prompted; then ask to perform a
Slow Vital Capacity (deep inhalation, maximal slow
expiration and deep inhalation again).
3. Press F3 or wait for automatic interruption (5 seconds
without flow) in order to visualise the V/t graph together
with the main parameters compared to the predicted values
4. To visualise the V/t graph and the main parameters press the
follow buttons:
view Volume Time graph
view data of the test
5. Press Alt+F3 to stop the acquisition discarding the results.
Chapter 7 - Spirometry - 85
Page 86

6. Repeat the test until it is correctly performed (ATS
recommends 3 times).
7. Press Exit to visualise the test list carried out during current
session together with the results of the main parameters.
8. Select the test that you want to save (the Best Test according
to the ATS criteria is highlighted by default) and press OK.
The reference for the ERV calculation is displayed on the V/T
graph.
86 - Pony FX User Manual
Page 87

Maximum Voluntary Ventilation
Test for assessing the maximum ventilatory capacity. In the past,
it was commonly performed during routine PF tests, however its
clinical use declined over the years. Today MVV test is most
commonly performed as part of the exercise tolerance tests,
where it is used as an index of maximum ventilatory capacity.
Test consists in breathing in and out deeply and rapidly for 12, 15
seconds. The expired volume during this short period is then
extrapolated
The most important measured parameter is the following:
MVV Maximum Voluntary Ventilation
Perform a MVV test
1. Select Maximum Voluntary Ventilation from the test
menu and wait for the green led is prompted on the right side
of the screen.
2. Press F2 and make the Patient breath as much deeply and
rapidly as possible for at least 12 seconds.
3. Press F3 or wait for automatic interruption (5 seconds
without flow) in order to visualise the V/t graph together
with the main parameters compared to the predicted values
4. To visualise the V/t graph and the main parameters press the
follow buttons:
view Volume Time graph
view data of the test
5. Press Alt+F3 to stop the acquisition discarding the results.
6. Repeat the test until it is correctly performed (ATS
recommends 3 times).
7. Press Exit to visualise the test list carried out during current
session together with the results of the main parameters.
8. Select the test that you want to save (the Best Test according
to the ATS criteria is highlighted as default) and press OK.
Chapter 7 - Spirometry - 87
Page 88

Bronchial Provocation Test
Bronchodilator test
Note: Read
carefully the
contraindications
in Chapter 1.
Bronchodilators are administered routinely in the PFT laboratory
to determine whether airflow obstruction is reversible.
Bronchodilators increase airway calibre by relaxing airway
smooth muscle.
The test consists of comparing results between the reference FVC
(FVC PRE) and the FVC POST performed after the
administration of the drug. Increasing value of 13-15% of FEV1,
respect to the basal value (FVC Pre) is considered as a reversible
condition.
Main parameters are the following:
DFEV1%pre Change of FEV1 as a percentage of test PRE
DFVC%pre Change of FVC as a percentage of test PRE
DPEF%pre Change of PEF as a percentage of test PRE
Some authors states that the above mentioned parameters are too
dependent from the FVC Pre, hence latest reference (ERS93, [A
comparison of six different ways of expressing the
bronchodilating response in asthma and COPD; reproducibility
and dependence of pre bronchodilator FEV1: E. Dompeling, C.P.
van Schayck et Al; ERJ 1992, 5, 975-981]) recommend the
following parameters:
DFEV1%pred Change of FVC as percentage of predicted value
DFEV1%poss Change of FEV1 as percentage of possible value
Methacholine and Histamine Bronchial provocation Tests
The most common indication for performing methacholine and
histamine bronchial challenges is to diagnose hyperresponsive
airways. Some patients demonstrate normal baseline pulmonary
function despite complaints of “tightness” wheezing, cough, and
a little or not response to bronchodilator. Other patients
demonstrate spirometric improvement after use of bronchodilator
have diurnal variation in peak flows. In this groups aerosolised
bronchial challenges are used to confirm a diagnosis of Asthma.
We can summarise the use of the test as follows:
1. Diagnose asthma
2. Confirm a diagnosis of asthma
88 - Pony FX User Manual
Page 89

3. Document the severity of hyperresponsivness
4. Follow changes in hyperresponsivness
When patients with hyperresponsive airways inhale certain
pharmacologic agents (i.e. Methacholine or histamine) the
airways respond by constricting.
Test consists of executing repeated FVC following the
pharmacologic agents inhalation according to an established
protocol. The fall of the FEV1 parameter is used to calculate the
bronchial hyperresponsivness. The most important parameter is
the PD20 that is amount of drug (mg/ml) that causes a reduction
of 20% of the FEV1 respect the basal value (without drug).
Main parameters are:
P10 Dose that causes a 10% fall of FEV1.
P15 Dose that causes a 15% fall of FEV1.
P20 Dose that causes a 20% fall of FEV1.
The representative plot is the Dose/response curve, showing the
percentage variation of FEV1 versus the Drug dose in
logarithmic scale.
The program assumes as the baseline test the best FVC pre
carried out during the today’s visit. You can change the reference
pre test editing the Post test.
The name of the drug, its quantity and its unit of measurement,
can be typed immediately before any FVC post manoeuvre
(manual protocol) or can be stored in a database of
bronchoprovocation (File/Bronchial Provocation protocols
Database…).
Perform the test
(During 1st step only) select Protocol... from the Test menu and
choose the name of the bronchoprovocation protocol that you are
going to use (manual protocol if you want to type the
information about the agent before any manoeuvre)
1. Select FVC post from the Test menu.
2. Select an existing protocol or click on “manual protocol”,
and wait the green leds turned on.
3. Press F2, or the button by side, to start the test.
4. Press F3, or the button by side, to achieve the test.
Chapter 7 - Spirometry - 89
Page 90

5. In order to visualise the V/t graph and the main parameters
press the follow buttons:
view Flow Volume graph
view data of the test
view bronchial provocation response
6. Press Alt+F3 to stop the acquisition discarding the results.
7. Repeat the test until it is correctly performed (ATS
recommends 3 times).
8. Press Exit to visualise the test list carried out during current
session together with the results of the main parameters.
9. Select the test that you want to save (the Best Test according
to the ATS criteria is highlighted as default) and press OK.
Bronchial Provocation protocols Database
The response to a bronchoprovocator is usually assessed in terms
of change in the FEV1, vital capacity or airways resistance on the
basis of serial measurements (FVC manoeuvres) in which the
results of the initial test constitute the reference values. The
international literature proposes several standardised protocols in
order to address the methodological issues of the various
available techniques.
The possibility to store a bronchoprovocation protocol in a
database is useful to simplify and automate the sequence of
operations that the Physician need to execute during the
bronchoprovocation tests.
The typical sequence of activities to carry out a
bronchoprovocation test are:
1. Typing and storing a bronchoprovocation protocol in the
database (usually only once).
2. Selection of protocol among the list of the ones already
present in the database before carrying out the FVC post
tests (the selection of “manual protocol” allows to execute
the test fully manually).
3. Performing the Post tests.
90 - Pony FX User Manual
Page 91

Enter a new Bronchial provocation protocol in the archive
1. Select Bronchoprov. protocols database from the File
menu.
2. Type the Protocol name, the Bronchoprovocator name and
the unit of measurement in the proper input fields.
3. If the bronchoprovocator has a cumulative effect select the
cumulative check button.
4. Enter the quantities for each step and press the button
.
Chapter 7 - Spirometry - 91
Page 92

Viewing results
All the visualisation functions refer to the test carried out by the
Current Patient, whose name is indicated on the left-side of the
status bar.
To view tests results:
1. Select the Patients from the File menu
2. Select the patient corresponding to the test you want to view.
3. Select in the list box of the tests up to 5 tests of the kind
(FVC, VC/IVC, or MVV) and press OK.
To switch between graph and or data use the following buttons
on the toolbar:
view Flow Volume graph (F5)
view Volume Time graph (F6)
view data of the test (F7)
view bronchial provocation response.
If you need more than one visualisation meantime use the New
Window function from the Window menu.
If you need to display a list of visits:
• Select Visits list... from the File menu.
• Type the name of the Company and/or the time interval
desired or simply confirm for the complete list.
Tests of the current patient
If a current patient has been selected you can quickly view his
tests selecting Test current patient... from the View menu.
Delete a test
1. Select Patients from the File menu or press the button by
side.
2. Select the test that you want to eliminate from the list of the
tests referred to the Current Patient and press Delete.
92 - Pony FX User Manual
Page 93

Printing results
You can print out in three different ways:
• printing the Report
• printing the Active Window
• printing a series of reports
Printing Reports
To print a report of the current visit, select Print report… from
File menu. The software will choose automatically the best
performed test.
The standard Report is composed by 1, 2 or 3 pages depending if
you wish to printout the FVC data and the graphs together on the
first page or if you wish to printout the bronchoprovocation
response.
• Selecting the option One page (no ATS) the report will
contain, on one page, the F/V and V/t graphs of the best test,
overlapped on the FVC Post, the patient data, the notes, the
diagnosis and the test results.
• Otherwise the report will contain two pages, the first with
the patient data, the graphs and the diagnosis, and the second
one with the measured parameters, according to the ATS
recommendations.
• The 3
Chapter 7 - Spirometry - 93
rd
page will contain the bronchoprovocation response.
Page 94

Select the desired options:
FVC graph Prints the F/V and V/t curves for the best
One page (no ATS) Prints data and graphs on the first page.
Response Prints the bronchoprovocator response.
FVC post Prints data and graphs for the Post FVC test
Preview Views a report preview on the screen.
Printing the active window
This printout function is only enabled when the active window
(title bar highlighted) is one of the following objects:
• Any kind of Graph.
• Numeric data
• List of visit
To print the active window select Print Active window from
File menu.
Printing a series of reports
Sometimes it is useful to printout automatically a series of reports
(all tests carried out with the employees, all tests carried out in
the today's session).
To print out proceed as follows:
1. Select Visit List from the File menu
2. Set the criteria of the visits to be added in the list (from,
to,...)
3. Select Print Report from the File menu.
FVC test.
(the test can be selected among the test
performed in the current visit).
Electronic reports (*.pdf)
If an Adobe PDF writer “Printer Driver” is installed and set as
the default printer, it is possible to store the printout report
automatically in any location of the HD or eventually LAN paths
according to a customizable filename format.
It is possible to define the created filename format selecting
File/Page Set up... (see Page set-up).
94 - Pony FX User Manual
Page 95

Export data
With this function you can export the test data in 4 different
formats:
• *.txt (ASCII)
• *.xls (Microsoft Excel)
• *.wk1 (Lotus 123)
• *.xpo (Cosmed)
Export a test
1. Select Export tests from the File menu.
2. Select the test to export from the list box and press OK.
3. Type the name and the format of the file in the dialog Save
as. If the ASCII format is selected, the Text button in the
dialog box Save as allows you to configure the separators for
character based files.
With the *.xpo Cosmed file format it is possible to import
data from another Quark archive. Press OK to confirm.
4. Select the folder for the export and type the file name. Press
OK to confirm. A status bar will show the file creation.
Chapter 7 - Spirometry - 95
Page 96

96 - Pony FX User Manual
Page 97

System
maintenance
Page 98

System maintenance
All service operations which are not specified in this user manual
should be performed by qualified personnel in accordance with
the service handbook (to be required to the manufacturer).
All materials used in the construction of the Pony FX are non
toxic and pose no safety risk to the patient or operator.
Prior to the device cleaning, disinfection and inspection it is
necessary to switch off the device and to disconnect adapters
from the supply mains.
In order to guarantee the highest accuracy of measurements we
recommend you to disinfect the turbine periodically.
Cleaning and disinfection
Cleaning and disinfecting instructions are of fundamental
importance to control infections and assure patient safety. In fact
aspiration of residue, particles and contaminated agents are life –
threatening.
In this handbook we strongly recommend you to follow the rules
worked out by ATS and ERS (see: ”Lung Volume Equipment
and Infection Control” – ERS/ATS WORKSHOP REPORT
SERIES, European Respiratory Journal 1997; 10: 1928 – 1932),
which are summarised and adapted for COSMED products as
follows:
• Accessible internal as well as external surfaces of equipment
exposed to expired gas should be washed and disinfected
prior to testing of subsequent patients.
• Disinfecting should ideally be performed by heat
sterilisation, but gas or liquid sterilisation can be used if the
equipment is well cleaned first (no droplets of saliva/sputum
remain).
• Disposable gloves should be worn when handling
mouthpieces, when cleaning equipment exposed to saliva or
sputum and especially when drawing blood.
• Laboratory staff should wash hands prior to testing of each
patient.
• Adopt particular precautions when testing patients with
recognised high – risk communicable diseases (e.g.
tuberculosis, multidrug – resistant staphylococcus). In these
98 - Pony FX User Manual
Page 99

cases, the clinical need for such testing should justify the
risks.
During the disinfection:
• do not use alcohol or other liquids containing gluteraldehyde
on the exterior surfaces of the equipment. Actually they can
damage polycarbonates plastics and may produce unhealthy
substances.
• do not use abrasive powders or glass cleaners containing
alcohol or ammonia on the plexiglas components of the
equipment
• do not steam autoclave any parts of the equipment unless it
is clearly specified.
• do not immerse the optoelectronic reader.
Warning: Do not
use alcoholic
solutions for the
turbine,
otherwise there
can be damages
to the plastic
material.
Cleaning the turbine flowmeter
It is necessary to disinfect periodically the turbine for sanitary
measures or/and for the correct device function.
As disinfecting solution it is suggested Sodium hypochlorite 5%
(bleach).
The disinfecting procedure is easy and may be effected every
time the user needs, keeping attention to some precautions:
1. Take out the turbine.
2. Dip it in a disinfectant solution (non alcoholic based) for
about 1 hour.
3. Rinse the turbine in a vessel, filled of clean water, shaking
gently to remove the disinfectant (do not clean the turbine by
putting it under running water!).
4. Let it dry to air.
5. After cleaning the turbine, check if the turbine propeller
rotates freely even with a low speed air flow.
6. Connect the turbine to the reader.
Precautions during the cleaning of the turbine
1. Do not expose the turbine to high heat and do not put it
under running water.
2. Do not ever dip the optoelectronic reader in any kind of
solution, the liquid infiltration would damage the internal
circuit.
3. Do not use alcoholic solutions to clean the turbine.
Chapter 8 - System maintenance - 99
Page 100

Inspections
Suggested disinfection solutions
Helipur H Plus Braun Melsungen AG
Gigasept FF Schulke & Mayr GmbH
Dismozon pur Bode Chemie GmbH
TETA-S Fresenius AG
CIDEX Johnson & Johnson
The equipment requires easy inspections to be carried out in
order to assure a proper electrical and mechanical safety level in
the years.
These inspections are highly recommended after a rough use of
the equipment or after a period of storage in unfavourable
environmental conditions.
Referring to the electrical safety, it is important to check the
conditions of insulation materials of cables, plugs and any other
visible part by means of simple inspection, when the equipment
is switched off and adapters (or electrical feeders) are
disconnected from the supply mains.
Extract the turbine from the unit and verify, by inspection, that
the turbine axis fits correctly its seats and the blade is strongly
fastened on the axis itself (it can be useful to shake slightly the
turbine in order to note any anomalous movement).
Check if there are any torn or broken components in the
breathing circuits: remember that they can create safety risk to
patients during tests.
100 - Pony FX User Manual
 Loading...