

Page 1
ED 2XX Icemaker Adapter Kit Installation Instructions
!
WARNING:
!
WARNING:
!
WARNING:
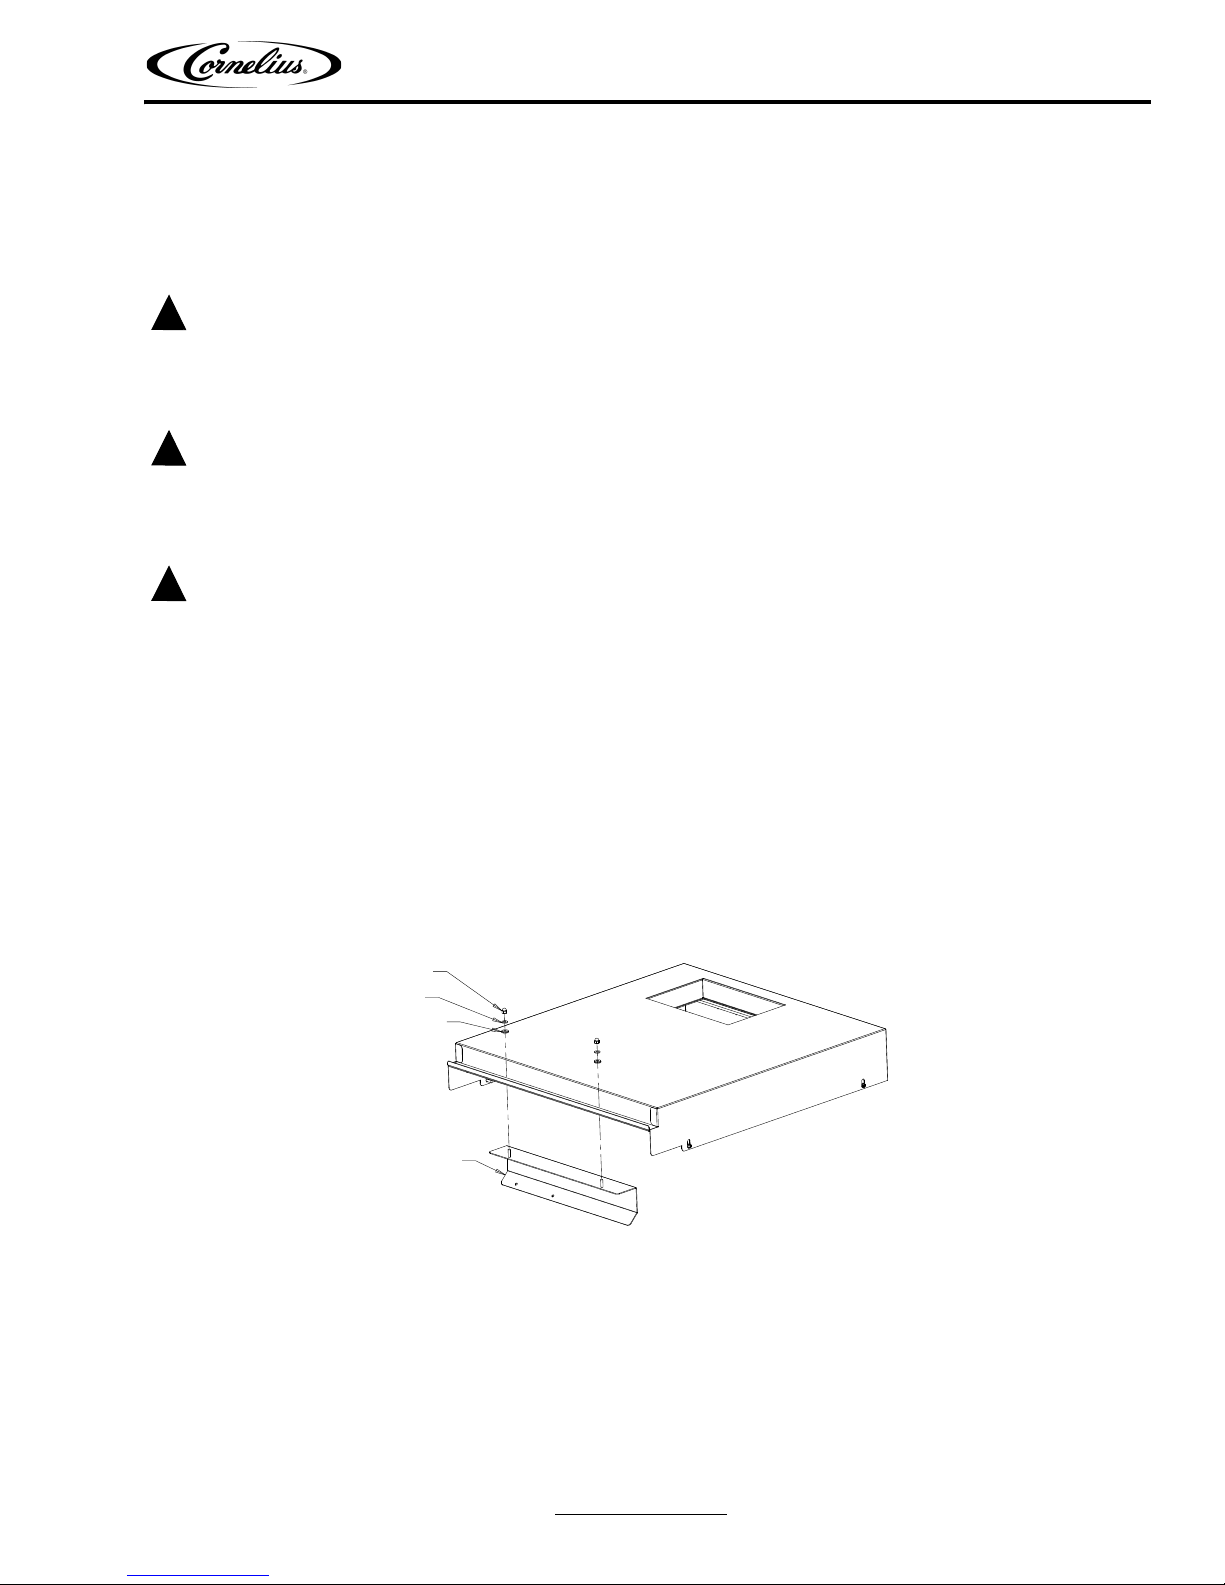
ACORN NUT
WASHER
SEALING WASHER
BAFFLE
INSTALLATION INSTRUCTIONS
ED 2XX ICE MAKER ADAPTER KIT
FOR USE WITH 2 CORNELIUS WCC SERIES ICE MAKERS
Disconnect power to the unit before installing the adaptor following all lockout/tag out procedures established by the
user. Verify that all the power is off to the unit before performing any work.
Failure to comply could result in serious injury, death or damage to the equipment.
All ice baffle plates and bin stats, if included or recommended in this kit, must be installed as directed in this manual or
the equipment manufacturer’s instructions.
Failure to comply could result in serious injury, death or damage to the equipment.
All of the attachment screws and plates must be installed as directed in this manual.
Failure to comply could result in serious injury, death or damage to the equipment.
1. Remove the plastic hopper lids from the top of the dispenser.
2. Install soft ice agitator kit (
NOTE: This soft ice agitator kit is required for proper dispenser operation using “compressed” or
“soft” ice types. Failure to install this kit may result in undesirable beverage quality.
3. Unpack the adapter kit.
4. Assemble the baffle assembly onto the adapter lid as shown in Figure 1.
sold separately
) into the dispenser.
Figure 1.
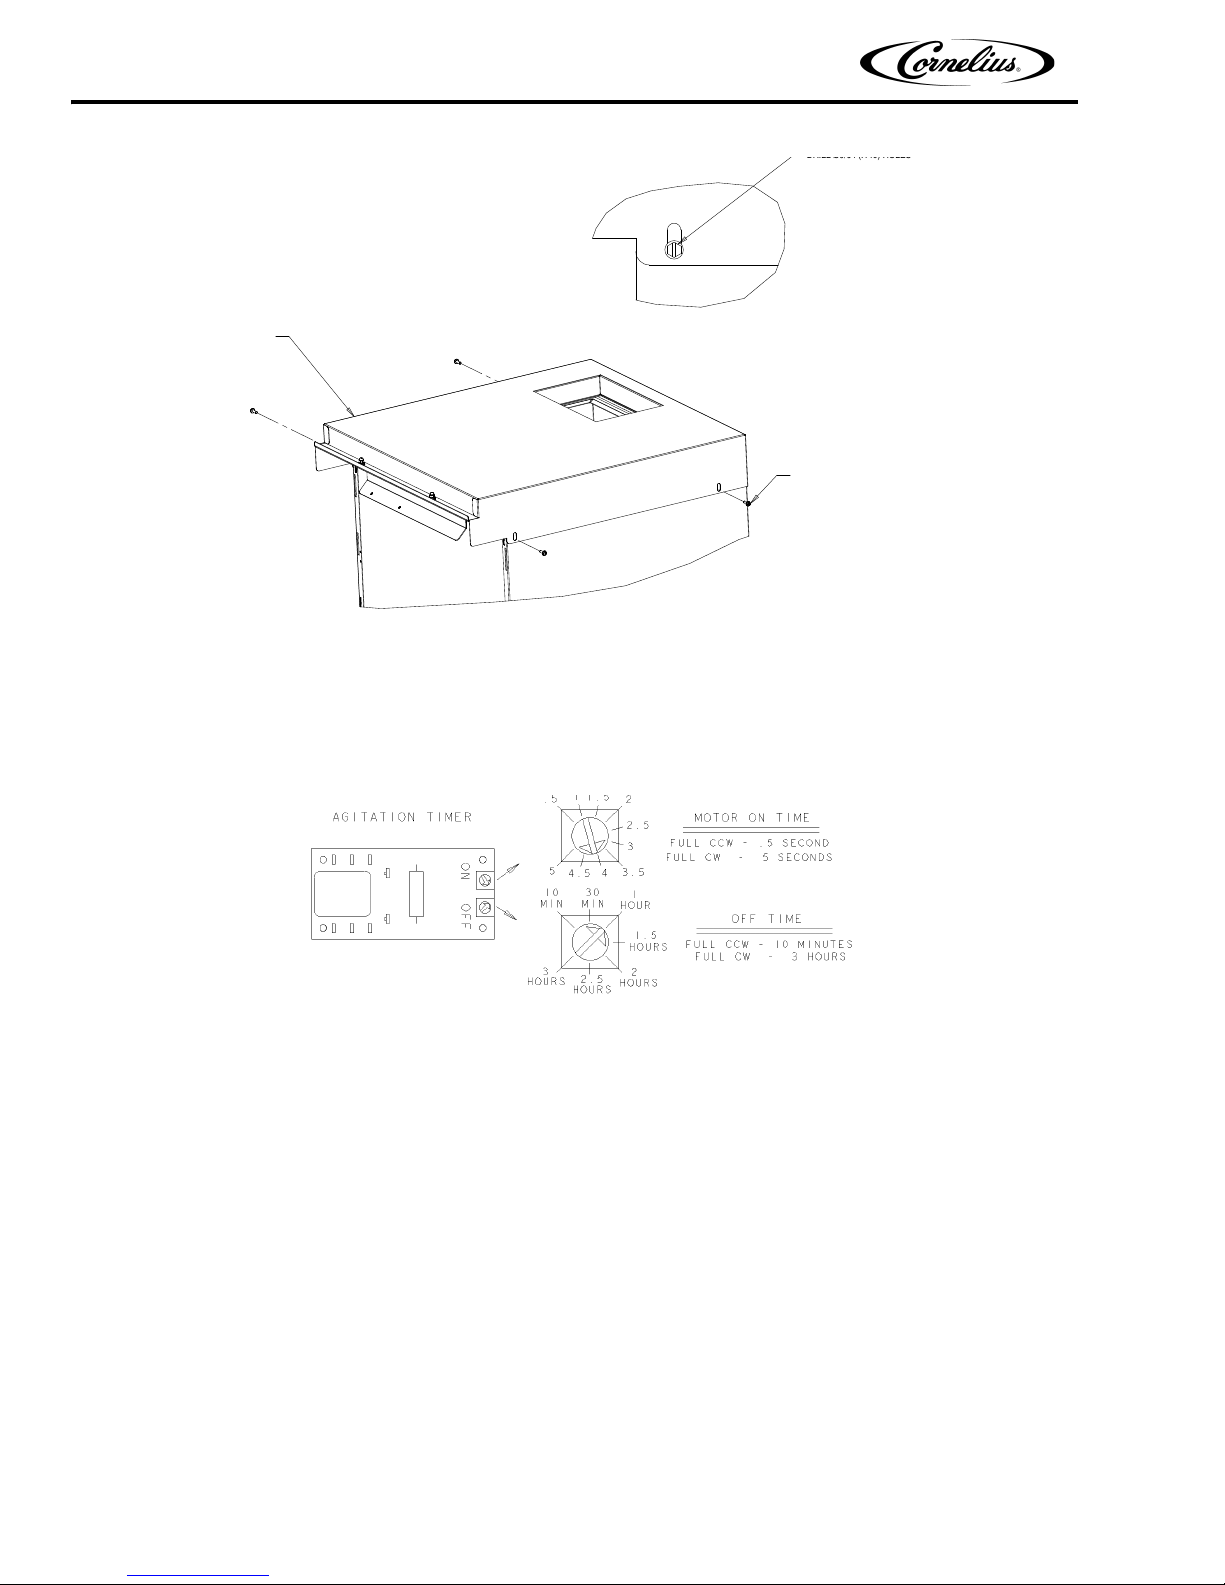
5. Set and secure adapter lid onto the dispenser as shown in Figure 2.
Release Date: November 10, 2010 www.cornelius.com Revision: B
© 2006-2010, IMI Cornelius Inc. - 1 - Publication Number: 620920831INS
Page 2
ED 2XX Icemaker Adapter Kit Installation Instructions
#8 SELF TAPPING SCREWS
FOR THE 1XX/2XX LIDS
ADAPTER LID
SCALE 1.000
DRILL Ø9/64 (.140) HOLES
USING BOTTOM OF SLOTTED
HOLES AS A TEMPLATE.
Figure 2.
6. Remove merchandiser from dispenser by lifting up then pulling out. Set merchandiser aside.
7. Adjust the automatic agitator timing settings (located in the dispenser’s electrical box) to 2 seconds ON, 3 hours
OFF. See Figure 3.
Figure 3.
8. Re-install merchandiser back onto the dispenser.
9. Set one ice maker on top of the adapter kit. See Figure 4.
Publication Number: 620920831INS - 2 - © 2006-2010, IMI Cornelius Inc.
Page 3

ED 2XX Icemaker Adapter Kit Installation Instructions
Figure 4.
10. Follow the ice maker manufacturing instructions to complete the installation of the ice maker.
NOTE: Failure to install a bin thermostat correctly may result in inadequate hopper fill, ice dispense
issues, hopper “ice bridging”, and/or possible damage to the ice maker.
11. Apply a continuous bead of NSF International (NSF) listed silastic sealant (Dow 732 or equivalent) to seal the ice
maker to the top of the adapter lid. All excess sealant
must
be wiped away immediately.
12. Install the ice maker mounting brackets on the back of the ice maker by drilling 9/64” diameter holes, using one of
the two supplied brackets as a template, into the rear of the ice maker and the rear of the adapter lid. USE
EXTREME CARE NOT TO DRILL INTO ANY ICEMAKER COMPONENTS!!! Secure the ice maker to the
adapter lid using the #8 self drilling and mounting brackets provided.
13. Repeat Steps 9 through 12 for the second ice maker.
14. Re-connect electrical power to the dispenser.
15. Verify function and operation of both ice maker and dispenser.
© 2006-2010, IMI Cornelius Inc. - 3 - Publication Number: 620920831INS
 Loading...