


NEDERLANDS
1
Conceptronic CHD3SU versie 2.0
Gebruiksaanwijzing
Gefeliciteerd met uw nieuwe
Conceptronic USB Harddisk Box
In deze gebruiksaanwijzing vindt u stap-voor-stap instructies voor de installatie van de Conceptronic
Harddisk Box op uw computer.
Bij problemen kunt u het beste naar onze support-site gaan (www.conceptronic.net
- klik op 'Support').
Daar vindt u een database met veel gestelde vragen (FAQ).
Als u een vraag over dit product heeft die niet op onze website wordt beantwoord, kunt u ons e-mailen op
support@conceptronic.net
.
Ga voor meer informatie over Conceptronic producten naar de Conceptronic website:
www.conceptronic.net
.
De hieronder beschreven software kan enigszins afwijken, afhankelijk van uw computer. Dit hangt samen
met de gebruikte versie van Windows.
1. Inhoud verpakking
U vindt de volgende items in de verpakking van de Conceptronic Harddisk Box:
• Conceptronic CHD3SU Harddisk Box
• Netvoeding (12 V, 1,5 A)
• USB-kabel
• Productstandaard
• Deze meertalige gebruiksaanwijzing
• Garantiekaart en boekje CE-verklaring
NEDERLANDS
2
2. Harddiskbox gebruiken
2.1 CHD3SU op uw computer aansluiten
• Sluit de netvoeding aan op de CHD3SU en op een stopcontact.
• Doe de USB-kabel in de CHD3SU en in een USB-aansluiting van uw computer.
• Zet uw computer aan.
• Zet de CHD3SU aan met de aan/uitschakelaar aan de achterkant.
De CHD3SU wordt automatisch herkend en geïnstalleerd door de computer. Installatie van
stuurprogramma's is niet nodig.
2.2 CHD3SU van uw computer loskoppelen
Om gegevensverlies te voorkomen, moet de CHD3SU veilig worden verwijderd voordat u hem van de
computer loskoppelt.
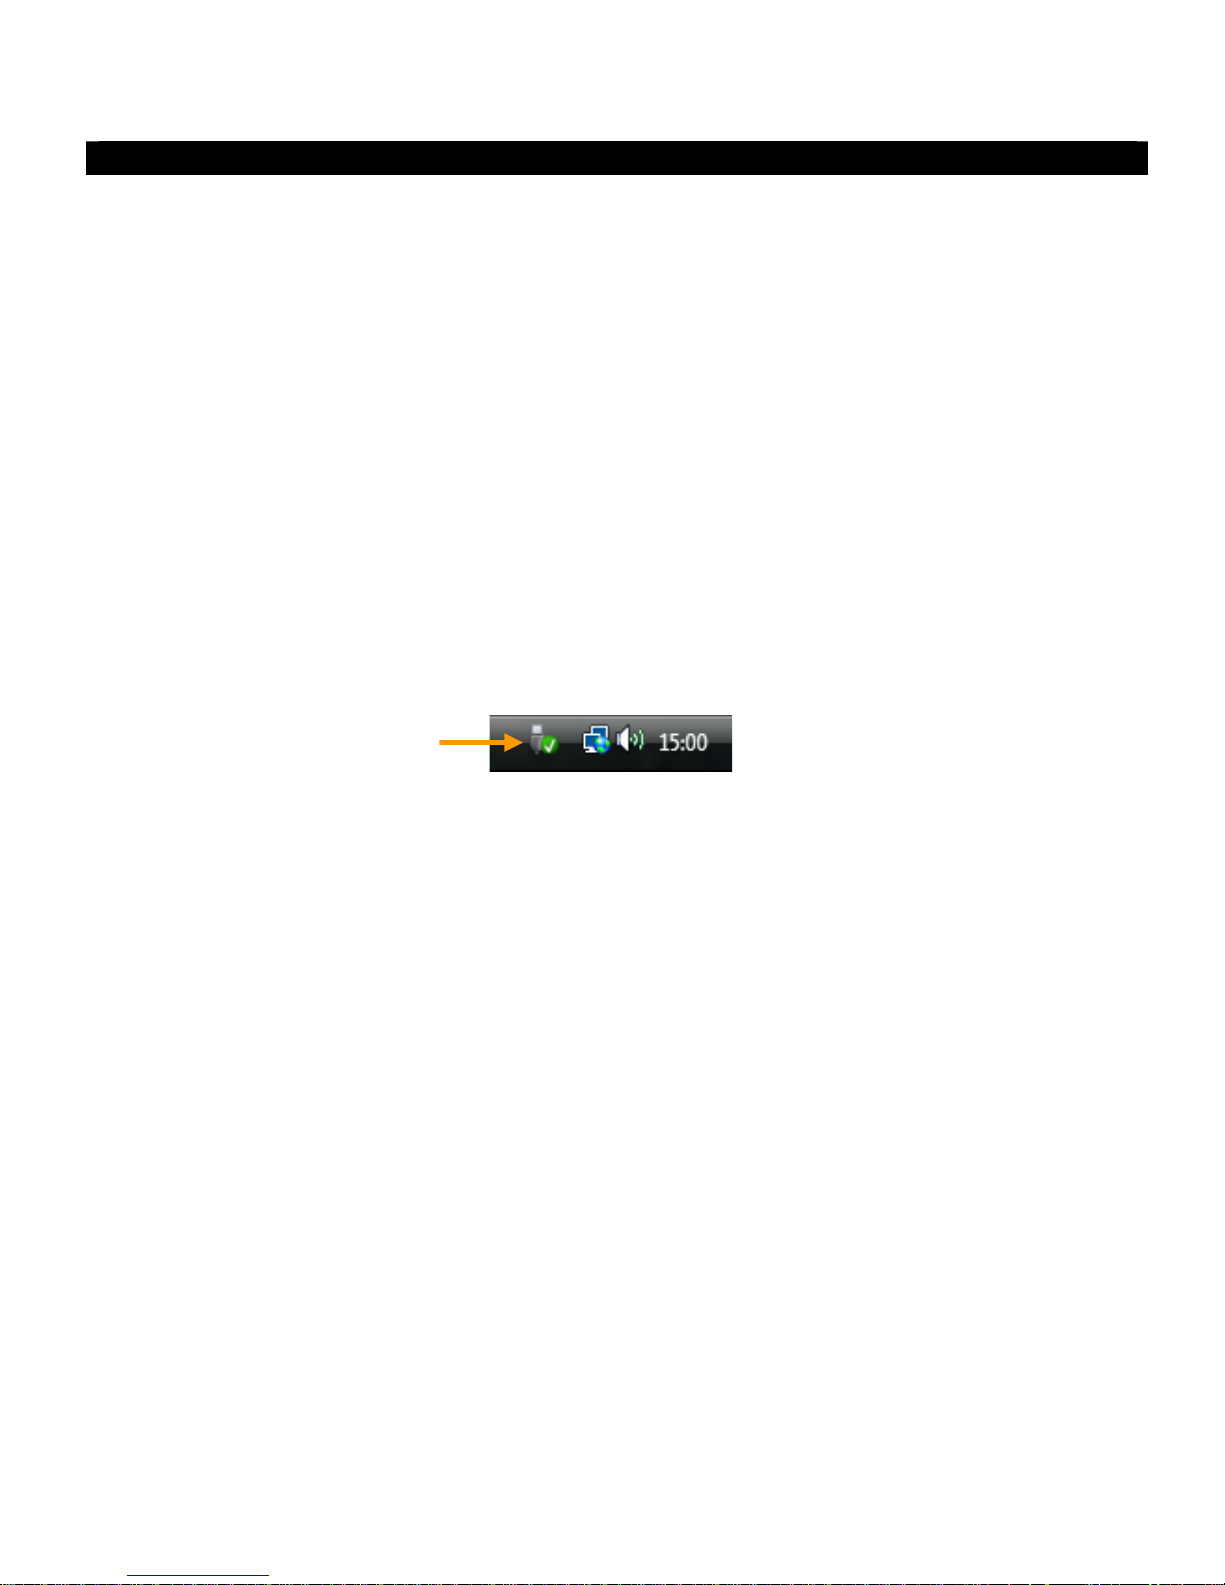
• Dubbelklik op het pictogram 'Veilig verwijderen' in het systeemvak.
Nu verschijnt het venster 'Hardware veilig verwijderen'.
• Klik op de aangesloten CHD3SU (vaak aangegeven als 'USB-apparaat voor massaopslag') en klik op de
knop 'Stoppen'.
• Klik op 'OK' om het verwijderen te bevestigen.
De CHD3SU is nu veilig verwijderd van uw computer. U kunt de CHD3SU nu loskoppelen.
NEDERLANDS
3
3. Harddiskbox gebruiken
Als de harde schijf in uw CHD3SU niet geformatteerd is, of als u de schijf opnieuw wilt formatteren, kunt
u de onderstaande instructies volgen.
NB:
De onderstaande formatteerinstructies zijn gebaseerd op Windows Vista. Wanneer u een andere
Windows-versie gebruikt, kunnen de stappen afwijken.
• Klik op de Start-knop van Windows en selecteer 'Alle programma's', 'Bureau-accessoires', 'Uitvoeren'.
• Geef de opdracht 'diskmgmt.msc' in (zonder de aanhalingstekens) en klik op 'OK' om de opdracht uit te
voeren.
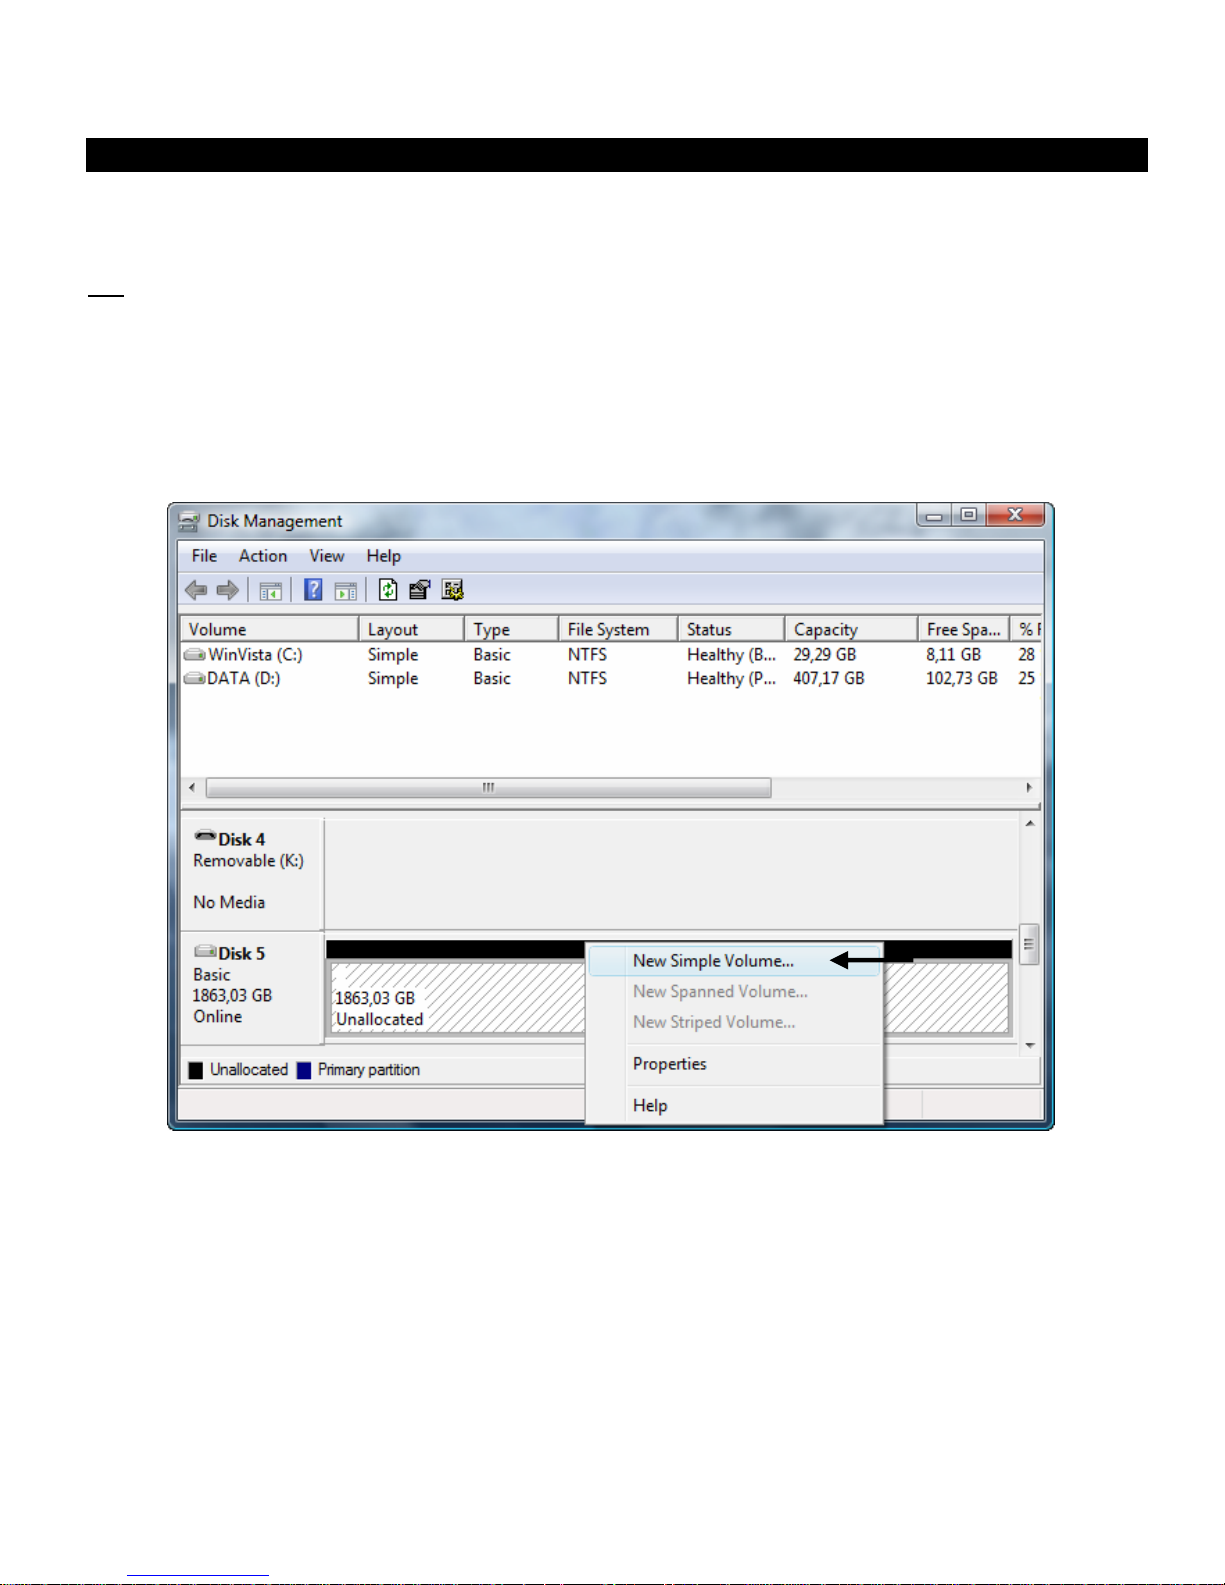
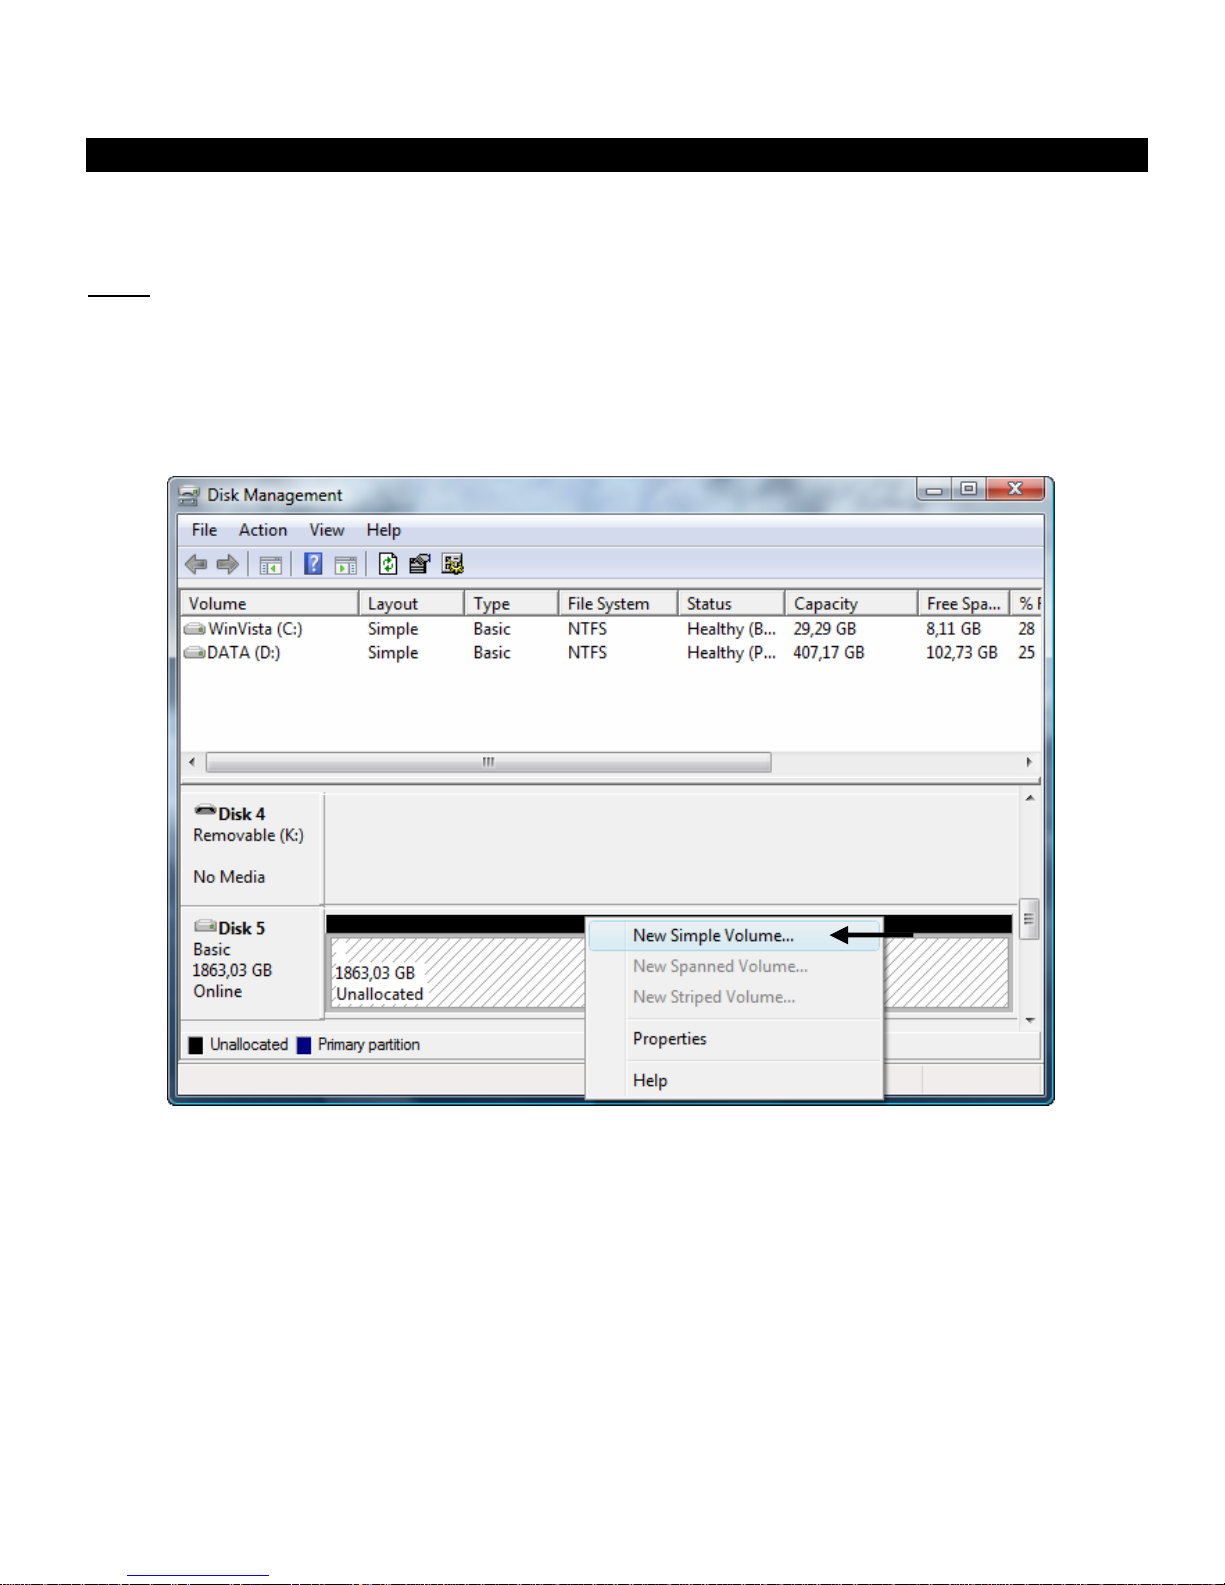
Het venster Schijfbeheer verschijnt op uw scherm.
• Selecteer in het onderste gedeelte van het venster uw nieuwe harde schijf (met niet-toegewezen
ruimte).
• Klik met de rechter muisknop op uw nieuwe harde schijf en selecteer 'Nieuw eenvoudig volume'.
NEDERLANDS
4
• De formatteerwizard verschijnt op uw scherm. Klik op 'Volgende' om door te gaan.
• Selecteer de grootte voor uw nieuwe schijf. Standaard is de maximale grootte geselecteerd. Als u meer
schijfvolumes op uw harddisk wilt maken, moet u de grootte van uw eerste volume kleiner maken. Als u
1 volume wilt maken, kunt u de maximale grootte zo laten. Klik op 'Volgende' om door te gaan.
• Selecteer de schijfletter die u aan het nieuwe volume wilt geven. Standaard wordt de eerste
beschikbare letter getoond. Klik op 'Volgende' om door te gaan.
• Selecteer uw formatteeropties. U kunt het bestandssysteem en de volumenaam wijzigen en kiezen voor
'Snelformatteren'. Klik op 'Volgende' om door te gaan.
NB:
Partities van meer dan 32 GB kunnen met Windows schijfbeheer alleen worden geformatteerd met
het NTFS-bestandssysteem.
• Nu ziet u een overzicht van de gekozen opdrachten. Selecteer 'Voltooien' om het venster van de
formatteerwizard te sluiten en het schijfvolume te formatteren.
Na afloop van het formatteren wordt het schijfvolume in het venster Schijfbeheer aangeduid met 'In
orde'.
U kunt de geformatteerde schijf nu gebruiken.
Veel plezier met uw Conceptronic Harddisk Box!

ENGLISH
5
Conceptronic CHD3SU Version 2.0
User Manual
Congratulations on the purchase of your
Conceptronic USB Harddisk Box.
This User Manual gives you a step-by-step explanation of how to install and use the Conceptronic USB
Harddisk Box on your computer.
When problems occur, we advise you to go to our support-site (go to www.conceptronic.net
and click
‘Support’). Here you will find the Frequently Asked Questions Database.
When you have other questions about your product and you cannot find it at our website then you can
contact us by e-mail: support@conceptronic.net
For more information about Conceptronic products, please visit the Conceptronic Web Site:
www.conceptronic.net
The software description below may be slightly different from the installation on your computer. This
depends on the Windows version you are using.
1. Package contents
The following items are present in the package of the Conceptronic Harddisk Box:
• Conceptronic CHD3SU Harddisk Box
• Power supply (12V, 1.5A)
• USB cable
• Product stand
• This multilanguage user manual
• Warranty card & CE declaration booklet

ENGLISH
6
2. Using your harddisk box
2.1 Connect the CHD3SU to your computer
• Connect the power supply to the CHD3SU and to a free wall outlet.
• Connect the USB cable to the CHD3SU and to a free USB port on your computer
• Turn on your computer.
• Turn on the CHD3SU with the power switch on the backside.
The computer will automatically recognize and install the CHD3SU. No driver installation is required.
2.2 Disconnect the CHD3SU from your compute
The CHD3SU must be removed safely before you disconnect it from your computer, in order to prevent
data loss.
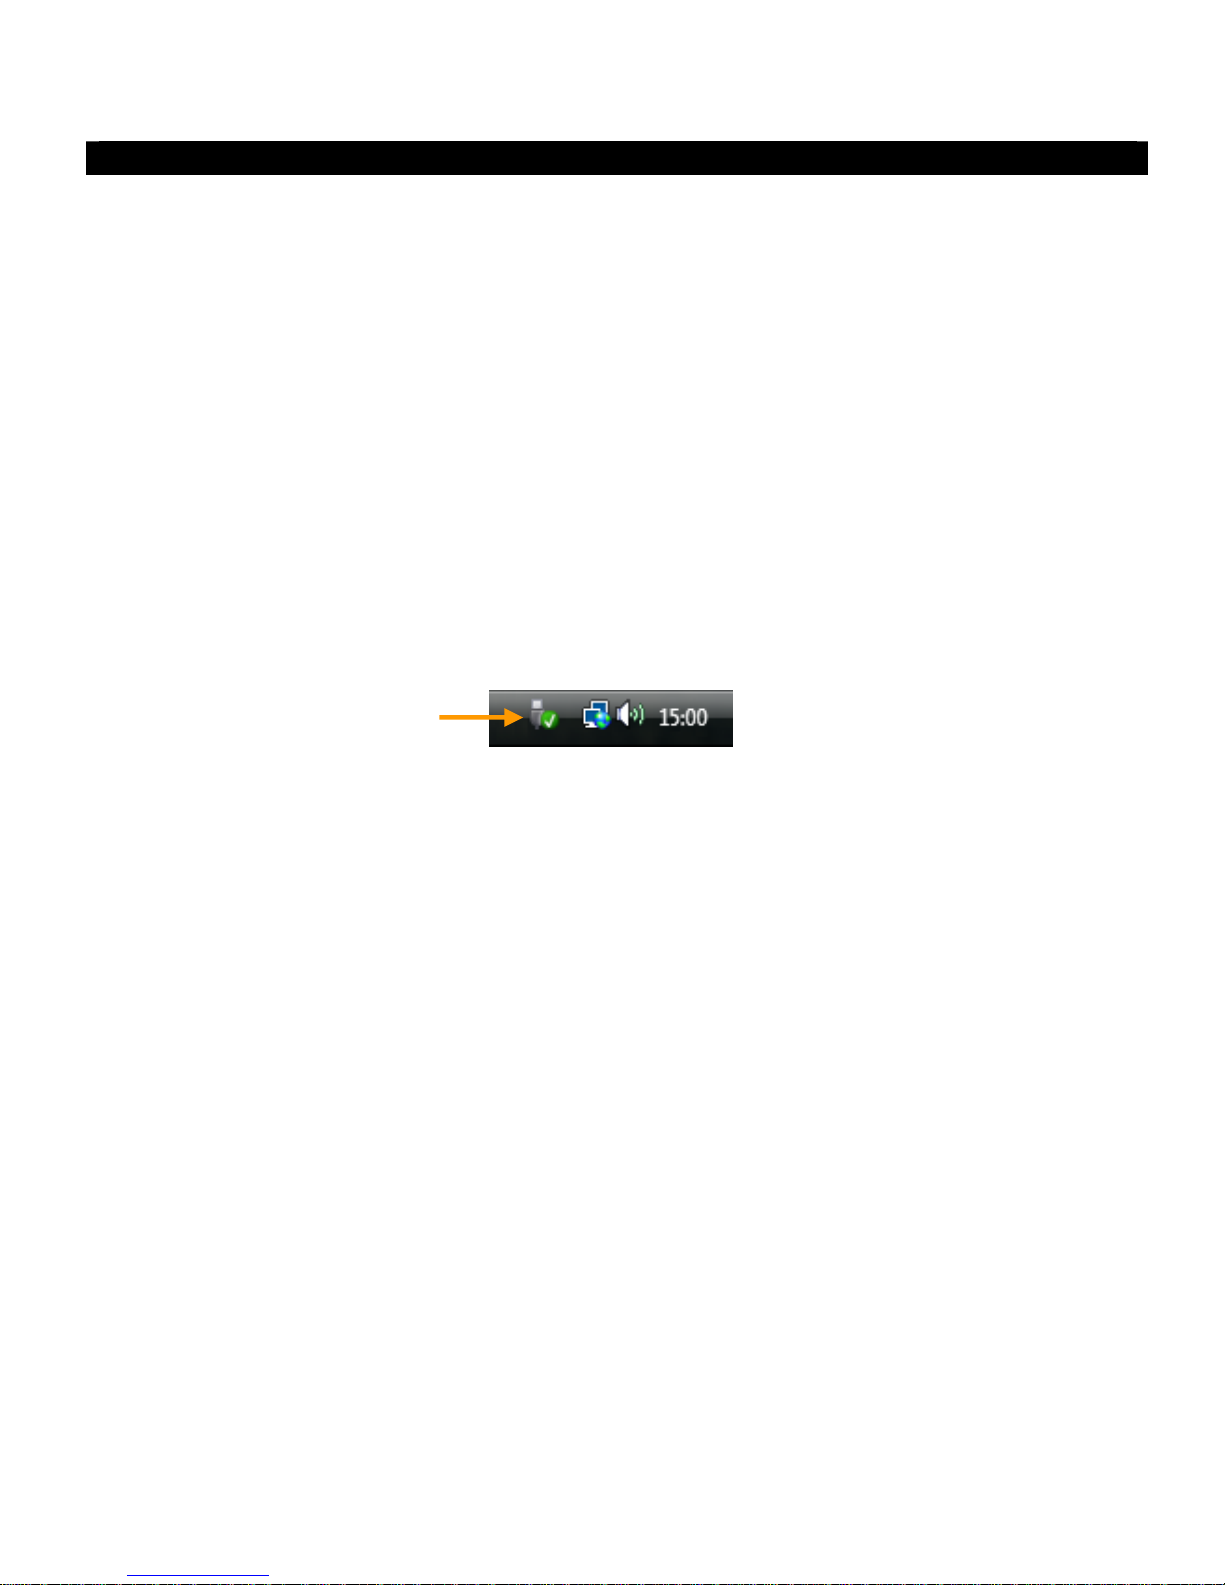
• Double click on the “Safely Remove Hardware” icon in your system tray.
The “Safely Remove Hardware” window will be shown.
• Click on the connected CHD3SU (often listed as “USB Mass Storage Device”) and click the “Stop”
button.
• Confirm the disconnection by clicking “OK”.
The CHD3SU is now safely removed from your computer. You can now disconnect the CHD3SU.
ENGLISH
7
3. Formatting your harddisk
When the harddisk in your CHD3SU is not formatted, or you want to format it again, you can follow the
format instructions below.
Note :
The format instructions below are based on Windows Vista. When formatting in a different version
of Windows, the steps below can vary.
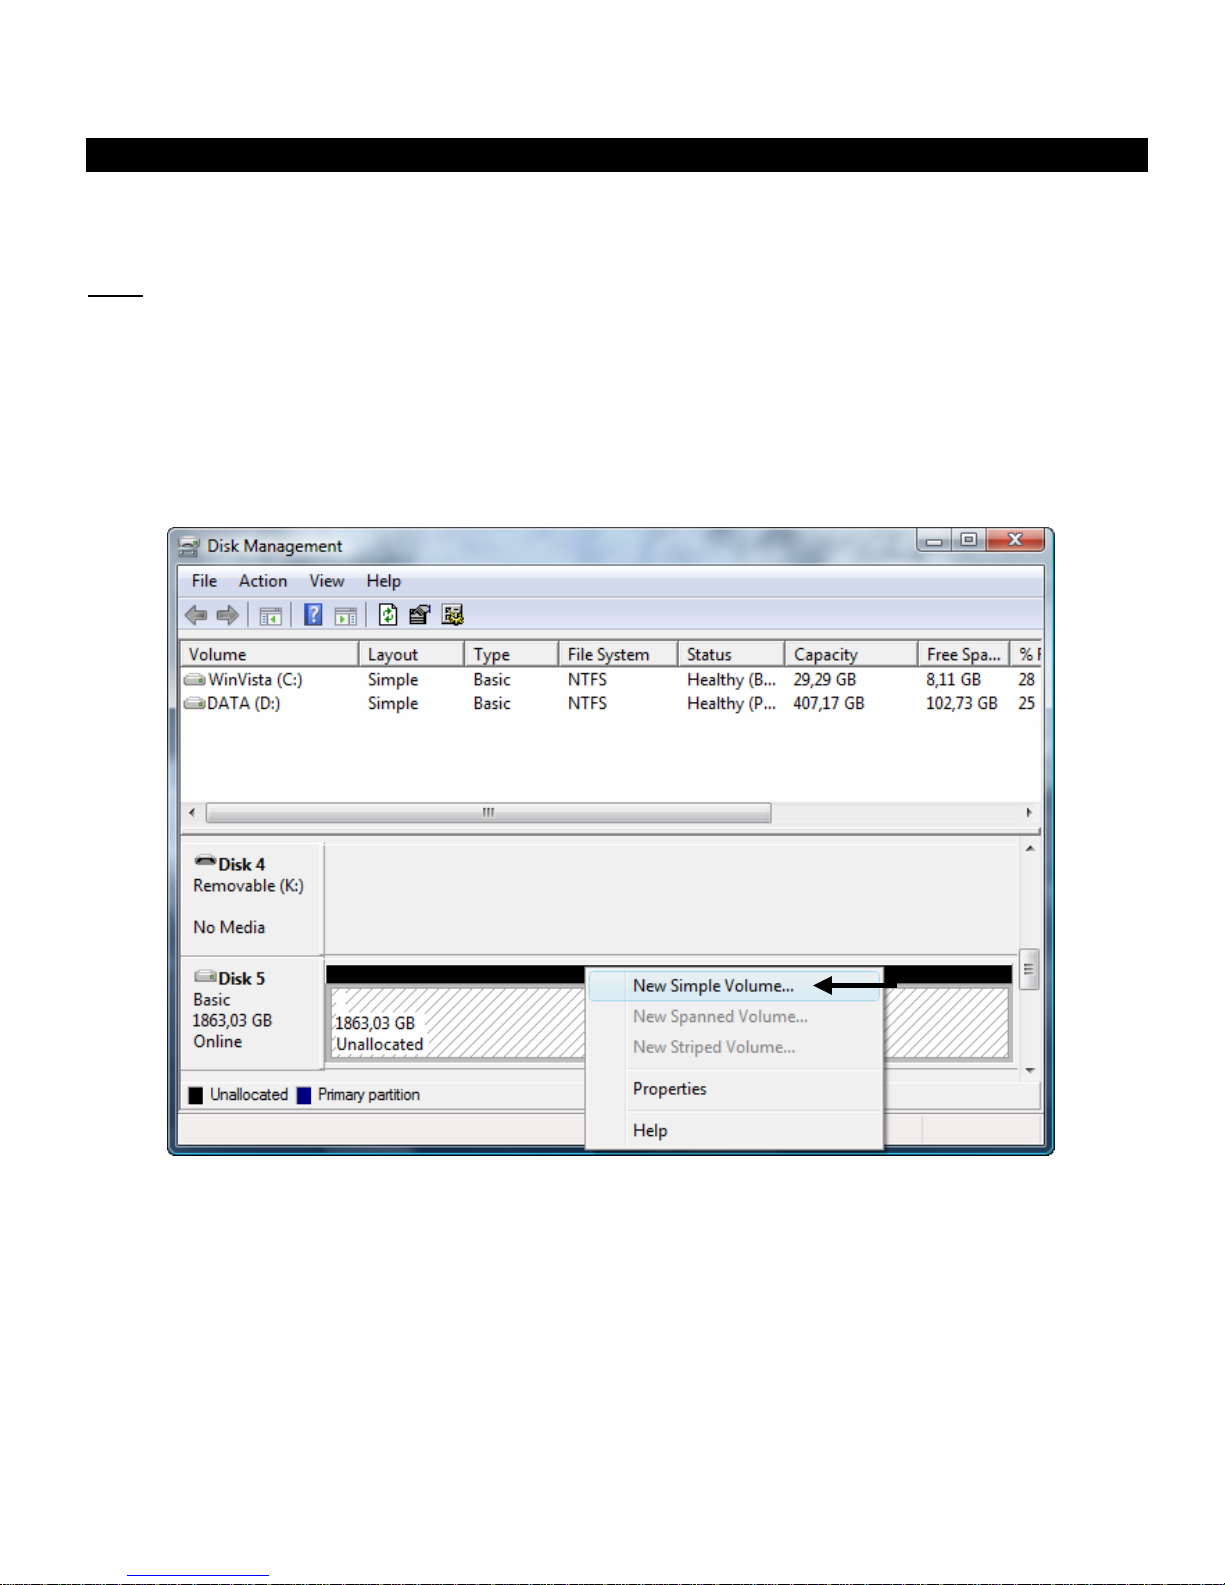
• Click on the “Start” button and select “All Programs”, “Accessories”, “Run”.
• Enter the command “diskmgmt.msc” (without the quotes) and click “OK” to run the command.
The Disk Management tool of Windows will appear on your screen.
• Select your new harddisk (with unallocated disk space) from the bottom section of the list.
• Right click your new harddisk and select “New Simple Volume”.
ENGLISH
8
• The Format Wizard will appear on your screen. Click “Next” to continue.
• Select the size for your new harddisk. By default, the maximum size is specified. If you want to create
multiple volumes on your harddisk, reduce the size to the required size of your first volume. If you
want to create 1 volume, keep the maximum size. Click “Next” to continue.
• Select which drive letter you want to assign to the new volume. By default, the first available drive
letter is shown. Click “Next” to continue.
• Select your format options. You can change the file system, change the volume label and choose for
“Perform a quick format”. Click “Next” to continue.
Note :
Partitions bigger than 32GB can only be formatted with the NTFS file system when using the
Windows Disk Management.
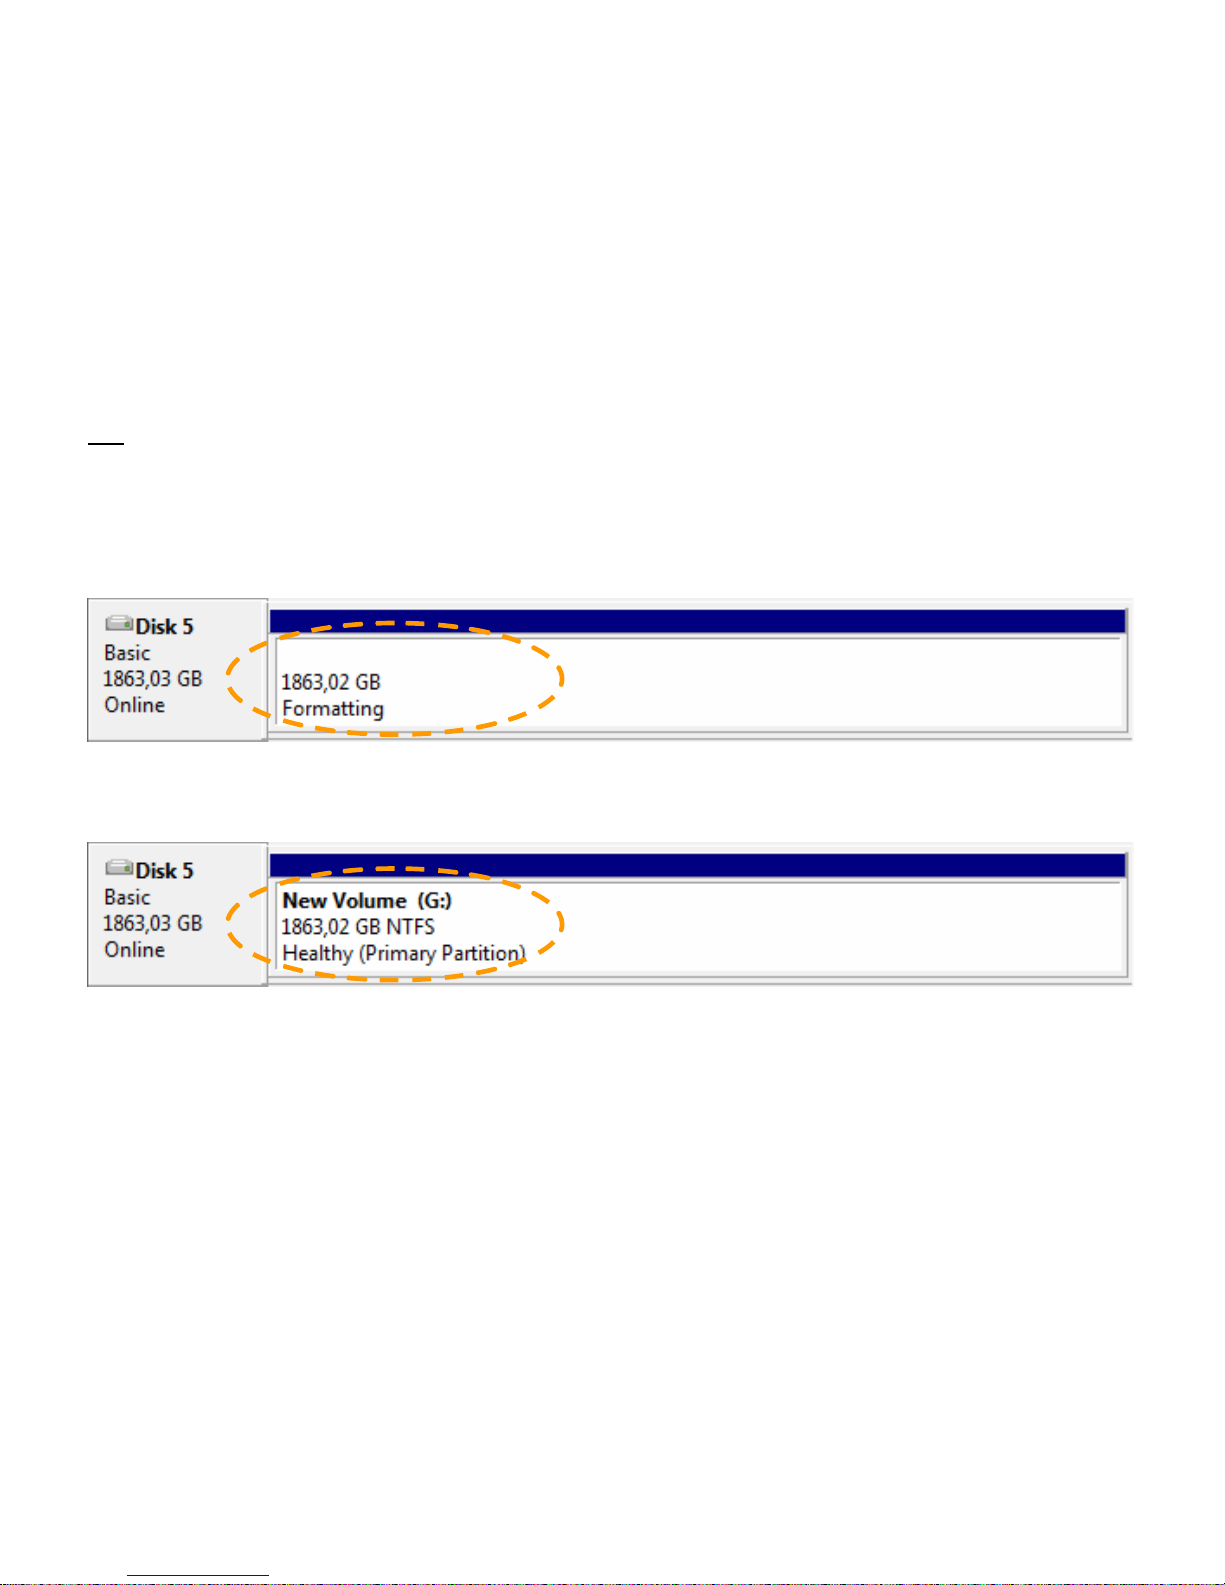
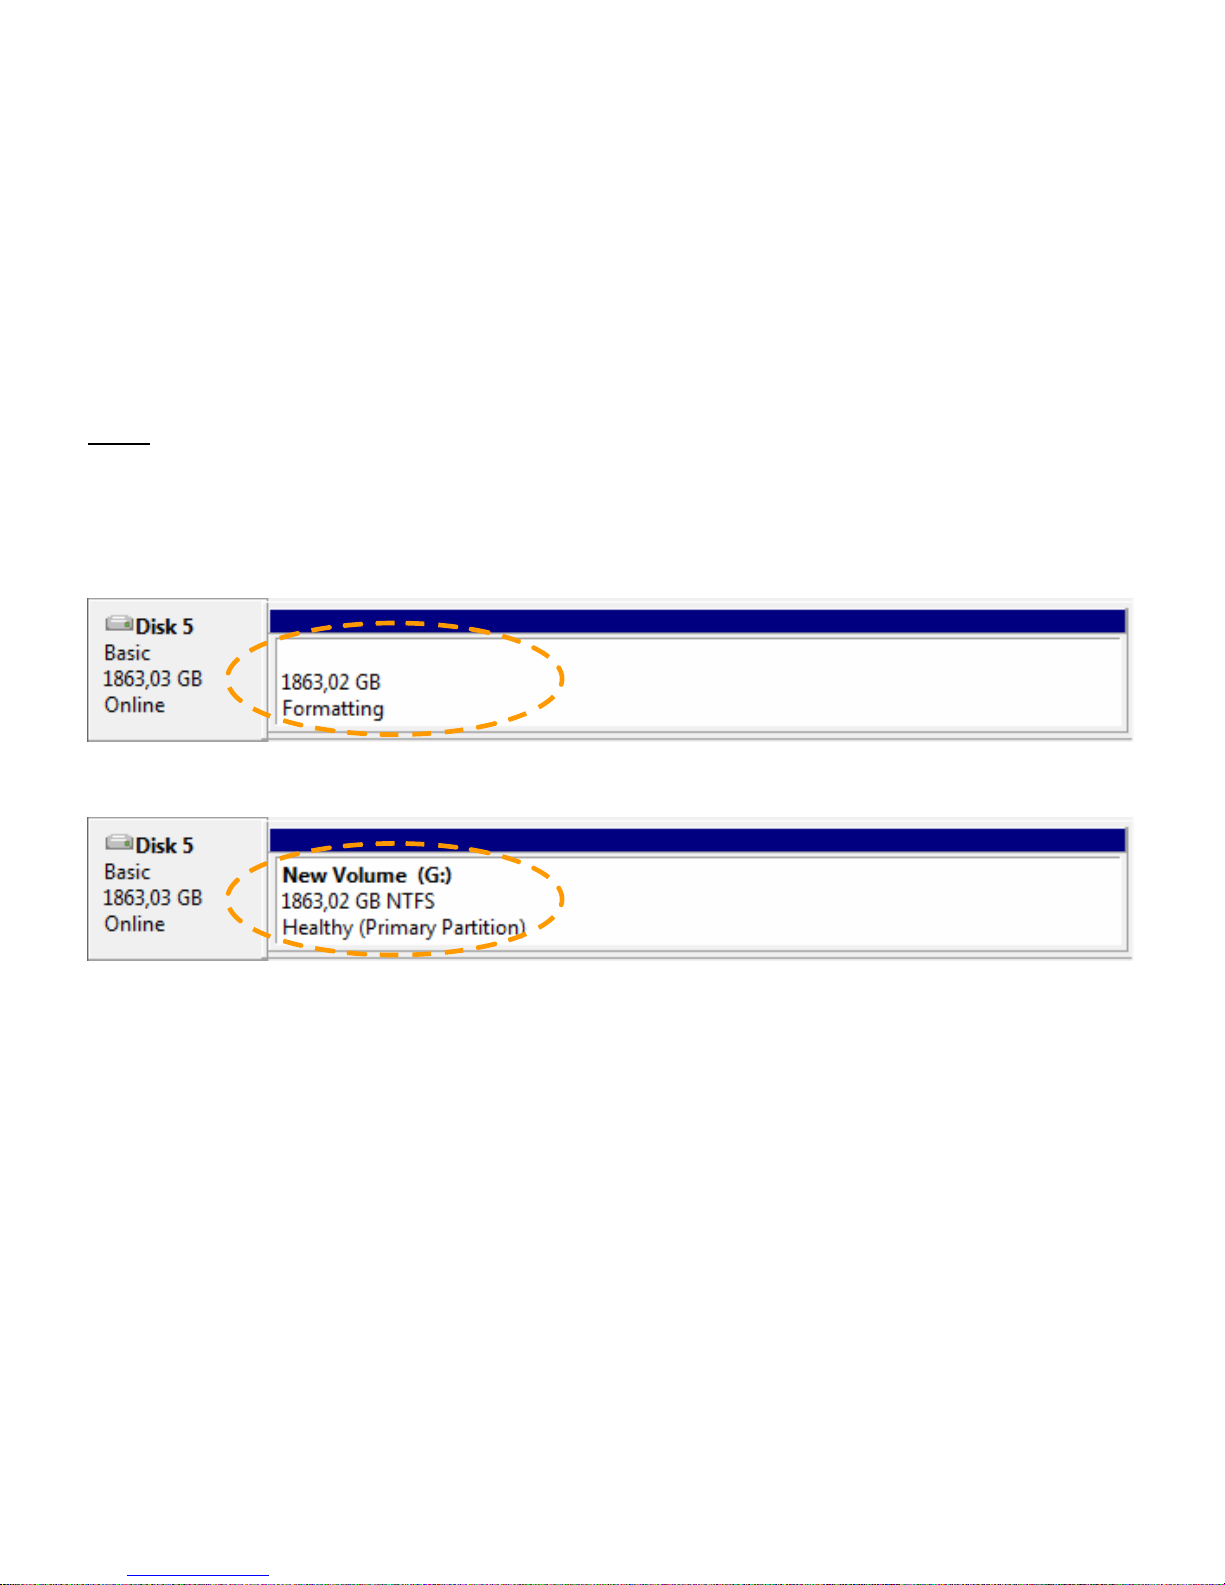
• You will see a summary of the selected commands. Select “Finish” to close the Format Wizard and start
formatting your harddisk.
When the format is completed, the harddisk will be shown in the Disk Management as “Healthy”.
You can now use the formatted harddisk.
Enjoy the use of your Conceptronic Harddisk Box!

ESPAÑOL
9
CHD3SU Versión 2.0 de Conceptronic
Manual del usuario
Felicidades por la compra de su
caja para disco duro USB de Conceptronic
Este manual de usuario le orientará paso a paso sobre cómo instalar y utilizar su nueva caja para disco
duro USB de Conceptronic.
En caso de surgir cualquier problema, visite nuestra página web de asistencia técnica (haga clic en el
apartado “Soporte” de www.conceptronic.net
. Aquí encontrará la base de datos de las preguntas más
frecuentes o FAQ).
Si tiene otras preguntas sobre su producto y no las encuentra en nuestro sitio web, póngase en contacto
con nosotros por correo electrónico: support@conceptronic.net
Si desea información adicional sobre los productos de Conceptronic, visite nuestro sitio web:
www.conceptronic.net
Los pasos de instalación del software que se detallan a continuación pueden diferir ligeramente de los
pasos a seguir en su ordenador en función de la versión de Windows que utilice.
1. Contenido del paquete
El paquete de la caja para disco duro de Conceptronic incluye los elementos siguientes:
• Caja CHD3SU para disco duro de Conceptronic
• Fuente de alimentación (12V, 1,5A)
• Cable USB
• Soporte del producto
• Este manual de usuario en varios idiomas
• Tarjeta de garantía y folleto de declaración de conformidad CE
ESPAÑOL
10
2. Utilización de la caja para disco duro
2.1 Conectar la CHD3SU a su ordenador
• Conecte la fuente de alimentación al CHD3SU y a una toma de corriente libre de pared.
• Conecte el cable USB al CHD3SU y a un puerto USB libre de su ordenador.
• Encienda el ordenador.
• Encienda el CHD3SU con el interruptor de encendido situado en la parte trasera.
El ordenador detectará automáticamente el CHD3SU y lo instalará. No se necesita instalar drivers.
2.2 Desconectar el CHD3SU de su ordenador
El CHD3SU debe ser retirado de forma segura antes de desconectarlo del ordenador para evitar la pérdida
de datos.
• Haga doble clic en el icono “Quitar hardware con seguridad” de la bandeja de sistema.
Se mostrará el recuadro de “Quitar hardware con seguridad”.
• Haga clic en el CHD3SU (normalmente mostrado como “Dispositivo de almacenamiento masivo USB”) y
haga clic en el botón “Stop”.
• Confirme la desconexión haciendo clic en “Aceptar”.
En ese momento el CHD3SU se encontrará correctamente desconectado de su ordenador. Ahora ya puede
desconectar físicamente el CHD3SU.
ESPAÑOL
11
3. Formatear el disco duro
Si el disco duro de su CHD3SU no está formateado, o desea formatearlo de nuevo, siga las siguientes
instrucciones de formateado.
Nota:
Las siguientes instrucciones para formatear el disco duro se basan en Windows Vista. Si formatea
el disco duro utilizando una versión diferente de Windows, los pasos que deben seguirse pueden
variar.
• Haga clic en el botón “Inicio” y seleccione “Todos los programas”, “Accesorios” y “Ejecutar”.
• Introduzca el comando “diskmgmt.msc” (sin las comillas) y haga clic en “Aceptar” para ejecutar el
comando.
A continuación aparecerá en pantalla la herramienta de gestión de disco de Windows.
• Seleccione su nuevo disco duro (con espacio de disco sin asignar) de la sección inferior de la lista.
• Haga clic con el botón derecho del ratón en su nuevo disco duro y seleccione “Nuevo volumen simple”.
 Loading...