

Page 1

NEDERLANDS
Conceptronic C300EXi / C300EXC
Gebruiksaanwijzing
Gefeliciteerd met uw nieuwe
In deze gebruiksaanwijzing vindt u stap-voor-stap instructies voor de installatie van de Conceptronic
802.11N Wireless Network Client op uw computer.
Bij problemen kunt u het beste naar onze support-site gaan (www.conceptronic.net
Daar vindt u een database met veel gestelde vragen (FAQ).
Als u een vraag over dit product heeft die niet op onze website wordt beantwoord, kunt u ons e-mailen op
support@conceptronic.net
Ga voor meer informatie over Conceptronic producten naar de Conceptronic website:
www.conceptronic.net
De hieronder beschreven software-installatie kan enigszins afwijken, afhankelijk van uw computer. Dit
hangt samen met de gebruikte versie van Windows.
U vindt de volgende items in de verpakking van de Conceptronic 802.11N Client:
(afhankelijk van de aangeschafte 11N Client)
Conceptronic C300EXi
* 3x antenne
* Product-cd
* Meertalige gebruiksaanwijzing
Of
Conceptronic C300EXC
* Product-cd
* Meertalige gebruiksaanwijzing
Conceptronic 802.11N Wireless Network Client
- klik op 'Support').
.
.
1. Inhoud verpakking
* Conceptronic 802.11N PCI-Express kaart
* Conceptronic 802.11N PC-Express kaart
1
Page 2
NEDERLANDS
2. Stuurprogramma's en software installeren
NB:
Voordat u de kaart in de computer doet, moet u eerst de stuurprogramma's en de software
installeren!
A. Doe de meegeleverde cd in het cd-station van uw computer. Normaal gesproken start de installatie
vanzelf. Als het Autorun-menu niet vanzelf verschijnt, opent u 'Deze computer' en dubbelklikt u op
het cd-station om het Autorun-menu te starten.
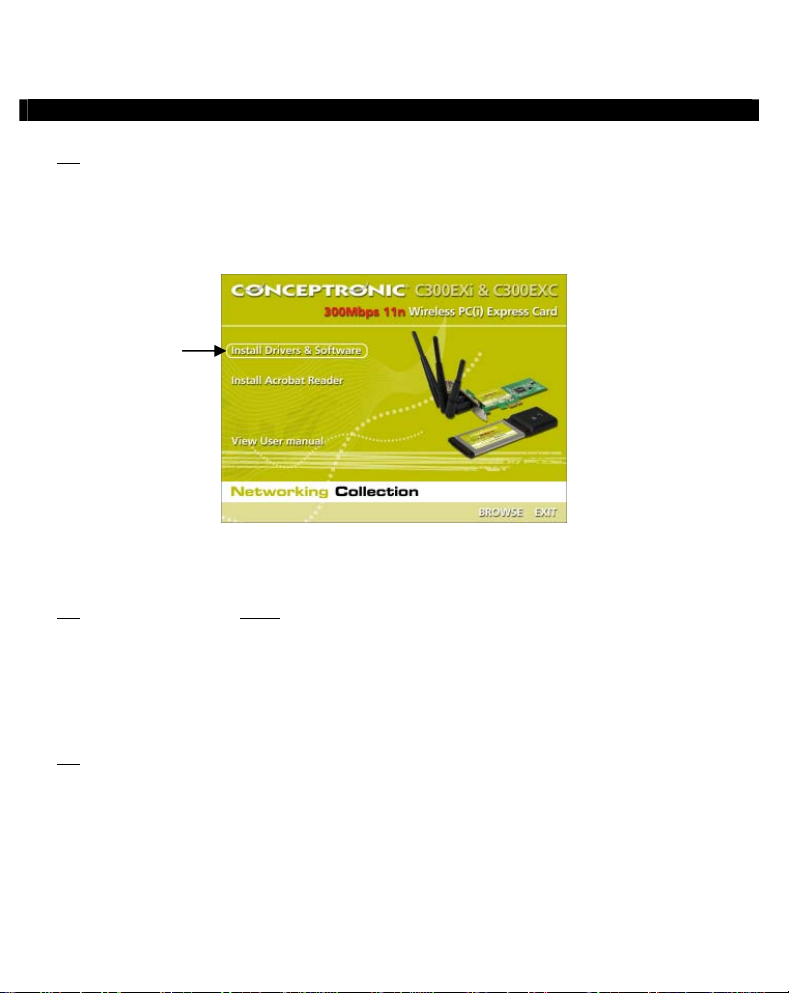
B. Selecteer de keuze 'Install Drivers & Software' (Stuurprogramma's en software installeren) in het
Autorun-menu. De installatiewizard verschijnt.
C. Klik op 'Next' (Volgende) om door te gaan.
NB:
De stappen D en E zijn alleen voor Windows XP bedoeld!
D. Selecteer 'Conceptronic Configuration Tool' als u voor deze verbinding de Conceptronic
configuratiesoftware wilt gebruiken, of selecteer 'Microsoft Zero Configuration Tool' als u het
configuratieprogramma van Microsoft voor draadloze verbindingen wilt gebruiken. Klik op 'Next'
(Volgende) om door te gaan.
E. Selecteer 'Optimize for WiFi mode' (Optimaliseren voor WiFi) of 'Optimize for performance mode'
(Optimaliseren voor prestaties). Klik op 'Next' (Volgende) om door te gaan.
NB:
Als u 'Optimize for performance mode' selecteert, wordt de TX-Burst optie van de kaart
ingeschakeld. Hiermee bereikt u hogere snelheden via uw draadloze netwerk, maar dit werkt alleen
als uw access point ook gebruikmaakt van deze functie.
F. Wanneer de installatiewizard u vraagt om verder te gaan met de installatie, klikt u op 'Install'
(Installeren). De installatiewizard installeert nu de stuurprogramma's en de software op uw
computer. Wacht tot de installatiewizard klaar is met de installatie.
G. Klik na afloop van de installatie op 'Finish' (Voltooien) om de installatiewizard te sluiten.
Ga verder met Hoofdstuk 3 voor de hardware-installatie van uw 802.11N Wireless Network Client.
2
Page 3

NEDERLANDS
3. Hardware installeren
Nadat de software van de 802.11N Client is geïnstalleerd, kunt u de hardware installeren.
Conceptronic C300EXi – PCI-Express kaart
A. Schakel uw computer uit en haal daarna de stekker uit het stopcontact.
B. Open de behuizing van uw computer door het zijpaneel los te schroeven en te verwijderen.
C. Zoek een lege PCI-Express sleuf op en verwijder het bijbehorende beschermplaatje uit de achterkant
van de computerbehuizing.
D. Zet de C300EXi voorzichtig in de lege PCI-Express sleuf en schroef hem vast aan de
computerbehuizing.
E. Sluit de computerbehuizing en monteer de 3 antennes op de C300EXi.
F. Zet uw computer aan.
Windows detecteert de nieuwe hardware en installeert automatisch de bijpassende stuurprogramma's.
Conceptronic C300EXC – PC-Express kaart
A. Nadat u uw notebook opnieuw heeft opgestart, doet u de C300EXC in een lege PC-Express sleuf van
uw notebook.
Windows detecteert de nieuwe hardware en installeert automatisch de bijpassende stuurprogramma's.
3
Page 4

NEDERLANDS
4. Verbinden met een draadloos netwerk
Wanneer de computer de hardware heeft geïnstalleerd, is de Wireless Network Client klaar voor gebruik.
U ziet nu een actieve Wireless Utility in uw systeembalk:
• Dubbelklik in de systeembalk op het pictogram van de Conceptronic Wireless Utility.
Het menu van de Conceptronic Wireless Utility verschijnt zoals hieronder aangegeven:
De Conceptronic Wireless Utility toont alle draadloze netwerken in de omgeving van uw computer. Als uw
draadloze netwerk niet wordt getoond, kunt u op 'Rescan' (Opnieuw scannen) klikken om opnieuw naar
netwerken te zoeken.
• Klik in de lijst met netwerken op het netwerk waarmee u verbinding wilt maken.
• Klik op 'Connect' (Verbinden, Windows XP
) of 'Add to Profile' (Aan profiel toevoegen, Windows Vista).
4
Page 5

NEDERLANDS
De Wireless Utility detecteert automatisch het op uw draadloze netwerk gebruikte beveiligingsniveau.
Onbeveiligd netwerk:
Als uw draadloze netwerk niet beveiligd is, maakt de Wireless Utility onmiddellijk verbinding met het
netwerk.
NB:
Als u verbinding met uw eigen netwerk maakt en het netwerk niet beveiligd is, raden we u aan uw
netwerk te beveiligen om toegang door onbevoegden te voorkomen. Zie de documentatie van uw
draadloze router/access point voor het instellen van uw netwerkbeveiliging.
Beveiligd netwerk:
Als uw draadloze netwerk beveiligd is, vraagt de Wireless Utility u naar de encryptiesleutel of de
passphrase/wachtwoord, afhankelijk van het beveiligingsniveau waarop het netwerk is ingesteld:
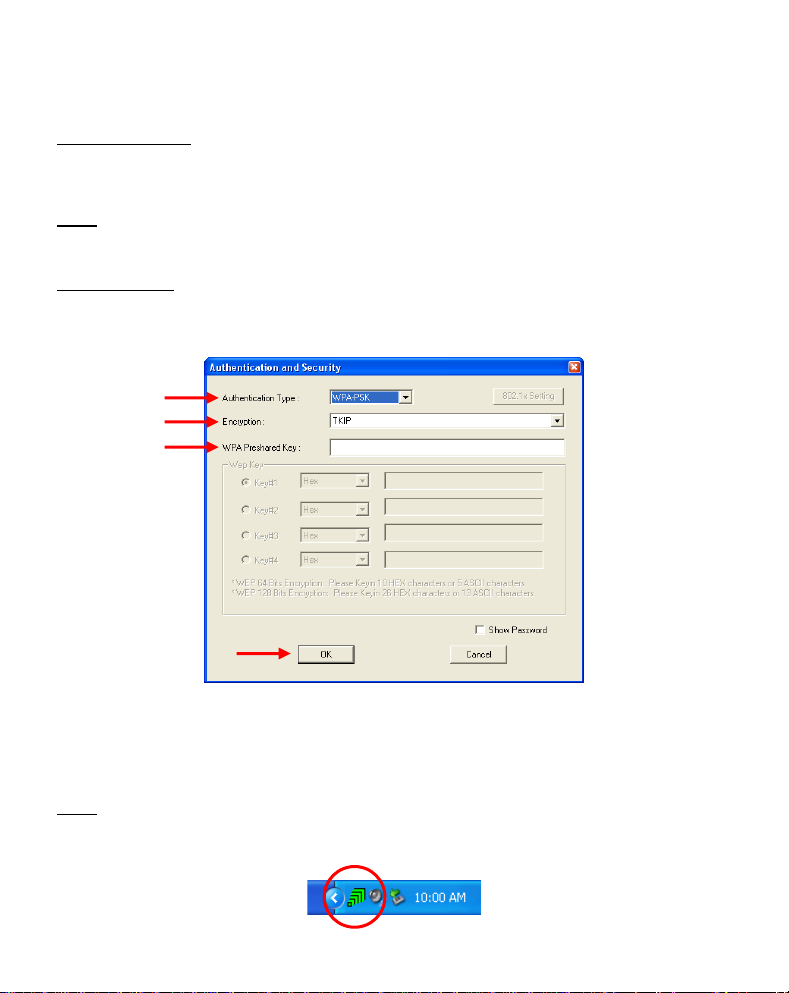
• Controleer of het Authentication Type (authenticatietype) en de Encryption (encryptie) die zijn
gedetecteerd, overeenkomen met de beveiliging van uw draadloze netwerk.
• Als u gebruikmaakt van WPA-beveiliging, geeft u de WPA-sleutel in in het veld 'WPA Preshared Key'
(Vooraf gedeelde WPA-sleutel); als u WEP-beveiliging gebruikt, geeft u de WEP-encryptiesleutel in in
het veld 'Wep Key' (WEP-sleutel).
• Klik op 'OK' om verbinding te maken met het geselecteerde netwerk.
NB:
Bij Windows Vista klikt u in het hoofdvenster van de Wireless Utility op de knop 'Activate' (Activeren)
om verbinding te maken met het draadloze netwerk.
U bent nu verbonden met het draadloze netwerk. De Wireless Utility geeft nu de signaalsterkte aan in uw
systeembalk:
5
Page 6

NEDERLANDS
5. WPS – Wireless Protected Setup
De Conceptronic 802.11N Clients ondersteunen WPS (Wi-Fi Protected Setup). WPS is een standaard
waarmee u uw draadloze netwerk met slechts enkele stappen eenvoudig kunt beveiligen zonder dat
hiervoor kennis van de verschillende encryptiesystemen vereist is.
Om WPS te kunnen gebruiken met uw 802.11N Client, moet uw router of access point eveneens WPS
NB:
ondersteunen.
5.1 WPS – Verbinden met een druk op de knop
• Druk op de WPS-knop van uw router of access point om een WPS-verbinding mogelijk te maken.
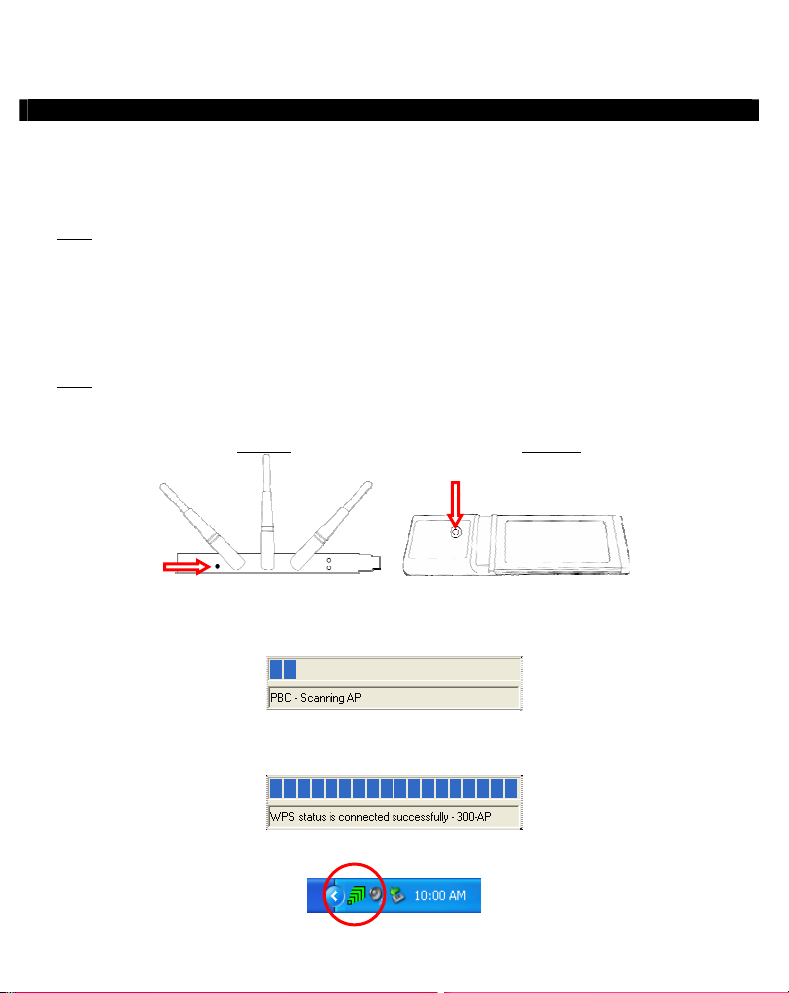
• Houd de WPS-knop van uw 802.11N Client ongeveer 5 seconden ingedrukt.
NB:
Als u een C300EXi (PCi-Express kaart) heeft, zit de knop naast de antennes op de achterkant. Als u
een C300EXC (PC-Express kaart) heeft, zit de knop aan de bovenkant van de kaart.
C300EXi
C300EXC
De Wireless Utility krijgt een signaal van de knop en probeert verbinding te maken met uw draadloze
netwerk. Als het hoofdvenster van de Wireless Utility op uw scherm verschijnt, ziet u onderin het venster
de WPS-activiteit:
Wanneer verbinding is gemaakt, wordt de melding 'WPS status is connected successfully' (WPS-verbinding
gelukt) getoond:
U bent nu verbonden met het draadloze netwerk. De Wireless Utility geeft nu de signaalsterkte aan in uw
systeembalk:
6
Page 7

NEDERLANDS
5.2 WPS – Verbinden met een pincode
Als uw router of access point geen drukknop heeft, kunt u ook een WPS-verbinding maken met een
pincode.
De Wireless Utility kan werken in de stand 'Enrollee' (Pincode genereren) of 'Registrar' (Pincode van
router/access point ingeven):
- Als voor 'Enrollee' wordt gekozen, genereert de Wireless Utility zelf een pincode die vervolgens
in de WPS-configuratie van uw router of access point moet worden opgenomen.
- Wanneer voor 'Registrar' is gekozen, moet u een pincode ingeven in de Wireless Utility. Deze
stand is nodig wanneer uw router of access point een pincode afgeeft die voor de draadloze
Activeer de WPS-pincodeverbinding op uw router of access point.
Selecteer de juiste 'Config Mode' in de Wireless Utility, zoals aangegeven in de voorgaande informatie.
Klik in de Wireless Utility op de 'PIN' knop.
U ziet nu de WPS-activiteit onderin het venster:
Wanneer verbinding is gemaakt, wordt de melding 'WPS status is connected successfully' (WPS-verbinding
gelukt) getoond:
U bent nu verbonden met het draadloze netwerk. De Wireless Utility geeft nu de signaalsterkte aan in uw
systeembalk:
verbinding moet worden gebruikt.
7
Page 8

NEDERLANDS
6. Windows Zero Configuration
De Conceptronic 802.11N Client kan ook worden beheerd met Windows Zero Configuration, het standaard
configuratieprogramma van Windows XP.
Wireless Zero Configuration kan alleen worden gebruikt onder Windows XP. In Windows Vista moet u
NB:
de Conceptronic Wireless Utility gebruiken.
U kunt Wireless Zero Configuration op twee manieren inschakelen:
- Kies tijdens de installatie van stuurprogramma's en software voor 'Microsoft Zero Configuration Tool'.
- Klik met de rechter muisknop op het Conceptronic-pictogram in de systeembalk en selecteer 'Use Zero
Configuration as Configuration Utility' (Zero Configuration als configuratieprogramma gebruiken).
U kunt Wireless Zero Configuration vervolgens openen door op het pictogram van uw draadloze
netwerkkaart te dubbelklikken:
Het venster Wireless Zero Configuration verschijnt nu op uw scherm.
Zie voor meer informatie over Wireless Zero Configuration en de bijbehorende opties uw
NB:
gebruiksaanwijzing van Windows XP.
Veel plezier met uw Conceptronic 802.11N Wireless Client!
8
Page 9

ENGLISH
Conceptronic C300EXi / C300EXC
User Manual
Congratulations on the purchase of your
This User Manual gives you a step-by-step explanation of how to install the Conceptronic 802.11N Wireless
Network Client on your computer.
When problems occur, we advise you to go to our support-site (go to www.conceptronic.net
‘Support’. Here you will find the Frequently Asked Questions Database.
When you have other questions about your product and you cannot find it at our website, contact us by email: support@conceptronic.net
For more information about Conceptronic products, please visit the Conceptronic Web Site:
www.conceptronic.net
The Software installation as described below may be slightly different from the installation on your
computer. This depends on the Windows version you are using.
The following items are present in the package of the Conceptronic 802.11N Client:
(Depending on the bought 11N Client)
Conceptronic C300EXi
* 3x Antenna
* Product CD-ROM
* Multi-language User Manual
Or
Conceptronic C300EXC
* Product CD-ROM
* Multi-language User Manual
Conceptronic 802.11N Wireless Network Client.
and click
1. Package contents
* Conceptronic 802.11N PCI-Express Card
* Conceptronic 802.11N PC-Express Card
9
Page 10

ENGLISH
2. Driver & Software installation
Note :
Before you insert the card, you must install the Drivers & Software!
A. Insert the CD-ROM in your CD-ROM Drive. The Autorun should appear automatically. If the Autorun
menu does not appear, navigate to “My Computer” and double-click on the CD-ROM drive to start
the Autorun menu.
B. Select the option “Install Drivers & Software” from the Autorun Menu. The Setup Wizard will
appear.
C. Click “Next” to continue.
Note :
Step D and E are for Windows XP only!
D. Select “Conceptronic Configuration Tool” if you want to use the Conceptronic software for
connection, or select “Microsoft Zero Configuration Tool” if you want to use the Microsoft wireless
configuration software. Click “Next” to continue.
E. Select “Optimize for WiFi mode”, or select “Optimize for performance mode”. Click “Next” to
continue.
Note :
When you select “Optimize for performance mode”, the TX-Burst option of the card will be
enabled. This will allow higher transfer speeds on your wireless network, but your access point
needs to have the TX-Burst option too in order to benefit from this feature.
F. The Setup Wizard will ask you to proceed with the installation. Click “Install” to continue with the
installation. The Setup Wizard will now install the drivers and software on your computer. Wait for
the Setup Wizard to finish the installation.
G. When the installation is finished, click “Finish” to close the Setup Wizard.
Proceed to Chapter 3 for the Hardware Installation of your 802.11N Wireless Network Client.
10
Page 11

ENGLISH
3. Hardware installation
When the software for your 802.11N Client is installed, you can proceed with the hardware installation.
Conceptronic C300EXi – PCI-Express Card
A. Turn off your computer and disconnect the computer from the AC outlet.
B. Open your computer case by removing the screws from the back and remove the panel.
C. Find a free PCI-Express slot and remove the protective plate from your computer case.
D. Insert the C300EXi gently in the free PCI-Express slot and fix it with a screw to your computer casing.
E. Close your computer case and assemble the 3 antenna’s to the C300EXi.
F. Turn on your computer.
Windows will detect new hardware and installs the drivers automatically.
Conceptronic C300EXC – PC-Express Card
A. After your notebook is rebooted, insert the C300EXC into a free PC-Express Card slot of your
notebook.
Windows will detect new hardware and installs the drivers automatically.
11
Page 12

ENGLISH
4. Connect to a wireless network
When the hardware is installed by the computer, the Wireless Network Client is ready to use.
You will see an active Wireless Utility in your system tray:
• Double-click on the system tray icon of the Conceptronic Wireless Utility.
The Conceptronic Wireless Utility will be shown like below:
The Conceptronic Wireless Utility will show all the wireless networks in the area of your computer. If your
wireless network is not shown, you can click “Rescan” to rescan for networks.
• Click on the network you want to connect to from the list with networks.
• Click “Connect” (Windows XP
) or “Add to Profile” (Windows Vista).
12
Page 13
ENGLISH
The Wireless Utility automatically detects which security level is used on your wireless network.
Unsecured Network:
If your wireless network is unsecured, the Wireless Utility will establish a connection with your wireless
network.
Note :
If you are connecting to your own network and it is unsecured, we advise you to add security to
your network to prevent unauthorized access to your network.
See the documentation of your Wireless Router/Access Point how to setup your network security.
Secured Network:
If your wireless network is secured, the Wireless Utility will ask you for the encryption key or pass phrase,
depending on the configured security level of your wireless network:
• Verify if the detected Authentication Type and Encryption matches your wireless network security.
• Enter the pass phrase in the “WPA Preshared Key” field when you are using WPA security, or enter the
WEP encryption key in the “Wep Key” field when you are using WEP security.
• Click “OK” to connect to the selected wireless network.
Note :
When using Windows Vista, click the “Activate” button in the main window of the Wireless Utility
to connect to the wireless network.
You are now connected to the wireless network. The Wireless Utility will indicate the signal strength in
your system tray:
13
Page 14

ENGLISH
5. WPS – Wireless Protected Setup
The Conceptronic 802.11N Clients support WPS (Wi-Fi Protected Setup). WPS is a standard to easily secure
your wireless network. With WPS you can protect your wireless network with just a few easy steps without
knowledge of different encryption options.
To use WPS with your 802.11N Client, you need to have a router or access point which supports
Note :
WPS.
5.1 WPS – Push Button connection
• Push the WPS button on your router or access point to enable WPS connection.
• Press and hold the WPS button on your 802.11N Client for about 5 seconds.
Note :
When you have the C300EXi (PCi-Express card), the button is located next to the antenna’s on
the back. When you have the C300EXC (PC-Express card), the button is located on the top of
the card.
C300EXi
C300EXC
The Wireless Utility will be triggered by the button and will try to connect to your wireless network. If the
Wireless Utility main window is shown on your screen, you can see the WPS activity at the bottom of the
window:
When the connection is established, the message “WPS status is connected successfully” will be shown:
You are now connected to the wireless network. The Wireless Utility will indicate the signal strength in
your system tray:
14
Page 15

ENGLISH
5.2 WPS – Pin Code connection
When your router or access point does not have a push button, you can also connect with WPS with a Pin
Code.
The Wireless Utility can work in “Enrollee” or “Registrar” mode:
- When “Enrollee” is selected, the Wireless Utility will generate a Pin Code which must be
entered in the WPS configuration of your router or access point.
- When “Registrar” mode is selected, you can enter a Pin Code in the Wireless Utility. This
mode is needed when your router or access point provides a Pin Code which must be used for
Activate the PIN WPS connection on your router or access point.
Select the correct “Config Mode” in the Wireless Utility, according to the information above.
Click the “PIN” button in the Wireless Utility.
You can see the WPS activity at the bottom of the window:
When the connection is established, the message “WPS status is connected successfully” will be shown:
You are now connected to the wireless network. The Wireless Utility will indicate the signal strength in
your system tray:
the wireless connection.
15
Page 16

ENGLISH
6. Windows Zero Configuration Tool
The Conceptronic 802.11N Clients can also be managed with the Windows Zero Configuration Tool, the
standard wireless configuration utility of Windows XP.
It is only possible to use the Wireless Zero Configuration Tool when using Windows XP. In Windows
Note :
Vista, you need to use the Conceptronic Wireless Utility.
You can enable the Wireless Zero Configuration in 2 different ways:
- Select during the installation of the drivers & software for “Microsoft Zero Configuration Tool”.
- Right click the Conceptronic Wireless Utility icon in the system tray and select “Use Zero Configuration
as Configuration Utility”.
You can access the Wireless Zero Configuration by double-clicking on the wireless icon of your network
card:
The Wireless Zero Configuration window will be shown on your screen.
For more information about the Wireless Zero Configuration tool and the options you can refer to
Note :
the Windows XP manual.
Enjoy the use of the Conceptronic 802.11N Wireless Client !
16
Page 17

ESPAÑOL
C300EXi / C300EXC de Conceptronic
Manual de usuario
Felicidades por la compra de su
Este manual de usuario le orientará paso a paso sobre cómo instalar el cliente de red inalámbrica 802.11N
de Conceptronic en su ordenador.
En caso de surgir cualquier problema, visite nuestra página web de asistencia técnica (haga clic en el
apartado “Soporte” de www.conceptronic.net
Preguntas Frecuentes (F.A.Q.).
Si tiene otras preguntas sobre su producto y no las encuentra en nuestro sitio web, póngase en contacto
con nosotros por correo electrónico: apoyo@conceptronic.net
Si desea información adicional sobre los productos de Conceptronic, visite nuestro sitio web:
www.conceptronic.net
La instalación del software que se detalla a continuación puede diferir ligeramente de la instalación en su
ordenador. Ello dependerá de la versión de Windows que utilice.
El paquete del cliente 802.11N de Conceptronic incluye los siguientes componentes:
(En función del cliente 11N adquirido)
C300EXi de Conceptronic
* 3 antenas
* CD-ROM del producto
* Manual de usuario en varios idiomas
O:
C300EXC de Conceptronic
* CD-ROM del producto
* Manual de usuario en varios idiomas
cliente de red inalámbrica 802.11N de Conceptronic.
). En esa sección podrá consultar la base de datos de
1. Contenido del paquete
* Tarjeta PCI-Express 802.11N de Conceptronic
* Tarjeta PC-Express 802.11N de Conceptronic
17
Page 18

ESPAÑOL
2. Instalación de los drivers y del software
Nota:
Antes de introducir la tarjeta, debe instalar los drivers y el software.
A. Introduzca el CD-ROM en la unidad de CD-ROM. El menú autoejecutable aparecerá automáticamente.
En caso de que esto no ocurra, vaya a “Mi PC” y haga doble clic en la unidad de CD-ROM para iniciar
el menú autoejecutable.
B. Seleccione la opción “Instalar drivers y software” desde el menú autoejecutable. Aparecerá el
asistente de configuración.
C. Haga clic en “Siguiente” para continuar.
Nota:
Los pasos D y E son sólo para Windows XP.
D. Seleccione “Herramienta de configuración de Conceptronic” si desea utilizar el software de
Conceptronic para la conexión, o “Herramienta de configuración Zero de Microsoft” si desea
utilizar el software de configuración inalámbrica de Microsoft. Haga clic en “Siguiente” para
continuar.
E. Seleccione “Optimizar para modo WiFi” o “Optimizar para modo rendimiento”. Haga clic en
“Siguiente” para continuar.
Nota:
Si selecciona la opción “Optimizar para modo rendimiento”, se habilitará la opción TX-Burst de
la tarjeta. Esto proporcionará una mayor velocidad de transferencia en su red inalámbrica, pero
para ello el punto de acceso deberá disponer también de la opción TX-Burst para poder
aprovechar esta característica.
F. El asistente de configuración le pedirá que proceda con la instalación. Haga clic en “Instalar” para
proseguir con la instalación. El asistente de configuración instalará los drivers y el software en su
ordenador. Espere a que el asistente de configuración finalice la instalación.
G. Cuando la instalación haya finalizado, haga clic en “Finalizar” para salir del asistente de
configuración.
Vaya al apartado 3 para la instalación del hardware de su cliente de red inalámbrica 802.11N.
18
Page 19

ESPAÑOL
3. Instalación del hardware
Cuando el software de su cliente 802.11N esté instalado, proceda con la instalación del hardware.
C300EXi de Conceptronic - Tarjeta PCI-Express
A. Apague su ordenador y desconecte el ordenador de la toma de corriente.
B. Abra la caja de su ordenador quitando los tornillos de la parte trasera y quite la carcasa.
C. Busque una ranura PCI-Express libre y quite la placa protectora de la caja de su ordenador.
D. Introduzca el C300EXi con cuidado en la ranura PCI-Express libre y fíjelo con un tornillo a la caja del
ordenador.
E. Cierre la caja del ordenador y acople las tres antenas al C300EXi.
F. Encienda el ordenador.
Windows detectará el nuevo hardware e instalará los drivers automáticamente.
C300EXC de Conceptronic - Tarjeta PC-Express
A. Después de que su portátil se haya reiniciado, introduzca el C300EXC en una ranura de tarjeta PC-
Express libre de su portátil.
Windows detectará el nuevo hardware e instalará los drivers automáticamente.
19
Page 20

ESPAÑOL
4. Conexión a una red inalámbrica
Cuando el hardware esté instalado en su ordenador, el cliente de red inalámbrica ya estará listo para ser
utilizado.
Verá la aplicación inalámbrica activa en la bandeja de sistema:
• Haga doble clic en el icono de la bandeja de sistema de la aplicación inalámbrica de Conceptronic.
La aplicación inalámbrica de Conceptronic aparecerá como se indica a continuación:
La aplicación inalámbrica de Conceptronic mostrará todas las redes inalámbricas en el área de su
ordenador. Si su red inalámbrica no se muestra, haga clic en “Rescan” (volver a buscar) para volver a
buscar las redes.
• Haga clic en la red de la lista a la que desea conectarse.
• Haga clic en “Conectar” (Windows XP
) o en “Añadir al perfil” (Windows Vista).
20
Page 21

ESPAÑOL
La aplicación inalámbrica detectará automáticamente qué nivel de seguridad se utiliza en su red
inalámbrica.
Red desprotegida:
Si su red inalámbrica está desprotegida, la aplicación inalámbrica establecerá una conexión con su red
inalámbrica.
Nota:
Si se está conectando a su propia red y ésta no está protegida, le aconsejamos que aumente la
seguridad de su red para evitar que terceros puedan acceder a ella sin autorización.
Vea la documentación de su router inalámbrico / punto de acceso para informarse sobre cómo
configurar la seguridad de su red.
Red protegida:
Si su red inalámbrica está protegida, la aplicación le solicitará la clave de cifrado o contraseña, en función
del nivel de seguridad configurado de su red inalámbrica:
• Verifique que el tipo de autenticación y cifrado se corresponde con el sistema de seguridad de su red
inalámbrica.
• Introduzca la contraseña en el campo “Clave precompartida WPA” si está utilizando seguridad WPA, o
introduzca la clave de cifrado en el campo “Clave WEP” si está utilizando seguridad WEP.
• Haga clic en “Aceptar” para conectarse a la red inalámbrica seleccionada.
Nota:
Si utiliza Windows Vista, haga clic en el botón “Activar” de la ventana principal de la aplicación
inalámbrica para realizar la conexión a la red inalámbrica.
En ese momento ya estará conectado a la red inalámbrica. La aplicación inalámbrica indicará el nivel de
señal en la bandeja del sistema:
21
Page 22
ESPAÑOL
5. WPS: configuración protegida inalámbrica
Los dispositivos clientes 802.11N de Conceptronic son compatibles con WPS (configuración protegida
inalámbrica). WPS es un estándar para proteger fácilmente su red inalámbrica. Con WPS podrá proteger su
red inalámbrica con sólo unos sencillos pasos sin necesidad de tener conocimientos sobre las diferentes
opciones de cifrado.
Para utilizar WPS con su cliente 802.11N, necesitará un router o un punto de acceso compatible
Nota:
con WPS.
5.1 WPS – Conexión con botón WPS
• Pulse el botón WPS del ruter o punto de acceso para activar la conexión WPS.
• Pulse durante unos 5 segundos el botón WPS del cliente 802.11N.
Nota:
Si dispone del C300EXi (tarjeta PCI-Express), el botón está situado en la parte posterior cerca
de la antena. Si dispone del C300EXC (tarjeta PC-Express), el botón está situado en la parte
superior de la tarjeta.
C300EXi
C300EXC
Al pulsar el botón, la aplicación inalámbrica se activará e intentará conectarse a su red inalámbrica. Si se
muestra en pantalla la ventana principal de la aplicación inalámbrica, podrá ver la actividad del WPS en la
parte inferior de la pantalla:
Una vez se haya establecido la conexión, se mostrará el mensaje “WPS status is connected successfully”
(Estado del WPS: conectado correctamente):
En ese momento ya estará conectado a la red inalámbrica. La aplicación inalámbrica indicará el nivel de
señal en la bandeja del sistema:
22
Page 23

ESPAÑOL
5.2 WPS – Conexión por código PIN
Cuando su router o punto de acceso no tenga un botón de conexión, también se puede conectar con WPS
mediante un código PIN.
La aplicación inalámbrica puede funcionar en modo “Enrollee” (inscrito) o modo “Registrar” (registrado):
- Cuando se selecciona el modo “Enrollee”, la aplicación inalámbrica genera un código PIN que
deberá ser introducido en la configuración WPS de su router o punto de acceso.
- Cuando se selecciona el modo “Registrar”, el usuario puede introducir un código PIN en la
aplicación inalámbrica. Hay que utilizar este modo cuando su router o punto de acceso
Activar la conexión WPS por PIN en su router o punto de acceso.
Seleccione el modo de configuración correcto en la aplicación inalámbrica, de acuerdo con lo explicado
arriba.
Haga clic en el botón “PIN” de la aplicación inalámbrica.
Puede comprobar la actividad WPS en la parte inferior de la ventana:
Una vez se haya establecido la conexión, se mostrará el mensaje “WPS status is connected successfully”
(Estado del WPS: conectado correctamente):
En ese momento ya estará conectado a la red inalámbrica. La aplicación inalámbrica indicará el nivel de
señal en la bandeja del sistema:
proporciona un código PIN que deberá ser utilizado para la conexión inalámbrica.
23
Page 24

ESPAÑOL
6. Herramienta de configuración de Windows: Wireless Zero
Los clientes 802.11N de Conceptronic también pueden configurarse con la herramienta de configuración
Zero de Windows, la utilidad de configuración inalámbrica estándar de Windows XP.
Sólo es posible utilizar la herramienta de configuración Wireless Zero si se está utilizando
Nota:
Windows XP. Con Windows Vista deberá utilizar la aplicación inalámbrica de Conceptronic.
Puede activar la configuración inalámbrica con Zero de 2 maneras diferentes:
- Seleccione, durante la instalación de drivers y software, “Herramienta de configuración Zero de
Windows”.
- Haga clic con el botón derecho en el icono de la herramienta inalámbrica de Conceptronic situado en la
bandeja del sistema y seleccione “Utilizar Zero como aplicación de configuración”.
Puede acceder a la configuración inalámbrica con Zero haciendo doble clic en el icono “inalámbrico” de su
tarjeta de red:
La ventana de configuración inalámbrica con Zero se mostrará en su pantalla:
Nota:
Para más información sobre la herramienta de configuración inalámbrica Wireless Zero y sus
opciones, consulte el manual de Windows XP.
¡Disfrute con el cliente 802.11N inalámbrico de Conceptronic!
24
Page 25

DEUTSCH
Conceptronic C300EXi / C300EXC
Benutzerhandbuch
Wir gratulieren Ihnen zum Kauf Ihres
In diesem Benutzerhandbuch wird Ihnen Schritt für Schritt gezeigt, wie der Conceptronic 802.11N Wireless
Network Client auf Ihrem Computer installiert werden muss.
Wenn Probleme auftreten sollten, besuchen Sie unsere Support-Seite (unter www.conceptronic.net
klicken Sie auf ‚Support’. Dort steht Ihnen unsere FAQ-Datenbank mit den häufig gestellten Fragen zur
Verfügung.
Wenn Sie weitere Fragen zu Ihrem Produkt haben, die Sie auf unserer Webseite nicht beantworten
können, kontaktieren Sie uns per E-Mail: support@conceptronic.net
Detaillierte Informationen über Conceptronic Produkte finden Sie auf unserer Webseite:
www.conceptronic.net
Möglicherweise weicht die Softwareinstallation auf Ihrem Computer von der im Folgenden beschriebenen
etwas ab. Dies hängt vom Windows-Betriebssystem ab, das Sie verwenden.
In der Verpackung des Conceptronic 802.11N Client ist Folgendes enthalten:
(Je nach erworbenem 11N Client-Modell)
Conceptronic C300EXi
* 3x Antennen
* Produkt-CD-ROM
* Mehrsprachiges Benutzerhandbuch
oder
Conceptronic C300EXC
* Produkt-CD-ROM
* Mehrsprachiges Benutzerhandbuch
Conceptronic 802.11N Wireless Network Clients.
) und
.
1. Packungsinhalt
* Conceptronic 802.11N PCI-Express-Karte
* Conceptronic 802.11N PC-Express-Karte
25
Page 26

DEUTSCH
2. Treiber- und Software-Installation
Hinweis:
Bevor Sie die Karte einführen, müssen Sie die Treiber und die Software installieren!
A. Legen Sie die CD-ROM in Ihr CD-ROM-Laufwerk ein. Das Autorun-Menü sollte automatisch starten.
Wenn das Menü nicht erscheint, gehen Sie zu Ihrem „Arbeitsplatz“ und doppelklicken Sie auf das
CD-ROM-Laufwerk, um das Autorun-Menü zu starten.
B. Wählen Sie im Autorun-Menü die Option „Install Drivers & Software [Treiber und Software
installieren]“. Es erscheint der Einrichtungsassistent.
C. Klicken Sie auf „Next [Weiter]“.
Hinweis:
Die Schritte D und E gelten nur für Windows XP!
D. Wählen Sie „Conceptronic Configuration Tool”, wenn Sie die Conceptronic-Software für die
Verbindung verwenden möchten, oder wählen Sie „Microsoft Zero Configuration Tool”, wenn Sie
dazu die Wireless-Konfigurationssoftware von Microsoft verwenden möchten. Klicken Sie auf „Next
[Weiter]“.
E. Wählen Sie „Optimize for WiFi mode [WiFi-Modus optimieren]” oder „Optimize for performance
mode [Für Performance-Modus optimieren]”. Klicken Sie auf „Next [Weiter]“.
Hinweis:
F. Der Einrichtungsassistent fordert Sie auf, die Installation fortzusetzen. Klicken Sie auf „Install
[Installieren]“, um die Installation fortzusetzen. Daraufhin installiert der Einrichtungsassistent die
Treiber und die Software auf Ihrem Computer. Warten Sie, bis der Einrichtungsassistent die
Installation abgeschlossen hat.
G. Wenn die Installation abgeschlossen ist, klicken Sie auf „Finish [Fertigstellen]”, um den
Einrichtungsassistenten zu schließen.
Gehen Sie weiter zu Kapitel 3 für die Hardware-Installation Ihres 802.11N Wireless Network Clients.
Wenn Sie „Optimize for performance mode [Für Performance-Modus optimieren]” wählen,
wird die TX Burst-Option der Karte aktiviert Dies ermöglicht höhere Übertragungsraten auf
Ihrem drahtlosen Netzwerk. Ihr Access Point muss jedoch auch über die TX Burst-Option
verfügen, damit Sie diese Funktion nutzen können.
26
Page 27

DEUTSCH
3. Installation der Hardware
Sobald die Software für Ihren 802.11N Client installiert wurde, können Sie mir der Installation der
Hardware beginnen.
Conceptronic C300EXi – PCI-Express-Karte
A. Schalten Sie Ihren Computer aus und trennen Sie ihn von der Stromversorgung.
B. Öffnen Sie das Computergehäuse, indem Sie die Schrauben auf der Rückseite und das Panel
entfernen.
C. Entfernen Sie die Schutzabdeckung eines freien PCI-Express-Steckplatzes.
D. Stecken Sie den C300EXi vorsichtig und ohne Gewalt in den PCI-Express-Steckplatz ein und
befestigen Sie sie mit einer Schraube an Ihrem Computergehäuse.
E. Schließen Sie das Computergehäuse und montieren Sie die 3 Antennen des C300EXi.
F. Schalten Sie Ihren Computer ein.
Windows erkennt die neue Hardware und installiert automatisch die Treiber.
Conceptronic C300EXC – PC-Express-Karte
A. Nachdem Ihr Computer neu gestartet wurde, führen Sie den C30EXC in einen freien PC-Express-
Kartensteckplatz Ihre Notebooks ein.
Windows erkennt die neue Hardware und installiert automatisch die Treiber.
27
Page 28

DEUTSCH
4. Anschluss an ein drahtloses Netzwerk
Sobald die Hardware auf dem Computer installiert ist, ist der Wireless Network Client betriebsbereit.
Auf der Kontrollleiste wird ein aktives Wireless-Utility angezeigt:
• Doppelklicken Sie auf das Symbol des Conceptronic-Wireless-Utilitys in der Kontrollleiste.
Daraufhin erscheint die folgende Anzeige des Conceptronic Wireless Utilitys:
Das Conceptronic Wireless Utility zeigt alle drahtlosen Netzwerke in der Umgebung Ihres Computers an.
Wenn Ihr drahtloses Netzwerk nicht aufgeführt ist, können Sie durch Klicken auf die Schaltfläche „Rescan
[Erneute Suche]“ eine neue Suche nach Netzwerken starten.
• Klicken Sie in der Liste der Netzwerke auf das Netzwerk, mit dem Sie sich verbinden möchten.
• Klicken Sie auf „Connect [Verbinden]” (Windows XP
(Windows Vista
).
) oder „Add to Profile [Dem Profil hinzufügen]”
Das Wireless Utility erkennt automatisch, welche Sicherheitsstufe auf Ihrem drahtlosen Netzwerk
verwendet wird.
28
Page 29

DEUTSCH
Ungesichertes Netzwerk:
Wenn Ihr drahtloses Netzwerk ungesichert ist, stellt das Wireless Utility eine Verbindung mit Ihrem
drahtlosen Netzwerk her.
Hinweis:
Wenn Ihr Netzwerk nicht gesichert ist, empfehlen wir Ihnen, dieses zu sichern, bevor Sie sich
damit verbinden, um den unberechtigten Zugriff darauf zu verhindern. Lesen Sie bitte in der
Dokumentation Ihres Wireless Routers/Access Points nach, wie die Netzwerksicherheit
Gesichertes Netzwerk:
Wenn Ihr drahtloses Netzwerk gesichert ist, werden Sie je nach konfigurierter Sicherheitsstufe Ihres
drahtlosen Netzwerks vom Wireless Utility zur Eingabe des Verschlüsselungsschlüssels oder der Passphrase
aufgefordert.
eingerichtet werden muss.
• Überprüfen Sie, ob der erkannte Authentifizierungstyp und die erkannte Verschlüsselung mit der Ihrer
Drahtlosnetzwerksicherheit übereinstimmt.
• Geben Sie im Feld „WPA Preshared Key [Pre-Shared Schlüssel]” die Passphrase ein, wenn Sie WPA-
Sicherheit verwenden, oder geben Sie im Feld „Wep Key [Wep-Schlüssel] den WEP-Schlüsselwert ein,
wenn Sie WEP-Sicherheit verwenden.
• Klicken Sie auf „OK“, um sich mit dem ausgewählten drahtlosen Netzwerk zu verbinden.
Hinweis:
Bei Windows Vista müssen Sie im Hauptfenster des Wireless Utilitys auf die Schaltfläche
„Activate [Aktivieren]" klicken, um die Verbindung mit dem drahtlosen Netzwerk
herzustellen.
Sobald Sie mit dem drahtlosen Netzwerk verbunden sind, zeigt das Wireless Utility die Signalstärke in der
Kontrollleiste an:
29
Page 30

DEUTSCH
5. WPS - Wireless Protected Setup
Die 802.11N Clients von Conceptronic unterstützen WPS (Wi-Fi Protected Setup). WPS ist ein Standard für
die einfache Sicherung Ihres drahtlosen Netzwerks. Mit WPS können Sie Ihr drahtloses Netzwerk mit nur
wenigen einfachen Schritten schützen, ohne die verschiedenen Verschlüsselungsoptionen zu kennen.
Hinweis:
Um WPS mit Ihrem 802.11N Client verwenden zu können, müssen Sie einen Router oder Access
5.1 WPS – Verbindung auf Knopfdruck
• Drücken Sie die WPS-Taste auf Ihrem Router oder Access Point, um die WPS-Verbindung zu aktivieren.
• Drücken Sie die WPS-Taste an Ihrem 802.11N Client und halten Sie diese für ca. 5 Sekunden gedrückt.
Hinweis:
Point haben, der WPS unterstützt.
Beim C300EXi (PCi-Express-Karte) befindet sich die Taste neben den Antennen auf der
Rückseite. Beim C300EXC (PC-Express-Karte) befindet sich die Taste auf der Oberseite der
Karte.
C300EXi
C300EXC
Der Tastendruck steuert das Wireless Utility an, welches die Verbindung mit Ihrem drahtlosen Netzwerk
herzustellen versucht. Wenn auf Ihrem Bildschirm das Hauptfenster des Wireless Utilitys angezeigt wird,
sehen Sie die WPS-Aktivität unten im Fenster:
Sobald die Verbindung hergestellt ist, wird die Meldung „WPS status is connected successfully [WPS-
Status erfolgreich verbunden]” angezeigt:
Sobald Sie mit dem drahtlosen Netzwerk verbunden sind, zeigt das Wireless Utility die Signalstärke in der
Kontrollleiste an:
30
Page 31

DEUTSCH
5.2 WPS – Verbindung mit PIN-Code
Wenn Ihr Router oder Access Point keinen Knopf hat, können Sie sich auch mit einem PIN-Code mit WPS
verbinden.
Das Wireless Utility funktioniert sowohl im „Enrollee-” als auch im „Registrar”-Modus:
- Wenn „Enrollee” gewählt wird, erzeugt das Wireless Utility einen PIN-Code, der bei der WPS-
Konfiguration Ihres Routers oder Access Points eingegeben werden muss.
- Wenn der „Registrar”-Modus gewählt wird, können Sie im Wireless Utility einen PIN-Code
eingeben. Dieser Modus wird dann benötigt, wenn Ihr Router oder Access Point einen PIN-Code
liefert, der für die drahtlose Verbindung verwendet werden muss.
Aktivieren Sie die PIN-WPS-Verbindung auf Ihrem Router oder Access Point.
Wählen Sie gemäß obigen Informationen den korrekten „Config Mode [Konfig-Modus]” im Wireless Utility.
Klicken Sie im Wireless Utility auf die Schaltfläche „PIN“.
Im unteren Teil des Bildschirms wird die WPS-Aktivität angezeigt:
Sobald die Verbindung hergestellt ist, wird die Meldung „WPS status is connected successfully [WPS-
Status erfolgreich verbunden]” angezeigt:
Sobald Sie mit dem drahtlosen Netzwerk verbunden sind, zeigt das Wireless Utility die Signalstärke in der
Kontrollleiste an:
31
Page 32

DEUTSCH
6. Windows Zero Configuration Tool
Die Conceptronic 802.11N Clients können auch mit dem Windows Zero Configuration Tool, dem StandardWireless-Konfigurationstool von Windows XP verwaltet werden.
Das Wireless Zero Configuration Tool kann nur mit dem Betriebssystem Windows XP verwendet
Hinweis:
Sie können die Wireless Zero Configuration auf zwei verschiedene Arten aktivieren:
- Wählen Sie bei der Installation der Treiber und Software „Microsoft Zero Configuration Tool”.
- Rechtsklicken Sie auf das Symbol des Conceptronic Wireless Utilitys in der Kontrollleiste und wählen Sie
Sie können auf die Wireless Zero Configuration zugreifen, indem Sie auf das Wireless-Symbol Ihrer
Netzwerkkarte klicken:
werden. Bei Windows Vista müssen Sie das Conceptronic Wireless Utility verwenden.
dann „Use Zero Configuration as Configuration Utility [Zero Configuration als Konfigurations-Utility
verwenden]”.
Daraufhin öffnet sich das Fenster ‚Wireless Zero Configuration’.
Weitere Informationen zum Wireless Zero Configuration Tool und dessen Optionen finden Sie
Hinweis:
im Windows XP-Handbuch.
Viel Spaß mit Ihrem Conceptronic 802.11N Wireless Client !
32
Page 33

FRANÇAIS
C300EXi / C300EX de Conceptronic
Manuel d’Utilisateur
Nous vous félicitons d'avoir acheté votre
Client de Réseau Sans Fils 802.11N de Conceptronic.
Vous trouverez dans ce Manuel d'Utilisateur une explication détaillée de l'installation du Client de Réseau
sans fils sur votre ordinateur.
En cas de problème, nous vous conseillons de vous rendre sur notre site de support technique (rendezvous sur le site de www.conceptronic.net
de la Foire aux Questions.
En cas de questions concernant votre produit et si vous n’obtenez pas de réponse sur notre site Web,
n’hésitez pas à nous contacter par e-mail : support@conceptronic.net
Pour plus d'informations concernant les produits Conceptronic, veuillez consulter notre site Web :
www.conceptronic.net
L’installation du Software décrite ci-après peut être légèrement différente de l’installation sur votre
ordinateur. Cela dépendra de la version Windows que vous utilisez.
1. Contenu du Coffret
Les éléments suivants sont fournis dans le paquet avec le 802.11N Client de Conceptronic :
(Selon la version client 11N achetée)
C300EXi de Conceptronic
* 3 Antennes
* CD-ROM du produit
* Manuel en plusieurs langues
ou
C300EXC de Conceptronic
* CD-ROM du produit
* Manuel en plusieurs langues
* Carte PCI- Express 802.11N de Conceptronic
* Carte PC- Express 802.11N de Conceptronic
et cliquez sur « Support ». Vous y trouverez la Base de données
33
Page 34

FRANÇAIS
2. Installation du Driver & du Software
Remarque : Avant d'insérer la carte vous devez installer les Drivers et le Software !
A. Placez le CD-ROM dans votre lecteur de CD-ROM. Le Menu à Lancement Automatique doit apparaître
automatiquement. Si le Menu à Lancement Automatique n'apparaît pas, naviguez dans "Mon
Ordinateur" et faites double clic sur le lecteur de Cd-Rom pour lancer le menu à lancement
automatique.
B. Sélectionnez l'option "Install Drivers & Software" [Installation de Software et Drivers] dans le menu
à lancement automatique. L'Assistant de Configuration apparaît.
C. Cliquez sur « Next » [Suivant] pour continuer.
Remarque : Les étapes D et E ne sont utiles que pour Windows XP !
D. Sélectionnez "Conceptronic Configuration Tool" [Outil de configuration de Conc eptronic" si vous
souhaitez utiliser le software de Conceptronic pour vous connecter, ou sélectionnez "Microsoft Zero
Configuration Tool" [Outil de configuration zéro de Microsoft] si vous souhaitez utiliser le software
de configuration sans fils de Microsoft. Cliquez sur « Next » [Suivant] pour continuer.
E. Sélectionnez "Optimize for WiFi mode" [Optimiser pour mode Wifi], ou sélectionnez "Optimize for
performance mode" [Optimiser pour mode performance]. Cliquez sur « Next » [Suivant] pour
continuer.
Remarque : Lorsque vous sélectionnez "Optimize for performance mode" [Optimiser pour mode
F. L'Assistant de Configuration vous demandera de poursuivre l'installation. Cliquez sur "Installer" pour
poursuivre l'installation. L'Assistant de Configuration installera à présent les drivers et le software
sur votre ordinateur. Attendez que l'Assistant de Configuration ait terminé l'installation.
G. Lorsque l'installation est terminée, cliquez sur "Finish" pour refermer l'Assistant de Configuration.
Poursuivez au Chapitre 3 pour installer le Hardware de votre Client de Réseau Sans Fils 802.11N.
performance], l'option TX-Burst de la carte est activée. Cela vous permettra d'obtenir des
vitesses de transfert de données plus rapide sur votre réseau sans fils, mais pour utiliser
cette fonction votre point d'accès devra être équipé également de l'option TX-Burst.
34
Page 35

FRANÇAIS
3. Installation du hardware
Lorsque vous avez installé le software de votre 802.11N Client, vous pouvez installer le hardware.
Carte PCI- Express C300EXi de Conceptronic
A. Éteignez votre ordinateur et débranchez l'ordinateur du réseau électrique.
B. Ouvrez le bâti de votre ordinateur en dévissant les vis situées à l'arrière et démontez le panneau.
C. Trouvez une encoche PCI-Express et démontez la plaque de protection du bâti de votre ordinateur.
D. Insérez soigneusement le C300EXi dans l'encoche PCI-Express libre et fixez-le avec une vis au bâti de
votre ordinateur.
E. Refermez le bâti de votre ordinateur et assemblez les 3 antennes au C3000EXi.
F. Allumez votre ordinateur.
Windows détectera le nouvel hardware et installera automatiquement les drivers.
Carte PC- Express C300EXC de Conceptronic
A. Lorsque vous avez redémarré votre ordinateur portable, insérez le C300EXC dans une encoche de
Carte PC-Express de votre ordinateur portable.
Windows détectera le nouvel hardware et installera automatiquement les drivers.
35
Page 36

FRANÇAIS
4. Connexion à un réseau sans fils
Lorsque le hardware est installé par l'ordinateur, vous pouvez utiliser le Client de Réseau Sans Fils.
Vous verrez un logo de Dispositif Sans Fils actif dans votre plateau système :
• Faites double clic sur l'icône du plateau système du Dispositif Sans Fils de Conceptronic.
Le Dispositif Sans Fils de Conceptronic s'affiche alors comme l'indique la capture d'écran suivante :
Le Dispositif Sans Fils de Conceptronic affiche tous les réseaux sans fils dans la zone de votre ordinateur.
Si votre réseau sans fils ne s'affiche pas, vous pouvez cliquer sur "Scanner à nouveau" pour lancer une
nouvelle recherche de réseaux disponibles.
• Cliquez sur le réseau auquel vous voulez vous connecter dans la liste des réseaux.
• Cliquez sur "Connecter" (Windows XP) ou "Ajouter à Profil" (Windows Vista).
36
Page 37

FRANÇAIS
Le Dispositif Sans Fils détecte automatiquement quel niveau de sécurité est utilisé sur votre réseau sans
fils.
Réseau non sécurisé :
Si votre réseau sans fils n'est pas sécurisé, le Dispositif Sans Fils établit une connexion avec votre réseau
sans fils.
Remarque : Si vous vous connectez sur votre propre réseau non sécurisé, nous vous conseillons d'ajouter
de la sécurité sur votre réseau pour empêcher tout accès non autorisé à votre réseau.
Voyez la documentation de votre Routeur Sans Fils / Point d'Accès pour savoir comment
configurer la sécurité de votre réseau.
Réseau Sécurisé :
Si votre réseau sans fils est sécurisé, le Dispositif Sans Fils vous demande le code de cryptage ou le mot de
passe, en fonction du niveau de sécurité configuré de votre réseau sans fils :
• Vérifiez si le Type d'Authentification détecté et le Cryptage correspond à la sécurité de votre réseau
sans fils.
• Entrez le mot de passe dans le champ "WPA Preshared Key" [Code prépartagé de WPA] ou entrez le
code de cryptage de WEP dans le champ "WEP Key" [Code WEP] lorsque vous utilisez une sécurité WEP.
• Cliquez sur "OK" pour vous connecter au réseau sans fils choisi.
Remarque : Lorsque vous utilisez Windows Vista, cliquez sur le bouton "Activate" [Activer] dans la
fenêtre principale de votre Dispositif Sans Fils pour vous connecter au réseau sans fils.
Vous êtes à présent connecté sur le réseau sans fils. Le Dispositif Sans Fils indiquera la force du signal dans
votre plateau système :
37
Page 38

FRANÇAIS
5. Configuration Protégée Sans Fils - WPS
Le 802.11N Client de Conceptronic supporte WPS (Configuration de Wi-Fi Protégée). WPS est une norme
qui permet de sécuriser facilement votre réseau sans fils. Avec WPS, vous pouvez protéger votre réseau
sans fils en quelques petites actions sans connaître différentes options de cryptage.
Remarque : Pour utiliser WPS avec votre Client 802.11N, vous devez disposer d'un routeur ou d'un point
5.1 Connexion de Bouton-Poussoir - WPS
• Appuyez sur le bouton WPS sur votre routeur ou votre point d'accès pour permettre la connexion de
WPS.
• Appuyez et tenez enfoncé le bouton WPS sur votre client de réseau 802.11N pendant environ 5
secondes.
Remarque :
d'accès qui supporte WPS.
Si vous disposez du C300EXi (carte PCI-Express), le bouton est situé à côté de l'antenne, sur
la partie arrière. Si vous disposez du C300EXC (carte PC-Express), le bouton est situé sur la
partie supérieure de la carte.
C300EXi C300EXC
Le Dispositif Sans Fils est déclenché par le bouton et tente de se connecter à votre réseau sans fils. Si la
fenêtre principale du Dispositif Sans Fils est affichée à l'écran, vous verrez l'activité WPS dans la partie
inférieure de la fenêtre :
Lorsque la connexion est établie, le message "WPS status is connected successfully" [Statut WPS :
connexion réussie] s'affiche :
Vous êtes à présent connecté sur le réseau sans fils. Le Dispositif Sans Fils indiquera la force du signal dans
votre plateau système :
38
Page 39

FRANÇAIS
5.2 WPS - Connexion avec code Pin.
Si votre routeur ou point d'accès n'a pas de bouton-poussoir, vous pouvez également vous connecter à WPS
avec un Code Pin.
Le Dispositif Sans fils peut travailler en mode "Enrollee" ou "Registrar" :
- Lorsque "Enrollee" est sélectionné, le Dispositif Sans Fils envoie un Code Pin qui doit être
défini dans la configuration WPS de votre routeur ou point d'accès.
- Lorsque le mode "Registrar" est sélectionné, vous pouvez saisir un Code Pin dans le Dispositif
Sans Fils. Ce mode est nécessaire lorsque votre routeur ou point d'accès fournit un Code Pin qui
doit être utilisé pour la connexion sans fils.
Activez la connexion PIN WPS sur votre routeur ou point d'accès.
Sélectionnez le bon "Config Mode" dans le dispositif Sans Fils, en fonction des informations indiquées ci-
dessus.
Cliquez sur le bouton "PIN" du Dispositif Sans Fils.
Vous pouvez voir l'activité du WPS dans la partie inférieure de la fenêtre :
Lorsque la connexion est établie, le message "WPS status is connected successfully" [Statut WPS :
connexion réussie] s'affiche :
Vous êtes à présent connecté sur le réseau sans fils. Le Dispositif Sans Fils indiquera la force du signal dans
votre plateau système :
39
Page 40

FRANÇAIS
6. Outil de Configuration Zéro de Windows
Le 802.11N Client de Conceptronic peut aussi être géré par l'Outil de Configuration Zéro de Windows,
l'outil de configuration de réseaux sans fils de Windows XP.
Remarque :
Vous pouvez activer la Configuration Zéro Sans Fils de 2 manières différentes :
- Sélectionnez pendant l'installation des drivers et du software "Outil de Configuration Zéro de
- Cliquez avec le bouton de droite de la souris sur l'icône Dispositifs Sans Fils de Conceptronic sur le
Vous pouvez accéder à la Configuration Zéro Sans Fils en faisant double clic sur l'icône de dispositifs sans
fils de votre carte réseau :
Il n'est possible d'utiliser l'Outil de Configuration Zéro Sans Fils que si vous travaillez avec
Windows XP. Dans Windows Vista, vous devez utiliser le système de Dispositifs Sans Fils de
Conceptronic.
Microsoft"
plateau système et sélectionnez "Utiliser Configuration Zéro comme Outil de Configuration".
La fenêtre de Configuration Zéro Sans Fils s'affiche à l'écran.
Remarque :
Pour plus d'informations sur l'outil de Configuration Zéro Sans Fils et ses options,
consultez le manuel de Windows XP.
Bon divertissement avec votre Client 802.11N Sans Fils de
Conceptronic !
40
Page 41

ITALIANO
Conceptronic C300EXi / C300EXC
Guida d’installazione
Complimenti per aver acquistato un
Questo manuale d’uso spiega passo per passo come installare il Client di Rete Wireless 802.11N
Conceptronic sul tuo computer.
Per la risoluzione di eventuali problemi, si rimanda al sito di assistenza (andare all’indirizzo
www.conceptronic.net
alle domande più frequenti.
Se non è possibile trovare la risposta alle domande sul prodotto acquistato nel sito Web, inviare un’e-mail
al seguente indirizzo: support@conceptronic.net
Per maggiori informazioni sui prodotti Conceptronic, si visiti il sito Web di Conceptronic:
www.conceptronic.net
La procedura di installazione del software di seguito riportata può essere leggermente diversa da quella
prevista sul proprio computer, che dipende dalla versione di Windows installata .
La confezione del Client 802.11N Conceptronic include le seguenti unità:
(In base al Client 11N acquistato)
Conceptronic C300EXi
* 3x Antenna
* CD-ROM del prodotto
* Il presente manuale d’uso multilingue
o
Conceptronic C300EXC
* CD-ROM del prodotto
* Il presente manuale d’uso multilingue
Client di Rete Wireless 802.11N Conceptronic
e cliccare su ‘Support’). È disponibile in questa pagina un archivio delle risposte
1. Contenuto della confezione
* Scheda i-Express-PC 802.11N Conceptronic
* Scheda Express-PC 802.11N Conceptronic
41
Page 42

ITALIANO
2. Installazione dei driver e dei software
Attenzione :
A. Inserire il CD-ROM nell’apposito alloggiamento per CD-ROM. Dovrebbe essere inizializzata
Prima di inserire la scheda, occorre installare i driver e i software!
automaticamente la modalità Autorun. Se il menu Autorun non appare, selezionare “Risorse del
Computer” e cliccare due volte sull’icona CD-ROM per avviare il menu Autorun.
B. Selezionare l’opzione “Install drivers & software” dal menu Autorun. Verrà visualizzato il Setup
Wizard .
C. Cliccare su “Next” per continuare.
Attenzione :
D. Selezionare “Conceptronic Configuration Tool” se si vuole utilizzare il software Conceptronic per il
E. Selezionare “Optimize for WiFi mode”, oppure “Optimize for performance mode”. Cliccare su
Attenzione :
F. Il Setup Wizard richiederà se si vuole procedere con l’installazione. Cliccare su “Install” per
G. Quando l’installazione è terminata, cliccare su “Finish” per chiudere la finestra del Setup Wizard.
Passare al Capitolo 3 per installare l’hardware del proprio Client di Rete wireless 802.11N.
i punti D e E riguardano solo la versione Windows XP!
collegamento, oppure selezionare “Microsoft Zero Configuration Tool” se si preferisce il software di
configurazione wireless di Microsoft. Cliccare su “Next” per continuare.
“Next” per continuare.
Quando si seleziona “Optimize for performance mode”, verrà abilitata l’opzione TX-Burst
della scheda che consente una velocità di trasferimento maggiore sulla rete wireless; per
poter utilizzare la funzione è necessario tuttavia che anche il punto di accesso utilizzato sia
dotato dell’opzione TX-Burst .
continuare con l’installazione. Il Setup Wizard procede all’installazione dei driver e dei software sul
computer. Attendere che il Setup Wizard concluda l’installazione.
42
Page 43

ITALIANO
3. Installazione dell’hardware
Una volta installato il software per il Client 802.11N, si può procedere all’installazione dell’hardware.
Scheda Express-PCI - Conceptronic C300EXi
A. Spegnere il computer e scollegarlo dalla presa AC.
B. Aprire il telaio del computer svitando le viti sulla parte posteriore e rimuovere il pannello.
C. Trovare una presa libera per Express-PC e rimuovere il pannello di protezione del telaio del
computer.
D. Inserire con attenzione il C300EXi nella presa Express-PC fissandola con una vite al telaio del
computer.
E. Chiudere il telaio del computer e montare le 3 antenne al C300EXi.
F. Accendere il computer.
Windows rileverà il nuovo hardware e installerà i driver automaticamente.
Scheda Express-PC - Conceptronic C300EXC
A. Una volta ricaricato il portatile, inserire il C300EXC in un alloggiamento libero per scheda Express-PC
del portatile.
Windows rileverà il nuovo hardware e installerà i driver automaticamente.
43
Page 44

ITALIANO
4. Collegamento a una rete wireless
Dopo aver installato l’hardware sul computer, il Client di Rete Wireless è pronto per l’uso.
Sarà possibile visualizzare la funzione Wireless nella barra del sistema:
• Cliccare due volte sull’icona presente nella barra della funzione Wireless Conceptronic.
La funzione Wireless Conceptronic sarà visualizzata come indicato di seguito:
La funzione Wireless Conceptronic visualizzerà tutte le reti wireless presenti nell’area del computer. Se la
rete wireless prescelta non appare, è possibile cliccare su “Nuova scansione” per aggiornare le reti.
• Cliccare sulla rete a cui ci si vuole collegare nella lista delle reti disponibili.
• Cliccare su “Collega” (Windows XP
) o “Aggiungi un Profilo” (Windows Vista).
44
Page 45

ITALIANO
La funzione Wireless rileva automaticamente il livello di sicurezza della rete wireless installata.
Rete non protetta:
Se la rete wireless selezionata non è protetta, la funzione Wireless stabilirà una connessione con la rete
wireless.
Attenzione:
Rete protetta:
Se la rete wireless è protetta, la funzione Wireless richiederà la chiave di codifica o la password, a
seconda del livello di sicurezza configurato sulla rete wireless:
Se si è collegati alla propria rete e questa non è protetta, si consiglia di metterla in
sicurezza per evitare accessi non autorizzati. Si consulti la documentazione relativa al
proprio router Wireless/punto di accesso sulle modalità di protezione della propria rete.
• Controllare se il tipo di autenticazione e codifica è compatibile con la protezione installata sulla rete
wireless.
• Inserire la password nel campo “WPA Preshared Key” se si sta utilizzando una protezione WPA, o
inserire la chiave di codifica WEP nel campo “Wep Key” se si utilizza una protezione WEP.
• Cliccare su “OK” per collegare la rete wireless selezionata.
Attenzione :
Si è in questo momento collegati alla rete wireless. La funzione Wireless indicherà la potenza del segnale
nella barra del sistema:
Se il sistema operativo utilizzato è Windows Vista, cliccare sul pulsante “Attiva” nella
finestra principale della funzione Wireless per collegarsi alla rete wireless.
45
Page 46

ITALIANO
5. WPS – Configurazione Protetta Wireless
Il Client 802.11N Conceptronic supporta WPS (Wi-Fi Protected Setup). WPS è uno standard per proteggere
facilmente la rete wireless. Con WPS è possibile proteggere la rete wireless in pochi passi senza dover
conoscere i vari sistemi di cifratura.
Attenzione :
5.1 WPS – Premere il tasto di connessione
• Premere il tasto WPS sul router o sul punto di accesso per abilitare la connessione WPS.
• Premere il tasto WPS del Client 802.11N per circa 5 secondi.
Attenzione :
Se si vuole utilizzare WPS con il Client 802.11N, è necessario un router o un punto di
accesso che supporti WPS.
Se si utilizza un C300EXi (scheda Express-PCI), il pulsante è ubicato vicino all’antenna sul
retro. Se si utilizza un C300EXC (scheda Express-PC), il pulsante è ubicato nella parte
superiore della scheda.
C300EXi
C300EXC
La funzione Wireless sarà inizializzata dal pulsante e tenterà di collegarsi alla rete wireless. Se la finestra
principale della funzione Wireless viene visualizzata sullo schermo, è possibile seguire l’attività WPS nella
parte inferiore della finestra:
Una volta stabilita la connessione, apparirà il messaggio “WPS status is connected successfully”:
Si è ora connessi alla rete wireless. La funzione Wireless indicherà la potenza del segnale nella barra del
sistema:
46
Page 47

ITALIANO
5.2 WPS – Connessione tramite codice Pin
Se il router o punto di accesso non dispone di pulsante, è possibile collegare il WPS tramite codice Pin.
La funzione Wireless può funzionare nella modalità “Enrollee” o “Registrar”:
- Quando è selezionata la modalità “Enrollee”, la funzione Wireless genererà un codice Pin che deve
essere inserito nella configurazione WPS del router o punto di accesso.
- Quando è selezionata la modalità “Registrar”, è possibile inserire il codice Pin nella funzione Wireless.
Tale modalità è obbligatoria se il router o punto di accesso è dotato di un codice Pin che deve essere
usato per connessioni wireless.
Attivare la connessione PIN WPS sul router o punto di accesso.
Selezionare la corretta “Config Mode” nella funzione Wireless, seguendo le istruzioni sopra riportate.
Cliccare sul tasto “PIN” della funzione Wireless.
È possibile visualizzare l’attività WPS nella parte inferiore della finestra:
Una volta stabilita la connessione, verrà visualizzato il messaggio “WPS status is connected successfully”:
Si è ora connessi alla rete wireless. La funzione Wireless indicherà la potenza del segnale nella barra del
sistema:
47
Page 48

ITALIANO
6. Windows Zero Configuration Tool
I client 802.11N Conceptronic possono essere gestiti anche tramite l’opzione Windows Zero Configuration
Tool, la configurazione wireless standard di Windows XP.
Attenzione :
Puoi abilitare la Wireless Zero Configuration in due modi diversi:
- Selezionare, durante l’installazione dei driver e dei software l’opzione “Microsoft Zero Configuration
Tool”.
- Cliccare con il tasto destro del mouse sull’icona della funzione Wireless Conceptronic presente nella
barra del sistema e selezionare “Use Zero Configuration as Configuration Utility”.
È possibile accedere all’opzione Wireless Zero Configuration con un doppio click sull’icona wireless della
scheda di rete:
è possibile utilizzare la Wireless Zero Configuration Tool soltanto se si utilizza Windows XP.
In Windows Vista, è necessario usare la funzione Wireless Conceptronic.
Sullo schermo verrà visualizzata la finestra Wireless Zero Configuration.
Attenzione :
Per maggiori informazioni sullo strumento Wireless Zero Configuration e le varie opzioni si
rimanda al manuale di Windows XP.
Buon utilizzo del tuo Client Wirelless 802.11N Conceptronic!
48
Page 49

PORTUGUÊS
Conceptronic C300EXi / C300EXC
Instruções de Uso
Parabéns por ter adquirido o
Nestas Instruções de Uso encontrará a explicação passo-a-passo de como instalar o Cliente de Rede sem
Fios 802.11N da Conceptronic no seu computador.
Se tiver algum problema, consulte o nosso sítio de suporte (vá a www.conceptronic.net
“Suporte”. Aí encontrará a secção de perguntas e respostas frequentes (F.A.Q.).
Se tiver alguma dúvida sobre o produto e não encontrar a resposta no nosso sítio web, consulte-nos por email: apoyo@conceptronic.net
Para mais informação sobre os produtos da Conceptronic visite o sítio web da Conceptronic:
www.conceptronic.net
A instalação do Software descrita abaixo pode diferir ligeiramente da instalação no seu computador,
dependendo da versão do Windows que utilizar.
A embalagem do Cliente 802.11N da Conceptronic contém os seguintes elementos:
(segundo o cliente 11N adquirido)
Conceptronic C300EXi
* 3 antenas
* CD-ROM do produto
* Instruções de Uso multilingues
ou
Conceptronic C300EXC
* CD-ROM do produto
* Instruções de Uso multilingues
Cliente de Rede sem Fios 802.11N da Conceptronic.
e clique em
1. Conteúdo da embalagem
* Placa PCI-Express 802.11N da Conceptronic
* Placa PC-Express 802.11N da Conceptronic
49
Page 50

PORTUGUÊS
2. Instalação dos drivers e do software
Nota:
Antes de inserir a placa é preciso instalar os drivers e o software.
A. Insira o CD-ROM na respectiva drive. A execução automática (AutoRun) costuma ser activada. Se isso
não acontecer, vá a “O meu Computador” e faça duplo clique na drive do CD-ROM para ver o menu
de execução automática.
B. Seleccione a opção “Instalar drivers e software” do menu. Aparecerá, então, o Assistente de
Configuração.
C. Clique em “Seguinte” para continuar.
Nota:
Os passos D e E são apenas para o Windows XP.
D. Seleccione “Ferramenta de Configuração Conceptronic” se pretende utilizar o software da
Conceptronic para a ligação ou “Ferramenta de Configuração Zero Microsoft” se deseja utilizar o
software de configuração sem fios Microsoft. Clique em “Seguinte” para continuar.
E. Seleccione “Optimizar para modo WiFi” ou seleccione “Optimizar para modo desempenho”.
Clique em “Seguinte” para continuar.
Nota:
Quando se selecciona “Optimizar para modo desempenho”, a opção TX-Burst (rajada de
transmissão) da placa é activada. Isto possibilita velocidades de transferência mais altas na rede
sem fios, mas o seu ponto de acesso também precisa de ter a opção TX-Burst para poder ser
utilizada esta função.
F. O Assistente de Configuração perguntará se deseja prosseguir com a instalação. Clique em “Instalar”
para prosseguir com a instalação. O Assistente de Configuração instalará, então, os drivers e o
software no computador. Espere até o Assistente de Configuração concluir a instalação.
G. Quando a instalação estiver finalizada, clique em “Concluir” para sair do Assistente de
Configuração.
Passe para o Capítulo 3 para realizar a instalação do Cliente de Rede sem Fios 802.11N.
50
Page 51

PORTUGUÊS
3. Instalação do hardware
Depois de instalar o software para o Cliente 802.11N, pode-se realizar a instalação do hardware.
Placa PCI-Express - Conceptronic C300EXi
A. Desligue o computador e desligue o cabo de alimentação da tomada CA.
B. Abra a caixa do computador, retirando os parafusos da parte posterior e remova o painel.
C. Encontre uma ranhura PCI-Express disponível e retire a placa de protecção da caixa do computador.
D. Insira a placa C300EXi delicadamente na ranhura PCI-Express disponível e fixe-a com um parafuso à
caixa do computador.
E. Feche a caixa do computador e una as três antenas à placa C300EXi.
F. Ligue o computador.
O Windows detectará o novo hardware e instalará os drivers automaticamente.
Placa PCI-Express - Conceptronic C300EXC
A. Depois de reiniciar o computador portátil, insira a C300EXC numa ranhura PC-Express disponível.
O Windows detectará o novo hardware e instalará os drivers automaticamente.
51
Page 52

PORTUGUÊS
4. Ligação a uma rede sem fios
O cliente de Rede sem Fios estará pronto para ser usado quando o hardware for instalado no computador.
Aparecerá um Utilitário sem Fios na bandeja do sistema:
• Faça duplo clique no ícone Utilitário sem Fios Conceptronic da bandeja do sistema.
O Utilitário sem Fios Conceptronic aparecerá como se mostra a seguir:
O Utilitário sem Fios Conceptronic exibirá todas as redes sem fios na área de alcance do computador. Se a
sua rede sem fios não aparecer, pode fazer clique em “Procurar novamente” para voltar a procurar
redes.
• Entre as redes da lista, clique naquela com a qual pretende estabelecer uma ligação.
• Clique em “Ligar” (Windows XP
) ou “Adicionar ao perfil” (Windows Vista).
52
Page 53

PORTUGUÊS
O Utilitário sem Fios detecta automaticamente o nível de segurança da sua rede sem fios.
Rede Insegura
Se a sua sem fios rede for insegura, o Utilitário sem Fios estabelecerá uma ligação com a sua rede.
Nota:
Rede Segura
Se a sua rede sem fios for segura, o Utilitário sem Fios pedirá a chave de criptografia ou a frase-chave,
segundo o nível de segurança configurado na sua rede sem fios:
Se a ligação for com a sua própria rede e esta for insegura, recomendamos que seja dotada de
segurança para evitar o acesso não autorizado à mesma.
Veja na documentação do seu router sem fios/ponto de acesso como configurar a segurança da
rede.
• Verifique se o tipo de autenticação e criptografia correspondem à configuração de segurança da sua
rede sem fios.
• Insira a frase-chave no campo “Frase-chave WPA”, se utilizar segurança WPA ; ou a chave de
criptografia WEP no campo “Chave Wep” se utilizar segurança WEP.
• Clique em “OK” para estabelecer a ligação com a rede sem fios seleccionada.
Nota:
Se utilizar Windows Vista, clique no botão “Activar” na janela principal do Utilitário sem Fios
para estabelecer a ligação com a rede sem fios.
Agora já estará ligado à rede sem fios. O Utilitário sem Fios indicará a potência do sinal na bandeja do
sistema:
53
Page 54

PORTUGUÊS
5. Configuração de redes sem fios protegidas - WPS
O Cliente 802.11N da Conceptronic suporta WPS (Wi-Fi Protected Setup). O WPS é um padrão para
proporcionar facilmente segurança à sua rede. Com o WPS é possível proteger a rede sem fios com apenas
alguns procedimentos fáceis de realizar mesmo sem ter conhecimento sobre as diversas opções de
criptografia.
Nota:
Para utilizar o padrão WPS com o Cliente 802.11N é preciso ter um router ou um ponto de acesso
que suporte WPS.
5.1 WPS – Ligação mediante o botão
• Prima o botão WPS do router ou ponto de acesso para habilitar a ligação WPS.
• Mantenha o botão WPS do Cliente 802.11N pressionado durante aproximadamente 5 segundos.
Nota:
Se tiver C300EXi (placa PCi-Express), o botão estará situado próximo das antenas, na parte
posterior. Se tiver C300EXC (placa PC-Express), o botão estará situado na parte superior da
placa.
C300EXi
C300EXC
O Utilitário sem Fios será activado mediante o botão e tentará estabelecer uma ligação com a rede sem
fios. Quando a janela principal do Utilitário sem Fios aparecer no ecrã, poderá ver a actividade do WPS na
parte inferior da janela:
Quando a ligação for estabelecida aparecerá a mensagem “WPS ligado com sucesso”:
Estará, então, ligado à rede sem fios. O Utilitário sem Fios indicará a potência do sinal na bandeja do
sistema:
54
Page 55

PORTUGUÊS
5.2 WPS – Ligação mediante código PIN
Se o router ou ponto de acesso não tiver um botão, pode-se estabelecer uma ligação com WPS mediante
um código PIN.
O Utilitário sem Fios pode funcionar nos modos “Inscrito” ou “Registador”:
- Quando se selecciona “Inscrito” o Utilitário sem Fios gera um código PIN que deve ser inserido
na configuração WPS do router ou ponto de acesso.
- Quando se selecciona o modo “Registador” é possível inserir um código PIN no Utilitário sem
Fios. É necessário utilizar este modo quando o router ou ponto de acesso proporciona um
Active a ligação WPS mediante código PIN no router ou ponto de acesso.
Seleccione o “Modo de configuração” correcto no Utilitário sem Fios, de acordo com a informação abaixo.
Clique no botão “PIN” do Utilitário sem Fios.
A actividade WPS pode ser vista na parte inferior da janela:
Quando a ligação for estabelecida aparecerá a mensagem “WPS ligado com sucesso”:
Estará, então, ligado à rede sem fios. O Utilitário sem Fios indicará a potência do sinal na bandeja do
sistema:
código PIN que precisa de ser usado para estabelecer uma ligação sem fios.
55
Page 56

PORTUGUÊS
6. Ferramenta de Configuração Zero do Windows
O Cliente 802.11N da Conceptronic também pode ser gerido mediante a Ferramenta de Configuração Zero
do Windows, o utilitário padrão de configuração sem fios do Windows XP.
Só é possível utilizar a Ferramenta de Configuração sem Fios Zero com o Windows XP. Com
Nota:
Windows Vista é preciso utilizar o Utilitário sem Fios Conceptronic.
A Configuração Zero sem Fios pode ser habilitada de duas formas diferentes:
- Seleccione “Ferramenta de Configuração Zero da Microsoft” durante a instalação dos drivers e do
software.
- Clique com o botão direito do rato no ícone do Utilitário sem Fios Conceptronic na bandeja do sistema
e seleccione “Usar Configuração Zero como utilitário de configuração”.
Pode-se ter acesso à Configuração Zero sem Fios fazendo duplo clique no ícone sem fios da placa de rede:
Aparecerá no ecrã a janela Configuração Zero sem Fios.
Nota:
Para obter mais informações sobre a Ferramenta Configuração Zero sem Fios, consulte o manual
do Windows XP.
Desfrute com a utilização do Cliente de Rede sem Fios 802.11N da
Conceptronic.
56
Page 57

MAGYAR
Conceptronic C300EXi/C300EXC
Használati utasítás
Köszönjük, hogy a Conceptronic 802.11N
Ez a használati utasítás lépésről lépésre elmagyarázza, miként kell a Conceptronic 802.11N vezeték
nélküli, hálózati ügyfelet számítógépén telepítenie.
Ha probléma jelentkeznek, azt tanácsoljuk, hogy keresse fel terméktámogatást nyújtó webhelyünket
(látogasson el a www.conceptronic.net
gyakran ismétlődő kérdések (GYIK) adatbázisa.
Ha a termékkel kapcsolatban további kérdése volna, és arra választ webhelyünkön nem talál, e-mailben is
fordulhat hozzánk: support@conceptronic.net
A Conceptronic termékekkel kapcsolatos további tájékozódás végett látogasson el a Conceptronic
webhelyére: www.conceptronic.net
A szoftvernek az alábbiakban ismertetett telepítése kicsit eltérhet az adott számítógépre történő
telepítéstől. Mindez függ az éppen használt Windows-verziótól.
A Conceptronic 802.11N ügyfelet tartalmazó csomagban az alábbiak találhatók:
(a vásárolt 11N ügyféltől függően)
Conceptronic C300EXi
* 3x antenna
* Termékismertető CD-ROM
* Többnyelvű használati utasítás
vagy
Conceptronic C300EXC
* Termékismertető CD-ROM
* Többnyelvű használati utasítás
vezeték nélküli, hálózati ügyfelét választotta.
honlapra, majd kattintson a „Support”-ra). Ott található ugyanis a
1. A csomag tartalma
* Conceptronic 802.11N PCI-Express kártya
* Conceptronic 802.11N PC-Express kártya
57
Page 58

MAGYAR
2. Az illesztőprogram és a szoftver telepítése
Megjegyzés:
A. Tegye be a CD-ROM-ot a CD-ROM meghajtóba. Az Autorunnak automatikusan meg kell jelennie. Ha
A kártya behelyezése előtt telepítenie kell az illesztőprogramokat és a szoftvert!
az Autorun menü nem jelenik meg, navigáljon a „My Computer”-hez, majd duplán kattintson a CDROM-meghajtóra az Autorun menü elindításához.
B. Jelölje ki az „Install Drivers & Software” opciót az Autorun menün. A telepítővarázsló jelenik meg.
C. A folytatáshoz kattintson a „Next”-re.
Megjegyzés:
D. Jelölje ki a „Conceptronic Configuration Tool”-t, ha a Conceptronic-szoftvert kívánja alkalmazni a
E. Jelölje ki a „Optimize for WiFi mode”-ot, vagy jelölje ki a „Optimize for performance mode”-ot.
Megjegyzés:
F. A telepítővarázsló kéri majd, hogy folytassák a telepítést. A telepítés folytatásához kattintson az
G. Amikor a telepítés befejeződött, a telepítővarázsló bezárásához kattintson a „Finish”-re.
A 802.11N vezeték nélküli, hálózati ügyfél hardverjének telepítésével kapcsolatban lapozzon a 3.
fejezethez.
A D. és E. lépés kizárólag a Windows XP-re vonatkozik!
csatlakoztatáshoz, vagy jelölje ki a „Microsoft Zero Configuration Tool”-t, ha a Microsoft vezeték
nélküli konfigurációs szoftverjét akarja használni. A folytatáshoz kattintson a „Next”-re.
A folytatáshoz kattintson a „Next”-re.
Ha az „Optimize for performance mode”-ot jelölte ki, a kártya TX-Burst opciója lesz az
engedélyezett. Ennek segítségével lehet ugyanis a nagyobb adatátviteli sebességet
biztosítani a vezeték nélküli hálózaton, de — ahhoz, hogy ennek a funkciónak az előnyét
kihasználhassák — az adott elérési pontnak TX-Burst opcióval is rendelkeznie kell.
„Install”-ra. A telepítővarázsló ezután a számítógépre telepíti az illesztőprogramokat és a szoftvert.
Várjon, amíg a telepítővarázsló nem végzett a telepítéssel.
58
Page 59

MAGYAR
3. A hardver telepítése
Ha a 802.11N ügyfélhez tartozó szoftver már telepítődött, a hardver telepítésével folytathatja.
Conceptronic C300EXi – PCI-Express kártya
A. Kapcsolja ki a számítógépet, majd húzza ki a számítógép kábelét a váltakozó áramú
falicsatlakozóból.
B. A hátlapon lévő csavarok eltávolításával nyissa fel a számítógép készülékházát, majd vegye ki a
panelt.
C. Keressen szabad PCI-Express kártyatartóhelyet, majd távolítsa el a védőlemezt a számítógép
készülékházáról.
D. Óvatosan tegye be a C300EXi-t a szabad PCI-Express kártyatartóhelyre, majd rögzítse csavar
segítségével a számítógép készülékházán.
E. Csukja vissza a számítógép készülékházát, majd szerelje fel a 3 antennát a C300EXi-re.
F. Kapcsolja be a számítógépet.
A Windows automatikusan érzékeli az új hardvert, illetve telepíti az illesztőprogramokat.
Conceptronic C300EXC – PC-Express kártya
A. A notebook újraindítása után tegye be a C300EXC-t a notebook valamelyik szabad PC-Express
kártyabővítő helyére.
A Windows automatikusan érzékeli az új hardvert, majd telepíti az illesztőprogramokat.
59
Page 60

MAGYAR
4. Csatlakoztatás vezeték nélküli hálózathoz
Ha a hardvert a számítógép már telepítette, a vezeték nélküli, hálózati ügyfél használatkész.
A tálcán aktív Wireless (vezeték nélküli) segédprogram jelenik meg:
• Duplán kattintson a Conceptronic Wireless segédprogramjának a tálcaikonjára.
A Conceptronic Wireless segédprogramja a következőképpen jelenik meg:
A Conceptronic Wireless segédprogramja megjeleníti az azon a területen elérhető összes, vezeték nélküli
hálózatot, ahol a számítógép található. Ha saját, vezeték nélküli hálózata nem látható, a hálózatok újbóli
letapogatásához rákattinthat a „Rescan”-re.
• Kattintson a hálózatokat tartalmazó listán arra a hálózatra, amelyhez csatlakozni kíván.
• Kattintson a „Connect”-re (Windows XP
), illetve az „Add to Profile”-ra (Windows Vista).
60
Page 61

MAGYAR
A Wireless segédprogram automatikusan érzékeli, milyen biztonsági szintet alkalmaznak az adott, vezeték
nélküli hálózat esetében.
Nem biztonságos hálózat:
Ha az adott, vezeték nélküli hálózat nem biztonságos, a Wireless segédprogram kapcsolatot alakít ki a
saját, vezeték nélküli hálózattal.
Megjegyzés: Ha éppen saját hálózatához csatlakozik és az nem biztonságos, azt tanácsoljuk, hogy — a
hálózathoz való jogosulatlan hozzáférés megelőzése érdekében — a biztonságot is biztosítsa
saját hálózata számára.
Arra vonatkozólag, hogy hogyan kell a hálózat biztonságát beállítania, lásd az adott,
vezeték nélküli útválasztó/elérési pont dokumentációját.
Biztonságos hálózat:
Ha az adott, vezeték nélküli hálózat biztonságos, a Wireless segédprogram kéri a titkosítási kulcsot vagy a
jelmondatot attól függően, hogy milyen a vezeték nélküli hálózat konfigurált biztonsági szintje:
• Ellenőrizze, hogy vajon az észlelt hitelesítési típus, illetve titkosítás megfelel-e az adott, vezeték
nélküli hálózat biztonságának.
• Írja be a jelmondatot a „WPA Preshared Key” mezőbe, ha éppen WPA-biztonságot alkalmaz, illetve
írja be a WEP titkosítási kulcsot a „Wep Key” mezőbe, ha éppen WEP-biztonságot alkalmaz.
• A kijelölt, vezeték nélküli hálózathoz való csatlakoztatás érdekében pedig kattintson az „OK”-ra.
Megjegyzés: Amennyiben éppen Windows Vistát használ, kattintson az „Activate” gombra a Wireless
segédprogram főablakában, ha csatlakozni kíván a vezeték nélküli hálózathoz.
Innentől fogva rá van csatlakozva a vezeték nélküli hálózatra. A Wireless segédprogram a jelerősséget a
tálcán jelzi:
61
Page 62

MAGYAR
5. WPS — Vezeték nélküli, védett konfiguráció
A Conceptronic 802.11N ügyfelek támogatják a WPS-t (Wi-Fi-vel védett konfiguráció). A WPS egyfajta
standardnak számít a vezeték nélküli hálózatok könnyű biztosítása szempontjából. A WPS segítségével
anélkül védheti csupán néhány könnyű lépés végrehajtásával saját, vezeték nélküli hálózatát, hogy
különböző titkosítási opciók ismeretével kellene rendelkeznie.
Megjegyzés:
5.1 WPS — Nyomógombos csatlakoztatás
• Nyomja meg a WPS gombot az útválasztón vagy elérési ponton, hogy a WPS-kapcsolatot
engedélyezhesse.
• Nyomja meg és tartsa lenyomva a WPS gombot mintegy 5 mp-ig a 802.11N ügyfélen.
Megjegyzés:
Ahhoz, hogy a WPS a 802.11N ügyféllel együtt alkalmazható legyen, a WPS-t támogató
útválasztóra vagy elérési pontra van szükség.
Ha C30EXi-ről van szó (PCi-Express kártya), a gomb az antenna közelében található a
hátlapon. Ha C300EXC-ről van szó (PC-Express kártya), a gomb a kártya tetején helyezkedik
el.
C300EXi
C300EXC
A Wireless segédprogram a gomb segítségével indítható, amely így majd megpróbálkozik a vezeték nélküli
hálózathoz történő csatlakoztatással. Ha a Wireless segédprogram főablaka látszik a képernyőn, akkor az
ablak alján a WPS-tevékenység látható:
Amikor a kapcsolat létrejött, „WPS status is connected successfully” üzenet jelenik meg:
Innentől fogva rá van csatlakozva a vezeték nélküli hálózatra. A Wireless segédprogram a jelerősséget a
tálcán jelzi:
62
Page 63

MAGYAR
5.2 WPS — PIN-kódos csatlakoztatás
Ha az adott útválasztónak vagy elérési pontnak nincs nyomógombja, PIN-kódos WPS-sel is rácsatlakozhat.
A Wireless segédprogram „Enrollee”, illetve „Registrar” üzemmódban működhet:
- Ha az „Enrollee” van kijelölve, a Wireless segédprogram generál egy PIN-kódot, amelyet be
kell írni az útválasztó vagy az elérési pont WPS-konfigurálásakor.
- Ha a „Registrar” üzemmódot jelölték ki, beírhat egy PIN-kódot a Wireless segédprogramba.
Erre az üzemmódra akkor van szükség, ha az útválasztó vagy az elérési pont olyan PIN-kódot
Aktiválja a PIN-es WPS-kapcsolatot az adott útválasztón vagy elérési ponton.
Jelölje ki a megfelelő „Config Mode”-ot a Wireless segédprogramban a fentieknek megfelelően.
Kattintson a „PIN” gombra a Wireless segédprogramban.
Ezután a WPS-aktivitás látható az ablak alján:
Amikor a kapcsolat létrejött, „WPS status is connected successfully” üzenet jelenik meg:
Innentől fogva rá van csatlakozva van a vezeték nélküli hálózatra. A Wireless segédprogram a jelerősséget
a tálcán jelzi:
kínál, amelyet a vezeték nélküli csatlakoztatáshoz kell használni.
63
Page 64

MAGYAR
6. A Windows Zero Configuration eszköze
A Conceptronic 802.11N ügyfelek a Windows Zero Configuration eszközével is kezelhetők, amely egyébként
a Windows XP-nek standard, a vezeték nélküli konfigurációt szolgáló segédprogramja.
Megjegyzés:
A vezeték nélküli Zero Configuration kétféleképpen engedélyezhető:
- Az illesztőprogramok és a szoftver telepítése során a „Microsoft Zero Configuration Tool”
kijelölésével.
- Az egér jobb oldali gombjával a Conceptronic Wireless segédprogramjának az ikonjára történő
rákattintással a tálcán, majd a „Use Zero Configuration as Configuration Utility” kijelölésével.
A vezeték nélküli Zero Configuration hozzáférhető, ha duplán rákattint az adott hálózati kártya vezeték
nélküli ikonjára:
A vezeték nélküli Zero Configuration (konfiguráció nélküli) eszköz csak akkor használható,
ha Windows XP-t alkalmaznak. Windows Vista esetén a Conceptronic Wireless
segédprogramját kell igénybe venni.
A vezeték nélküli Zero Configuration ablak jelenik meg a képernyőn.
Megjegyzés:
A vezeték nélküli Zero Configuration eszközzel és az opciókkal kapcsolatos további
tájékozódás végett lásd a Windows XP kézikönyvét.
Kívánjuk, hogy örömmel használja a Conceptronic 802.11N vezeték
nélküli ügyfelét!
64
Page 65

TÜRKÇE
Conceptronic C300EXi / C300EXC
Kullanıcı Kılavuzu
Conceptronic 802.11N Kablosuz Ağ İstemcisi
Satın Aldığınız İçin Tebrikler.
Elinizdeki Kullanıcı Kılavuzu, Conceptronic 802.11N Kablosuz Ağ İstemcisi kurulumunun bilgisayarınıza adım
adım nasıl yapılacağı konusunda bilgi vermektedir.
Problem ortaya çıkması halinde, destek sitemize gitmenizi (www.conceptronic.net
‘Support’ bölümüne tıklayın) tavsiye ederiz. Burada Sıkça Sorulan Sorular Veritabanını bulacaksınız.
Ürününüzle ilgili başka sorularınız varsa ve bunların yanıtlarını web sitemizde bulamıyorsanız, bize e-posta
ile ulaşın: support@conceptronic.net
Conceptronic ürünleri ile ilgili daha fazla bilgi için, lütfen Conceptronic Web Sitesini ziyaret edin:
www.conceptronic.net
Aşağıda açıklanan yazılım yüklemesi bilgisayarınızdaki yüklemeden biraz daha farklı olabilir. Bu durum
kullandığınız Windows sürümüne bağlıdır.
1. Paket İçeriği
Conceptronic 802.11N İstemci paketinin içeriği aşağıdaki gibidir:
(Satın alınan 11N İstemcisine bağlı olarak)
Conceptronic C300EXi
* 3x Anten
* Ürün CD-ROM’u
* Çok dilli Kullanıcı Kılavuzu
Ya da
Conceptronic C300EXC
* Ürün CD-ROM’u
* Çok dilli Kullanıcı Kılavuzu
* Conceptronic 802.11N PCI-Express Kart
* Conceptronic 802.11N PCI-Express Kart
adresine gidin ve
65
Page 66

TÜRKÇE
2. Sürücü ve Yazılım Kurulumu
Not:
Kartı takmadan önce Sürücü ve Yazılımı kurmanız gerekir!
A. CD-ROM’u CD-ROM Sürücüsüne yerleştirin. Otomatik çalıştırma menüsü ekrana gelmelidir. Otomatik
çalıştırma menüsü ekrana gelmezse “My Computer (Bilgisayarım)” simgesinden CD-ROM sürücü
üzerine çift tıklayarak Otomatik çalıştırma menüsünü çalıştırın.
B. Otomatik çalıştırma menüsünden “Install Drivers & Software (Sürücüleri ve Yazılımı Kur)”
seçeneğini seçin. Kurulum Sihirbazı ekrana gelir.
C. Devam etmek için “Next (İleri)”ye tıklayın.
Not:
D ve E adımları sadece Windows XP içindir!
D. Bağlantı için Conceptronic yazılımını kullanmak isterseniz “Conceptronic Configuration Tool
(Conceptronic Yapılandırma Aracı)” ya da Microsoft kablosuz yapılandırma yazılımını kullanmak
isterseniz “Microsoft Zero Configuration Tool (Microsoft Sıfır Yapılandırma Aracı)” seçeneğini
seçin. Devam etmek için “Next (İleri)”ye tıklayın.
E. “Optimize for WiFi mode (WiFi modu için en iyi duruma getir)” ya da “Optimize for performance
mode (Performans modu için en iyi duruma getir)” seçeneğini seçin. Devam etmek için “Next
(İleri)”ye tıklayın.
Not:
“Optimize for performance mode (Performans modu için en iyi duruma getir)” seçeneğini
seçtiğinizde, kartın TX-Burst seçeneği etkinleştirilecektir. Bu da kablosuz ağınızda daha yüksek
transfer hızlarına izin verecektir, ancak bu özellikten yararlanmak için erişim noktanızın da TXBurst seçeneğine sahip olması gerekir.
F. Kurulum Sihirbazı kuruluma devam etmenizi isteyecektir. Kuruluma devam etmek için “Install
(Kur)”a tıklayın. Kurulum Sihirbazı bilgisayarınıza sürücüleri ve yazılımı kuracaktır. Kurulum
Sihirbazının kurulumu bitirmesini bekleyin.
G. Kurulum işlemi tamamlandığında, Kurulum Sihirbazından çıkmak için “Finish (Son)”a tıklayın.
802.11N Kablosuz Ağ İstemcinizin Donanım Kurulumu için Bölüm 3’e ilerleyin.
66
Page 67

TÜRKÇE
3. Donanım Kurulumu
802.11N İstemcinizin yazılımı yüklendikten sonra kuruluma donanım kurulumu ile devam edebilirsiniz.
Conceptronic C300EXi – PCI-Express Kart
A. Bilgisayarınızı kapatın ve bilgisayarın AC priz ile bağlantısını kesin.
B. Bilgisayarın arkasındaki vidaları sökerek bilgisayar kasasını açın ve paneli çıkarın.
C. Boş bir PCI-Express yuva bulun ve bilgisayar kasasından koruyucu plakayı çıkarın.
D. C300EXi kartını yavaşça boş PCI-Express yuvasına yerleştirin ve kartı bir vida ile bilgisayar kasasına
sabitleyin.
E. Bilgisayar kasasını kapatın ve 3 adet anteni C300EXi kartına monte edin.
F. Bilgisayarınızı açın.
Windows yeni donanımı algılayacak ve otomatik olarak sürücüleri yükleyecektir.
Conceptronic C300EXC – PC-Express Kart
A. Dizüstü bilgisayarınızı yeniden başlattıktan sonra C300EXC kartını dizüstü bilgisayarınızın boş bir PC-
Express Kart yuvasına yerleştirin.
Windows yeni donanımı algılayacak ve otomatik olarak sürücüleri yükleyecektir.
67
Page 68

TÜRKÇE
4. Kablosuz Ağ Bağlantısı
Bilgisayar tarafından donanım kurulumu yapıldıktan sonra Kablosuz Ağ istemcisi kullanıma hazırdır.
Sistem tepsisinde aktif halde bir Kablosuz Hizmet Programı göreceksiniz:
• Conceptronic Kablosuz Hizmet Programının sistem tepsisindeki simgesine çift tıklayın.
Conceptronic Kablosuz Hizmet Programı açıldığında aşağıda gösterilen pencere ekrana gelecektir:
Conceptronic Kablosuz Hizmet Programı bilgisayarınızın bulunduğu alandaki tüm kablosuz ağları
gösterecektir. Kablosuz ağınız görüntülenmiyorsa, yeniden ağ taratmak için “Rescan (Yeniden tara)”ya
tıklayabilirsiniz.
• Ağ listesinden bağlanmak istediğiniz ağ üzerine tıklayın.
• “Connect (Bağlan)” (Windows XP) ya da “Add to Profile (Profile Ekle)” (Windows Vista) üzerine
tıklayın.
68
Page 69

TÜRKÇE
Kablosuz Hizmet Programı kablosuz ağınızda hangi güvenlik seviyesinin kullanıldığını otomatik olarak
algılar.
Güvenli Olmayan Ağ:
Kablosuz ağınız güvenli değilse, Kablosuz Hizmet Programı kablosuz ağınızla bir bağlantı kuracaktır.
Not:
Kendi ağınıza bağlanıyorsanız ve ağınız güvenli değilse, ağınıza yetkisiz erişimleri önlemek için ağ
güvenliği eklemenizi tavsiye ederiz.
Ağ güvenliği ayarları için Kablosuz Router/Erişim Noktası dokümantasyonuna bakınız.
Güvenli Ağ:
Kablosuz ağınız güvenli ise, kablosuz ağınızın yapılandırılmış güvenlik seviyesine bağlı olarak Kablosuz
Hizmet Programı tarafından şifreleme anahtarı ya da şifre cümlesi sorulacaktır.
• Algılanan Authentication Type (Kimlik Doğrulama Tipi) ve Encryption (Şifreleme) değerinin kablosuz ağ
güvenliğiniz ile eşleştiğini doğrulayın.
• WPA güvenliğini kullanırken “WPA Preshared Key” alanına şifre cümlesini ya da WEP güvenliğini
kullanırken “Wep Key” alanına WEP şifreleme anahtarını girin.
• Seçilen kablosuz ağa bağlanmak için “OK (Tamam)”a tıklayın.
Not:
Windows Vista kullanırken, kablosuz ağa bağlanmak için Kablosuz Hizmet Programının ana
penceresinde bulunan “Activate (Etkinleştir)” düğmesine tıklayın.
Böylece kablosuz ağa bağlanmış olursunuz. Kablosuz Hizmet Programı, sistem tepsisinde sinyal gücünü
gösterecektir:
69
Page 70

TÜRKÇE
5. WPS - Kablosuz Korumalı Kurulum
Conceptronic 802.11N İstemcileri WPS’i (Kablosuz Korumalı Kurulum) desteklemektedir. WPS, kablosuz
ağınızın güvenliğini sağlayan bir standarttır. WPS ile farklı şifreleme seçeneklerini bilmeksizin birkaç kolay
adımla kablosuz ağınızı koruyabilirsiniz.
Not:
WPS’i 802.11N İstemciniz ile kullanmak için, WPS destekli bir router ya da erişim noktasına sahip
olmanız gerekmektedir.
5.1 WPS – Push Button (Düğme) bağlantısı
• WPS bağlantısını etkinleştirmek için router ya da erişim noktasında bulunan WPS düğmesine basın.
• 802.11N İstemcinizde bulunan WPS düğmesine yaklaşık 5 saniye basılı tutun.
Not:
C300EXi (PCI-Express kart)’ınız varsa düğmenin yeri arka tarafta antenin yanındadır. C300EXC
(PC-Express kart)’ınız varsa düğmenin yeri kartın üzerindedir.
C300EXi
C300EXC
Kablosuz Hizmet Programı düğmeye basıldığında tetiklenecek ve kablosuz ağınıza bağlanmaya çalışacaktır.
Kablosuz Hizmet Programının ana penceresi ekranınızda açıksa pencerenin alt tarafında WPS işlemini
görebilirsiniz:
Bağlantı gerçekleştirildiğinde, “WPS status is connected successfully” mesajı ekrana gelir:
Böylece kablosuz ağa bağlanmış olursunuz. Kablosuz Hizmet Programı sistem tepsisinde sinyal gücünü
gösterecektir:
70
Page 71

TÜRKÇE
5.2 WPS – Pin Kodu bağlantısı
Router ya da erişim noktanız düğmeye sahip değilse bir Pin Kodu ile de WPS bağlantısı yapabilirsiniz.
Kablosuz Hizmet Programı “Enrollee” ya da “Registrar” modunda çalışabilir:
- “Enrollee” seçildiğinde, Kablosuz Hizmet Programı tarafından router ya da erişim noktanızın
WPS yapılandırmasında girilmesi gereken bir Pin Kodu üretilecektir.
- “Registrar” modu seçildiğinde, Kablosuz Hizmet Programında bir Pin Kodu girebilirsiniz. Bu
moda, router ya da erişim noktası, kablosuz bağlantı için kullanılması gereken bir Pin Kodu
Router ya da erişim noktanızda PIN WPS bağlantısını etkinleştirin.
Kablosuz Hizmet Programında yukarıdaki bilgilere göre doğru “Config Mode (Yapılandırma Modu)”nu
seçin.
Kablosuz Hizmet Programında “PIN” düğmesine tıklayın.
Pencerenin altında yer alan WPS işlemine bakabilirsiniz:
Bağlantı gerçekleştirildiğinde, “WPS status is connected successfully” mesajı ekrana gelir:
Böylece kablosuz ağa bağlanmış olursunuz. Kablosuz Hizmet Programı sistem tepsisinde sinyal gücünü
gösterecektir:
sağladığında ihtiyaç duyulmaktadır.
71
Page 72

TÜRKÇE
6. Windows Sıfır Yapılandırma Aracı
Conceptronic 802.11N İstemciler Windows XP’nin standart kablosuz yapılandırma programı olan Windows
Sıfır Yapılandırma Aracı ile de yönetilebilir.
Windows XP kullanırken sadece Kablosuz Sıfır Yapılandırma Aracını kullanmak mümkündür.
Not:
Windows Vista’da Conceptronic Kablosuz Hizmet Programını kullanmanız gerekir.
Kablosuz Sıfır Yapılandırmasını 2 farklı şekilde etkinleştirebilirsiniz:
- Sürücülerin ve yazılımın kurulumu sırasında “Microsoft Zero Configuration Tool (Microsoft Sıfır
Yapılandırma Aracı)”nı seçin.
- Sistem tepsisindeki Conceptronic Kablosuz Hizmet Programı simgesine sağ tıklayın ve “Use Zero
Configuration as Configuration Utility (Yapılandırma Programı olarak Sıfır Yapılandırmayı Kullan)”
seçeneğini seçin.
Kablosuz Sıfır Yapılandırmasına ağ kartınızı
n kablosuz simgesine çift tıklayarak erişebilirsiniz:
Ekranınızda Kablosuz Sıfır Yapılandırma penceresi görünecektir.
Not:
Kablosuz Sıfır Yapılandırma aracı ve seçenekler hakkında daha fazla bilgi için Windows XP
kılavuzuna bakabilirsiniz.
Conceptronic 802.11N Kablosuz İstemci kullanmanın keyfini çıkarın !
72
 Loading...