

Page 1
INSTALLATION &
OPERATION
MANUAL
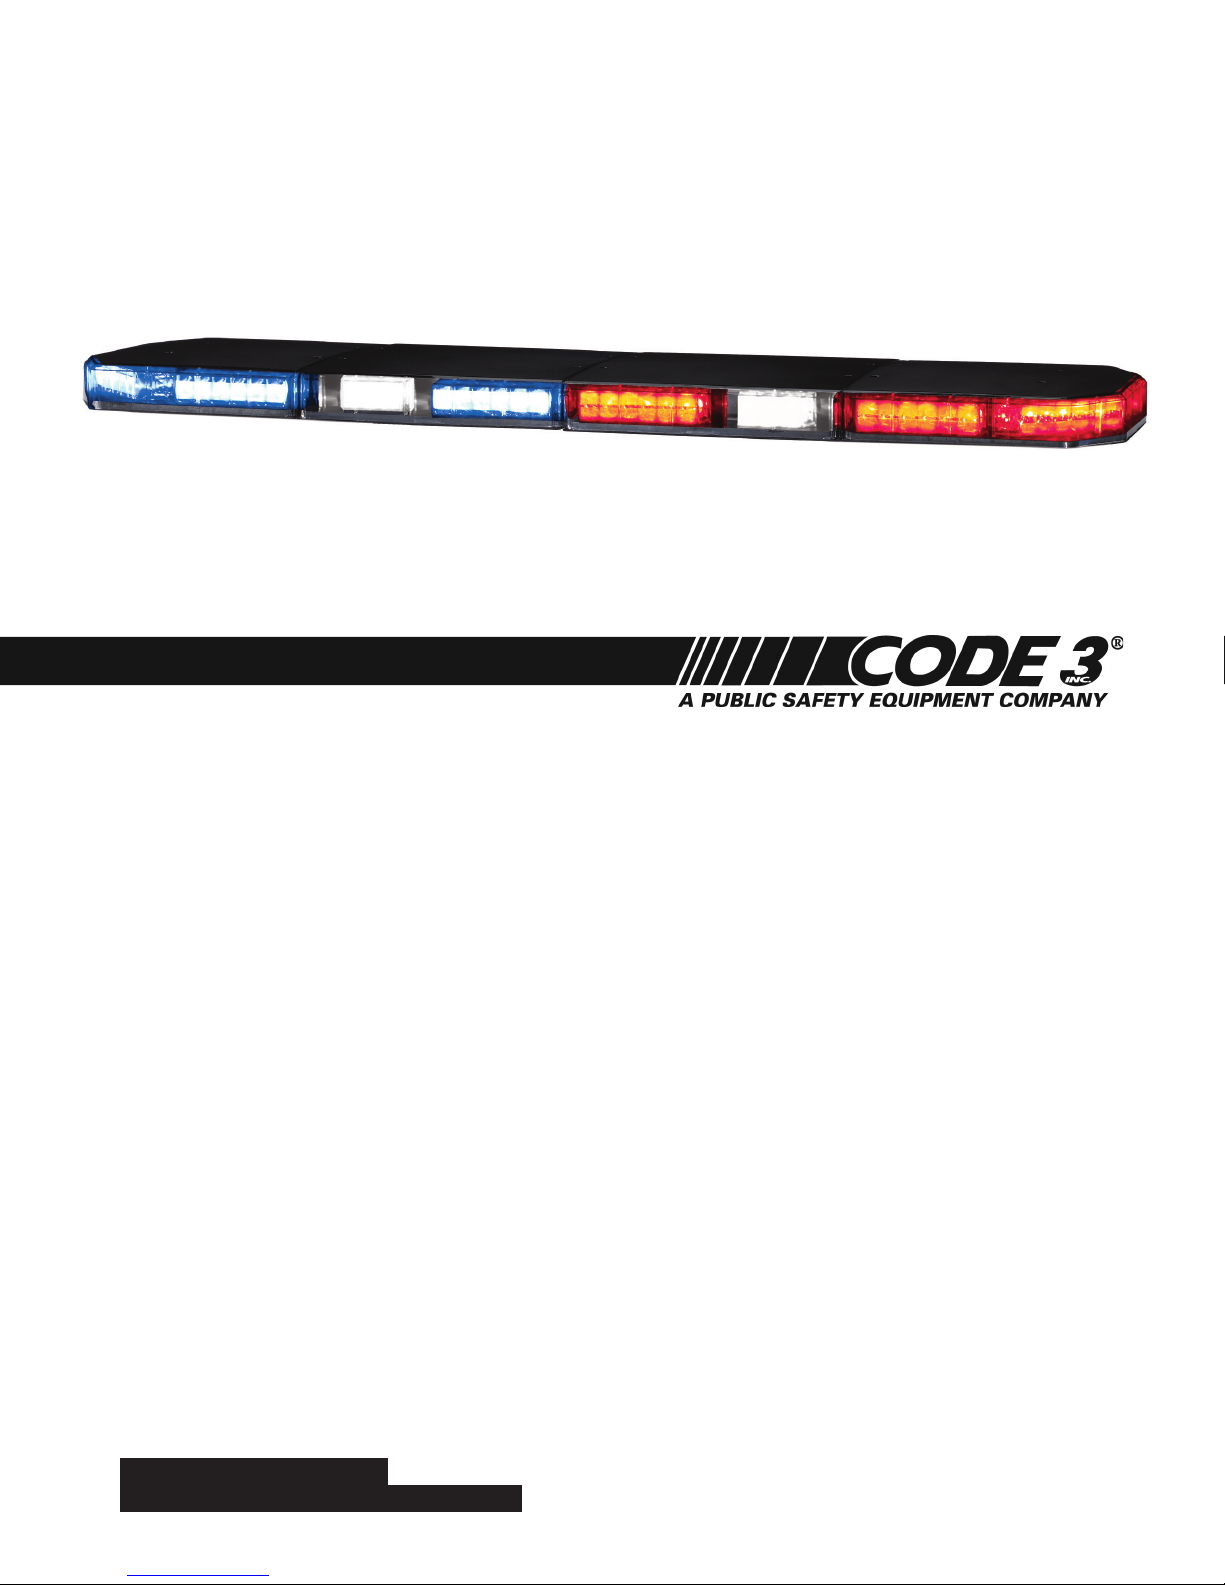
FOR DEFENDER™ TRICORE™
LIGHTBAR
DEFENDER™
LIGHTBAR
WITH TRICORE™ TECHNOLOGY
U.S. Patent Nos. 7,153,015 and 7,300,175
CONTENTS:
Introduction............................................................................................2
Unpacking & Pre-Installation...................................................................3
Installation & Mounting............................................................................3
Wiring Instructions...............................................................................3
Options & Specications......................................................................3-4
Flash Pattern Selection......................................................................4-7
Maintenance.......................................................................................8
Exploded View/Parts List.............................................................................8-9
Troubleshooting...............................................................................10
Notes...............................................................................10-11
Warranty/Returns................................................................................12
For future reference record your lightbar's serial no. here __________________________________________
Read all instructions and warnings before installing and using.
IMPORTANT:
INSTALLER: This manual must be delivered to the end user of this equipment.
1
Page 2
Introduction
The DEFENDER™ (Patent-Pending) Lightbar Features the truly unique, TriCore™ (Patent-Pending) Technology which constitutes a
quantum leap forward in signal brightness---far exceeding the intensity and quality of any system. Unlike traditional LED Lightbars that
drop off at key angles, TriCore maintains it's astonishing visibility a full 360 degrees. TriCore is also designed so that brightness won't
fade. Watt for Watt, TriCore is the most efcient emergency warning light ever made.
The DEFENDER is approximately 2.2" high, yet delivers 360° of unobstructed warning signal. The low prole and aerodynamic lines
reduce air drag, which results in fuel savings and stability at high speeds. The DEFENDER lightbar also has an extruded internal
frame that is 2X stronger, shock-resistant polycarbonate lenses with an intermolded solar barrier, a modular lens design that enables
almost any lightbar length which can be created from 3 lens lengths, and warning signals that exceed SAE standards.
The use of this or any warning device does not ensure that all drivers can or will observe or react to an
emergency warning signal. Never take the right-of-way for granted. It is your responsibility to be sure
you can proceed safely before entering an intersection, driving against trafc, responding at a high rate of
speed, or walking on or around trafc lanes.
The effectiveness of this warning device is highly dependent upon correct mounting and wiring. Read and
follow the manufacturer’s instructions before installing or using this device. The vehicle operator should
insure daily that all features of the device operate correctly. In use, the vehicle operator should insure the
projection of the warning signal is not blocked by vehicle components (i.e.: open trunks or compartment
doors), people, vehicles, or other obstructions.
This equipment is intended for use by authorized personnel only. It is the user’s responsibility to
understand and obey all laws regarding emergency warning devices. The user should check all
applicable city, state and federal laws and regulations.
Code 3, Inc., assumes no liability for any loss resulting from the use of this warning device.
WARNING!
Proper installation is vital to the performance of this warning device and the safe operation of the
emergency vehicle. It is important to recognize that the operator of the emergency vehicle is under
psychological and physiological stress caused by the emergency situation. The warning device should
be installed in such a manner as to: A) Not reduce the output performance of the system, B) Place the
controls within convenient reach of the operator so that he can operate the system without losing eye
contact with the roadway.
Emergency warning devices often require high electrical voltages and/or currents. Properly protect and
use caution around live electrical connections. Grounding or shorting of electrical connections can cause
high current arcing, which can cause personal injury and/or severe vehicle damage, including re.
PROPER INSTALLATION COMBINED WITH OPERATOR TRAINING IN THE PROPER USE OF
EMERGENCY WARNING DEVICES IS ESSENTIAL TO INSURE THE SAFETY OF EMERGENCY
PERSONNEL AND THE PUBLIC.
Wiring Instructions (Read Carefully Before Installation)
2
Page 3

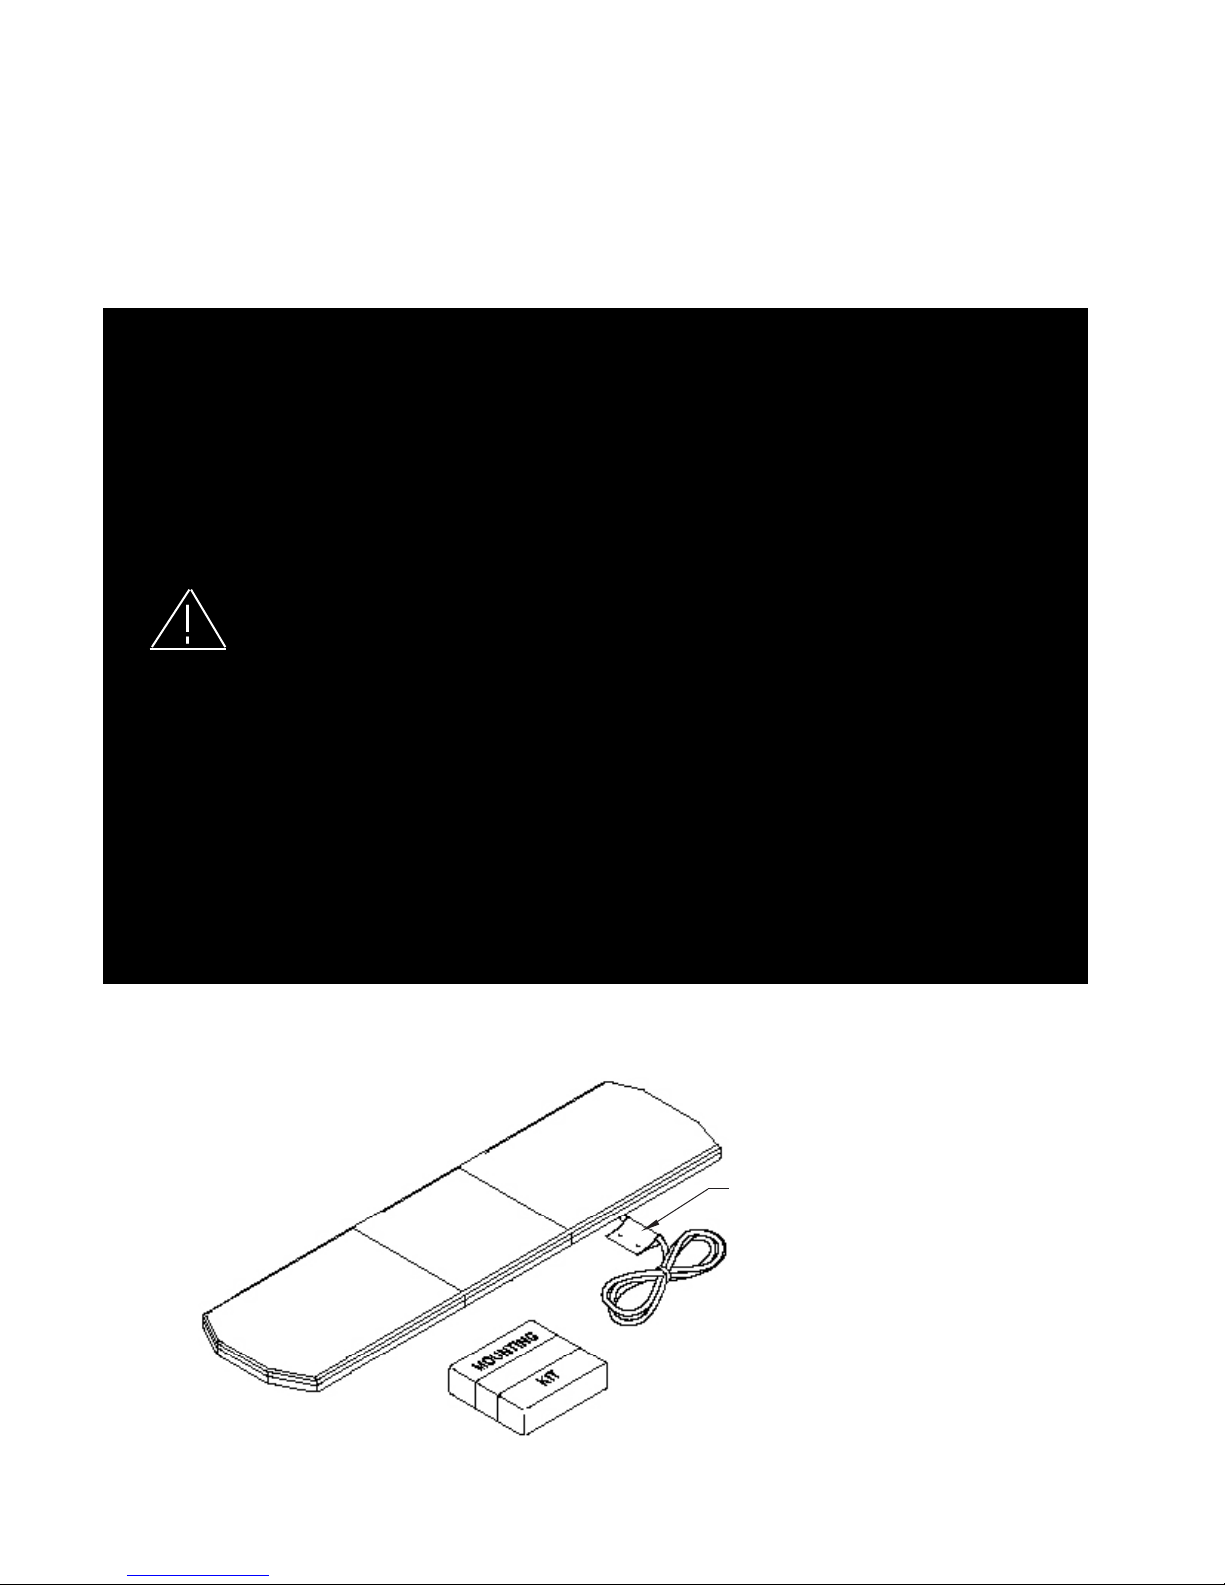
Unpacking & Pre-Installation
Carefully remove the lightbar and place it on a at surface, taking care not to scratch the lenses or damage the cable coming out of
the bottom. Examine the unit for transit damage, broken lamps, etc. Report any damage to the carrier and keep the shipping carton.
Standard lightbars are built to operate on 12 volt D.C. negative ground (earth) vehicles. If you have an electrical system other than 12
volt D.C. negative ground (earth), and have not ordered a specially wired lightbar, contact the factory for instructions.
Test the unit before installation. To test, touch the black wire to the ground (earth) and the other wires to +12 volts D.C., in accordance
with the instructions attached to the cable (an automotive battery is preferable for this test). A battery charger may be used, but note
that some electronic options (ashers, etc.) may not operate normally when powered by a battery charger. If problems occur at this
point, contact the factory.
Utilizing non-factory supplied screws and/or mounting brackets and/or the improper number of
screws or modifying the supplied parts may result in loss of warranty coverage on the equipment.
WARNING!
Installation & Mounting
MOUNTING HARDWARE - Mounting hardware is usually packed in a small box inside the main carton although some mounting kits
may be shipped separately. Refer to the Installation Manual included in the mounting kit for mounting instructions. Note: Hook-on
mounting for "gutterless" type vehicles will require a special hook for mounting. Several special application hooks are available. Contact the factory for details.
Wiring Instructions
Before attempting to connect wiring, refer to wire tag attached to the lightbar's main cable. Each wire in the cable controls a separate
function of the Central Controller as described in the wire tag.
The DEFENDER provides an ArrowStik function as a standard feature. Connect the appropriate control wires to any control switch
capable of providing +power at approximately 25ma current. As noted in the wire description, connecting both the LEFT Arrow and
RIGHT Arrow wire to +power at the same time enables the Center-Out ArrowStik function.
Larger wires and tight connections will provide longer service life for components. For high current wires it
is highly recommended that terminal blocks or soldered connections be used with shrink tubing to protect
the connections. Do not use insulation displacement connectors (e.g. 3M® Scotchlock type connectors).
Route wiring using grommets and sealant when passing through compartment walls. Minimize the number
of splices to reduce voltage drop. High ambient temperatures (e.g. underhood) will signicantly reduce the
current carrying capacity of wires, fuses, and circuit breakers. Use "SXL" type wire in engine compartment.
All wiring should conform to the minimum wire size and other recommendations of the manufacturer and
be protected from moving parts and hot surfaces. Looms, grommets, cable ties, and similar installation
hardware should be used to anchor and protect all wiring. Fuses or circuit breakers should be located
WARNING!
as close to the power takeoff points as possible and properly sized to protect the wiring and devices.
Particular attention should be paid to the location and method of making electrical connections and splices
to protect these points from corrosion and loss of conductivity. Ground terminations should only be made
to substantial chassis components, preferably directly to the vehicle battery. The user should install a
fuse sized to approximately 125% of the maximum Amp capacity in the supply line to protect against
short circuits. For example, a 30 Amp fuse should carry a maximum of 24 Amps. DO NOT USE 1/4"
DIAMETER GLASS FUSES AS THEY ARE NOT SUITABLE FOR CONTINUOUS DUTY IN SIZES ABOVE
15 AMPS. Circuit breakers are very sensitive to high temperatures and will "false trip" when mounted in hot
environments or operated close to their capacity.
OPTIONS & SPECIFICATIONS
Many options are available for the DEFENDER. This section is designed to describe the function of the various options.
TRICORE WARNING MODULES
Fusing Considerations
The DEFENDER Lightbar should be installed with an external fuse or circuit breaker in the RED lead of the two conductor 10
AWG power cable. The recommended external fuse size for the lightbar is 30A. The internal circuitry of the Central Controller is
reverse polarity protected. Each TriCore output on the Central Controller board is protected against over current and over heating with automatically resetting output devices.
3
Page 4
Dim Operation
The DEFENDER features a low power "Dimming" mode. Dimming will be controlled by applying +12V by way of the appropriate wire
(Blue) in the wire harness/wire list. When DIM is engaged, the TriCore light heads will operate in a reduced power mode.
Note: The corner mounted TriCore light heads are excepted from this function and will not dim.
Please contact the factory if more information is needed concerning the dimming mode.
The Dim setting reduces the light output of emergency warning lights reducing the effectiveness of
them especially in brightly lit areas. Failure to use adequate light for the circumstances can cause
motorists to fail to see the emergency vehicle and lead to serious personal injury or death. Never
use the DIM setting in a brightly lit area. Use of the DIM setting may cause emergency lights to not
WARNING!
comply with applicable emergency warning light standards. Use caution when using the DIM setting to
assure that motorists can clearly see the emergency vehicle.
LED ArrowStik feature
The DEFENDER has a programmable ArrowStik feature integrated into the light bar that operates independently of the other
features. Refer to the ArrowStik Programming section of this manual for detailed information on pattern selection and
operation instruction.
This Product contains high intensity TriCore devices. To prevent eye damage,
WARNING!
DO NOT stare into light beam at close range.
Selecting Flash Patterns
The Pattern Select wire is the BLK/RED wire in the sixteen conductor lightbar control cable and is activated by momentarily touching
the wire to +power.
STEP 1
Power-up the lightbar and select the Level-1 ash mode by applying +power to the GRN/BLK wire in the 16 conductor control cable.
STEP 2
Observe the ashing pattern operation and determine which pattern is in operation for Level-1. Refer to Table 1. This table shows the
available ash patterns. Note: the Factory Default is different and identied in the table for each of the ash mode Levels (L1, L2, L3).
Once the ash pattern has been determined, proceed to Step 3.
STEP 3
Scroll to the next ash pattern by momentarily holding the Pattern Select wire (BLK/RED) to +power for ~1 sec, until the TriCore light
heads switch ash patterns, and then releasing it. This will step to the next pattern in numbered order as listed in Table 1 for the
selected 3-Level mode. The new pattern is automatically stored each time. Repeat this procedure for Level-2 and Level-3.
Note: All control inputs are +power enabled.
Control Input Function Denitions
Wire Color Function Description
GRN/BLK Level 1 Level 1 Emergency Mode
WHT/BLK Level 2 Level 2 Emergency Mode
RED/BLK Level 3 Level 3 Emergency Mode
ORG/BLK Takedown lights Takedown Lights Steady Burn (overrides Takedown Flash)
BLU/BLK Rear Cut-Off Blacks-Out Rear Facing heads
GRN/WHT Front Cut-Off Blacks-Out Front Facing heads
RED/WHT Right Alley Light Right Alley Steady Burn (overrides Alley Light Flash)
BLK/WHT Left Alley Light Left Alley Steady Burn (overrides Alley Light Flash)
WHT ArrowStik Flash ArrowStik Flash (overrides L1, L2 & L3 for rear of light bar)
BLK/RED** Pattern Select Pattern Select for ArrowStik, L1, L2 & L3, (enables test mode)
BLK Takedown Flash Enables Takedown Lights Wig/Wag Flash
RED* ArrowStik Left Left ArrowStik (overrides L1, L2 & L3 for rear of light bar)
GRN Cruise Lights End heads only (overridden by all other functions)
ORG* ArrowStik Right Right ArrowStik (overrides L1, L2 & L3 for rear of light bar)
BLU Light bar DIM Sets heads to Dim mode
BLU/WHT Alley Light Flash Enables Alley Light Wig/Wag Flash
See "Notes" Next Page
4
Page 5

Notes:
*When the ArrowStik Left and ArrowStik Right wires are both connected to +power, the Center-Out ArrowStik function
is activated.
**When the Pattern Select wire is connected to +power and all other inputs are off, test mode is enabled to exercise all
outputs in sequence until +power is removed from the wire.
The priority for the 3-Level inputs is L3, L2 then L1 in that order. In other words, if power is applied to both the L1 and
L2 inputs, the L2 function will be enabled.
If the lightbar is equipped with Steady Burning TriCore light heads, these heads are enabled with the 3-Level input
wires. The jumper plug must be moved to JP1, JP2 or JP3 to select the 3-Level input which will enable the Steady
Burning TriCore heads, (see Figure 1).
The Steady Burn function for both the Takedown and Alley lights will always override the Wig/Wag Flash function.
The Cruise Light function is mutually exclusive with all other functions. If any other input has +power applied, the
Cruise Lights will be turned off.
The Dim function sets the brightness of the TriCore light heads in both the ArrowStik mode and Emergency Warning
Flash mode.
The Front Cut and Rear Cut functions must be used with the greatest care to ensure that the use of these functions
does not diminish the effectiveness of the Emergency Warning signal.
TABLE 1
Factory Default Lighting Level Flash Pattern Description
L1 L2 L3
Factory Default Level 2 14 1 4 Fast Alternating Quad Flash
15 2 5 Alternating Two Flash
16 3 6 Alternating Single Flash
17 4 7 Fast Picket Fence Quad Flash
18 5 8 Slow Picket Fence Quad Flash
19 6 9 Alternate Quad Flash
20 7 10 Slow Alternating Six Flash
21 8 11 Alternating Six Flash
22 9 12 Variable Rate Even/Odd Flash
23 10 13 Alternating Quad Flash 75 FPM (NFPA)
Factory Default Level 1 1 11 14 Fast Alternating Quad Flash (Rear Only)
2 12 15 Fast Even/Odd Quad Flash (Rear Only)
3 13 16 Alternating Quad Flash (Rear Only)
4 14 17 Slow Alternating Six Flash (Rear Only)
5 15 18 Variable Rate Even/Odd Head Flash (Rear Only)
6 16 19 Flast Alternating Quad Flash (Front Only)
7 17 20 Fast Even/Odd Quad Flash (Front Only)
8 18 21 Alternating Quad Flash (Front Only)
9 19 22 Fast Alternating Six Flash (Front Only)
10 20 23 Variable Rate Even/Odd Head Flash (Front Only)
Factory Default Level 3 11 21 1 Cycle Flash (cycles through multiple ash patterns)
12 22 2 Simultaneous Quad Flash (all Ligtht Heads) 75 FPM (NFPA)
13 23 3 Null Flash (no ashing light Heads - only Steady Burns if equipped)
5
Page 6

Steady Burn Setting
The DEFENDER's Steady Burn feature allows up to two (2) of the light bar's TriCore light heads to be designated to operate in Steady
Burn mode. The Steady Burn TriCore light heads are always connected to connectors P9 & P10.
The Steady Burn outputs are enabled by the 3-Level control inputs. The DEFENDER may be congured so that Steady Burn TriCore light
heads are on when either L1, L2 or L3 are active (JP1 position); when L2 or L3 are active (JP2 position) or just when L3 is active (JP3
position). Simply move the jumper to the appropriate location (JP1, JP2 or JP3). Refer to the detail in Figure 1.
ArrowStik Pattern Selection
Introduction
The DEFENDER is designed to offer user selectable trafc directing signals and trafc warning options.
This allows the greatest exibility when controlling the various DEFENDER congurations available. The end user can match the
desired signal to a particular lightbar conguration whether it is a 5, 6 or 8 lighthead conguration. The lightbar will come from the
factory with the default patterns selected as indicated in Table 2. The default conguration will be for a 6 head system with all building
patterns ( Building 6 HD ). If it is desired to change the pattern in any of the modes ( LEFT, CTR, RIGHT or FLASH ) or if you have
other than a 6 head ystem ( 5 or 8 head ) and you want to optimize the patterns for your particular conguration, then follow the
programming procedure outlined.
6
Page 7

Table 2 - Trafc Directing / Trafc Warning Pattern Options
Mode LEFT CENTER-OUT RIGHT FLASH
1. Building 8HD Building 8HD Building 8HD Quad Fl Even/Odd
2. Building 8HD, 3 Flash Building 8HD, 3 Flash Building 8HD, 3 Flash Left/Right Flash *
3. Traveling Ball 8HD, 3 Flash Traveling Ball 8HD, 3 Flas Traveling Ball 8HD, 3 Flash Quad Fl, Left/Right
4. Build/Collapse 8HD Build/Collapse 8HD Build/Collapse 8HD Traveling Ball Flash
Fctry Dt 5. Building 6HD Building 6HD Building 6HD Standard Flash *
6. Building 6HD, 3 Flash Building 6HD, 3 Flash Building 6HD, 3 Flash Quad Flash Standard
7. Traveling Ball 6HD, 3 Flash Traveling Ball 6HD, 3 Flash Traveling Ball 6HD, 3 Flash Simultaneous Flash *
8. Build/Collapse 6HD Build/Collapse 6HD Build/Collapse 6HD Quad Fl Simultaneous
9. Building 5HD Building 5HD Building 5HD Even/Odd Flash*
10. Building 5HD, 3 Flash Building 5HD, 3 Flash Building 5HD, 3 Flash
11. Traveling Ball 5HD, 3 Flash Traveling Ball 5HD, 3 Flash Traveling Ball 5HD, 3 Flash
12. Build/Collapse 5HD Build/Collapse 5HD Build/Collapse 5HD
Signal options for DEFENDER ArrowStik Control.
Selecting the ArrowStik Pattern
As mentioned previously, the DEFENDER will come from the factory with the ArrowStik patterns set in the default conguration, which
is the Building 6HD conguration. See Table 2 above. The current conguration can be determined by observing the operation of the
ArrowStik unit. Note that FLASH Signal Patterns marked with an Asterisk "*" are available in Fast, Medium or Slow ash rate.
Note: It will be important to observe the operation of the ArrowStik unit during the programming proce-
dure while stepping through the signal options. Signals are available for 5, 6 or 8 head congurations.
Also refer to the trafc directing signal options in Table 2 for the following procedure.
The Pattern Select wire is the BLK/RED wire in the sixteen conductor lightbar control cable and is activated by momentarily touching the
wire to +power.
STEP 1
Power-up the lightbar and select the ArrowStik mode that you wish to program (LEFT, CENTER-OUT, RIGHT or FLASH).
STEP 2
Observe the ArrowStik operation and determine the current mode. Determine what pattern and conguration the control head is currently in, if not in the factory default.
Once the pattern / conguration have been determined, proceed to Step 3.
STEP 3
Refer to Table 2, above. This table shows the available patterns for each mode and their order in program memory. Notice that for the
LEFT, CENTER-OUT and RIGHT positions there are four (4) pattern choices; Building, Building with 3 Flash for the end lights, Traveling
Ball with 3 ash for the end lights and Build/Collapse, three (3) congurations for the number of heads; 5, 6 or 8HD and three (3) speeds;
Fast, Medium and Slow. There are a total of twelve possible selections for each conguration of light heads and then you return to the
top selection, Building 8 HD, Fast. Starting from the rst pattern in Table 2 you can step through each pattern, ( 1-4 ) for an 8HD, ( 5-8
) for a 6HD and ( 9-12 ) for a 5HD conguration, by momentarily holding the Pattern Select wire to +power for 1-2 seconds, until the
Arrowstik TriCore Heads stop, and then releasing. This will step to the next pattern in Table 2 for the selected mode. The new pattern is
automatically stored each time.
Note: HOLD the Pattern Select wire to +POWER source until you are sure Arrowstik pattern has changed (~1 second) before
releasing the wire from the +POWER source. To restore the Factory Default Arrowstik patterns, hold the PGM wire on the
+POWER source for ~four (4) seconds .
When the FLASH function is selected, the same procedure applies as above, but you will notice in Table 2 that the patterns are not
grouped by the number of heads or outputs. These are trafc warning patterns and work equally well for any conguration of TriCore light
heads. There are a total of nine ( 1-9 ) trafc warning patterns available. Flash patterns marked with an asterisk "*" may also be selectable in Fast, Medium or Slow ash rate. When you have programmed the desired pattern for the selected function, proceed to Step 4.
STEP 4
Select another mode and repeat the previous steps until all of the functions are programmed as desired.
7
Page 8

1
2
8
8
9
9
3
4
5
6
10
7
Maintenance
Lens Cleaning
Use plain water and a soft cloth, or Code 3® lens polish and a very soft paper towel or
facial tissue. Plastic scratches easily, as a result, cleaning is recommended only when
necessary (about every six months). Do not subject the lenses to car washes that use
brushes, as these will scratch the lenses.
Lens Removal
With a Phillips screwdriver, remove the (4) #8 X 5/8" Phillips Pan Head Hi-Lo Screws
W Neoprene Washer (See Figure 2). Then gently lift the lens off. When nished care-
fully replace the lens making sure the lens gasket is not misplaced, then replace the
lens mounting screws making sure the neoprene washers are in place.
Light Head Removal
Unplug the TriCore light head's power wire/wires from the light bar's wiring harness.
Then with a 1/4" Hex Bit Driver, remove the #8 X .270" 6 Lobe Hex Washer Head
Screws that attach the light head mounting brackets to the light bar. Note: For front
or rear facing light heads there are (2) screws holding each light head and for
corner light heads there are (6) screws holding the light head. Then remove the
light head (See Figure 3).
DEFENDER - EXPLODED VIEW
FIGURE 2
FIGURE 3
FIGURE 7
8
Page 9

Parts List
(Reference numbers identify items shown in Figure 7)
Ref No. Description Part No.
1 Outboard Upper Lens
Green T51160
Clear T51161
Red T51162
Blue T51163
Amber T51164
2 Center Long Upper Lens
Green T51150
Clear T51151
Red T51152
Blue T51153
Amber T51154
2 Center Short Upper Lens
Green T51140
Clear T51141
Red T51142
Blue T51143
Amber T51144
3 Outboard Lower Plate T51137
4 Center Lower Plate-Long T51136
4 Center Lower Plate-Short T51135
5 Outboard Lower Plate Mtg Brkt T51131
6 Center Lower Plate-Long Mtg Brkt T51130
6 Center Lower Plate-Short Mtg Brkt T51129
7 Lens Mtg Screw W Neprene Washer T51179
8 6-UP TriCore Light head
Red
White
Blue
Amber
Green
9 3-UP TriCore Light head
Red
White
Blue
Amber
Green
10 3-UP Take Down Half Blank T51176
CALL FACTORY
11 PCB, DEFENDER with ArrowStik control T11564
9
Page 10

Any disassembly of any of the TriCore light heads will result in loss of warranty coverage on the
equipment.
WARNING!
Troubleshooting
All DEFENDER Lightbars are thoroughly tested prior to shipment. However, should you encounter a problem during installation or
during the life of the product, follow the guide below for information on repair and troubleshooting. Additional information may be
obtained from the factory technical help line at 314-996-2800.
TRICORE LIGHT HEAD
TROUBLESHOOTING GUIDE
Note: LED light heads must be replaced as a module. There are no user serviceable parts. Warranty is void if module is disassembled
PROBLEM
TriCore Front Module
not operating.
TriCore Corner Module
has one head out.
Cruise Lights do not
operate
QUESTIONS
Are all heads
out in front or in
back, and not just a
single module out?
Yes
No
NA
NA
POSSIBLE CAUSE
a. Front and/or Rear Cut function
powered.
a. Defective module
b. Cable/Connector unplugged
a. Defective module
b. Cable/Connector unplugged
a. No power on Cruise wire
b. Another Central Controller Function
is on.
a. Remove power (turn off) Front
and/or Rear Cut
a. Replace module.
b. Check cable & connector
a. Replace module.
b. Check cable & connector
a. Connect Cruise wire to switch
b. Turn off other functions.
Notes:
SOLUTION
10
Page 11

Notes:
11
Page 12

WARRANTY
This product with TriCore™ Technology was tested and found to be operational at the time of manufacture.
Provided this product is installed and operated in accordance with the manufacturer's recommendations, Code
3®, Inc. warrants all parts and components (with the exception of all incandescent and halogen bulbs) of the
product to be free of defects in material and workmanship for a period of one (1) year and TriCore light heads
for a period of ve (5) years from the date of purchase. This Warranty excludes normal wear & tear. Units
demonstrated to be defective within the warranty period will be repaired or replaced at the factory service
center at no cost. Code 3, Inc. will return the repaired product with transportation cost prepaid. Code 3, Inc.
assumes no liability for expenses incurred in the packaging, handling, and shipping of the product to the Factory
Technical Service Department for repair. For in-warranty product return authorization, questions regarding
product warranty coverage or questions regarding out-of-warranty repair quotes, contact the Factory Technical
Service Department.
The TriCore light heads are sealed as part of the quality control process. This Warranty is void if, in the
judgment of Code 3, Inc. (1) an attempt has been made to break the light head seal or repair the light head,
and/or (2) the product has been used with inappropriate or inadequate wiring or circuit protection, and/or (3)
the product has failed as a result of abuse or unusual use and/or accidents.
CODE 3, INC. SHALL IN NO WAY BE LIABLE FOR ANY OTHER DAMAGES RELATING TO THE
PRODUCT INCLUDING BUT NOT LIMITED TO CONSEQUENTIAL, INCIDENTAL, INDIRECT OR SPECIAL DAMAGES OR LOST PROFITS OR REVENUE; NOR ANY EXPENSES INCURRED IN THE REMOVAL AND/OR RE-INSTALLATION OF PRODUCTS REQUIRING SERVICE AND/OR REPAIR.
EXCEPT AS SET FORTH ABOVE, CODE 3, INC. MAKES NO OTHER EXPRESS OR IMPLIED
WARRANTIES WHATSOEVER, INCLUDING, WITHOUT LIMITATION, WARRANTIES OF FITNESS FOR A
PARTICULAR PURPOSE OR MERCHANTABILITY, WITH RESPECT TO THIS PRODUCT.
PRODUCT RETURNS
If a product must be returned for repair or replacement*, please contact our factory to obtain a Return
Goods Authorization Number (RGA number) before you ship the product to Code 3®, Inc. Write the RGA number
clearly on the package near the mailing label. Be sure you use sufcient packing materials to avoid damage to
the product being returned while in transit.
*Code 3®, Inc. reserves the right to repair or replace at its discretion. Code 3®, Inc. assumes no responsibility or liability for
expenses incurred for the removal and /or reinstallation of products requiring service and/or repair.; nor for the packaging, handling, and
shipping: nor for the handling of products returned to sender after the service has been rendered.
For Technical Support / Service, please call 314-996-2800.
Code 3® is a registered trademark of Code 3, Inc. a subsidiary of Public Safety Equipment, Inc.
12
Code 3®, Inc.
St. Louis, Missouri 63114-2029—USA
Ph. (314) 426-2700 Fax (314) 426-1337
Revision 2, 03/09 - Instruction Book Part No. T51171
2008 Public Safety Equipment, Inc. Printed in USA
10986 N. Warson Road
www.code3pse.com
 Loading...