

Page 1

100775
PAGE 1 OF 4
SERVER.
ASSEMBLY INSTRUCTIONS
COASTER FINE FURNITURE
www.coastercompany.com
REVISION 0 : 08/01/2017
Page 2

ITEM :
PAGE 2 OF 4
ASSEMBLY TIPS :
1. Remove hardware from box and sort by size.
2. Please check to see that all hardware and parts are present prior to start of assembly.
3. Please follow attached instruction in the same sequence as numbered to assure fast & easy assembly.
100775
Warning !
1. Don't attempt to repair or modify parts that are broken or defective. Please contact the store
immediately.
2. This product is for home use only and not intended for commercial establishment.
ASSEMBLY TIME 15 MINUTES
ASSEMBLY INSTRUCTIONS
PARTS IDENTIFICATION:
A
X
STEP 1
SERVER
KNOB WITH SCREW
NOTE : PHILLIPS HEAD SCREW DRIVER IS REQUIRED IN THE ASSEMBLY
PROCESS; HOWEVER, MANUFACTURER DOES NOT PROVIDE THIS ITEM.
1PC
3SETS
A
X
www.coastercompany.com
Page 3
PAGE 3 OF 4
ITEM :
STEP 2
To remove the shelf,unscrew the shelf from shelf support using Phillips head screw driver (NOT INCLUDED)
STEP 3
Adjust the height of shelf support.
STEP 4
Align and fasten shelf support to shelf using screw and fully tighten with Phillips head screw driver
(NOT INCLUDED)
100775
STEP 2
ASSEMBLY INSTRUCTIONS
STEP 3
STEP 4
www.coastercompany.com
Page 4

PAGE 4 OF 4
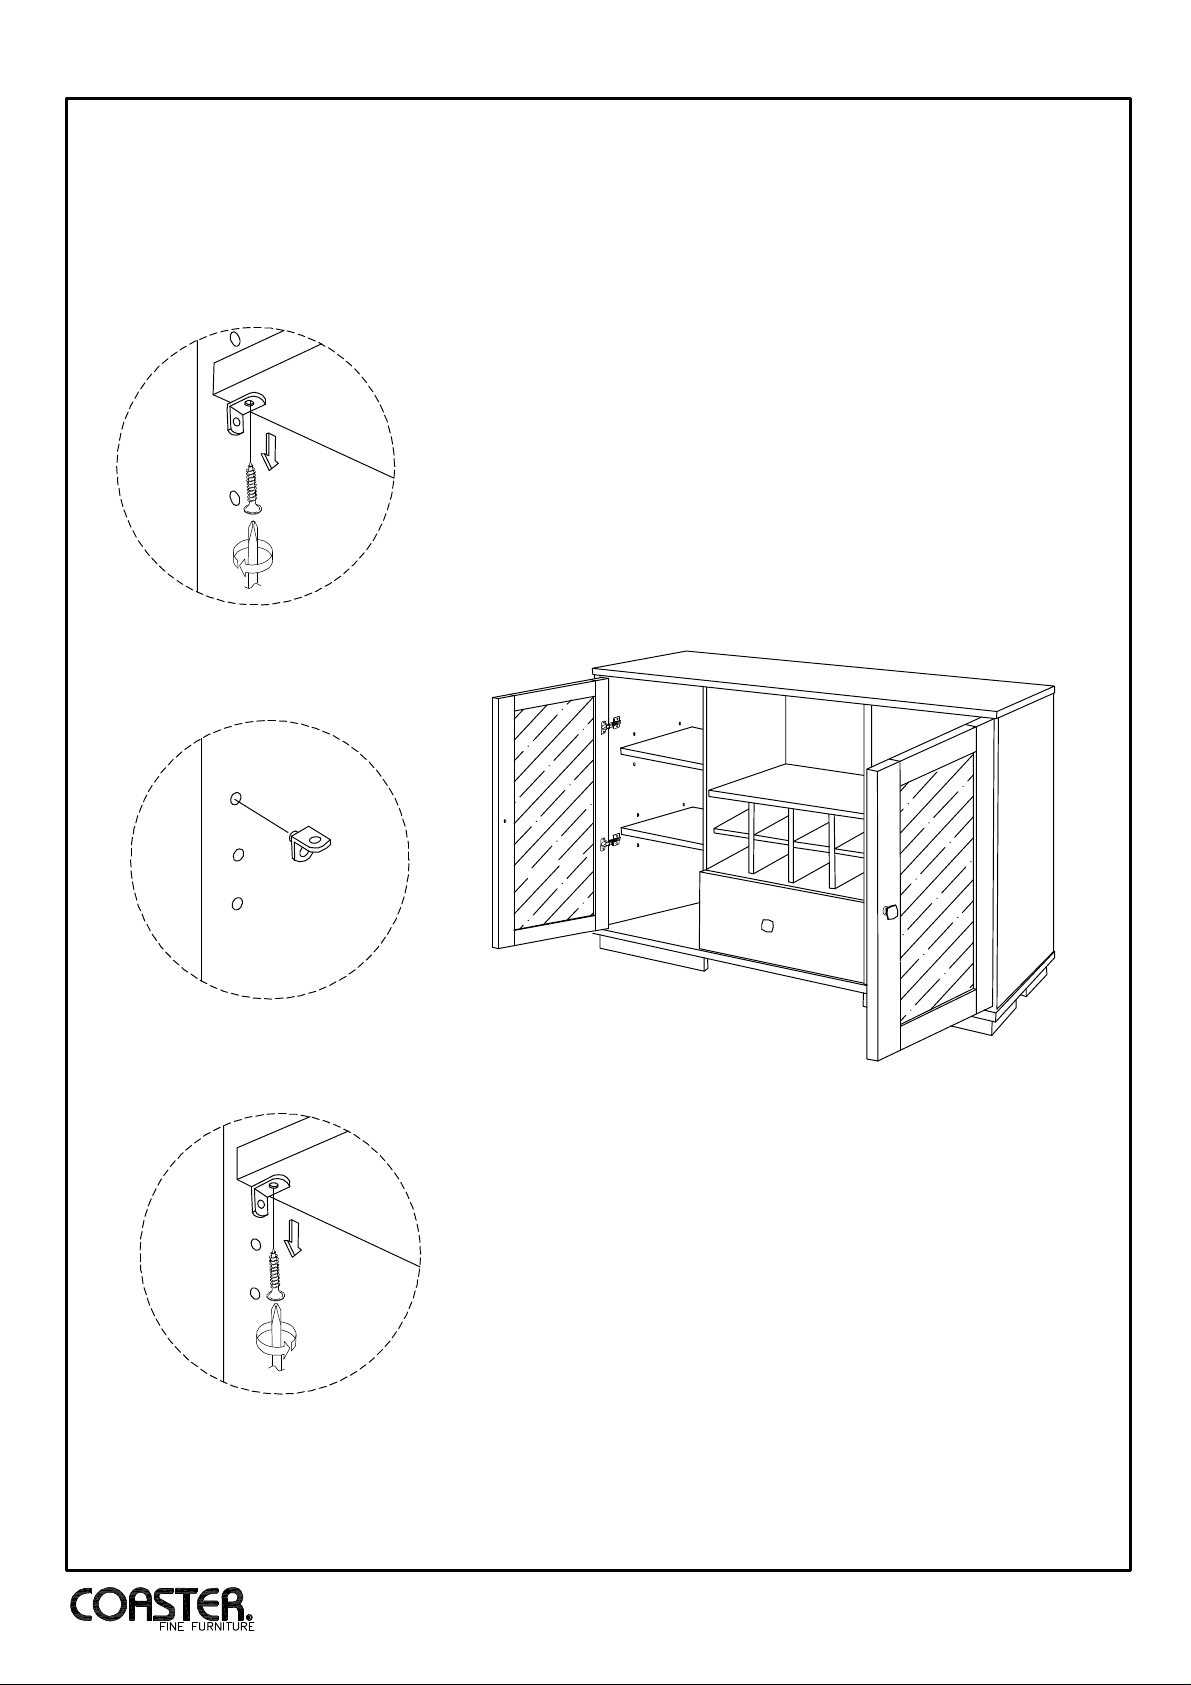
ANTI - TIPPING KIT
PARTS IDENTIFICATION:
A
This tip restraint must be attached to a wall
stud using long screw enclosed.
STEP 1
Attach a bracket securely to the back top rail of the server
using short screw provided, through the smaller hole.
SERVER
1PC
A
4
1
HARDWARE IDENTIFICATION:
1
2
3
4
STEP 2
Locate the other bracket on the wall over a wall stud and two
inches below the mounting bracket secured to the back of
server. Attached to the wall stud using the long screw
provided, through the smaller hole.
4
2
SHORT SCREW
LONG SCREW
CABLE TIE
L BRACKET
WALL
1PC
1PC
1PC
2PCS
STEP 3
Place the server into position so both mounting brackets are vertically in line. Lace the end of the restraint strap through the
larger hole in each mounting bracket. Bring both ends together and slide the flat end through the locking end and draw it
through until all slack is removed. Confirm that the strap is securely laced and locked.
3
WALL
www.coastercompany.com
 Loading...