

Page 1

Model EST-Front Loader
Quick Setup
MODEL EST FRONT LOADER
REAR VIEW
Instructions
WARNING: Electrical and
plumbing connections
need to be made by a
licensed service person
and comply with all
Federal, State and Local
Health, Electrical,
Plumbing and Safety
codes.
1/2" WATER
1
INLET
HARD WIRE
POWER SUPPLY
3
3
TUBE
STIFFENER
CHEMICAL
TUBING
STEP
1
Connect dishmachine to hot water source
recommended 140
minimum temperature required).
PN: 10130.19
temperature (120
STEP
2
8"
WALL
DRAIN
Connect a 2" drain pipe (not supplied)
from scrap accumulator to floor or wall
drain.
2" DRAIN
2
OUTLET
STEP
RED
FLOOR DRAIN
3
BLUE
WHITE
Insert tube stiffener with chemical tubing
into each corresponding chemical
dispenser.
11-2016
Page 2
Model EST-Front Loader
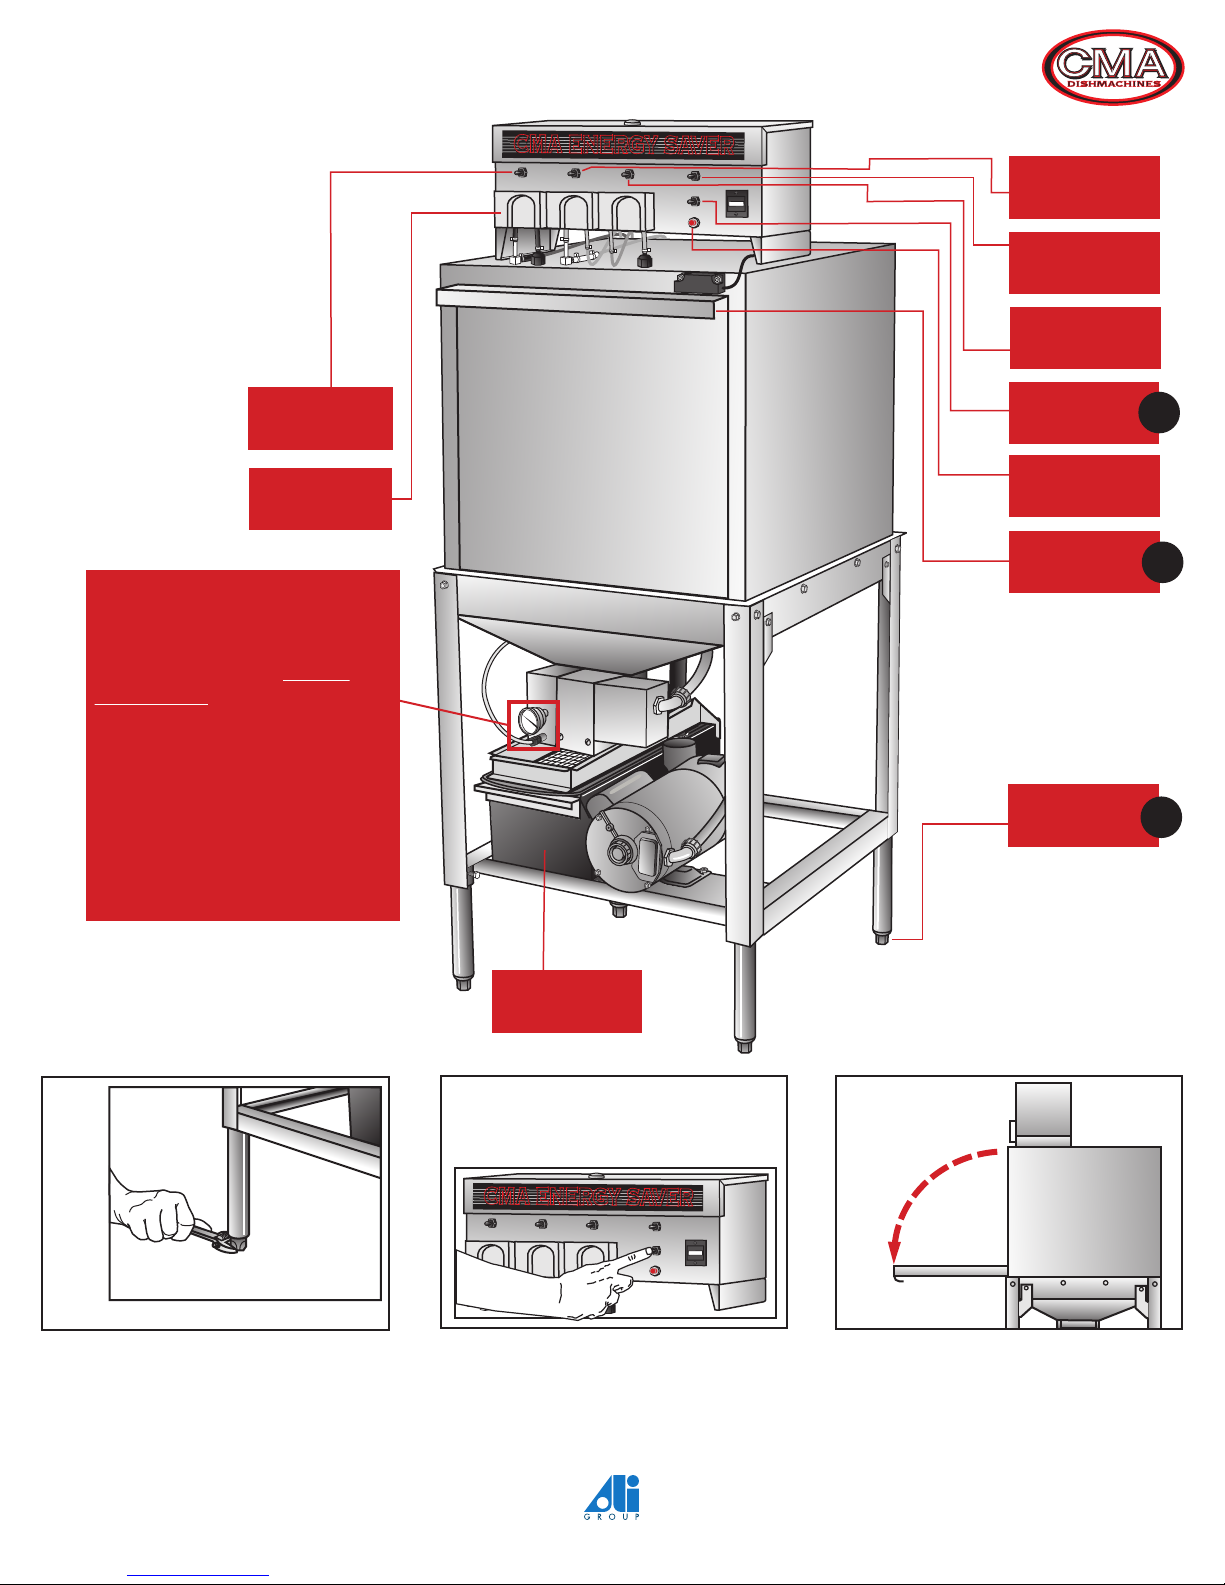
MODEL EST FRONT LOADER
FRONT VIEW
Quick Setup
Instructions
WARNING: Electrical and
plumbing connections
need to be made by a
licensed service person
and comply with all
Federal, State and Local
Health, Electrical,
Plumbing and Safety
codes.
THERMOMETER NEEDS TO
BE INSTALLED:
The Model EST FRONT LOADER
is Shipped from CMA without
thermometer being installed. To
prevent leaking, the installation
Team will need to install it on the
dishwasher using TEFLON TAPE.
So the thermometer for this unit
is not misplaced during shipment,
please find thermometer shipped
inside the dishwasher, zip-tied
to the dishrack.
DETERGENT
SWITCH
PERISTALTIC
PUMP
CMA ENERGY SAVER
CMA ENERGY SAVER
SANI
SWITCH
DRAIN
SWITCH
RINSE
SWITCH
FILL/START
SWITCH
CYCLE LIGHT
DOOR
HANDLE
LEVELING
LEGS
5
6
4
STEP
4
Level dishmachine by adjusting leveling legs.
Dishmachine must be level front and back to
ensure proper performance.
Press the "FILL/START" switch. Hold in the
"FILL" position until the water overflows into
the scrap accumulator.
POLY PROTM SCRAP
ACCUMULATOR
STEP
5
CMA ENERGY SAVER
CMA ENERGY SAVER
an Ali Group Company
The Spirit of Excellence
STEP
6
Open dishmachine doors completely. Closing
the door will automatically activate the
machine.
11-2016
 Loading...