

ClonerAlliance Chert 4KC CA-10804KC User Manual
ClonerAlliance Chert 4KC User Manual

ClonerAlliance Chert 4KC User Manual
This documentation describes how to use ClonerAlliance Chert 4KC (Model: CA-10804KC) device.
Copyright Notice
Copyright © ClonerAlliance® Inc. All rights reserved.
Documentation Version 1.0
No part of this publication may be reproduced, transmitted, transcribed, stored in a retrieval system, or translated into any
language or computer language, in any form or by any means, electronic, mechanical, magnetic, optical, chemical, manual,
or otherwise, without the prior written permission of ClonerAlliance® Inc.
Trademarks
HDML® is a registered trademark of ClonerAlliance® Inc.

Safety Notices
Before using ClonerAlliance Chert 4KC, please ensure that you read and understand the safety precautions below:
1. Do not attempt to open the case of ClonerAlliance Chert 4KC or modify it in any
way, as this will void the warranty.
2. Keep ClonerAlliance Chert 4KC away from water and other liquids, as this may
cause the unit to malfunction.
3. ClonerAlliance Chert 4KC may become warm during use. This does not indicate
malfunction.
4. Do not place heavy objects on ClonerAlliance Chert 4KC, as this may cause the
unit to overheat and malfunction.
5. If the exterior of ClonerAlliance Chert 4KC requires cleaning, wipe it with a soft
dry cloth.
6. Do not dispose of the unit via conventional domestic waste.

CONTENTS
1 Getting Started 1
1.1 Box Contents . . . . . . . . . . . . . . . . . . . . . . . . . . . . . . . . . . . . . . . . . . . . . . . . . . . . . . . . . . . . . . . . . . . . . . . . . . . . . . .1
1.2 Product Diagram. . . . . . . . . . . . . . . . . . . . . . . . . . . . . . . . . . . . . . . . . . . . . . . . . . . . . . . . . . . . . . . . . . . . . . . . . . . . .2
2 Software Installation 3
2.1 Install and register HDML-Cloner Pro Helper . . . . . . . . . . . . . . . . . . . . . . . . . . . . . . . . . . . . . . . . . . . . . . . . . . . . . .3
2.2 Install OBS Studio . . . . . . . . . . . . . . . . . . . . . . . . . . . . . . . . . . . . . . . . . . . . . . . . . . . . . . . . . . . . . . . . . . . . . . . . . . .6
3 Play game console on PC without TV 8
3.1 Connection Guide . . . . . . . . . . . . . . . . . . . . . . . . . . . . . . . . . . . . . . . . . . . . . . . . . . . . . . . . . . . . . . . . . . . . . . . . . . . .8
3.2 Play game console for Windows users . . . . . . . . . . . . . . . . . . . . . . . . . . . . . . . . . . . . . . . . . . . . . . . . . . . . . . . . . . . .11
3.3 Play game console for Mac OS users . . . . . . . . . . . . . . . . . . . . . . . . . . . . . . . . . . . . . . . . . . . . . . . . . . . . . . . . . . . . .15
3.4 Play game console for Linux users. . . . . . . . . . . . . . . . . . . . . . . . . . . . . . . . . . . . . . . . . . . . . . . . . . . . . . . . . . . . . . .17
4 Record/capture videos to PC. 23
4.1 Connect . . . . . . . . . . . . . . . . . . . . . . . . . . . . . . . . . . . . . . . . . . . . . . . . . . . . . . . . . . . . . . . . . . . . . . . . . . . . . . . . . . . .23
4.2 Record/Capture for Windows users . . . . . . . . . . . . . . . . . . . . . . . . . . . . . . . . . . . . . . . . . . . . . . . . . . . . . . . . . . . . . .26
4.3 Record/Capture for Mac OS users . . . . . . . . . . . . . . . . . . . . . . . . . . . . . . . . . . . . . . . . . . . . . . . . . . . . . . . . . . . . . . .33
4.4 Record/Capture for Linux users . . . . . . . . . . . . . . . . . . . . . . . . . . . . . . . . . . . . . . . . . . . . . . . . . . . . . . . . . . . . . . . . .35
5 Record/capture videos to mobile. 41
5.1 Connect . . . . . . . . . . . . . . . . . . . . . . . . . . . . . . . . . . . . . . . . . . . . . . . . . . . . . . . . . . . . . . . . . . . . . . . . . . . . . . . . . . . .41
5.2 Record/Capture with ClonerAlliance App . . . . . . . . . . . . . . . . . . . . . . . . . . . . . . . . . . . . . . . . . . . . . . . . . . . . . . . . .44
6 Preview videos for live streaming. 48
6.1 Connect . . . . . . . . . . . . . . . . . . . . . . . . . . . . . . . . . . . . . . . . . . . . . . . . . . . . . . . . . . . . . . . . . . . . . . . . . . . . . . . . . . . .48
6.2 Install software . . . . . . . . . . . . . . . . . . . . . . . . . . . . . . . . . . . . . . . . . . . . . . . . . . . . . . . . . . . . . . . . . . . . . . . . . . . . . .49
i

CONTENTS
6.3 Setting for preview video . . . . . . . . . . . . . . . . . . . . . . . . . . . . . . . . . . . . . . . . . . . . . . . . . . . . . . . . . . . . . . . . . . . . . .49
7 Frequently Asked Questions 54
8 Product Specifications 64
9 After Sales Warranty 65
10 Contact Us 66
11 Disclaimer 67
ii

GETTING STARTED
1.1 Box Contents
a
b
c
d
• a. ClonerAlliance Chert 4KC
• b. USB Type-C to USB Type-A connector
• c. USB 2.0 female to male connector
• d. User Manual
1
1.2. Product Diagram
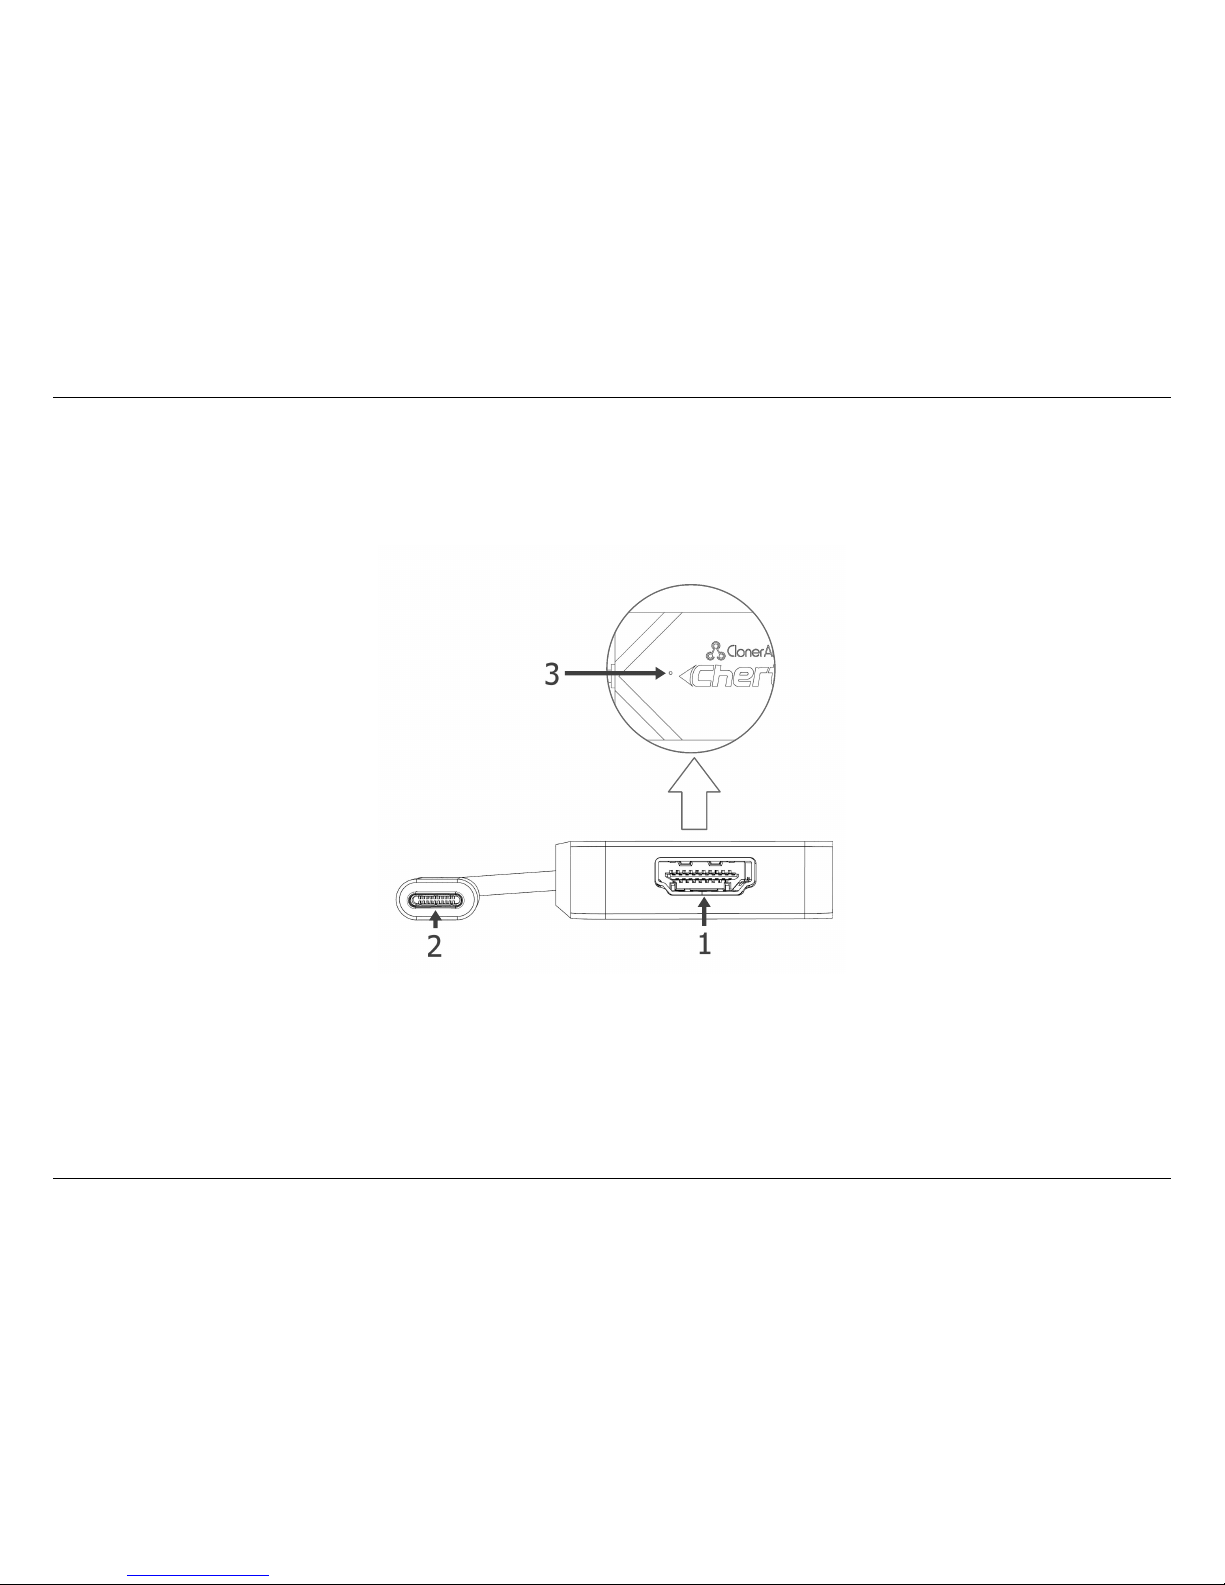
1.2 Product Diagram
1. INPUT: HDMI input interface. Connect an HDMI cable between the source video player and ClonerAlliance Chert
4KC.
2. USB Type-C: Connect ClonerAlliance Chert 4KC to PC via the USB Type-C cable.
3. LED indicator: Stable Green indicates ClonerAlliance Chert 4KC is in working mode.
2

SOFTWARE INSTALLATION
2.1 Install and register HDML-Cloner Pro Helper
1. Install HDML-Cloner Pro Helper
HDML-Cloner Pro Helper is a smart program to record video discs, game videos, homemade videos or anything from any
video source under Windows OS working together with ClonerAlliance Chert 4KC.
• Download HDML-Cloner Pro Helper software from https://www.cloner-alliance.com/hdmicloner-pro-helper.html
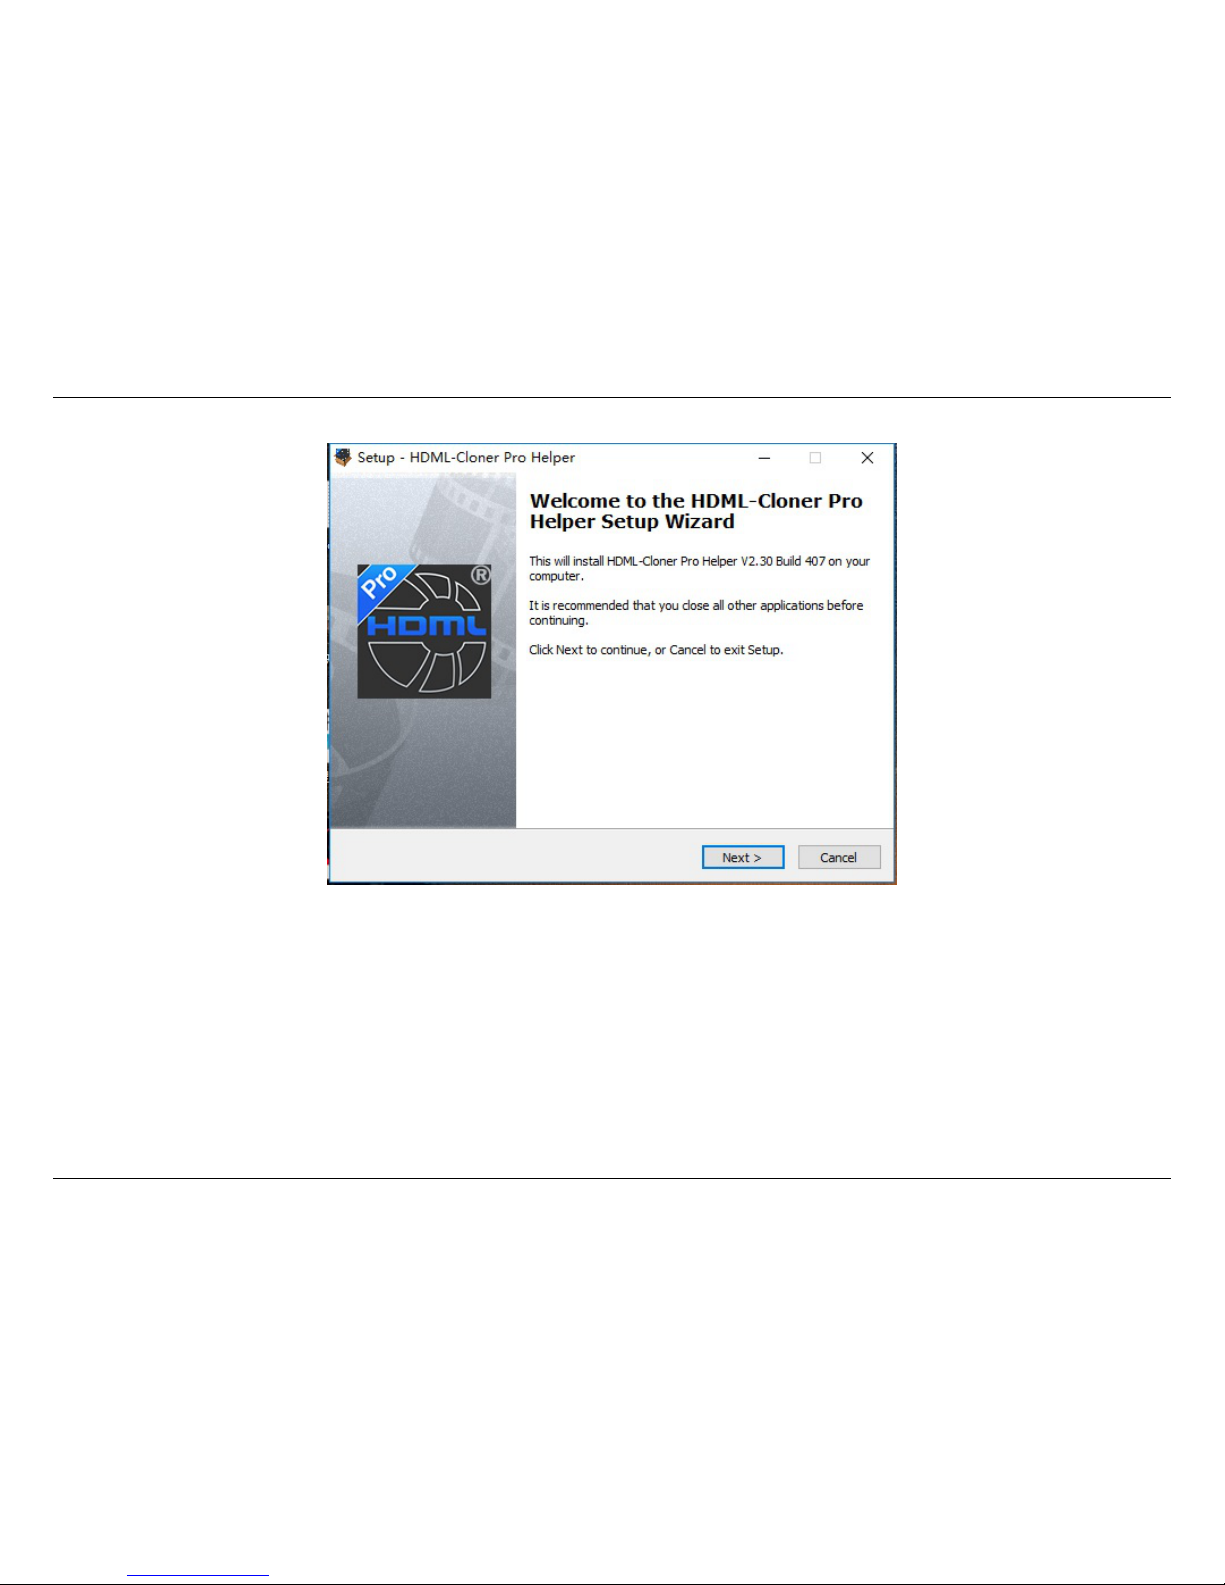
• Double click the installation file and the setup wizard window will pop up. Follow the installation wizard to complete
the installation process. You do not have to restart your computer after the installation is complete.
3
2.1. Install and register HDML-Cloner Pro Helper
Note: Prior to installing HDML-Cloner Pro Helper, please make sure you are using Windows 7 or later versions and your
PC is equipped with USB 2.0 or 3.0 port.
2. Register HDML-Cloner Pro Helper
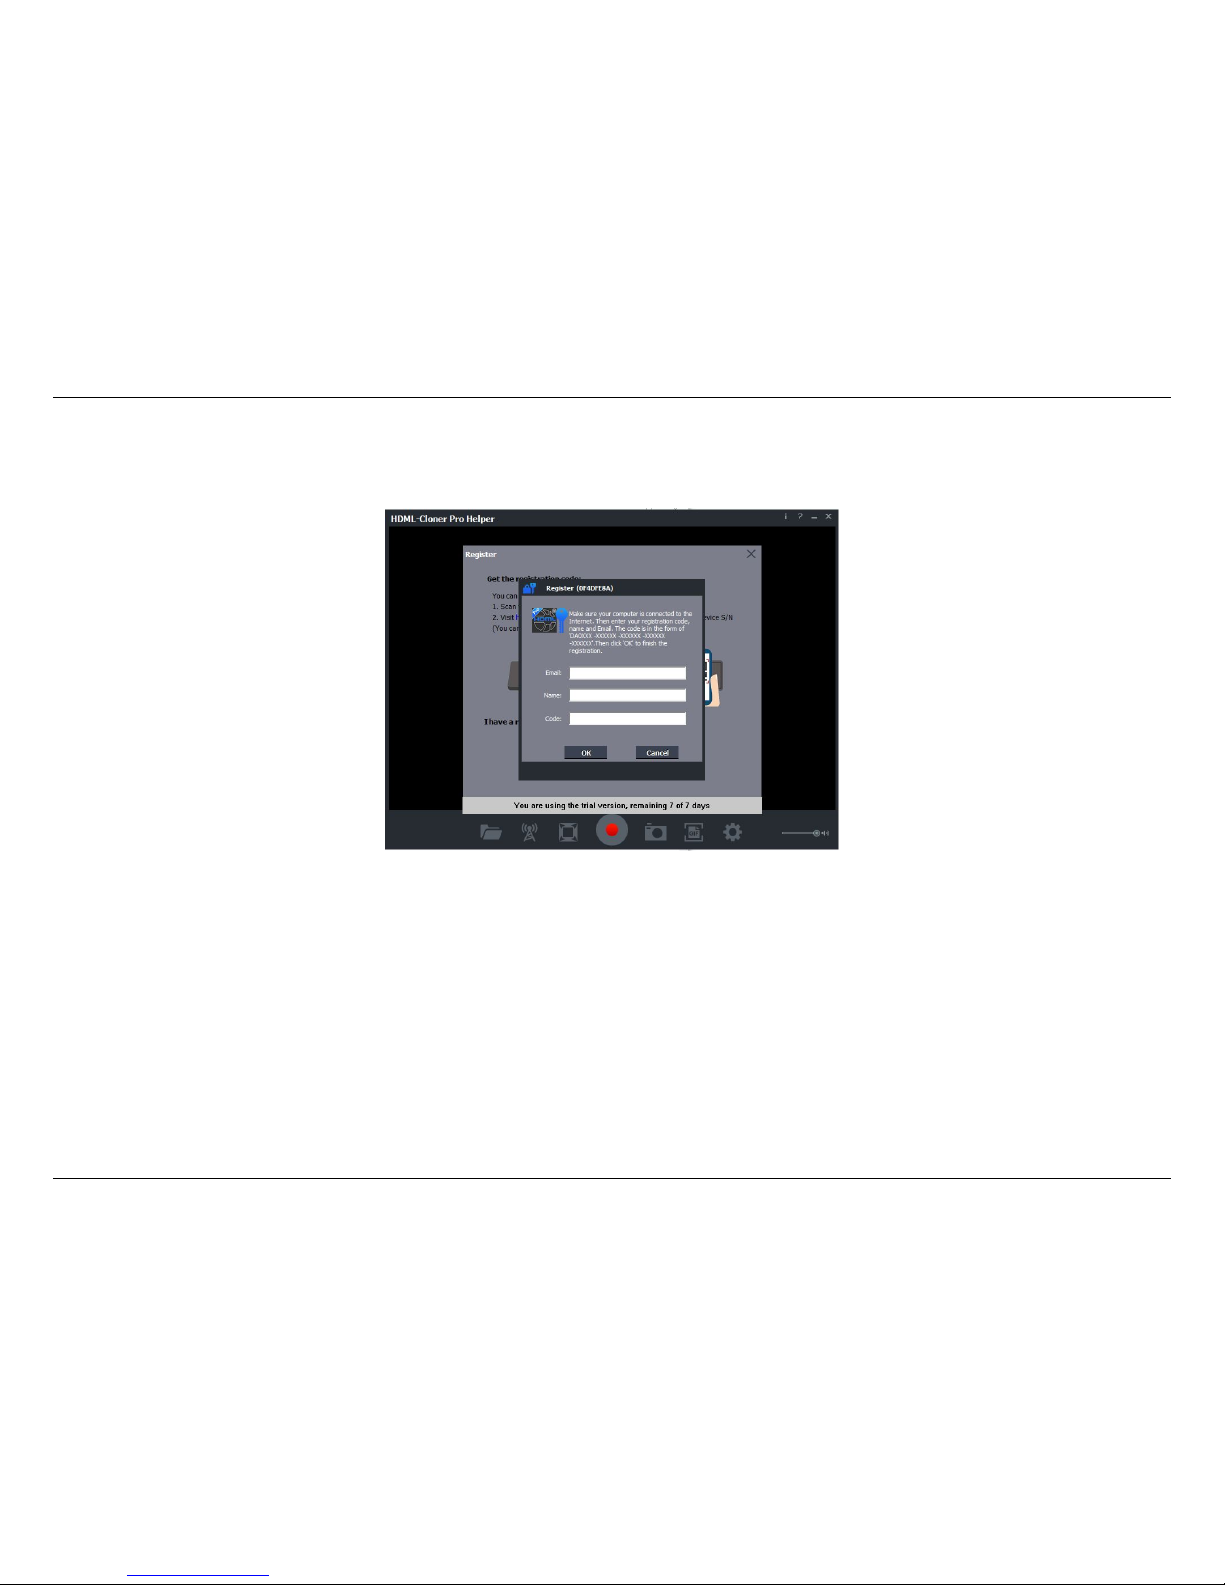
Please register HDML-Cloner Pro Helper first before using, otherwise it can only be used for 7 days. Launch HDML-Cloner
Pro Helper. Click ”Input registration code” button in the auto pop-up Register window. Fill in your proper Email address,
4
2. Software Installation
real name and code. Then click ”OK” to finish the registration.
• Obtain the registration code of HDML-Cloner Pro Helper.
Scan the QR code below to get the code directly. Or visit https://www.cloner-alliance.com/register, fill in your product S/N.
You will get a registration code directly. It is advised that you input your correct email address to receive the registration
code at the same time. You may use the registration code, name and your email address to register HDML-Cloner Pro Helper.
MP4-Cloner will be registered automatically.
If you get trouble in the process, don’t be discouraged, just send us a message to support@cloner-alliance.com with your
S/N and your order ID. Our support will send you the code directly.
5

2.2. Install OBS Studio
(a)
Click.Here
CKXXXXXXXX
For more details about registering HDML-Cloner Pro Helper, visit here to read step by step instructions.
2.2 Install OBS Studio
Please install Open Broadcaster Software (OBS Studio) and run it on your computer.
Tip: You can click here to download Open Broadcaster Software (OBS Studio).
6

2. Software Installation
7

PLAY GAME CONSOLE ON PC WITHOUT TV
3.1 Connection Guide
1. Connect the game console to the “INPUT”port on ClonerAlliance Chert 4KC via an HDMI cable.
2. Connect ClonerAlliance Chert 4KC to PC with the USB Type-C cable.
8
3. Play game console on PC without TV
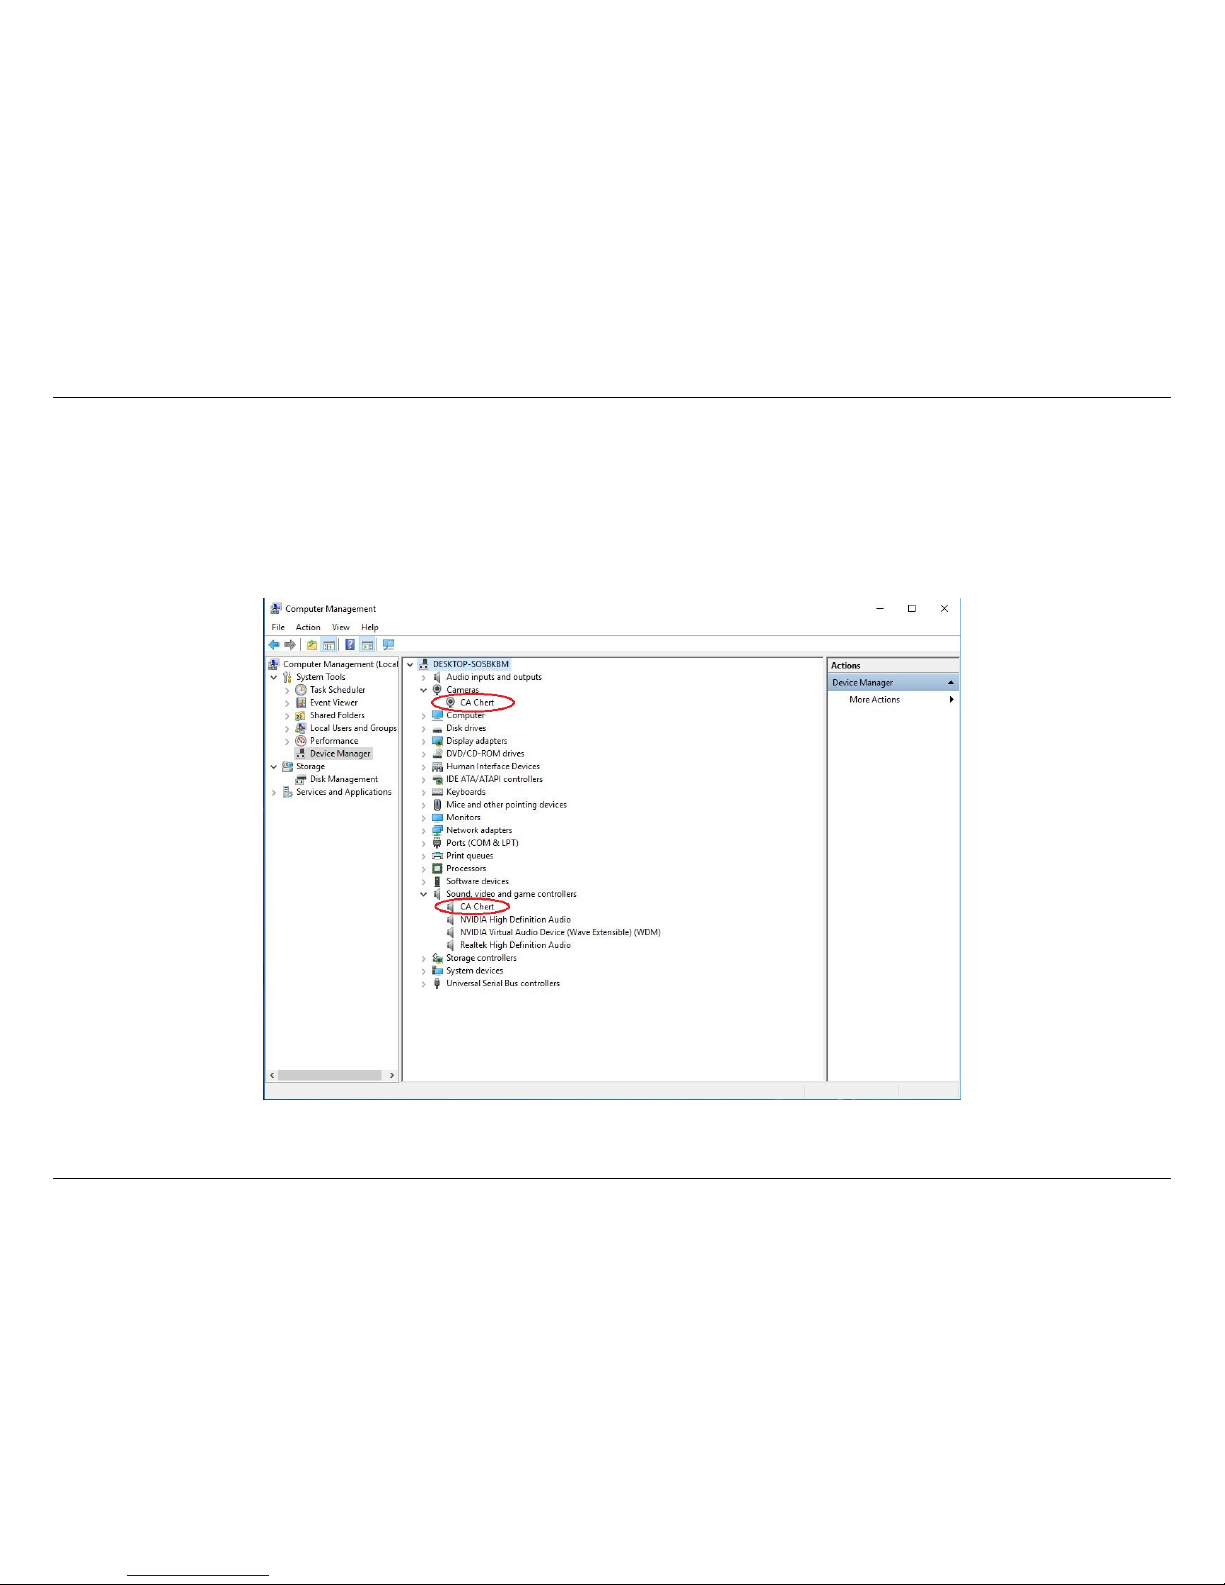
• For Windows
After all devices are connected properly, when you power on all devices, go to“Device manager”, it will show“CA Chert”
under “Cameras”and “Sound, video and game controllers”:
9

3.1. Connection Guide
• For Linux
Connect ClonerAlliance Chert 4KC to PC via USB Type-C cable, go to the “Sound/Input”, it will show in the list.
• For Mac OS
Connect ClonerAlliance Chert 4KC to Mac, go to “Settings/Sound/Input/CA Chert”it also shows ”CA Chert ”device
among the list.
10

3. Play game console on PC without TV
3.2 Play game console for Windows users
Function description:
It’s annoying there is no immediate reaction or delay when you press gamepad buttons in an exciting video games. In order
11

3.2. Play game console for Windows users
to help ClonerAlliance customers get the best gaming experience in HDML-Cloner Pro Helper, our developers add a new
viewing mode as ”Playing game mode”. Under the ”Playing game mode”, our software sets the“FPS”of ClonerAlliance
Chert 4KC to the highest and selects the fastest “Picture Render Engine”automatically. Do you want to experience it now?
Let’s get started.
Step 1:
Please download HDML-Cloner Pro Helper software and install it on your PC first.
See details about Install and register HDML-Cloner Pro Helper
Step 2:
Please connect the USB Type-C cable of ClonerAlliance Chert 4KC to your PC.
Step 3:
Please connect game console to the HDMI port of ClonerAlliance Chert 4KC with HDMI cable then power up the game
console.
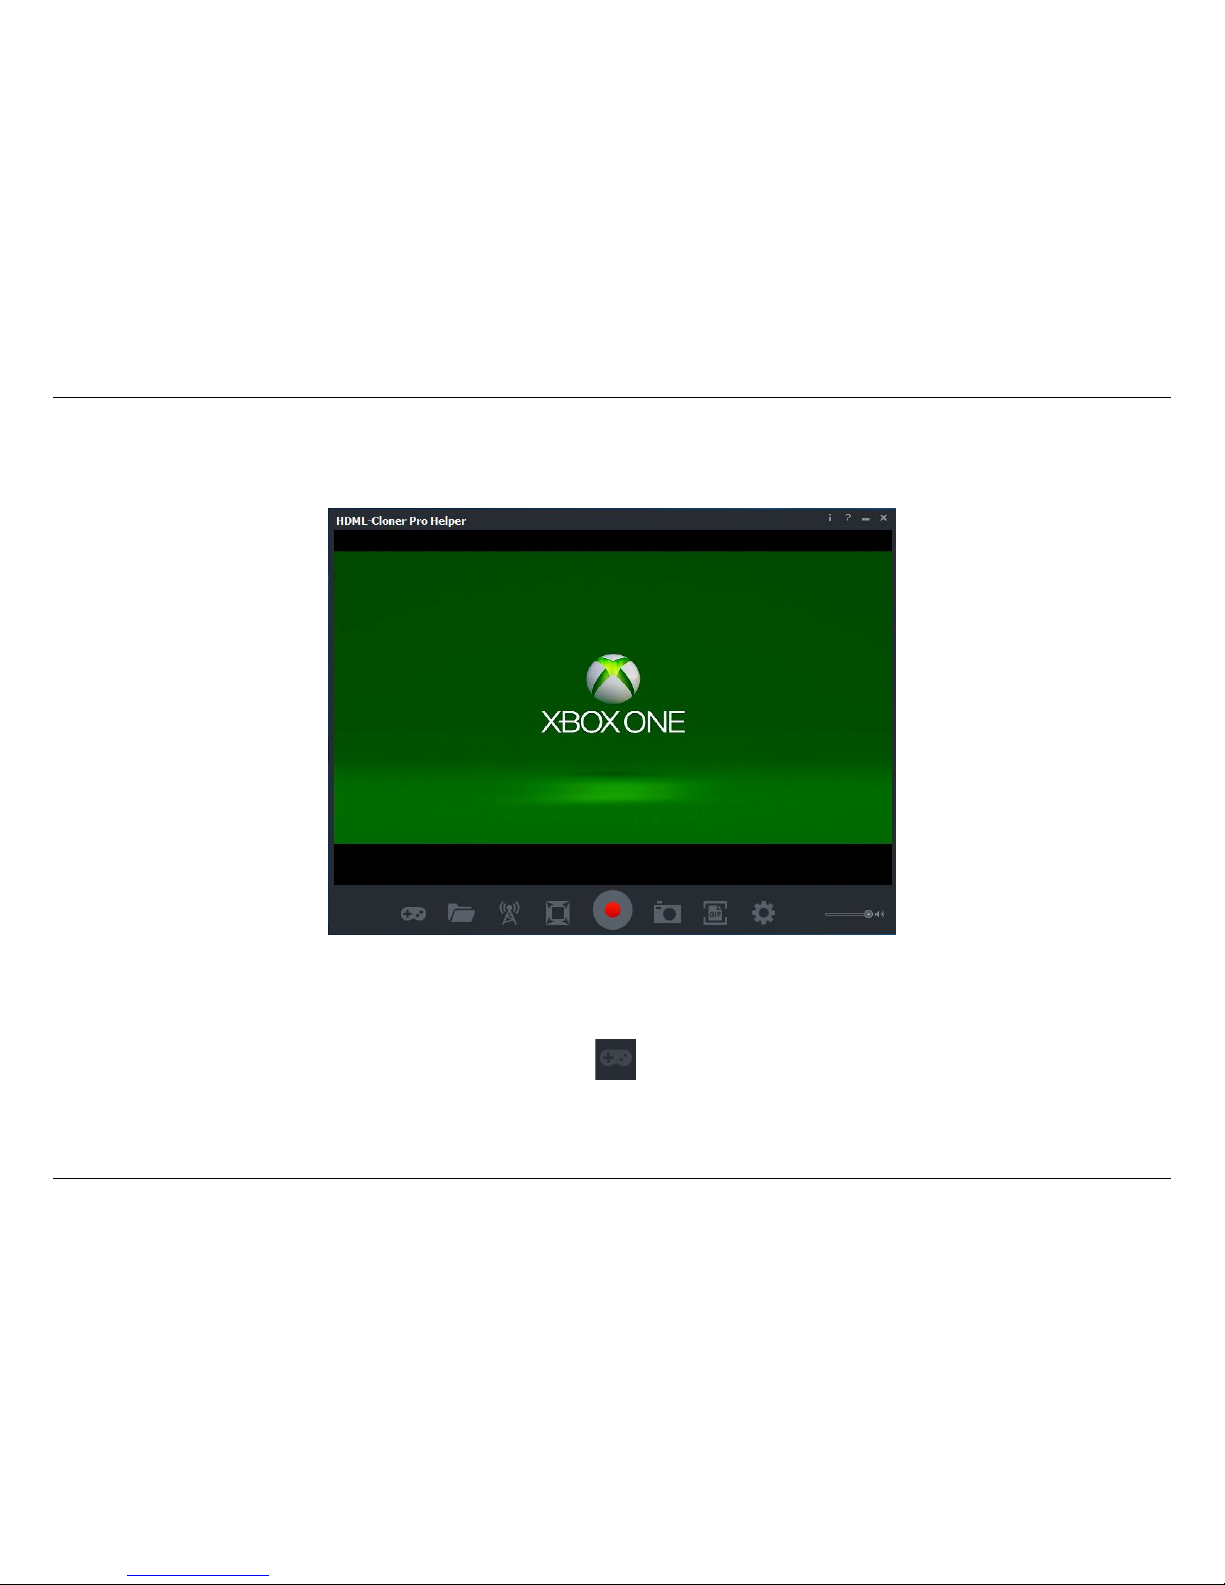
Step 4:
Launch HDML-Cloner Pro Helper software, it will recognize ClonerAlliance Chert 4KC device automatically and show the
12
3. Play game console on PC without TV
game console’s screen after connected.
Step 5:
For the best gaming experience, it is recommended to click switch the viewing mode as ”Playing game mode”. In this
mode, it will present ultra high flow and ultra low latency.
13

3.2. Play game console for Windows users
Note:
• ClonerAlliance Chert 4KC device supports up to 4K input resolution, and the output will be 1080p@60fps automatically.
14

3. Play game console on PC without TV
3.3 Play game console for Mac OS users
1. After all devices are connected properly, insert the video disc into the drive of the video player and launch Quick Time
Player.
2. Please confirm the setting of Camera/Microphone/Quality as below.
15

3.3. Play game console for Mac OS users
3. You can capture your game now.
16
3. Play game console on PC without TV
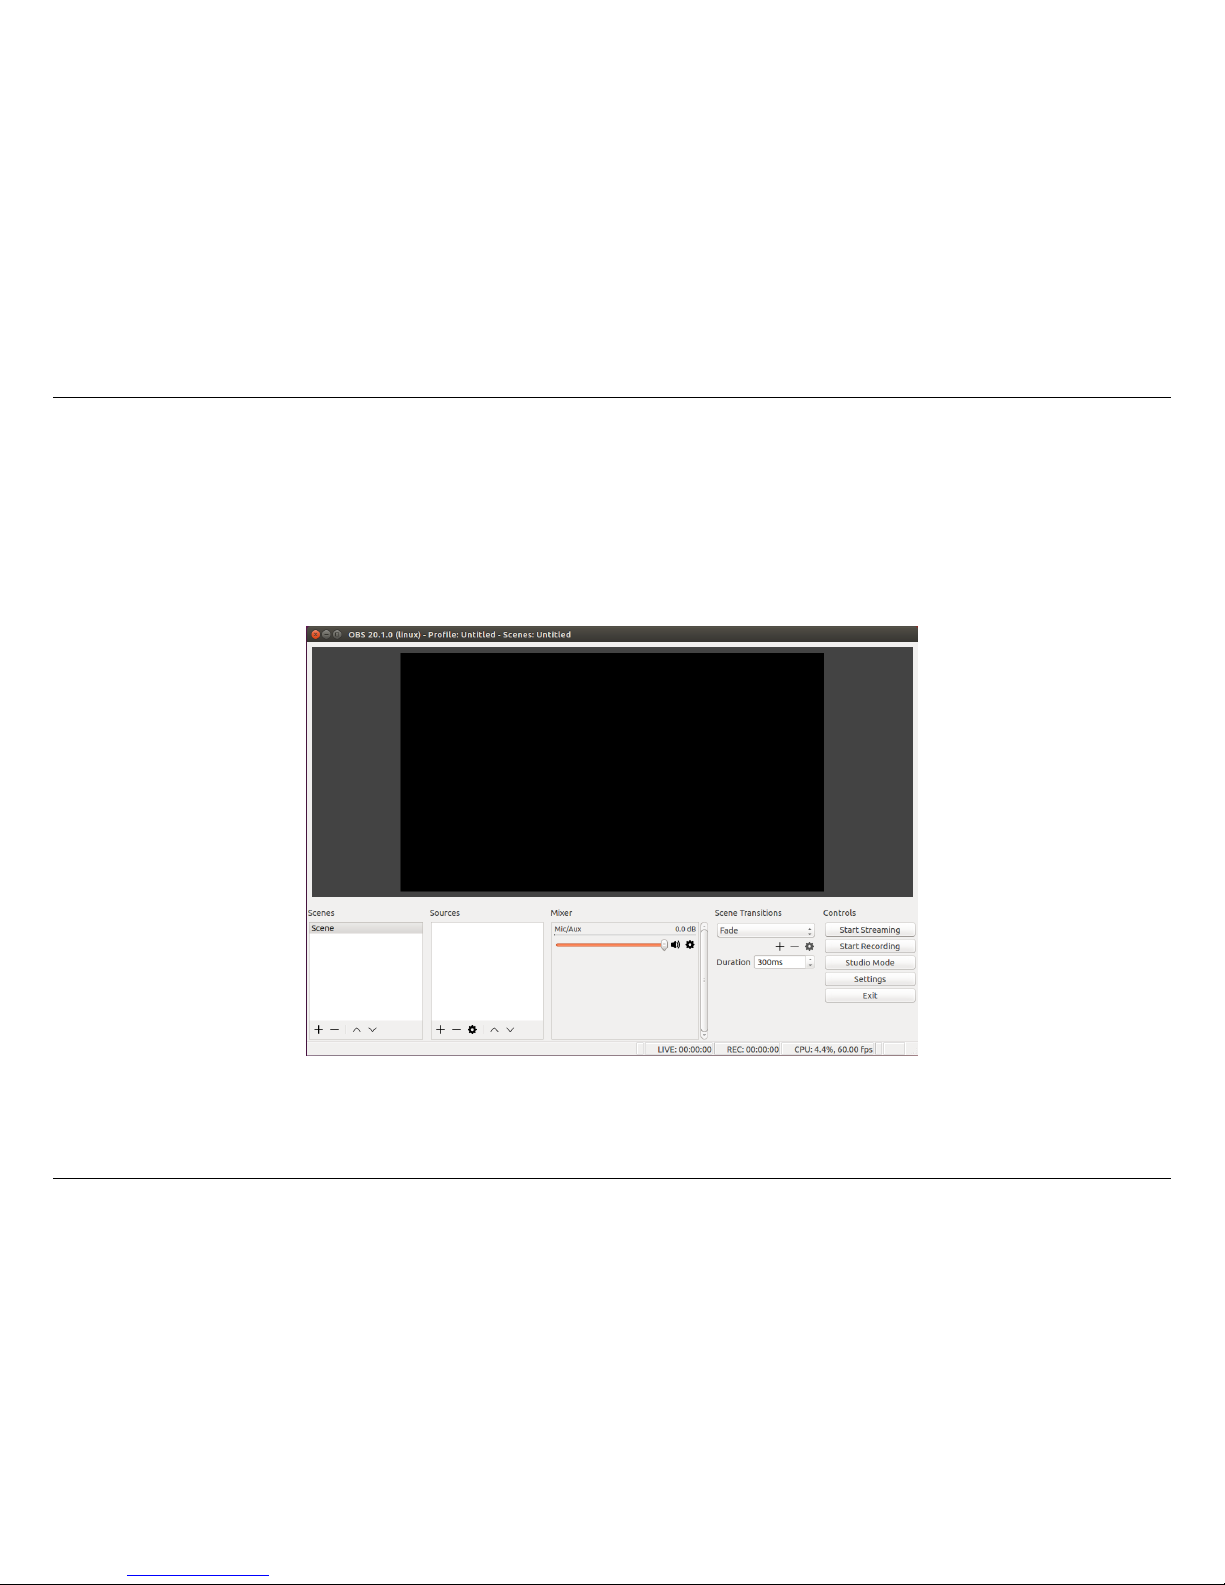
3.4 Play game console for Linux users
1. After all devices are connected properly, insert the video disc into the drive of the video player and launch OBS Studio
software.
2. In source column, click “+”to add video capture device:
17
 Loading...