

Page 1
ClearCube Technology, Inc. 3700 W Parmer Lane Austin, TX 78727 (512) 652-3500 www.clearcube.com
Package
contents
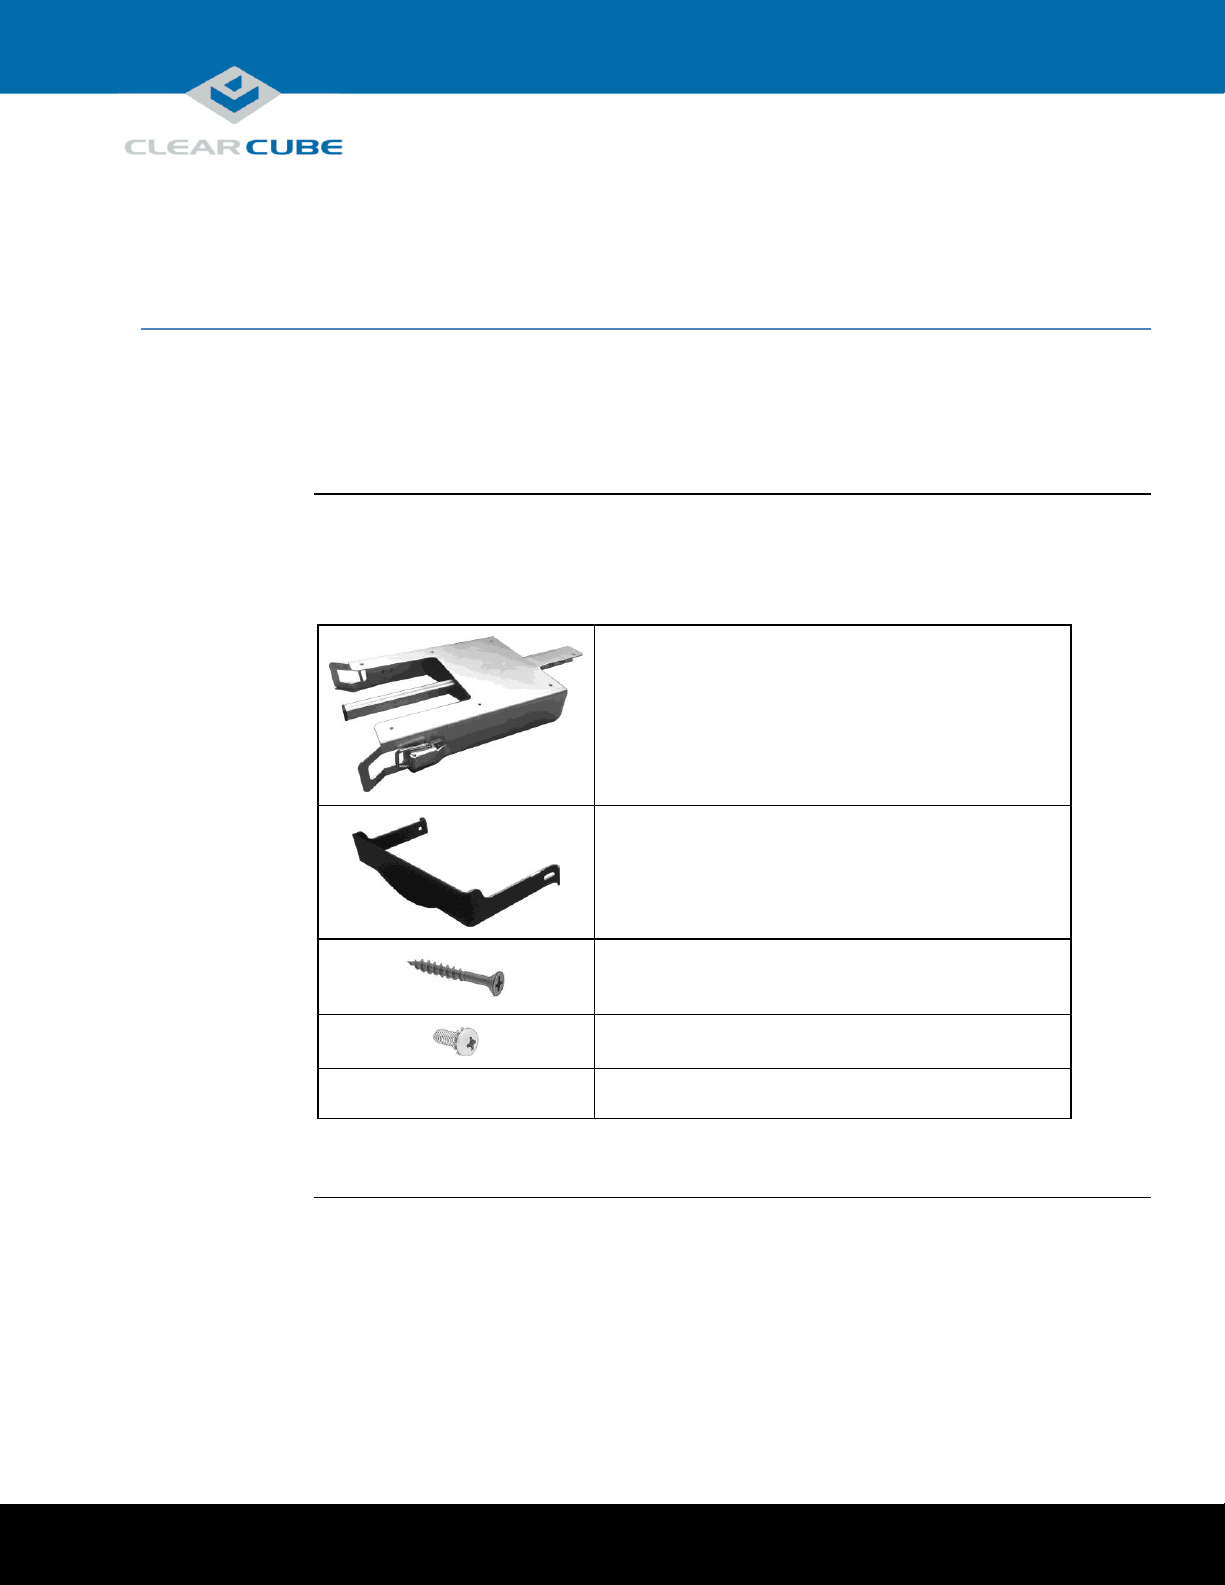
The list below shows the contents of a mounting bracket package (images are not
to scale).
ClientCube 2 mounting bracket (× 1)
Keeper bracket (× 1)
Wood screws, 0.75-inch (× 7) for under-desk
mounting
Machine screw, 0.75-inch (× 1) for rear bracket
—
This Quick Start Guide (× 1)
ClientCube 2 Mounting Bracket
Quick Start Guide
About the ClientCube 2 Mounting Bracket
Continued on next page
Page 1 of 6 P/N G0200165 Rev B, 1.1.08.15.2014
Page 2

ClearCube Technology, Inc. 3700 W Parmer Lane Austin, TX 78727 (512) 652-3500 www.clearcube.com
Assembled
brackets
The pictures below show assembled brackets (figure 1) and the mounting bracket installed
below a desk with a ClientCube 2 (figure 2).
Figure 1. Mounting bracket with keeper bracket latched in place
Figure 2. ClientCube 2 mounted under a desk
About the ClientCube 2 Mounting Bracket, Continued
Page 2 of 6 P/N G0200165 Rev B, 1.1.08.15.2014
Page 3

ClearCube Technology, Inc. 3700 W Parmer Lane Austin, TX 78727 (512) 652-3500 www.clearcube.com
Safety and
precautions
If any zero clients in a ClientCube 2 contain a smart card reader:
Prevent ESD (electrostatic discharge) damage to smart card readers by always
discharging your body and smart card before using a reader (for example, by
touching a grounded, unpainted, metal object). ESD can vary depending on many
environmental conditions, including clothing that users wear and how they handle smart
cards. ESD damage can potentially cause unsupported card reader behavior including
failure. Always perform ESD prevention steps before using the card reader.
Tools
The list below shows tools needed for installation.
Phillips head screwdriver
Drill and
32
3
-inch bit (for drilling pilot holes)
Before You Begin
Page 3 of 6 P/N G0200165 Rev B, 1.1.08.15.2014
Page 4

ClearCube Technology, Inc. 3700 W Parmer Lane Austin, TX 78727 (512) 652-3500 www.clearcube.com
Installing the
mounting
bracket
The steps below show how to install a mounting bracket under a desk.
Step
Action
1
Place the bracket on the underside of a desk. Ensure the front ears are set
back a minimum of 1 ⅛- inches from the front of the desk. Mark the holes in
the bracket and set it aside.
NOTE: If you are installing the mounting bracket near a wall, ensure that
the bracket ears can fully extend when securing the keeper bracket (see
Figure 6 below).
2
Use a
32
3
-inch bit to drill pilot holes into the underside of the desk. Be sure
that pilot holes do not exceed the length of the included wood screws.
3
Support the mounting bracket and use the included wood screws to screw it
into place under the desk.
Figure 3. Screwing the mounting bracket into a desk
Now mount the ClientCube 2 as shown in the next section.
Installation
This section shows how to install the mounting bracket and then install and secure a ClientCube 2.
Continued on next page
Page 4 of 6 P/N G0200165 Rev B, 1.1.08.15.2014
Page 5

ClearCube Technology, Inc. 3700 W Parmer Lane Austin, TX 78727 (512) 652-3500 www.clearcube.com
Mount the
ClientCube 2
The steps below show how to mount a ClientCube 2.
Step
Action
1
The ClientCube 2 slides onto the mounting bracket’s square tube. Lift the
ClientCube 2 and align the square hole on the back of the ClientCube 2 with
the bracket’s square tube. Push the ClientCube 2 onto the tube until it stops.
Figure 4. Sliding the ClientCube 2 onto the mounting bracket square tube
2
From the rear of the mounting bracket, screw the included machine screw
into the ClientCube 2.
Figure 5. Secure the bracket to the ClientCube 2 with the included screw
Rear of ClientCube 2
Installation, Continued
Continued on next page
Page 5 of 6 P/N G0200165 Rev B, 1.1.08.15.2014
Page 6

ClearCube Technology, Inc. 3700 W Parmer Lane Austin, TX 78727 (512) 652-3500 www.clearcube.com
Mount the
ClientCube 2
(continued)
Step
Action
3
Slide the keeper bracket through cutouts on the front and fasten the latches.
Figure 6. Slide the keeper bracket through cutouts and latch
Contacting
Support
Web
UUUwww.clearcube.com/support/
Email
UUUsupport@clearcube.com
Toll-free
(866) 652-3400
Direct
(512) 652-3400
Installation, Continued
Additional Information and Support
Page 6 of 6 P/N G0200165 Rev B, 1.1.08.15.2014
 Loading...