

Page 1
ClearCube Technology, Inc. 3700 W Parmer Lane Austin, TX 78727 (512) 652-3500 www.clearcube.com
Package
contents
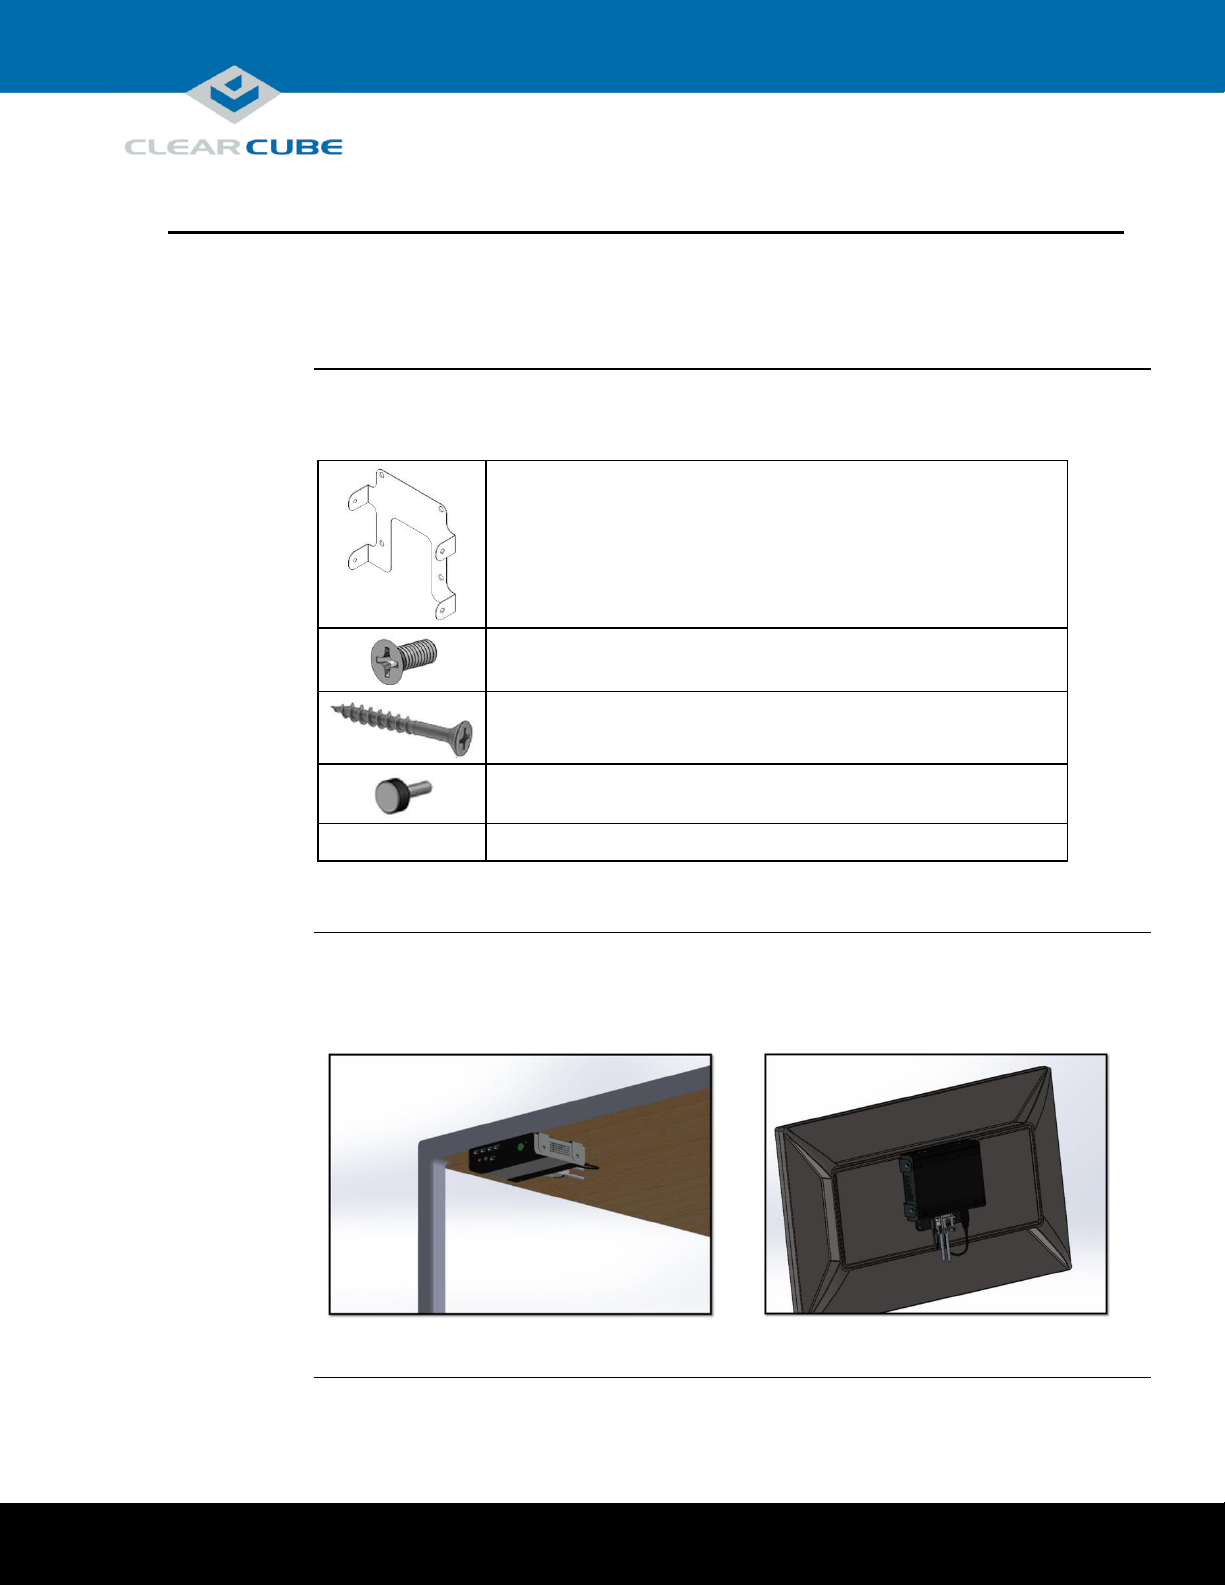
The list below shows the contents of a zero client mounting bracket package (images are not
to scale).
Zero client mounting bracket (× 1) with 100 × 100 mm VESA®
mounting hole pattern
Machine screws, 0.4-inch (× 4) for VESA mounting option
Wood screws, 0.75-inch (× 4) for under-desk mounting option
Thumb screws (× 4) for securing bracket to zero client
—
This Quick Start Guide
Mounting
options
The pictures below show the under-desk and VESA mounting options.
Under Desk Mount
VESA Mount
98/7800-Series Zero Client Mounting Bracket Quick Start Guide
About the Zero Client Mounting Bracket
Page 1 of 6 P/N G0200166 Rev A, 1.0.05.14.2014
Page 2
ClearCube Technology, Inc. 3700 W Parmer Lane Austin, TX 78727 (512) 652-3500 www.clearcube.com
Safety and
precautions
If your zero client contains a smart card reader:
Prevent ESD (electrostatic discharge) damage to smart card readers by always
discharging your body and smart card before using a reader (for example, by touching a
grounded, unpainted, metal object). ESD can vary depending on many environmental
conditions, including clothing that users wear and how they handle smart cards. ESD damage can
potentially cause unsupported card reader behavior including failure. Always perform ESD prevention
steps before using the card reader.
Setup and
cooling
requirements
The list below shows setup and cooling requirements. Ensure that:
Ambient temperature around a zero client does not exceed 35° C (95° F).
No objects are stacked on the zero client or are blocking the client’s vents (such as papers, folders,
computer speakers, or any other objects).
Adjacent furniture (file drawers, desk supports, chairs) do not block or enclose any sides of the zero client.
The zero client is not in any enclosed environment such as on a shelf or inside a drawer.
Tools required
The list below shows tools needed for installation.
Phillips head screwdriver
Pencil or pen for marking mounting holes (for under-desk mounting)
Drill and
32
3
-inch bit (for under-desk mounting)
Before You Begin
Page 2 of 6 P/N G0200166 Rev A, 1.0.05.14.2014
Page 3

ClearCube Technology, Inc. 3700 W Parmer Lane Austin, TX 78727 (512) 652-3500 www.clearcube.com
Under desk
mounting
The steps below show how to mount a bracket under a desk or other piece of furniture and how to
attach a zero client to the bracket.
Mounting the bracket
Step
Action
1
When choosing a mounting location, be sure to orient the bracket as shown in the
figure below. Use the bracket as a template to mark the location of the four
mounting holes.
2
Use a
32
3
-inch bit to drill pilot holes for the wood screws in the locations you
marked (be sure that the depth of the pilot holes is appropriate for the thickness of
the furniture – do not drill through the top of the desk).
3
Align the bracket with the pilot holes. Use the included wood screws to affix the
bracket to the desk.
Now attach a zero client to the bracket as shown below.
Installation
This section shows how to install the mounting bracket under a desk (or other piece of furniture) or using a VESA mount.
Continued on next page
Page 3 of 6 P/N G0200166 Rev A, 1.0.05.14.2014
Page 4
ClearCube Technology, Inc. 3700 W Parmer Lane Austin, TX 78727 (512) 652-3500 www.clearcube.com
Under desk
mounting
(continued)
Attaching the zero client
Step
Action
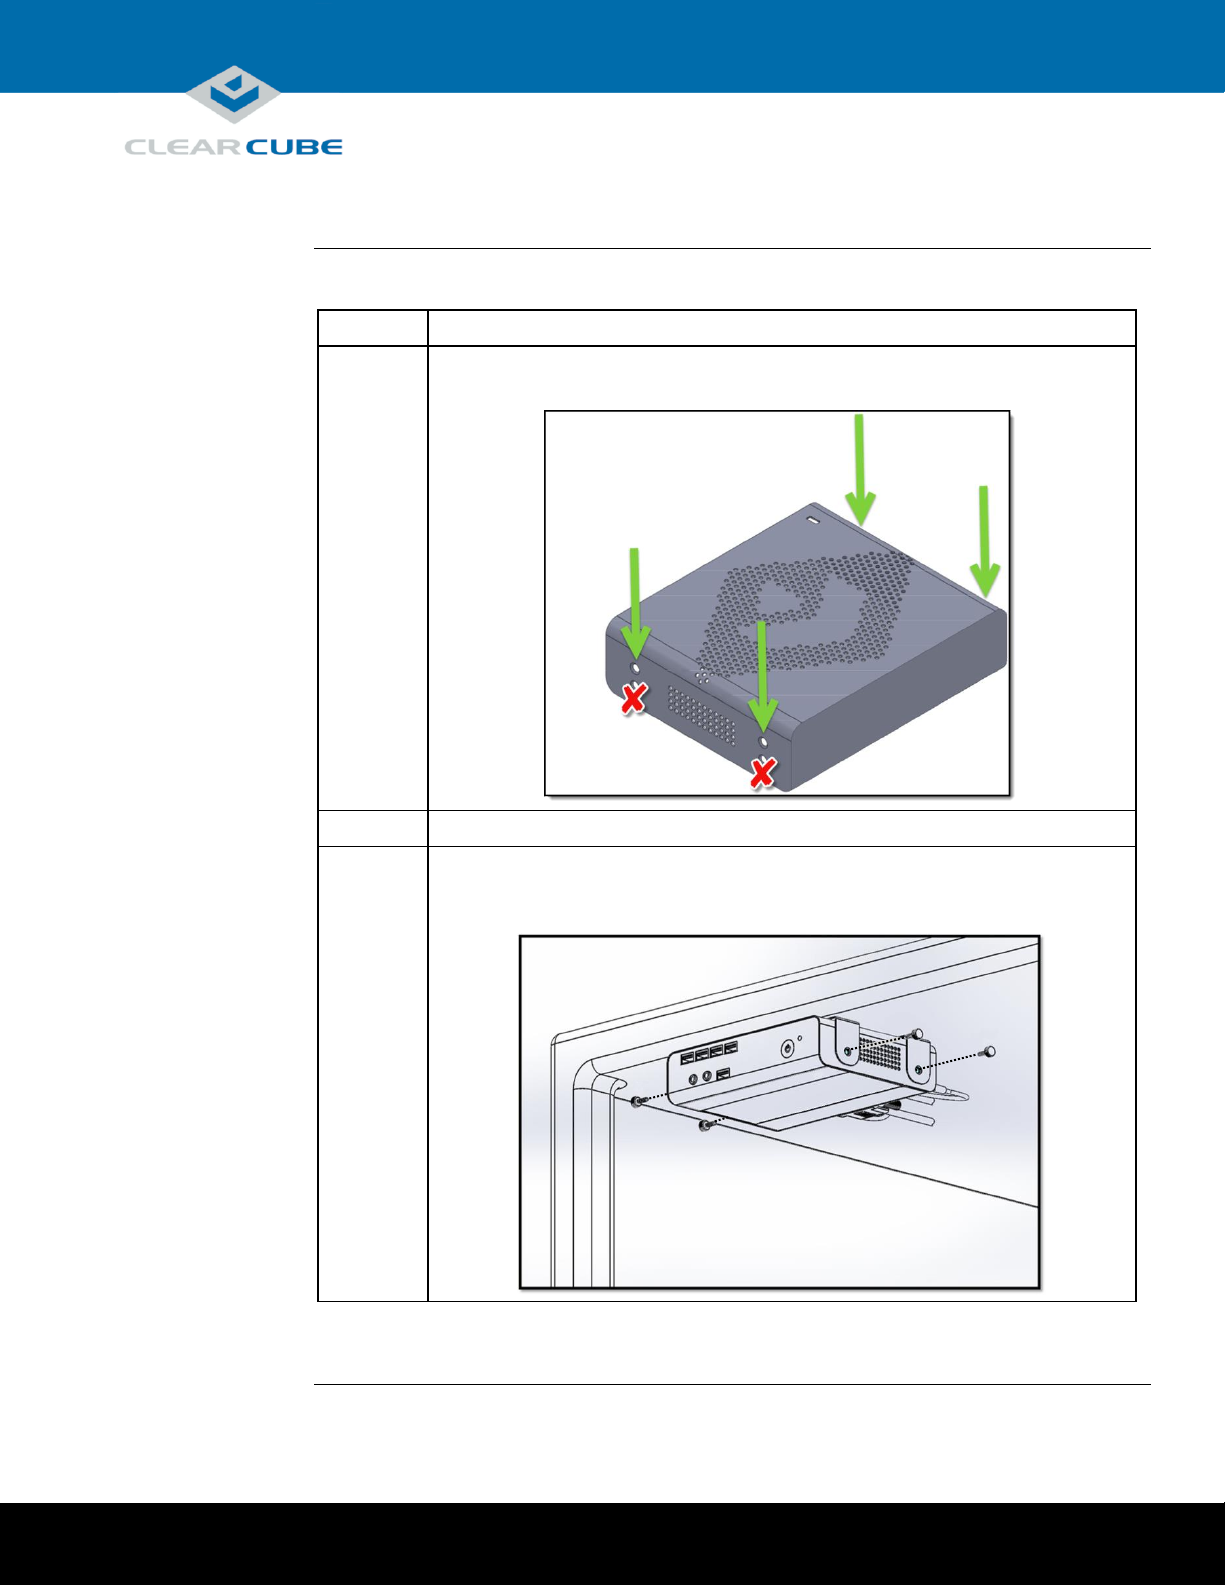
1
Remove the top-most screws from both sides of the zero client, as shown in the
figure below (remove a total of four screws).
2
Connect cables (network, video, and power) to the rear of the zero client.
3
Align the holes in the zero client with the corresponding holes in the bracket as
shown below. Hold in place while using the included thumb screws to attach the zero
client to the bracket.
You can now power on the zero client and connect to a remote device. See the zero client Quick Start
Guide for more information.
Installation, Continued
Continued on next page
Page 4 of 6 P/N G0200166 Rev A, 1.0.05.14.2014
Page 5

ClearCube Technology, Inc. 3700 W Parmer Lane Austin, TX 78727 (512) 652-3500 www.clearcube.com
VESA
mounting
The steps below show how to mount a bracket to a 100 × 100 mm VESA mount (such as on the back
of a monitor) and how to attach a zero client to the bracket.
Mounting the bracket
Step
Action
1
Orient the bracket as shown in the figure below and align the bracket holes with the
VESA mount holes.
2
While holding the bracket in place, use the included machine screws to affix the
bracket to the VESA mount.
You can now attach a zero client to the bracket as shown below.
Installation, Continued
Continued on next page
Page 5 of 6 P/N G0200166 Rev A, 1.0.05.14.2014
Page 6
ClearCube Technology, Inc. 3700 W Parmer Lane Austin, TX 78727 (512) 652-3500 www.clearcube.com
VESA mounting
(continued)
Attaching the zero client
Step
Action
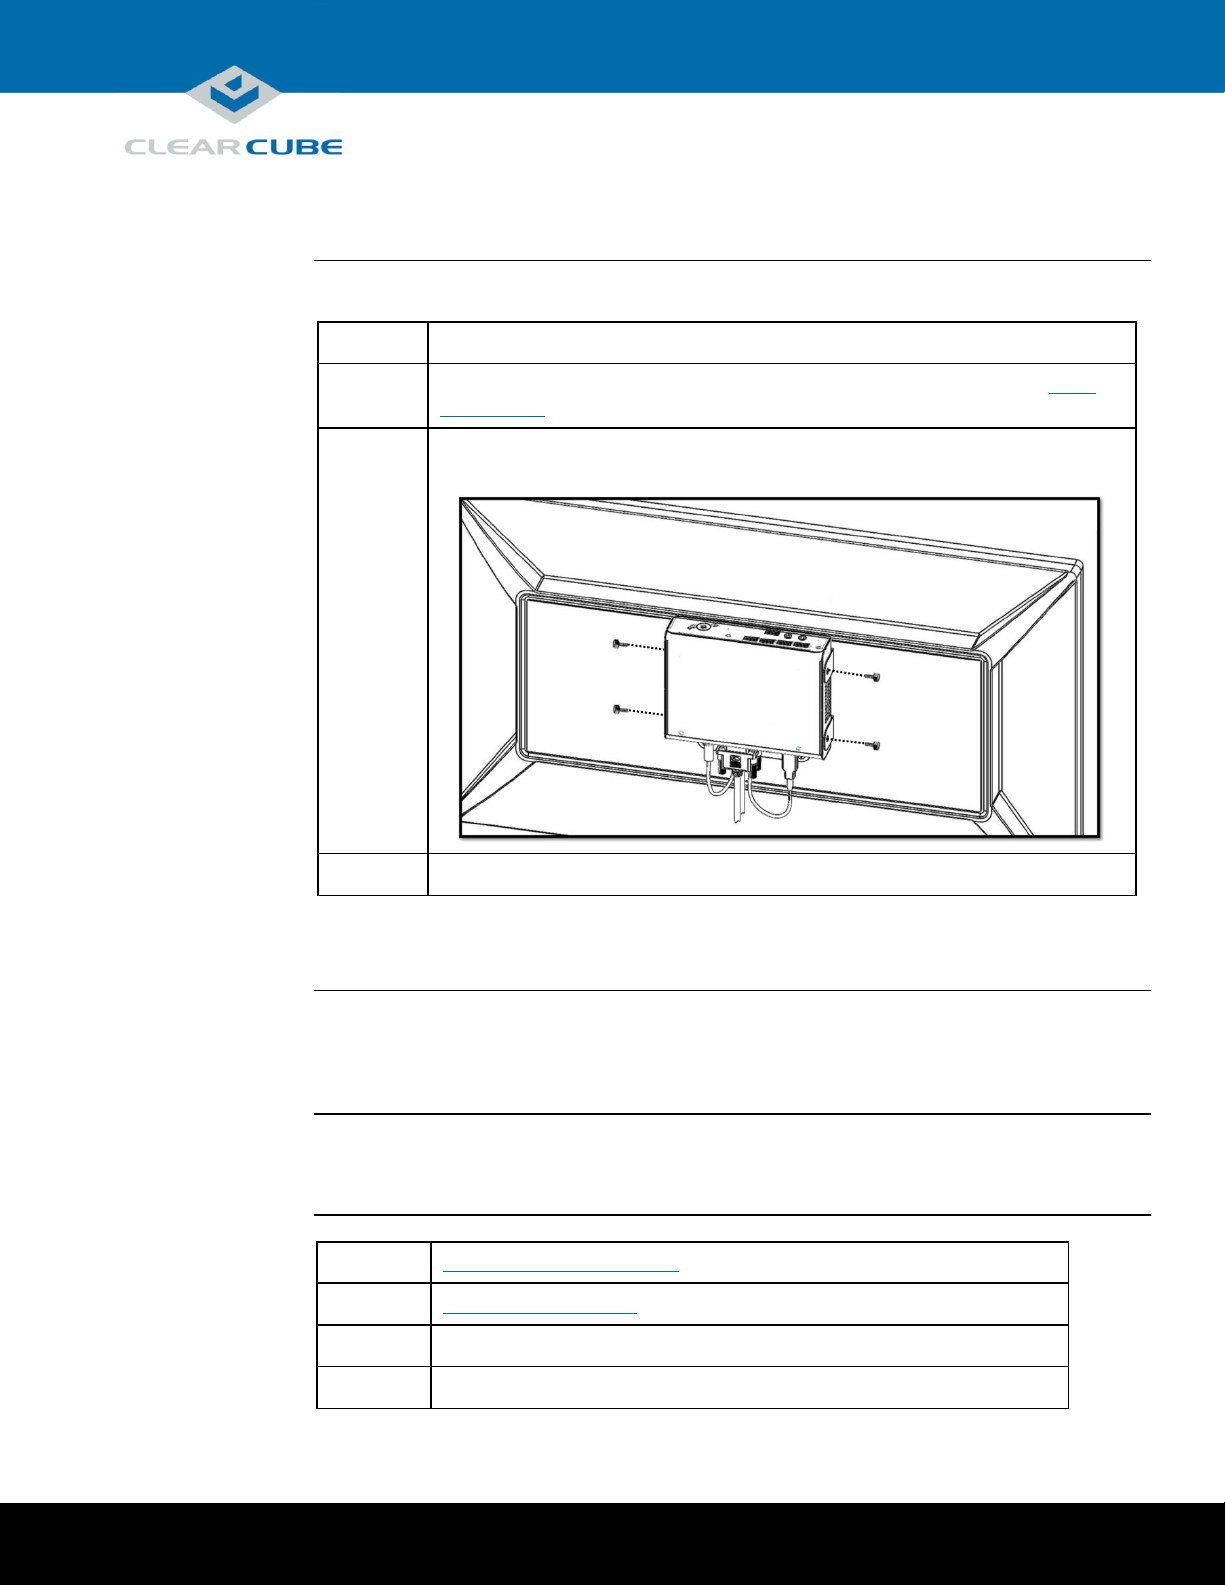
1
Remove the designated screws from the sides of the zero client as shown in step 1 on
page 4 above.
2
Position the zero client in the bracket as shown in the figure below and hold in place.
Use the included thumb screws to attach the zero client to the bracket.
3
Connect cables (network, video, and power) to the rear of the zero client.
You can now power on the zero client and connect to a remote device. See the zero client Quick Start
Guide for more information.
Additional
information
For information about zero clients, see the zero client Quick Start Guide or PC-over-IP® System
User’s Guide on the Support site.
Contacting
Support
Web
UUUwww.clearcube.com/support/
Email
UUUsupport@clearcube.com
Toll-free
(866) 652-3400
Direct
(512) 652-3400
Installation, Continued
Additional Information and Support
Page 6 of 6 P/N G0200166 Rev A, 1.0.05.14.2014
 Loading...