

Page 1
Quick Start Guide
Capio One
10
1
3
2
4
5
11
6
7
8
12
13
14
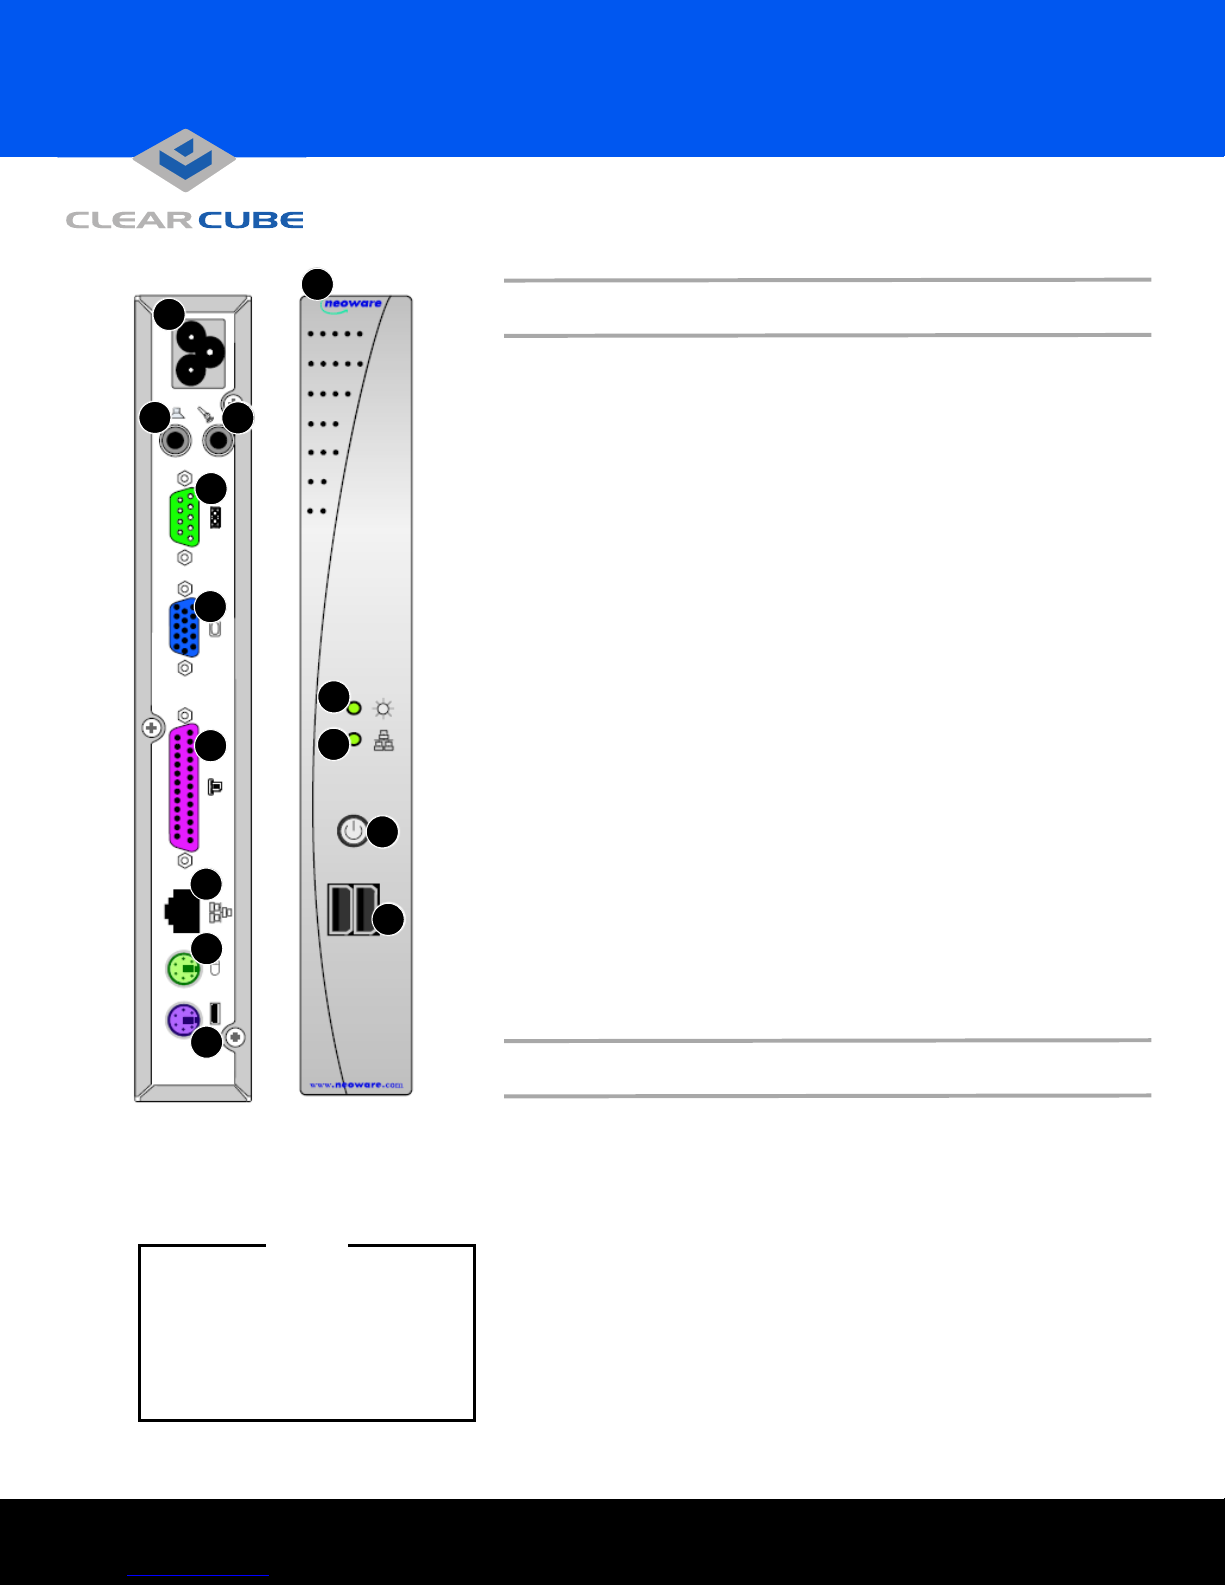
CONNECTIONS
1. Power supply connector 8. PS/2 Mouse port
2. Audio line in 9. PS/2 Keyboard port
3. Audio line out 10. Security lock slot (on side)
4. Serial port 11. Power LED
5. VGA video port 12. Network activity LED
6. Parallel port 13. Power switch
7. 10/100 BaseT Ethernet port 14. USB ports
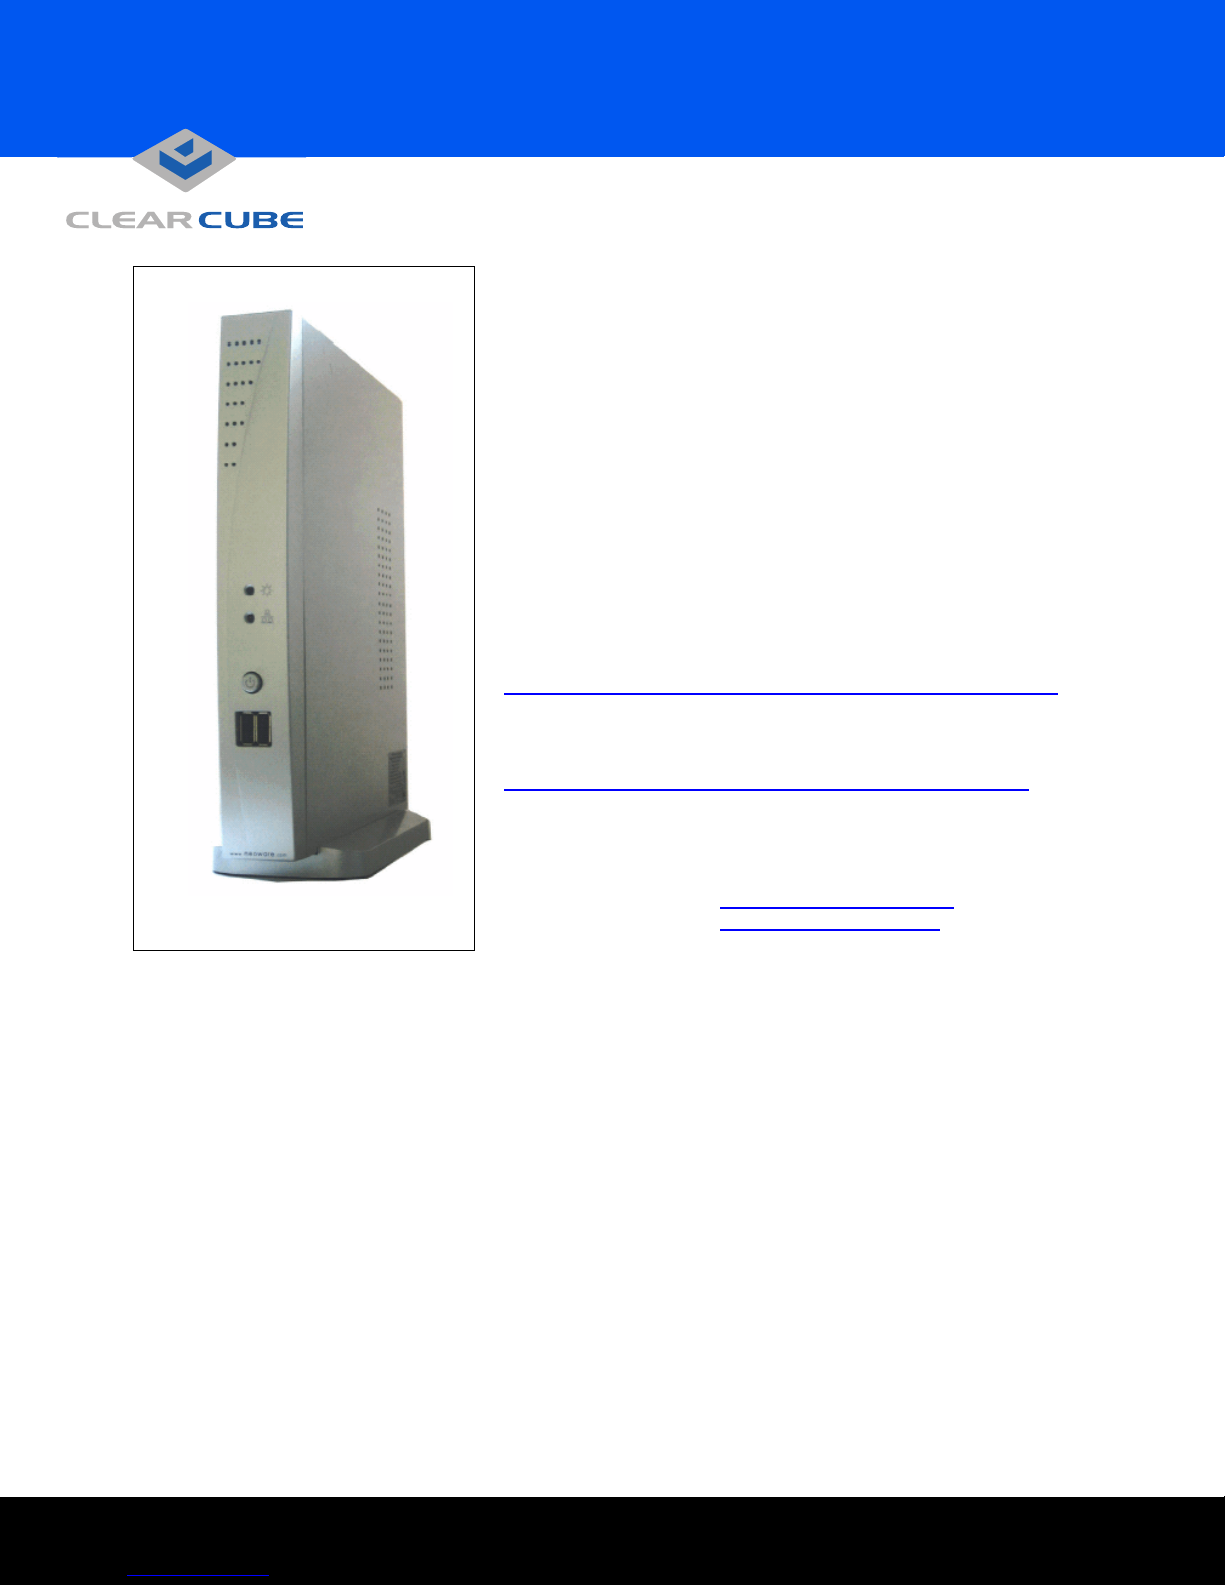
The Capio One is designed to operate in either a vertical or horizontal
position. To mount vertically, install your Capio One in its stand with the
vent holes on top. To mount horizontally, place your Capio One on its
side, with the vent holes in the side panel on top.
Connect the power supply connector, keyboard, mouse, Ethernet, and
monitor to the ports as labeled. Attach other devices as desired.
To turn on your Capio One, push in the circular on/off button on its front
panel. To turn off, push the on/off button again. You may need to hold the
button in for 5 seconds, depending upon how your I/Port is configured.
Attach other devices as desired.
Verify connectivity to your network by watching for the flashing green network
activity LED. Enable any necessary ports on your switches and routers.
Grid Center uses port 6500 TCP. RDP uses port 3389 TCP and port 139
UDP. Your individual network may use other ports besides these.
9
Note
• The Ethernet connection on
the Neolinux I/Port must be
connected to an active network
before starting the I/Port in
order for the operating system
to turn on the network adapter.
ClearCube Technology 8834 Capital of Texas Hwy N Austin, Texas 78759 voice 512 652 3500 www.clearcube.com
NEOLINUX OPERATING SYSTEM
Your Linux-based Capio One auto-starts the Grid Center client, and you
can login to a Blade from the login screen that is displayed. If you need to
log in to the I/Port to change configurations, the default administrator ID
and password is
If you are using your Linux-based Capio One as a client managed by Grid
Center, do the following from the Grid Center Console:
1. Discover the I/Port.
2. Configure the I/Port with the Primary and Secondary Consoles’ names
to establish them as trusted machines.
3. Add the I/Port to the Grid Center authentication database.
4. Allocate the I/Port to a Blade or a Blade group.
root / clearcube . No default user ID is configured.
Page 2
The Grid Center authentication database allows adding and configuring
multiple I/Ports simultaneously. See the Grid Center Administrator’s
Guide for more information.
When the Capio One boots, it loads the Grid Center I/Port client as the
default client. Enter your authentication credentials to login to a Blade.
The Grid Center client automatically initiates a Remote Desktop Protocol
(RDP) session, allowing you to log in to the Blade you specify.
If you are not using Grid Center and want to use the ezConnect client,
select Neoware –> ezConnect from the menu bar. The ezConnect client
allows viewing and modifying settings on the I/Port such as display settings and network configurations.
If you are using a Capio One as a client managed by ezRemote Manager,
please see the ezRemote Manager User Manual for information on topics
such as updating the I/Port software.
Documentation can be downloaded at:
http://www.clearcube.com/support/controller/manuals.php
ezRemote Manager can be downloaded at:
http://www.neoware.com/downloads/management.aspx
Capio One I/Port
Please contact ClearCube for technical support on your Capio One.
Email: support@clearcube.com
Website: support.clearcube.com
In the US: (866) 652-3400
Outside the US: +1 (512) 652-3400
Please do not contact Neoware for support issues.
ClearCube will provide hardware warranty support for your Capio One
according to the warranty coverage option selected at the time of purchase. Please see the ClearCube Product Manual and Installation Guide
for full warranty details.
ClearCube Technology 8834 Capital of Texas Hwy N Austin, Texas 78759 voice 512 652 3500 www.clearcube.com
G020042-A Rev 8/4/2005
Page 3

FCC regulatory and safety information
Regulatory information
Federal Communications Commission (FCC) (USA only)
Federal Communications Commission Radio Frequency
Interference Statement
WARNING: This equipment has been tested and found
to comply with the limits for a Class B digital device, pursuant to Part 15 of the FCC Rules. These limits are
designed to provide reasonable protection against harmful interference in a residential installation. This equipment generates, uses, and can radiate radio frequency
energy and, if not installed and used in accordance with
the instructions, may cause harmful interference to radio
communications. However, there is no guarantee that
interference will not occur in a particular installation. If
this equipment does cause harmful interference to radio
or television reception, which can be determined by turning the equipment off and on, the user is encouraged to
correct the interference by one or more of the following
measures:
• Reorient or relocate the receiving antenna.
• Increase the separation between the equipment and
the receiver.
• Connect the equipment into an outlet that is on a circuit different from the receiver.
• Consult the dealer or an experienced radio/TV technician for help.
Neoware’s system RFI and Radiated Immunity tests
were conducted with Neoware-supported peripheral
devices and Neoware-shielded cables, such as those
you receive with your system. Changes or modifications
not expressly approved by Neoware could void the user's
authority to operate the equipment. To comply with the
limits for an FCC Class B computing device, always use
shielded signal cables and the power cord supplied with
this unit.
Capio One = CA5
End User License Agreement
You have acquired a device (“DEVICE”) that includes
software developed by and/or licensed by NEOWARE
SYSTEMS, INC. (“NEOWARE”) and its suppliers and
licensors (“Suppliers”). All such software products, as
well as associated media, printed materials, and “online”
or electronic documentation (“SOFTWARE”) are protected by United States as well as international intellectual property laws and treaties.
The SOFTWARE is licensed, for use, not sold. All rights
reserved.
IF YOU DO NOT AGREE TO THIS EULA, DO NOT USE
THE DEVICE OR COPY THE SOFTWARE. INSTEAD,
PROMPTLY CONTACT NEOWARE FOR INSTRUCTIONS ON RETURN OF THE UNUSED DEVICE(S).
ANY USE OF THE SOFTWARE, INCLUDING BUT NOT
LIMITED TO USE ON THE DEVICE, WILL CONSTITUTE YOUR AGREEMENT TO THIS EULA (OR RATIFICATION OF ANY PREVIOUS CONSENT).
GRANT OF SOFTWARE LICENSE. This EULA grants
you the following license:
• You may use the SOFTWARE only on the DEVICE.
• NOT FAULT TOLERANT. THE SOFTWARE IS NOT
FAULT TOLERANT.
• NO WARRANTIES FOR THE SOFTWARE. THE
SOFTWARE IS PROVIDED “AS IS,” WITH NO
WARRANTY. NEOWARE AND ITS SUPPLIERS
DISCLAIM ALL WARRANTIES EXPRESS OR
IMPLIED, INCLUDING WITHOUT LIMITATION ANY
IMPLIED WARRANTIES OF MERCHANTABILITY
OR FITNESS FOR A PARTICULAR PURPOSE
EXCEPT TO THE EXTENT THAT ANY WARRANTIES IMPLIED BY LAW CANNOT BE WAIVED.
• NOTE ON JAVA SUPPORT. The SOFTWARE may
contain support for programs written in Java. Java
technology is not fault tolerant and is not designed,
manufactured, or intended for use or resale as online
control equipment in hazardous environments requiring fail-safe performance, such as in the operation of
nuclear facilities, aircraft navigation or communication systems, air traffic control, direct life support
machines, or weapons systems, in which the failure
of Java technology could lead directly to death, personal injury, or severe physical or environmental
damage. Sun Microsystems, Inc. has contractually
obligated NEOWARE to make this disclaimer, AND
Many PC products and accessories contain cords, cables or wires, such as power cords or cords to connect the
accessory to a PC. If this product has such a cord, cable or wire, then the following warning applies:
WARNING: Handling the cord on this product will expose you to lead, a chemical known to the State of California to
cause cancer, and birth defects or other reproductive harm. Wash hands after handling.
ClearCube Technology 8834 Capital of Texas Hwy N Austin, Texas 78759 voice 512 652 3500 www.clearcube.com
G020042-A Rev 8/4/2005
Page 4

NEOWARE AND ITS SUPPLIERS SHALL HAVE NO
LIABILITY OR FAULT FOR ANY JAVA technology
failures.
• LIMITATIONS OF LIABILITIES AND EXCLUSIONS.
TO THE MAXIMUM EXTENT PERMITTED BY
APPLICABLE LAW, IN NO EVENT SHALL
NEOWARE OR ITS SUPPLIERS BE LIABLE FOR
ANY SPECIAL, INCIDENTAL, PUNITIVE, INDIRECT, OR CONSEQUENTIAL DAMAGES WHATSOEVER (INCLUDING, BUT NOT LIMITED TO,
DAMAGES FOR LOSS OF PROFITS OR CONFIDENTIAL OR OTHER LOSS OF PRIVACY, FOR
FAILURE TO MEET ANY DUTY INCLUDING OF
GOOD FAITH OR OF REASONABLE CARE, NEGLIGENCE, AND ANY OTHER PECUNIARY OR
OTHER LOSS WHATEVER) ARISING OUT OF OR
IN ANY WAY RELATED TO THE USE OF OR
INABILITY TO USE THE SOFTWARE, THE PROVISION OF OR FAILURE TO PROVIDE SUPPORT
OR OTHER SERVICES, INFORMATION, AND
RELATED CONTENT THROUGH THE SOFTWARE
OR OTHERWISE ARISING OUT OF THE USE OF
THE SOFTWARE, OR OTHERWISE UNDER IN
CONNECTION WITH ANY PROVISION OF THIS
EULA OR ANY SUPPLEMENTAL EULA, EVEN IN
THE EVENT OF FAULT, TORT (INCLUDING NEGLIGENCE), MISREPRESENTATION, STRICT OR
PRODUCT LIABILITY, BREACH OF CONTRACT
OR BREACH OF WARRANTY OF NEOWARE OR
ANY SUPPLIER, AND EVEN IF NEOWARE, OR
ANY SUPPLIER HAS BEEN ADVISED OF THE
POSSIBILITY OF SUCH DAMAGES.
NOTWITHSTANDING ANY DAMAGES THAT YOU
MIGHT INCUR FOR ANY REASON WHATSOEVER
(INCLUDING WITHOUT LIMITATION, ALL DAMAGES REFERENCED AB OVE AND ALL DIRECT
OR GENERAL DAMAGES IN CONTRACT OR ANYTHING ELSE), THE ENTIRE LIABILITY OF
NEOWARE AND ANY OF ITS SUPPLIERS UNDER
ANY PROVISION OF THIS EULA OR ANY SUPPLEMENTAL EULA AND YOUR EXCLUSIVE REMEDY FOR ALL OF THE FOREGOING SHALL BE
LIMITED TO THE GREATER OF THE ACTUAL
DAMAGES YOU INCUR IN REASONABLE RELIANCE ON THE SOFTWARE UP TO THE AMOUNT
ACTUALLY PAID BY YOU FOR THE SOFTWARE
OR U.S. $5.00. THE FOREGOING LIMITATIONS,
EXCLUSIONS AND DISCLAIMERS SHALL APPLY
TO THE MAXIMUM EXTENT PERMITTED BY
APPLICABLE LAW, EVEN IF ANY REMEDY FAILS
ITS ESSENTIAL PURPOSE.
IT IS EXPRESSLY UNDERSTOOD AND AGREED
THAT EACH AND EVERY PROVISION OF THIS
EULA WHICH PROVIDES FOR A LIMITATION OF
LIABILITY, DISCLAIMER OF WARRANTIES, OR
EXCLUSIONS OF DAMAGES IS INTENDED BY
THE PARTIES TO BE SEVERABLE AND INDEPENDENT OF ANY OTHER PROVISION AND TO BE
ENFORCED AS SUCH.
• Limitations on Reverse Engineering, Decompila-
tion, and Disassembly. You may not reverse engineer, decompile, or disassemble the SOFTWARE,
except and only to the extent that such activity is
expressly permitted by applicable law.
• SOFTWARE TRANSFER ALLOWED BUT WITH
RESTRICTIONS. You may permanently transfer
rights under this EULA only as part of a permanent
sale or transfer of the DEVICE, and only if the recipient agrees to the provisions of this EULA expressly. If
the SOFTWARE is an upgrade, or snap in, any transfer must also include all prior versions of the SOFTWARE.
• EXPORT RESTRICTIONS. Regardless of any disclosure made by or to NEOWARE of an ultimate destination of the SOFTWARE, you acknowledge the
SOFTWARE is subject to U.S. export control laws
and jurisdiction. You acknowledge your exclusive
obligation to ensure that exports from the United
States are in compliance with the U.S. export control
laws. You shall also be responsible for complying
with all applicable governmental regulations of any
foreign countries with respect to the use of the
SOFTWARE outside of the United States. You agree
that you will not submit the SOFTWARE to any government agency for licensing consideration or other
regulatory approval without the prior written consent
of NEOWARE. You shall defend, indemnify, and hold
NEOWARE and its Suppliers harmless from and
against any and all claims, judgements, awards and
costs (including reasonable legal fees) arising out of
your noncompliance with applicable U.S. or foreign
law with respect to the use or unauthorized transfer
of SOFTWARE by you.
• GOVERNING LAW. This EULA shall be governed by
and controlled under the Commonwealth of Pennsylvania law without reference to its conflicts of law principals. In the event of any conflicts between foreign
law, rules, and regulations and United States of
America law, rules and regulations, United States of
America Law, rules and regulations shall prevail and
govern. The United Nations Convention on Contracts
for the International Sales of goods shall not apply to
this EULA.
– December 10, 2003
ClearCube Technology 8834 Capital of Texas Hwy N Austin, Texas 78759 voice 512 652 3500 www.clearcube.com
G020042-A Rev 8/4/2005
 Loading...