

Page 1
Quick Start Guide
Upgrading an A3000 Chassis
to an A3100 Chassis
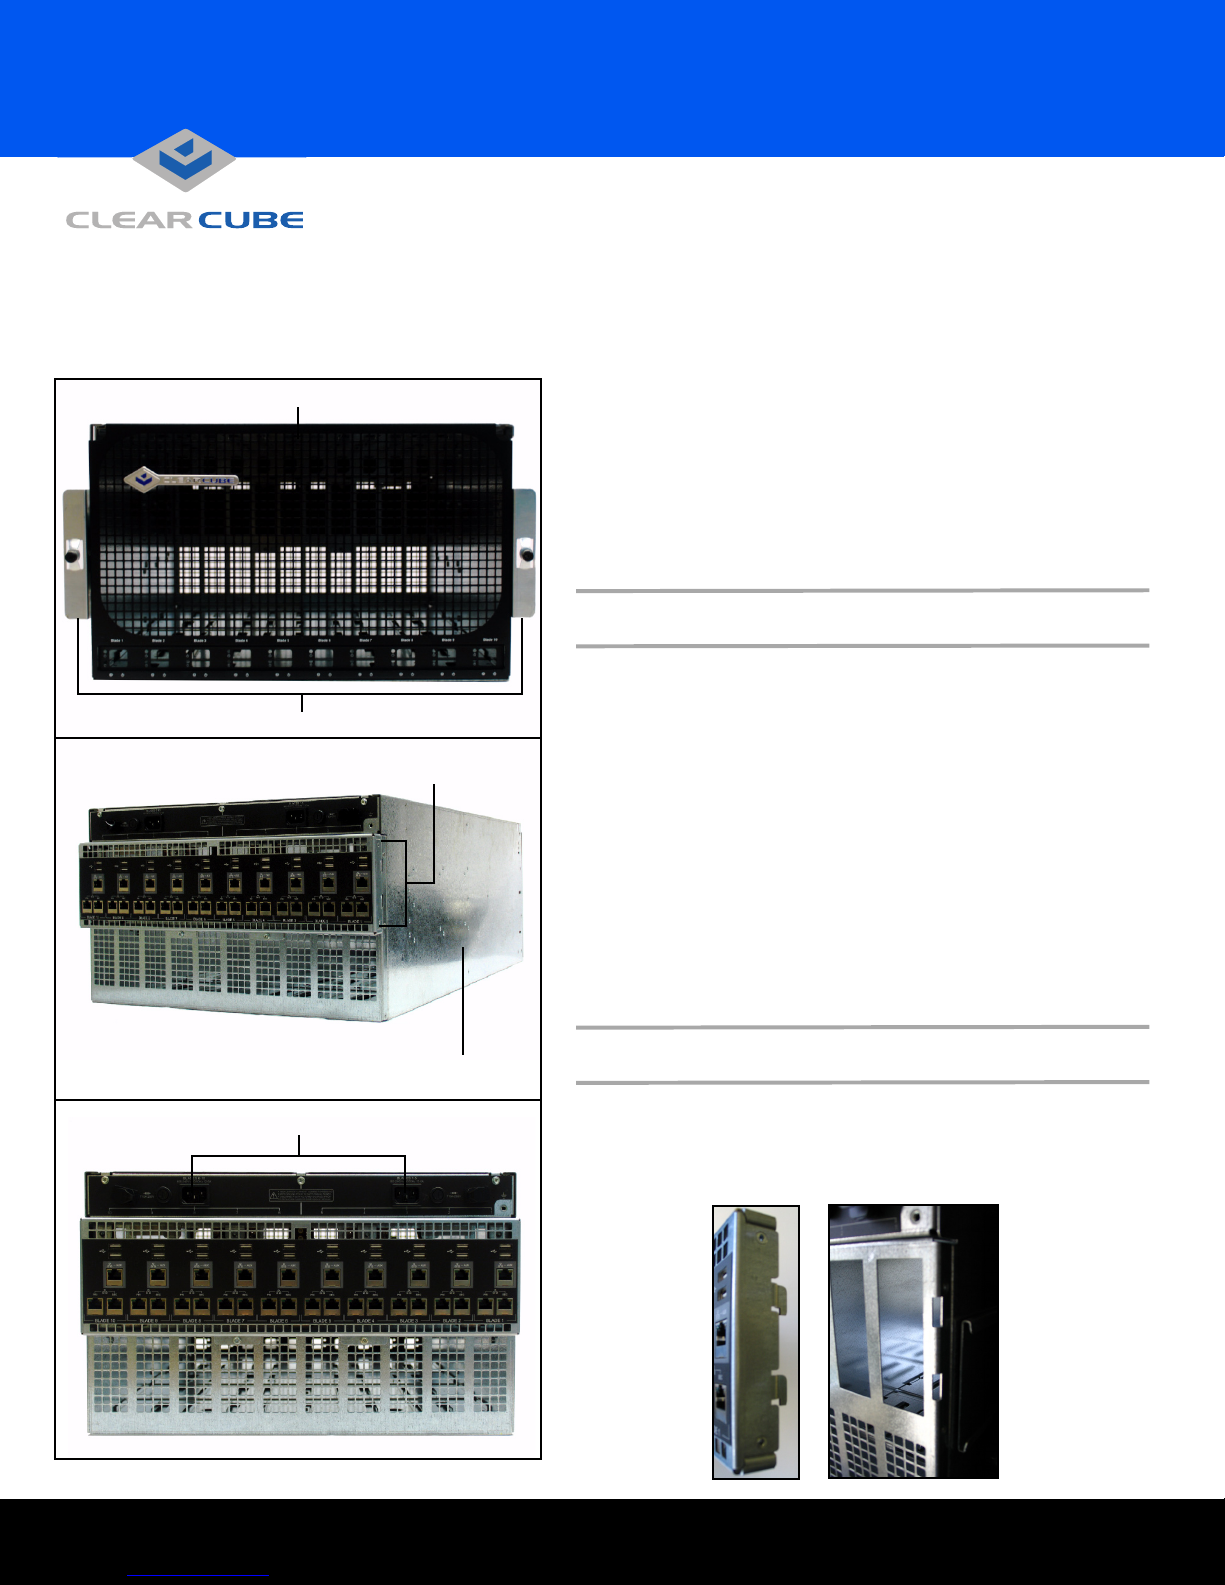
Front Bezel
Rack-Mount Brackets
Expansion Backplane
A3000 Upgrade QSG Rev A.fm — Enter yo ur TB topic here
Use your A3000 Chassis Upgrade Kit to upgrade a ClearCube
A3000 chassis to an A3100 chassis. Your upgrade kit contains:
• A3100 front bezel—Compatible with A1410 blades only.
• Expansion Backplane—Provides all signal connectors and
chassis ID, or electronic asset tag.
• Mounting hardware—Two 6-32 hex head, self-tapping screws.
The A3100 chassis is a centralized 6U-form factor chassis that
houses as many as 10 A1410 blades. A standard 42U 19-inch rack
can hold as many as seven A3100 chassis, for a total of 70 blades.
Each A3100 chassis contains an expansion backplane to provide
all signal connectors for A1410 blades and an electronic asset tag.
Note: The A3100 chassis does not support A1010 blades.
Upgrade Overview and Chassis Considerations
To upgrade your A3000 chassis, you must:
1. Disconnect power from the chassis and attach the expansion
backplane.
2. Remove the A3000 front bezel and attach the A3100 front bezel.
After upgrading the chassis, reconnect AC cables to the chassis and
insert your A1410 blades. See the A1410 Quick Start Guide included
with your blades for instructions about inserting A1410 blades.
AC Power Receptacles
Chassis
The A3100 chassis draws air in through the front of the chassis
and exhausts it out the back. If you use a cabinet enclosure,
ensure that you have at least 34 inches (86cm) of interior depth
from the front of the enclosure to accommodate the cabling and
air flow exiting from the rear of each chassis. Spacing between
the front and back rails can be no more than 30 inches (76cm).
Attaching the Expansion Backplane
1. Ensure that neither AC power cord is connected to the chassis.
2. From the rear of the chassis, insert the hooks on each side of the
expansion backplane into the slots on each side of the chassis,
then gently lower the backplane until it rests on the chassis.
Expansion
Backplane
and hooks
Chassis with
slots for
backplane
hooks
ClearCube Technology 8834 Capital of Texas Hwy N Austin, Texas 78759 voice 512 652 3500 www.clearcube.com
Page 2
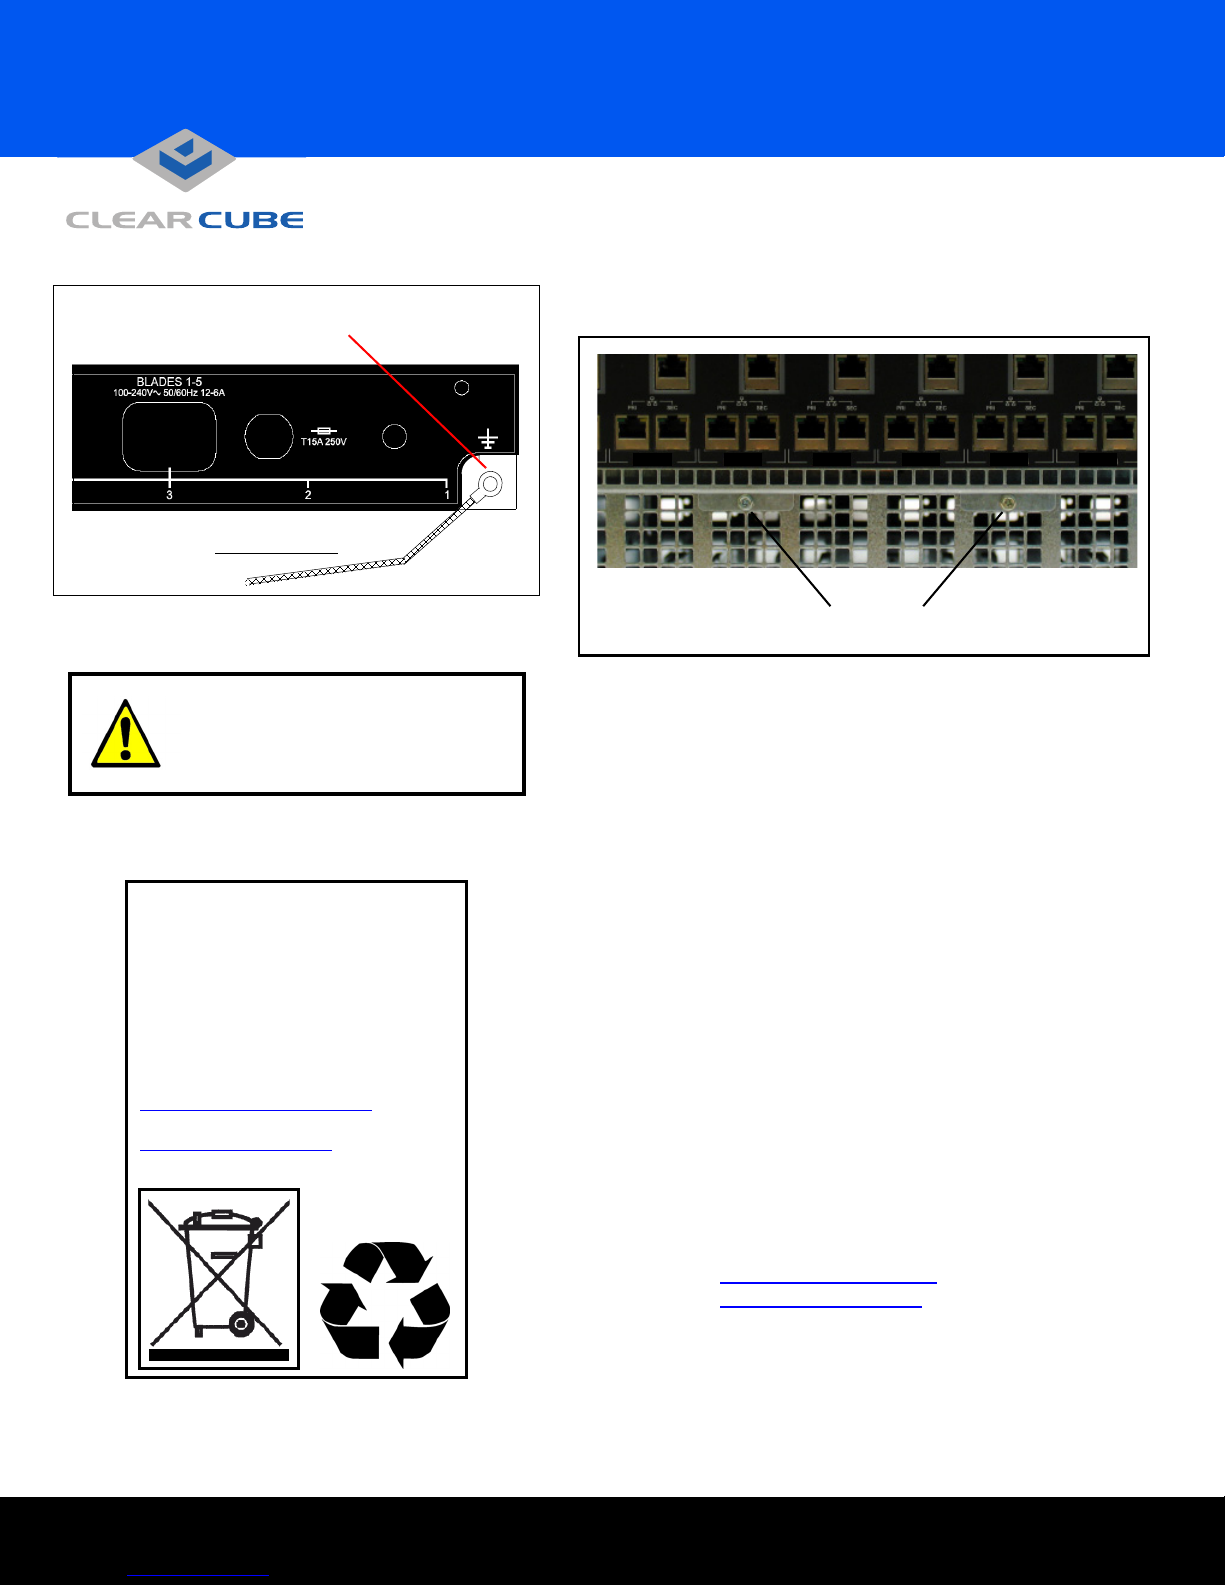
Use 10-32 screw to attach ground strap
to chassis and to rack frame
Ground Strap
3. Insert the screws included in your kit into the flanges on the
bottom edge of the backplane. Use a #2 Phillips screwdriver to
screw both screws into the chassis.
SLOT 8 SLOT 7 SLOT 6 SLOT 5 SLOT 4 SLOT 3
Insert both screws into backplane flanges
CAUTION: High Leakage Current
Connect chassis earth ground
before supplying AC power
to chassis.
WEEE Initiative Notice
This electronic product is recyclable under
WEEE (Waste Electrical and Electronic
Equipment) guidelines and should not
be discarded as regular trash.
Please locate your nearest recycling facility
to ensure proper disposal of this product,
or contact ClearCube Technology
on the web at:
http://support.clearcube.com/
or by email at:
recycle@clearcube.com
for more information.
You can now reconnect power, insert your A1410 blades, and
connect Ethernet cabling as appropriate for your environment.
Note: Ensure that the ground strap, included with your A3000
chassis, is connected to the A3100 chassis and to the
rack.
See Setup and Installation Guide for A–Series Blade and Chassis
for more information.
ClearCube Technology 8834 Capital of Texas Hwy N Austin, Texas 78759 voice 512 652 3500 www.clearcube.com
Email
support@clearcube.com
Web site support.clearcube.com
Toll-free (866) 652-3400
Phone (512) 652-3400
G0200099 Rev A
 Loading...