

Classe Audio TUNER ONE Owner's Manual

CLASSÉ AUDIO
TUNER-1
FM STEREO TUNER
TUNER-1
OWNER'S MANUAL

CLASSÉ DESIGN PHILOSOPHY
1. REPEATED LISTENING DESIGN SESSIONS:
Fine tuning of sound by exchanging and mixing of parts (transistors, capacitors, wiring, PCB boards
etc.), and adjusting many specific operating voltages within proper engineering ranges, producing an
overall sonic recipe giving the most natural harmonic realism of music typical of instruments in a
live performance.
2. UPGRADABLE SINGLE CIRCUIT DESIGNS:
All Classé products share exactly the same circuit design philosophy. This means all amplifiers and
all high level circuits benefit from the same design goals. Similar circuits are then tailored to
different power levels etc. Differences between less expensive models and more expensive models
are parts quality and compliment, power supply extravagance and the amount of filtering etc., as
well as features and packaging.
Classé has over the years been constantly sonically fine tuning and technically upgrading circuit
designs and their application, thus reaching a very high level of natural musical enjoyment, as well
as excellent reliability which benefits all models.
3. EXTREME LONG LIFE IN REAL WORLD CONDITIONS:
Choosing the best attainable quality parts and materials combined with the advantages of the two
above-mentioned areas provides Classé owners with years of proven trouble free reliability and
musical enjoyment.

TUNER-1
OWNER'S MANUAL
TABLE OF CONTENTS
UNPACKING & SET-UP .......................................…................ 4
A.C. LINE POWER ..............................................….….............. 5
FRONT PANEL AND CONTROLS ...............................…....... 6
REMOTE CONTROL WAND.....................................…........... 9
REAR PANEL CONNECTIONS AND FUNCTIONS.............. 13
TECHNICAL DESCRIPTION ....................................…......…. 14
SPECIFICATIONS ..................................................…................ 15

-4-
UNPACKING & SET-UP
The Classé TUNER ONE has been carefully wrapped in heavy gauge plastic, packed in semi-
rigid foam and packed in a special box. To remove the unit, open and spread the top flaps of the box.
By its sides, lift out the entire unit with the foam pieces attached. Remove each foam side by pulling
straight out. Remove the plastic wrap and inspect the unit for any concealed damage.
Apart from this owner's manual, please ensure the following is also included:
1) Detachable A.C. power cord.
2) Remote control handset (along with allen key and two (2) type "AAA" batteries).
Report any damage or missing parts to your dealer immediately.
The TUNER must be located in a position free of any hum-inducing magnetic fields.
Permanent placement adjacent to power amplifiers, A.C. line filters, or regulation devices should be
avoided. Ideally, a few feet should separate the TUNER from the power amplifier. As well, keep low-
level interconnect cables away from the power amp and separate from A.C. line cords. Experimentation
with placement will show you how close to your other equipment you can place the Classé Tuner in
your own system
Heat generated by the Tuner is negligible. Air space around the unit need not be a concern, but
like all other electronics, it should not be enclosed in a cabinet which will become overheated by other
components.
Check the Serial Number sticker on the back of the unit for the correct operating voltage.
Regardless of voltage, the fuse rating should be .8 AMP SLO-BLO.

-5-
A.C. LINE POWER
The TUNER-1 has NO ON/OFF switch. The TUNER-1’s low power consumption and improved sonics
from always being ON allow the unit to be “ON” all the time. It is permissible to plug the TUNER-1
into a power-strip if you wish to power it on and off. While thoroughly musical shortly after initial turn-
on, the TUNER-1 will exhibit "sonic growth" for the first 300 hours of use.
For optimum sonic performance, use of the optional CLASSÉ REFERENCE A.C. LINECORD is
recommended. Consult your dealer regarding this accessory.
CAUTION: "FLOATING THE GROUND” OR DEFEATING THE GROUND ON THE 3-
PRONG LINECORD MAY CREATE A SHOCK HAZARD. CONNECT ALL INTERCONNECT
CABLES BETWEEN THE ELECTRONICS BEFORE CONNECTING THE A.C. LINECORDS TO
THE WALL OUTLETS. THIS WILL REDUCE THE POTENTIAL SHOCK HAZARD. SEE ALSO
THE WARRANTY SECTION OF THIS OWNER'S MANUAL.
-6-
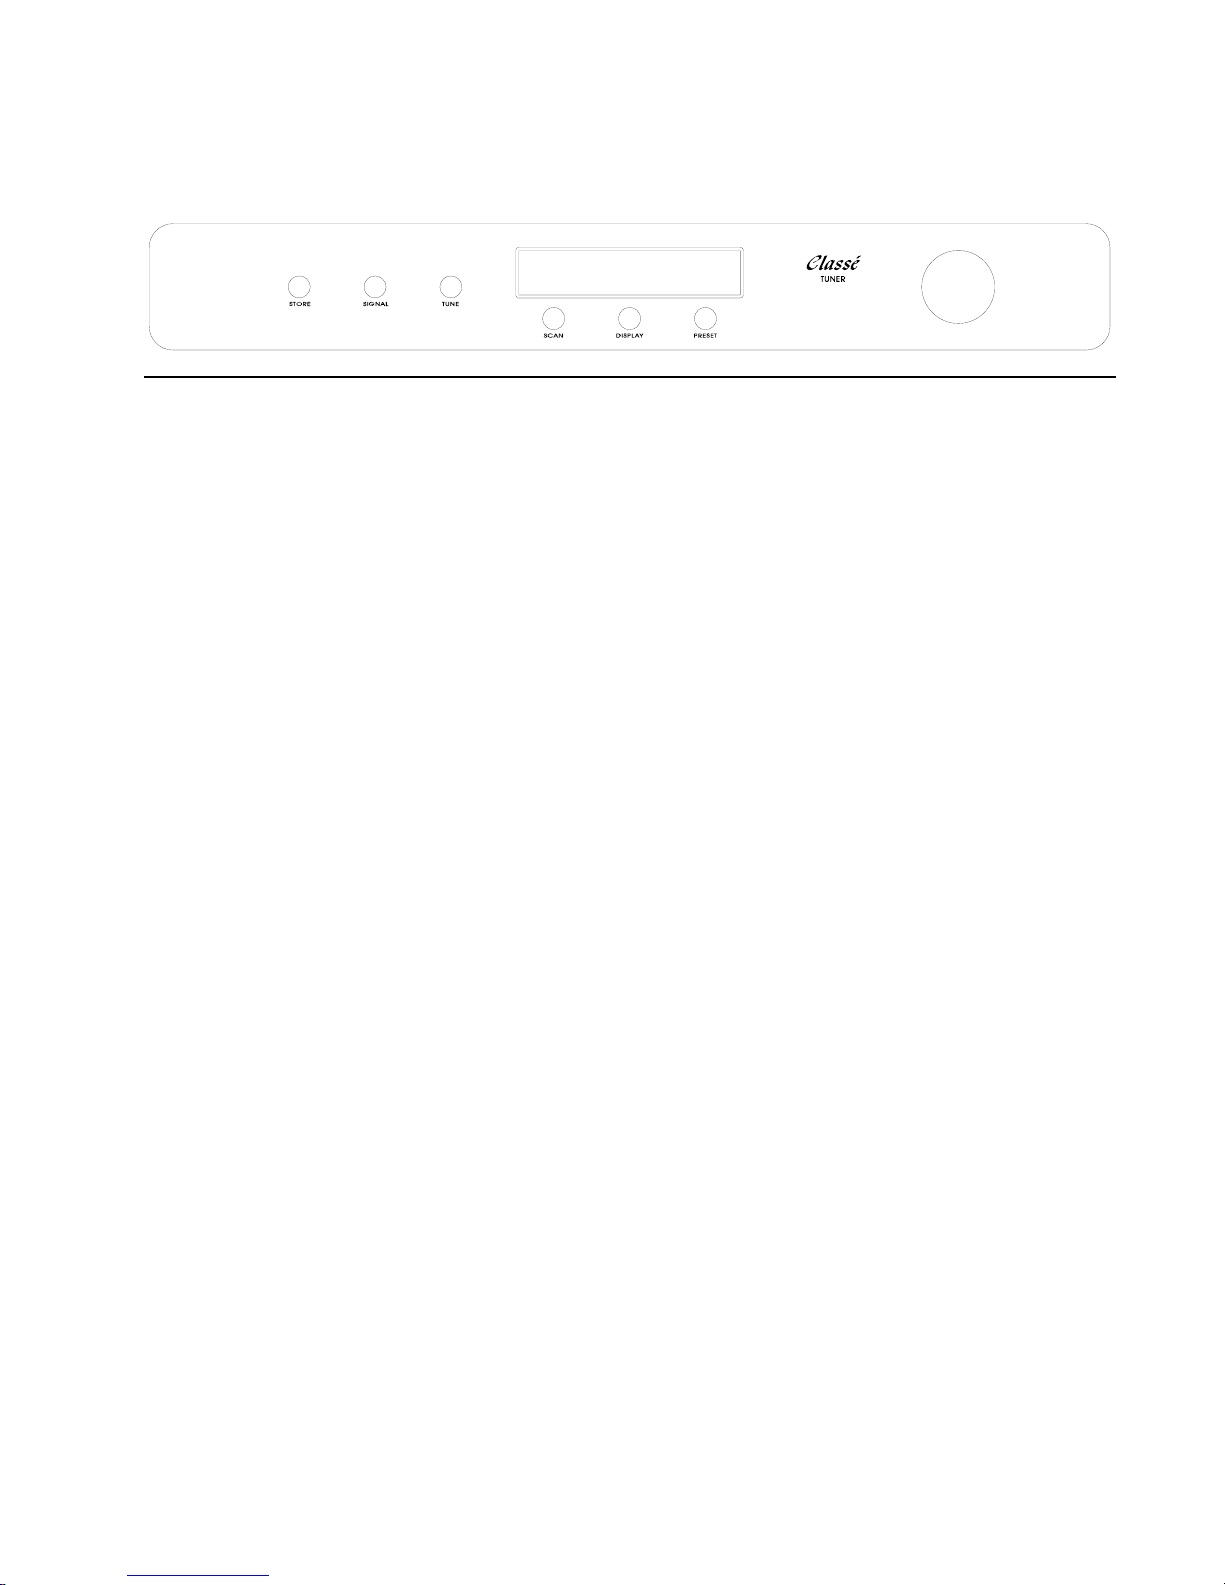
FRONT PANEL AND CONTROLS:
The Front Panel Controls are similar in operation to the controls on the Remote Wand. Each
is discussed below in its own section for the sake of clarity.
1 Selecting a Station
Put the TUNER-1 into tune mode by pressing TUNE on the front panel, to the left of the display
The display will show the current frequency. Now turning the knob on the right of the faceplate
either will tune continuously if held in place or in 50 kHz steps if turned and released. Turning the
knob to the right will tune up through the frequencies and turning it to the left will tune down
through the frequencies. When the highest or lowest FM frequency is reached the display will jump
to the lowest or highest and start over.
2 Storing a Preset
Up to 80 stations may be stored for instant recall. With the TUNER-1 in tune mode press STORE.
The TUNER-1 will show the next lowest available preset location in which the station at that
frequency can be stored. Turning the knob left or right allows you to select another desired lower or
higher number preset position. Once the location has been selected the preset is stored by pressing
STORE again. If there is already a preset stored in a location then the display will show St. to
indicate that you will overwrite a previous preset if the STORE command is executed.
3 Recalling a preset
Put the TUNER-1 into preset mode by pressing the PRESET button below the display. Step through
the stored presets using the knob, turning it left or right to step down or up through the preset
locations. The tuner can store up to 80 presets. When a preset station has been selected its location
number will remain in the display.
NOTE: TO CLEAR ALL PRESETS, unplug the AC cord from the unit, then re-insert the AC cord
while holding the “PRESET” button. Keep holding until the display shows ‘CLR’.
4 Scanning and Searching
The TUNER-1 has two automatic ways of finding stations.
Scanning will scan up or down through the frequency band for stations and will stop and play 5
seconds of the detected station. It will then scan for the next station and play 5 seconds of the next
station found. Searching will scan up or down through the frequency band and stop permanently on
the next station found.
 Loading...