

Page 1
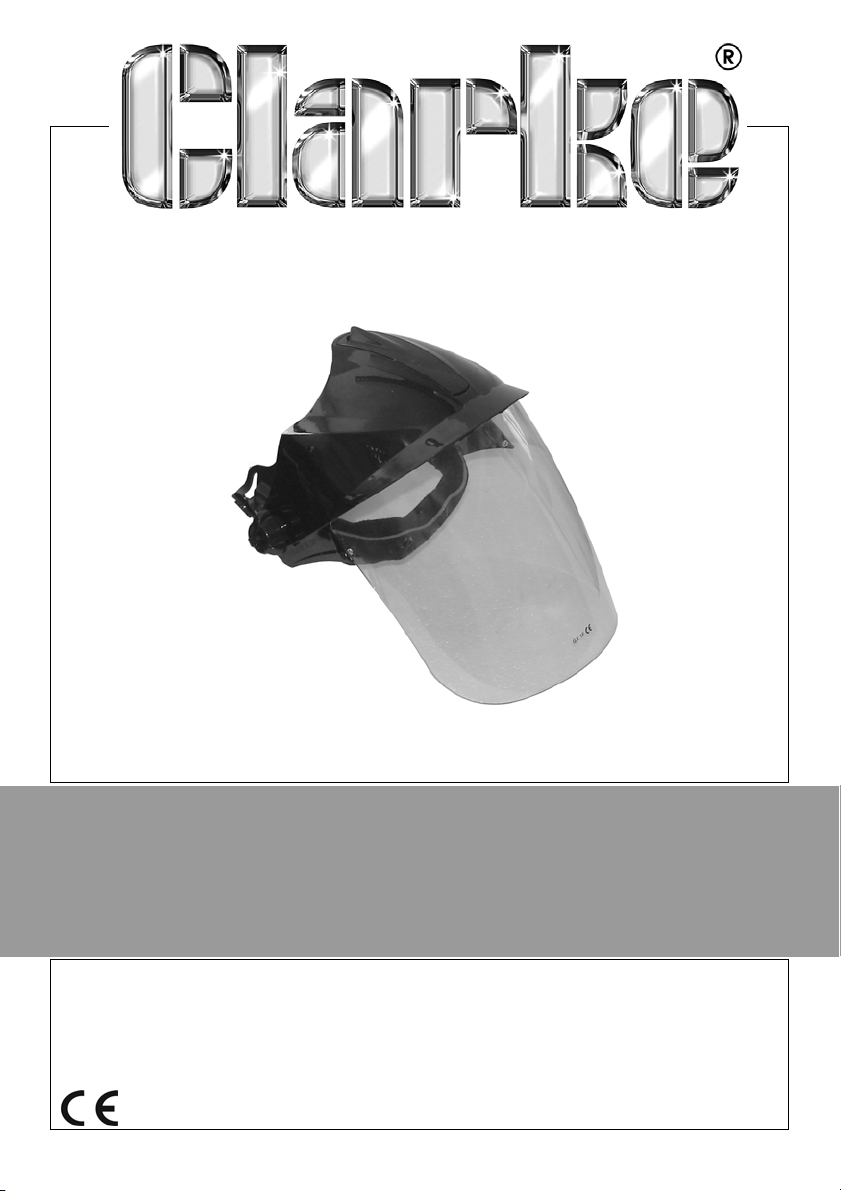
FACE VISOR
MODEL NO: SV2
PART NO: 8133810
USER
INSTRUCTIONS
ORIGINAL INSTRUCTIONS GC0618 ISS1
Page 2
INTRODUCTION
Thank you for purchasing this CLARKE Face Visor.
Before attempting to use this product, please read this manual thoroughly and
follow the instructions carefully. In doing so you will ensure the safety of yourself
and that of others around you, and you can look forward to your purchase
giving you long and satisfactory service.
GUARANTEE
This product is guaranteed against faulty manufacture for a period of 12
months from the date of purchase. Please keep your receipt which will be
required as proof of purchase.
This guarantee is invalid if the product is found to have been abused or
tampered with in any way, or not used for the purpose for which it was
intended.
Faulty goods should be returned to their place of purchase, no product can
be returned to us without prior permission. This guarantee does not effect your
statutory rights.
SAFETY PRECAUTIONS
• This face visor is designed for face and eye protection against highspeed particles of low energy impact. The visor is designed to be
lightweight and comfortable to wear but is not unbreakable.
• The protective lens in this visor is breakable and will not protect
against heavy impact hazards.
• This visor is not suitable for welding, laser cutting or grinding.
• Use this face visor for face and eye protection against low energy
impact and splashing liquids.
• The visor will not provide protection against fine dust, gas, ultra violet
or infra red radiation, ionising radiation, liquids under pressure or
other severe hazards.
• Inspect the visor frequently as a pitted or scratched visor reduces
vision and therefore should be replaced immediately.
• Do not use if any part of the visor is cracked or broken.
• Never place this product on a hot surface.
• When necessary, use identical replacement parts. This will ensure
that the safety of the product is maintained.
2
Parts & Service: 020 8988 7400 / E-mail: [email protected] or [email protected]
Page 3
MATERIALS DECLARATION
No parts of the visor are made of materials that are known to cause skin
irritation. However, materials that come into contact with the skin can cause
allergic reactions to certain susceptible individuals.
COMPLIANCE
This product complies with European Standard EN166:2001 and with PPE
Directive 89/686/EEC REACH (PAH for skin contact parts)
COMPONENT PARTS
3
Parts & Service: 020 8988 7400 / E-mail: [email protected] or [email protected]
Page 4
ADJUSTMENTS
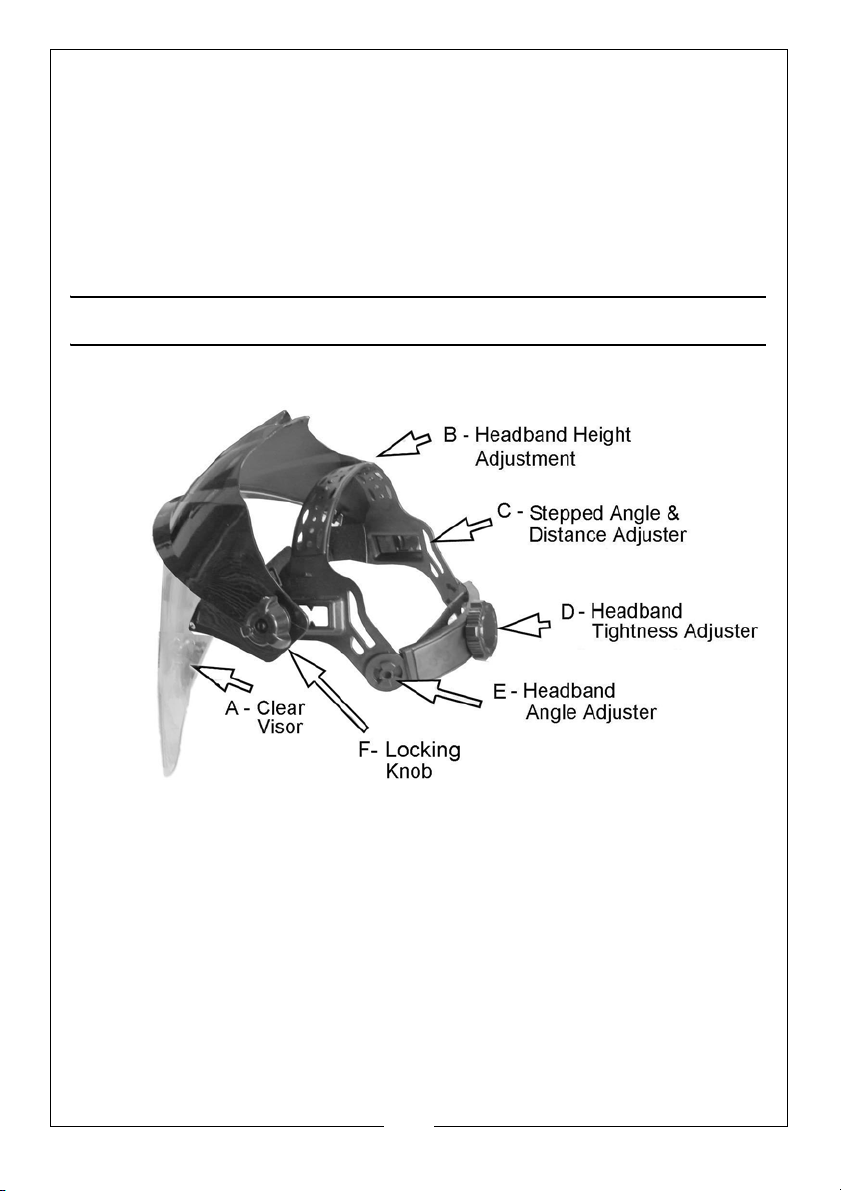
The face visor has three adjustment points for comfort and utility. All items are
shown on page 3.
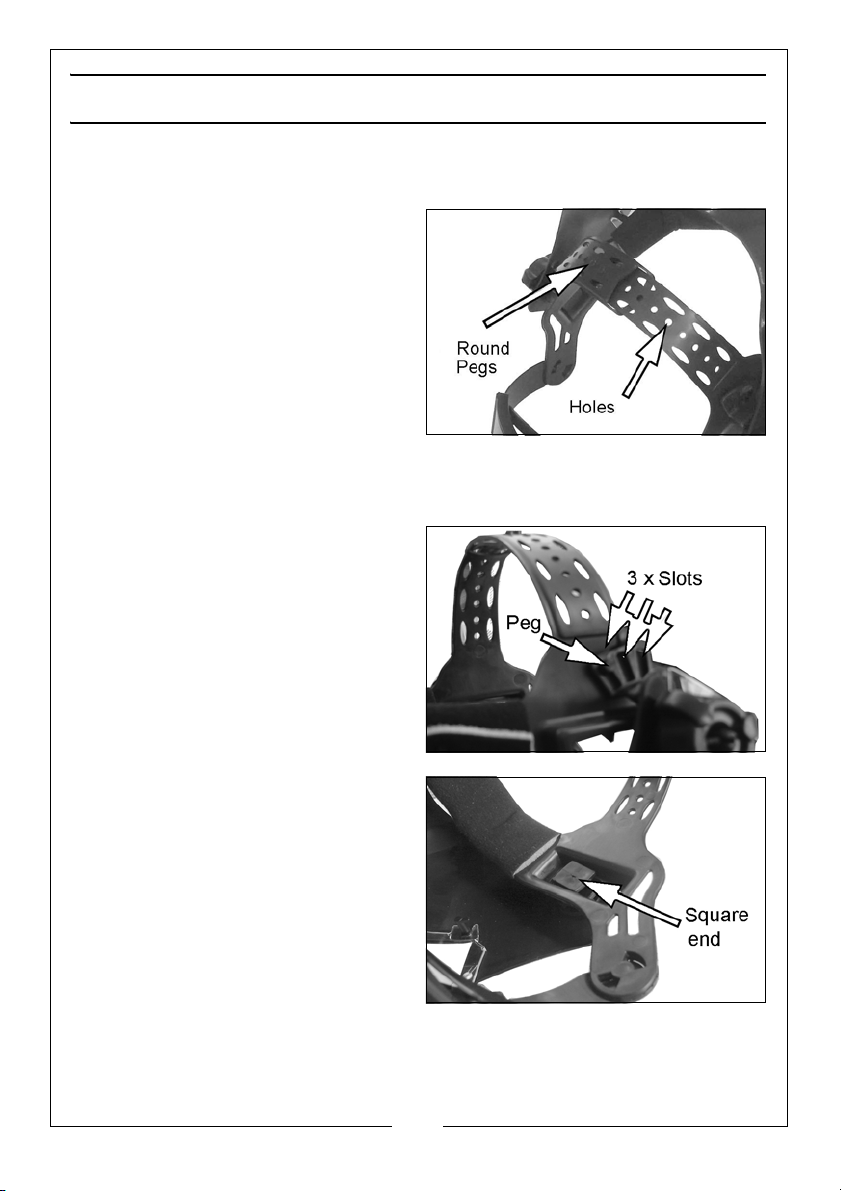
HEIGHT ADJUSTMENT (B)
1. Separate the two headband
halves.
• Increase the overlap to reduce
the height.
• Decrease the overlap to
increase the height.
ANGLE AND DISTANCE ADJUSTMENT (C)
1. Loosen the locking knobs on either side.
ANGLE
2. Reposition one of the inner tab’s
three slots onto the headband’s
peg.
3. Chose the same slot on the other
side.
• The face visor’s angle will rise or
lower, based on which slot is
chosen.
DISTANCE
The square end on the back of the
locking knob fits into the internal
track as shown.
1. Push the square end backward to
move the visor closer to your face.
2. Push the square end forward to
move the visor further away.
4
Parts & Service: 020 8988 7400 / E-mail: [email protected] or [email protected]
Page 5
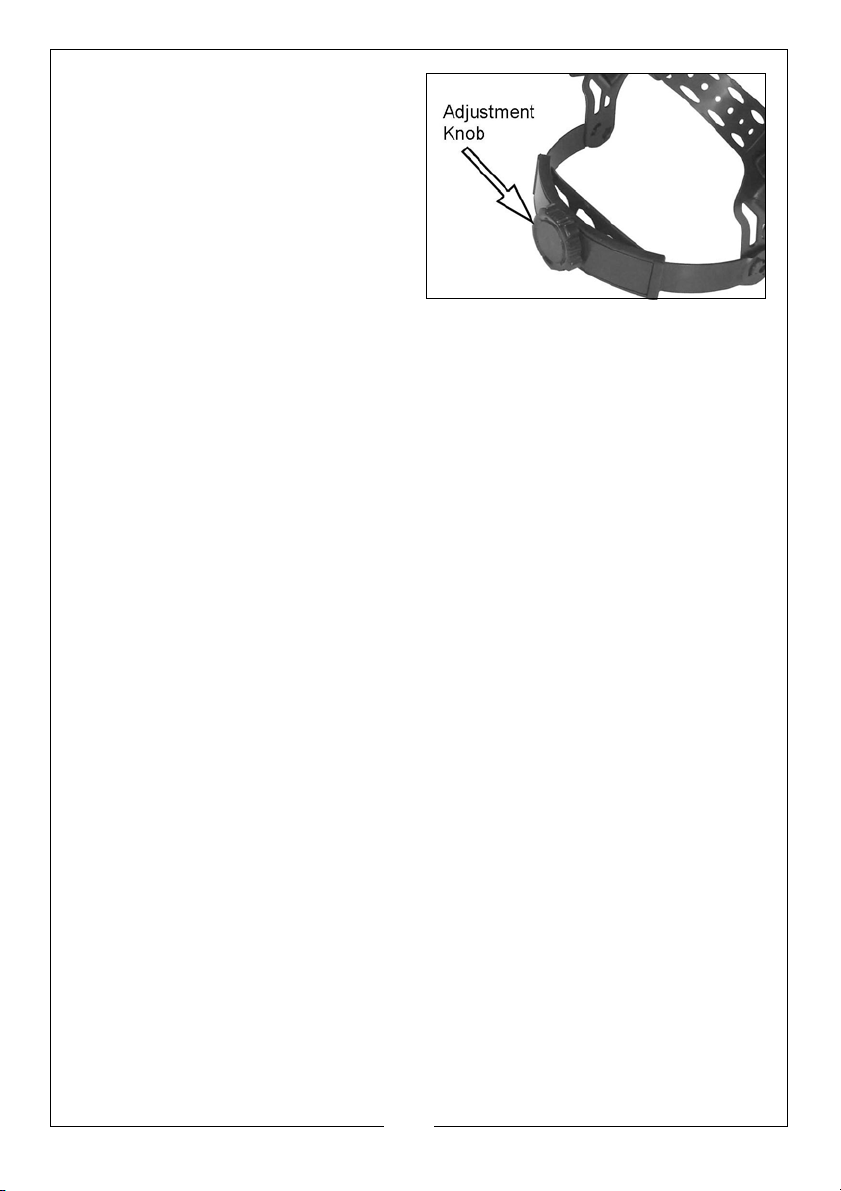
TIGHTNESS ADJUSTMENT (D)
Set the headband diameter with the
adjustment knob.
• Twist clockwise to tighten and
counterclockwise to loosen.
5
Parts & Service: 020 8988 7400 / E-mail: [email protected] or [email protected]
Page 6
PRODUCT CARE
• Damaged components must be replaced immediately to avoid risk
of eye and face injuries. A cracked, pitted or scratched visor will
reduce vision and seriously reduce the level of protection and must
be replaced.
• The visor can be wiped with soapy water or a household window
cleaning product when dirty. Apply the cleaner with a clean cloth
or paper towel.
• Do not use solvents. Never use tools or other sharp objects to remove
material from the visor.
• Store the visor in it’s box or similar safe place.
• The ideal storage is at room temperature, i.e.23
humidity.
• The product has a working life of at least 2 years under appropriate
conditions.
o
C and 55% relative
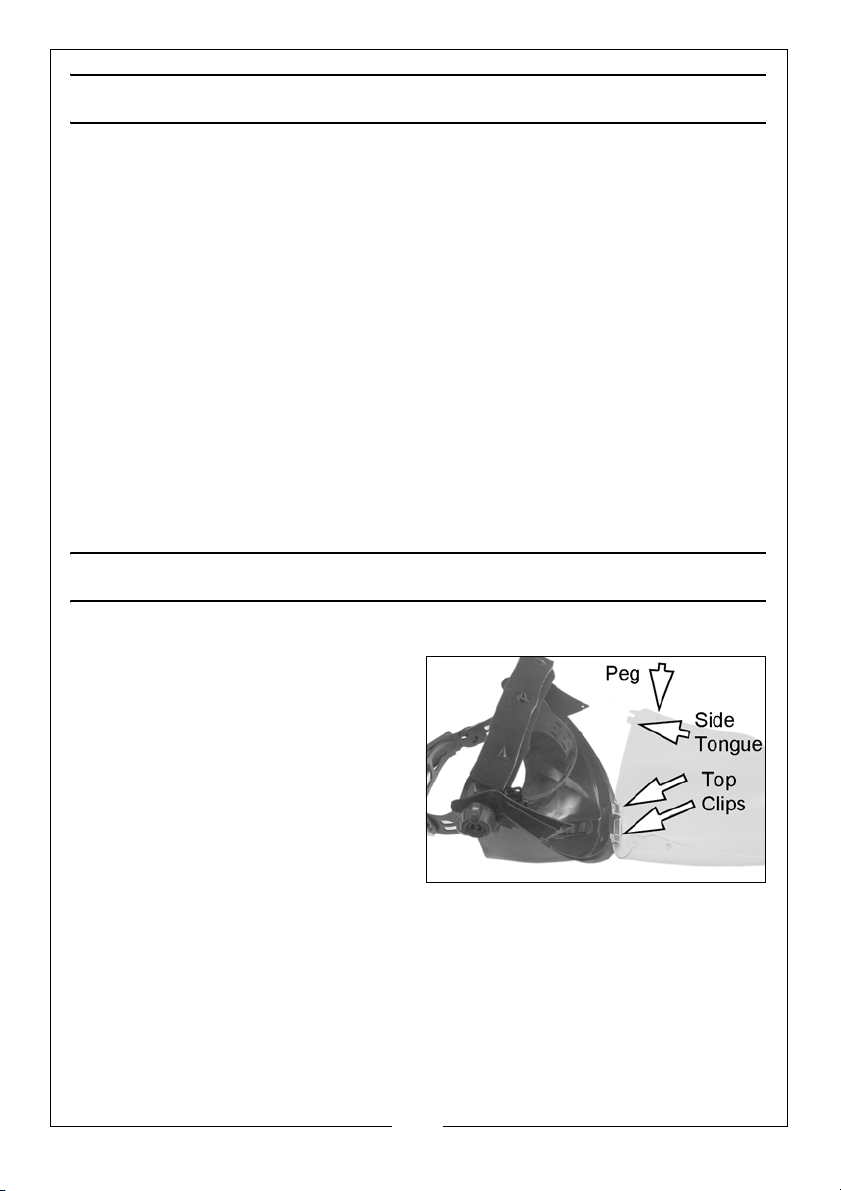
REPLACING THE VISOR
The visor can be removed for replacement.
1. Free the visor by pinching the side
pegs out of the frame.
2. Pull the visor away from the frame,
disengaging the top clips and
side tongues from the frame.
3. Re-fit the new visor in the same
way.
6
Parts & Service: 020 8988 7400 / E-mail: [email protected] or [email protected]
Page 7
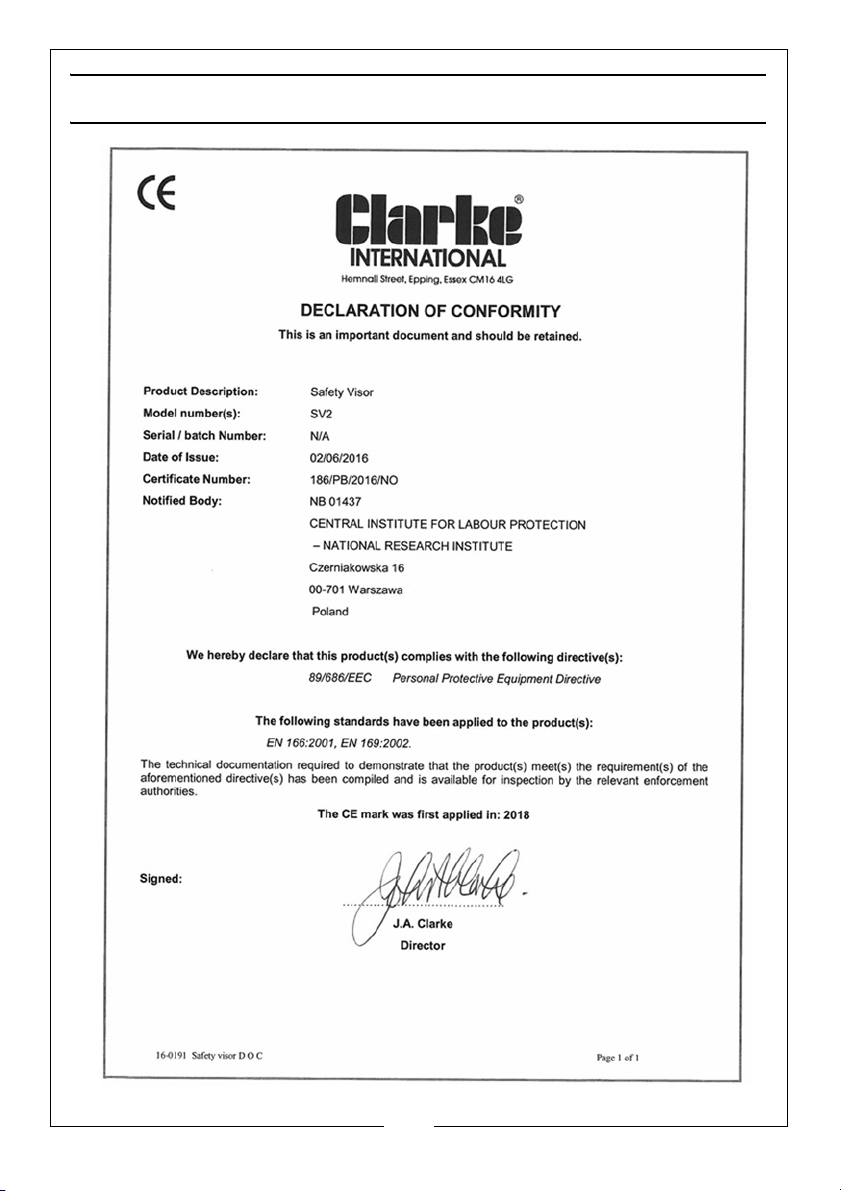
DECLARATION OF CONFORMITY
7
Parts & Service: 020 8988 7400 / E-mail: [email protected] or [email protected]
Page 8

 Loading...