

Page 1
© 2005 Clarity,a Division of Plantronics,Inc.
All rights reserved.Clarity, Amplifying Your Life and the Amplification logo are trademarks
or registered trademarks of Plantronics,Inc. DECT is a trademark of ETSI. Printed in China. 02/05
39128-01 Rev A
Importer:
Plantronics B.V.
Southpoint Building C
Scorpius 140
2132 LR Hoofddorp
The Netherlands
www.clarityproducts.com
User Guide
Bedienungsanleitung
Guía del usuario
Guide de l’utilisateur
Manuale d’istruzioni
Gebruiksaanwijzing
Manual do Utilizador
C710 AMPLIFIED
DECT
™
TELEPHONE
United Kingdom
0800 410014
Germany
0800 9323400
France
0825 0825 99
(0,15 € TTC/mn)
Switzerland
0800 932340
Spain
902 415191
Netherlands
0800 7526876
Luxembourg and Belgium
00800 75268766
Austria
0800 242500
Sweden
0200 214681
Portugal
+34 91 640 47 44
Denmark
80884610
Finland
0800 117095
Ireland
1 800 551896
Norway
800 11336
Italy
800 950934
HELP LINE TELEPHONE NUMBERS
1
DIAGRAMS
2
Fig A
Page 2
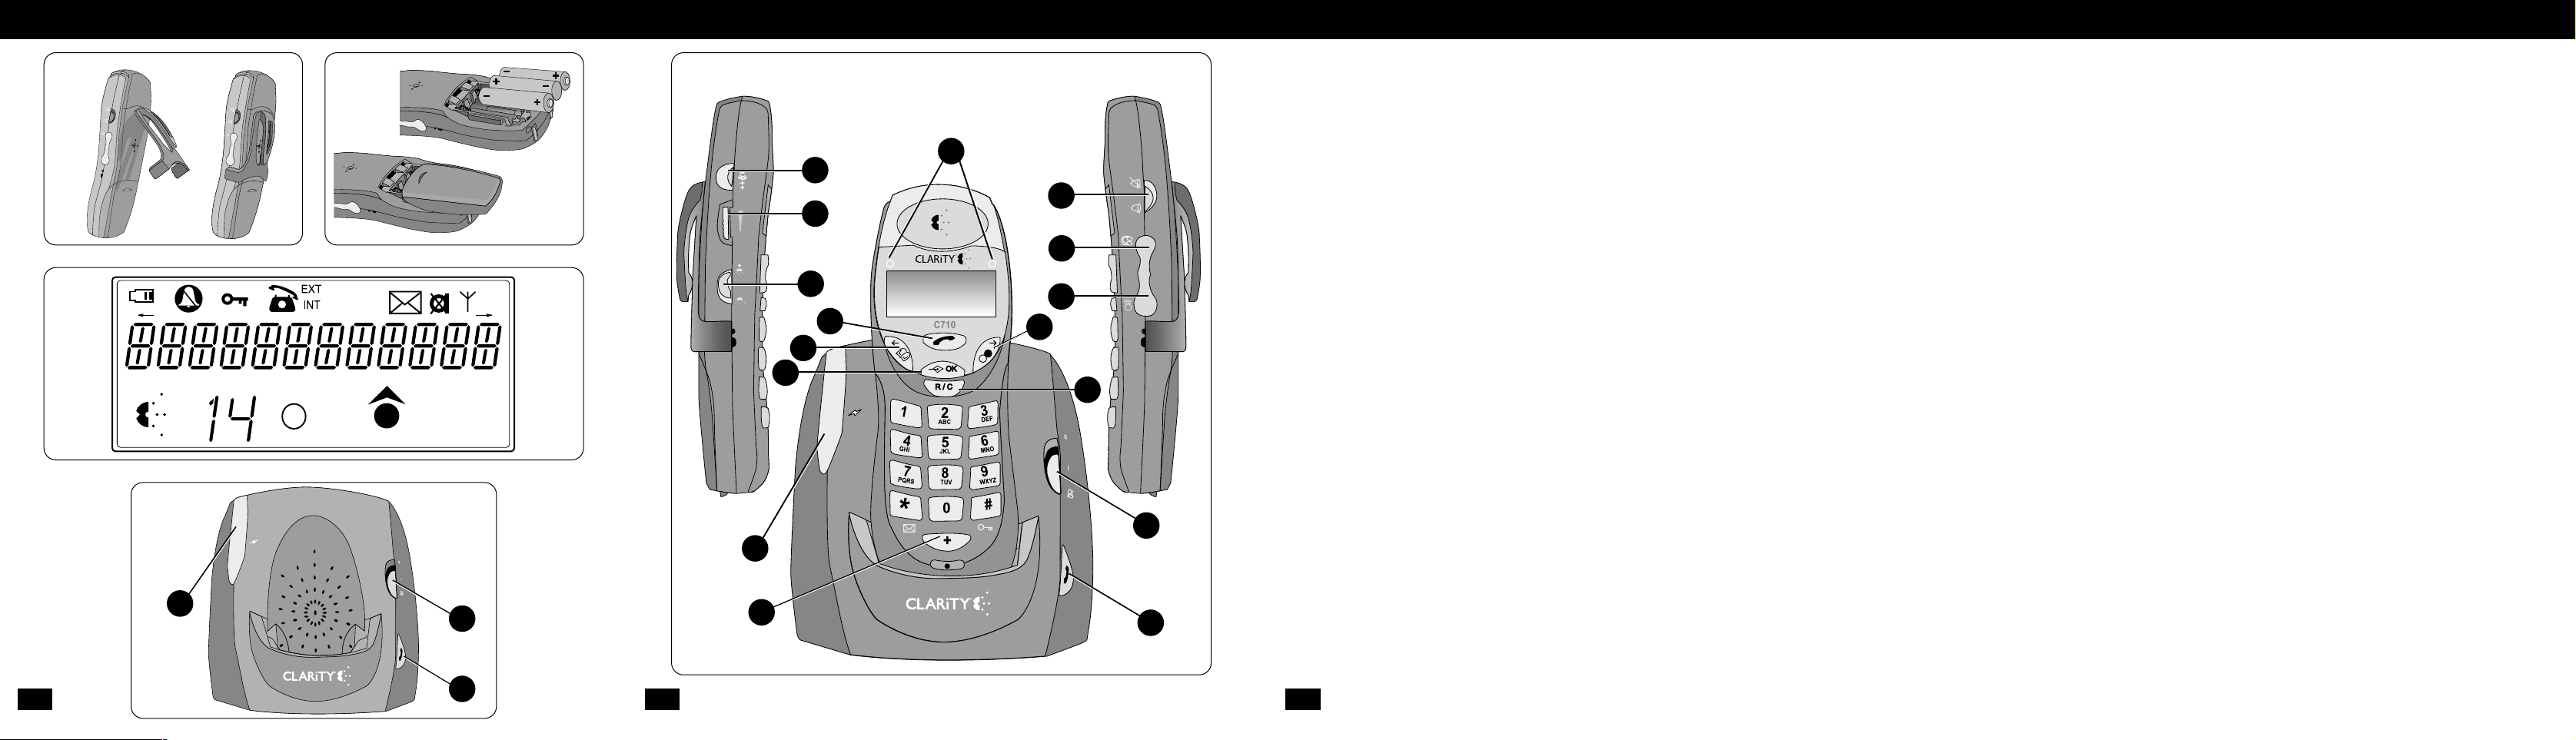
Fig F
DIAGRAMS
3 4 5
DIAGRAMS CONTENTS
GB ENGLISH Page 6-23
DE DEUTSCH Seite 24-43
ES ESPAÑOL Página 44-63
FR FRANÇAIS Page 64-83
IT ITALIANO Pagina 84-103
NL NEDERLANDS Pagina 104-121
PT PORTUGUÊS Página 122-139
C710
Fig B
Fig D
Fig E
Fig C
1
2
3
4
5
6
15
14
16
15
14
16
7
13
12
10
9
8
11
C710
Page 3

WELCOME
C710 Amplified DECT
™
Telephone from Clarity
www.clarityproducts.com
Thank you for selecting the C710
Amplified DECT
™
* T elephone
from Clarity.
This User Guide provides you with
the information you need to use your
C710 effectively and safely.
Read this user guide thoroughly before
using your telephone.Keep the manual
near the telephone for easy reference.
*Digital Enhanced Cordless Telecommunications
6
GB D E E S F R I T NL PT
Page 4

IMPORTANT SAFETY INFORMATION – continued
Do not dispose of batteries in a fire.They may explode.Take empty batteries to
a collection point for chemical waste.
Do not install or use this telephone near water.
Unplug this telephone from the wall outlets before cleaning.Do not use liquid cleaners
or aerosol cleaners on the telephone.Use a damp cloth for cleaning.
Do not cover the slots and openings on this telephone.This telephone should never be
placed near or over a radiator or heater.This telephone should not be placed in a builtin installation unless proper ventilation is pr ovided.
Do not place anything on the telephone line cable.Install the telephone where no one
will step or trip on the cable.
Never push any objects thr ough the slots in the telephone.They can touch dangerous
voltage points or short out parts that could result in a risk of fire or electrical shock.
Never spill liquid of any kind on the telephone.
To reduce the risk of electrical shock,do not take this phone apart.Opening or
removing covers may expose you to dangerous voltages or other risks.Incorrect
reassembly can cause electric shock when the appliance is subsequently used.
Never install telephone wiring during a lightning storm.
Hereby, Plantronics BV declares that the Clarity™C710 Amplified DECT
™
Telephone is in compliance with the essential requirements and all other
relevant provisions of Directives 1999/5/EC and 93/42/EEC.
To view the Declaration of Conformity for this product please see
www.plantronics.com/documentation
Class I medical device
When the Boost icon is shown on the displa y,the volume ma y be v ery
loud and in excess of 118dB.This mode is intended specifically for hearing
impaired users.
8
GB D E E S F R I T NL PT
7
GB
IMPORTANT SAFETY INFORMATION
PLEASE READ THE FOLLOWING INSTR UCTIONS BEFORE USE:
When using your telephone equipment these basic safety precautions should always
be followed to reduce the risk of fir e,electric shock,and injury to persons including
the following:
Read and understand all instructions.
Follow all warnings and instructions marked on the telephone.
GB
DIAGRAM KEY
HANDSET
1
Boost Button
2 Volume Control
3 Clarity Power ON/OFF
4 Ringer ON/OFF
5 Headset Socket
6 Neck Loop Socket
7 Redial
8 Recall/Cancel Key
9 OK Key
10 Phone Book
11 ON/OFF Line Ke y
12 Visual Ringer
13 Emergency Ke y
BASE UNIT
14
Visual Ringer
15 Ringer V olume Control
16 Handset Page Button
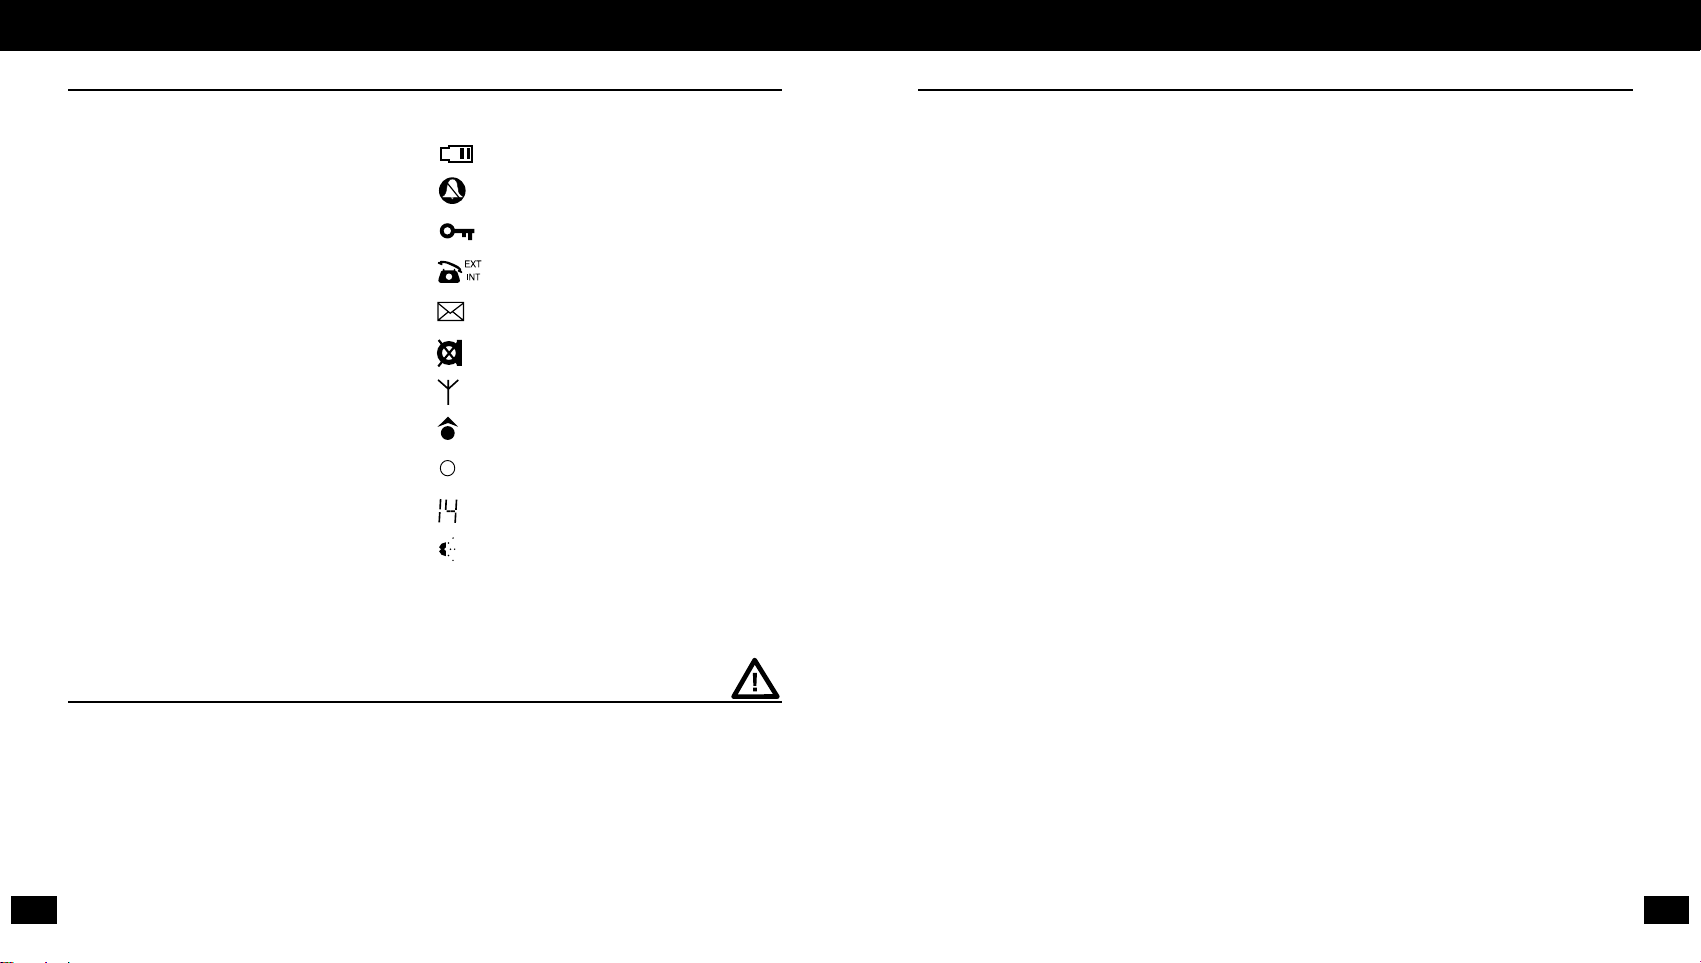
LCD ICONS
Battery
Handset Ringer OFF
Ke ypad Lock ON
Telephone OFF Hook
Voice Mail Message
Mute
Aerial
Clarity Power ON
Clarity Power OFF
Volume Level
Boost ON
Page 5

Once it is found,the display will show:
Place the handset onto the base unit.
The orange LED with the symbol should
illuminate and the telephone should ring once.
Before you use the handset for the first time,it is important to fully charge the batteries.
Leave the handset in the base station for a minim um of 14 hours.
NOTE: Leave the handset on the base unit when you are not using the telephone in
order to keep the batteries charged.
HANDSET LCD SCREEN
The upper two lines are designated for basic DECT functionality,while the third line
displays the enhanced audio settings.Refer to Fig D.
HANDSET MENU SETTINGS
To access the menu settings screen press the button.
To scroll left through the menu options pr ess the or to
scroll right press the to display the settings you wish to
change.These buttons are now referred to as arro w keys and two arrows will be
displayed on the LCD indicating y ou are in the Menu Settings mode.
CHANGE LANGUAGE SETTING
Press the button and scroll along to the option between options ‘0 – Delete
HS’ and ‘1 – Store Memory’.
Press .
Scroll through the choices to y our r equired language option.
Press .
The phone emits a confirmation beep and returns to standby
mode.
GB
10
GB D E E S F R I T NL PT
GB
9
GETTING STARTED
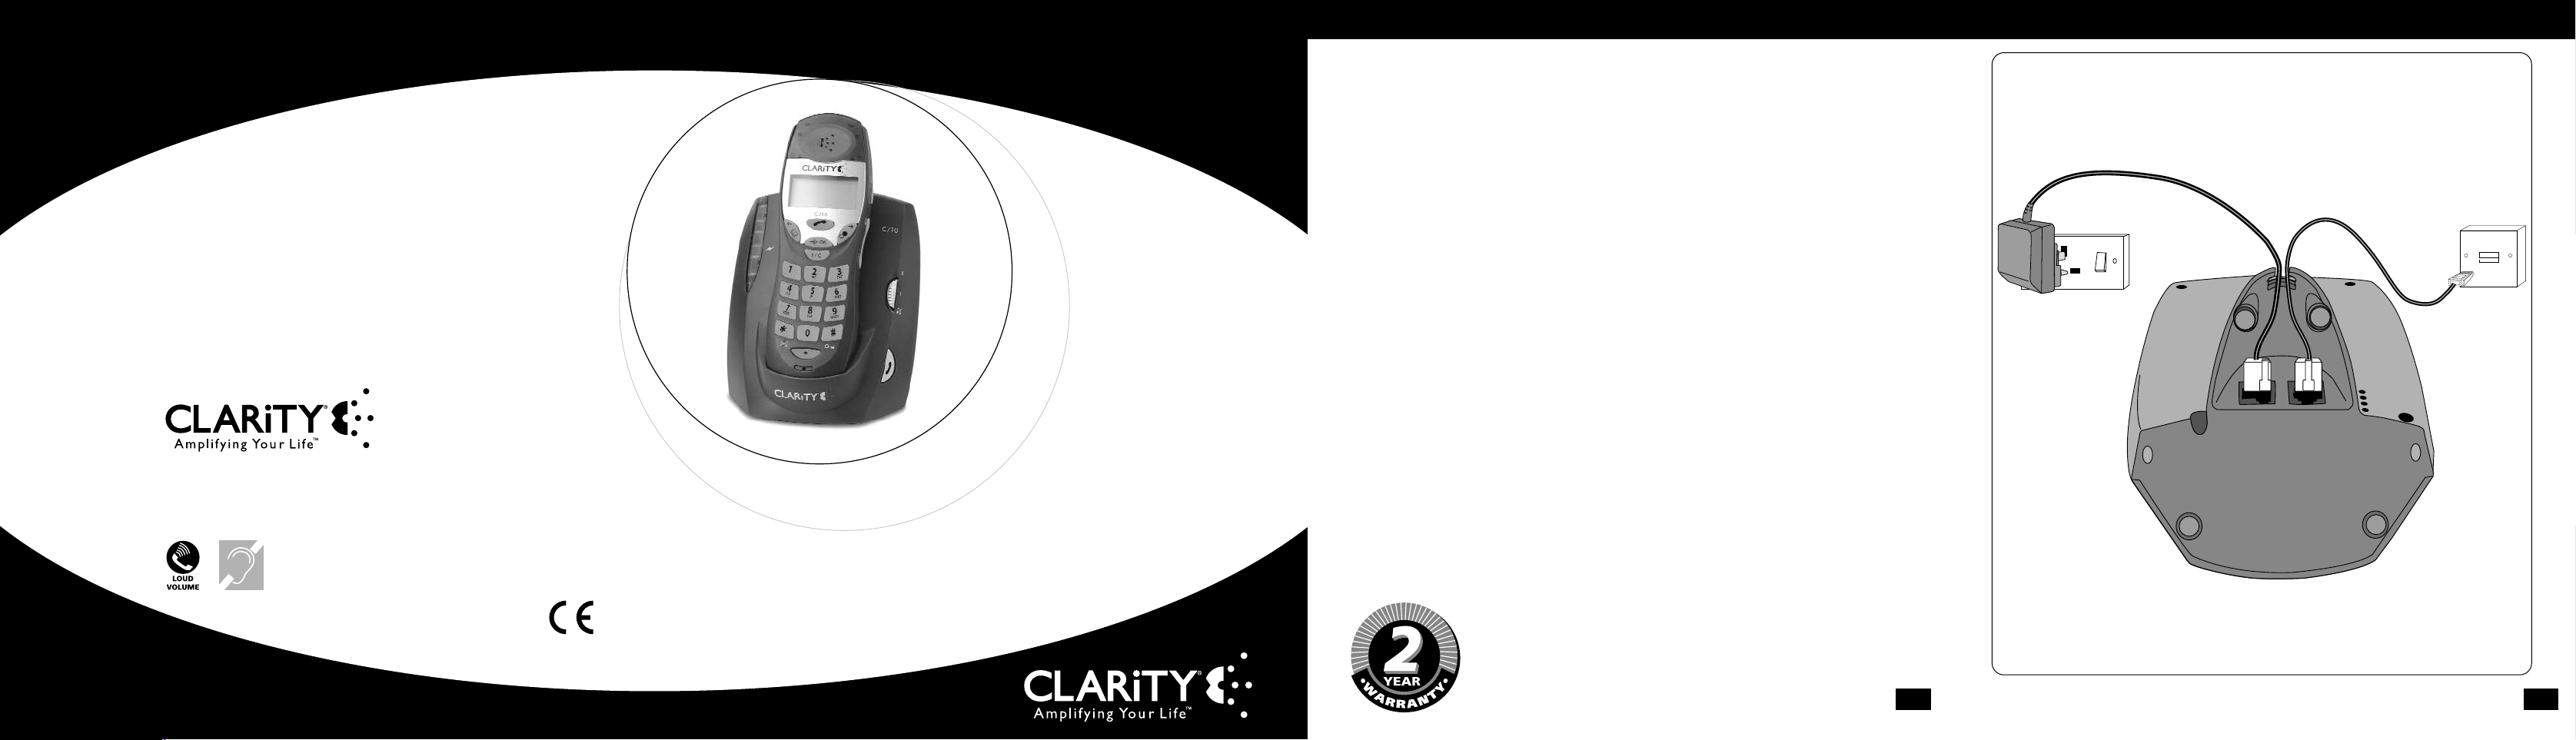
BASE UNIT CONNECTIONS
Plug the mains power lead and the telephone cord into the back of the base unit.
Refer to Fig A.
Plug the telephone cable into your telephone line socket then plug the AC adapter into
a mains power supply sock et.Refer to Fig A.
TELEPHONE RANGE
This telephone uses radio signals between the handset and base unit.To use your
handset and base unit together, you must be able to establish a radio link between them.
The range between the base and the phone conforms to the DECT™specifications and
will allow up to 300m distance between the handset and its base in a free space and
typically up to 50m in a normal home environment.
NO TE: Any large metal object – like a refrigerator,a mirror or a filing cabinet between the
handset and the base unit may block the radio signal.
Other solid structures, like walls, may reduce the signal strength and range.
Some electrical equipment – fridges, washing machines, microwave ovens, fluorescent
lights, computers,TVs etc may cause interference.
A TTACHING BELT CLIP T O HANDSET
Insert the belt clip into the slot on the rear of the handset and click the bottom of the
belt clip onto the handset.Refer to Fig B.
INST ALLING BATTERIES IN THE HANDSET
Remove battery compartment cover and install the supplied 3 x AAA rechargeable
batteries.Refer to Fig C.
Replace the cover.
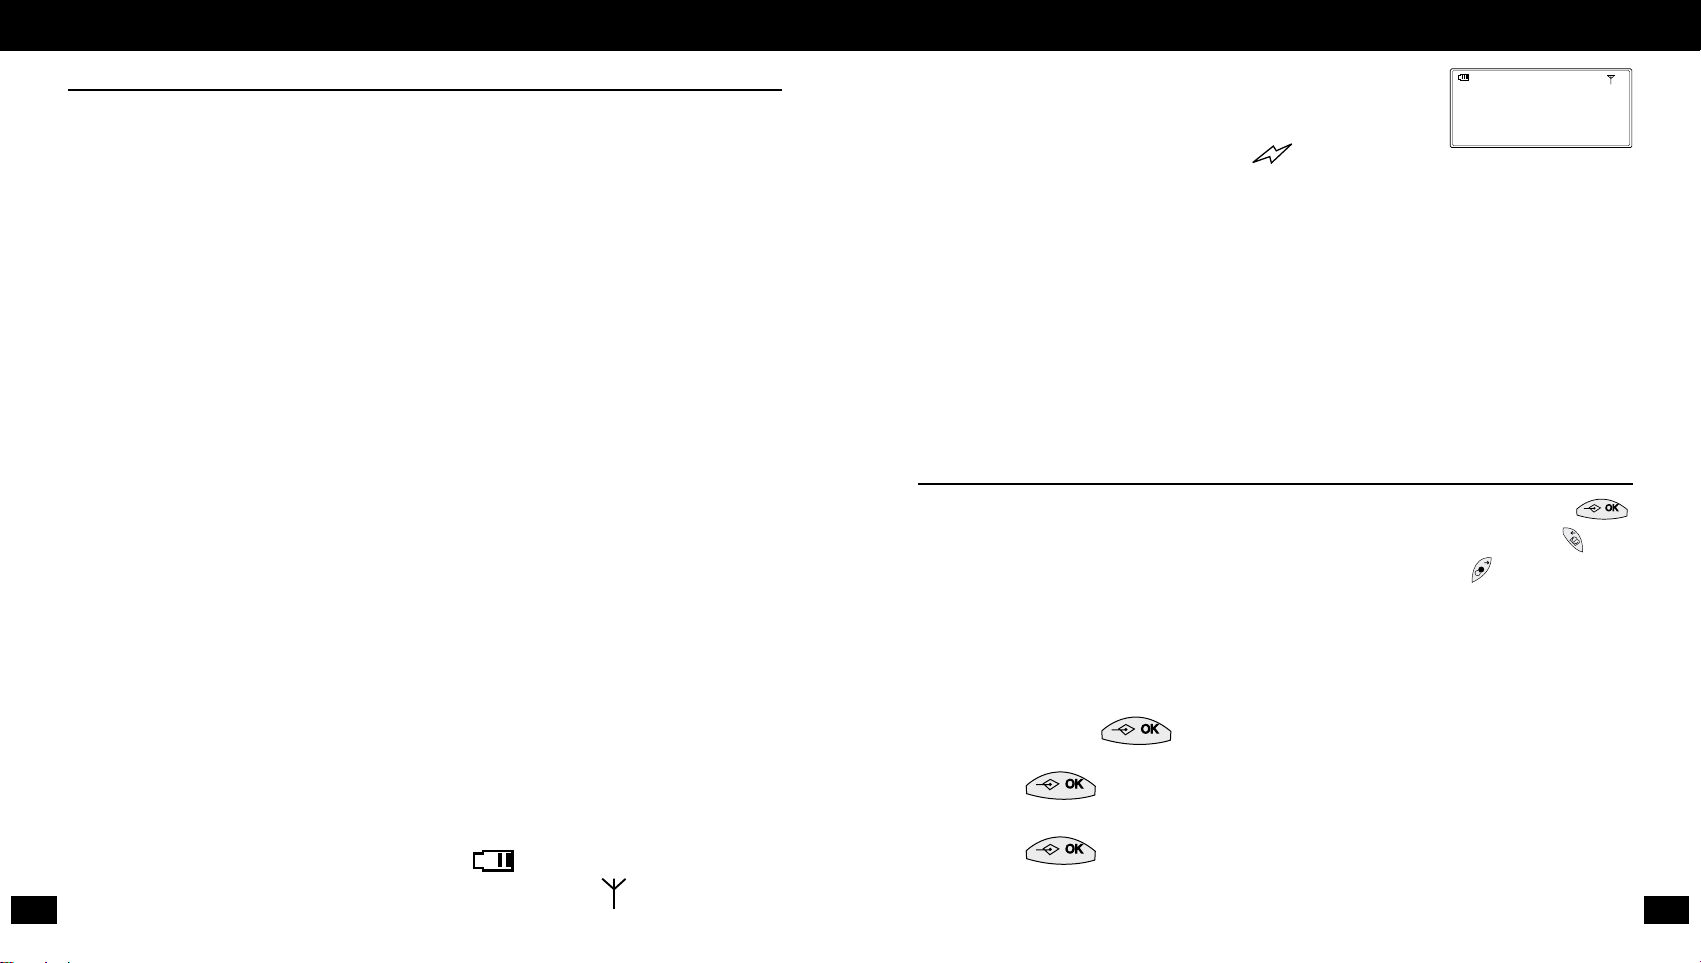
Battery charge condition icon will illuminate .
The telephone will begin to search for the base station.The icon will flash until the
base is found.
Page 6
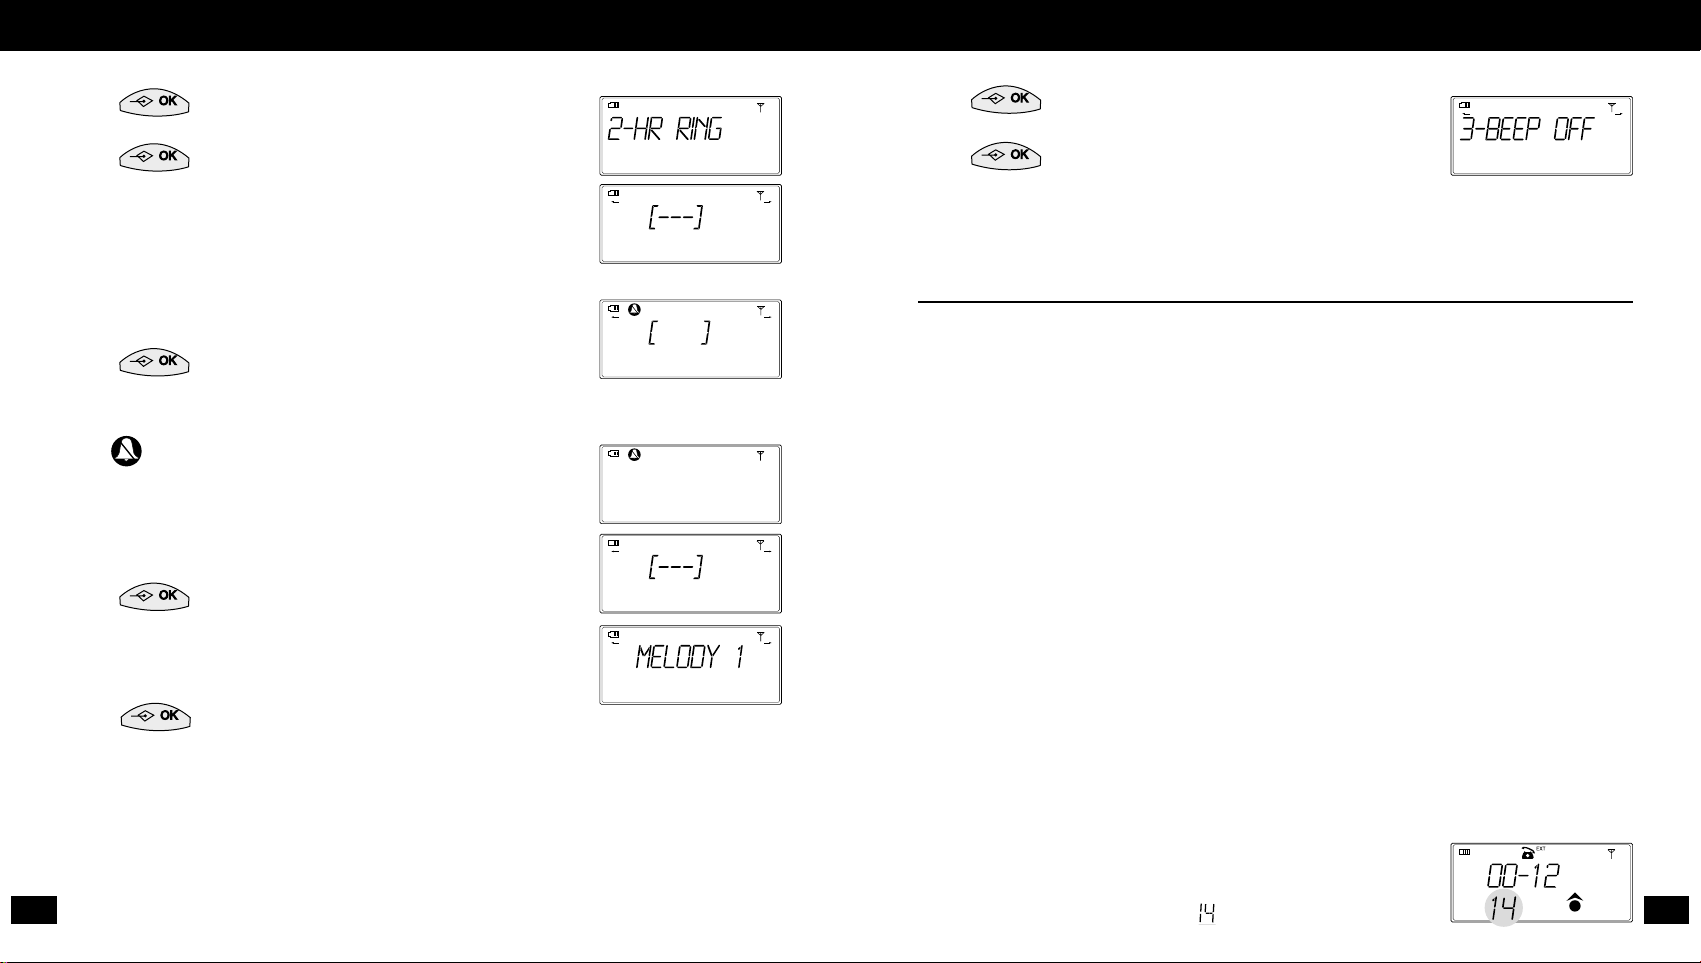
KEYP AD BEEP (ON/OFF)
Press to enter Setup mode.Use arrow keys to
arrive at option 3.
Press to change the current setting.Confirmation
beep is emitted.Handset returns to standby mode.
These are the most commonly used menu settings,see page 18 for information on
setting additional handset features through the men u.
USING SPECIAL HANDSET FEATURES
HEARING AIDS
Some hearing aids are susceptible to radio frequency interfer ence.In general digital
hearing aids experience less interference than analogue hearing aids.If in doubt,
please check with your hearing aid manufacturer or audiologist.If your hearing aid is
compatible with GSM mobile telephones,it is likely to provide adequate radio immunity
from DECT telephones.
VISUAL RINGER
Two flashing lights on the back of the headset,and two on the front (12) illuminate
when the phone rings,in addition the backlit keypad will flash.
BACKLIT KEYPAD
The keypad illuminates up orange for 5 seconds when the handset is lifted fr om the
base unit,or if a button is pressed.
HANDSET VOLUME CONTROL
To adjust the handset volume.
While on a call you can adjust the Handset Volume Control (2) to a comfortable level
using the thumbwheel on the side of the handset.Refer to Fig F.
When BOOST
(1) is OFF,the volume control amplification
range is displayed as 0-15
When BOOST (1) is ON,the volume control range is
displayed as 12-32.
The volume level is displayed on the bottom row
of the handset display,for example
.
GB
12
GB D E E S F R I T NL PT
GB
11
TO ADJUST HANDSET RINGER V OLUME.
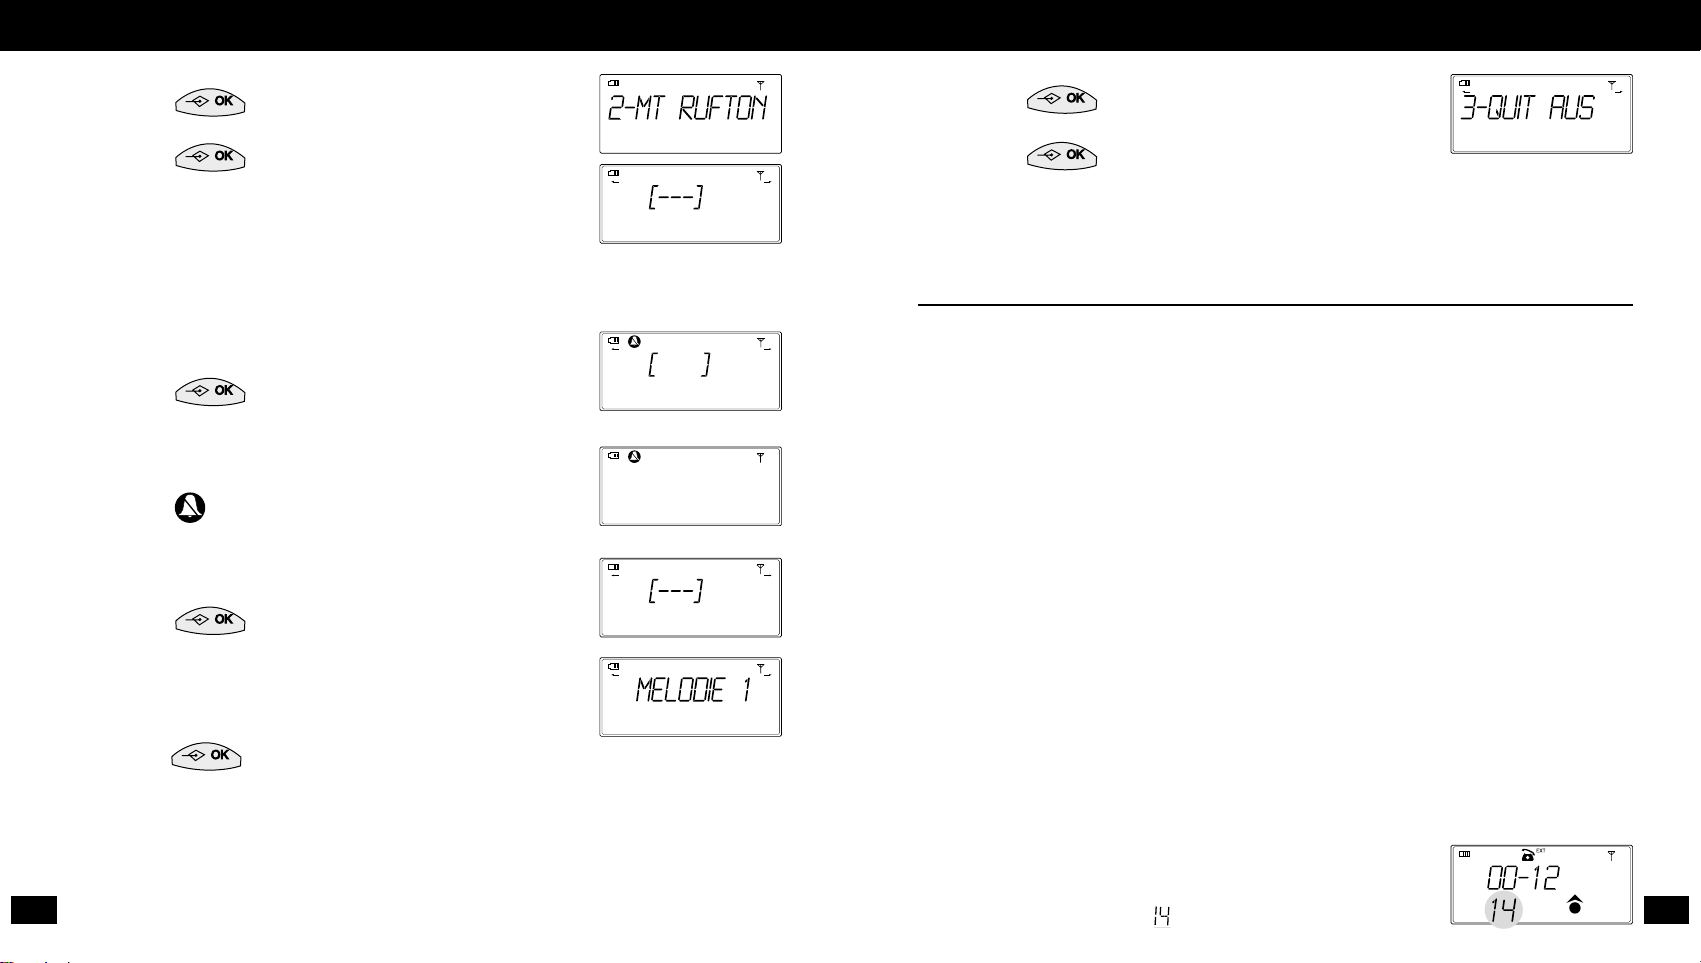
Press to enter Menu mode.Use right arrow key
to arrive at option 2.
Press .
The screen displays the cur r ent setting f or
the Handset Ringer.
Use arrow k e ys to set the desir ed volume (3 levels and OFF).
If setting is OFF,the following shall appear on
the handset display.
Press if this is the desired setting.
Confirmation beep is emitted,handset returns to
standby mode.
The icon appears on the screen as long
as this setting is selected.
If setting is not OFF,the screen shows desired setting
for the volume.
Press to set the volume to this level
Immediately after,the screen displays the ringer
tones available (1-9),while playing the display ed tone.
Use arrow k e ys f or scrolling.
Press when the desired tone is display ed.
Confirmation beep is emitted.Handset returns to standby mode.
NOTE:When the Handset Ringer Switch (4) is in OFF position, it overrides the settings
for this feature. The settings will become active when the switch is set to ON position.
Page 7
MAKING TELEPHONE CALLS
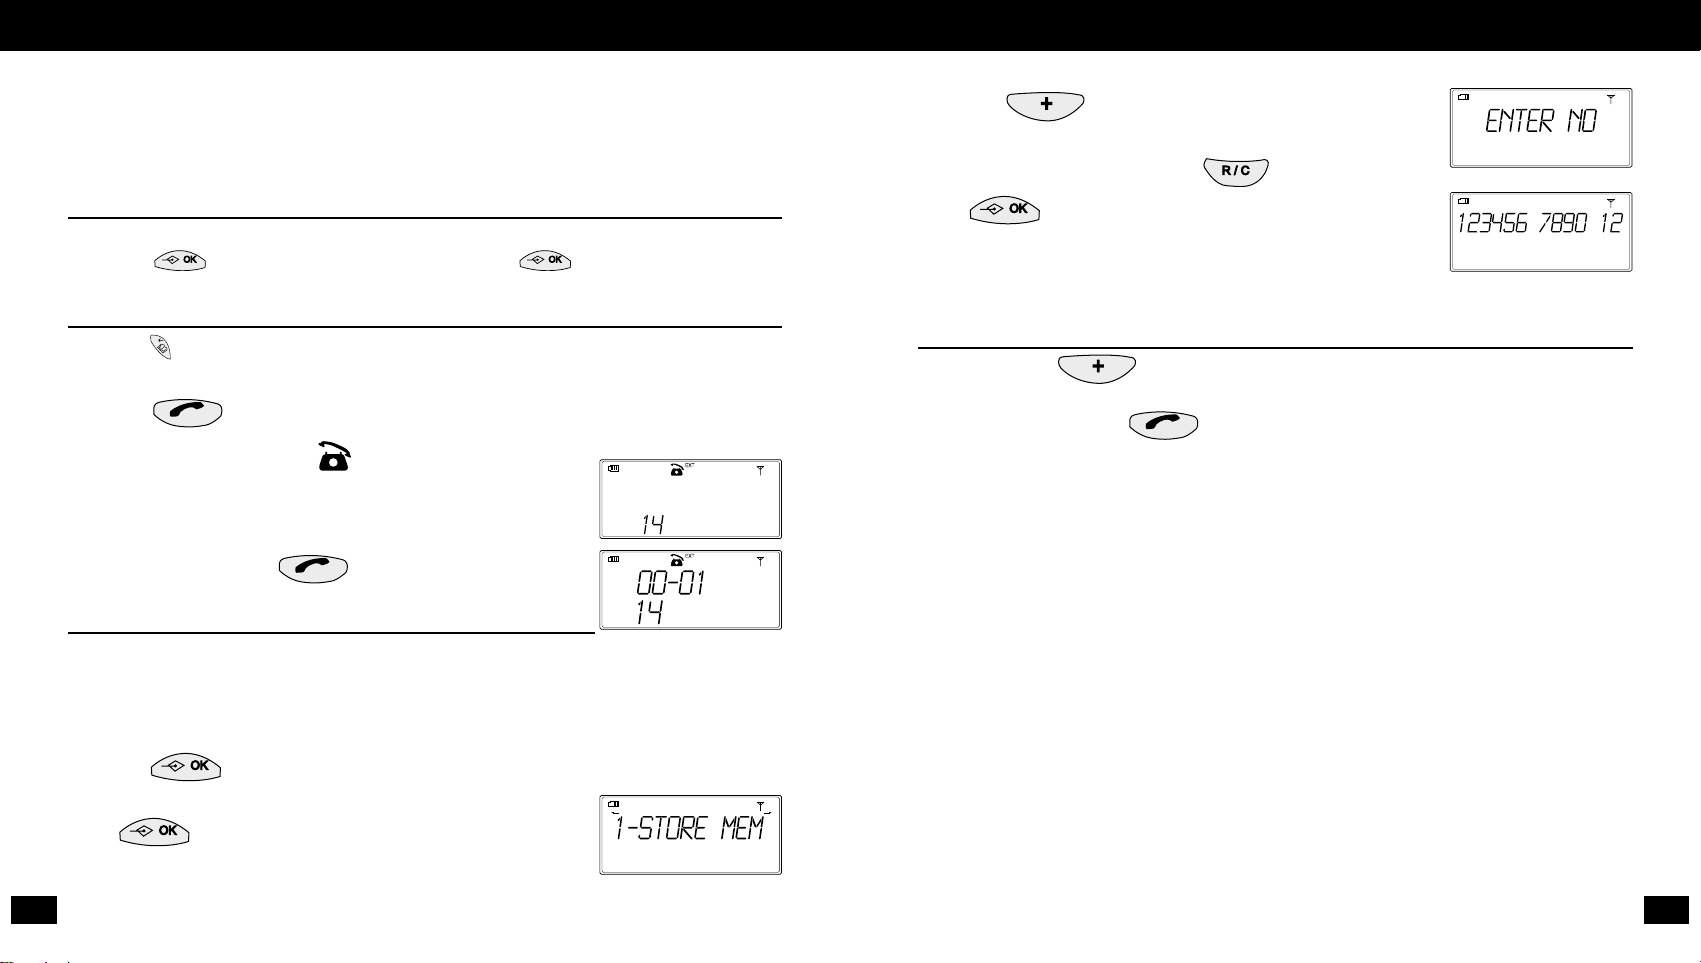
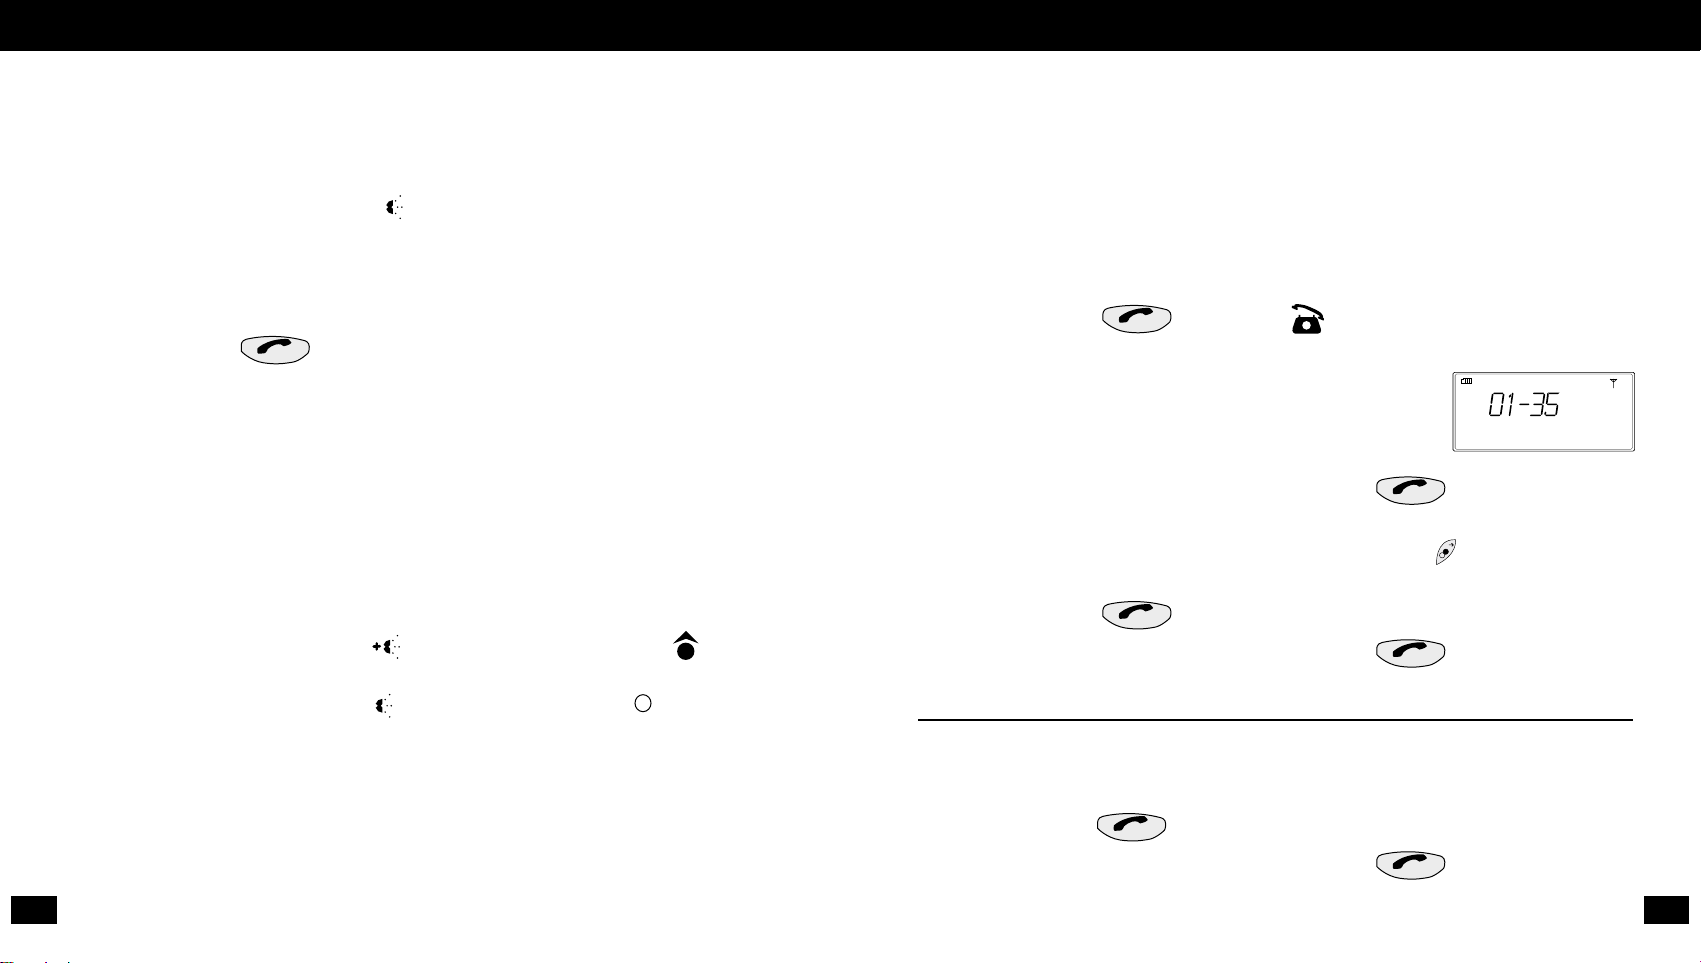
Press the button.The icon shall appear on the handset display.
Dial the number as required.
After 5 seconds of no further key press,
the call timer will start counting.
To end the call,press the button again.
The last call time will remain for 5 seconds.
To redial the last number press the button,
the number you dialled appears on the displa y screen when this key is selected.
Press button to call this number.
To end the call,press the button again.
ANSWERING INCOMING CALLS
The caller’s phone number should appear on the handset display scr een,or ‘Withheld’
will display if the service provider does not support this function.
Select the button to answer the call.
To end the call,press the button again.
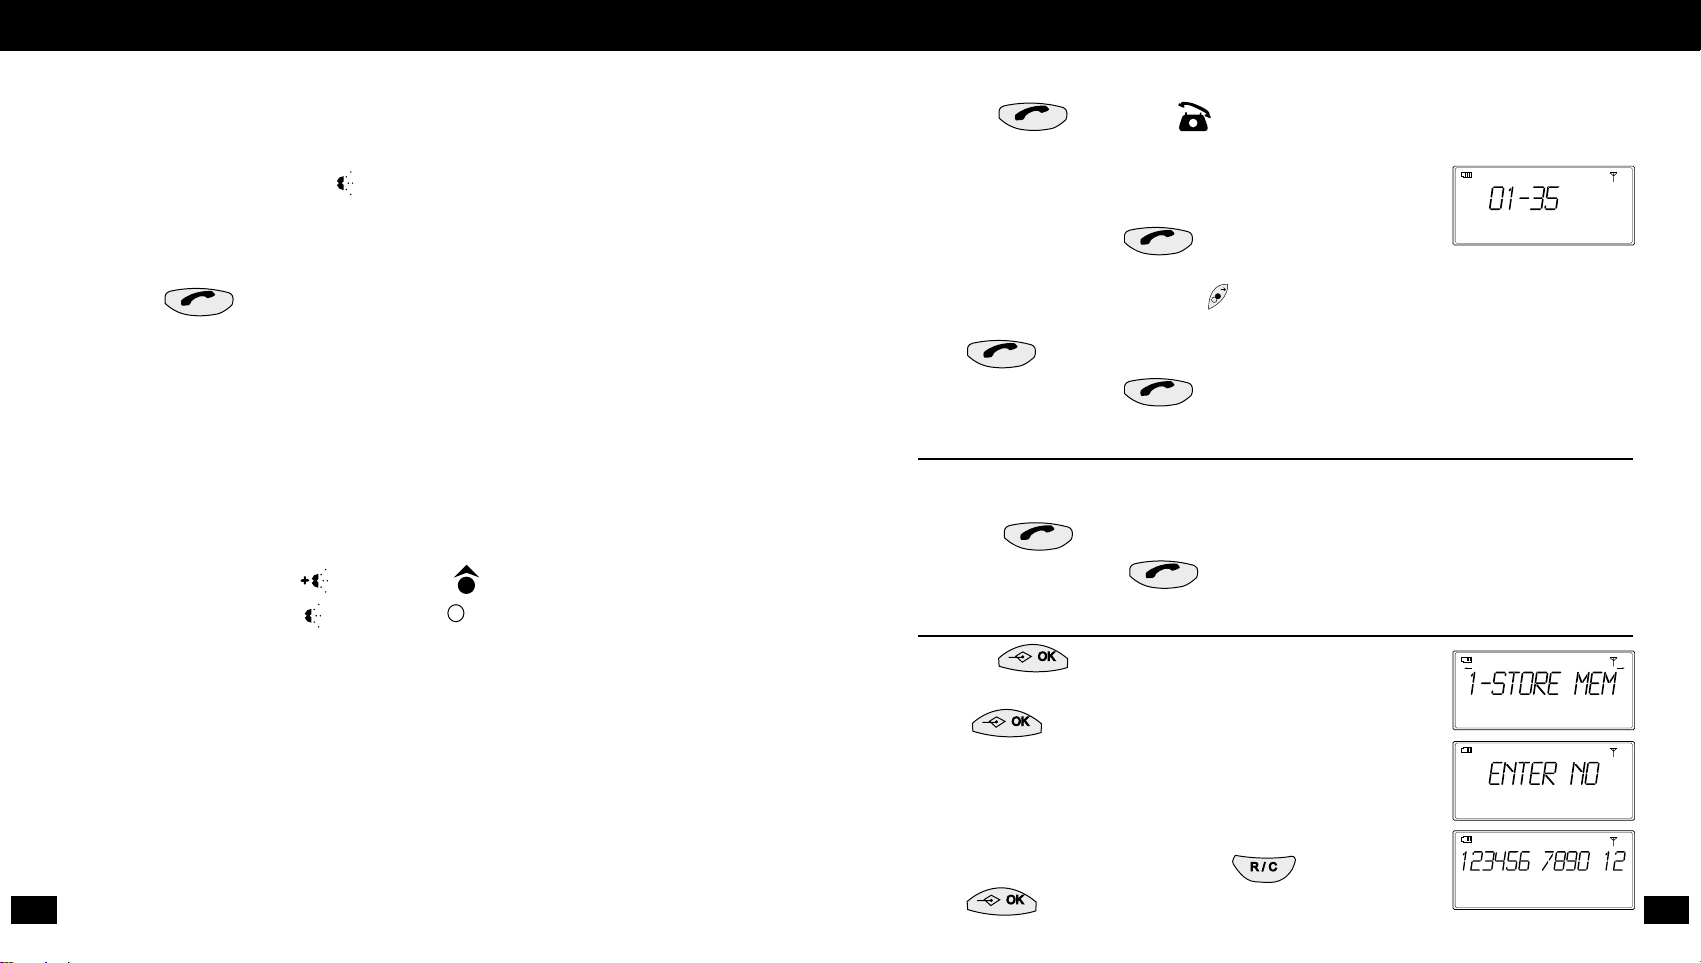
STORING ENTRIES IN THE PHONE BOOK
Press the button on the handset
The following shall be display ed.
Press .
‘Location?’ shall be displayed on the handset scr een.
Select a number between 0-9 on the ke ypad to specify location
of phone number to be stored.
Enter phone number to be stored (up to 25 digits).
To delete an incorrect entry ,press the button.
Press to confirm.
GB
14
GB D E E S F R I T NL PT
GB
13
BOOST BUTT ON
For additional handset volume.
The boost works in conjunction with the Handset Volume Control (2).When the Boost
Button (1) is pressed,additional amplification is induced for the duration of the call.
Refer to Fig F.When activated a icon will illuminate on the bottom left of the handset
display.Use the Handset Volume Control (2) to obtain a comfortable listening level.
Press once again to de-activate volume BOOST (1).
BOOST automatically turns off when the phone is hung up.
NOTE:The button lights up red in normal conversation mode but when
BOOST
(1) is activated it lights up orange.
By activating the BOOST mode you are choosing to increase the level of
amplification that allows any abnormal event to exceed 118dB. This is potentially
harmful.The volume control should be increased gradually to find the minimum level
of amplification that is comfortable for you.Avoid prolonged or unnecessary exposure
to high volume levels.
CLARITY POWER ON/OFF
The Clarity Power switch (3) amplifies higher frequencies when the BOOST function is
ON to compensate for some circumstances of moderate hearing loss.Refer to Fig F.
When Clarity Power is ON ,a black circle icon appears on the handset displa y.
When Clarity Power is OFF ,a white circle icon appears on the handset display.
NECK LOOP SOCKET
A Neck Loop socket (6) is provided for those who use this assistive device.Refer to Fig F.
HEADSET SOCKET
A Headset Socket (5) is compatible with headsets fitted with a 2.5mm plug.Refer to Fig F.
HANDSET RINGER ON/OFF SWITCH (4) FIG F
In OFF position,the handset does not ring.
In ON position,the handset rings in accordance to the settings selected.
Page 8
‘Location’ shall be displayed on the handset scr een.
Select the button.
Enter phone number to be stored (up to 25 digits).
To delete an incorrect entry ,press .
Press .
A beep is emitted and the phone returns to standby
mode screen.
CALLING THE EMERGENCY NUMBER
Simply press the button and the phone automatically dials the emergency
number and displays it on the handset scr een.
To end the call,press the button.
NOTE:This is a recessed key to avoid pressing it accidentally.
GB
16
GB D E E S F R I T NL PT
GB
15
A tone is emitted and the phone returns to standby mode screen.
NOTE:A new entry saved under a number where a previous telephone number is
already saved,will overwrite the original entry without any warning that the location
is already in use.
DELETING ENTRIES IN THE PHONE BOOK
To erase an entry select the memory location but do not enter any telephone number
and press .“ERASE” will be displayed then press .
MAKING TELEPHONE CALLS TO A STORED NUMBER
Press the button.
Select the required memory location number on the keypad (0 to 9)
Press the button to call the telephone number.
When the phone is in use the icon
shall appear on the handset display.
After 5 seconds of no further key press,the call timer will
start counting.
To end the call,press the button again.
EMERGENCY BUTTON
This is a one-touch memory button,which can store an emergency number of
your choice.
Storing an Emergency Number (same steps as when storing a telephone number in the
phone book.)
Press the button.
The following shall be display ed.
Press .
Page 9

ADDITIONAL HANDSET FEATURES
AUTO ANSWER (ON/OFF)
Enables you to answer the phone while it is ringing by picking up the handset from the
base and hang-up by placing the handset in the base.Alternatively y ou can still hang-up
by pressing the button.
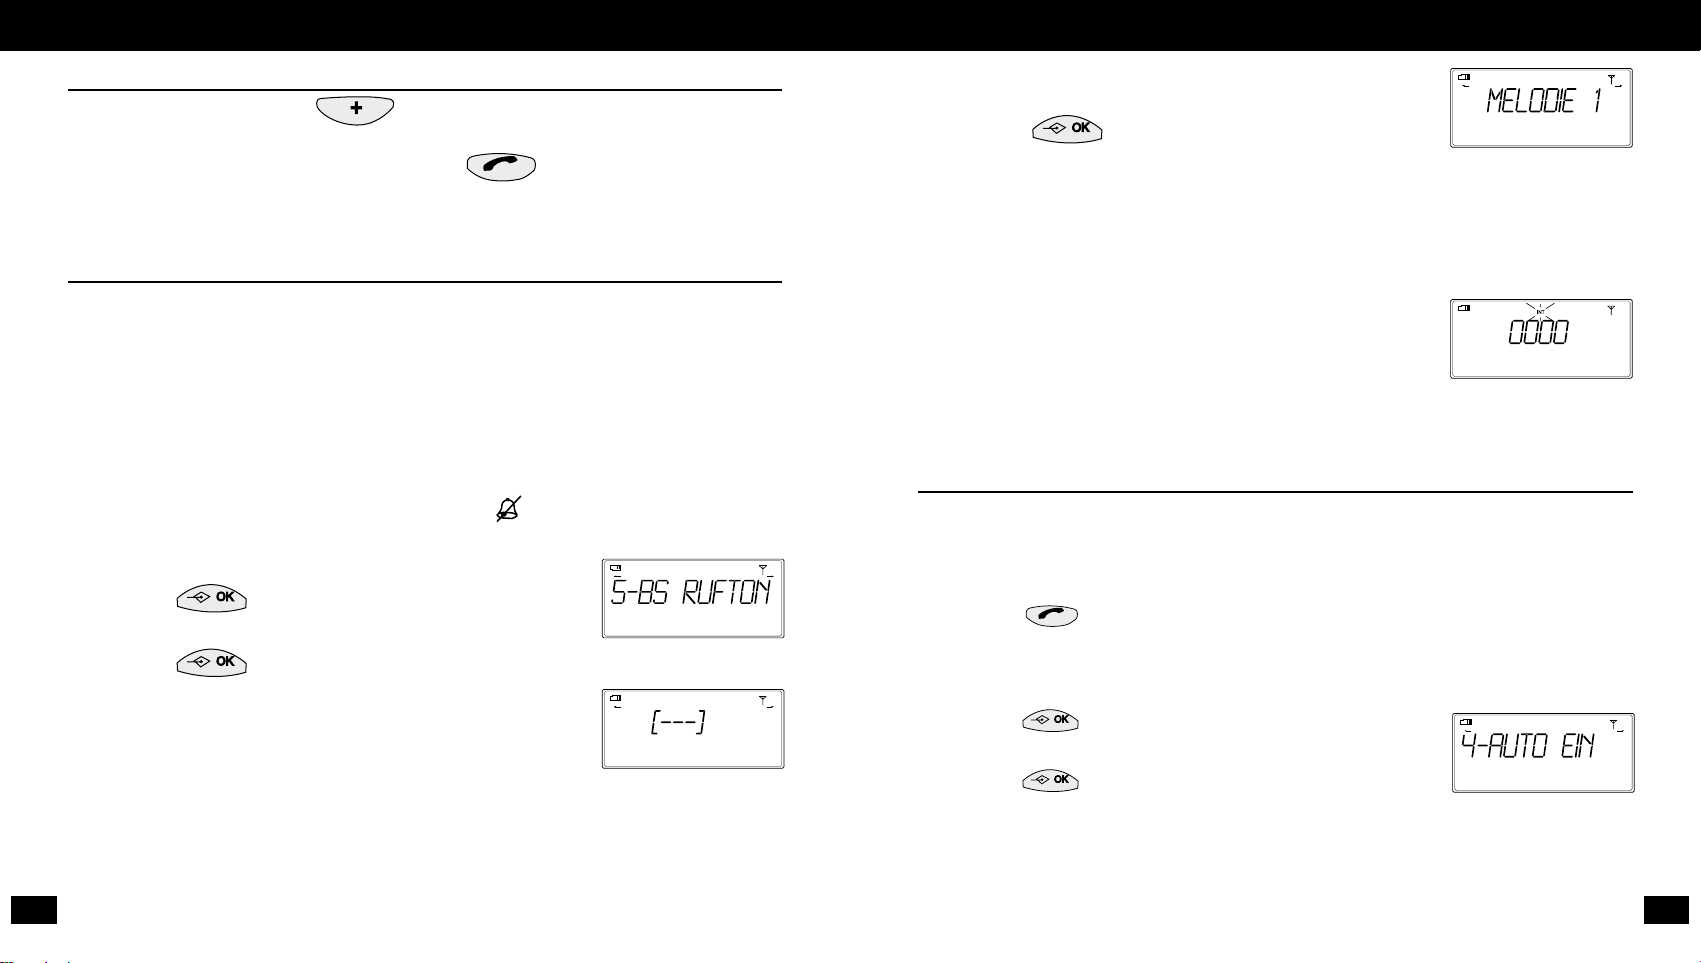
To have this function option activated,the mode must be set to ‘Auto ON’,by
Pressing to enter Setup mode.Use arrow keys to
arrive at option 4.Press to change the current setting.
A confirmation beep will be emitted and will return to
Standby mode.
MICROPHONE MUTE FUNCTION
While on call press to mute microphone.
Screen rev erts to call timer,indicates
the microphone is muted.
Press to un-mute.
Screen rev erts to regular call display.
DIAL MODE
Enables the user to choose between Tone or Pulse for dialling mode.
Press to enter Setup mode.Use arrows to
arrive at option 7.
Press .
Use arrow k e ys to scroll between options.
Press to choose the display ed setting.Phone will
emit confirmation beep,and return to standby mode.
NOTE:The factor y default setting is "Tone".It should not be
necessary to adjust this setting if an outgoing call can be made.
GB
18
GB D E E S F R I T NL PT
GB
17
BASE UNIT FUNCTIONS
VISUAL RINGER
Lights Flash on the base unit Visual Ringer (14) when the phone rings.Refer to Fig E or F.
BASE UNIT RINGER VOLUME CONTR OL
Adds to the existing ring signal transmitted by the handset.
Switch to increase or decrease the base unit Ringer Volume
(15).Refer to Fig E or F.
The OFF position turns the base unit ringer off.
BASE RINGER SETTINGS
Press .Use arrow keys to arrive at option 5.
Press .
The screen displays the cur r ent setting f or the
base unit Ringer Volume
(15) – 3 levels and OFF.
If the volume is ON,a choice of nine (1 to 9) ring tones is given.
Use arrow k e ys to scroll through tones.
If the volume is OFF,the phone emits a confirmation beep
and returns to standby mode.
Press to confirm the choice.
NOTE:When the Base Ringer switch is in OFF position,
it overrides the settings for this feature.The settings will
become active when the switch is in ON position.
P A GING FUNCTION
Allows for a misplaced handset to be found.
Press the Page Button (16) and the handset
will be paged.The back light will flash and the handset
display will show the follo wing.Refer to Fig E or F.
Press the Page Button
(16) or any button in the handset to
stop the page tone.
Page 10
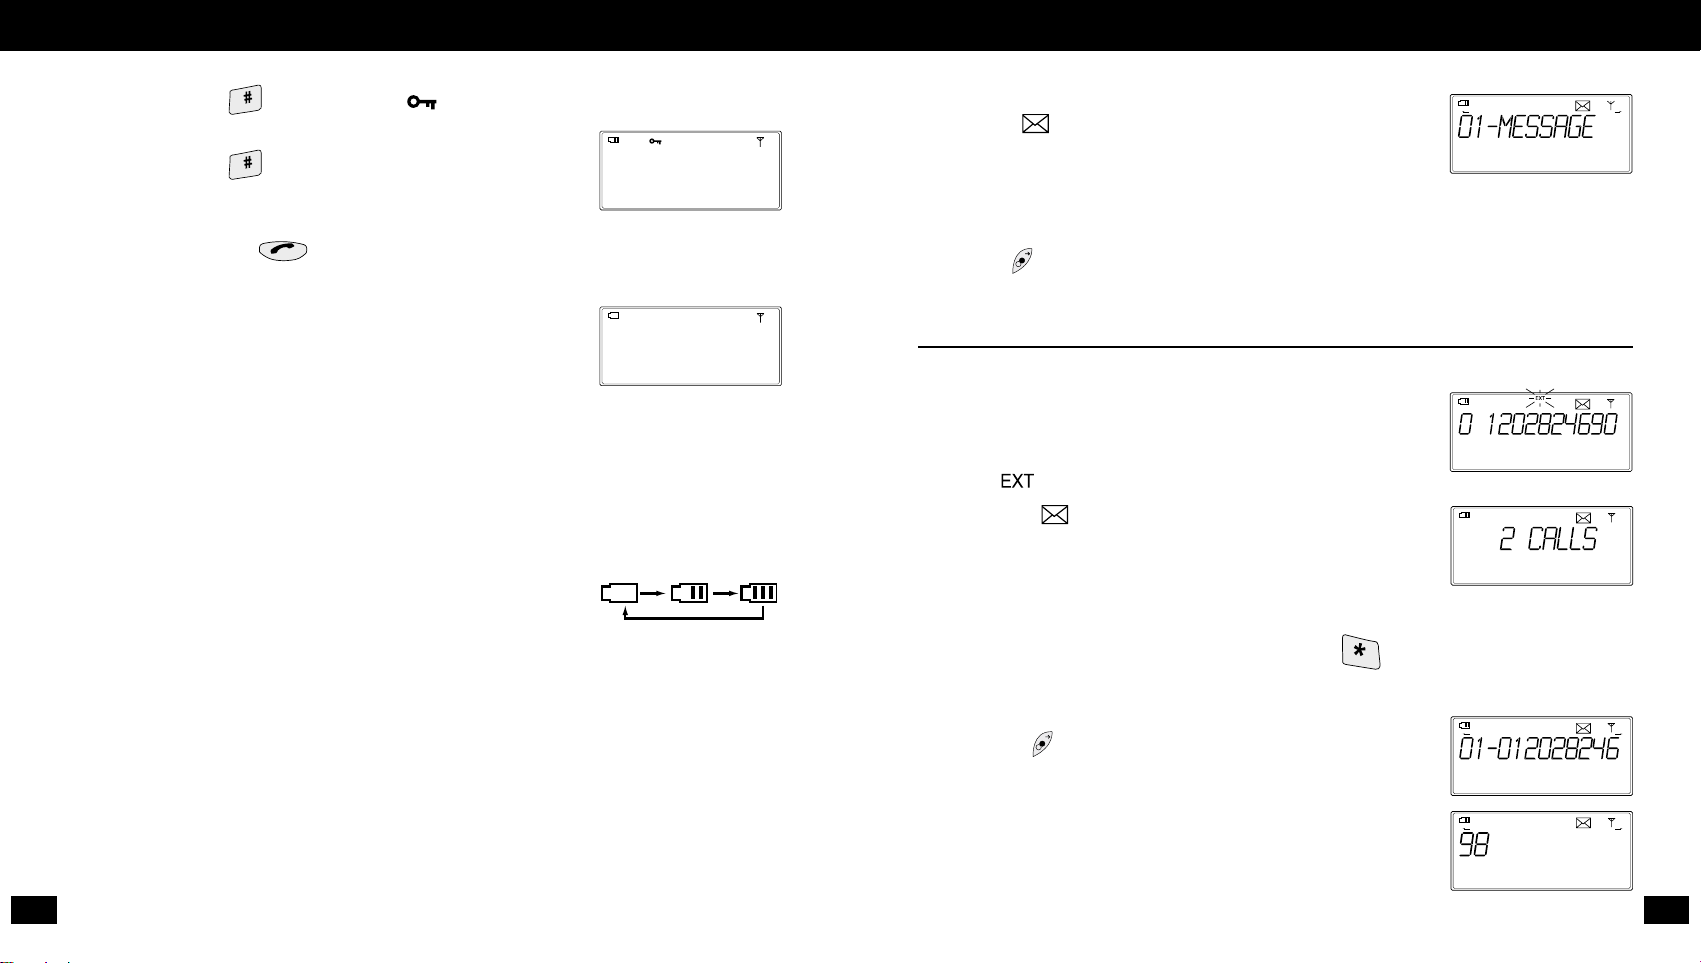
VOICE MAIL MESSA GE
If you subscribe to a Voice Mail service from y our phone
company, an icon will appear to indicate that there is a
message(s) waiting for you.The calls are indicated as Caller ID,
but the data is displayed as ‘MESSAGE’,rather than the
caller’s phone number.
Voice Mail (with Phone Company) was received.
Press right arrow button to retriev e date and
time for this message.
CALLER ID AND FUNCTIONS
INCOMING CALL
When a call is received,the screen displays the incoming caller’s
number.
While the phone is ringing,the caller’s number is
displayed. icon flashes to indicate the incoming call.
The Voice Mail icon will appear on the display screen,
as shown.
When the phone stops ringing,the screen displays
the number of calls missed.
RETRIEVING CALLER ID RECORDS
To retrieve new or old Caller ID records,press the button for 2 seconds.
The Caller ID memory retains the last 10 incoming calls’ telephone numbers.
The data is displayed starting with the most recent call.
Use the right arrow button to retrieve the
entire number,when it is longer than 9 digits.
The rest of the phone number is displa y ed.
GB
20
GB D E E S F R I T NL PT
GB
19
HANDSET KEYP AD LOCK
Press and hold the button until the icon appears on the handset display.
Locked ke ypad scr een.
Press and hold the button once again to remove
the keypad lock.
In locked ke ypad mode,you can still answer
and end a call with the key.
LOW BATTER Y W ARNING
When the battery low condition is detected during standby
mode,a single low-battery warning tone can be heard and the
empty battery sign is as shown.
If the low battery condition is detected whilst making a call,
a low-battery warning tone can be heard every 20 seconds
and the empty battery sign is shown.
The current call connection will remain until the phone is hung up .
BATTERY CHARGING
When the handset is put on the base unit,the battery will be fast charged for about
30 minutes.
While the battery is being charged,the following
animation on the battery icon can be seen.
After the 30 minutes period,the battery charging animation
will stop and the battery icon will be shown as full.
Note:An empty battery has to be charged for about 14 hours in order to reach
maximum capacity.
OUT OF RANGE W ARNING
When a call is being made and the handset is too far awa y from the base unit,an out of
range warning tone can be heard from the ear-piece every 20 seconds.
Page 11
UNIDENTIFIED INCOMING CALL
When an unidentifiable incoming call is received,
no Caller ID record is displa y ed – the scr een line is blank.
NOTE: Up to 18 digits for incoming Caller ID calls
can be displayed.
ADDITIONAL FEATURES
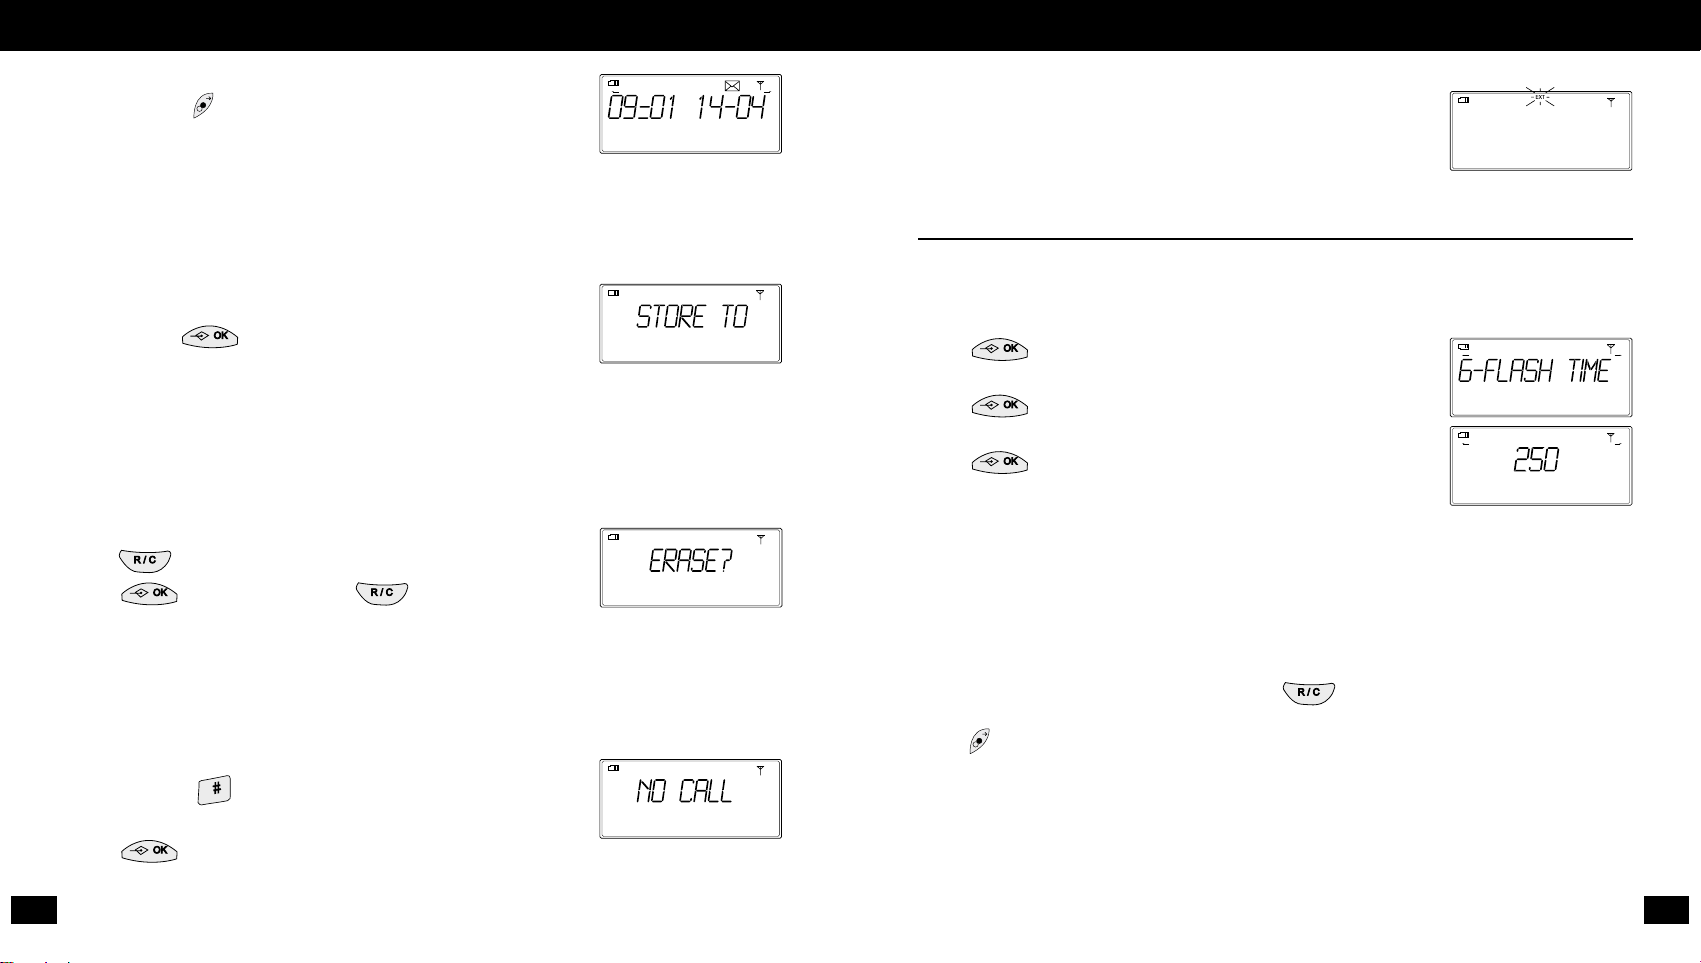
FLASH TIME SETTING
This option enables the user to set the country-appropriate TBR (Timed Break Recall).
The choices are 100ms,250ms and 600ms.
Press to enter Setup mode.
Use arrow k e ys to ar riv e at option 6.
Press .
Use arrows to scr oll thr ough the three choices.
Press to enable the displayed setting.Phone emits
confirmation beep and returns to standby mode.
This is used to access certain network features such as conference calling or call
transfer etc. Please contact your network pro vider or PABX administrator for further
information if required.
USING FLASH SETTING
After dialling the required number pr ess the button to flash the line to perform
some P ABX function and digit ‘r’ will be shown on the LCD.
Press button to add a pause and digit ‘P’ will be shown.
The number dialled after the ‘Flash’ will not be stored in the redial memory.
GB
22
GB D E E S F R I T NL PT
GB
21
Press the right arrow button again to retriev e
the time and date of that call.
NOTE: The caller ID functionalities depend on the services
offered by your network provider.
SA VING CALLER ID RECORDS
While the Caller ID record is displa y ed on the handset
screen,press to store the display recor d.
Select a number (0-9) for which the Caller ID record is to
be stored.
The phone emits a confirmation beep and returns to the
Caller ID list.
ERASING CALLER ID RECORDS
While a Caller ID record is displa y ed,
press button for 2 seconds.
Press to confirm,or press
to cancel the command.
NOTE:To avoid erasing accidentally,only the displayed record will be removed.
No "Erase all" may occur.
NO CALL MESSAGE
When no Caller ID record exists in the memory,
if you press the button for 2 seconds a ‘NO CALL’
message displays on the handset screen.
Press to return to standby mode scr een.
Page 12

24
GB DE ES FR IT NL PT
WILLKOMMEN
Schnurloses DECT
™
Verstärkertelefon C710
von Clarity
www.clarityproducts.com
Vielen Dank,dass Sie sich für das
DECT
™
*-Verstärkertelefon C710 von
Clarity entschieden haben.
In dieser Bedienungsanleitung finden Sie
wichtige Informationen zur effektiven und
ordnungsgemäßen V erwendung Ihres C710.
Lesen Sie vor der ersten Verwendung
des Telefons die Bedienungsanleitung
aufmerksam durch.Bewahren Sie die
Anleitung leicht zugänglich in der Nähe
des T elef ons auf.
*Digital Enhanced Cordless Telecommunications
GB
23
FLASH TIME REQUIREMENTS
TBR SETTING COUNTRY
100 Austria,Belgium, Bulgaria,Cyprus,Czech Republic,Denmark,
Finland,Hungary,Iceland, Italy,Norway,Switzerland
250 France,Portugal
In other countries please check with your network pro vider.
Page 13
WICHTIGE SICHERHEITSINFORMATIONEN – fortsetzung
Werfen Sie die Akkus niemals ins Feuer,da Explosionsgefahr besteht. Entsorgen Sie leere
Akkus bei Sammelstellen für Chemieabfälle.
Installieren oder verwenden Sie das Telefon nicht in der Nähe von Wasser.
Ziehen Sie vor der Reinigung des Telefons die Kabel ab.Verwenden Sie zur Reinigung des
Telefons weder Flüssigreiniger noch Sprayreiniger.Verw enden Sie für die Reinigung ein
feuchtes T uch.
Decken Sie die Steckplätze und Öffnungen des Telefons nicht ab.Stellen Sie das Telefon
niemals in die Nähe eines Heizkörpers oder Heizgerätes bzw.über einen Heizkörper
oder ein Heizgerät.Das Telefon sollte nur in ein anderes Gerät installiert werden,wenn
für eine ordnungsgemäße Belüftung gesorgt ist.
Stellen Sie nichts auf das Telefonkabel.Installieren Sie das Telefon an einem Ort,an dem
niemand auf das Kabel treten oder darüber stolpern kann.
Versuchen Sie niemals, Gegenstände durch Öffnungen in das Telefon zu stecken,da
gefährliche Spannungspunkte berührt oder Kurzschlüsse ausgelöst wer den können,die
zu einem Brand oder zu Stromschlägen führen können.Verschütten Sie nie Flüssigkeiten
auf dem Telefon.
Das Telefon bitte nicht öffnen,um die Gefahr von Stromschlägen zu v ermeiden.Beim
Öffnen oder Entfernen von Abdeckungen können gefährliche Spannungen nicht
ausgeschlossen werden.Durch das nicht ordnungsgemäße Zusammensetzen des
Netzteils kann es bei Verwendung des Produkts zu Stromschlägen kommen.
Installieren Sie niemals Telefonkabel während eines Gewitters.
Plantronics BV erklärt hiermit,dass das vorliegende DECT
™
-Verstärkertelefon Clarity™C710 den grundlegenden Anforderungen und
weiteren relevanten Vorgaben der Richtlinien 1999/5/EG und 93/42/EWG
entspricht.
Die Konf ormitätserklärung für dieses Pr odukt finden Sie unter
www.plantronics.com/documentation.
Medizinprodukt Klasse 1
Wenn das Verstärker-Symbol auf dem Display angezeigt wird,ist die
Lautstärke möglicherweise sehr laut und übersteigt 118 dB.Dieser Modus ist
speziell für hörgeschädigte Benutzer gedacht.
DE
26
GB DE ES FR IT NL PT
DE
25
SYMBOL ERKLÄRUNG
HÖRER
1
Verstärkertaste
2 Lautstärkeregler
3 Clarity Power EIN/AUS
4 Klingeln EIN/AUS
5 Headset-Buchse
6 Nacken- bzw.Iduktivcouplerbuchse
7 Wahlwiederholung
8 Rückfrage-/Abbruchtaste
9 OK-Taste
10 Telefonbuch
11 Gesprächstaste
12 Visuelle Rufanzeige
13 Notruftaste
BASISEINHEIT
14
Visuelle Rufanzeige
15 Tonruflautstärkeregler
16 Hörer-Paging-Taste
LCD-SYMBOLE
Akku
Hörertonruf AUS
Tastensperre EIN
Telefon abgenommen
Voicemail-Nachricht
Stummschaltung
Verbindung
Clarity Power EIN
Clarity Power AUS
Lautstärkepegel
Verstärker EIN
WICHTIGE SICHERHEITSINFORMATIONEN
LESEN SIE VOR VERWENDUNG DES GERÄTS DIE FOLGENDEN
ANWEISUNGEN AUFMERKSAM DURCH:
Bei der Verwendung Ihres Telefons sollten Sie immer folgende Sicherheitshinweise zur
Vermeidung von Feuer ,Stromschlägen und Verletzungen befolgen:
Lesen und befolgen Sie alle Anweisungen.
Befolgen Sie alle auf dem Telefon aufgedruckten Warnungen und Anweisungen.
Page 14
Sobald sie gefunden wird,wird auf dem
Display Folgendes angezeigt:
Stellen Sie den Hörer in die Basiseinheit.
Die orangefarbene LED mit dem Symbol sollte
aufleuchten und das Telefon sollte ein Mal klingeln.
Laden Sie die Akkus unbedingt vollständig auf,bevor Sie den Hörer zum ersten Mal
verwenden.Lassen Sie den Hörer dazu mindestens 14 Stunden in der Basisstation.
HINWEIS:Lassen Sie den Hörer in der Basisstation, wenn Sie das Telefon nicht
verwenden,damit die Akkus immer aufgeladen bleiben.
LCD-BILDSCHIRM DES HÖRERS
In den ersten beiden Zeilen werden die grundlegenden DECT-Funktionen angezeigt,in
der dritten Zeile die erweiterten Toneinstellungen.Nähere Informationen dazu finden
Sie in Abb.D.
MENÜEINSTELLUNGEN DES HÖRERS
Um auf den Bildschirm mit Menüeinstellungen zuzugreifen,drücken Sie die Taste
Um die Einstellungen anzuzeigen,die Sie ändern möchten, drücken Sie die Taste um
sich nach links durch die Menüoptionen zu bewegen,oder die Taste um sich nach
rechts zu bewegen.Diese Tasten werden jetzt als Pfeiltasten bezeichnet und auf dem
LCD werden zwei Pfeile angezeigt,die angeben,dass Sie sich im Modus für
Menüeinstellungen befinden.
ÄNDERN DER SPRACHEINSTELLUNGEN
Drücken Sie die Taste und bewegen Sie sich zu der Option zwischen den
Optionen „0 – Delete HS" (Hörer löschen) und „1 – Store Memory" (Speichern).
Drücken Sie .
Bewegen Sie sich durch die Optionen bis zu der v on Ihnen ge w ünschten Sprache.
Drücken Sie .
Das Telefon piept einmal zur Bestätigung und kehrt in den Standby-Modus zurück.
DE
28
GB DE ES FR IT NL PT
DE
27
ERSTE SCHRITTE
ANSCHLÜSSE AN DER BASISSTA TION
Schließen Sie die Stromquelle und das Telefonkabel an die Rückseite der Basisstation an.
Nähere Informationen dazu finden Sie in Abb.A.
Schließen Sie das Telefonkabel an die Telefonsteckdose an den Netzadapter an eine
Netzsteckdose an.Nähere Informationen dazu finden Sie in Abb.A.
REICHWEITE DES TELEFONS
Dieses Telefon verwendet Funksignale zur K omm unikation zwischen dem Hör er und der
Basiseinheit.Damit der Hörer und die Basiseinheit zusammen verwendet werden
können,muss die Herstellung einer Funkverbindung zwischen beiden möglich sein.
Die Reichweite zwischen der Basiseinheit und dem Hörer entspricht den DECT
™
-Spezifikationen;je nach örtlichen Gegebenheiten kann der Abstand zwischen dem
Hörer und der Basiseinheit bis zu 300 m im Freien und bis zu 50m in einer
gewöhnlichen Büroumgebung betragen.
HINWEIS:Ein großes Metallobjekt wie z.B.ein Kühlschrank,ein Spiegel oder ein
Aktenschrank zwischen dem Hörer und der Basiseinheit kann das Funksignal blockieren.
Andere undurchlässige Objekte wie z.B.Wände können die Stärke und Reichweite des
Signals reduzieren.
Einige elektrische Geräte wie z.B. Kühlschränke,Waschmaschinen,Mikrowellengeräte,
Leuchtstofflampen,Computer,Fernseher usw.können Interferenzen verursachen.
BEFESTIGEN DES GÜRTELCLIPS AM HÖRER
Stecken Sie den Gürtelclip in den Schlitz auf der Rückseite des Hörers und lassen Sie
den unteren Teil des Gürtelclips am Hörer einrasten.Nähere Informationen dazu finden
Sie in Abb.B.
EINLEGEN VON AKKUS IN DEN HÖRER
Nehmen Sie die Abdeckung des Akkufachs ab und legen Sie die mitgelieferten 3 AAAAkkus ein.Nähere Informationen dazu finden Sie in Abb.C.
Setzen Sie die Abdeckung wieder ein.
Das Symbol für den Akkuladezustand leuchtet auf
Das Telefon beginnt,nach der Basisstation zu suchen.Das Symbol blinkt,bis die
Basisstation gefunden wird.
Page 15
TASTENTÖNE (EIN/AUS)
Drücken Sie um den Einrichtungsmodus aufzurufen.
Verwenden Sie die Pfeiltasten,um zu Option 3 zu gelangen.
Drücken Sie um die aktuelle Einstellung zu ändern.
Das Telefon piept einmal zur Bestätigung und kehrt in den Standby-Modus zurück.
Dies sind die am häufigsten verwendeten Menüeinstellungen.Informationen zum
Einstellen zusätzlicher Hörerfunktionen über das Menü finden Sie auf Seite 36.
VER WENDUNG SPEZIELLER HÖRERFUNKTIONEN
HÖRGERÄTE
Einige Hörgeräte können durch Interferenz v on Funkfr equenzen gest ört wer den.Im
Allgemeinen sind digitale Hörgeräte weniger störanfällig als analoge Hörgeräte.Wenden
Sie sich im Zweifelsfall an den Hersteller Ihres Hörgerätes oder Ihr en HörgeräteAkustiker. Wenn Ihr Hörgerät mit GSM-Mobiltelefonen kompatibel ist, bietet es
wahrscheinlich auch ausreichende Störfestigkeit gegenüber DECT-Telefonen.
VISUELLE RUFANZEIGE
Zwei Leuchten auf der Rückseite des Hörers und zwei auf der Vor derseite (12)blinken,
wenn das Telefon klingelt.Außerdem blinkt die Hintergrundbeleuchtung der Tastatur.
TASTATUR MIT HINTERGRUNDBELEUCHTUNG
Die Tastatur leuchtet 5 Sekunden lang orange,wenn der Hörer von der Basiseinheit
abgenommen oder wenn eine Taste gedrückt wird.
LAUTSTÄRKEREGELUNG AM HÖRER
Zum Einstellen der Lautstärke am Hörer.
Während eines Anrufs können Sie die Lautstärkeregelung am Hörer (2) mithilf e des
Drehschalter an der Seite des Hörers auf einen passenden Wert einstellen.Nähere
Informationen dazu finden Sie in Abb.F.
Wenn die Verstärkung (1) ausgeschaltet ist,wird der Verstärkungsbereich der
Lautstärkeregelung als 0-15 angezeigt. Wenn die Verstärkung (1) eingeschaltet ist,wird
der Bereich,in dem Sie die Lautstärke einstellen können,
als 12-32 angezeigt.
Der Lautstärkepegel wird in der unteren Zeile des
Hörerdispla ys angezeigt,z.B.
.
DE
30
GB DE ES FR IT NL PT
DE
29
EINSTELLEN DER TONR UFLAUTSTÄRKE AM HÖRER
Drücken Sie um den Menümodus aufzurufen.
Verwenden Sie die rechte Pfeiltaste,um zu Option 2 zu gelangen.
Drücken Sie .
Auf dem Bildschirm wird die aktuelle Einstellung für den
Hörertonruf angezeigt.
Verwenden Sie die Pfeiltasten,um die gewünschte Lautstärke
einzustellen (3 Lautstärkepegel und AUS).
Wenn die Einstellung AUS aktiviert ist,wird Folgendes auf dem
Display des Hörers angezeigt.
Drücken Sie wenn dies die gewünschte Einstellung ist.
Das Telefon piept einmal zur Bestätigung und kehrt in den
Standby-Modus zurück.
Das Symbol wird auf dem Bildschirm angezeigt,
solange diese Einstellung aktiviert ist.
Wenn eine andere Einstellung als A US aktiviert ist,wird die
gewünschte Lautstärkeeinstellung auf dem Bildschirm angezeigt.
Drücken Sie um die Lautstärke auf dieses Niveau
einzustellen Anschließend werden die verfügbar en Ruftöne (1-9)
auf dem Bildschirm angezeigt;der gerade angezeigte Rufton
wird wiedergegeben.
Verwenden Sie die Pfeiltasten zum Blättern.
Drücken Sie wenn der gewünschte Rufton angezeigt wird.
Das Telefon piept einmal zur Bestätigung und kehrt in den Standby-Modus zurück.
HINWEIS:Wenn sich der Tonrufschalter des Hörers (4) in der Stellung A US befindet,
werden die Einstellungen für diese Funktion übergangen.Die Einstellungen werden
aktiviert,wenn der Schalter in die Stellung EIN geschaltet wird.
Page 16
HEADSET-BUCHSE
An die Headset-Buchse (5) können Headsets mit einem 2,5-mm-Stecker angeschlossen
werden.Nähere Informationen dazu finden Sie in Abb.F.
EIN-/AUSSCHALTER FÜR HÖRERT ONR UF (4) ABB.F
Wenn der Schalter in der Stellung AUS steht,klingelt der Hörer nicht.
Wenn der Schalter in der Stellung EIN steht, klingelt der Hörer gemäß den
vorgenommenen Einstellungen.
TÄTIGEN VON ANRUFEN
Drücken Sie die Taste Das Symbol wird auf dem Display des
Hörers angezeigt.
Wählen Sie die gewünschte Nummer.
Wenn Sie 5 Sekunden lang keine weitere Taste drücken,
beginnt der Anruftimer zu zählen.
Um den Anruf zu beenden, drücken Sie erneut die Taste
Die letzte Anrufzeit wird 5 Sekunden lang auf dem Display angezeigt.
Um die letzte Nummer erneut zu wählen,drücken Sie die Taste Die zuletzt gewählte
Nummer wird dann auf dem Displaybildschirm angezeigt.
Drücken Sie die Taste um diese Nummer anzurufen.
Um den Anruf zu beenden, drücken Sie erneut die Taste
ANNEHMEN V ON EINGEHENDEN ANRUFEN
Die Rufnummer des Anrufers sollte auf dem Bildschirm des Hörers angezeigt werden.
Wenn der Netzbetreiber diese Funktion nicht unterstützt,wird „Withheld" (Nummer
unbekannt) angezeigt.
Drücken Sie die Taste um den Anruf anzunehmen.
Um den Anruf zu beenden, drücken Sie erneut die Taste
DE
32
GB DE ES FR IT NL PT
DE
31
VERSTÄRKERTASTE
Für höhere Lautstärke am Hörer.
Die V erstärkung arbeitet in Verbindung mit der Lautstärkeregelung des Hörers (2).Wenn
die V erstärkertaste (1) gedrückt wird,wird für die Dauer des Anrufs eine zusätzliche
Verstärkung aktiviert.Nähere Informationen dazu finden Sie in Abb.F. W enn diese
Funktion aktiviert ist,wird das Symbol unten links auf dem Display des Hörers
angezeigt.Verwenden Sie die Lautstärkeregelung des Hörers (2),um einen angenehmen
Lautstärkepegel einzustellen.
Drücken Sie die Taste erneut,um die Verstärkung (1) zu deaktivieren.
Die V erstärkung wird automatisch ausgeschaltet, wenn der Hörer aufgelegt wird.
HINWEIS: Die Taste leuchtet im normalen Gesprächsmodus rot.Wenn der
Verstärker-Modus aktiviert ist, leuchtet sie orange.
Die Aktivierung des V erstärker-Modus erhöht die Hörlautstärke und kann 118 dB
überschreiten. Dies birgt ein mögliches Gesundheitsrisiko.Die Hörlautstärke sollte nur
allmählich erhöht werden,um die f ür Sie angenehmste Hörlautstärke auf geringstem
Level zu finden.Setzen Sie sich nie zu lange einer lauten oder unnötig lauten
Hörlautstärke aus.
CLARITY POWER EIN/A US
Der Clarity Power-Schalter (3) verstärkt höhere Frequenzen,wenn die
Verstärkerfunktion eingeschaltet ist,und gleicht so einige Auswirkungen von leichtem
Gehörverlust aus.Nähere Informationen dazu finden Sie in Abb.F.
Wenn Clarity Power eingeschaltet ist wird ein schwarzes Kreissymbol auf dem
Display des Hörers angezeigt.
Wenn Clarity Power ausgeschaltet ist wird ein weißes Kreissymbol auf dem
Display des Hörers angezeigt.
BUCHSE FÜR HINTER-DEM-OHR-GERÄTE
Eine Buchse für Hinter -dem-Ohr-Geräte (6) steht für diejenigen,die diese Art von
Hörgerät verw enden,zur Verfügung.Nähere Informationen dazu finden Sie in Abb .F.
Page 17

Wenn das Telefon verwendet wird,wird das Symbol
auf dem Display des Hörers angezeigt.
Wenn Sie 5 Sekunden lang keine weitere Taste drücken,
beginnt der Anruftimer zu zählen.
Um den Anruf zu beenden,
drücken Sie erneut die Taste button again.
NOTRUFTASTE
Hier können Sie eine Notrufnummer Ihrer Wahl speichern und mit einem einzigen
Tastendruck anrufen.
Speichern einer Notrufnummer (gleiche Schritte wie beim Speichern einer
Telefonnummer im Telefonbuch).
Drücken Sie die Taste
Es wird Folgendes angezeigt.
Drücken Sie .
Auf dem Bildschirm des Hörers wird „Location" (Speicherort)
angezeigt.
Drücken Sie die Taste
Geben Sie die zu speichernde Telefonnummer ein
(bis zu 25 Ziffern).
Um eine falsche Eingabe zu löschen,
drücken Sie die Taste
Drücken Sie .
Es ertönt ein Ton und das Telefon kehrt zum
Standby-Modus-Bildschirm zurück.
DE
34
GB DE ES FR IT NL PT
DE
33
SPEICHERN V ON EINTRÄGEN IM TELEFONBUCH
Drücken Sie die Taste am Hörer.
Es wird Folgendes angezeigt.
Drücken Sie .
Auf dem Bildschirm des Hörers wird „Location?" (Speicherort?)
angezeigt.
Wählen Sie eine Nummer von 0-9 auf der Tastatur,um den
Speicherort der zu speichernden Telefonnummer anzugeben.
Geben Sie die zu speichernde Telefonnummer ein
(bis zu 25 Ziffern).Um eine falsche Eingabe zu löschen,
drücken Sie die Taste
Drücken Sie zur Bestätigung.
Es ertönt ein Ton und das Telefon kehrt zum Standby-Modus-Bildschirm zurück.
HINWEIS:Wenn Sie einen neuen Eintrag unter einer Nummer speichern, unter der
bereits eine Telefonnummer gespeicher t war,wird die vorherige Telefonnummer ohne
Warnmeldung überschrieben.
LÖSCHEN V ON EINTRÄGEN IM TELEFONBUCH
Um einen Eintrag zu löschen,wählen Sie den Speicherort, geben aber keine
Telefonnummer ein,sondern drücken einfach nur „ERASE" (LÖSCHEN) wird
angezeigt.Drücken Sie .
ANRUFEN VON GESPEICHERTEN NUMMERN
Drücken Sie die Taste
Wählen Sie den gewünschten Speicherort auf der Tastatur (0 bis 9)
Drücken Sie die Taste um die Telefonnummer anzurufen.
Page 18
Wenn die Lautstärke ausgeschaltet ist,piept das Telefon einmal
zur Bestätigung und kehrt in den Standby-Modus zurück.
Drücken Sie um Ihre Auswahl zu bestätigen.
HINWEIS:Wenn der Tonrufschalter der Basiseinheit in der Stellung AUS steht, werden
die Einstellungen für diese Funktion übergangen.Die Einstellungen werden aktiviert,
wenn der Schalter in die Stellung EIN geschaltet wird.
PAGING-FUNKTION
Ermöglicht das Auffinden eines verlegten Hörers.
Drücken Sie die Paging-Taste (16),und der Hörer beginnt zu
klingeln.Die Hintergrundbeleuchtung blinkt und auf dem Display
des Hörers wird Folgendes angezeigt.Nähere Informationen
dazu finden Sie inAbb. E oder F.
Drücken Sie die Paging-Taste (16) oder eine beliebige Taste am Hörer,
um den Paging-Ton abzuschalten.
ZUSÄTZLICHE HÖRERFUNKTIONEN
AUTOMA TISCHE ANNAHME (EIN/AUS)
Wenn das Telefon klingelt,können Sie mit dieser Funktion den Anruf einfach
entgegennehmen,indem Sie das Telefon aus der Basiseinheit nehmen,und wieder
auflegen,indem Sie es wieder in die Basisstation stellen. Sie können auch auflegen,indem
Sie die Taste
Um diese Funktionsoption zu aktivieren,muss der Modus auf „Auto ON"
eingestellt sein.
Drücken Sie um den Einrichtungsmodus aufzurufen.
Verwenden Sie die Pfeiltasten,um zu Option 4 zu gelangen.
Drücken Sie um die aktuelle Einstellung zu ändern.
Der Hörer piept zur Bestätigung und kehrt in den Standby-Modus zurück.
DE
36
GB DE ES FR IT NL PT
DE
35
ANRUFEN DER NOTRUFNUMMER
Drücken Sie einfach die Taste und das Telefon wählt automatisch die
Notrufnummer und zeigt sie auf dem Bildschirm des Hörers an.
Um den Anruf zu beenden, drücken Sie die Taste
HINWEIS: Um eine versehentliche Betätigung auszuschließen, ist diese Taste leicht
vertieft.
FUNKTIONEN DER BASISEINHEIT
VISUELLE RUF ANZEIGE
Leuchten blinken auf der visuellen Rufanzeige (14) der Basiseinheit,wenn das Telefon
klingelt.Nähere Informationen dazu finden Sie in Abb.E oder F.
TONRUFLAUTSTÄRKEREGLER DER BASISEINHEIT
Ergänzt das vom Hörer ausgehende Signal.
Schalter zum Erhöhen oder Senken der Tonruflautstärke der Basiseinheit (15).Nähere
Informationen dazu finden Sie in Abb.E oder F.
Wenn sich der Schalter in der Stellung AUS befindet Ergänzt das vom Hörer
ausgehende Signal.
TONRUFEINSTELLUNGEN DER BASISEINHEIT
Drücken Sie .Verwenden Sie die Pfeiltasten,
um zu Option 5 zu gelangen.
Drücken Sie .
Auf dem Bildschirm wird die aktuelle Einstellung für die
Tonruflautstärke der Basiseinheit
(15) angezeigt –
3 Lautstärkepegel und AUS.
Wenn die Lautstärke eingeschaltet ist,stehen neun Ruftöne (1-9)
zur Auswahl.
Verwenden Sie die Pfeiltasten,um sich durch die Töne zu bewegen.
Page 19
W ARNUNG BEI NIEDRIGEM AKKUSTAND
Wenn im Standby-Modus ein niedriger Akkustand festgestellt
wird,wird ein einzelner Warnton für niedrigen Akkustand
ausgegeben und das Symbol für einen leeren Akku wird angezeigt.
Wenn während eines Anrufs ein niedriger Akkustand festgestellt
wird,wird alle 20 Sekunden ein Warnton für niedrigen Akkustand
ausgegeben und das Symbol für einen leeren Akku wird angezeigt.
Die aktuelle Anrufverbindung bleibt bestehen,bis aufgelegt wird.
LADEN DES AKKUS
Wenn der Hörer auf der Basisstation platziert wird, wird der
Akku etwa 30 Minuten lang schnellgeladen.
Während der Akku aufgeladen wird,wird das folgende
animierte Akkusymbol angezeigt.
Nach den 30 Minuten hört die Ladeanimation auf und das Symbol
für einen vollen Akku wird angezeigt.
Hinweis:Ein leerer Akku muss etw a 14 Stunden lang aufgeladen wer den,um seine
maximale Kapazität zu erreichen.
REICHWEITENWARNUNG
Wenn ein Anruf getätigt wird und der Hör er zu w eit von der Basiseinheit entfernt ist,
ertönt alle 20 Sekunden eine Reichweitenwarnung vom Hörer.
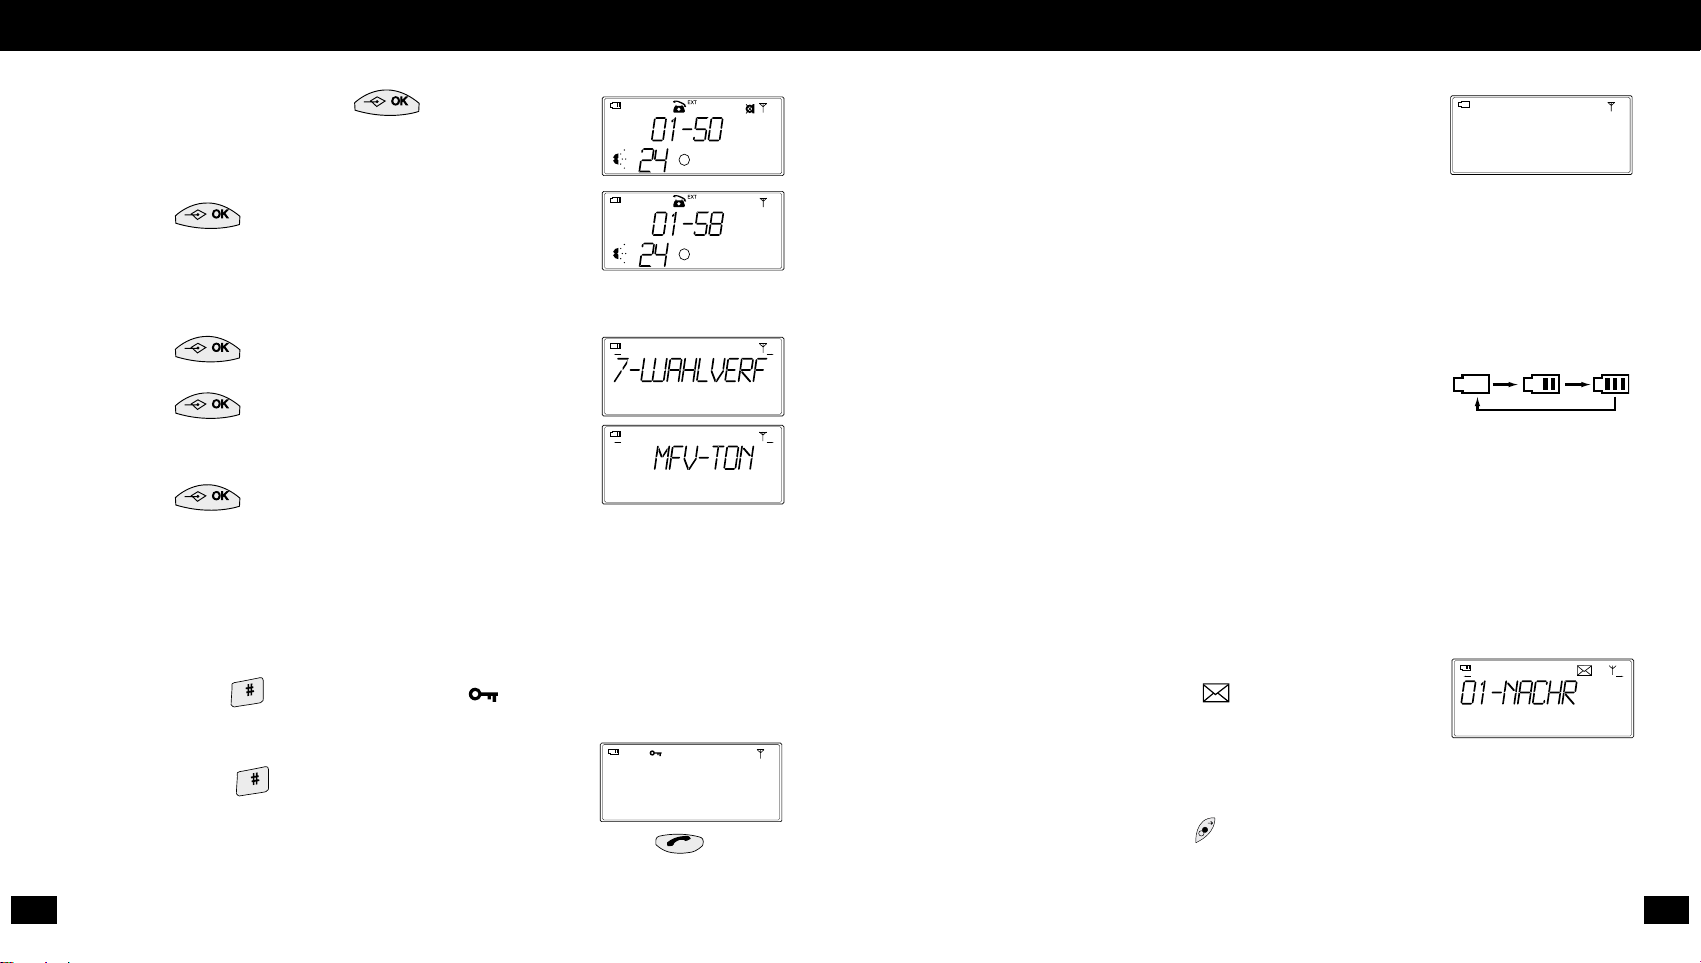
VOICEMAIL-NACHRICHT
Wenn Sie einen Voicemail-Dienst Ihrer Telefongesellschaft
abonniert haben,wird das Symbol angezeigt,um anzuzeigen,
dass Sie neue Nachrichten haben.Die Anrufe werden als
Anrufer-ID angezeigt, aber statt der Telefonnummer des Anrufers
werden die Daten als „MESSA GE" (NACHRICHT) angezeigt.
Voicemail (mit Telefongesellschaft) empfangen.
Drücken Sie die rechte Pfeiltaste um Datum und Zeit dieser Nachricht abzurufen.
DE
38
GB DE ES FR IT NL PT
DE
37
MIKROFON-STUMMSCHALTUNGSFUNKTION
Drücken Sie während eines Anrufs um das Mikrofon
stumm zu schalten.
Auf dem Bildschirm wird der Anruftimer angezeigt.
Dies gibt an,dass das Mikrofon stumm geschaltet ist.
Drücken Sie um die Stummschaltung aufzuheben.
Der Bildschirm kehrt zur normalen Anrufanzeige zurück.
WÄHLMODUS
Gibt dem Benutzer die Wahl zwischen Ton- und Impulswahl für den Wählmodus.
Drücken Sie um den Einrichtungsmodus aufzurufen.
Verwenden Sie die Pfeiltasten,um zu Option 7 zu gelangen.
Drücken Sie
Verwenden Sie die Pfeiltasten,um zwischen den Optionen
zu wechseln.
Drücken Sie um die angezeigte Einstellung zu
übernehmen.Das Telefon piept einmal zur Bestätigung und kehrt in den Standby-Modus
zurück.
HINWEIS:Die Werkseinstellung ist „Tone" (Tonwahl).Eine Anpassung dieser
Einstellung sollte nicht erforderlich sein,wenn ein ausgehender Anruf getätigt
werden kann.
HÖRERTASTENSPERRE
Halten Sie die Taste gedrückt, bis das Symbol auf dem Display des Hörers
angezeigt wird.
Bildschirm bei Tastensperre
Halten Sie die Taste erneut gedrückt,um die Tastensperre
aufzuheben.
Bei aktivierter T astensper r e können Sie Anrufe immer noch mit der Tast
annehmen und beenden.
Page 20
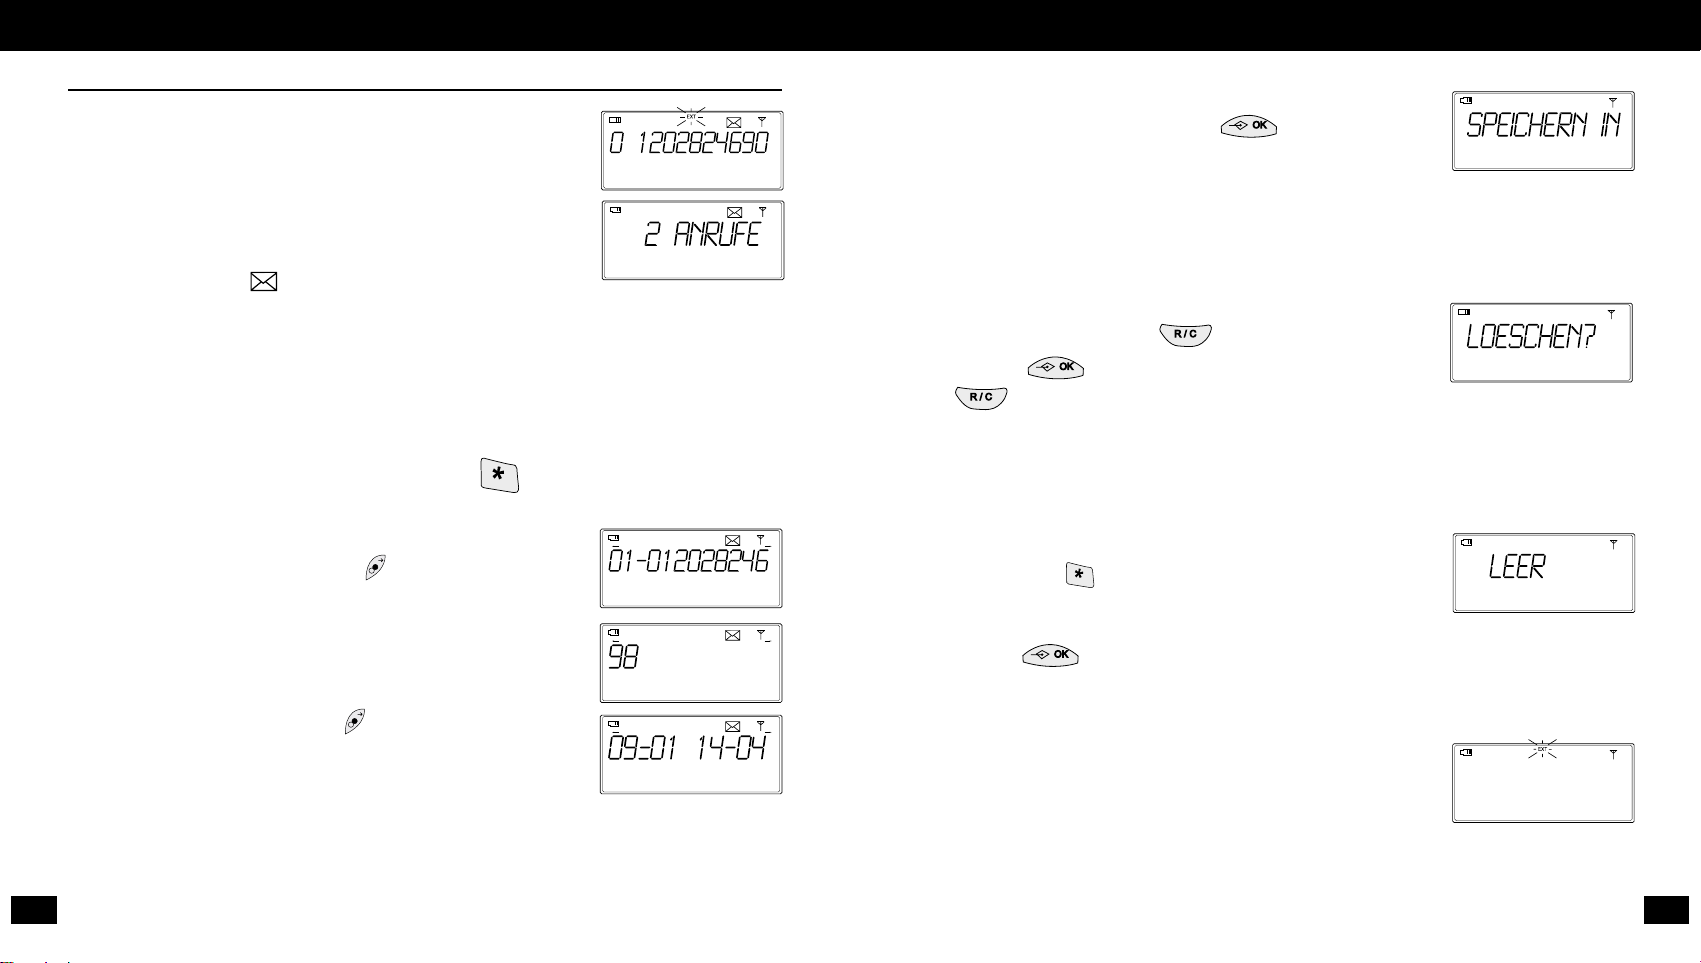
SPEICHERN VON ANRUFER-ID-EINTRÄGEN
Wenn ein Anrufer-ID-Eintrag auf dem Bildschirm des Hörers
angezeigt wird,drücken Sie die T aste um den angezeigten Eintrag zu speichern.
Wählen Sie eine Ziffer (0-9),unter der der Anrufer-ID-Eintrag
gespeichert werden soll.
Das Telefon piept einmal zur Bestätigung und kehrt zur Anrufer-ID-Liste zurück.
LÖSCHEN VON ANRUFER-ID-EINTRÄGEN
Wenn ein Anrufer-ID-Eintrag angezeigt wird,drücken
Sie 2 Sekunden lang die Taste
Drücken Sie zur Bestätigung,oder drücken
Sie um den Vorgang abzubrechen.
HINWEIS:Um ein versehentliches Löschen auszuschließen,wird nur der
angezeigte Eintrag gelöscht.Es gibt keine Funktion zum Löschen aller Einträge.
NACHRICHT KEINE ANRUFE
Wenn keine Anruf er-ID-Einträge im Speicher vorhanden sind
und Sie die Taste 2 Sekunden lang drücken,wird die
Nachricht „NO CALL" (KEIN ANRUF) auf dem Display des
Hörers angezeigt.
Drücken Sie um zum Standby-Modus zurückzukehren.
NICHT IDENTIFIZIERTER EINGEHENDER ANRUF
Wenn ein nicht identifizierbarer Anruf eingeht,wird keine
Anrufer-ID-Eintrag angezeigt – die Bildschirmzeile bleibt leer.
HINWEIS: Für Anrufer-IDs eingehender Anrufe können bis
zu 18 Ziffern angezeigt werden.
DE
40
GB DE ES FR IT NL PT
DE
39
ANRUFER-ID UND FUNKTIONEN
EINGEHENDER ANRUF
Bei einem eingehenden Anruf wird die Nummer des Anruf ers
auf dem Bildschirm angezeigt.
Während das Telefon klingelt,wird die Nummer des Anrufers
angezeigt.Das Symbol EXT blinkt, um einen eingehenden Anruf
anzuzeigen.
Das Voicemail-Symbol wird auf dem Display angezeigt,
wie abgebildet.
Wenn das Telefon aufhört zu klingeln, wird die Anzahl der entgangenen Anrufe auf dem
Display angezeigt.
ABRUFEN VON ANRUFER-ID-EINTRÄGEN
Um neue oder alte Anrufer-ID-Einträge
aufzurufen,drücken Sie 2 Sekunden lang die T aste
.
Der Anrufer-ID-Speicher speichert die Telefonnummern der letzten 10 Anrufer.
Die Daten werden beginnend mit dem letzten Anruf angezeigt.
Verwenden Sie die rechte Pfeiltaste arrow button to
retrieve the entir e n umber,when it is longer than 9 digits.
Der Rest der Telefonnummer wird angezeigt.
Drücken Sie die rechte Pfeiltaste erneut,um Datum und
Uhrzeit dieses Anrufs anzuzeigen.
Hinweis:Die Anrufer-ID-Funktionen sind von den
angebotenen Diensten Ihres Netzbetreibers abhängig.
Page 21
FLASHZEIT-ANFORDERUNGEN
TBR-EINSTELLUNG LAND
100 Belgien,Bulgarien, Dänemark,Finnland,Island,Italien,
Norwegen,Österreich,Schweiz,Tschechische Republik,
Ungarn,Zypern
250 Frankreich,Portugal
In anderen Ländern erkundigen Sie sich bitte bei Ihrem Netzbetreiber.
DE
42
GB DE ES FR IT NL PT
DE
41
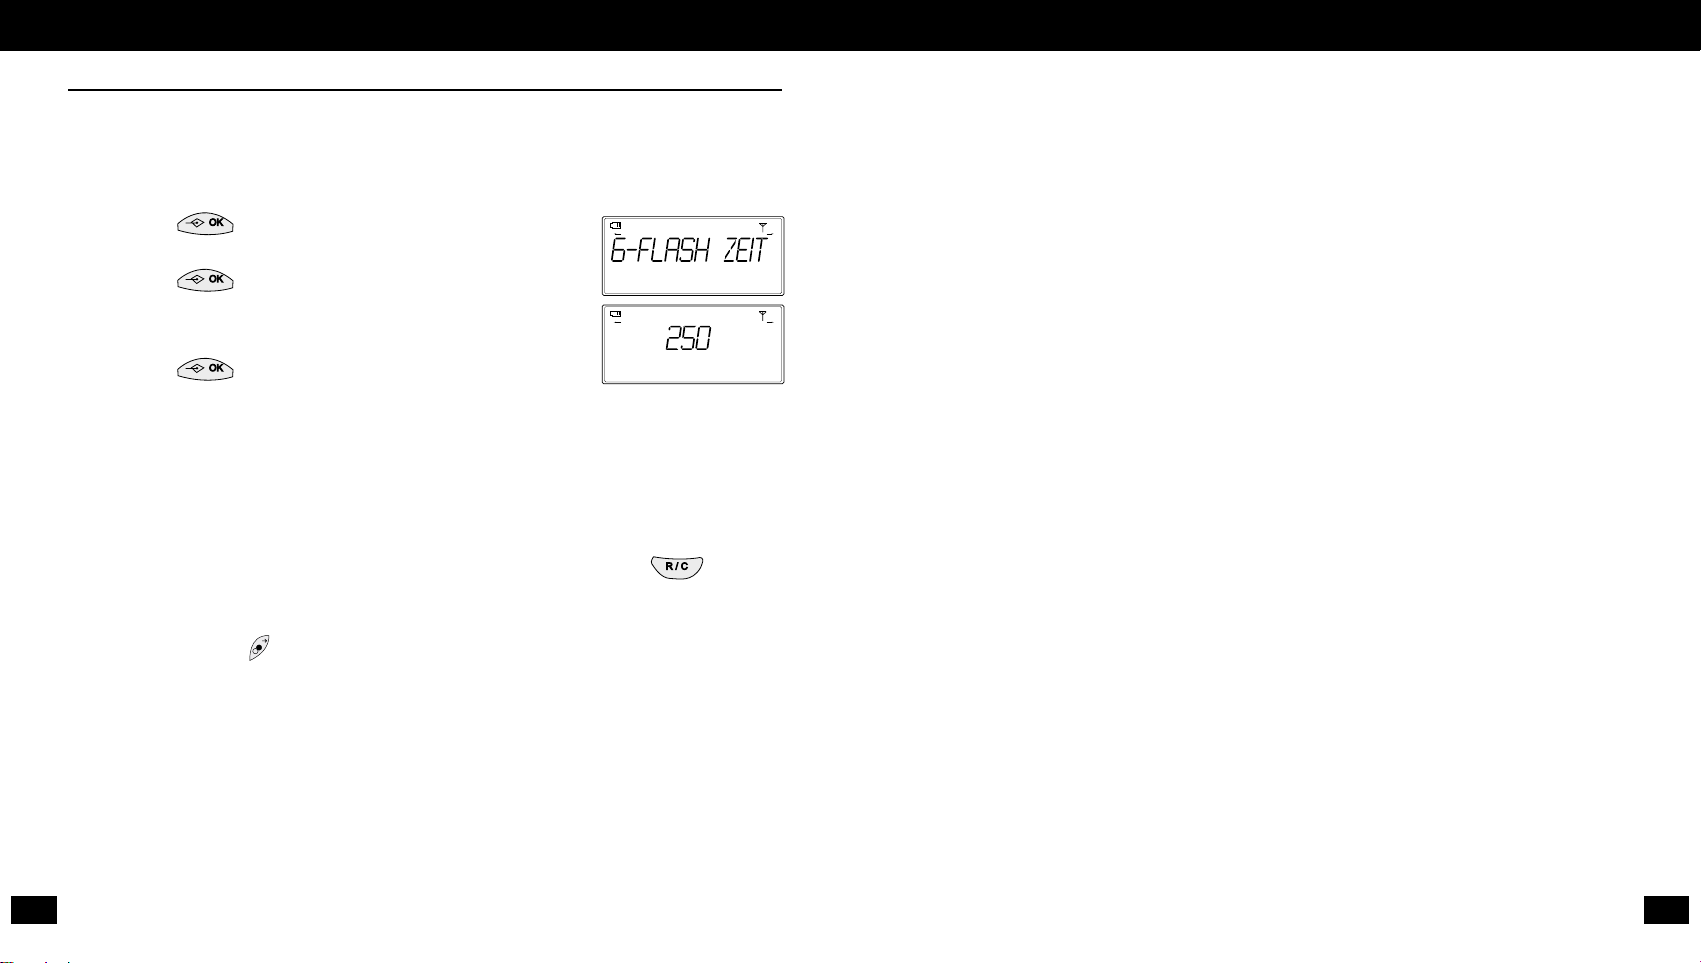
ZUSÄTZLICHE FUNKTIONEN
FLASHZEIT-EINSTELLUNG
Mit dieser Option kann der Benutzer die TBR (Timed Break Recall – Zeitgeschaltete
Wahl wiederholung) für sein Land einstellen.Es können 100 ms,250 ms oder 600 ms
eingestellt werden.
Drücken Sie um den Einrichtungsmodus aufzurufen.
Verwenden Sie die Pfeiltasten,um zu Option 6 zu gelangen.
Drücken Sie .
Verwenden Sie die Pfeiltasten,um zwischen den drei
Wahlmöglichkeiten zu wechseln.
Drücken Sie um die angezeigte Einstellung zu aktivieren.
Das Telefon piept einmal zur Bestätigung und kehrt in den
Standby-Modus zurück.
Dies wird für einige Netzwerkfunktionen wie Konferenzschaltungen oder
Anrufweiterleitung usw. verwendet.Wenn Sie w eiter e Inf ormationen benötigen,
wenden Sie sich an Ihren Netz- oder Nebenstellenbetreiber.
VER WENDEN DER FLASH-EINSTELLUNG
Drücken Sie nach dem Wählen der entsprechenden Nummer die Taste um die
Leitung zu unterbrechen und eine Nebenstellenfunktion auszuführen.Der Buchstabe
„r" wird auf dem Display angezeigt.
Drücken Sie die Taste um eine Pause zu aktivieren,und der Buchstabe
„P" wird angezeigt.
Die nach dem „Flash" gewählte Nummer wird nicht im Wahl wiederholungsspeicher
gespeichert.
Page 22

44
GB DE ES FR IT NL PT
43
BIENVENIDO
Tel éfono DECT™con
amplificador de voz
C710 de Clarity
www.clarityproducts.com
Gracias por elegir el teléfono DECT
™
*
con amplificador de voz C710 de Clarity.
En la presente guía del usuario se ofrece
la información que necesita para utilizar
el teléfono C710 con eficacia y seguridad.
Lea esta guía detenidamente antes de
utilizar el teléfono y manténgala cerca
del aparato para poder consultarla
con facilidad.
* Del inglés Digital Enhanced Cordless Telecommunications,
sistema de telecomunicación digital inalámbrica mejorada.
Page 23

INSTRUCCIONES SOBRE SEGURIDAD – continuación
No tire las pilas al fuego,ya que podrían estallar. Lleve las pilas usadas a los puntos
de recogida de residuos químicos.
No instale ni utilice este teléfono cerca del agua.
Desenchufe el teléfono de la toma de alimentación eléctrica antes de limpiarlo.
No utilice detergentes ni aerosoles para limpiar el teléfono.Utilice un paño húmedo
para limpiarlo.
No cubra las ranuras ni las rejillas de este teléfono .Este teléfono no debe colocarse
cerca de un radiador o de una fuente de calor,ni encima de ellos.Tampoco debe
colocarse en instalaciones cerradas a menos que se disponga de la ventilación adecuada.
No coloque ningún objeto sobre el cable de la línea telefónica.Instale el teléfono en
un lugar en el que nadie vaya a pisar el cable o tropezar con él.
No inserte nunca objetos en las ranuras del teléfono,puesto que pueden entrar en
contacto con puntos de voltaje peligroso o pr ovocar cortocircuitos y dar lugar a
incendios o descargas eléctricas.No derrame ningún líquido sobre el teléfono.
Para reducir el riesgo de descargas eléctricas,no desmonte el teléfono. Al abrir o
retirar las cubiertas,puede quedar expuesto a voltajes peligrosos u otros riesgos.
Si el aparato vuelve a montarse de forma incorr ecta,se podría producir una descarga
eléctrica al utilizarlo.
No instale nunca cableado telefónico durante tormentas eléctricas.
Por la presente,Plantronics BV declara que el teléfono DECT™con amplificador
de voz C710 de Clarity™cumple los requisitos fundamentales y todas las demás
disposiciones pertinentes establecidas por las directivas 1999/5/EC y 93/42/EEC.
Si desea leer la Declaración de conformidad correspondiente a este producto,
visite www.plantronics.com/documentation.
Dispositivo médico de clase I
Cuando el icono de aumento aparece en la pantalla,el volumen podría estar muy
alto y exceder los 118 dB.Este modo está previsto específicamente para usuarios
con problemas de audición.
ES
46
GB DE ES FR IT NL PT
ES
45
DESCRIPCIÓN DEL DIAGRAMA
MICROTELÉFONO
1
Botón de aumento
2 Control de volumen
3 Tecnología Clarity Power activada
o desactivada
4 Timbre activado o desactivado
5 Conector para auriculares
6 Conector para dispositivo de
escucha para colgar en el cuello
7 Último número marcado
8 Tecla de repetición de
llamada/cancelar
9 Tecla para aceptar
10 Agenda telefónica
11 Tecla de línea activada o desactivada
12 Timbre visual
13 Tecla de emergencia
UNIDAD BASE
14
Timbre visual
15 Control de volumen del timbre
16 Botón de localización
del microteléfono
ICONOS DE LA P ANTALLA
Batería
Timbre del microteléfono
desactivado
Bloqueo del teclado
numérico activado
Teléfono descolgado
Mensaje de voz
Mute
Antena
Tecnología Clarity Power activada
Tecnología Clarity Power
desactivada
Nivel de volumen
Aumento activado
INSTRUCCIONES SOBRE SEGURIDAD
LEA LAS SIGUIENTES INSTRUCCIONES ANTES DE UTILIZAR
EL PRODUCT O:
Al utilizar el equipo telefónico,siempre se deben seguir estas instrucciones básicas de
seguridad para reducir el riesgo de incendio,descargas eléctricas y daños personales.
Entre estas instrucciones de seguridad se encuentran las siguientes:
Lea todas las instrucciones detenidamente.
Siga todos los avisos e instrucciones que se indican en el teléfono.
Page 24

El teléfono iniciará la detección de la unidad base.El icono parpadeará hasta que se
haya detectado la base.
Una vez detectada,en la pantalla se mostrará lo siguiente:
Coloque el microteléfono en la unidad base.El indicador
LED naranja con el símbolo se iluminará y el teléfono
sonará una vez.
Es importante cargar las baterías por completo antes de empezar a usar el teléfono.
Deje el microteléfono en la unidad base durante 14 horas como mínimo.
NO TA:Deje el microteléfono en la unidad base cuando no lo esté utilizando para
mantener las baterías cargadas.
P ANTALLA DEL MICRO TELÉFONO
Las dos líneas superiores están destinadas a las funciones DECT básicas,mientras que la
tercera línea muestra la configuración de sonido mejorado.Consulte la figura D .
MENÚ DE CONFIGURACIÓN DEL MICROTELÉFONO
Para acceder a la pantalla del menú de configuración,pulse el botón .
Para desplazarse a la izquierda por las opciones de menú,pulse el botón y el botón
para desplazarse a la derecha y mostrar la configuración que desee modificar.Estos
botones se denominan botones de flecha y en la pantalla aparecerán dos flechas para
indicarle que se encuentra en el menú de configuración.
CAMBIO DE LA CONFIGURACIÓN DE IDIOMA
Pulse el botón y desplácese hasta situarse entre las opciones "0 – Delete HS
(Borrar HS)" y "1 – Store Memory (Guardar memoria)".
Pulse .
Desplácese hasta la opción de idioma que desee.
Pulse .
El teléfono emitirá un sonido de confirmación y volverá al modo de espera.
ES
48
GB DE ES FR IT NL PT
ES
47
INTRODUCCIÓN
CONEXIONES DE LA UNIDAD BASE
Enchufe el cable de alimentación eléctrica y el cable del teléfono en la parte posterior
de la unidad base.
Consulte la
figura A.
Enchufe el cable del teléfono en la toma de la línea telefónica y, a continuación,enchufe
el adaptador de CA en la toma de alimentación eléctrica.Consulte la figura A.
ALCANCE DEL TELÉFONO
Este teléfono utiliza señales de radio entre el microteléfono y la unidad base.
Para poder utilizar el microteléfono y la unidad base conjuntamente,es necesario
establecer un enlace de radio entre ambos.
Cobertura: La cobertura entre la base y el teléfono es la especificada en el estándar
DECT
™
y permite hasta 300 metros de distancia entre la base y el teléfono en
espacios abiertos y una cobertura de hasta 50 metros en un entorno edificado.
NOTA: Los objetos metálicos de gran tamaño, como neveras, espejos o
archivadores, que se encuentren entre el microteléfono y la unidad base
pueden bloquear la señal de radio.
Otras estructuras sólidas,como paredes, pueden reducir la potencia y el
alcance de la señal.
Ciertos aparatos eléctricos, como neveras, lavadoras, hornos
microondas, lámparas fluorescentes, ordenadores o televisores, pueden
causar interferencias.
ENGANCHE DEL CLIP DE CINTURÓN AL MICROTELÉFONO
Introduzca el clip de cinturón en la ranura de la parte posterior del microteléfono y haga
encajar la parte inferior del clip de cinturón en el microteléfono.Consulte la figura B.
INSTALACIÓN DE BA TERÍAS EN EL MICR OTELÉFONO
Abra el compartimento de las baterías y coloque las tres baterías recargables AAA
suministradas.Consulte la figura C.
Cierre el compartimento.
Se iluminará el icono de carga de las baterías .
Page 25

SONIDO DEL TECLADO NUMÉRICO
(ACTIVADO/DESACTIVADO)
Pulse para pasar al modo de configuración.
Utilice los botones de flecha para llegar a la opción 3.
Pulse para cambiar la configuración actual.
El teléfono emitirá un sonido de confirmación y volverá al modo de espera.
Éstas son las configuraciones de menú más utilizadas.Consulte la página 57 para
obtener más información acerca de la configuración de características adicionales
del microteléfono a tra vés del menú.
USO DE CARACTERÍSTICAS ESPECIALES DEL MICROTELÉFONO
AUDÍFONOS
Algunos audífonos pueden verse afectados por interfer encias de radiofr ecuencia.
Como normal general,los audífonos digitales reciben menos interferencias que los
audífonos analógicos.En caso de duda, póngase en contacto con el fabricante del
audífono que utilice o su audiólogo.Si el audífono es compatible con los teléfonos
móviles GSM,es probable que esté adecuadamente protegido ante la radiofrecuencia
de los teléfonos DECT.
TIMBRE VISUAL
Cuando suena el teléfono,se iluminan dos luces intermitentes en la parte posterior
del auricular y dos en la parte frontal (12), y el teclado numérico iluminado parpadea.
TECLADO NUMÉRICO ILUMINADO
El teclado numérico se ilumina en naranja durante 5 segundos cuando se descuelga
el microteléfono de la unidad base y al pulsar un botón.
CONTROL DE V OLUMEN DEL MICRO TELÉFONO
Para ajustar el volumen del microteléfono.
Durante las llamadas,puede ajustar el control de volumen del microteléfono
(2) a un
nivel que le resulte cómodo utilizando la rueda de volumen situada en el lateral del
microteléfono.Consulte la figura F.
ES
50
GB DE ES FR IT NL PT
ES
49
AJUSTE DEL VOLUMEN DEL TIMBRE DEL MICROTELÉFONO
Pulse para pasar al modo de menú.Utilice el botón
de flecha a la derecha para llegar a la opción 2.
Pulse .
En la pantalla se mostrará la configuración actual del timbre
del microteléfono.
Utilice los botones de flecha para establecer el volumen deseado
(3 niveles y desactivado).
Si se desactiva el volumen,la siguiente imagen aparecerá en la
pantalla del microteléfono.
Pulse si ésta es la configuración deseada.
El teléfono emitirá un sonido de confirmación y volverá al
modo de espera.
Al seleccionar esta configuración,el icono
aparecer á en la pantalla.
Si el volumen no está desactivado,en la pantalla se mostrará
la configuración de volumen deseada.
Pulse para establecer este nivel de volumen.
Inmediatamente después,en la pantalla se mostrarán los
tonos disponibles (1-9) y se oirá el tono mostrado.
Utilice los botones de flecha para desplazarse.
Pulse cuando aparezca el tono deseado.
El teléfono emitirá un sonido de confirmación y volverá al modo de espera.
NO TA:Cuando el interruptor del timbre del microteléfono (4) está en la posición
de desactivado,la configuración de esta característica queda anulada.
La configuración vuelve a activarse cuando el interruptor se cambia a la posición
de activado.
Page 26

Cuando la tecnología Clarity Power está activado ,aparece un círculo negr o
en la pantalla del microteléfono.
Cuando la tecnología Clarity Power está desactivado ,aparece un círculo blanco
en la pantalla del microteléfono.
CONECTOR PARA DISPOSITIV O DE ESCUCHA P ARA COLGAR EN
EL CUELLO
El teléfono cuenta con un conector que puede utilizarse con un dispositivo de escucha para
colgar en el cuello (6).Consulte la figura F.
CONECTOR PARA A URICULARES
El conector para auriculares (5) es compatible con auriculares provistos de conectores de
2,5 mm.Consulte la figura F.
INTERRUPT OR DE TIMBRE DEL MICRO TELÉFONO (4) A CTIV ADO
O DESACTIV ADO ,FIGURA F
Si el interruptor se encuentra en la posición desactivado,el microteléfono no suena.
Si se encuentra en la posición activado,el microteléfono suena de conformidad con la
configuración seleccionada.
REALIZACIÓN DE LLAMADAS TELEFÓNICAS
Pulse el botón El icono aparecerá en la pantalla del microteléfono.
Marque el número que desee.
Cinco segundos después de pulsar la última tecla,
el cronómetro de llamadas comenzará a contar.
Para finalizar la llamada,pulse el botón de nuevo.
La duración de la última llamada se mostrará durante 5 segundos.
Para volver a marcar el último número marcado,pulse el botón .
El número marcado apar ece en la pantalla al pulsar esta tecla.
Pulse el botón para llamar a este número.
Para finalizar la llamada,pulse el botón de nuevo.
ES
52
GB DE ES FR IT NL PT
ES
51
Cuando la función de aumento (1) está desactivada,el rango
de amplificación del control de volumen se muestra como 0-15.
Cuando la función de aumento
(1) está activada,
el rango del control de volumen se muestra como 12-32.
El nivel de volumen apar ece en la fila inferior de la pantalla
del microteléfono,por ejemplo
.
BOTÓN DE AUMENTO
Para obtener un mayor v olumen del microteléfono.
La característica de aumento funciona en combinación con el control de volumen del
microteléfono (2). Al pulsar el botón de aumento (1),se produce una amplificación de
sonido adicional durante la llamada en curso.Consulte la figura F.Cuando esta función
está activada,el icono se ilumina en la parte inferior izquierda de la pantalla del
microteléfono .Utilice el control de volumen del micr oteléfono (2)para establecer un nivel
de escucha cómodo.
Vuelva a pulsar el botón para desactivar el aumento de volumen
(1).
La característica de aumento se desactiva automáticamente al colgar el teléfono.
NOTA: El botón se ilumina en rojo en el modo de conversación normal y
en naranja cuando la característica de aumento (1) está activada.
Al activar el modo de aumento,se incrementa el nivel de amplificación y se permite
que ruidos fuera de lo común excedan los 118 dB,lo que puede ser perjudicial para la
salud. El control del volumen debe aumentarse de forma gradual hasta encontrar el
nivel mínimo de amplificación con el que se sienta cómodo.Evite la exposición
prolongada e innecesaria a niveles de volumen altos.
TECNOLOGÍA CLARITY POWER ACTIV AD A O DESA CTIV ADA
El interruptor de Clarity Power(3) amplifica las frecuencias más altas cuando la función
de aumento está activada para compensar algunos casos de pérdida auditiva moderada.
Consulte la figura F.
Page 27

ELIMINACIÓN DE NÚMEROS DE LA AGENDA TELEFÓNICA
Para borrar un número,seleccione la ubicación de memoria sin introducir ningún
número y pulse .Cuando la pantalla muestre el mensaje "ERASE" (BORRAR),
pulse .
REALIZACIÓN DE LLAMADAS A UN NÚMER O ALMACENADO
Pulse el botón .
Seleccione el número de la ubicación de memoria que desee mediante el teclado
numérico (0 a 9).
Pulse el botón para llamar al número teléfono.
Cuando el teléfono esté en uso,el icono aparecerá
en la pantalla del microteléfono.
Cinco segundos después de pulsar la última tecla,
el cronómetro de llamadas comenzará a contar.
Para finalizar la llamada,pulse el botón de nuevo.
BOTÓN DE EMERGENCIA
Se trata de un botón de memoria de una pulsación que puede almacenar el número
de emergencia que desee.
Para guardar un número de emergencia,siga los pasos para almacenar números de
teléfono en la agenda telefónica.
Pulse el botón.
En la pantalla se mostrará lo siguiente.
Pulse .
ES
54
GB DE ES FR IT NL PT
ES
53
RESPUESTA A LLAMADAS ENTRANTES
El número de teléfono del interlocutor aparecerá en la pantalla del microteléfono.
Si el proveedor de servicios no admite esta función,en la pantalla aparecerá el mensaje
"Withheld" (No disponible).
Pulse el botón para responder a la llamada.
Para finalizar la llamada,pulse el botón de nuevo.
ALMACENAJE DE NÚMEROS EN LA AGENDA TELEFÓNICA
Pulse el botón del microteléfono.
En la pantalla se mostrará lo siguiente.
Pulse .
En la pantalla del microteléfono se mostrará el mensaje
"Location?" (¿Ubicación?).
Seleccione un número entre 0 y 9 en el teclado numérico
para especificar la ubicación del número de teléfono que
se va a guardar.
Introduzca el número de teléfono que desee guar dar
(hasta 25 dígitos).
Para borrar un número erróneo ,pulse el botón.
Pulse para confirmar .
El teléfono emitirá un sonido y volverá a la pantalla de modo de espera.
NO TA:Cuando guarde un número en la ubicación de un númer o de teléfono
anterior ya almacenado,el número original se sobrescribirá sin que aparezca
ningún aviso de que dicha ubicación ya se encuentra en uso.
Page 28

FUNCIONES DE LA UNIDAD BASE
TIMBRE VISUAL
Cuando el teléfono suena,el timbre visual (14) de la unidad base parpadea.
Consulte las figuras E o F.
CONTROL DE VOLUMEN DELTIMBRE DE LA UNID AD BASE
Complementa el timbre del microteléfono.
Utilice el interruptor para aumentar o disminuir el volumen del timbre
(15) de la unidad
base.Consulte las figuras E o F.
La posición de desactivado anula el timbre de la unidad base.
CONFIGURACIÓN DEL TIMBRE DE LA BASE
Pulse .Utilice los botones de flecha para llegar
a la opción 5.
Pulse .
En la pantalla se muestra la configuración actual del volumen
del timbre (15) de la unidad base (3 niveles y desactivado).
Si el volumen está activado,aparecen nueve opciones
de tonos (1 a 9).
Utilice los botones de flecha para desplazarse por los tonos.
Si el volumen está desactivado,el teléfono emite un sonido
de confirmación y vuelve al modo de espera.
Pulse para confirmar la opción seleccionada.
NO TA:Cuando el interruptor del timbre de la base está en la posición
de desactivado,la configuración de esta característica queda anulada.
La configuración vuelve a activarse cuando el interruptor se cambia a la
posición de activado.
ES
56
GB DE ES FR IT NL PT
ES
55
En la pantalla del microteléfono se mostrará el mensaje
"Location" (Ubicación).
Pulse el botón.
Introduzca el número de teléfono que desee guar dar
(hasta 25 dígitos).
Para borrar un número erróneo,pulse .
Pulse .
El teléfono emitirá un sonido y volverá a la pantallade modo de espera.
LLAMADAS AL NÚMERO DE EMERGENCIA
Sólo con pulsar el botón el teléfono marca el número de emergencia
automáticamente y lo muestra en la pantalla del microteléfono.
Para finalizar la llamada,pulse el botón.
NOTA:Esta tecla está hundida para evitar pulsarla por accidente.
Page 29

MODO DE MARCACIÓN
Permite elegir entre el modo de mar cación por impulsos o por tonos.
Pulse para pasar al modo de configuración.
Utilice los botones de flecha para llegar a la opción 7.
Pulse .
Utilice los botones de flecha para desplazarse por las opciones.
Pulse para elegir la configuración mostrada.
El teléfono emitirá un sonido de confirmación y volverá al
modo de espera.
NO TA:La configuración predeterminada de fábrica es por tonos.No es necesario
modificar esta configuración si es posible realizar llamadas.
BLOQUEO DEL TECLADO NUMÉRICO DEL MICROTELÉFONO
Pulse y mantenga pulsado el botón hasta que el icono
aparezca en la pantalla del microteléfono.
Pantalla de teclado numérico bloqueado.
Pulse y mantenga pulsado el botón de nuevo para
desbloquear el teclado numérico.
Aun en el modo de bloqueo del teclado numérico,puede
contestar y poner fin a una llamada con la tecla .
A VISO DE BA TERÍA BAJA
Si se detecta que el nivel de la batería es bajo en el modo
de espera,oirá un único tono de aviso de batería baja y se
mostrará el icono de batería agotada tal como se indica.
Si se detecta que el nivel de la batería es bajo durante el
transcurso de una llamada,oirá un tono de aviso de batería
baja cada 20 segundos y se mostrará el icono de batería
agotada tal como se indica.
La llamada no se desconectará hasta que se cuelgue el teléfono.
ES
58
GB DE ES FR IT NL PT
ES
57
FUNCIÓN DE LOCALIZACIÓN
Permite buscar el microteléfono en caso de extravío.
Pulse el botón de localización (16) para buscar el microteléfono.
La luz de fondo parpadeará y en la pantalla del microteléfono se
mostrará lo siguiente.Consulte las figuras E o F.
Pulse el botón de localización (16) o cualquier botón del
microteléfono para detener el tono de localización.
CARACTERÍSTICAS ADICIONALES DEL MICROTELÉFONO
RESPUEST A AUT OMÁTICA (ACTIV AD A/DESA CTIV AD A)
Permite contestar al teléfono cuando suena levantando el micr oteléf ono de la base
y colgar colocándolo en la base.Si lo prefiere,también puede colgar pulsando el
botón.
Para activar esta función,debe establecer el modo en "Auto ON". Para ello:
Pulse para pasar al modo de configuración.
Utilice los botones de flecha para llegar a la opción 4.
Pulse para cambiar la configuración actual.
El teléfono emitirá un sonido de confirmación y volverá al modo de espera.
FUNCIÓN MUTE DEL MICRÓFONO
Pulse durante una llamada para desactivar el micrófono.
En la pantalla se muestra el cronómetro de llamadas y se indica
que el micrófono está desactivado.
Pulse para desactivar la función mute.
La pantalla vuelve al modo de llamada normal.
Page 30

RECUPERACIÓN DE REGISTROS DE ID DEL INTERLOCUT OR
Para recuperar registros de ID del interlocutor n ue v os o antiguos,pulse el botón
durante dos segundos.La memoria de ID del interlocutor conserva los últimos
10 números de teléfono de las llamadas entrantes.
La llamada más reciente se muestra primero.
Utilice el botón de flecha derecho para recuperar
un número entero cuando tenga más de nue v e dígitos.
Se mostrará el resto del número de teléfono.
Pulse el botón de flecha derecho de nuevo para recuperar
la hora y la fecha de la llamada.
NO TA:Las funciones de ID del interlocutor dependen
de los servicios que ofrezca su proveedor de telefonía.
ALMACENAJE DE REGISTROS DE ID DEL INTERLOCUTOR
Cuando el registro de ID del interlocutor apar ezca en la
pantalla del microteléfono,pulse para guardar el
registro mostrado .
Seleccione un número (0 a 9) para guardar el registro
de ID del interlocutor.
El teléfono emite un sonido de confirmación y vuelve a la lista de ID del interlocutor.
ELIMINACIÓN DE REGISTROS DE ID DEL INTERLOCUT OR
Cuando se muestre un registr o de ID del interlocutor,
pulse el botón durante 2 segundos.
Pulse para confirmar o pulse
para cancelar la acción.
NOTA:Para evitar borrar registros accidentalmente,sólo se eliminará el registro
mostrado. No pueden borrarse todos los registros.
ES
60
GB DE ES FR IT NL PT
ES
59
CARGA DE LA BATERÍA
El modo de carga rápida de 30 minutos de la batería se activa
al colocar el microteléfono en la unidad base.
Durante la carga de la batería,aparecerá la siguiente animación
en el icono de batería.
Después de 30 minutos,la animación de carga de la batería se
detendrá y el icono de batería se mostrará como lleno.
NOTA: Si la batería está agotada, debe cargarse durante unas 14 horas para
obtener la carga máxima.
AVISO DE FUERA DE ALCANCE
Al realizar una llamada,si el microteléfono está demasiado lejos de la unidad base,
oirá un tono de aviso de fuera de alcance cada 20 segundos.
MENSAJE DE VOZ
Si está suscrito a un servicio de buzón de voz provisto por
su compañía telefónica,se mostrará el icono para indicar
que tiene mensajes en espera.Las llamadas se identifican por
el ID del interlocutor, pero los datos se muestran como
"MESSAGE" (MENSAJE) en lugar del número de teléf ono del interlocutor.
Mensaje (con compañía telefónica) recibido.
Pulse el botón de flecha derecho para ver la fecha y la hora del mensaje.
ID DEL INTERLOCUTOR Y FUNCIONES
LLAMADA ENTRANTE
Al recibir una llamada,en la pantalla se muestra el número
del interlocutor de la llamada entrante.
El número aparece mientras el teléfono suena.El icono EXT
parpadea para indicar que hay una llamada entrante.
El icono de buzón de voz apar ecerá en la pantalla tal
como se indica.Cuando el teléfono deja de sonar,en la pantalla
se muestra el número de llamadas perdidas.
Page 31

USO DE LA CONFIGURACIÓN FLASH
Después de marcar el número deseado ,pulse el botón para que la línea realice
una función P ABX.La letra "r" aparecerá en la pantalla.
Pulse el botón para añadir una pausa.Se mostrará la letra "P".
El número marcado tras activar la función Flash no se almacenará en la memoria de
último número marcado .
REQUISIT OS PARA LA DURACIÓN FLASH
CONFIGURACIÓN TBR P AÍS
100 Austria,Bélgica, Bulgaria,Chipre,República Checa,
Dinamarca,Finlandia,Hungría,Islandia,Italia,
Noruega,Suiza
250 Francia,Portugal
Para otros países,póngase en contacto con su proveedor de telefonía.
ES
62
GB DE ES FR IT NL PT
ES
61
MENSAJE SIN LLAMADAS
Cuando no haya ningún registro de ID del interlocutor en
la memoria,al pulsar el botón durante 2 segundos,
en la pantalla del microteléfono se mostrará el mensaje
"NO CALL" (SIN LLAMADAS).
Pulse para volver a la pantalla de modo de espera.
LLAMADA ENTRANTE NO IDENTIFICAD A
Al recibirse una llamada entrante no identificada,
no se mostrará ningún registro de ID del interlocutor
y la línea de la pantalla estará en blanco.
NOTA: Pueden mostrarse hasta 18 dígitos del ID
del interlocutor de llamadas entrantes.
CARACTERÍSTICAS ADICIONALES
CONFIGURACIÓN DE LA DURA CIÓN FLASH
Esta opción permite establecer la repetición de llamada de ruptura con tasa de duración
(TBR) según el país.Las opciones son 100, 250 y 600 ms.
Pulse para pasar al modo de configuración.
Utilice los botones de flecha para llegar a la opción 6.
Pulse .
Utilice los botones de flecha para desplazarse por las
tres opciones.
Pulse para activar la configuración mostrada.
El teléfono emite un sonido de confirmación y vuelve al modo de espera.
Esta función se utiliza para acceder a ciertas características de red como
audioconferencias o transferencias de llamadas.En caso necesario,póngase en contacto
con su proveedor de telefonía o administrador PABX para obtener más información.
Page 32

64
GB DE ES FR IT NL PT
63
BIENVENUE
Téléphone à amplificateur
Clarity C710 DECT
™
www.clarityproducts.com
Merci d'avoir choisi le téléphone à
amplificateur Clarity C710 DECT
™
*.
Ce guide de l'utilisateur contient les
informations nécessaires à une utilisation
efficace et en toute sécurité de votre
téléphone C710.
Veuillez lire ce guide attentivement avant
d'utiliser votre téléphone.Conservez le
manuel près du téléphone pour pouvoir
le consulter facilement.
* Digital Enhanced Cordless Telecommunications
(Télécommunications numériques européennes sans fil)
Page 33

COMBINE
1
Bouton d'amplification du volume
2 Contrôle du volume
3 Activation/désactivation de Clarity
4 Activation/désactivation
de la sonnerie
5 Prise du micro-casque
6 Prise du kit à induction
7 Touche bis
8 Touche rappel/annuler
9 Touche OK
10 Répertoire téléphonique
11 Touche de prise de ligne
12 Indicateur visuel de sonnerie
13 Touche d'urgence
BASE
14
Indicateur visuel de sonnerie
15 Bouton de volume de la sonnerie
16 Touche de recherche du combiné
ICONES SUR L'ECRAN A
CRIST A UX LIQUIDES
Batterie
Sonnerie du combiné désactivée
Verrouillage du clavier activé
Prise de ligne activée
Message vocal
Touche secret
Antenne
Activation de Clarity
Désactivation de Clarity
Niveau du volume
Amplification du volume activée
INFORMATIONS DE SECURITE IMPORTANTES – suite
Ne jetez pas les piles dans le feu car elles pourraient exploser.Déposez vos piles
usagées dans un point de collecte des déchets toxiques.
Veillez à ne pas installer ni utiliser ce téléphone à proximité d'un point d'eau.
Débranchez le téléphone de la prise murale avant de le nettoyer. N'utilisez pas de
nettoyant liquide ou en aérosol sur le téléphone.Utilisez un chiffon humide pour
le nettoyage.
Ne recouvrez pas les fentes et ouv ertures du téléphone.Ne placez jamais ce téléphone
au-dessus ou à proximité d'un radiateur ni d'une source de chaleur,ni dans une
installation fermée sans ventilation appropriée.
Ne placez aucun objet sur le cordon téléphonique.Installez le téléphone de façon à ce
que personne ne marche ou trébuche sur le cordon.
N'insérez jamais d'objets dans les fentes du téléphone.Ils pourraient entrer en contact
avec des points de tension élevée ou créer un court circuit,ce qui se traduirait par un
risque d'incendie ou de choc électrique.Ne renversez pas de liquide,quel qu'il soit,sur
le téléphone.
Afin de réduire le risque de choc électrique,ne démontez pas ce téléphone.L'ouverture
ou le retrait des couvercles vous expose à des tensions élevées ou à d'autres dangers.Si
vous ne remontez pas corr ectement l'appareil,des chocs électriques peuvent survenir
lors de son utilisation.
Ne procédez jamais au branchement d'un téléphone pendant un orage.
Par la présente,Plantronics BV déclare que le téléphone à amplificateur
Clarity™C710 DECT™est conforme aux exigences fondamentales et aux
autres dispositions applicables des Directiv es 1999/5/CE et 93/42/CEE.
P our pr endre connaissance de la Déclaration de Conformité de ce produit,
consultez le site Internet www.plantronics.com/documentation
Appareil médical de classe I.
Quand l'icône d'amplification du volume s'affiche,le volume peut être très
fort et dépasser 118 dB.Ce niveau s'adresse spécifiquement aux utilisateurs
malentendants.
FR
66
GB DE ES FR IT NL PT
FR
65
LEGENDE DU SCHEMA
INFORMATIONS DE SECURITE IMPORTANTES
LISEZ LES INSTRUCTIONS SUIV ANTES A VANT L'UTILISA TION:
Lorsque vous utilisez votre équipement téléphonique,il convient de respecter les
précautions de sécurité fondamentales ci-après pour réduire les risques d'incendie,de
choc électrique et de blessures corporelles:
Lisez et assurez-vous d'a v oir compris toutes les instructions.
Suivez tous les av ertissements et instructions mentionnés sur l'appar eil téléphonique.
Page 34

Lorsque la base est trouvée,l'écran affiche:Placez le combiné
sur la base.Le témoin lumineux orange accompagné du
symbole s'allume et le téléphone sonne une fois.
Avant d'utiliser le combiné pour la première f ois,il est important
de charger complètement les batteries.Laissez le combiné sur sa
base pendant au moins 14 heures.
REMARQUE : reposez le combiné sur la base quand vous n'utilisez pas le
téléphone.De cette façon,les batteries ne se déchargent pas.
ECRAN A CRISTAUX LIQUIDES DU COMBINE
Les deux lignes supérieures se rapportent à la fonction de base DECT.La troisième ligne
affiche les paramètres audio avancés.Reportez-vous à la figure D.
PARAMETRES DU MENU DU COMBINE
Pour accéder à l'écran affichant les paramètres du men u,appuyez sur le bouton
Pour afficher les paramètres que vous souhaitez modifier,appuyez sur la touche
pour les faire défiler sur la gauche et sur pour les faire défiler sur la droite.Dans la
suite du guide de l'utilisateur, ces boutons seront désignés par l'appellation « touches
fléchées ».En effet,les deux flèches à l'écran vous indiquent que vous êtes en mode
Paramètres du menu.
PARAMETRES DE CHANGEMENT DE LA LANGUE
Appuyez sur le bouton et accédez à l'option située entre les options
« 0 – Supprimer HS » (Delete HS) et « 1 – Enregistrer dans la mémoire »
(Store Memory).
Appuyez sur .
Faites défiler les différents choix possibles jusqu'à la langue souhaitée.
Appuyez sur .
Le téléphone émet un bip de confirmation et se repositionne en mode veille.
FR
68
GB DE ES FR IT NL PT
FR
67
DEMARRAGE
CONNECTIONS AVEC LA BASE
Branchez le câble d'alimentation principal ainsi que le cordon du téléphone à l'arrière
de la base.Reportez-vous à la figure A.
Branchez le câble du téléphone à la ligne téléphonique,puis branchez l'adaptateur
secteur à une prise d'alimentation électrique.Reportez-vous à la figure A.
PORTEE DU TELEPHONE
Ce téléphone utilise des signaux radio entre le combiné et la base.Pour utiliser le
combiné et la base ensemble, vous devez être en mesure d'établir une liaison radio
entre les deux.
La portée entre la base et le téléphone respecte les spécifications DECT
™
et permet d'utiliser le combiné dans un rayon pouvant aller jusqu’à 300 mètres en
champ libre – jusqu’à 50 mètres dans une résidence standard.
REMARQUE : tout objet métallique (comme un réfrigérateur,un miroir ou un
classeur à tiroirs) situé entre le combiné et la base peut empêcher l'émission
du signal radio.
D'autres structures solides, comme les murs, peuvent réduire la portée et la
puissance du signal.
Certains équipements électriques (réfrigérateurs, machines à laver, fours à
micro-ondes, lumières fluorescentes, ordinateurs ou téléviseurs) peuvent
causer des interférences.
RACCORDEMENT DU CLIP DE CEINTURE AU COMBINE
Insérez le clip de ceinture dans la fente située à l'ar rièr e du combiné et cliquez sur la
base du clip de ceinture vers le combiné.Reportez-vous à la figure B.
INST ALLATION DES BATTERIES D ANS LE COMBINE
Retirez le couvercle du compartiment des batteries et installez les tr ois batteries
rechargeables AAA fournies.Reportez-vous à la figure C.
Remettez le couvercle en place.
L'icône se rapportant au niveau de charge des batteries apparaît.
Le téléphone recherche alors la base.L'icône clignote jusqu'à la fin de la recherche.
Page 35

SON DES TOUCHES (A CTIV ATION/DESACTIV ATION)
Appuyez sur pour entrer dans le mode de
configuration.Utilisez les touches fléchées pour accéder
à l'option 3.
Appuyez sur Un bip de confirmation est émis.
Le combiné retourne en mode veille.
Ces paramètres du menu sont les fonctions le plus fréquemment utilisées.
Reportez-vous à la page 76 pour obtenir des informations sur la configuration
de fonctions supplémentaires du combiné via le menu.
UTILISATION DES FONCTIONS SPECIALES DU COMBINE
AIDES AUDITIVES
Certaines aides auditives sont sensibles aux perturbations radioélectriques.En général,
les aides auditives numériques rencontr ent moins de pr oblèmes d'interférence que les
aides auditives analogiques.En cas de doute, consultez le fabricant de votre aide auditive
ou votre audioprothésiste.Si votre aide auditive est compatible a vec les téléphones
mobiles GSM,vous ne devriez pas rencontrer de problèmes liés à l'utilisation d'un
téléphone DECT.
SONNERIE VISUELLE
Deux témoins lumineux clignotants à l'arrière du combiné et deux autres sur le devant
(12) s'allument quand le téléphone sonne.De plus, le clavier de l'écran éclairé clignote.
ECLAIRAGE DU CLA VIER
Le clavier devient orange pendant 5 secondes si le combiné n'est plus sur sa base ou si
vous appuyez sur un bouton.
CONTROLE DU VOLUME DU COMBINE
Réglage du volume du combiné.
Lorsque vous êtes en ligne,vous pouvez régler le volume du combiné
(2) pour obtenir
un volume adéquat en utilisant la molette située sur le côté du combiné.Reportez-vous
à la figure F.
FR
70
GB DE ES FR IT NL PT
FR
69
REGLAGE DU VOLUME DE LA SONNERIE
DU COMBINE
Appuyez sur pour entrer dans le mode Menu.
Utilisez la touche fléchée droite pour accéder à l'option 2.
Appuyez sur .
L'écran affiche le paramètre relatif à la sonnerie du combiné
en cours d'utilisation.
Utilisez les touches fléchées pour définir le volume souhaité
(niveaux 1,2,3 ou désactivation).
Si le paramètre est désactivé,l'information suivante apparaît sur
l'écran du combiné.
Appuyez sur si votre choix vous satisfait.
Un bip de confirmation est émis et le combiné retourne en
mode veille.
L'icône apparaît sur l'écran tant que ce paramètre est
sélectionné.
Si le paramètre n'est pas désactivé,l'écran affiche le volume
sélectionné.
Appuyez sur pour définir le volume.
Ensuite,l'écran affiche les différentes sonneries disponibles (1 à 9).
Les sonneries sont émises au fur et à mesure du défilement.
Utilisez les touches fléchées pour faire défiler les sonneries.
Appuyez sur quand la sonnerie souhaitée est affichée.
Un bip de confirmation est émis.Le combiné retourne en mode veille.
REMARQUE :lorsque le bouton d'activation/désactiv ation de la sonnerie (4)
du combiné est en position désactivation,les paramètres de cette fonction sont
inactifs.Ces paramètres redeviennent actifs quand la sonnerie est réactivée.
Page 36

Lorsque l'option Clarity est activée un cercle noir apparaît sur
l'écran du combiné.
Lorsque l'option Clarity est désactivée un cercle blanc apparaît sur
l'écran du combiné.
PRISE DU KIT A INDUCTION
La Prise de kit à induction (6) est fournie aux utilisateurs qui utilisent ce dispositif auditif.
Reportez-vous à la figure F.
PRISE DU MICRO-CASQUE
La Prise du micro-casque (5) est compatible avec les micro-casques dotés d'une prise
de 2,5 mm.Reportez-vous à la figur e F.
ACTIV ATION/DESACTIV ATION DE LA SONNERIE (4)
DU COMBINE,FIG F
Lorsque que la sonnerie est désactivée,le combiné ne sonne pas.
Lorsque que la sonnerie est activée,le combiné sonne conformément aux
paramètres sélectionnés.
EFFECTUER UN APPEL TELEPHONIQUE
Appuyez sur le bouton L'icône apparaît sur l'écran du combiné.
Composez le numéro.
Si vous n'appuyez sur aucune touche pendant 5 secondes,
la minuterie s'enclenche.
Pour terminer l'appel en cours,appuyez de nouveau sur le
bouton .La durée du dernier appel reste affichée pendant 5 secondes.
Pour rappeler le dernier numér o,appuyez sur le bouton
Le numéro composé apparaît alors sur l'écran quand cette option est sélectionnée.
Appuyez sur le bouton pour appeler ce numéro.
Pour terminer l'appel en cours,appuyez de nouveau sur le bouton .
FR
72
GB DE ES FR IT NL PT
FR
71
Lorsque le bouton d'amplification du volume (1) est désactivé,la plage d'amplification
du contrôle du volume se situe entre 0 et 15.
Lorsque le bouton d'amplification du volume
(1) est activé,
la plage de contrôle du volume se situe entre 12 et 32.
Le niveau de volume est affiché sur la ligne du bas de l'écran
du combiné par exemple
.
BOUTON D'AMPLIFICATION DU V OLUME
Pour obtenir un volume sonore plus élevé dans le combiné.
La fonction d'amplification du volume s'ajoute au volume sonor e que v ous pouv ez
modifier en appuyant sur le bouton de Contrôle du volume du combiné (2).Lorsque
vous appuyez sur le Bouton d'amplification du v olume (1),le volume sonore de l'appel
en cours est amplifié.Reportez-vous à la figur e F.Si cette option est activée,l'icône
s'affiche en bas à gauche de l'écran du combiné.Utilisez le bouton de Contrôle de volume
du combiné (2) pour obtenir le niveau d'écoute adéquat.
Appuyez de nouveau pour désactiver le Bouton d'amplification du v olume
(1).
L'amplification du volume est désactivée dès que vous raccrochez.
REMARQUE :le bouton s'allume en rouge en mode de conversation normale
mais si le Bouton d'amplification du volume (1) est activé,il s'allume en orange .
En activant la fonction d'amplification,le volume d'amplification est augmenté de
telle façon qu'un bruit inhabituel dépasse les 118 dB. Cela peut être dangereux.
Le contrôle du volume doit être augmenté de façon progressive afin de déterminer le
niveau d'amplification qui vous convient le mieux.Evitez toute exposition inutile ou
prolongée à des volumes d'écoute élevés.
ACTIV ATION/DESACTIV ATION DE CLARITY
La touche Activation/Désactivation Clarity (3) amplifie les plus hautes fréquences quand
la fonction d'amplification du volume est activée pour compenser de possibles pertes
auditives modérées.Reportez-vous à la figure F.
Page 37

SUPPRESSION DES ENTREES DANS LE REPERTOIRE
TELEPHONIQUE
Pour effacer une entrée,sélectionnez l'emplacement de la mémoire sans entrer de
numéro de téléphone,puis appuyez sur .Le message « ERASE » (Effacer) s'affiche.
Appuyez ensuite sur .
UTILISATION D'UN NUMERO DE LA MEMOIRE
Appuyez sur le bouton .
Sélectionnez le numéro désiré à l'aide du clavier (0 à 9).
Appuyez sur le bouton pour composer le numéro.
Lorsque le téléphone est en cours d'utilisation,l'icône
apparaît sur l'écran du combiné.
Si vous n'appuyez sur aucune touche pendant 5 secondes,
la minuterie s'enclenche.
Pour terminer l'appel en cours,appuyez de nouveau
surle bouton .
TOUCHE DE NUMERO D'URGENCE
Cette touche est une touche de mémoire instantanée permettant d'enregistrer
le numéro d'urgence de votr e choix.
Pour enregistrer un n uméro d'urgence,suivez la même procédur e que pour
l'enregistrement d'un numér o de téléphone dans le répertoire téléphonique.
Appuyez sur le bouton .
L'information suivante s'affiche.
Appuyez sur .
Le message « Location » (Emplacement) s'affiche sur l'écran du combiné.
Sélectionnez le bouton .
FR
74
GB DE ES FR IT NL PT
FR
73
REPONSE AUX APPELS ENTRANTS
Le numéro de téléphone de la personne qui vous appelle a pparaît sur l'écran du
combiné.Le message « Withheld » (Refusé) s'affiche si l'opérateur ne prend pas en
charge cette fonction.
Appuyez sur le bouton pour répondre à l'appel.
Pour terminer l'appel en cours,appuyez de nouveau sur le bouton .
ENREGISTREMENT D'ENTREES DANS LE REPERTOIRE
TELEPHONIQUE
Appuyez sur le bouton du combiné.
L'information suivante s'affiche.
Appuyez sur .
Le message « Location » (Emplacement) s'affiche sur l'écran
du combiné.
Sélectionnez un numéro entre 0 et 9 sur le clavier pour
spécifier l'emplacement du numéro de téléphone à enr egistr er.
Entrez le numéro de téléphone à enregistrer
(25 chiffres maximum).
Si vous vous trompez lors de la saisie et que vous souhaitez
effacer un chiffre,appuyez sur le bouton .
Appuyez sur pour confirmer.
Une tonalité est émise et le téléphone retourne en mode veille.
REMARQUE :si une nouvelle entrée est enregistrée à un emplacement déjà utilisé par
un autre numéro de téléphone,l'entrée est remplacée sans avertissement préalable.
Page 38

L'écran affiche le paramètre choisi pour le Bouton du volume
de la sonnerie (15) (niveaux 1,2,3 et désactivation).
Si le volume est activé,vous avez un choix de 9 sonneries (1 à 9).
Utilisez les touches fléchées pour faire défiler les sonneries.
Si le volume est désactivé,le téléphone émet un bip
de confirmation et retourne en mode veille.
Appuyez sur pour confirmer votre choix.
REMARQUE :lorsque le bouton d'activation/désactivation de la sonnerie du de la
base est en position désactivation,les paramètres de cette fonction sont inactifs .
Ces paramètres redeviennent actifs quand la sonnerie est réactivée.
FONCTION DE RECHERCHE DU COMBINE
Cette fonction vous permet de retr ouv er votre combiné
si vous l'av ez égaré.
Appuyez sur le Bouton de recherche du combiné
(16) pour
retrouver le combiné.Le témoin lumineux arrière clignote
et l'affichage ci-après apparaît sur l'écran.Reportez-vous à la figure E ou F.
Appuyez sur le Bouton de recherche du combiné (16) ou tout autre bouton du
combiné pour arrêter la tonalité de rappel.
FONCTIONS SUPPLEMENTAIRES DU COMBINE
REPONSE AUT OMATIQUE (ACTIV ATION/DESACTIV ATION)
Cette option vous permet de répondre directement à l'a ppel en décrochant le combiné
de la base et de mettre fin à l'appel en reposant le combiné sur la base.Il est également
possible de raccrocher en appuyant sur le bouton .
Pour activer cette option,le mode « Auto ON » (décrochage automatique activé) doit
être configuré.
Pour ce faire,appuyez sur pour entrer dans le
« Setup mode » (Mode de configuration).
FR
76
GB DE ES FR IT NL PT
FR
75
Entrez le numéro de téléphone à enregistrer
(25 chiffres maximum).
Si vous vous trompez lors de la saisie et que vous
souhaitez effacer un chiffre,appuyez sur le bouton
Appuyez sur .
Un bip est émis et le téléphone retourne en mode veille.
APPEL DU NUMERO D'URGENCE
Appuyez simplement sur le bouton .Le numéro d'urgence est alors
automatiquement composé et s'affiche sur l'écran du combiné.
Pour terminer l'appel,appuyez sur le bouton .
REMARQUE :cette touche est en retrait dans le clavier, afin d'éviter tout risque de
pression accidentelle.
FONCTIONS DE LA BASE
SONNERIE VISUELLE
Les témoins lumineux de l'Indicateur visuel de sonnerie de la base (14) clignotent lorsque
le téléphone sonne.Reportez-vous à la figure E ou F.
CONTROLE DU V OLUME DE LA SONNERIE DE LA BASE
Cette option permet d'ajouter une fonction à la sonnerie du combiné.
La base est dotée d'un Bouton du volume de la sonnerie
(15).Reportez-vous
à la figure E ou F.
La désactivation désactive la sonnerie de la base.
P ARAMETRES DE LA SONNERIE DE LA BASE
Appuyez sur .Utilisez les touches fléchées pour
accéder à l'option 5.
Appuyez sur .
Page 39

VERROUILLAGE DU CLA VIER DU COMBINE
Appuyez sur le bouton et maintenez-le enfoncé jusqu'à
ce que l'icône apparaisse sur l'écran du combiné.
L'écran du clavier est verrouillé.
Appuyez sur le bouton et maintenez-le enfoncé
pour désactiver le verr ouillage du clavier.
En mode de verrouillage,il est possible de répondre
au téléphone et de mettre fin à un appel avec la touche .
A VER TISSEMENT DE BA TTERIE F AIBLE
En mode veille,si la batterie est faible,une faible tonalité
unique se fait entendre et l'icône de batterie vide s'affiche
comme indiqué.
Si le niveau de batterie faible est détecté au cours d'un appel,
une faible tonalité d'avertissement se fait entendre toutes
les 20 secondes et l'icône de batterie vide s'affiche comme spécifié.
L'appel en cours se poursuit jusqu'à ce que vous raccrochiez.
CHARGEMENT DE LA BATTERIE
Lorsque le combiné est sur sa base, la batterie se recharge rapidement,
en 30 minutes.
Lorsque la batterie est en cours de chargement,
l'animation suivante, concernant l'icône de la batterie, s'affiche .
Après 30 minutes,l'animation de chargement de la batterie s'arrête
et l'icône indique que la batterie est pleine.
REMARQUE :une batterie vide nécessite environ 14 heures de chargement
pour atteindre sa capacité maximale.
BIP D'AVER TISSEMENT SI L'UTILISA TEUR QUITTE LE RA Y ON DE POR TEE
Quand un appel est en cours et que le combiné est trop éloigné de la base,un bip
d'avertissement se fait entendre dans l'écouteur toutes les 20 secondes.
FR
78
GB DE ES FR IT NL PT
FR
77
Utilisez les touches fléchées pour accéder à l'option 4.
Appuyez sur pour changer le paramètre utilisé.Un bip de confirmation
est émis et le combiné retourne en mode veille.
TOUCHE SECRET DU MICR OPHONE
Quand vous êtes en ligne,appuyez sur pour activer
le mode secret.
L'écran affiche alors la durée de l'appel et indique que
le mode secret est activé.
Appuyez sur pour désactiver cette fonction.
L'affichage normal revient à l'écran.
MODE DE NUMERO TATION
Cette option permet à l'utilisateur de choisir entre Tonalité ou Impulsion lors de la
numérotation.
Appuyez sur pour entrer dans le Mode de configuration.
Utilisez les flèches pour accéder à l'option 7.
Appuyez sur .
Utilisez les touches fléchées pour passer d'une option
à une autre.
Appuyez sur pour choisir le paramètre souhaité.
Le téléphone émet un bip de confirmation et retourne en mode veille.
REMARQUE :« Tonalité» est le paramètre par défaut en sortie d'usine. Il n'est pas
nécessaire de modifier ce paramètre si un appel peut être effectué.
Page 40

INFORMA TIONS SUR LA PERSONNE QUI VOUS A APPELE
Pour récupérer les nouvelles ou les anciennes inf ormations concernant la personne qui
vous a appelé,appuyez sur le bouton pendant 2 secondes.
La mémoire relative aux inf ormations sur les appels entrants
conserve les 10 derniers numéros de téléphone entrants.
Le dernier appel en date s'affiche en premier.
Utilisez la touche fléchée droite pour lire l'intégralité
du numéro quand il est composé de plus de 9 chiffres.
Le reste du numéro de téléphone apparaît.
Appuyez de nouveau sur la touche fléchée droite
pour connaître la date et l’heure de cet appel.
REMARQUE :les fonctions relatives aux informations
sur les personnes qui vous ont appelé dépendent des
services proposés par votre opérateur téléphonique.
ENREGISTREMENT DES INFORMATIONS SUR
LA PERSONNE QUI V OUS A APPELE
Quand les informations relatives à l'appelant sont affichés
sur l'écran du combiné,appuyez sur pour les enregistrer.
Sélectionnez un chiffre (0 à 9) pour enregistrer les inf ormations
sur la personne qui vous a appelé.
Le téléphone émet un bip de confirmation et se repositionne
sur la liste des personnes qui vous ont appelé.
FR
80
GB DE ES FR IT NL PT
FR
79
MESSAGEVOCAL
Si vous souscrivez à un service de messagerie vocale auprès
de votre compagnie de téléphone,l'icône apparaît pour
indiquer que vous av ez un ou plusieurs messages.
Pour les appels reçus,l'identité de la personne qui a appelé
est répertoriée.En revanche,les données sont affichées sous
forme de « MESSAGE »,non pas avec le numér o de téléphone
de la personne qui vous a appelé.
Vous avez reçu un message (av ec v otre opérateur).
Appuyez sur la touche fléchée droite pour connaître la date
et l'heure de ce message.
INFORMATIONS SUR LA PERSONNE QUI VOUS
A APPELE ET FONCTIONS
APPEL ENTRANT
Lorsque vous recev ez un a ppel,l'écran affiche le numéro
de l'appel entrant.
Lorsque le téléphone sonne,le numéro de la personne
qui vous a appelé s'affiche.L'icône EXT clignote pour
indiquer que vous av ez un a ppel entrant.
L'icône Message vocal apparaît sur l'écran d'affichage
comme indiqué.
Lorsque le téléphone arrête de sonner,l'écran affiche
le nombre d'appels manqués.
Page 41

FONCTIONS SUPPLEMENTAIRES
PARAMETRER LA DUREE DE LA FONCTION FLASH
Cette option permet à l'utilisateur de configurer la durée du signal d'appel TBR
(Timed Break Recall).Les choix possibles sont les suivants:100 ms,250 ms et 600 ms.
Appuyez sur pour entrer dans le mode de configuration.
Utilisez les touches fléchées pour accéder à l'option 6.
Appuyez sur .
Utilisez les flèches pour faire défiler les trois choix.
Appuyez sur pour activer le paramètre affiché.
Le téléphone émet un bip de confirmation et retourne
en mode veille.
Cette option est utilisée pour accéder à certaines fonctions comme la téléconférence
ou le transfert d'appel par exemple.Contactez votre opérateur téléphonique ou votre
administrateur P ABX pour obtenir plus d'inf ormations.
UTILISATION DE LA FONCTION FLASH
Après avoir composé le numéro de téléphone souhaité, appuyez sur le bouton
pour exécuter des fonctions PABX. Le signe « r » s'affiche alors sur l'écran.
Appuyez sur le bouton pour ajouter une pause.Le signe « P » s'affiche alors.
Le numéro composé après avoir utilisé la f onction « Flash » n'est pas enregistré
dans la mémoire.
CONFIGURATION DE LA DUREE RELATIVE
A LA FONCTION FLASH
P ARAMETRE TBR PA Y S
100 Autriche,Belgique,Bulgarie,Chypre,République Tchèque,
Danemark,Finlande,Hongrie, Islande, Italie,Norvège, Suisse
250 France,Portugal
Pour les autres pays,consultez votre opérateur téléphonique.
FR
82
GB DE ES FR IT NL PT
FR
81
SUPPRESSION DES INFORMATIONS RELATIVES
AUX PERSONNES QUI V OUS ONT APPELE
Lorsque les informations concernant la personne qui vous
a appelé s'affichent,appuyez sur le bouton .
Appuyez sur pour confirmer votre choix ou a ppuy ez
sur pour annuler.
REMARQUE :pour éviter d'effacer accidentellement des entrées, seul l'enregistrement
à l'écran est supprimé.Il est donc impossible d'effacer toutes les informations en
même temps.
P AS D'APPEL
Lorsque aucune information sur la personne qui vous
a appelé n'apparaît dans la mémoire,appuyez sur le
bouton pendant 2 secondes.
Un message « NO CALL » (pas d'appel) indiquant qu'aucun
appel n'a été reçu s'affiche sur l'écran du combiné.
Appuyez sur pour revenir à l'écran en mode de veille.
APPEL ENTRANT NON IDENTIFIE
Quand un appel entrant non identifié est reçu,aucune
information sur la personne qui a appelé ne s'affiche.
L'écran reste vierge.
REMARQUE :il est possible d'afficher un numéro de
téléphone d'une longueur maximale de 18 chiffres
concernant la personne qui a appelé.
Page 42

83
IT
84
GB D E E S F R I T NL PT
INTRODUZIONE
Telefono DECT
™
amplificato Clarity C710
www.clarityproducts.com
Grazie per aver scelto il telefono
DECT
™
* amplificato Clarity C710.
Il presente manuale fornisce tutte le
informazioni necessarie per utilizzare il
telefono amplificato C710 in maniera
efficace e sicura.
Leggere il presente manuale con
attenzione prima di utilizzare il telefono.
Si consiglia di tenere il manuale vicino al
telefono come riferimento.
*Digital Enhanced Cordless Telecommunications
Page 43

IMPORTANTI INFORMAZIONI SULLA SICUREZZA – continua
Non gettare le batterie in prossimità di fonti di calor e o fiamme libere poiché
potrebbero esplodere.Per lo smaltimento delle batterie scariche,recarsi presso un
punto di raccolta per rifiuti chimici.
Non posizionare o utilizzare il telefono vicino all'acqua.
Scollegare il telefono dalla presa a par ete prima di pulirlo.Non utilizzare detergenti
liquidi o nebulizzatori per la pulizia del telefono.Utilizzare un panno umido per la pulizia.
Non coprire i fori e le aperture del telefono .Non collocare mai il telefono accanto o
sopra a un radiatore o a un'altra fonte di calore.In mancanza di un'adeguata ventilazione,
è consigliabile non utilizzare un'installazione del telefono a muro.
Non collocare oggetti sul cav o di connessione alla linea telef onica.Posizionare il telefono
in modo che nessuno calpesti il cavo o possa inciamparvi.
Non introdurre oggetti nei fori del telef ono, poiché si potrebbero toccare punti di
tensione o provocar e cortocircuiti,con rischio di incendi o scosse elettriche.Evitare di
versare sostanze liquide di qualsiasi tipo sul telefono .
Per evitare il rischio di scosse elettriche,non smontare il prodotto.Non aprire o
rimuovere le co v er per e vitare il rischio di scosse elettriche o pericoli di altro tipo.
Un errato assemblaggio può provocare scosse elettriche quando il dispositivo
viene riutilizzato.
Non installare mai l'impianto telefonico durante un temporale.
Plantronics BV dichiara che il telefono DECT™amplificato Clarity™C710
è conforme ai requisiti essenziali e a tutte le altre disposizioni rilevanti della
Direttiva 1999/5/EC e 93/42/EEC.
Per leggere la dichiarazione di conformità relativa a questo pr odotto,visitare il
sito Internet www.plantronics.com/documentation
Dispositivo medico di classe I
Quando l'icona di amplificazione viene visualizzata sul display,è possibile che il
livello del volume sia molto alto e che superi il limite di 118 dB.Questa funzione è
stata progettata specificamente per gli utenti con problemi di udito.
IT
86
GB D E E S F R I T NL PT
IT
85
LEGENDA
CORNETTA
1
Pulsante di amplificazione
2 Controllo del volume
3 Clarity Power ON/OFF
4 Suoneria ON/OFF
5 Presa per la cuffia
6 Presa per apparecchi acustici
7 Ripetizione dell'ultimo numero
8 Tasto Richiamata/Annulla
9 Tasto OK
10 Rubrica
11 Tasto linea ON/OFF
12 Indicatore luminoso suoneria
13 Tasto numero di emergenza
BASE
14
Indicatore luminoso suoneria
15 Controllo del volume della suoneria
16 Pulsante di richiamo
ICONE LCD
Batteria
Suoneria cornetta OFF
Blocco tastiera ON
Cornetta sollevata
Messaggio vocale
Esclusione del microfono
Antenna
Clarity Power ON
Clarity Power OFF
Livello del volume
Amplificazione ON
IMPORTANTI INFORMAZIONI SULLA SICUREZZA
LEGGERE LE SEGUENTI ISTRUZIONI PRIMA DELL'USO:
Quando si utilizza l'apparecchio telefonico ,è consigliabile attenersi alle seguenti
precauzioni di sicurezza per ridurr e il rischio di incendio,scosse elettriche e danni
alle persone.
Leggere attentamente tutte le istruzioni.
Seguire tutte le avv ertenze e le istruzioni indicate sul telefono .
Page 44

Una volta individuata la base,il display appare come mostrato
nella figura:Inserire la cornetta sulla base. L'indicatore LED
arancione con il simbolo si illumina e il telefono squilla
una volta.
Prima di utilizzare l'apparecchio per la prima v olta,è importante caricare completamente
le batterie.Lasciare la cornetta sulla base per almeno 14 ore.
NO TA:lasciare la cornetta sulla base quando non si utilizza il telefono per
mantenere le batterie cariche.
DISPLAY LCD DELLA CORNETT A
Le due righe superiori indicano le funzionalità DECT di base,mentre la terza riga indica
le impostazioni audio avanzate.Vedere la Fig.D.
MENU IMPOSTAZIONI DELLA CORNETTA
Per accedere alla schermata del menu di impostazioni,premere il pulsante
Scorrere le opzioni del menu a sinistra pr emendo il tasto oppure scorrere a destra
premendo il tasto per visualizzare le impostazioni da modificare.I tasti indicati
verranno ora definiti tasti freccia e sul display LCD verranno visualizzate due frecce per
segnalare che è attiva la modalità del menu impostazioni.
MODIFICA DELL'IMPOSTAZIONE DELLA LINGUA
Premere il pulsante e scorrer e fino all'opzione tra le v oci ‘0 – Delete HS’
(0 – Elimina HS) e ‘1 – Store Memory’ (1 – Memorizza).
Premere .
Scorrere le opzioni fino a individuar e la lingua desiderata.
Premere .
Il telefono emette un segnale acustico per confermare l'impostazione,quindi ritorna in
modalità standby.
IT
88
GB D E E S F R I T NL PT
IT
87
PER INIZIARE
COLLEGAMENTI DELLA BASE
Collegare il cav o dell'alimentazione e il cavo del telefono sul retro della base.
Vedere la Fig.A.
Collegare il cav o del telef ono nella pr esa della linea telef onica,quindi inserire l'adattatore
CA in una presa di corrente.Vedere la Fig.A.
RAGGIO D'AZIONE DEL TELEFONO
Questo telefono trasmette segnali radio tra la cornetta e la base. Per utilizzare
insieme la cornetta e la base, è necessario stabilire un collegamento radio.
Il raggio d'azione tra la base e il telefono è conforme alle specifiche DECT
™
e consente di utilizzare la cornetta fino a una distanza di 300 m dalla base,
in un ambiente aperto,tipicamente fino a 50m in un normale ambiente casalingo.
NOTA: oggetti metallici di grandi dimensioni, ad esempio un frigorifero,uno
specchio o un classificatore, situati sulla traiettoria tra la cornetta e la base
possono bloccare il segnale radio.
Altre strutture solide, ad esempio pareti, possono ridurre la potenza del
segnale e il raggio d'azione dell'apparecchio.
Alcune apparecchiature elettriche (frigoriferi,lavatrici,forni a microonde, luci
fluorescenti,computer,televisori,ecc.) possono causare interferenze.
COLLEGARE IL GANCIO DA CINTURA ALLA CORNETT A
Inserire il gancio da cintura nella fessura sul retr o della cornetta e spinger e la parte
inferiore per fissare il gancio all'appar ecchio.Vedere la Fig.B.
INST ALLAZIONE DELLE BATTERIE NELLA CORNETT A
Rimuovere il coperchio del vano batterie e inserire le 3 batterie AAA ricaricabili fornite
con il telefono.Vedere la Fig.C.
Reinstallare il coperchio .
L'icona del livello di carica della batteria si illumina .
Il telefono inizia la ricerca della base.L'icona lampeggia fino a quando non viene
individuata la base.
Page 45

SUONO T ASTIERA (ON/OFF)
Premere il pulsante per entrare nella modalità
di configurazione.Utilizzare i tasti freccia per selezionar e
l'opzione 3.
Premer per modificare l'impostazione corrente.
Viene emesso un segnale acustico di conferma,quindi il telefono
ritorna in modalità standby.
Quelle descritte finora sono le impostazioni di menu utilizzate più di frequente.
Per informazioni sull'impostazione delle altre funzioni del telefono tramite il men u,
andare a pagina 96.
USO DELLE FUNZIONI SPECIALI DEL TELEFONO
APP ARECCHI ACUSTICI
Alcuni apparecchi acustici sono soggetti alle interferenze causate dalle radiofr equenze.
Gli apparecchi acustici digitali sono generalmente meno soggetti a interferenze rispetto
agli apparecchi di tipo analogico.Per ulteriori chiarimenti,consultare il produttore
dell'apparecchio acustico o il proprio audiologo. Se l'apparecchio acustico in uso è
compatibile con i telefoni portatili GSM,è probabilmente in grado di garantire
un'adeguata immunità dalle radiofrequenze emesse dai telefoni DECT.
INDICA T ORE LUMINOSO DELLA SUONERIA
Due spie lampeggianti sul retro della cornetta e due sulla parte frontale (12)
si illuminano quando il telefono squilla.Inoltre, la tastiera retroilluminata inizia
a lampeggiare.
T ASTIERA RETROILLUMINATA
La tastiera si illumina in arancione per 5 secondi quando la cornetta viene sollevata
dalla base o quando si preme un pulsante.
CONTROLLO DEL V OLUME DEL TELEFONO
Consente di regolare il v olume del telefono.
Durante una chiamata,è possibile regolare il volume del telefono
(2) sul livello
desiderato utilizzando la rotellina situata sul lato della cornetta.Vedere la Fig.F.
IT
90
GB D E E S F R I T NL PT
IT
89
REGOLAZIONE DEL VOLUME DELLA SUONERIA
Premere il pulsante per entrare nella modalità menu.
Utilizzare il tasto freccia destro per selezionare l'opzione 2.
Premere .
Sul display viene visualizzata l'impostazione corr ente della
suoneria.
Utilizzare i tasti freccia per impostare il v olume desiderato
(3 livelli oppure OFF).
Se si imposta la suoneria su OFF,sul display della cornetta viene
visualizzata l'immagine mostrata nella figura.
Premere per confermare l'impostazione.
Il telefono emette un segnale acustico,quindi ritorna in
modalità standby.
Sul display compare l'icona fino a quando l'impostazione
non viene modificata.
Se si seleziona un'opzione diversa da OFF,sul display viene
indicata l'impostazione del volume selezionata.
Premere per confermare l'impostazione del liv ello
del volume indicata.
Immediatamente dopo,sul display vengono visualizzate
e riprodotte le melodie disponibili (1-9).
Utilizzare i tasti freccia per scorr er e le opzioni.
Premere quando viene visualizzata la melodia da impostare.
Viene emesso un segnale acustico di conferma,quindi il telefono ritorna in
modalità standby.
NO TA:quando l'interruttore di attivazione della suoneria (4) è in posizione OFF,
l'impostazione selezionata per questa funzione viene ignorata.Le impostazioni
vengono attivate quando l'interruttore è in posizione ON.
Page 46

Se la funzione Clarity Power è attivata viene visualizzata sul display del telefono
un'icona raffigurante un cerchio di colore ner o .
Se la funzione Clarity Power è disattivata viene visualizzata sul display del telefono
un'icona raffigurante un cerchio di colore bianco .
PRESA PER APP ARECCHI ACUSTICI
Il telefono è dotato di una presa per appar ecchi acustici (6) per gli utenti che utilizzano
dispositivi per ipoacusici.Vedere la Fig.F.
PRESA DELLA CUFFIA
La presa per cuffie (5) è compatibile con cuffie dotate di una spina da 2,5 mm.
Vedere la Fig.F.
INTERRUTT ORE SUONERIA ON/OFF (4) FIG.F
Se l'interruttore si trova in posizione OFF,la suoneria è disattivata.
Se l'interruttore si trova in posizione ON,il telefono squilla in base alle
impostazioni selezionate.
ESECUZIONE DI CHIAMATE
Premere il pulsante Sul display della cornetta viene visualizzata l'icona
Comporre il numero desiderato.
Se non si preme alcun altro tasto entr o 5 secondi,viene attivato
il timer della chiamata.
Per terminare la chiamata,premere nuovamente
il pulsante .La durata dell'ultima chiamata viene visualizzata per 5 secondi.
Per chiamare nuovamente l'ultimo n umero composto,premere il pulsante .
Una volta premuto il tasto ,il numero viene visualizzato sul displa y.
Premere il pulsante per chiamare il numer o visualizzato.
Per terminare la chiamata,premere nuovamente il pulsante
.
IT
92
GB D E E S F R I T NL PT
IT
91
Quando la funzione di AMPLIFICAZIONE (1) è disattivata,
l'intervallo di amplificazione del volume indicato è 0-15.
Quando la funzione di AMPLIFICAZIONE
(1) è attivata,
l'intervallo di amplificazione del volume indicato è 12-32.
Il livello del volume è indicato nella riga inferior e del display
del telefono,ad esempio
.
PULSANTE DI AMPLIFICAZIONE
Consente di aumentare ulteriormente il volume del telefono .
La funzione di amplificazione viene regolata insieme al controllo del v olume (2).
Se si preme il pulsante di amplificazione (1),il volume del telefono viene amplificato per
la durata della chiamata. Vedere la Fig.F.Quando questa funzione è attivata, l'icona
si illumina nella parte inferiore sinistra del display.Utilizzare il controllo del v olume (2)
per impostare il livello di ascolto desiderato .
Premere nuovamente per disattivare l'amplificazione del volume
(1).
La funzione di AMPLIFIC AZIONE viene disattivata automaticamente quando si
riaggancia il telefono.
NOTA: il pulsante si illumina in rosso in modalità di conversazione
normale, mentre si illumina in arancione se è attivata la funzione di
AMPLIFICAZIONE (1).
Attivando la modalità di AMPLIFICAZIONE,si aumenta il livello di amplificazione,
consentendo di superare in casi eccezionali i 118 dB, un livello che potrebbe risultare
dannoso. È consigliabile aumentare il volume gradualmente fino a raggiungere il livello
minimo di amplificazione confortevole. Evitare l'esposizione a livelli di volume elevati
se non necessario.
CLARITY POWER ON/OFF
L'interruttore di attivazione di Clarity Power (3) amplifica le frequenze più alte quando
è attivata la funzione di AMPLIFICAZIONE in alcune situazioni di moderata perdita
dell'udito.Vedere la Fig.F.
Page 47

ESECUZIONE DI CHIAMATE VERSO NUMERI IN MEMORIA
Premere il pulsante
Selezionare il numero corrispondente alla posizione di memorizzazione desiderata
(da 0 a 9) sulla tastiera.
Premere il pulsante per effettuare la chiamata.
Quando il telefono è in uso,sul display viene visualizzata
l'icona Se non si preme alcun altro tasto entro 5 secondi,
viene attivato il timer della chiamata.
Per terminare la chiamata,premere nuovamente
il pulsante
PULSANTE NUMERO DI EMERGENZA
Questo pulsante a tocco singolo consente di memorizzare un numero di emergenza
a scelta.
Memorizzazione di un numero di emergenza (seguire la stessa pr ocedura utilizzata
per memorizzare un numero di telefono in rubrica).
Premere il pulsante
Sul display viene visualizzata l'indicazione mostrata nella figura.
Premere .
‘Location’ (Posizione) viene visualizzato sul display del telef ono.
Premere il pulsante
Immettere il numero di telefono da memorizzar e (fino a 25 cifr e).
Per cancellare un numer o immesso per err or e,premere
Premere .
Viene emesso un segnale acustico,quindi il telefono ritorna in
modalità standby.
IT
94
GB D E E S F R I T NL PT
IT
93
RISPOSTA ALLE CHIAMATE IN ARRIVO
Sul display del telefono viene visualizzato il numero di telefono del chiamante
oppure l'indicazione ‘Withheld’ (Privato) se l'operatore telefonico in uso non
supporta questa funzione.
Premere il pulsante per rispondere alla chiamata.
Per terminare la chiamata,premere nuovamente il pulsante .
MEMORIZZAZIONE DELLE VOCI IN RUBRICA
Premere il pulsante sulla cornetta
Sul display viene visualizzata l'indicazione mostrata nella figura.
Premere .
Sul display della cornetta viene visualizzato il messaggio
‘Location?’ (Posizione?).
Selezionare un numero tra 0 e 9 sulla tastiera per specificar e
la posizione del numero di telefono da memorizzare.
Immettere il numero di telefono da memorizzare (fino a 25 cifre).
Per cancellare un numer o immesso per er rore,
premere il pulsante
Premere per confermare.
Viene emesso un segnale acustico,quindi il telefono ritorna in modalità standby .
NO TA:se una nuov a v oce viene salvata nella posizione in cui era stato già salvato
un altro numero,la nuova voce sovrascrive quella precedente e non viene
visualizzato alcun avviso con l'indicazione che la posizione è già in uso.
ELIMINAZIONE DELLE VOCI IN RUBRICA
Per cancellare una voce in rubrica,selezionare la posizione di memorizzazione,senza
immettere un numero di telefono, quindi premere .Quando sul display viene
visualizzato "ERASE" (CANCELLA),premere .
Page 48

NO TA:quando l'interruttore di attivazione della suoneria della base (4) è in posizione OFF,
le impostazioni selezionate per questa funzione vengono ignorate.Le impostazioni
vengono attivate quando l'interruttore è in posizione ON.
FUNZIONE DI RICHIAMO
Consente di individuare il telefono se è stato smarrito .
Premere il pulsante di richiamo (16) per attivar e questa
funzione.La spia posteriore lampeggia e sul displa y del telefono
viene visualizzata l'indicazione mostrata nella figura.
Vedere la Fig. E o F.
Premere il pulsante di richiamo (16) o un qualsiasi pulsante del telefono per
interrompere il segnale di richiamo.
FUNZIONI AGGIUNTIVE DEL TELEFONO
RISPOST A AUTOMA TICA (ON/OFF)
Consente di rispondere al telefono mentre squilla sollevando la cornetta dalla base
e di terminare la chiamata reinserendo la cornetta sulla base.In alternativa,è possibile
terminare la chiamata premendo il pulsante .
Per attivare questa funzione,il telefono deve trovarsi in modalità ‘Auto ON’ (Risposta
automatica ON).
Premere il pulsante per entrare nella modalità di
configurazione. Utilizzare i tasti freccia per selezionare l'opzione 4.
Premere per modificare l'impostazione cor r ente.
Viene emesso un segnale acustico di conferma,quindi il telefono
ritorna in modalità standby.
IT
96
GB D E E S F R I T NL PT
IT
95
CHIAMATE AL NUMERO DI EMERGENZA
È sufficiente premere il pulsante e viene composto automaticamente il
numero di emergenza impostato,che viene visualizzato sul display della cornetta.
Per terminare la chiamata,premere il pulsante
NOTA:questo tasto è incassato per evitare che venga premuto accidentalmente.
FUNZIONALITÀ DELLA BASE
INDICA T ORE LUMINOSO DELLA SUONERIA
Le spie dell'indicatore luminoso di chiamata (14) sulla base lampeggiano quando il telefono
squilla.Vedere la Fig.E o F.
CONTROLLO DEL V OLUME DELLA SUONERIA SULLA BASE
Viene aggiunto al segnale della suoneria esistente trasmesso dalla cornetta.
Regolare per aumentare o diminuir e il volume della suoneria sulla base (15).Vedere la
Fig.E o F .
In posizione OFF la suoneria della base viene disattivata.
IMPOST AZIONI DELLA SUONERIA DELLA BASE
Premere . Utilizzare i tasti freccia per selezionare
l'opzione 5.
Premere
Sul display viene visualizzata l'impostazione corr ente del v olume
della suoneria della base (15) (3 livelli oppure OFF).
Se il volume è in posizione ON,è possibile scegliere una delle
nove melodie disponibili (da 1 a 9).Utilizzare i tasti freccia per
scorrere le div erse melodie.
Se il volume è in posizione OFF,viene emesso un segnale
acustico di conferma,quindi il telefono ritorna in modalità standby.
Premere per confermare la melodia selezionata.
Page 49

A VVISO DI CARICA IN ESAURIMENT O
Quando il livello di carica della batteria è in esaurimento,e il
telefono si trova in modalità standby,viene emesso un avviso
e visualizzata l'icona raffigurante una batteria vuota.
Se la carica della batteria viene rilevata in esaurimento mentre
è in corso una chiamata,l'avviso viene emesso ogni 20 secondi e viene visualizzata l'icona
della batteria vuota.
La connessione della chiamata in corso viene mantenuta fino a quando il telefono non
viene riagganciato.
CARICA DELLA BATTERIA
Se la cornetta viene installata sulla base, la batteria viene caricata rapidamente in
circa 30 minuti.
Durante la ricarica della batteria,l'icona della batteria mostra
l'animazione rappresentata nella figura.
Dopo 30 minuti,l'animazione della batteria in carica si interrompe e l'icona della
batteria appare piena.
NOTA: una batteria scarica deve essere caricata per circa 14 ore per
raggiungere la capacità massima.
A VVISO DI SUPERAMENT O DEL RAGGIO DI AZIONE
Durante una chiamata,se il telefono si trova a una distanza eccessiva dalla base,
viene emesso un segnale di avviso di superamento del raggio di azione a intervalli
di 20 secondi.
MESSAGGIO VOCALE
Se si sottoscrive un abbonamento di servizi di messaggeria
vocale con la propria compagnia telefonica,viene visualizzata
l'icona per segnalare l'arriv o di un n uovo messaggio.
Le chiamate vengono indicate come ID chiamante,tuttavia i dati
vengono visualizzati come messaggio e non con il numero di telef ono del chiamante.
È stato ricevuto un messaggio vocale (indicazione della compagnia telefonica).
Premere il tasto freccia a destra per leggere la data e l'ora di arriv o del messaggio.
IT
98
GB D E E S F R I T NL PT
IT
97
FUNZIONE DI ESCLUSIONE MICROFONO
Durante una chiamata,premere per disattivare
il microfono.
Sul display viene nuovamente visualizzato il timer della chiamata,
con l'indicazione che il microfono è disattivato.
Premere per annullar e l'esclusione micr of ono.
La visualizzazione della chiamata sul display torna quella normale.
MODALITÀ DI COMPOSIZIONE
Consente di selezionare una modalità di composizione tra Toni o Impulsi.
Premere il pulsante per entrare nella modalità di
configurazione.Utilizzare i tasti freccia per selezionar e
l'opzione 7.
Premere .
Utilizzare i tasti freccia per scorr er e le opzioni.
Premere per modificare l'impostazione visualizzata.
Viene emesso un segnale acustico di conferma,quindi il telefono
ritorna in modalità standby.
NO TA:l'impostazione predefinita è "Toni".Non è necessario modificare questa
impostazione se si riesce a effettuare chiamate in uscita.
BLOCCO DELLA TASTIERA DEL TELEFONO
Tenere premuto il pulsante fino a quando l'icona non compare sul display
della cornetta.
Schermata del blocco tastiera.
Tenere nuovamente premuto il pulsante per disattivare
il blocco tastiera.
In modalità blocco tastiera,è ugualmente possibile rispondere
e terminare una chiamata utilizzando il tasto
Page 50

SALVATAGGIO DEI D ATI DELL'ID CHIAMANTE
Mentre i dati dell'ID chiamante sono visualizzati sul display
del telefono,premere per memorizzare i dati.
Selezionare un numero (da 0 a 9) a cui associar e i dati dell'ID
chiamante da memorizzare.
Viene emesso un segnale acustico di conferma,quindi il telefono visualizza nuovamente
l'elenco degli ID chiamante.
ELIMINAZIONE DEI DATI DELL'ID CHIAMANTE
Mentre sono visualizzati i dati dell'ID chiamante,
premere il pulsante per 2 secondi.
Premer per confermare oppur e pr emere
per annullare il comando.
NOTA:per evitare di cancellare inavvertitamente i dati, vengono eliminati solo i dati
visualizzati. Non è disponibile la funzione cancella tutto.
MESSAGGIO NESSUNA CHIAMAT A
Se in memoria non sono presenti dati sugli ID chiamante,
e si premere il pulsante per 2 secondi,sul display del
telefono viene visualizzato il messaggio ‘NO CALL’
(NESSUNA CHIAMATA).
Premere per tornare alla schermata della modalità standb y.
CHIAMA TA IN ARRIV O NON IDENTIFICAT A
Se si riceve una chiamata che non può essere identificata,
non viene visualizzato alcun dato sull'ID chiamante e la riga
del display è vuota.
NOTA: possono essere visualizzate fino a 18 cifre per le
chiamate in arrivo con ID chiamante.
IT
100
GB D E E S F R I T NL PT
IT
99
ID CHIAMANTE E FUNZIONI
CHIAMA TA IN ARRIV O
Quando si riceve una chiamata,sul display viene visualizzato
il numero del chiamante.
Mentre il telefono squilla,viene visualizzato il numero del
chiamante.L'icona EST.lampeggia per segnalare la chiamata
in arrivo.
Viene visualizzata sul display l'icona del messaggio vocale
come mostrato nella figura.
Quando il telefono smette di squillare,sul display viene visualizzato il numero di
chiamate perse.
RECUPERO DEI D A TI DELL'ID CHIAMANTE
Per recuperare i dati di un ID chiamante n uo v o o esistente,premere il pulsante
per 2 secondi.
La memoria degli ID chiamante può contenere gli ultimi
10 numeri di telefono delle chiamate in arrivo .
I dati vengono visualizzati partendo dalla chiamata più recente.
Utilizzare il tasto freccia a destra per visualizzare il numero
completo,in caso di numeri superiori alle 9 cifre.
Viene visualizzata la parte restante del numero di telefono .
Premere nuovamente il tasto fr eccia destro per recuperare
la data e l'ora della chiamata.
NO TA:le funzioni relative all'ID chiamante variano in
base ai servizi offerti dall'operatore della r ete telefonica.
Page 51

REQUISITI PER LA DURATA DEL TBR
IMPOST AZIONE TBR P AESE
100 Austria,Belgio,Bulgaria,Cipro ,Repubblica Ceca,
Danimarca,Finlandia,Ungheria,Islanda,Italia,Norvegia,
Svizzera
250 Francia,Portogallo
Per conoscere l'impostazione del TBR richiesta in altri paesi,contattare l'operatore
della rete telefonica.
IT
102
GB D E E S F R I T NL PT
IT
101
CARATTERISTICHE AGGIUNTIVE
IMPOST AZIONE DELLA DURAT A DEL TBR
Questa funzione consente di impostare il TBR (Timed Break Recall) specifico del paese.
Le opzioni disponibili sono 100 ms,250 ms e 600 ms.
Premere per entrare nella modalità di configurazione.
Utilizzare i tasti freccia per selezionare l'opzione 6.
Premere .
Utilizzare i tasti freccia per scorr er e le tr e opzioni disponibili.
Premere per attivare l'impostazione visualizzata.
Viene emesso un segnale acustico di conferma,quindi il
telefono ritorna in modalità standby.
Questa funzione viene utilizzata per accedere a determinate
funzioni della rete,ad esempio le chiamate in conferenza,il trasferimento di chiamata,
ecc.Per ulteriori informazioni,contattare l'operatore telefonico o l'amministratore del
sistema P ABX.
USO DELL'IMPOST AZIONE TBR
Una volta composto il numero desiderato,premere il pulsante per eseguire
il flash della linea e utilizzare alcune funzioni PABX. Sul display viene visualizzata la
lettera ‘r’. Premere il pulante per aggiungere una pausa.Sul display viene visualizzata
la lettera ‘P’.
Il numero composto dopo il ‘Flash’ non viene memorizzato per l'uso della funzione di
ripetizione dell'ultimo numero.
Page 52

104
GB DE ES FR IT NL PT
103
WELKOM
Versterkte DECT
™
-telefoon C710 van Clarity
www.clarityproducts.com
Hartelijk dank dat u hebt gekozen
voor de versterkte DECT
™
*
-telefoon C710 van Clarity.
In deze handleiding vindt u alle informatie
die u nodig hebt om de C710 vlot en
veilig te gebruiken.
Lees deze handleiding grondig door
voordat u het toestel gaat gebruiken.
Bewaar deze handleiding bij uw telefoon
zodat u deze altijd kunt raadplegen.
*Digital Enhanced Cordless Telecommunications
Page 53

BELANGRIJKE VEILIGHEIDSINFORMATIE – vervolg
Werp batterijen nooit in het vuur.Ze kunnen ontploffen.Breng lege batterijen naar
een inzamelpunt voor klein chemisch afval.
Plaats of gebruik het toestel niet in de buurt van water .
Koppel het toestel los van de wandcontactdoos v oor dat u het gaat schoonmaken.
Reinig het toestel niet met vloeibare schoonmaakmiddelen of spuitbussen.Maak het
toestel met een vochtige doek schoon.
Dek de sleuven en openingen van het toestel niet af.Het toestel mag nooit op of nabij
een radiator of verwarmingsrooster wor den geplaatst en mag alleen worden ingebouwd
als er een goede ventilatie is.
Plaats geen voorwerpen op de telefoonlijnkabel.Plaats het toestel op een plek waar
niemand over de kabel kan struikelen.
Duw geen voorwerpen door de sleuven van het toestel omdat u anders onder delen
kunt aanraken die onder hoogspanning staan of kortsluiting tussen onderdelen kunt
veroorzak en,waardoor brand kan ontstaan.Mors geen vloeistof op het toestel.
Haal het product niet zelf uit elkaar,om elektrische schokken te voork omen.
Uit veiligheidsoverw egingen (str oomschokken of andere risico's) dient u de afdekplaatjes
niet te openen of te verwijderen. Als u het toestel verkeerd in elkaar zet,loopt u kans
een elektrische schok te krijgen als u het toestel gaat gebruiken.
Installeer telefoonlijnen nooit tijdens onweer.
Plantronics BV verklaart hierbij dat de versterkte DECT™-telefoon Clarity
™
C710 voldoet aan de essentiële vereisten en andere relevante voorwaarden van
de richtlijnen 1999/5/EC en 93/42/EEC.
De conformiteitsverklaring (Declaration of Conformity) voor dit product kunt u
bekijken op www.plantr onics.com/documentation
Klasse I medisch apparaat
Als het versterkingspictogram op het scherm wordt weergegeven,staat het volume
mogelijk zeer hard (har der dan 118 dB).Deze modus is speciaal bedoeld voor
gebruikers die doof of slechthorend zijn.
NL
106
GB DE ES FR IT NL PT
NL
105
VERKLARING BIJ HET SCHEMA
HANDSET
1
Versterkingsknop
2 Volumeregeling
3 Clarity AAN/UIT
4 Belsignaal AAN/UIT
5 Aansluiting headset
6 Aansluiting neksnoer
7 Nummerherhaling
8 Doorverbinden/Annuleren
9 OK
10 Telefoonboek
11 V erbinding AAN/UIT
12 Visuele belindicator
13 Noodhulp
BASISSTATION
14
Visuele belindicator
15 Belvolumeregeling
16 Oproepknop handset
LCD-PICTOGRAMMEN
Batterij
Belsignaal handset UIT
T oetsenv ergrendeling AAN
Telefoonhoorn V AN haak (Ext.Int.)
Voicemailbericht
Mute
Antenne
Clarity AAN
Clarity UIT
Volume
V ersterker AAN
BELANGRIJKE VEILIGHEIDSINFORMATIE
LEES DE V OLGENDE INSTRUCTIES DOOR VOORD A T U HET TOESTEL
GAAT GEBRUIKEN:
Bij gebruik van het telefoontoestel moeten de volgende basisvoorzorgsmaatr egelen
altijd in acht worden genomen om het risico op brand,elektrische schokken en
lichamelijk letsel zoveel mogelijk te beperken:
Lees alle instructies door.
Houdt u aan alle waarschuwingen en volg alle instructies op die op het toestel staan.
Page 54

Het volgende wordt w eergege v en op het display:
Plaats de handset in het basisstation.
Het oranje lampje gaat branden en het pictogram
wordt weergege v en.
De telefoon gaat een keer ov er.
U dient de batterijen volledig op te laden voordat u de handset v oor het eerst gaat
gebruiken.Laat de handset ten minste 14 uur in het basisstation staan.
OPMERKING:plaats de handset in het basisstation wanneer u de telefoon niet
gebruikt,zodat de batterijen altijd zijn opgeladen.
LCD-DISPLA Y VAN DE HANDSET
De bovenste twee r egels ge v en de DECT-basisfuncties aan en op de derde regel worden
de verbeterde audio-instellingen weergege v en.Raadpleeg afbeelding D .
MENU-INSTELLINGEN VAN DE HANDSET
Druk op om het menu te openen.
Blader door de menu-opties me (naar links) of (naar rechts) en zoek de
instellingen die u wilt aanpassen.Vanaf nu noemen w e deze knoppen de pijltjestoetsen.
Wanneer u de instellingen w eergeeft,worden op het LCD-displa y te vens twee pijlen
weergegeven.
DE TAAL INSTELLEN
Druk op en ga naar de optie die wordt weergegev en tussen ‘0 – Delete HS’
(0 - HS verwijderen) en ‘1 – Store Memory’ (1 - Opslaan in geheugen).
Druk op .
Zoek de gewenste taal.
Druk op .
U hoort een pieptoon ter bevestiging van uw selectie en de telefoon keert terug naar
de stand-bymodus.
NL
108
GB DE ES FR IT NL PT
NL
107
AAN DE SLAG
HET BASISSTATION AANSLUITEN
Sluit het netsnoer en de telefoonkabel aan de achterzijde van het basisstation aan.
Raadpleeg afbeelding A.
Sluit de telefoonkabel aan op de telefoonaansluiting en de voedingsadapter op een
stopcontact.Raadpleeg afbeelding A.
BEREIK
Deze telefoon maakt gebruik van radiosignalen tussen de handset en het basisstation.
Daarom moet er een radioverbinding tot stand kunnen worden gebracht tussen
de handset en het basisstation als u de telefoon wilt gebruiken.Reikwijdte van de
telefoon:De reikwijdte tussen het basisstation en de telefoon is conform de DECT
™
specificaties en bedraagt tot 300 meter tussen het basisistation en de telefoon in een
open omgeving en gebruikelijk tot 50 meter in een normale huiselijke omgeving.
OPMERKING: het radiosignaal wordt mogelijk geblokkeerd als er zich grote
metalen voorwerpen,zoals een koelkast,spiegel of archiefkast,tussen de
handset en het basisstation bevinden.
Andere massieve structuren,zoals muren, kunnen het signaal verzwakken of
het bereik verminderen.
Bepaalde elektrische apparatuur,zoals koelkasten, wasmachines, magnetrons,
tl-verlichting,computers, televisies enz., veroorzaakt wellicht storingen.
DE RIEMCLIP AAN DE HANDSET BEVESTIGEN
Plaats de riemclip in de sleuf aan de achterzijde van de handset en klik de onderzijde van
de clip vast.Raadpleeg afbeelding B.
DE BA TTERIJEN IN DE HANDSET PLAATSEN
Verwijder het batterijdeksel en plaats de 3 meegeleverde oplaadbare AAA-batterijen.
Raadpleeg afbeelding C.
Plaats het batterijdeksel terug.
Het batterijpictogram wordt weergegeven.
De telefoon zoekt onmiddellijk het basisstation.Het pictogram knippert totdat het
basisstation is gedetecteerd.
Page 55

TOETSENBLOKT ONEN (AAN/UIT)
Druk op om het menu te openen.
Ga met de pijltjestoetsen naar optie 3.
Druk op om de huidige instelling te wijzigen.
U hoort een pieptoon ter bevestiging van uw selectie.
De handset keert terug naar de stand-bymodus.
Dit zijn de meestgebruikte instellingen van de telefoon.Raadpleeg pagina 116 voor
informatie over het instellen van de andere men u-opties van de handset.
DE SPECIALE HANDSETFUNCTIES GEBRUIKEN
GEHOORAPPARATEN
Bepaalde gehoorapparaten zijn gevoelig voor storingen via radiofrequenties.Doorgaans
doen er zich minder storingen voor bij digitale dan bij analoge gehoorapparaten.
Raadpleeg in geval van twijfel de fabrikant van uw gehoorapparaat of uw audioloog.
Als uw gehoorapparaat compatibel is met GSM-mobieltjes,is het wellicht ook geschikt
voor gebruik met DECT-telefoons.
VISUELE BELINDICA T OR
Wanneer de telef oon overgaat,knipperen er twee lampjes aan de voorzijde en twee aan
de achterzijde van de headset (12).Ook het verlichte toetsenblok knippert dan.
VERLICHT TOETSENBLOK
Het toetsenblok licht gedurende 5 seconden oranje op wanneer de handset uit het
basisstation wordt gehaald of wanneer u op een knop drukt.
VOLUMEREGELING VAN DE HANDSET
Hiermee past u het volume van de handset aan.
Tijdens een telefoongesprek kunt u het volume van de handset naar w ens r egelen met
de draaischijf (2) op de zijkant van de handset.Raadpleeg afbeelding F.
Wanneer de VERSTERKER (1) is uitgeschakeld,is het bereik van de volumeregeling 0-15.
Wanneer de VERSTERKER
(1) is ingeschakeld,is het bereik van de volumeregeling 12-32.
NL
110
GB DE ES FR IT NL PT
NL
109
HET BELVOLUME VAN DE HANDSET REGELEN
Druk op om het menu te openen.
Ga naar optie 2 met de pijltjestoets naar rechts.
Druk op .
Het huidige belvolume van de handset wordt w eergege v en.
Stel met de pijltjestoetsen het gewenste volume in
(3 niveaus en UIT).
Als u het volume uitschakelt,wordt het volgende pictogram
weergegeven op het display van de handset.
Druk op als u deze instelling wilt gebruiken.
U hoort een pieptoon ter bevestiging van uw selectie en
de handset keert terug naar de stand-bymodus.
Het pictogram wordt weergege v en op het display zo lang
de instelling is ingeschakeld.
Als het belvolume niet volledig is uitgeschak eld,wordt het
gewenste volume w eergege v en op het display.
Druk op om het weergegeven volume in te stellen.
Onmiddellijk daarna worden de beschikbare beltonen
(1-9) weergegeven op het display.De weergegeven beltoon
wordt afgespeeld.
Zoek met de pijltjestoetsen de gewenste beltoon.
Druk op wanneer de gewenste beltoon wordt w eergege v en.
U hoort een pieptoon ter bevestiging van uw selectie.De handset keert terug naar de
stand-bymodus.
OPMERKING: wanneer op de handset de aan-uitschakelaar van het belsignaal (4)
op UIT staat, worden de andere volume-instellingen overschreden. Ze worden opnieuw
geactiveerd wanneer de schakelaar op AAN staat.
Page 56

AANSLUITING VOOR HEADSETS
De aansluiting voor headsets (5) is geschikt voor headsets met een 2,5-mm stekker.
Raadpleeg afbeelding F.
AAN-UITSCHAKELAAR V AN HET BELSIGNAAL (4) FIG F
Als de schakelaar op UIT staat,rinkelt de telefoon niet.
Als de schakelaar op AAN staat,rinkelt de telefoon ov er eenkomstig
de geselecteerde instellingen.
TELEFONEREN
Druk op .Het pictogram wordt weergege ven
op het display van de handset.
Kies het gewenste nummer.
De timer start 5 seconden nadat u op de laatste toets
hebt gedrukt.
Druk opnieuw op om het telefoongesprek
te beëindigen.De duur van het laatste gesprek wordt
5 seconden weergegeven.
Druk op om het laatstgekozen nummer opnieuw te bellen.Het nummer wordt
weergegeven op het display.
Druk op om het nummer te bellen.
Druk opnieuw op om het telefoongesprek te beëindigen.
BINNENKOMENDE GESPREKKEN AANNEMEN
Het nummer van de beller wordt weergege ven op het display van de handset.Als de
serviceprovider deze functie niet ondersteunt,wordt ‘Withheld’ (Privé) weergegeven.
Druk op om het gesprek aan te nemen.
Druk opnieuw op om het telefoongesprek te beëindigen.
NL
112
GB DE ES FR IT NL PT
NL
111
Het ingestelde volume wordt w eergege v en op de onderste
regel van het display,bijv .
.
VERSTERKINGSKNOP
Hiermee kunt u het volume versterk en.
De versterkingsfunctie wordt in combinatie met de v olumer egeling van de handset(2)
gebruikt.Wanneer u op de versterkingsknop (1) drukt,wordt het volume tijdens het
telefoongesprek versterkt.Raadpleeg afbeelding F. Als de versterker actief is,wordt
het pictogram weergegeven links onderaan in het displa y.Stel met de volumeregeling
van de handset (2) het volume in op een comfortabel luisterniveau.
Druk nogmaals op de versterkingsknop (1) om de functie uit te schakelen.
De VERSTERKER wordt automatisch uitgeschakeld wanneer u het gesprek beëindigt.
OPMERKING: De knop licht bij een normaal telefoongesprek rood op.
Als de VERSTERKER (1) is ingeschakeld, licht de knop oranje op.
Als de versterker actief is, wordt het versterkingsniveau verhoogd,waardoor het geluid
in uitzonderlijke gevallen de 118 dB kan overschrijden. Dit kan schadelijk zijn.Verhoog
het volume gelijkmatig om het minimale versterkingsniveau te vinden dat voor u het
meest geschikt is.Vermijd langdurige en onnodige blootstelling aan harde geluiden.
CLARITY AAN/UIT
Druk op de knop Clarity AAN/UIT (3) om als de versterker actief is hoge frequenties te
versterken.Het gemiddelde gehoorverlies in bepaalde omstandigheden kan zo worden
verholpen.Raadpleeg afbeelding F.
Als Clarity is ingeschakeld w or dt het pictogram w eergege ven in het display
van de handset.
Als Clarity is uitgeschakeld ,wordt het pictogram weergegeven in het display
van de handset.
AANSLUITING VOOR NEKSNOER
De telefoon is uitgerust met een speciale aansluiting voor neksnoeren (6).
Raadpleeg afbeelding F.
Page 57

Wanneer de telef oon w or dt gebruikt,wordt het pictogram
weergegeven op het display.
De timer start 5 seconden nadat u op de laatste toets
hebt gedrukt.
Druk opnieuw op het telefoongesprek te beëindigen.
NOODHULP (13)
Met één druk op deze knop belt u het noodnummer dat u hier hebt opgeslagen.Volg
voor het opslaan van een specifiek noodnummer dezelfde stappen als voor het opslaan
van een nummer in het telefoonboek.
Druk op .
Het volgende wordt w eergege v en op het display.
Druk op .
‘Location?’ (Locatie?) wordt weergege v en op het display
van de handset.
Druk op .
Voer het gewenste telefoonnummer in (max.25 cijfers).
Druk op om een verkeerde inv oer te wissen.
Druk op .
U hoort een pieptoon en de telefoon keert terug naar
de stand-bymodus.
HET NOODNUMMER BELLEN
Druk simpelweg op en de telefoon belt automatisch het opgeslagen
noodnummer en geeft het weer op het displa y van de handset.
Druk op om het telefoongesprek te beëindigen.
OPMERKING:om te voorkomen dat de knop per ongeluk wordt ingedrukt,
is deze in de handzet verz onken.
NL
114
GB DE ES FR IT NL PT
NL
113
TELEFOONNUMMERS OPSLAAN IN HET TELEFOONBOEK
Druk op op de handset.
Het volgende wordt w eergege v en op het display.
Druk op .
‘Location?’ (Locatie?) wordt weergege v en op het display
van de handset.
Geef met de cijfertoetsen (0-9) het cijfer op waaronder
het telefoonnummer moet worden opgeslagen.
Voer het gewenste telefoonnummer in (max.25 cijfers).
Druk op om een verkeerde inv oer te wissen.
Druk ter bevestiging op .
U hoort een pieptoon en de telefoon keert terug naar de stand-bymodus.
OPMERKING:wanneer u een nieuw telefoonnummer opslaat onder een reeds
gebruikt cijfer,wordt het oorspronkelijke telefoonnummer ov erschrev en.Let op,
er wordt geen waarschuwing weergegeven.
TELEFOONNUMMERS VERWIJDEREN UIT HETTELEFOONBOEK
Selecteer het cijfer waaronder u het te verwijder en telef oonnummer hebt opgeslagen.
Voer geen nieuw nummer in,maar druk direct op ."ERASE" (Verwijderen) wordt
weergegeven.Klik vervolgens op .
EEN OPGESLAGEN NUMMER BELLEN
Druk op .
Selecteer het cijfer waaronder u het telefoonnummer hebt opgeslagen met de
cijfertoetsen (0-9).
Druk op om het telefoonnummer te bellen.
Page 58

OPROEPFUNCTIE
Met deze functie kunt u de handset zoeken.
Druk op de oproepknop (16) om de handset te zoeken.
De achtergrondverlichting gaat knipperen en het volgende
wordt weergege v en op het display.Raadpleeg afbeelding Eof F.
Druk op de oproepknop (16) of een andere knop op de
handset om de oproeptoon uit te zetten.
EXTRA HANDSET-FUNCTIES
AUT OMA TISCH BEANTWOORDEN AAN/UIT
Hiermee beantwoordt u een telefoongesprek terwijl de telef oon o v ergaat door de
handset uit het basisstation te halen en beëindigt u het gesprek door de handset
opnieuw in het station te plaatsen.U kunt nog steeds ophangen met de knop .
Stel de functie in op ‘Auto ON’ (Auto AAN) om deze te activeren.
Druk hiervoor op om het menu te openen.
Ga met de pijltjestoetsen naar optie 4.Druk op
om de huidige instelling te wijzigen.U hoort een pieptoon
ter bevestiging van uw selectie en de telefoon k eert terug
naar de stand-bymodus.
MUTEFUNCTIE VAN DE MICROFOON
Druk tijdens een telefoongesprek op om de
microfoon te dempen.
Op het display wor dt de timer w eergege ven zo lang de
microfoon is gedempt.
Druk op om de mutefunctie uit te schakelen.
Het gebruikelijke display wordt opnieuw weergegeven.
NL
116
GB DE ES FR IT NL PT
NL
115
FUNCTIES VAN HET BASISSTATION
VISUELE BELINDICA T OR
Wanneer de telef oon ov ergaat,knippert de visuele belindicator (14) op het basisstation.
Raadpleeg afbeelding E of F.
BEL V OLUMEREGELING OP HET BASISST ATION
Hiermee voegt u extra volume toe aan het belsignaal van de handset.
Gebruik deze knop om het belvolume van het basisstation
(15) in of uit te schakelen.
Raadpleeg afbeelding E of F.
Het belsignaal van het basisstation is uitgeschakeld als wordt weergegev en.
HET BEL V OLUME VAN HET BASISST ATION INSTELLEN
Druk op .Ga met de pijltjestoetsen naar optie 5.
Druk op .
Het huidige belvolume van het basisstation
(15) wordt
weergegeven op het display (3 niveaus en UIT).
Als u het belvolume hebt ingeschakeld,kunt u uit negen (1-9)
verschillende beltonen kiezen.
Zoek met de pijltjestoetsen naar de gewenste beltoon.
Schakelt u het volume uit,dan hoort u een pieptoon ter
bevestiging van uw selectie en keert de telefoon terug naar
de stand-bymodus.
Druk ter bevestiging op .
OPMERKING: wanneer het belvolume van het basisstation is uitgeschakeld, worden de
andere belvolume-instellingen overschreden.Ze worden geactiveerd wanneer u het
volume op het basisstation opnieuw inschakelt.
Page 59

DE BATTERIJ OPLADEN
Wanneer u de handset in het basisstation plaatst,wordt de batterij ongeveer 30
minuten opgeladen.
De volgende pictogrammen worden afwisselend weergegeven
terwijl de batterij wordt opgeladen.(Battery)
Na 30 minuten wordt een pictogram met een volledig
opgeladen batterij weergegeven.
OPMERKING: een lege batterij moet gedurende 14 uur worden opgeladen,
zodat de maximale capaciteit kan worden benut.
BUITEN-BEREIKWAARSCHUWING
Wanneer de handset zich tijdens een telef oongespr ek te ver van het basisstation
bevindt,hoort u elke 20 seconden een waarschuwingstoon via het oorknopje.
VOICEMAILBERICHT
Als u zich hebt geabonneerd op de voicemailservice van uw
telefoonmaatschappij,wordt het pictogram weergegev en
op het display wanneer u een voicemailbericht hebt ontvangen.
Gesprekken w or den aangeduid met een beller-ID,maar in
plaats van deze beller -ID (telef oonn ummer) w or dt ‘MESSAGE’
(Bericht) weergegeven.Voicemailbericht (+ telefoonmaatschappij ontvangen.
Druk op om de datum en tijd van het ontvangen bericht te controleren.
BELLER-ID EN FUNCTIES
BINNENK OMEND GESPREK
Wanneer er een gespr ek binnenkomt, wordt op het display het
telefoonnummer van de beller weergegev en.
Terwijl de telefoon overgaat,wordt het nummer weergegev en.
Het pictogram EXT knippert om aan te geven dat er een
gesprek binnenkomt.
Het pictogram wordt w eergege ven op het display.
Zodra de telefoon niet meer overgaat,wordt op het display
weergegeven hoe v eel gespr ekken u hebt gemist.
NL
118
GB DE ES FR IT NL PT
NL
117
KIESSTAND
Hiermee kunt u kiezen voor toon- of pulskiezen.
Druk op om het menu te openen.
Ga met de pijltjestoetsen naar optie 7.
Druk op .
Kies met de pijltjestoetsen een van de opties.
Druk op om de weergegeven instelling te selecter en.
U hoort een pieptoon ter bevestiging van uw selectie en de
telefoon keert terug naar de stand-bymodus.
OPMERKING:de fabrieksinstelling is "Tone" (Toonkiezen).Als u uitgaande
gesprekken kunt plaatsen,hoeft u deze instelling niet te wijzigen.
TOETSENVERGRENDELING VAN DE HANDSET
Houd ingedrukt totdat het pictogram wordt weergegev en op het display
van de handset.
Display bij vergr endeld toetsenblok.
Houd nogmaals ingedrukt om het toetsenblok
te ontgrendelen.
Wanneer het toetsenblok is v ergrendeld,kunt u nog steeds
telefoongesprekken beantw oor den en beëindigen met .
BATTERIJ-BIJNA-LEEG-WAARSCHUWING
Als de telefoon in de stand-bymodus staat wanneer de batterij
bijna leeg is,hoort u één waarschuwingstoon en wordt het
batterijpictogram weergegeven.
Als de batterij tijdens het telefoneren bijna leeg is,hoort u elke
20 seconden een waarschuwingstoon en wordt het batterijpictogram op het
display weergege v en.
De huidige verbinding wordt pas v erbroken wanneer de telefoon wor dt opgehangen.
Page 60

"NO CALL" (GEEN GESPREK)
Als er geen beller -ID in het geheugen zit,wordt er op het
display ‘NO CALL’ (Geen gespr ek) w eergege ven wanneer
u 2 seconden ingedrukt houdt.
Druk op om terug te keren naar de stand-bymodus.
ONBEKEND NUMMER
Wanneer er een gesprek binnenkomt vanaf een onbekend
nummer, wordt er geen beller-ID weergegeven.
OPMERKING: er kunnen maximaal 18 tekens worden
weergegeven voor binnenkomende gesprekken met
beller-ID.
OVERIGE FUNCTIES
DE W A CHTSTAND INSTELLEN
Met deze optie kunt u de TBR (Timed Break Recall of herhalen na ingestelde
onderbreking) instellen voor een specifiek land.100 ms,250 ms en 600 ms zijn de
beschikbare instellingen.
Druk op om het menu te openen.
Ga met de pijltjestoetsen naar optie 6.
Druk op .
Kies met de pijltjestoetsen een van de drie mogelijkheden.
Druk op om de weergegeven instelling te selecter en.
U hoort een pieptoon ter bevestiging van uw selectie en de
telefoon keert terug naar de stand-bymodus.
Deze optie wordt gebruikt voor bepaalde netw erkfuncties,bijv.voor telefonische
vergaderingen of voor het doorschak elen van gespr ekken. Neem eventueel contact
op met de netwerkexploitant of de PABX-beheerder voor meer informatie.
NL
120
GB DE ES FR IT NL PT
NL
119
BELLER-ID'S WEERGEVEN
Houd 2 seconden ingedrukt om nieuwe of oude beller-ID's weer te geven.
In het geheugen voor beller-ID's worden de telefoonnummers van de laatste 10
binnengekomen gesprekk en opgeslagen.
De gegevens van het recentste gespr ek w or den
eerst weergegeven.
Druk op om het volledige telefoonnummer weer te ge v en
als dat uit meer dan 9 cijfers bestaat.
De rest van het telefoonnummer wor dt w eergege ven.
Druk opnieuw op om de datum en tijd van het gesprek
te controleren.
OPMERKING:de functies voor beller-ID's zijn afhankelijk
van de services van uw netwerkexploitant.
BELLER-ID'S OPSLAAN
Als de beller -ID wordt weergegev en op het display,drukt
u op om de ID op te slaan. Selecteer een cijfer (0-9)
waaronder de beller-ID dient te worden opgeslagen.
U hoort een pieptoon ter bevestiging van uw selectie.
De lijst met beller -ID's wordt opnieuw weergegev en.
BELLER-ID'S VERWIJDEREN
Wanneer een beller-ID wordt weergegev en,houdt u de knop
ongeveer 2 seconden ingedrukt.
Druk ter bevestiging op of druk op om de
opdracht te annuleren.
OPMERKING: om te voorkomen dat ID’s per ongeluk worden verwijerd,wordt alleen
de weergegeven beller-ID verwijderd.De ID’s mogen niet allemaal tegelijkertijd
worden verwijderd.
Page 61

PT
122
GB DE ES FR IT NL PT
BEM-VINDO
Telefone DECT
™
Amplificado C710 da Clarity
www.clarityproducts.com
Obrigado por seleccionar o Telefone
DECT
™
* Amplificado C710 da Clarity.
Este Manual do Utilizador faculta-lhe as
informações de que precisa para utilizar
eficazmente e em segurança o seu C710.
Leia atentamente este manual do
utilizador antes de utilizar o telefone.
Mantenha o manual próximo do telefone
para maior facilidade de consulta.
* Digital Enhanced Cordless Telecommunications
(Telecomunicações digitais sem fios)
NL
121
DE W A CHTSTAND GEBRUIKEN
Nadat u het gewenste nummer hebt gek ozen,drukt u op zodat de lijn waarop
u bepaalde P ABX-functies wilt uitvoeren in de wachtstand wordt gezet.Op het display
wordt ‘r’ weergegeven.
Druk op om een onderbreking toe te voegen.Op het display wordt ‘P’ weergegeven.
Het nummer dat u vervolgens kiest,wordt niet opgeslagen in het geheugen
voor nummerherhaling.
VEREISTEN
TBR-INSTELLING LAND
100 België,Bulgarije,Cyprus,Denemarken,Finland, Hongarije,
IJsland,Italië, Noorwegen,Oostenrijk,Tsjechië,Zwitserland
250 Frankrijk,Portugal
Raadpleeg in andere landen de netwerk exploitant.
Page 62

INFORMAÇÕES IMPORTANTES DE SEGURANÇA – continuação
Não deite as pilhas fora em fogueiras.Podem explodir. Leve as pilhas gastas a um ponto
de recolha de lixo químico.
Não instale ou utilize este telefone próximo de água.
Desligue o telefone das tomadas de parede antes de o limpar.Não utilize líquidos ou
aerossóis de limpeza no telefone.Utilize um pano húmido para limpar.
Não cubra as ranhuras e aberturas do telefone. Este telefone nunca deve ser colocado
próximo ou sobre um radiador ou aquecedor. Este telefone nunca deve ser colocado
numa instalação embutida,excepto no caso de ser facultada a devida ventilação.
Não coloque nada sobre o fio do telefone. Instale o telefone num local onde não seja
pisado ou onde alguém possa tropeçar no fio.
Nunca introduza quaisquer objectos nas ranhuras do telefone.Podem tocar em pontos
de tensão perigosa ou provocar curtos-cir cuitos em peças,levando a incêndios ou
choques eléctricos.Não derrame qualquer tipo de líquido sobre o telefone.
Para reduzir o risco de choques eléctricos,não desmonte este telefone.A abertura ou
remoção de tampas pode expô-lo a tensões perigosas ou outros riscos.Uma nova
montagem incorrecta pode provocar choques eléctricos quando o aparelho é utilizado
subsequentemente.
Nunca instale cabos telefónicos durante uma tempestade.
Pelo presente documento,a Plantronics BV declara que o Telefone DECT
™
Amplificado C710 Clarity™está conforme aos requisitos essenciais e outras
cláusulas relevantes das Directiv as 1999/5/CE e 93/42/CEE.
Para ver a Declaração de Conformidade deste produto,visite
www.plantronics.com/documentation
Dispositivo médico de classe I
Quando o ícone Aumentar apar ecer no visor, o volume pode estar muito alto e
acima dos 118 dB.Este modo destina-se especificamente aos utilizadores com
problemas de audição.
PT
124
GB DE ES FR IT NL PT
PT
123
LEGENDA DO DIAGRAMA
MICROTELEFONE
1
Botão Aumentar
2 Controlo de volume
3 Ligar/desligar Clarity
4 Activar/desactivar toque
5 Entrada dos auriculares
6 Entrada da fita para o pescoço
7 Remarcação
8 Tecla Ligar último número/Cancelar
9 Tecla OK
10 Lista telefónica
11 Tecla Ligar/desligar linha
12 Toque visual
13 Tecla de emergência
UNIDADE DE BASE
14
Toque visual
15 Controlo do volume do toque
16 Botão de pager do microtelefone
ÍCONES LCD
Bateria
Toque do microtelefone
Desactivado
Bloqueio do teclado Activado
Telefone fora do gancho
Mensagem de Voice Mail
Corte de som
Antena
Clarity ligado
Clarity desligado
Nível de volume
Aumentar activado
INFORMAÇÕES IMPORTANTES DE SEGURANÇA
LEIA AS SEGUINTES INSTRUÇÕES ANTES DE UTILIZAR:
Ao utilizar o seu equipamento telefónico,deve sempre seguir estas precauções básicas
de segurança de forma a reduzir o risco de incêndios,choques eléctricos e ferimentos
em pessoas,incluindo o seguinte:
Leia e compreenda todas as instruções.
Siga todos os avisos e instruções assinalados no telefone.
Page 63

O ícone do estado de carga da bateria acende-se .
O telefone começa a procurar a estação de base.O ícone fica intermitente até a
base ser encontrada.
Depois de ser encontrada,o visor indica: Coloque o
microtelefone na unidade de base.O LED cor-de-laranja com
o símbolo deve acender -se e o telef one de v e tocar
uma vez.
Antes de utilizar o microtelefone pela primeira vez,é importante carregar
completamente as pilhas.Deixe o microtelefone na estação de base durante,pelo
menos,14 horas.
NO TA:deixe o micr otelefone na unidade de base quando não estiv er a utilizar
o telefone,de forma a manter as pilhas carregadas.
ECRÃ LCD DO MICRO TELEFONE
As duas linhas superiores são dedicadas à funcionalidade DECT básica,ao passo que a
terceira linha apresenta as definições áudio melhoradas.Consulte a Fig.D.
DEFINIÇÕES DO MENU DO MICROTELEFONE
Para aceder ao ecrã das definições do menu prima o botão
Para navegar para a esquer da através das opções do menu, prima ou para navegar
para a direita prima para ver definições que pretende alterar.Estes botões são agora
referidos como teclas de setas e aparecem duas setas no LCD que indicam que está no
modo Menu Settings (Definições do menu).
ALTERAÇÃO DO IDIOMA
Prima o botão e avance para a opção entre as opções ‘0 – Delete HS’
e ‘1 – Store Memory’.
Prima .
Percorra as opções até ao idioma da sua pr ef erência.
PT
126
GB DE ES FR IT NL PT
PT
125
COMO COMEÇAR
LIGAÇÕES DA UNID ADE DE BASE
Ligue o cabo de alimentação e o fio do telefone na parte de trás da unidade de base.
Consulte a Fig.A.
Ligue o cabo do telefone na entrada da linha telefónica,depois ligue o transformador
de CA na entrada de alimentação.Consulte a Fig.A.
ALCANCE DO TELEFONE
Este telefone utiliza sinais de rádio entre o microtelefone e a unidade de base.Para
utilizar o seu microtelefone e a unidade de base em conjunto,tem de conseguir
estabelecer uma ligação de rádio entre eles.
Cobertura:A cobertura entre a base e e o telefone á a especificada na norma
standar DECT
™
e permite até 300 metros de distância entre a base e o telefone
em espaços abertos e uma cobertura até 50 metros em ambiente de edificio.
NOTA: qualquer objecto metálico de grandes dimensões, tal como um
frigorífico, um espelho ou um arquivo,entre o microtelefone e a unidade de
base pode bloquear o sinal de rádio.
Outras estruturas sólidas,tais como as paredes, podem reduzir a força e o
alcance do sinal.
Determinado equipamento eléctrico, tal como frigoríficos, máquinas de lavar,
fornos microondas, luzes fluorescentes, computadores, televisores,etc., pode
provocar interferências.
PRENDER O CLIPE P ARA CINT O A O MICRO TELEFONE
Introduza o clipe para cinto na ranhura do microtelefone e fixe com um clique a parte
inferior do clipe para cinto no microtelefone.Consulte a Fig. B.
INSTALAÇÃO DAS PILHAS NO MICRO TELEFONE
Retire o compartimento das pilhas e instale as 3 x pilhas recarregáv eis AAA.
Consulte a Fig.C.
Volte a colocar a tampa.
Page 64

BIP DO TECLADO (ACTIVAR/DESACTIV AR)
Prima para entrar no modo Setup (Configuração).
Utilize as teclas de seta para chegar à opção 3.
Prima para alterar a definição actual.É emitido um
bip de confirmação.O microtelefone regressa ao modo de standby.
Estas são as definições do menu mais utilizadas;consulte a página 134 para obter
informações sobre a definição de funcionalidades adicionais do microtelefone através
do menu.
UTILIZAÇÃO DE FUNCIONALIDADES ESPECIAIS
DO MICROTELEFONE
AP ARELHOS AUDITIV OS
Alguns aparelhos auditivos estão sujeitos a interferências de radiofr equência.No geral,
os aparelhos auditivos digitais sofr em menos interfer ências do que os aparelhos digitais
analógicos.Em caso de dúvida, consulte o fabricante do seu aparelho auditivo ou o seu
audiologista.Se o seu aparelho auditivo for compatível com os telemóveis GSM,é
provável que possua a imunidade a rádio adequada aos telef ones DECT.
TOQUE VISUAL
Duas luzes intermitentes na parte de trás do microtelefone,e duas na parte da
frente (12) iluminam-se quando o telefone toca,além disso o teclado retroiluminado
fica intermitente.
TECLADO RETROILUMINADO
O teclado acende-se a cor -de-laranja durante 5 segundos quando o microtelefone é
levantado da unidade de base,ou se um botão for premido.
CONTROLO DE V OLUME DO MICRO TELEFONE
Para ajustar o volume do microtelefone.
Durante uma chamada,pode ajustar o Controlo de Volume do Microtelefone
(2) para
um nível confortável utilizando o botão rotativ o na parte lateral do microtelef one.
Consulte a Fig.F.
PT
128
GB DE ES FR IT NL PT
PT
127
Prima .
O telefone emite um bip de confirmação e regressa ao modo de standby.
AJUSTE DO VOLUME DO TOQUE DO MICRO TELEFONE
Prima para entrar no modo Menu.Utilize a tecla de
seta da direita para chegar à opção 2.
Prima .
O ecrã apresenta a definição actual do Toque do Microtelefone.
Utilize as teclas de seta para definir o volume pretendido
(3 níveis e desactivado).
Se a definição for OFF (Desactivado),aparece o seguinte no
visor do microtelefone.
Prima se for a definição pretendida.
É emitido um bip de confirmação e o microtelefone regr essa
ao modo de standby.
O ícone aparece no ecrã,desde que esta definição
tenha sido seleccionada.
Se a definição não for OFF (Desactivado),o ecrã apresenta
a definição pretendida para o volume.
Prima para definir o volume para este nível
Imediatamente a seguir, o ecrã apresenta os toques disponíveis
(1-9),enquanto reproduz o toque apresentado.
Utilize as teclas de seta para navegar.
Prima quando o toque pretendido aparecer.
É emitido um bip de confirmação.O microtelefone regressa ao modo de standby.
NO TA:quando o Interruptor de Toque do Microtelefone (4) estiver na posição
OFF (Desactivado),as definições desta funcionalidade são anuladas.As definições
tornam-se activas quando o interruptor estiver na posição ON (Activado).
Page 65

ENTRADA D A FITA P ARA O PESCOÇO
É facultada uma Entrada da Fita para o Pescoço(6) para quem utiliza este dispositivo
auxiliar.Consulte a Fig. F.
ENTRADA DOS AURICULARES
Uma Entrada dos Auriculares (5) é compatível com auricular es com fichas de 2,5 mm.
Consulte a Fig.F.
INTERRUPT OR A CTIV AR/DESA CTIV AR TOQUE DO MICROTELEFONE
(4) FIG.F
Na posição OFF (Desactivado),o microtelefone não toca.
Na posição ON (Activado),o microtelefone toca de acordo com as definições seleccionadas.
FAZER CHAMADAS TELEFÓNICAS
Prima o botão O ícone aparece no visor do microtelefone.
Marque o número pr etendido.
Após 5 segundos da última pressão de teclas,o temporizador
de chamadas começa a contar.
Para terminar a chamada,prima novamente o botão
O tempo da última chamada permanece durante 5 segundos.
Para remarcar o último númer o,prima o botão o número marcado apar ece no visor
quando esta tecla é seleccionada.
Prima o botão para marcar este número.
Para terminar a chamada,prima novamente o botão
ATENDER CHAMADAS
O número do emissor da chamada deve a par ecer no visor do microtelefone,ou aparece
‘Withheld’ (Chamada anónima) se o fornecedor do serviço não suportar esta função.
Seleccione o botão para atender a chamada.
Para terminar a chamada,prima novamente o botão
PT
130
GB DE ES FR IT NL PT
PT
129
Quando AUMENT AR (1) está OFF (Desactivado), o alcance da amplificação do controlo
de volume é apresentado como 0-15
Quando AUMENT AR
(1) está ON (Activado),o alcance do
controlo de volume é apr esentado como 12-32.
O nível de volume é apr esentado na fila de baixo do visor
do microtelefone,por exemplo
.
BOTÃO AUMENTAR
Para volume adicional do microtelefone.
O aumento funciona em conjunto com o Controlo do Volume do Microtelefone (2).
Quando o Botão Aumentar (1) é premido ,é induzida amplificação adicional durante
toda a chamada.Consulte a Fig. F. Quando activado,o ícone acende-se na canto
inferior esquerdo do visor do microtelefone.Utilize o Controlo de Volume do
Microtelefone (2) para obter um nível de audição confortável.
Prima mais uma vez para desactivar o aumento de volume
(1).
O aumento é automaticamente desactivado quando o telefone é desligado.
NO TA:O botão acende-se a vermelho no modo de con v ersação normal,
mas quando AUMENTAR (1) é activado acende-se a cor-de-laranja.
Ao activar o modo AUMENTAR,opta por aumentar o nível de amplificação que permite
a qualquer evento anormal exceder os 118 dB.Isto pode ser prejudicial.O controlo do
volume deve ser aumentado gradualmente para encontrar o nível mínimo de amplificação
que lhe é confortável.Evite exposições prolong adas ou desnecessárias a níveis ele vados
de volume.
LIGAR/DESLIGAR CLARITY
O interruptor Ligar/desligar Clarity (3) amplifica as frequências mais altas quando a
função AUMENT AR está Activada para compensar algumas circunstâncias de perda
moderada de audição.Consulte a Fig.F.
Quando o Clarity está Activado um ícone com um círculo preto apar ece no
visor do microtelefone.
Quando o Clarity está Desactivado um ícone com um círculo branco aparece no
visor do microtelefone.
Page 66

Após 5 segundos da última pressão de teclas,o temporizador
de chamadas começa a contar.
Para terminar a chamada,prima novamente o botão
BOTÃO DE EMERGÊNCIA
Trata-se de um botão de memória de um só toque que pode guardar um número de
emergência da sua escolha.
Guardar um Número de Emergência (os mesmos passos que para guardar um número
de telefone na lista telefónica)
Prima o botão
Aparece o seguinte.
Prima .
‘Location’ (Localização) aparece no visor do microtelefone.
Seleccione o botão
Introduza o número de telefone a guar dar (até 25 dígitos).
Para eliminar uma entrada incorrecta,prima .
Prima .
É emitido um bip e o telefone regressa ao ecrã do modo
de standby.
MARCAR O NÚMERO DE EMERGÊNCIA
Basta premir o botão e o telefone marca automaticamente o númer o de
emergência e apresenta-o no ecrã do microtelefone.
Para terminar a chamada,prima o botão
NOTA:trata-se de uma tecla côncava para evitar que seja premida acidentalmente.
PT
132
GB DE ES FR IT NL PT
PT
131
GUARDAR ENTRADAS NA LISTA TELEFÓNICA
Prima o botão no microtelefone
Deve aparecer o seguinte.
Prima .
‘Location?’ (Localização) aparece no visor do microtelefone.
Seleccione um número entre 0-9 no teclado para especificar
a localização do número de telefone a guardar.
Introduza o número de telefone a guar dar (até 25 dígitos).
Para eliminar uma entrada incorrecta,prima o botão
Prima para confirmar .
É emitido um sinal sonoro e o telefone regr essa ao ecrã do modo de standb y.
NO TA:uma nova entrada guardada num número onde um númer o de telefone
anterior já está guardado,substitui a entrada original sem qualquer aviso de que
a localização está em utilização.
APAGAR ENTRADAS DA LISTA TELEFÓNICA
Para apagar uma entrada,seleccione a localização na memória, mas não introduza
qualquer número de telefone e prima . Aparece "ERASE" (Apagar) e depois
prima .
FAZER CHAMADAS PARA UM NÚMERO LISTADO
Prima o botão
Seleccione o número de localização pretendido na memória atra vés do teclado (0 a 9)
Prima o botão para marcar o número de telefone.
Quando o telefone estiver em utilização,aparece o ícone
no visor do microtelefone.
Page 67

FUNÇÃO DE P A GER
Permite encontrar o microtelefone.
Prima o Botão Pager (16) e o microtelef one r ecebe um bip.
A retroiluminação fica intermitente e o visor do micr otelefone
apresenta o seguinte.Consulte a Fig. E ou F.
Prima o Botão Pager (16) ou qualquer botão do microtelefone
para interromper o sinal do bip.
FUNCIONALIDADES ADICIONAIS DO MICROTELEFONE
A TENDIMENT O AUT OMÁTICO (ACTIV AR/DESA CTIV AR)
Permite-lhe atender o telefone quando toca levantando-o da base e desligá-lo
colocando-o na base.Alternativamente,pode desligá-lo premindo o botão
Para activar esta função,o modo tem de ser definido para ‘Auto ON ’
(Automático activado):
Prima para entrar no modo Setup (Configuração).
Utilize as teclas de seta para chegar à opção 4.Prima
para alterar a definição actual.É emitido um bip de confirmação
e regressa ao modo de standby.
FUNÇÃO DE CORTE DE SOM DO MICR O TELEFONE
Durante a chamada,prima para cortar o som
do microtelefone.
O ecrã reverte para o temporizador de chamada,indicando
que o telefone está sem som.
Prima para devolver o som.
O ecrã volta ao visor normal da chamada.
PT
134
GB DE ES FR IT NL PT
PT
133
FUNÇÕES DA UNIDADE DE BASE
TOQUE VISUAL
As luzes do Toque Visual (14) da unidade de base ficam intermitentes quando o telefone
toca.Consulte a Fig. E ou F.
CONTROLO DO VOLUME DO TOQUE DA UNIDADE DE BASE
Aumenta o sinal sonoro existente transmitido pelo microtelefone.
Prima para aumentar ou diminuir o Volume do Toque (15) da unidade de base.Consulte
a Fig.E ou F.
A posição OFF desliga o toque da unidade de base.
DEFINIÇÕES DOTOQUE DA BASE
Prima Utilize as teclas de seta para chegar à opção 5.
Prima .
O ecrã apresenta a definição actual do Volume do Toque
(15)
da unidade de base – 3 níveis e OFF (Desactivado).
Se o volume estiver activado ,tem à sua escolha uma selecção
de nove (1 a 9) toques.
Utilize as teclas de seta para navegar pelos toques.
Se o volume estiver desactivado ,o telefone emite um bip de
confirmação e regressa ao modo de standby.
Prima para confirmar a escolha.
NO TA:quando o interruptor de Toque da Base estiver na posição OFF
(Desactivado),as definições desta funcionalidade são anuladas. As definições
tornam-se activas quando o interruptor estiver na posição ON (Activado).
Page 68

CARREGAR A BATERIA
Quando o microtelefone é colocado na unidade de base,a bateria carrega
rapidamente durante cerca de 30 minutos.
Enquanto a bateria está a ser carregada,pode ver a seguinte
animação no ícone da bateria.
Após o período de 30 minutos,a animação de carregamento da bateria pára e o
ícone da bateria aparece cheio.
NOTA: uma bateria vazia tem de ser carregada durante cerca de 14 horas de
forma a atingir a capacidade máxima.
A VISO DE FORA DE ALCANCE
Durante uma chamada,se o microtelefone estiver demasiado longe da unidade de base,
pode ouvir um sinal sonoro de aviso de f ora de alcance a cada 20 segundos.
MENSAGEM DE VOICE MAIL
Se subscrever um serviço de Voice Mail à sua companhia dos
telefones,aparece um ícone para indicar que tem
mensagens à sua espera. As chamadas são indicadas como
Identificação de chamada,mas os dados são apresentados
como ‘MESSAGE’ (Mensagem) em vez do número de telefone do emissor.
Voice Mail (da companhia dos telefones) recebido.
Prima o botão da seta direita para conhecer a data e a hora desta mensagem.
IDENTIFICAÇÃO DE CHAMADA E FUNÇÕES
CHAMADA RECEBID A
Ao receber uma chamada,o ecrã apresenta o número do
emissor da chamada.
Enquanto o telefone toca,o número do emissor é apresentado.
O ícone EXT fica intermitente para indicar a chamada recebida.
O ícone do Voice Mail aparece no visor,tal como é indicado.
Quando o telefone pára de tocar,o ecrã apresenta o número
de chamadas não atendidas.
PT
136
GB DE ES FR IT NL PT
PT
135
MODO DE MARCAÇÃO
Permite ao utilizador escolher entre Tom ou Impulso para o modo de marcação.
Prima para entrar no modo Setup (Configuração).
Utilize as setas para chegar à opção 7.
Prima .
Utilize as teclas de seta para navegar entr e as opções.
Prima para escolher a definição apresentada.
O telefone emite um bip de confirmação e regressa ao modo
de standby.
NO TA:a predefinição de fábrica é "Tom".Não deve ser necessário ajustar esta
definição se conseguir efectuar uma chamada.
BLOQUEIO DO TECLADO DO MICRO TELEFONE
Prima e mantenha premido o botão até o ícone apar ecer no visor do
microtelefone.Ecrã de teclado bloqueado.
Prima e mantenha premido o botã mais uma vez para
remover o bloqueio do teclado .
No modo de teclado bloqueado,pode continuar a atender
e terminar chamadas com a tecla .
AVISOS DE BATERIA FRACA
Quando é detectado um estado de bateria fraca no modo
de standby, pode ser ouvido um sinal sonoro de aviso de bateria
fraca e é apresentado o sinal de bateria vazia.
Se o estado de bateria fraca for detectado durante uma chamada,
pode ouvir um sinal sonoro de aviso de bateria fraca a cada 20 segundos
e o sinal de bateria vazia é apresentado.
A ligação actual é mantida até o telefone ser desligado.
Page 69

MENSAGEM NO CALL (SEM CHAMAD AS)
Quando não existe qualquer registo de Identificação de
Chamadas na memória,se premir o botão durante
2 segundos,aparece a mensagem ‘NO CALL’ (Sem chamadas)
no visor do microtelefone.
Prima para regressar ao ecrã do modo de standby.
CHAMADA RECEBID A NÃO IDENTIFICAD A
Quando uma chamada recebida não identificada chega,
não é apresentado qualquer registo de Identificação de
Chamada – a linha do visor fica em branco.
NOTA: podem ser apresentados até 18 dígitos para as
chamadas com Identificação de Chamada recebidas.
FUNCIONALIDADES ADICIONAIS
DEFINIÇÃO DE FLASH TIME
Esta opção permite ao utilizador definir o TBR (Timed Break Recall - Intervalo
temporizado da rechamada) apropriado para o seu país. As opções são de 100 ms,
250 ms e 600 ms.
Prima para entrar no modo Setup (Configuração).
Utilize as teclas de seta para chegar à opção 6.
Prima
Utilize as teclas de seta para navegar pelas três opções.
Prima para activar a definição apresentada.O telefone
emite um bip de confirmação e regressa ao modo de standby.
É utilizado para aceder a certas funcionalidades de rede,tais como a teleconferência ou
a transferência de chamadas,etc.Contacte o seu fornecedor de rede ou administrador
de P ABX para mais inf ormações,caso seja necessário.
PT
138
PT
137
RECUPERAR OS REGISTOS DE IDENTIFICAÇÃO DE CHAMAD AS
Para recuperar registos nov os ou antigos de Identificação de Chamadas,prima o botão
durante 2 segundos. A memória de Identificações de Chamadas retém os
10 últimos números de telefone de chamadas r ecebidas.
Os dados são apresentados,a começar pela chamada
mais recente.
Utilize o botão de seta da direita para recuperar o número
completo,quando for superior a 9 dígitos.
É apresentado o resto do númer o de telef one.
Prima novamente o botão de seta da direita para recuperar
a hora e a data dessa chamada.
NO TA:as funcionalidades de identificação da chamada
dependem dos serviços oferecidos pelo seu fornecedor
de rede.
GUARD AR OS REGIST OS DE IDENTIFICAÇÃO DE CHAMAD AS
Enquanto o registo de Identificação de Chamadas é apresentado
no visor do microtelefone,prima para guardar
o registo.Seleccione o número (0-9) onde o registo de
Identificação de Chamada deve ser guardado .
O telefone emite um bip de confirmação e regressa à lista
de Identificações de Chamadas.
AP A GAR OS REGIST OS DE IDENTIFICAÇÃO DE CHAMADAS
Enquanto um registo de Identificação de Chamada
é apresentado:
Prima o botão durante 2 segundos.
Prima para confirmar, ou prima para cancelar o comando.
NO TA:para evitar apagar acidentalmente,apenas o registo apresentado é
removido.Não pode ocorrer que apague tudo.
GB DE ES FR IT NL PT
Page 70

PT
139
UTILIZAR A DEFINIÇÃO DE FLASH
Após marcar o número pr etendido,prima o botão para transmitir à linha a
realização de uma função PABX e ‘r’ apar ece no LCD.
Prima o botão para adicionar uma pausa e ‘P’ a par ece no visor.
O número marcado após o ‘Flash’ não é guardado na memória de remarcação.
REQUISITOS DO FLASH TIME
DEFINIÇÃO DO TBR P AÍS
100 Áustria,Bélgica, Bulgária,Chipre,Dinamarca,Finlândia,
Hungria,Islândia, Itália,Noruega,República Checa,Suíça
250 França,Portugal
Noutros países,consulte o seu fornecedor de rede.
Page 71

 Loading...