

Page 1
Owner’s manual
Mode d’emploi
Manual de instrucciones
DSH920S
SIRIUS SATELLITE RADIO RECEIVER
RÉCEPTEUR RADIO SATELLITE SIRIUS
SINTONIZADOR SIRIUS DE RECEPCIÓN
RADIO VÍA SA TÉLITE
Page 2

Thank you for purchasing this Clarion product.
English
∗Please read this owner’s manual in its entirety before operating this equipment.
∗After reading this manual, be sure to keep it in a handy place (e.g., glove compartment).
∗Check the contents of the enclosed warranty card and keep it carefully with this manual.
Contents
1. FEATURES...................................................................................................................................... 2
2. PRECAUTIONS............................................................................................................................... 3
3. CONTROLS..................................................................................................................................... 5
4. SIRIUS OPERATION....................................................................................................................... 7
5. INSTALLATION AND WIRE CONNECTION................................................................................. 10
6. SYSTEM EXAMPLES ................................................................................................................... 13
7. SPECIFICATIONS ......................................................................................................................... 15
1.FEATURES
■ CeNET Connection
■ RCA Output
■ Switching between Slave, Stand-alone Provided
■ Connection of DSC920S (Exclusive Commander) Supporting the other
Manufacturer’s Center Units
■ Antenna Terminals for Satellite and Terrestrial Waves (SMB)
■ 3 Bands Having 6 Channels each, a Total of 18 Channels for Memorization
Enabled
2 DSH920S
Page 3
2.PRECAUTIONS
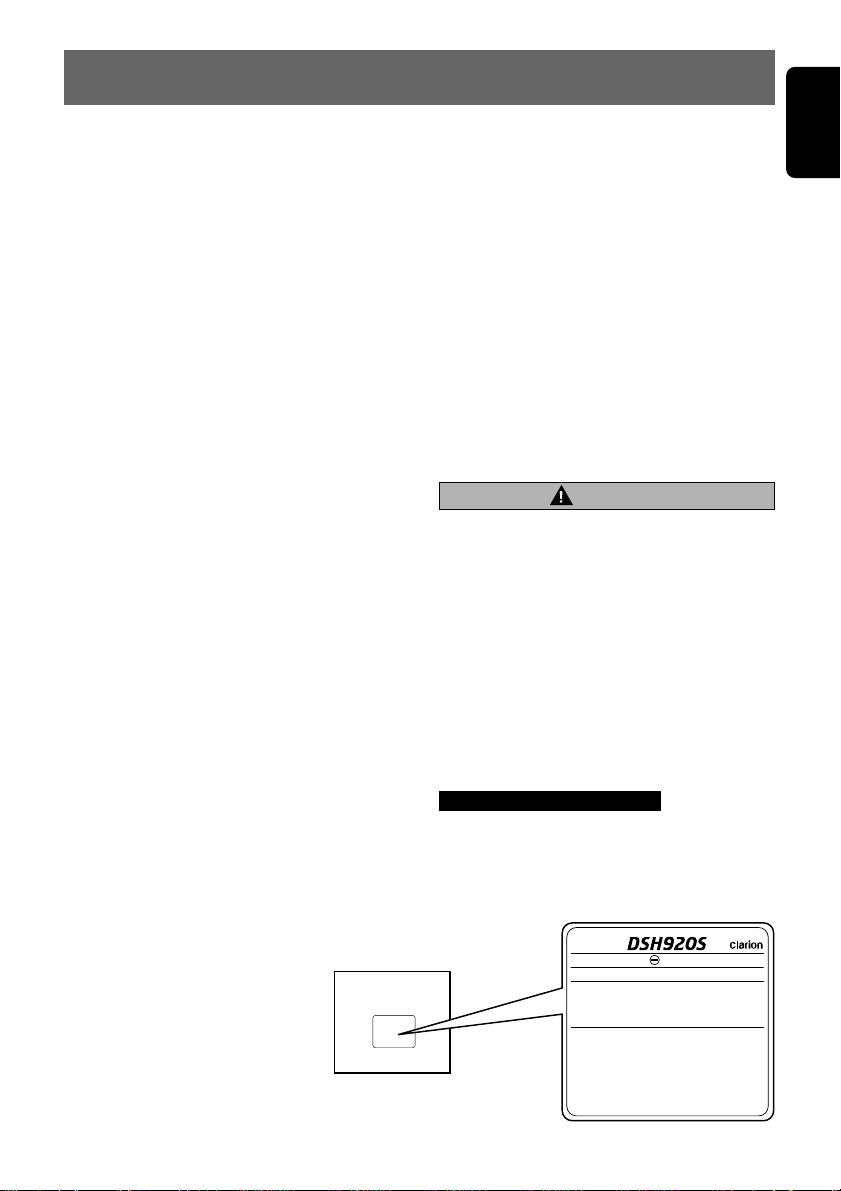
Bottom View of Unit
286-
Clarion Co.,Ltd.
MADE IN
2320~2332.5MHz
SIRIUS SATELLITE RADIO
12V GROUND
MODEL
THIS DEVICE COMPLIES WITH PART 15 OF THE FCC RULES.
OPERATION IS SUBJECT TO THE FOLLOWING TWO CONDITIONS :
(1) THIS DEVICE MAY NOT CAUSE HARMFUL INTERFERENCE, AND
(2) THIS DEVICE MUST ACCEPT ANY INTERFERENCE RECEIVED,
INCLUDING INTERFERENCE THAT MAY CAUSE UNDESIRED
OPERATION.
12V GROUND
MADE IN JAPAN
EE-1195B
Clarion Co.,Ltd.
286-9953-00
English
1. The first time or when starting after turning
off the backup power supply, the receiver
does not operate normally until reception.
The sound is not heard until 20 or 30 seconds after reception.
2. Text data regarding the names of received
channels is written to the receiver 30 to 60
seconds after start of normal operation. If the
power is turned off before the text data is
written, it may not be correctly displayed next
time. Perform a reset operation if no text data
is displayed.
3. If the receiver freezes, reset it.
● Resetting
Disconnect the SIRIUS Receiver power
cable (the CeNET cable if connected to the
CeNET and the 4-pin power cable during
standalone operation), wait about 10 seconds and connect it again.
The last channel, preset memory and other
data stored in the receiver are deleted returning it to its default settings.
4. A CeNET and standalone operation switch is
provided on the rear of the receiver. The
switch is set to CeNET position at the time of
shipment.
Do not set this switch to the standalone position when using the CeNET.
5. The tuner inside the receiver becomes warm
during operation; this is only normal and not
a cause for concern.
6. Do not touch the connector pins on the receiver as this may damage the ICs inside the
unit.
7. No station is selected when the [a] or [d]
button is moved quickly. This is because button operations are not accepted until the
channel is confirmed. It takes between 1.5 to
5 seconds to change channels.
This equipment has been tested and found to
comply with the limits for a Class B digital device, pursuant to Part 15 of the FCC Rules.
These limits are designed to provide reasonable
protection against harmful interference in a residential installation.
This equipment generates, uses, and can radiate radio frequency energy and, if not installed
and used in accordance with the instructions,
may cause harmful interference to radio communications. However, there is no guarantee
that interference will not occur in a particular installation.
If this equipment does cause harmful interference to radio or television reception, which can
be determined by turning the equipment off and
on, the user is encouraged to consult the dealer
or an experienced radio/TV technician for help.
CAUTION
USE OF CONTROLS, ADJUSTMENTS, OR PERFORMANCE OF PROCEDURES OTHER THAN
THOSE SPECIFIED HEREIN, MAY RESULT IN
HAZARDOUS RADIATION EXPOSURE.
THE COMPACT DISC PLAYER and MINI DISC
PLA YER SHOULD NOT BE ADJUSTED OR REPAIRED BY ANYONE EXCEPT PROPERLY
QUALIFIED SERVICE PERSONNEL.
CHANGES OR MODIFICATIONS NOT EXPRESSLY APPROVED BY THE MANUFACTURER FOR COMPLIANCE COULD VOID THE
USER’S AUTHORITY T O OPERA TE THE EQUIPMENT.
INFORMATION FOR USERS:.
CHANGES OR MODIFICATIONS TO THIS
PRODUCT NOT APPROVED BY THE MANUFACTURER WILL VOID THE WARRANTY AND
WILL VIOLATE FCC APPROVAL.
DSH920S 3
Page 4
What is Sirius
English
Satellite Radio?
Sirius is radio the way it was meant to be: Up to
100 new channels of digital quality programming
delivered to listeners coast to coast via satellite.
That means 50 channels of completely commercial-free music. Plus up to 50 more channels of
news, sports, and entertainment from names
like CNBC, Discovery, SCI-FI Channel, A&E,
House of Blues, E!, NPR, Speedvision and
ESPN.
Sirius is live, dynamic entertainment, completely
focused on listeners. Every minute of every day
of every week will be different. All 50 commercial-free music channels are created in-house
and hosted by DJs who know and love the music. Do you like Reggae? How about Classic
Rock or New Rock? Sirius has an array of
choices spanning a vast range of musical tastes
including the hits of the 50’s, 60’s, 70’s, & 80’s
as well as Jazz, Country, Blues, Pop, Rap, R&B,
Bluegrass, Alternative, Classical, Heavy Metal,
Dance and many others...
From its state-of-the-art, digital broadcasting facility in Rockefeller Center, New York City, Sirius
will deliver the broadest, deepest mix of radio
entertainment from coast to coast.
Sirius will bring you music and entertainment
programming that is simply not available on traditional radio in any market across the country.
It’s radio like you’ve never heard before.
So Get Sirius and Listen Up! For more information, visit siriusradio.com.
To receive Sirius Satellite Radio on
this receiver
This receiver contains a SIRIUS ID for user
identification. All you have to do to obtain a subscriber contract and enable reception of Sirius
Satellite Radio is to call the Sirius Service Center (888-539-SIRI) and inform us of your SIRIUS
ID and a few other details.
Verifying your Sirius ID
1. Press and hold the [ADJ] button for 1 second
or longer to enter the Adjust mode.
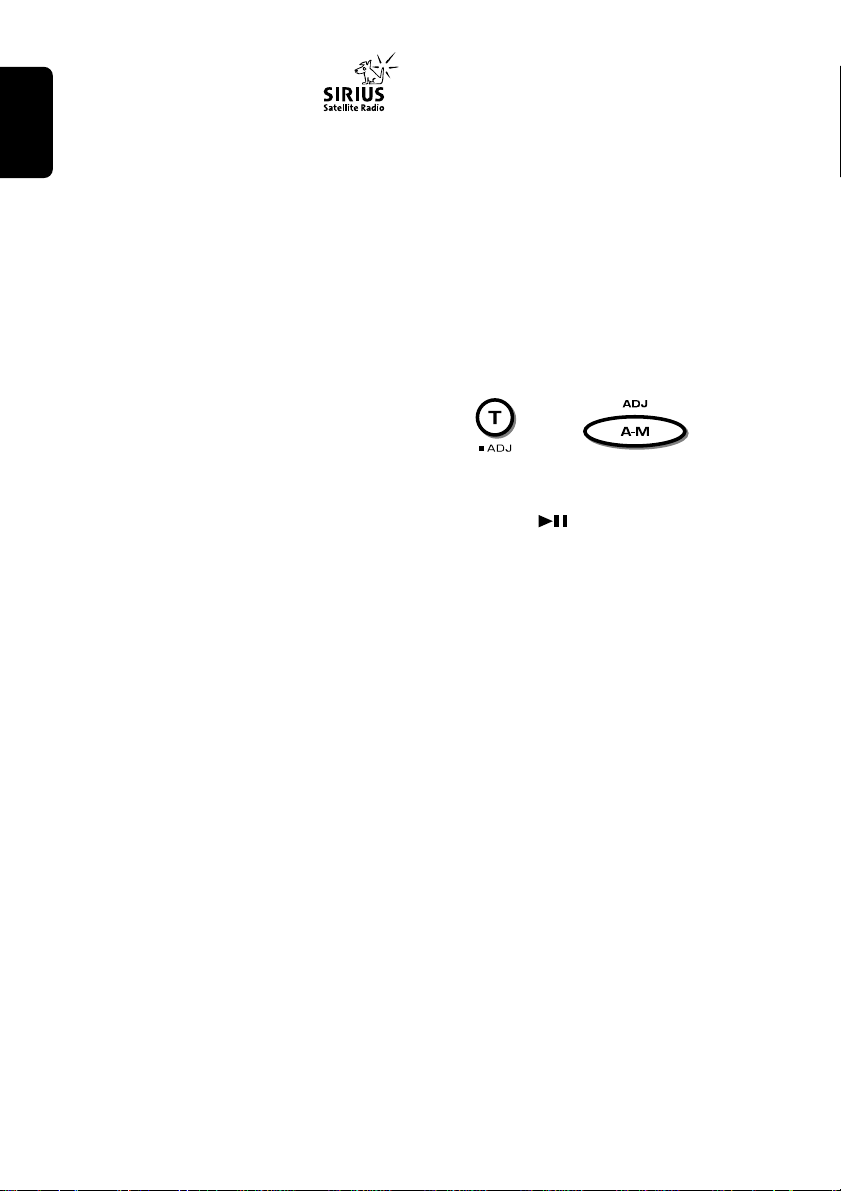
Note:
The [ADJ] button is described in the source unit instruction manual either as the [T] (TITLE) button or
[A-M] button. This refers to the function of the button labeled “ADJ” on the source unit panel.
or etc.
2. Press the [a] or [d] to select the “ESN
DISP”.
3. Press the [
ID.
The source unit displays the high-order 6
digits of the SIRIUS ID in the Operation status indication.
4. Turn the [ROTARY] knob clockwise to
change the low-order 6 digits of the SIRIUS
ID.
To display the high-order 6 digits of the
SIRIUS ID again, turn [ROTAR Y] knob counterclockwise.
] button to display the SIRIUS
4 DSH920S
Page 5
3.CONTROLS
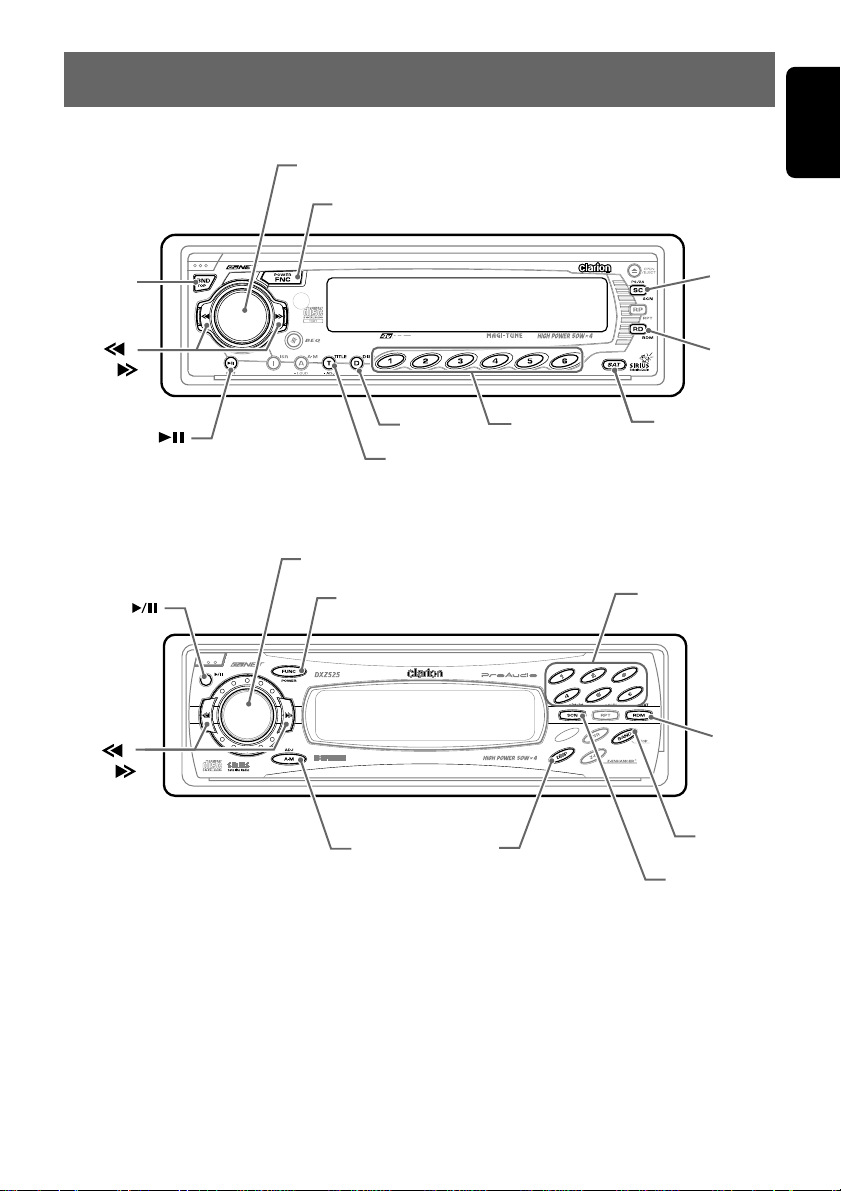
Source unit buttons, example 1
[
ROTARY
[
FNC
English
]
]
[
]
BND
[ ],
[ ]
[
]
Source unit buttons, example 2
[
ROTARY
[
]
[ ],
[ ]
[
FUNC
[
ADJ
[SC]
[RD]
[
]
SAT
[
DIRECT
[
SCN
]
[
RDM
[
BAND
]
]
]
DISP
[
]
[D]
[
]
ADJ
]
]
]
[
DIRECT
]
Notes:
• The above illustrations show two source units as
an example of the button names used.
• Since this manual covers several models, the
names of some buttons vary with the model.
As shown below, this manual gives the different
button names when more than name is used.
[FNC] (FUNC) button,
[SC] (SCN) button etc.
DSH920S 5
Page 6

Display Items
English
Source unit display, example 1
: Manual indication
Source unit display, example 2
Operation status indication
Function mode indication
Operation status indication
:
SIRIUS
indication
Preset channel indication
6 DSH920S
: Category indication
:
SIRIUS indication
Preset channel indication
: Manual indication
Page 7

4.SIRIUS OPERATION
English
Selecting Sirius Radio modes
Press the [SAT] button or the [FNC] (FUNC) but-
ton to select the Sirius mode.
The Sirius indication lights entering the mode
that was engaged when the unit was turned off
last time.
Notes:
• The [SAT] button selects the Sirius mode directly.
Some source unit does not have a [SAT] button. If
not, press the [FNC] (FUNC) button.
• The [FNC] (FUNC) button selects the external devices connected to the source unit in order, for example: Radio mode
➜
CD mode ➜ CD changer mode ➜ …
➜
DAB mode ➜ Sirius mode
Selecting a band
Press the [BND] button to select a band.
Each press of the button changes the display as
shown below.
SR1 ➜ SR2 ➜ SR3 ➜ SR1 …
∗ The currently received band is displayed in the func-
tion mode indication.
∗ Models without a function mode indication display
the band name and channel number in the Operation status indication.
● Information displayed during reception
The following information is displayed in the Operation status indication when Sirius Radio cannot be received normally .
• UPDATING : when the receiver is turned on
• ACQUIRING : when a channel is being tuned
• INVALID CH : a channel without a broadcast
NO SIGN-UP
•
• ANTENNA : no antenna is connected or the
the first time or after a reset
in (no signal is yet received)
(“LINKING” is shown on an 8digit display)
has been selected
(“INVLD CH” is shown on an 8-
digit display)
: a channel not covered by your
contract
antenna is defective)
Switching the display
1. Press the [DISP] (D) button to select the de-
sired display.
The main display or the clock display appears each time you press the [DISP] (D)
button.
2. In the main display, press and hold the
[DISP] (D) button for 1 second or longer to
cycle between the following display modes:
Channel name ➜ title ➜ artist name ➜ category name ➜ text ➜ channel name ➜ …
Notes:
• The Operation status indication of the source unit
displays the abbreviated channel name for 2 seconds when a station is selected before returning
to the previous display mode.
• Scrolling starts when the channel name or other
text has been displayed for 2 seconds. When
scrolling finishes, the first text display appears.
To start scrolling again, press the [ADJ] button.
• The [ADJ] button is described in the source unit
instruction manual either as the [T] (TITLE) button
or [A-M] button. This refers to the function of the
button labeled “ADJ” on the source unit panel.
or etc.
Channel selection
Channels are selected with the following buttons.
• The [a] or [d] button
•A [DIRECT] button
• The [SCN] (SC) button
• The [CAT] (RDM) button
∗ For details, see the following operation descriptions.
Notes:
∗
The audio output is muted and other button operations are not accepted during channel selection.
Tuning mode (T-MODE)
There are two channel selection modes: seek
mode and manual mode.
● Seek tuning
Only channels that can be received are selected
while channels without broadcasts and channels
not covered by the contract are automatically
skipped.
1. Press the [a] or [d] button.
The receiver seeks the next available channel below or above the current channel.
2. Press and hold the [a] or [d] button.
DSH920S 7
Page 8

Sirius operation
English
The receiver moves to seek channels below
or above the current channel. If the channel
found when either button is released is available that channel is received. Otherwise,
seeking continues until an available channel
is found.
● Manual tuning
Any channel including channels without broadcasts and channels not covered by the contract
can be selected during manual tuning.
1. Press and hold the [BAND] (BND) button for
1 second or longer.
∗ This changes the seek mode to manual mode
and the “MANU” indicator on the display lights.
When this operation is performed in manual
mode, the seek mode is engaged and the
“MANU” indicator on the display goes off.
Notes:
• The receiver automatically reverts to the seek
mode when the [
7 seconds in the manual mode.
2. Press the [a] or [d] button. The receiver
moves to channels above or below the current channel one by one.
3. Press and hold the [a] or [d] for 1 second
or longer.
The receiver moves to seek channels below
or above the current channel and the channel found when either button is released is
received.
a
] or [d] button is not used for
Recalling a preset station
A total of 18 SIRIUS stations can be stored (6SR1, 6-SR2 and 6-SR2). This allows you to select your favorite SIRIUS stations and store
them in memory for later recall.
1. Press the [BND] button and select the desired SIRIUS band (SR1, SR2 or SR3).
2. To recall a stored SIRIUS station, press the
desired [DIRECT] button to select that station.
∗ Press and hold one of the [DIRECT] buttons
for 2 seconds or longer to store the current
station into preset memory.
Manual memory
1. Select the desired station with seek tuning,
manual tuning or preset tuning.
2. Press and hold one of [DIRECT] buttons for
2 seconds or longer to store the current station into preset memory.
8 DSH920S
Notes:
• When the name of a channel stored in memory is
changed by a broadcasting station, the display
may show a channel name that differs from the
stored name.
• A channel stored in memory may be discontinued
at the option of the broadcasting station.
Category selection function
SIRIUS Radio allows you to select broadcast
channel category (contents).
Receiving stations selected by
category
1. Press the [RDM] (RD) button to enter the
category selection mode.
2. Turn the [ROTAR Y] knob clockwise or coun-
terclockwise to select a category.
Or, press a [DIRECT] button if the category
is preset.
3. Press [a] or [d] button to tune in a station.
This starts seek tuning and broadcast channels that meet the specified category are selected. The “CA” indicator is displayed in the
function mode indication during seek tuning.
The CAT indicator lights on models without a
function mode indication.
4. Press the [RDM] (RD) button again to cancel.
Notes:
• When the category selection mode is entered, the
category of the last received channel is displayed
first.
• The category selection mode is canceled when
no channel with the selected category can be
found.
• Press the [
ter a channel has been set to continue seeking
channels up or down. The category selection
mode is canceled and normal reception is resumed if no operation is performed for 7 seconds.
a
] or [d] button within 7 seconds af-
Presetting a category
A category can be preset by registering specific
categories in [DIRECT] buttons 1 to 6. Then the
desired category can be recalled by pressing
the corresponding [DIRECT] button.
1. Press the [RDM] (RD) button to enter the
category mode.
2. Turn the [ROTAR Y] knob clockwise or coun-
terclockwise to select a category.
3. Press and hold one [DIRECT] button for 2
seconds or longer to store the current category in the preset memory.
Page 9

Notes:
• When the name of a channel stored in memory is
changed by a broadcasting station, the display
may show a channel name that differs from the
stored name.
• A channel stored in memory may be discontinued
at the option of the broadcasting station.
Scan function
There are two scan modes: a category scan
mode and a preset scan mode.
During scanning channels are displayed in abbreviated form and the display mode cannot be
switched.
● Category scanning
In a category scan, broadcast channels in the
same category as the current channel are selected about every 10 seconds.
1. Press the [SCN] (SC) button to start a cat-
egory scan.
2. Press the [SCN] (SC) button, a [DIRECT]
button, the [a] or [d] button to cancel a
category scan.
Note:
• Category scanning is not available when no category is defined for the current channel.
● Preset scan
A preset scan scans the channels (up to 18
channels) stored in the preset memory about
every 10 seconds.
1. Press and hold the [SCN] (SC) button for 1
second or longer to start a preset scan.
2. Press the [SCN] (SC) button, a [DIRECT]
button, the [a] or [d] button to cancel a
preset scan.
Sirius operation
English
DSH920S 9
Page 10

English
5.
INSTALLATION AND WIRE CONNECTION
Before Installation
1. Before starting, be sure to disconnect the
battery’s negative “–” terminal to prevent accidents due to short-circuits.
2. Location
Consider safety and operability when selecting a place for installation. Avoid the following.
• Locations where the unit will hamper driving.
• Locations where the unit could injure passengers if the car stops suddenly.
• Locations exposed to direct sunlight or hot air
from the heater, etc.
• Locations where the unit may be exposed to
rain or water.
Accessories
3. Be sure to use the included screws and
brackets. Screws other than those supplied
could damage the unit.
Case Case
Damage
8mm max.
4. When drilling holes in the dashboard, etc., be
sure to check beforehand that there are no
harnesses or other wires inside.
1 Mounting bracket .............................. 2 pieces
2 Mounting screw ................................ 4 pieces
3 Canoe clip ......................................... 4 pieces
4 CeNET cable ...................................... 1 piece
10 DSH920S
Page 11

Installation Example
1. Attach the mounting brackets 1 to the sides
of the DSH920S using the screws 2 provided.
2. Select the location on the floor mat. Drill
holes in the floor mat to match the positions
of the holes in the mounting brackets 1.
3. Insert the canoe clips 3 from the rear of the
floor mat and install the DSH920S.
∗ There are three mounting holes on each side
of the DSH920S. Select the appropriate holes
to match to the installation location.
(Installing the unit under the driver’s seat)
Connection Example and Identification of Parts
English
1 CeNET input/output terminal
Connect to the main unit or CD/MD changer
using the CeNET cable 4.
∗ Equipment to this terminal is not specified.
2 RCA pin terminal
This terminal is not used for this unit. Use it
when the DSC920S (sold separately) is connected.
3 SATELLITE antenna terminal
Connect to the SIRIUS antenna (SATELLITE) cable, (sold separately).
4 TERRESTRIAL antenna terminal
Connect to the SIRIUS antenna (TERRESTRIAL) cable, (sold separately).
5 CONTROLLER terminal
This terminal is not used for this unit. Use it
when the DSC920S (sold separately) is connected.
6 POWER SUPPLY terminal
This terminal is not used for this unit. Use it
when the DSC920S (sold separately) is connected.
7 CeNET/STANDALONE switch
This switch is used to select the setting position when the CeNET connection is made or
the DSC920S (sold separately) is connected
to this unit (STAND ALONE).
2
Bottom view of the unit
1
CeNET cable
SIRIUS
antenna cable
56
374
DSH920S 11
Page 12

How to Make Wirings
English
1. CeNET Cable
Orient the CeNET cable in the direction
shown in the figure and insert it until it is
locked in position. To remove the CeNET
cable, pull it by lightly grasping the slide cap
A in your fingers.
2. SIRIUS antenna
Connect a SIRIUS antenna (sold separately)
to the SIRIUS antenna terminal.
3
3. CeNET/STAND ALONE switch
Be sure to check to see if the select switch
located on the back side of the main unit is
set to the “CeNET” position.
Also, set it to the “STAND ALONE” position
when the SIRIUS controller (DSC920S), sold
separately, is used.
4
When removing, extract while keep pressing
the portion B.
Note:
• Be sure to turn the main unit power off when the
SIRIUS antenna cable is connected.
• Do not give a strong shock to the antenna con-
nector.
12 DSH920S
Page 13

6.SYSTEM EXAMPLES
■
Example 1
67
1
English
3
4
2
5
1 Main unit compatible with CeNET connection
2 CD changer compatible with CeNET connec-
tion
3 CeNET cable (provided with the DSH920S)
Using this cable, connect the DSH920S to
the main unit.
Note:
• The longest wiring length of the CeNET cable is less than 20m. When you connect the CeNET cable, be
careful not to execeed the wiring length of 20m.
4 CeNET cable (provided with the CD
changer)
Using this cable, connect the DSH920S to
the CD changer.
5 SIRIUS antenna (sold separately)
6 Front speakers
7 Rear speakers
DSH920S 13
Page 14

■
Example 2
English
1
4
3
6
5
2
1 SIRIUS controller (DSC920S, sold sepa-
rately)
2 Connection cable (provided with the
DSH920S)
3 Audio systems other than those compatible
with the CeNET connection
Connect the SIRIUS satellite radio output to
the external input terminal.
14 DSH920S
4 RCA pin (audio) cable (sold separately)
5 SIRIUS antenna (sold separately)
6 Front speakers
Page 15

7.SPECIFICATIONS
English
Digital radio section
Receiving frequencies:
Satellite : 2322.293/2330.207 MHz
Terrestrial : 2326.250 MHz
Audio
Signal to noise ratio : 95 dB
Distortion : 0.01 % (1kHz)
Note:
• Specifications and design are subject to change without notice for further improvement.
General
Power supply voltage:
14.4 V DC (10.8 to 15.6 V allowable),
negative ground
Power consumption:
Less than 1 A (with antenna)
Antenna current limit ; 0.2 A
Weight : 0.55 kg
Dimensions : 178 (W) × 30 (H) × 130 (D) mm
DSH920S 15
Page 16

16 DSH920S
 Loading...