

Page 1
Owner’s manual
Mode d’emploi
Manual de instrucciones
HIGH-FIDELITY AM/FM CD PLAYER
•
LECTEUR AM/FM CD HAUTE FIDELITE
•
REPRODUCTOR DE CD CON AM/FM DE ALTA FIDELIDAD
Page 2

Thank you for purchasing this Clarion product.
English
∗ Please read this owner’s manual in its entirety before operating this equipment.
∗ After reading this manual, be sure to keep it in a handy place (e.g., glove compartment).
∗ Check the contents of the enclosed warranty card and keep it carefully with this manual.
∗ This manual includes the operating procedures of the CD changer and TV tuner connected via the
CeNET cable. The CD changer and TV tuner have their own manuals, but no explanations for operating them are described.
Contents
1. FEATURES...................................................................................................................................... 2
2. PRECAUTIONS .............................................................................................................................. 3
Handling Compact Discs ................................................................................................................. 4
Digital Wiring ................................................................................................................................... 4
3. CONTROLS .................................................................................................................................... 5
4. NOMENCLATURE .......................................................................................................................... 6
Names of the Buttons and their Functions ...................................................................................... 6
Major Button Operations when External Equipment is Connected to this Unit ................................ 7
Display Items ................................................................................................................................... 8
5. REMOTE CONTROL ....................................................................................................................... 9
Inserting the Batteries ...................................................................................................................... 9
Functions of Remote Control Unit Buttons .................................................................................... 10
6. OPERATIONS ................................................................................................................................11
Basic Operations ............................................................................................................................ 11
Radio Operations ........................................................................................................................... 13
CD Operations ............................................................................................................................... 14
Operations Common to Each Mode .............................................................................................. 16
7. OPERATIONS OF ACCESSORIES .............................................................................................. 25
CD Changer Operations ................................................................................................................ 25
TV Operations ................................................................................................................................ 27
8. IN CASE OF DIFFICULTY ............................................................................................................ 29
9. ERROR DISPLAYS ....................................................................................................................... 30
10. SPECIFICATIONS ......................................................................................................................... 30
APPENDIX : TIME ALIGNMENT LIST ................................................................................................ 32
MEMO : SOUND SETUP MEMO......................................................................................................... 34
1. FEATURES
• 96kHz High sampling conversion sound
• Burr Brown DACs / 0.5dB STEP Burr Brown Volume
• 6N 8ch / MAX 8 Volt Gold Plated RCA Line Level Output and 4-Channel RCA AUX Input with 3 Level
Adjustments
• 0.7cm STEP Time alignment / 4WAY Cross-Over / 5-BAND Parametoric EQ
• Direct (Front+Rear+Non-fader) / Standard (Front2Way+Rear+SUB) / 4-Way Multi Mode
• Alminum Upper Covered DC-DC converter
• CeNET with Balanced Audio Line Transmission and Dynamic Noise Canceling
• IR Remote Control Included
2 DRZ9255
Page 3
2. PRECAUTIONS
1. When the inside of the car is very cold and the
player is used soon after switching on the
heater moisture may form on the disc or the
optical parts of the player and proper playback
may not be possible. If moisture forms on the
disc, wipe it off with a soft cloth. If moisture
forms on the optical parts of the player, do not
use the player for about one hour. The
condensation will disappear naturally allowing
normal operation.
This equipment has been tested and found to
comply with the limits for a Class B digital device,
pursuant to Part 15 of the FCC Rules.
These limits are designed to provide reasonable
protection against harmful interference in a
residential installation.
This equipment generates, uses, and can radiate
radio frequency energy and, if not installed and
used in accordance with the instructions, may
cause harmful interference to radio
communications. However, there is no guarantee
that interference will not occur in a particular
installation.
If this equipment does cause harmful interference
to radio or television reception, which can be
determined by turning the equipment off and on,
the user is encouraged to consult the dealer or
an experienced radio/TV technician for help.
MODEL
12V GROUND
AM 530-1710kHz/FM 87.9-107.9MHz
THIS DEVICE COMPLIES WITH PART 15 OF THE FCC RULES.
OPERATION IS SUBJECT TO THE FOLLOWING TWO CONDITIONS:
(1) THIS DEVICE MAY NOT CAUSE HARMFUL INTERFERENCE, AND
(2) THIS DEVICE MUST ACCEP T ANY INTERFERENCE RECEIVED,
INCLUDING INTERFERENCE THAT MAY CAUSE UNDESIRED
OPERATION.
THIS PRODUCTION COMPLIES WITH DHHS RULES 21 CFR
SUBCHAPTER J APPLICABLE AT DATE OF MANUFACTURE.
CLARION CO.,LTD.
50 KAMITODA,TODA-SHI,SAITAMA-KEN,JAPAN
MANUFACTURED:
SERIAL No.
PE-
Clarion Co.,Ltd.
MADE IN
2. Driving on extremely bumpy roads which
cause severe vibration may cause the sound
to skip.
3. This unit uses a precision mechanism. Even in
the event that trouble arises, never open the
case, disassemble the unit, or lubricate the
rotating parts.
USE OF CONTROLS, ADJUSTMENTS, OR
PERFORMANCE OF PROCEDURES OTHER
THAN THOSE SPECIFIED HEREIN, MAY
RESULT IN HAZARDOUS RADIATION
EXPOSURE.
THE COMPACT DISC PLAYER and MINI DISC
PLAYER SHOULD NOT BE ADJUSTED OR
REPAIRED BY ANYONE EXCEPT PROPERLY
QUALIFIED SERVICE PERSONNEL.
CHANGES OR MODIFICATIONS NOT
EXPRESSLY APPROVED BY THE
MANUFACTURER FOR COMPLIANCE COULD
VOID THE USER’S AUTHORITY TO OPERATE
THE EQUIPMENT.
INFORMATION FOR USERS:.
CHANGES OR MODIFICATIONS TO THIS
PRODUCT NOT APPROVED BY THE
MANUFACTURER WILL VOID THE WARRANTY
AND WILL VIOLATE FCC APPROVAL.
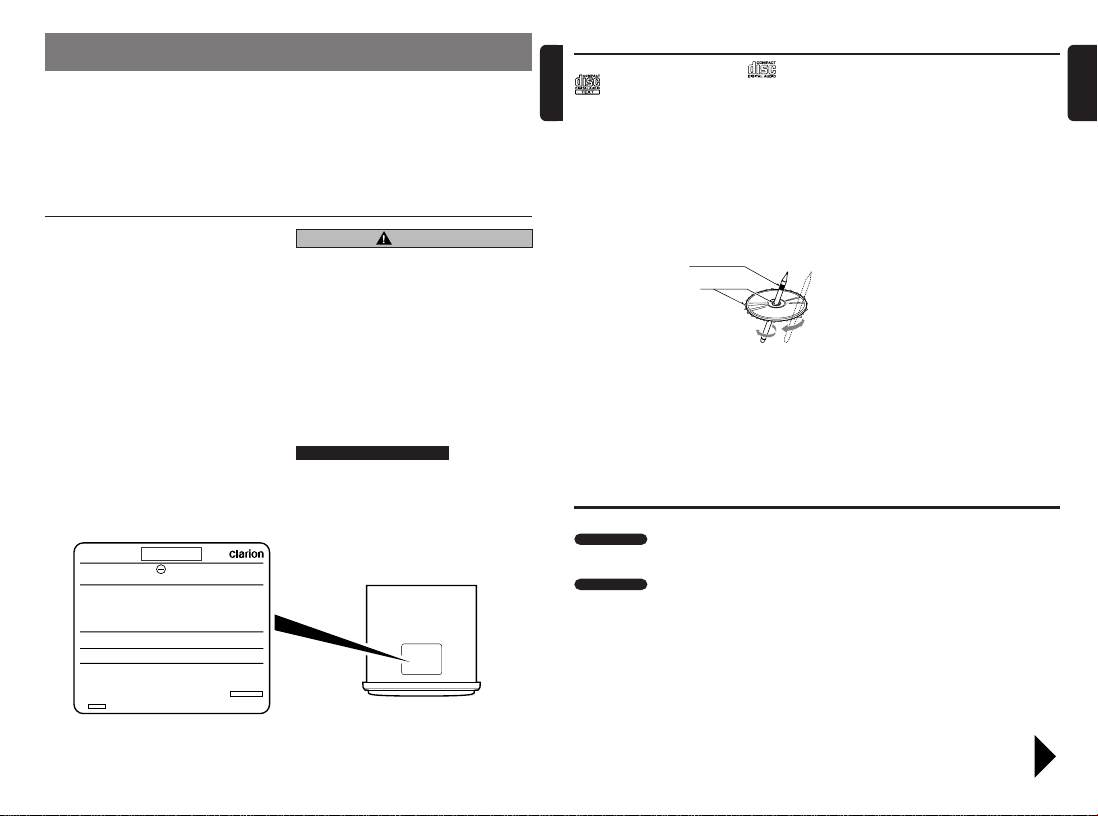
CAUTION
Bottom View of Source Unit
Handling Compact Discs
English
Use only compact discs bearing the or
mark.
Do not play heart-shaped, octagonal, or other
specially shaped compact discs.
Some CDs recorded in CD-R/CD-RW mode
may not be usable.
Handling
•
Compared to ordinary music CDs, CD-R and
CD-RW discs are both easily affected by high
temperature and humidity and some of CD-R
and CD-RW discs may not be played. Therefore,
do not leave them for a long time in the car.
• New discs may have
some roughness
around the edges. If
such discs are used,
the player may not
work or the sound
may skip. Use a ballpoint pen or the like
to remove any
roughness from the edge of the disc.
Never stick labels on the surface of the compact
•
disc or mark the surface with a pencil or pen.
• Never play a compact disc with any
cellophane tape or other glue on it or with
peeling off marks. If you try to play such a
compact disc, you may not be able to get it
back out of the CD player or it may damage
the CD player.
Ball-point pen
Roughness
Digital Wiring
About Reset
Digital Output
•
When a 5.1ch surround decoder is connected,
switch the set to direct mode.
Digital Intput
• When the optical digital cable is connected to
or disconnected from this set later, press the
function button while holding down direct
buttons [1] and [6] with the power OFF to
perform a system check.
Though pressing the reset button also
performs a system check, the contents of
memory will be erased completely in this
case.
Do not use compact discs that have large
•
scratches, are misshapen, cracked, etc. Use of
such discs may cause misoperation or damage.
•
To remove a compact disc from its storage case,
press down on the center of the case and lift the
disc out, holding it carefully by the edges.
• Do not use commercially available CD
protection sheets or discs equipped with
stabilizers, etc. These may damage the disc or
cause breakdown of the internal mechanism.
Storage
• Do not expose compact discs to direct sunlight
or any heat source.
• Do not expose compact discs to excess
humidity or dust.
• Do not expose compact discs to direct heat
from heaters.
Cleaning
• To remove fingermarks and dust, use a soft
cloth and wipe in a straight line from the center
of the compact disc to the circumference.
• Do not use any solvents, such as commercially
available cleaners, anti-static spray, or thinner
to clean compact discs.
• After using special compact disc cleaner, let
the compact disc dry off well before playing it.
• When the digital input of a DVD changer is
connected, read the Owner's Manual provided
with the DVD changer, and change "AUDIO
OUT" in the "GENERAL SET UP" menu to
"SPDIF/PCM".
When "AUDIO OUT" is set to "SPDIF/RAW",
DIGITAL/dts audio is not output. Also, noise is
sometimes output.
English
Be sure to unfold and read the next page. / Veuillez déplier et vous référer à la page suivante.
DRZ9255 38 DRZ9255 DRZ9255 4
Cerciórese de desplegar y de leer la página siguiente.
Page 4
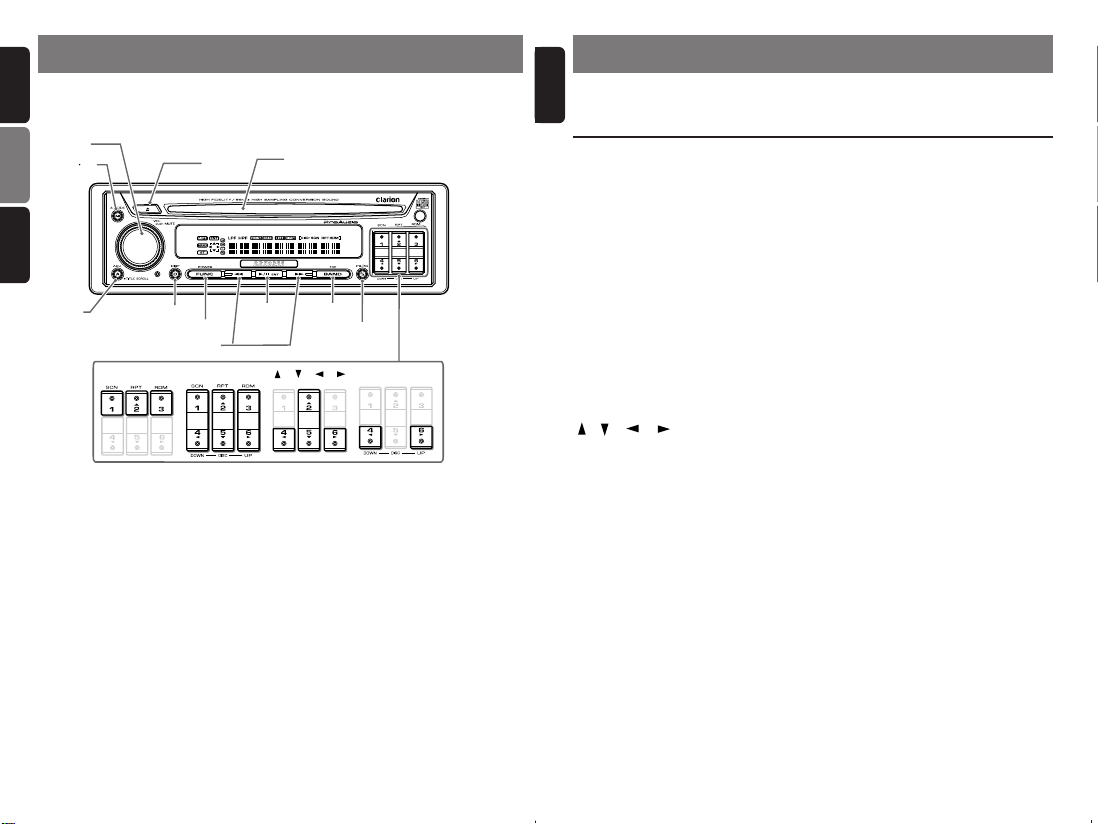
English
3.CONTROLS / LES COMMANDES / CONTROLES
Source unit / Appareil pilote / Unidad fuente
Français
[
]
ROTARY
[
A M
]
[Q]
[
CD SLOT
]
Español
[
]
[
ADJ
]
[
SCN][RPT][RDM
[
]
DISP
[
[A], [D]
]
FUNC
[
DIRECT
[s]
]
]
BAND
[
]
P/A
[
], [
], [
], [
], [UP] [
]
DOWN
English
4. NOMENCLATURE
Note:
• Be sure to read this chapter referring to the front diagrams of chapter “3. CONTROLS” on page 5 (unfold).
Names of the Buttons and their Functions
[ROTARY] knob
• Adjust the volume by turning the knob
clockwise or counterclockwise.
• Mute the sound. When the knob is pressed
and held for 1 second or longer, the volume is
changed from 1db steps to 0.5db steps.
[Q] button
• Eject a CD when it is loaded into the unit.
[CD SLOT]
• CD insertion slot.
[SCN] button
• Perform scan play for 10 seconds of each
track while in the CD mode.
[RPT] button
• Repeat play while in the CD mode.
[RDM] button
• Perform random play while in the CD mode.
[DIRECT] buttons
• Store a station into memory or recall it
directly while in the radio mode.
[ ], [ ] , [ ] , [ ] buttons
• Select items in the Adjust mode.
[UP], [DOWN] buttons
• Select the disc.
[P/A] button
• Perform preset scan while in the radio mode.
When the button is pressed and held, auto
store is performed.
[BAND] button
• Switch the band, or seek tuning or manual
tuning while in the radio mode.
• Play a first track while in the CD mode.
[A], [D] buttons
• Select a station while in the radio mode or
select a track when listening to a CD. These
buttons are used to make various settings.
• Press and hold the button for 1 second or
longer to switch the fast-forward/fastbackward.
[s] button
• Play or pause a CD while in the CD mode.
[FUNC] button
• Press the button to turn on the power.
Press and hold the button for 1 second or
longer to turn off the power.
• Switches the operation mode among the
radio mode, etc.
[DISP] button
• Switch the display indication (Main display,
Sub display, Clock display).
[ADJ] button
• Press the button to enter the adjust mode.
• When the button is pressed and held for 1
second or longer, the title is scrolled.
[A-M] button
• Use the button to switch to the audio mode
(bass/treble, balance/fader)
• Hold down for at least one second to turn the
display OFF.
Note: Be sure to unfold this page and refer to the front diagrams as you read each chapter.
Remarque: Veuillez déplier cette page et vous référer aux schémas quand vous lisez chaque chapitre.
Nota: Cuando lea los capítulos, despliegue esta página y consulte los diagramas.
Page 5

Major Button Operations when External Equipment is Connected to this Unit
● When the CD/DVD changer is
connected
∗ For details, see the section “CD changer
operations”. For the DVD changer, refer to
the Owner’s Manual provided with the
DVD changer.
[SCN] button
• Perform scan play for 10 seconds of each
track. Disc scan play is performed when the
button is pressed and held.
[RPT] button
• Perform repeat play. When this button is
pressed and held, disc repeat play is
performed.
[RDM] button
• Perform random play. Also perform disc
random play when the button is pressed and
held.
[UP], [DOWN] buttons
• Select the disc.
[BAND] button
• Move the next disc in increasing order.
[A], [D] buttons
• Select a track when listening to a disc.
• Press and hold the button for 1 second or
longer to switch the fast-forward/fastbackward.
[s] button
• Play or pause a CD or DVD.
[DISP] button
• Press and hold the button to switch between
the user titles or track titles, etc. while in the
CD changer mode.
● When the TV is connected
∗ For details, see the section “TV
operations”.
[DIRECT] buttons
• Store a station into memory or recall it
directly.
[P/A] button
• Perform preset scan while in the TV mode.
When the button is pressed and held, auto
store is performed.
[BAND] button
• Switch the band.
• Press and hold the button to switch between
seek tuning or manual mode.
[A], [D] buttons
• Select a station.
[s] button
• Switch the TV picture mode or VTR (external)
picture mode.
English
DRZ9255 75 DRZ9255 6 DRZ9255
Page 6
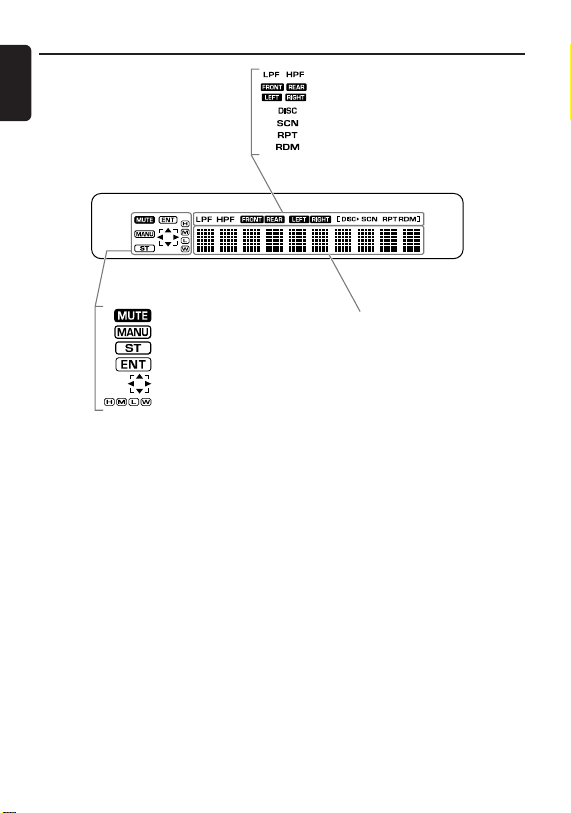
Display Items
English
: Filter indication
: Speaker indication
: Disc indication
: Scan indication
: Repeat indication
: Random indication
: Mute indication
: Manual indication
: Stereo indication
: Enter indication
: Cursor indication
: Range adjustment indication
Operation status indication
Titles, frequency, clock, etc. are displayed.
Page 7

5. REMOTE CONTROL
English
Receiver for remote control unit
Operating range: 30˚ in all directions
Signal transmitter
Remote control unit
[
]
FNC
[
]
BND
[
],[ ]
[
]
MUTE
[
]
PS/AS
Inserting the Batteries
1. Turn the remote control over, and remove the
rear cover with a sharp-pointed object while
pressing in the direction of the arrow.
2.Insert batteries (CR2025) making sure that they
face the directions shown in the figure.
3. Press in the cover until you hear it click into place.
Notes:
Using batteries improperly can cause them to
explode. Take note of the following points:
• When replacing batteries, replace both batteries
with new ones.
• Do not short-circuit, disassemble or heat batteries.
• Do not dispose of batteries into fire or flames.
• Dispose of spent batteries properly.
Rear cover
CR2025 Battery
[
SCN
[
RPT
[
RDM
[
DISC
[
[
DISP
[
[
ADJ
[
[
A-M
[
]
]
]
]
],[
]
]
]
]
],[
]
]
], [
]
Rear side
DRZ9255 9
Page 8

Functions of Remote Control Unit Buttons
English
Mode
Button
[FNC]
[BND]
[ ] , [ ]
[ ] , [ ]
[ ]
[MUTE]
[DISP]
[SCN]
[1]
[RPT]
[2]
[RDM]
[3]
[DISC]
[4][6]
[5]
[ ][ ][ ][ ]
[PS/AS]
[ADJ]
[A-M]
∗ Some of the corresponding buttons on the main unit and remote control unit have different functions.
Radio CD
Switches among radio, CD, CD changer, DVD changer, TV and AUX.
Switches reception
band.
Increases and decreases volume (in all modes).
Tunes in the desired
station.
No function.
Turns mute on and off. Holding down the button for about one second changes the volume from 1dB
steps to 0.5dB steps.
Switches among main display, sub display, clock display.
Recalls the station in
the memory.
When pressed and
held for 1 second:
Manual memory.
Select items in the Adjust mode.
Preset scan.
When pressed and
held for 2 seconds:
Auto store.
Enters the adjust
mode.
Adjusts the tone, the balance, and the fader.
When pressed and held for 1 second: Display off.
Plays the first track.
Top play.
Moves tracks up and down.
When pressed and held for 1 second:
Fast-forward/fast-backward.
Switches between playback and pause.
Scan play.
Repeat play.
Random play.
No function.
No function.
Scan play.
Enters the adjust
mode.
When pressed and
held for 1 second:
Title scroll.
CD changer
DVD changer
Moves the next disc in
increasing order.
Scan play.
When pressed and
held for 1 second:
Disc scan play.
Repeat play.
When pressed and
held for 1 second:
Disc repeat play.
Random play.
When pressed and
held for 1 second:
Disc random play.
[4]:Disk down.
[6]:Disk up.
No function.
Scan play.
Enters the adjust
mode.
When pressed and
held for 1 second:
Title scroll.
(This function is only
for CD changer.)
Switches reception
band.
Tunes in the desired
TV station.
Switches between TV
and VTR.
Recalls the station in
the memory.
When pressed
and held for 1 second:
Manual memory.
Preset scan.
When pressed and
held for 2 seconds:
Auto store.
Enters the adjust
mode.
TV
6. OPERATIONS
Note:Be sure to read this chapter referring to the front diagrams of
Basic Operations
CAUTION
Be sure to lower the volume before
switching off the unit power or the ignition
key. The unit remembers its last volume
setting. If you switch the power off with the
volume up, when you switch the power back
on, the sudden loud volume may hurt your
hearing and damage the unit.
Turning on/off the power
Note:
• Be careful about using this unit for a long time
without running the engine. If you drain the car’s
battery too far, you may not be able to start the
engine and this can reduce the service life of the
battery.
1. Press the [FUNC] button.
2. The illumination and display on the unit light
up. The unit automatically remembers its last
operation mode and will automatically switch
to display that mode.
3. Press and hold the [FUNC] button for 1
second or longer to turn off the power for the
unit.
Note:
• System check
The first time this unit is turned on after the wire
connections are completed, it must be checked
what equipment is connected. When the power is
turned on, “SYSTEM CHK” and “Push POWER”
appear in the display alternately, so press the
[FUNC] button. The system check starts within
the unit. When the system check is complete,
press the [FUNC] button again.
Selecting a mode
1. Press the [FUNC] button to change the
operation mode.
2. Each time you press the [FUNC] button, the
operation mode changes in the following
order:
Radio mode ➜CD mode ➜ CD changer
mode ➜ DVD changer mode ➜ TV mode ➜
AUX mode ➜ Radio mode...
∗ External equipment not connected with
CeNET is not displayed.
English
chapter “3. CONTROLS” on page 5 (unfold).
Adjusting the volume
Turning the [ROTARY] knob clockwise increases
the volume; turning it counterclockwise
decreases the volume.
∗ The volume level is from ---- (minimum) to +6dB
(maximum).
∗ Holding down the [ROTARY] knob switches the
volume from 1dB steps to 0.5dB steps.
Mute the sound
To mute the volume during playback, press the
[ROTARY] knob.
Switching the display
Press the [DISP] button to select the desired
display.
Each time you press the [DISP] button, the
display switches in the following order:
Main display
Sub display
Clock display
Main display
∗ Once selected, the preferred display becomes
the display default. When a function
adjustment such as volume is made, the
screen will momentarily switch to that
function’s display, then revert back to the
preferred display several seconds after the
adjustment.
10 DRZ9255
DRZ9255 11
Page 9

Basic Operations
English
Turning on/off the display
You can turn the display ON/OFF by holding the
[A-M] button down for at least one second.
You can also turn the display ON by pressing
the [DISP] button while the display is OFF.
Adjusting the tone
Press the [A-M] button and select the item to
adjust. Each time you press the [A-M] button,
the item changes in the following order:
∗ "BASS" and "TREB" are displayed when "BASS/
TREB" are selected at EQ SELECT.
● When “STD” is set
“SW-VOL”
“BAL” ➜ “FADER” ➜ Last function mode.
● When “DIRECT” is set
“N-FAD VOL” ➜ “BAL” ➜ “FADER” ➜
Last function mode.
● When “MULTI” is set
“SW-VOL”
“BAL” ➜ Last function mode.
∗1
The item can be adjusted when the sub-woofer
setting is not set to "OFF".
∗2
The item can be adjusted when "EQ SELECT" in
the Adjust mode is set to "BASS/TREB".
∗1
➜ “BASS”
∗1
➜ “BASS”
∗2
➜ “TREBLE”
∗2
➜ “TREBLE”
Adjusting the volume of subwoofer/non-fader output
These items can be adjusted when the subwoofer/non-fader setting is "ST" (stereo) or
"MONO" (monaural).
∗ The factory default setting is "0.0 dB".
1. Press the [A-M] button to select "SW-VOL"
or "N-FAD VOL".
∗ Select "SW-VOL" when the Audio mode is the
Standard mode or the Multi mode, and "N-
FAD VOL" when the Audio mode is the Direct
mode.
2. Press the [ ] or [ ] button to set the output
volume.
∗ The adjustment range is -10.0 dB to +10.0 dB
(0.5 dB steps).
3. Press the [A-M] button several times to
return to the previous mode.
Radio Operations
Adjusting the bass/treble
This function is used to set the tone in more
detail for listening.
• The tone can be adjusted when the Equalizer
mode is set to "BASS/TREB".
∗ This can be adjusted when the Audio mode is the
Standard mode or the Multi mode.
∗ The factory default setting is "0 dB".
1. Press the [A-M] button to select "BASS" or
"TREB".
2. Press the [
output volume.
∗2
➜
∗ The adjustment range is -12 dB to +12 dB
3. Press the [A-M] button several times to
return to the previous mode.
] or [ ] button to adjust the
FM reception
For enhanced FM performance the
tuner includes signal actuated stereo control,
Enhanced Multi AGC, Impulse noise reduction
curcuits and Multipath noise reduction circuits.
Listening to the radio
1. Press the [FUNC] button and select the radio
mode. The frequency appears in the display.
2. Press the [BAND] button and select the radio
band. Each time the button is pressed, the
radio reception band changes in the following
order:
FM1 ➜ FM2 ➜ FM3 ➜ AM ➜ FM1...
3. Press the [A] or [D] button to tune in the
desired station.
Tuning
Adjusting the balance/fader
• "FADER" (fader) can be adjusted when the
∗2
➜
Audio mode is the Standard mode or the
Direct mode.
∗ The factory default setting is "0".
1. Press the [A-M] button to select "BAL" or
"FADER".
2. Press the [
volume.
●Adjusting the balance (volume of the left
and right speakers)
To enhance the left side, press the [
To enhance the right side, press the [
button.
∗ The adjustment range is L13 to R13.
●Adjusting the fader (volume of the front
and rear speakers)
To enhance the rear side, press the [
To enhance the front side, press the [
button.
∗ The adjustment range is R12 to F12.
3. Press the [A-M] button several times to
return to the previous mode.
] or [ ] button to adjust the
] button.
]
] button.
]
There are 3 types of tuning mode available, seek
tuning, manual tuning and preset tuning.
Seek tuning
1. Press the [BAND] button and select the
desired band (FM or AM).
∗ If “MANU” is lit in the display, press and hold
the [BAND] button for 1 second or longer.
“MANU” in the display goes off and seek
tuning is now available.
2. Press the [A] or [D] button to
automatically seek a station.
When the [D] button is pressed, the station
is sought in the direction of higher
frequencies; if the [A] button is pressed,
the station is sought in the direction of lower
frequencies.
Manual tuning
There are 2 ways available: Quick tuning and
step tuning.
When you are in the step tuning mode, the
frequency changes one step at a time. In the
quick tuning mode, you can quickly tune the
desired frequency.
1. Press the [BAND] button and select the
desired band (FM or AM).
∗ If “MANU” is not lit in the display, press and
hold the [BAND] button for 1 second or longer.
“MANU” is lit in the display and manual tuning
is now available.
2. Tune in a station.
● Quick tuning:
Press and hold the [A] or [D] button for 1
second or longer to tune in a station.
● Step tuning:
®
Press the [A] or [D] button to manually
tune in a station.
Recalling a preset station
A total of 24 preset positions (6-FM1, 6-FM2, 6FM3, 6-AM) exist to store individual radio
stations in memory. Pressing the corresponding
[DIRECT] button recalls the stored radio
frequency automatically.
1. Press the [BAND] button and select the
desired band (FM or AM).
2. Press the corresponding [DIRECT] button to
recall the stored station.
∗ Press and hold one of the [DIRECT] buttons
for 2 seconds or longer to store that station
into preset memory.
Manual memory
1. Select the desired station with seek tuning,
manual tuning or preset tuning.
2. Press and hold one of the [DIRECT] buttons
for 2 seconds or longer to store the current
station into preset memory.
Auto store
Auto store is a function for storing up to 6
stations that are automatically tuned in
sequentially. If 6 receivable stations cannot be
received, a previously stored station remains
unoverwritten at the memory position.
1. Press the [BAND] button and select the
desired band (FM or AM).
2. Press and hold the [P/A] button for 2
seconds or longer. The stations with good
reception are stored automatically to the
preset channels.
∗ If auto store is performed in the FM bands, the
stations are stored in FM3 even if FM1 or FM2
was chosen for storing stations.
Preset scan
Preset scan receives the stations stored in
preset memory in order. This function is useful
when searching for a desired station in memory.
1. Press the [P/A] button.
2. When a desired station is tuned in, press the
[P/A] button again to continue receiving that
station.
Note:
• Be careful not to press and hold the [P/A] button
for 2 seconds or longer, otherwise the auto store
function is engaged and the unit starts storing
stations.
English
12 DRZ9255
DRZ9255 13
Page 10

CD Operations
English
Loading a CD
Insert a CD into the center of the CD SLOT with
the labeled side facing up. “LOADING” appears
in the display, the CD enters into the slot, and
the play starts.
For CD (12 cm) For single CD (8 cm)
CD SLOT
Notes:
• Never insert foreign objects into the CD SLOT.
• If the CD is not inserted easily, there may be
another CD in the mechanism or the unit may
require service.
• Discs not bearing the
CD-ROMs cannot be played by this unit.
• Some CDs recorded in CD-R/CD-RW mode may
not be usable.
Loading 8 cm compact discs
∗ No adapter is required to play an 8 cm CD.
∗ Insert the 8 cm CD into the center of the insertion
slot.
or mark and
Listening to a CD already inserted
Press the [FUNC] button to select the CD mode.
Play starts automatically. If no CD is loaded in
the unit, “NO DISC” appears in the display.
Pausing play
1. Press the [s] button to pause play.
“PAUSE” appears in the display.
2. To resume CD play, press the [s] button
again.
Displaying CD titles
This unit can display title data for CD-text CDs
and user titles input with this unit.
1. Press the [DISP] button to display the title.
2. Each time you press and hold the [DISP]
button for 1 second or longer, the title
display changes in the following order:
CD-text title (disc) ➜ Artist name ➜ CD-text
title (track) ...
Note:
• If the CD playing is not a CD-text CD or no user
title has been input, “NO TITLE” appears in the
display.
Ejecting a CD
1. Press the [Q] to eject the CD. Take it out
from the ejected position.
Note:
• If you force a CD into before auto reloading, the
CD can be damaged.
∗ If a CD (12 cm) is left in the ejected position for 15
seconds, the CD is automatically reloaded (Auto
reload).
∗ 8 cm CDs are not auto reloaded. Be sure to remove
it when ejected.
Selecting a track
● Track-up
1. Press the [D] button to move ahead to the
beginning of the next track.
2. Each time you press the [D] button, the
track advances ahead to the beginning of the
next track.
● Track-down
1. Press the [A] button to move back to the
beginning of the current track.
2. Press the [A] button twice to move to the
beginning of the previous track.
Fast-forward/fast-backward
● Fast-forward
Press and hold the [D] button for 1 second or
longer.
● Fast-backward
Press and hold the [A] button for 1 second or
longer.
Top function
The top function resets the CD player to the first
track of the disc. Press the [BAND] button to
play the first track (track No. 1) on the disc.
Scan play
The scan play locates and plays the first 10
seconds of each track on a disc automatically.
This function continues on the disc until it is
cancelled.
∗ The scan play is useful when you want to select a
desired track.
1. Press the [SCN] button to start scan play.
“SCN” lights in the display.
2. To cancel the scan play, press the [SCN]
button again. “SCN” goes off from the
display and the current track continues to
play.
Repeat play
The repeat play continuously plays the current
track. This function continues automatically until
it is cancelled.
1. Press the [RPT] button. “RPT” lights in the
display and the current track is repeated.
2. To cancel the repeat play, press the [RPT]
button again. “RPT” goes off from the display
and normal play resumes.
Random play
The random play selects and plays individual
tracks on a disc in no particular order. This
function continues automatically until it is
cancelled.
1. Press the [RDM] button. “RDM” lights in the
display, an individual track is selected
randomly and play begins.
2. To cancel the random play, press the [RDM]
button again. “RDM” goes off from the display
and normal play resumes.
CD Operations
English
14 DRZ9255
DRZ9255 15
Page 11

Operations Common to Each Mode
English
Setting the clock
This unit displays the time when the car engine
is running (ACC ON).
The clock is displayed in 12-hour format.
• When a navigation system is connected, the
clock cannot be adjusted as clock data is sent
from the navigation system.
Selecting the sampling frequency
(SAMPLING)
●About the sampling frequency
You can switch between 96 kHz and 48 kHz as
the sampling frequency.
When the sampling frequency is set to 96 kHz,
high band spread, depth of tones and
transparency of sound are improved.
1. Press the [ADJ] button. The previously
adjusted item "CLOCK", for example, is
displayed on the title display, and the mode
changes to the Adjust mode.
2. Press the [
] or [ ] button to select
∗ The factory default setting is "fs=96 kHz".
1. Press the [ADJ] button.
2. Press the [
"CLOCK".
3. Press the [s] button. The time at
3. Press the [
adjustment (e.g. "PM 2:20") is displayed, and
the mode changes to the Clock setup mode.
4. Press the [ADJ] button to return to the
Blinking
Selecting the audio mode (MODE)
* The clock is not adjusted if you press any
other button while you are setting the clock.
4. Press the [ ] or [ ] button to select hours
or minutes. Items that are blinking can be
adjusted.
5. Press the [
] or [ ] button to set the setting
for the item.
6. Press the [s] button.
You will hear a short high-pitched sound, and
the clock will be set.
Note:
• You cannot set the clock when it is displayed with
the power turned OFF.
• Set the clock again if you remove the battery for
inspection or repairs.
7. Press the [ADJ] button to return to the
previous mode.
∗ The factory default setting is "STANDARD".
●Standard mode <STANDARD>/Multi mode
This is used to make various sound adjustments
for playback. For details, see "About the
Standard mode and Multi mode" (page 18)
●Direct mode <DIRECT>
This is used to playback tones as they are
without adjusting the tones of this unit. The
configuration of the speaker system becomes
"front (2ch) + rear (2ch) + non-fader (2ch)."
1. Press the [ADJ] button.
2. Press the [
3. Press the [
4. Press the [ADJ] button to return to the
"SAMPLING".
] or [ ] button to select
] or [ ] button to select
"fs=96kHz" or "NORMAL" (fs=48kHz).
previous mode.
<MULTI>
] or [ ] button to select
"MODE".
] or [ ] button to select
"STANDARD", "DIRECT" or "MULTI".
previous mode.
Adjusting the filter (FILTER/XOVER)
The filter can be adjusted for each speaker. For
details, see "About filter settings" (page 18).
∗ The filter can be adjusted when the Audio mode is
the Standard mode or the Multi mode.
1. Press the [ADJ] button.
2. Press the [
"SOUND".
3. Press the [s] button.
4. Press the [
"FILTER" or "X-OVER".
∗ Select "FILTER" when the Audio mode is the
Standard mode, and "X-OVER" when the
Audio mode is the Multi mode.
5. Press the [ ] or [ ] button to select "
FRONT" or " HIGH".
∗ Select " FRONT" when the Audio mode is
the Standard mode, and "
Audio mode is the Multi mode.
6. Press the [ ] or [ ] button to select the
speaker to adjust.
∗ The mute function of a selected speaker can
be turned ON/OFF by pressing the [ROTARY]
knob while the speaker is selected.
Each press of the buttons switches the setting
as follows:
In the Standard mode:
FRONT
FRONT
REAR
SUB-W
] or [ ] button to select
] or [ ] button to select
HIGH" when the
In the Multi mode:
HIGH
MID
LOW
SUB-W
Operations Common to Each Mode
7. Press the [
8. Press the [
speaker adjustment item. Each press of the
buttons switches the adjustment item.
fc LPF (filter frequency of low-pass filter)*
SLP LPF (filter slope of low-pass filter)*
fc HPF (filter frequency of high-pass filter)*
SLP HPF (filter slope of high-pass filter)*
G (gain)*
PHASE (phase)*
* Sometimes this is not displayed depending on the
selected speaker.
9. Press the [s] button. The setting value
blinks.
10.Press the [
setting.
∗ For details of the adjustment ranges of each
adjustment item, see "About filter settings"
(page 18).
11.When you have finished the adjustment,
press the [s] button to return to the
screen in step 8. This sets the setting value.
12.Repeat steps 8 to 11 to adjust the
adjustment items for the selected speaker.
13.When you have finished the adjustment,
press the [
in step 6.
14.Repeat steps 6 to 13 to adjust the filter of
each speaker.
15.Press the [ADJ] button to return to the
previous mode.
] button.
] or [ ] button to select the
Blinking
] or [ ] button to adjust the
] button to return to the screen
English
16 DRZ9255
DRZ9255 17
Page 12

Operations Common to Each Mode
Gain(G)
Filter Frequency(fc)
1oct
-18dB
-12dB
-6dB
English
About the Standard mode and Multi
mode
These two modes can be used to make the
following various sound adjustments for playing
back music sources:
• Setting of the filter (high-pass filter and low-pass
filter) frequency for each speaker
• Tone adjustment by P.EQ (parametric equalizer) or
BASS/TREB (bass/treble)
• Position setting by TIME ALIGN (time alignment)
• Sub-woofer "ST" (stereo), "MONO" (monaural) and
"OFF"
Select the Standard mode or the Multi mode
according to your speaker configuration.
• Standard mode: FRONT(2ch) + FRONT(2ch)
+ REAR(2ch) +
• Multi mode:
LOW(2ch) + SUB-W(2ch)
●About filter settings
The following filters can be set for each speaker:
• Filter frequency (fc)
• Filter slope (SLP)
• Gain (G)
• Phase (PHASE)
Notes:
• Input of a low-band signal to the tweeter may
cause a malfunction.
SUB-W(2ch)
HIGH(2ch) + MID(2ch) +
About filter frequency (fc)
The filter (high-pass filter and low-pass filter)
frequency can be set for each speaker
according to the characteristics of the speaker.
Set the lower limit frequency to be played back
mainly on that speaker on the high-pass filter
(simply called "HPF" from here on), and set the
upper limit frequency on the low-pass filter
(simply called "LPF" from here on).
When HPF is set to "2kHz" and LPF is set to
"20kHz"
Frequency band played back
mainly by the speaker
2kHz 20kHz
(2kHz to 20kHz)
Frequency set on the low-pass filter
Frequency set on the high-pass filter
When the filter is set to "THROUGH", the setting
for that filter is disabled, and all frequencies are
played back.
When HPF is set to "2kHz" and LPF is set to
"THROUGH"
Frequency band played back
2kHz
mainly by the speaker (2kHz onwards)
Frequency set on the high-pass filter
When HPF is set to "THROUGH" and LPF is set
to "20kHz"
Frequency band played back
mainly by the speaker (to 20 kHz)
20kHz
Frequency set on the low-pass filter
The following figure shows the factory default
settings for filter frequencies in the Multi mode.
Frequency band played back
Frequency band played back
mainly by SUB-W (to 80 kHz)
mainly by LOW (80 kHz to 500 Hz)
80Hz 500Hz
The filter frequency ranges that can be set vary
according to the speaker. The following table
shows these ranges.
Note, however, that the frequencies are selected
from the value (1/3 octave steps) currently set
on this unit.
Standard
Multi
Speaker
FRONT
FRONT
REAR
SUB-W
HIGH
MID
LOW
SUB-W
(factory default setting: THROUGH)
HPF (lower limit
315Hz to 20kHz
(factory default setting: 2kHz)
THROUGH, 25Hz to 250Hz
(factory default setting:THROUGH)
THROUGH, 16Hz to 80Hz
(factory default setting:THROUGH)
315Hz to 20kHz
(factory default setting: 2kHz)
THROUGH, 200Hz to 10kHz
(factory default setting: 500 Hz)
THROUGH, 25Hz to 250Hz
(factory default setting: 80Hz)
THROUGH, 16Hz to 80Hz
Operations Common to Each Mode
Frequency band played back mainly
by MID (500 Hz to 2 kHz)
frequency)
-
-: THROUGH (fixed) cannot be changed.
Frequency band played back mainly
by HIGH (2 kHz onwards)
2kHz
LPF (upper limit
frequency)
-
250Hz to 20kHz, THROUGH
(factory default setting: 2kHz)
25Hz to 250Hz, THROUGH
(factory default setting: 80Hz)
250Hz to 20kHz, THROUGH
(factory default setting: 2kHz)
250Hz to 10kHz, THROUGH
(factory default setting: 500 Hz)
25Hz to 250Hz, THROUGH
(factory default setting: 80Hz)
-
-
English
18 DRZ9255
About filter slope (SLP)
Effectiveness can be adjusted for each filter
(HPF or LPF).
"-12dB/oct" is more effective than "-6dB/oct" and
"-18dB/oct" is much more effective.
The factory default setting is "-12dB/oct". Try
switching between "-6dB/oct", "-12dB/oct" and "18dB/oct " and select the setting that sounds
most natural to you.
●Characteristics during filter slope
adjustment
-6dB
-12dB
- 18dB
1oct
DRZ9255 19
Page 13

Operations Common to Each Mode
English
About gain (G)
This function allows you to adjust how much the
output level is to be lowered.
●Characteristics during gain adjustment
SUB-WOOFER LOW MID HIGH
About phase (PHASE)
The factory default setting is "NOR" (forward
phase). Try switching between "NOR" (forward
phase) and "REV" (reverse phase) and select
the setting that sounds most natural to you.
Adjusting the position (TIME ALIGN)
●About the time alignment function
This function allows you to adjust the speakers
so that any listener in the car can obtain the
same sound effect from the speakers.
∗ This item can be adjusted when the Audio mode is
the Standard mode or the Multi mode.
1. Press the [ADJ] button.
2. Press the [
"SOUND".
3. Press the [s] button.
4. Press the [
ALIGN".
5. Press the [
FRONT " or " HIGH ".
∗ Select " FRONT " when the Audio
mode is the Standard mode, and "
6. Press the [ ] or [ ] button to select the
speaker to adjust.
* The mute function of a selected speaker can
be turned ON/OFF by pressing the [ROTARY]
knob while the speaker is selected.
Each press of the button switches the setting as
follows.
] or [ ] button to select
] or [ ] button to select "TIME
] or [ ] button to select "
" when the Audio mode is the Multi mode.
HIGH
0dB
-24dB
In the Standard mode:
FRONT
FRONT
FRONT
FRONT
REAR
REAR
SUB-W
SUB-W
In the Multi mode:
HIGH
HIGH
MID
MID
LOW
LOW
SUB-W
SUB-W
7. Press the [ ] button. The setting value is
displayed.
Blinking
8. Press the [s] button. The setting value
blinks.
9. Press the [
] or [ ] button to set the
distance from the speaker up to the listener.
∗ The adjustment range is 0 cm to 512.4 cm (in
about 0.7 cm steps).
∗ The range can be adjusted in about 7 cm
steps by holding down the [
∗ For details, see "Appendix : Time Alignment
List" (page 32).
] or [ ] buttons.
10.When you have finished the adjustment,
press the [s] button to return to the
screen in step 7. This sets the setting value.
11.Press the [
] button to return to the screen
in step 6.
12.Repeat steps 6 to 11 to adjust the position of
each speaker.
13.Press the [ADJ] button to return to the
previous mode.
Adjusting P.EQ
●About P.EQ (Parametric Equalizer)
This function allows you to correct in detail all
frequency levels by a smooth curve by correcting
frequencies matched to the type of your car.
∗ This can be adjusted when the Equalizer mode is
set to "P.EQ".
∗ This can be adjusted when the Audio mode is the
Standard mode or the Multi mode.
1. Press the [ADJ] button.
2. Press the [
"SOUND".
3. Press the [s] button.
4. Press the [
5. Press the [
6. Press the [
adjustment item.
∗ Pressing the [ROTARY] knob while the L/R channel
is selected turns the mute function of the selected
channel ON/OFF.
Each press of the button switches the setting as
follows.
P.EQ ON/OFF: ON/OFF
P.EQ LEFT/RIGHT: Left channel/Right channel
BAND: band (1 to 5)
fo: frequency (BAND 1,2,3 : 50 Hz to 20 kHz)
G: gain (-12 dB to +12 dB)
Q: Q-curve (0.5 to 12.0)
C: copy
] or [ ] button to select
] or [ ] button to select "P.EQ".
] button.
] or [ ] button to select the
(BAND 4,5 : 630 Hz to 20 kHz)
Operations Common to Each Mode
7. Press the [s] button. The setting value
blinks.
8. Press the [
setting.
9. When you have finished the adjustment,
press the [s] button to return to the
screen in step 6. This sets the setting value.
10.Repeat steps 6 to 9 to adjust each of the
adjustment items.
11.Press the [ADJ] button to return to the
previous mode.
] or [ ] button to adjust the
English
20 DRZ9255
DRZ9255 21
Page 14

Operations Common to Each Mode Operations Common to Each Mode
English
●About P.EQ adjustment
The P.EQ menu contains the following
adjustment items.
• Selection of channel (LEFT/RIGHT)
Select the channel (left or right) to be adjusted.
• Selection of band (BAND)
Select the frequency band (1 to 5) to be adjusted.
• Selection of center frequency (fo)
Select the frequency to be taken as the center
frequency in frequency correction.
Bands 1 to 3: Select from the range 50 Hz to
20 kHz (1/3 octave steps, 27 points)
Bands 4 and 5: Select from the range 630 Hz
to 20 kHz (1/3 octave steps, 16 points)
• Gain adjustment (GAIN)
Gain (output level) can be adjusted within the
range -12 dB to +12 dB.
(0.5 dB steps, 49 points)
• Selection of Q-curve (Q)
Select the sharpness of the Q-curve within the
range 0.5 to 12.0.
(0.5 steps, 24 points)
• Copying adjustment values (COPY)
Select whether or not to copy the channel settings
currently being adjusted to another channel.
When you press the [s] button, the copy
confirmation screen is displayed.
Blinking
* L: shows the channel being adjusted while R:
shows un-adjusted channels.
Holding down the [s] button for about 1
second copies the settings, and returns to the
previous screen.
To return to the previous screen without
copying the settings, press the [s] button.
●About correction
When the frequency characteristics are
measured by a measuring device, they do not
need to be corrected if the frequency
characteristics are flat (no ridges or valleys in
the frequency waveform). However, frequency
characteristics sometimes partially rise up or fall
down. If this happens, create a frequency curve
of inverse characteristics matched to the center
frequency of the ridges or valleys in the
frequency waveform. This corrects the frequency
characteristics so that they are flat.
"Correction" is the process or making frequency
characteristics as flat as possible.
About correction of frequency
characteristics
The following figure shows the relationship
between center frequency, gain and Q-curve.
f
Q-curve (Q)
Q =
3dB
F
f
Level
(dB)
Gain (G)
Frequency
curve
About Q-curve
The following figure and the table show the
relationship between center frequency, gain and
Q-curve.
When a large numerical value is set, the Qcurve becomes sharper, and when a small
numerical value is set, the Q-curve becomes
gentler.
Flat frequency characteristics can be made by
selecting a Q-curve inverted to the frequency
curve to be corrected.
Q-curve
12
Q-curve
0.5
fo: Center frequency, G: gain (output level),
Q: Q-curve
Parametric equalizer parameters
BAND
BAND1 50Hz*1 0dB 1 50Hz*1 0dB 1
BAND2 160Hz*1 0dB 1 160Hz*1 0dB 1
BAND3 500Hz*1 0dB 1 500Hz*1 0dB 1
BAND4 2kHz*2 0dB 1 2kHz*2 0dB 1
BAND5 8kHz*2 0dB 1 8kHz*2 0dB 1
*1 Select from range 50 Hz to 20 kHz
*2 Select from range 630 Hz to 20 kHz
Left channel Right channel
fo G Q fo G Q
Saving the filter setting/time
alignment setting/P.EQ setting
(MEMORY)
Three groups of adjustment settings made to
suit your car can be saved for both the Standard
mode and Multi mode.
∗ P.EQ settings are not saved when the Equalizer
mode is set to "BASS/TREB".
1. Press the [ADJ] button.
2. Press the [
"SOUND".
3. Press the [s] button.
4. Press the [
"MEMORY".
5. Press the [
6. Press the [
"MEMORY1", "MEMORY2", "MEMORY3" or
"DEFAULT".
∗ The factory default setting is "DEFAULT". This
setting can be called up but cannot be
changed to other settings.
7. Hold down the [s] button for about 1
second. "SAVE?" is displayed.
8. Hold down the [s] button for about 1
second. You will hear a short high-pitched
sound, and the filter settings, time alignment
settings and P.EQ settings are saved to the
memory (1 to 3) selected in step 6.
9. Press the [ADJ] button to return to the
previous mode.
●To call up saved settings
At step 7, press the [s] button, and hold
down the [s] button for about 1 second when
"LOAD?" is displayed.
You will hear a short high-pitched sound, and
the settings are called up. Press the [ADJ]
button to return to the previous mode.
∗ When the Equalizer mode is set to "BASS/TREB",
the P.EQ settings that are called up are reflected
when the Equalizer mode setting is changed to
"P.EQ".
●About settings after a reset
When the [RESET] button is pressed to reset
this unit, all settings set here disappear. Make a
note of the settings in the Sound Setup Memo
(page 34) to make these settings again after a
reset.
] or [ ] button to select
] or [ ] button to select
] button.
] or [ ] button to select
Selecting the equalizer mode
(EQ SELECT)
This item can be selected when the Audio mode
is the Standard mode or the Multi mode.
The factory default setting is "P.EQ".
●Parametric equalizer mode <P.EQ>
The sound field can be adjusted by the P.EQ of
five bands. For details on P.EQ adjustment, see
"Adjusting P.EQ" (page 21).
●Bass/treble mode <BASS/TREB>
The sound field can be adjusted by bass/treble.
For details on bass/treble adjustment, see
"Adjusting the bass/treble" (page 12).
1. Press the [ADJ] button.
2. Press the [
] or [ ] button to select "EQ
SELECT".
3. Press the [
] or [ ] button to select "P.EQ"
or "BASS/TREB".
4. Press the [ADJ] button to return to the
previous mode.
Setting the sub-woofer/non-fader
(SUB-WOOFER/NON-FADER)
Set to "ST" (stereo) or "MONO" (monaural)
when a sub-woofer/non-fader is connected.
There is no output when "OFF" is set.
* The factory default setting is "ST".
1. Press the [ADJ] button.
2. Press the [
WOOFER" or "NON-FADER".
∗ Select "SUB-WOOFER" when the Audio
mode is the Standard mode or the Multi mode,
and "NON-FADER" when the Audio mode is
Direct mode.
3. Press the [ ] or [ ] button to select "ST"
(stereo), "MONO" (monaural) or "OFF".
4. Press the [ADJ] button to return to the
previous mode.
] or [ ] button to select "SUB-
English
22 DRZ9255
DRZ9255 23
Page 15

Operations Common to Each Mode
English
Setting the input level for portable
audio (AUX SENS)
This unit is provided with two AUX input lines.
The input level for third-party portable audio
connected to each of these lines can be set.
* The factory default setting is "MID".
1. Press the [ADJ] button.
2. Press the [
SENS".
3. Press the [s] button.
4. Press the [
line.
Each press of the button switches the line as
follows:
AUX1 SENS: Input line 1
AUX2 SENS: Input line 2
5 Press the [ ] button.
6. Press the [
"MID" or "LOW".
7. When you select this, press the [
to return to the screen in step 4.
8. Repeat steps 4 to 7 to set the input level of
each input line.
9. Press the [ADJ] button to return to the
previous mode.
] or [ ] button to select "AUX
] or [ ] button to select the input
] or [ ] button to select "HIGH",
Setting the digital output (D-OUT)
Set digital output ON when the digital output
connector is used as the digital output
connector of the built-in CD. There is no output
when "OFF" is set.
∗ This item cannot be set when a CD changer is
connected via the CeNET cable.
* The factory default setting is "OFF".
] button
Setting the anti-theft indicator
(BLINK LED)
This function makes the indicator of Pch6 blink
(red) when ACC is OFF to create a visual antitheft effect.
* The factory default setting is "OFF".
1. Press the [ADJ] button.
2. Press the [
"BLINK-LED".
3. Press the [
"OFF".
4. Press the [ADJ] button to return to the
previous mode.
] or [ ] button to select
] or [ ] button to select "ON" or
Setting the beep tone during button
operation (BEEP)
A high-pitched beep tone is emitted when you
operate a button. This beep output can be
disabled.
* The factory default setting is "ON".
1. Press the [ADJ] button.
2. Press the [
"BEEP".
3. Press the [
"OFF".
4. Press the [ADJ] button to return to the
previous mode.
] or [ ] button to select
] or [ ] button to select "ON" or
7. OPERATIONS OF ACCESSORIES
CD Changer Operations
CD changer functions
When an optional CD changer is connected
through the CeNET cable, this unit controls all
CD changer functions. This unit can control a
total of 2 changers.
Press the [FUNC] button and select the CD
changer mode to start play. If 2 CD changers
are connected, press the [FUNC] button to
select the CD changer for play.
∗ If “NO MAG” appears in the display, insert the
magazine into the CD changer. “DISC CHK” appears
in the display while the player loads (checks) the
magazine.
∗ If “NO DISC” appears in the display, eject the
magazine and insert discs into each slot. Then,
reinsert the magazine back into the CD changer.
Note:
• Some CDs recorded in CD-R/CD-RW mode may
not be usable.
CAUTION
CD-ROM discs cannot be played from every
CD changer, it depends on the model.
Pausing play
1. Press the [s] button to pause play.
“PAUSE” appears in the display.
2. To resume play, press the [s] button again.
Displaying CD titles
This unit can display title data for CD-text CDs
and user titles input with this unit.
∗ Title data for CD-text CDs can be displayed with
this unit only when it is connected to CDC655Tz.
● When connected to DCZ625 or CDC1255z.
Press the [DISP] button to display the title.
● When connected to CDC655Tz
1. Press the [DISP] button to display the title.
2. Each time you press and hold the [DISP]
button for 1 second or longer, the title display
changes in the following order:
CD-text title (disc) ➜ Artist name ➜ CD-text title
(track) …
Notes:
• If the CD playing is not a CD-text CD or no user
title has been input, “NO TITLE” appears in the
display.
• If a CD-text CD is not input its disc title or a track
title, “NO TITLE” appears in the display.
Procedure to scroll a title
1. Press and hold the [ADJ] button for 1 second
or longer.
2. The title is scrolled.
Selecting a CD
1. Press the [UP] or [DOWN] button to select
the desired disc.
∗ If a CD is not loaded in a slot of magazine,
pressing the [UP] or [DOWN] buton can not
work.
English
1. Press the [ADJ] button.
2. Press the [
OUT".
3. Press the [
"OFF".
4. Press the [ADJ] button to return to the
previous mode.
] or [ ] button to select "D-
] or [ ] button to select "ON" or
24 DRZ9255
DRZ9255 25
Page 16

CD Changer Operations
English
Selecting a track
● Track-up
1. Press the [D] button to move ahead to the
beginning of the next track.
2. Each time you press the [D] button, the
track advances ahead to the beginning of the
next track.
● Track-down
1. Press the [A] button to move back to the
beginning of the current track.
2. Press the [A] button twice to move to the
beginning of the previous track.
Fast-forward/fast-backward
● Fast-forward
Press and hold the [D] button for 1 second or
longer.
● Fast-backward
Press and hold the [A] button for 1 second or
longer.
Scan play
Scan play locates and plays the first 10 seconds
of each track on a disc automatically. This
function continues on the disc until it is cancelled.
∗ The scan play is useful when you want to select a
desired track.
1. Press the [SCN] button to start track
scanning. “SCN” lights in the display.
2. To cancel the scan play, press the [SCN]
button again. “SCN” goes off from the display
and the current track continues to play.
Disc scan play
Disc scan play locates and plays the first 10
seconds of the first track on each disc in the
currently selected CD changer. This function
continues automatically until it is cancelled.
∗ Disc scan play is useful when you want to select a
desired CD.
1. Press and hold the [SCN] button for 1
second or longer. “DISC” and “SCN” light in
the display and disc scan play starts.
2. To cancel disc scan play, press the [SCN]
button again. “DISC” and “SCN” go off from
the display and the current track continues to
play.
Repeat play
Repeat play continuously plays the current track.
This function continues automatically until it is
cancelled.
1. Press the [RPT] button. “RPT” lights in the
display and the current track is repeated.
2. To cancel repeat play, press the [RPT] button
again. “RPT” goes off from the display and
normal play resumes.
Disc repeat play
After all the tracks on the current disc have been
played, disc repeat play automatically replays
the current disc over from the first track. This
function continues automatically until it is
cancelled.
1. Press and hold the [RPT] button for 1 second
or longer. “DISC” and “RPT” light in the
display and disc repeat play starts.
2. To cancel disc repeat play, press the [RPT]
button again. “DISC” and “RPT” go off from
the display and normal play resumes on the
current track.
Random play
Random play selects and plays individual tracks
on the disc in no particular order. This function
continues automatically until it is cancelled.
1. Press the [RDM] button. “RDM” lights in the
display and random play begins.
2. To cancel random play, press the [RDM]
button again. “RDM” goes off from the display
and normal play resumes.
Disc random play
The disc random play selects and plays
individual tracks or discs automatically in no
particular order. This function continues
automatically until it is cancelled.
1. Press and hold the [RDM] button for 1
second or longer. “DISC” and “RDM” light in
the display and disc random play starts.
2. To cancel disc random play, press the [RDM]
button again. “DISC” and “RDM” go off from
the display and normal play resumes from
the current track.
TV Operations
TV tuner functions
When an optional TV tuner is connected through
the CeNET cable, this unit controls all TV tuner
functions. To watch a TV, a TV tuner and a
monitor are required.
Watching a TV
1. Press the [FUNC] button and select the TV
mode.
2. Press the [BAND] button to select the
desired TV band (TV1 or TV2). Each time the
button is pressed, the input selection toggles
between TV1 and TV2.
3. Press the [A] or [D] button to tune in the
desired TV station.
Watching a video
The TV tuner has a VTR input terminal to which
1 external device can be connected. Connect a
12 V video cassette player (VCP) or video
cassette recorder (VCR) to the TV tuner input
terminal.
1. Press the [s] button to select VTR.
2. To return to the TV broadcast, press the
[s] button.
Tuning
There are 3 types of tuning mode available,
Seek tuning, manual tuning and preset tuning.
Seek tuning
1. Press the [BAND] button and select the
desired TV band (TV1 or TV2).
∗ If “MANU” is lit in the display, press and hold
the [BAND] button for 1 second or longer.
“MANU” in the display goes off and seek
tuning is now available.
2. Press the [A] or [D] button to
automatically seek a station. Press the [D]
button to automatically tune up the frequency
band to the next available TV station; press
the [A] button to automatically tune down.
English
Manual tuning
There are 2 ways available: Quick tuning and
step tuning.
When you are in the step tuning mode, the
frequency changes one step at a time. In the
quick tuning mode, you can quickly tune the
desired frequency.
1. Press the [BAND] button and select the
desired band (TV1 or TV2).
∗ If “MANU” is not lit in the display, press and
hold the [BAND] button for 1 second or longer.
“MANU” lights in the display and manual
tuning is now available.
2. Tune in a station.
● Quick tuning:
Press and hold the [A] or [D] button for 1
second or longer to tune in a station.
● Step tuning:
Press the [A] or [D] button to manually
tune in a station.
Recalling a preset station
A total of 12 TV stations can be stored (6-TV1
and 6-TV2). This allows you to select your
favorite TV stations and store them in memory
for later recall.
1. Press the [BAND] button and select the
desired TV band (TV1 or TV2).
2. To recall a stored TV station, press the
desired [DIRECT] button to select that
station.
∗ Press and hold one of the [DIRECT] buttons
for 2 seconds or longer to store the current
station into preset memory.
Manual memory
1. Select the desired station with seek tuning,
manual tuning or preset tuning.
2. Press and hold one of [DIRECT] buttons for
2 seconds or longer to store the current
station into preset memory.
26 DRZ9255
DRZ9255 27
Page 17

TV Operations
English
Auto store
Auto store selects 6 TV stations automatically
and stores each one into preset memory.
If there are not 6 stations with good reception,
stations previously stored in memory remain
and only the strong stations are stored into
memory.
1. Press the [BAND] button and select the
desired TV band (TV1 or TV2).
2. Press and hold the [P/A] button for 2
seconds or longer. The stations with good
reception are stored automatically to the
preset channels.
Preset scan
Preset scan allows the user to view each preset
position before it automatically advances to the
next preset. This function is useful for searching
for a desired TV station in memory.
1. Press the [P/A] button.
2. When the desired station is found, press the
[P/A] button again to remain tuned to that
station.
Note:
• Do not press and hold the [P/A] button for 2
seconds or longer. Doing so will trigger the auto
store function and start storing stations into
memory.
Setting the TV diversity (TV DIVER)
This function automatically switches to reception
by a good-reception antenna during reception of
TV broadcasts (when a TV tuner is connected).
* The factory default setting is "ON". Set again to
"OFF" when the TV diversity antenna is not in use.
1. Press the [ADJ] button.
2. Press the [
DIVER".
3. Press the [
"OFF".
4. Press the [ADJ] button to return to the
previous mode.
] or [ ] button to select "TV
] or [ ] button to select "ON" or
8. IN CASE OF DIFFICULTY
Problem
Power does not turn
on.
(No sound is produced.)
No sound output
when operating the
unit with amplifiers or
power antenna attached.
General
Nothing happens
when buttons are
pressed.
Display is not accurate.
Compact disc cannot
be loaded.
Sound skips or is
noisy.
CD
Sound is bad directly
after power is turned
on.
The CD is automatically ejected.
Fuse is blown.
Incorrect wiring.
Power antenna lead is shorted to ground or excessive
current is required for remote controlling on the amplifiers or power antenna.
The microprocessor has
malfunctioned due to noise,
etc.
Another compact disc is already loaded.
Compact disc is dirty.
Compact disc is heavily
scratched or warped.
Water droplets may form on
the internal lens when the
car is parked in a humid
place.
A CD is loaded upsidedown inside the CD deck
and does not play.
Cause Measure
Replace with a fuse of the same amperage. If
the fuse blows again, consult your store of
purchase.
Consult your store of purchase.
1. Turn the unit off.
2. Remove all wires attached to the power
antenna lead. Check each wire for a possible
short to ground using an ohm meter.
3. Turn the unit back on.
4. Reconnect each amplifier remote wire to the
power antenna lead one by one. If the
amplifiers turn off before all wires are
attached, use an external relay to provide
remote-on voltage (excessive current
required).
Press the reset button for
about 2 seconds with a
thin rod.
Eject the compact disc before loading the new
one.
Clean the compact disc with a soft cloth.
Replace with a compact disc with no scratches.
Let dry for about 1 hour with the power on.
Eject the disc then reload it properly.
English
Reset button
28 DRZ9255
DRZ9255 29
Page 18

English
9. ERROR DISPLAYS
If an error occurs, one of the following displays is displayed.
Take the measures described below to eliminate the problem.
Measure
ERROR 2
CD
ERROR 3
ERROR 2
ERROR 3
CD changer
ERROR 6
ERROR 2
ERROR 3
ERROR 6
DVD changer
ERROR P
ERROR R
CauseError Display
A CD is caught inside the CD deck and is
not ejected.
A CD cannot be played due to scratches,
etc.
A CD inside the CD changer is not loaded.
A CD inside the CD changer cannot be
played due to scratches, etc.
A CD inside the CD changer cannot be
played because it is loaded upside-down.
A DISC inside the DVD changer cannot be
played.
A DISC cannot be played due to scratches,
etc.
A DISC inside the DVD changer cannot be
played because it is loaded upside-down.
Parental level error
Region code error
This is a failure of CD deck’s mechanism.
Consult your store of purchase.
Replace with a non-scratched,
non-warped-disc.
This is a failure of CD changer’s mechanism.
Consult your store of purchase.
Replace with a non-scratched, non-warped
disc.
Eject the disc then reload it properly.
This is a failure of DVD mechanism.
Consult your store of purchase.
Retry or replace with a non-scratched, nonwarped-disc.
Eject the disc then reload it properly
Set the correct Parental level.
Eject the disc and replace correct region
code disc.
If an error display other than the ones described above appears, press the reset button. If the problem
persists, turn off the power and consult your store of purchase.
10. SPECIFICATIONS
FM Tuner
Frequency Range:
87.9 MHz to 107.9 MHz
Usable Sensitivity:
9 dBf
50dB Quieting Sensitivity:
15 dBf
Alternate Channel Selectivity:
70 dB
Stereo Separation (1 kHz):
35 dB
Frequency Response (±3 dB):
30 Hz to 15 kHz
AM Tuner
Frequency Range:
530 kHz to 1710 kHz
Usable Sensitivity:
25 µV
CD Player
System:
Compact disc digital audio system
Usable Discs:
Compact disc
Frequency Response (±1 dB):
5 Hz to 20 kHz
Signal to Noise Ratio (1 kHz):
112 dB
Dynamic Range (1 kHz):
100 dB
Harmonic Distortion:
0.003% (20Hz to 20kHz)
Each fc1/3 oct step GAIN ±12 dB Q0.5 to 12
: Time alignment/0 to 512.4 cm 0.7 cm steps
: Tone control/BASS 50 Hz ±12 dB
TREBLE 10 kHz ±12 dB
* When BASS/TREB is selected
STANDARD mode: FRONT-2WAY
HIGH-HPF 315 Hz to 20 kHz/
FRONT-LPF 250 Hz to 20 kHz, THROUGH/
REAR-HPF THROUGH, 25 Hz to 250 Hz/
SUB-W-LPF 25 Hz to 250 Hz, THROUGH/
SUB-W-HPF THROUGH, 16 Hz to 80 Hz
Audio
Bass Control Action (50 Hz):
±12 dB
Treble Control Action (10 kHz):
Each fc1/3 oct step SLOPE -6/-12/-18 dB
GAIN 0 to -24 dB
5BAND-P.EQ/time alignment/tone control
DIRECT mode: FRONT+REAR+NON-FADER
±12 dB
Line Output Level (CD 1 kHz):
Vol 0dB = 4V
Vol +6dB = 8V (Max)
General
Power Supply Voltage:
14.4 V DC (10.8 to 15.6 V allowable),
negative ground
DSP/DAC
• A/D conversion: 24-bit 64x oversampling ∆Σ
A/D converter
• D/A conversion: 96 kHz/24-bit advanced
segment D/A converter
• 8x oversampling digital filter:
Blocked band attenuation: -130 dB
Transmitted band attenuation: ±0.00001 dB
• Sampling rate converter:
Input sampling rate (fs32k, fs44.1k, fs48k,
fs96k)
Output sampling rate (fs48k, fs96k)
• DSP: 24-bit audio DSP, 34-bit arithmetic
operation (overflow margin 4-bit)
MULTI mode: 4WAY. X-OVER/
HIGH-HPF 315 Hz to 20 kHz/
MID-LPF 250 Hz to 20 kHz, THROUGH/
MID-HPF THROUGH, 200 Hz to 20 kHz/
Current Consumption:
Less than 5 A
Weight / Source unit:
3.96 lb. (1.8 kg)
Weight / DC-DC Converter:
1.541 lb. (700 g)
Weight / Remote control unit:
1.76 oz. (50 g) (including battery)
Dimensions / Source unit:
7" (Width) ✕ 2" (Height) ✕ 6-1/8" (Depth)
[178 (W) ✕ 50 (H) ✕ 155 (D) mm]
Dimensions / DC-DC Converter:
6-7/10" (Width) ✕ 1-5/8" (Height) ✕ 3-7/8" (Depth)
[163 (W) ✕ 42 (H) ✕ 98 (D) mm]
Dimensions / Remote control unit:
1-3/4" (Width) ✕ 4-5/16" (Height) ✕ 1-1/8" (Depth)
[52 (W) ✕ 125 (H) ✕ 12 (D) mm]
LOW-LPF 250 Hz to 10 kHz, THROUGH/
LOW-HPF THROUGH, 25 Hz to 250 Hz/
SUB-W-LPF 25 Hz to 250 Hz, THROUGH/
SUB-W-HPF THROUGH, 16 Hz to 80 Hz
Each fc1/3 oct step SLOPE -6/-12/-18 dB
GAIN 0 to -24 dB
: 5BAND-P.EQ/BAND 1/2/3 50 Hz to 20 kHz
BAND4/5 630 Hz to 20 kHz
Note:
• Specifications and design are subject to change without notice for further improvement.
English
30 DRZ9255
DRZ9255 31
Page 19

English
APPENDIX : TIME ALIGNMENT LIST
The list below shows values obtained by calculating the 1STEP delay with 1STEP distance set to
0.715625cm and rounding the resulting figures to the nearest whole number.
1STEP delay : 0.020833333[msec] Velocity of sound v=331.5+0.6∗T
T=20°C v =343.5[m/s]
STEP
Distance
Time
[cm] [msec]
0 0.0 0.00
1 0.7 0.02
2 1.4 0.04
3 2.1 0.06
4 2.9 0.08
5 3.6 0.10
6 4.3 0.13
7 5.0 0.15
8 5.7 0.17
9 6.4 0.19
10 7.2 0.21
11 7.9 0.23
12 8.6 0.25
13 9.3 0.27
14 10.0 0.29
15 10.7 0.31
16 11.5 0.33
17 12.2 0.35
18 12.9 0.38
19 13.6 0.40
20 14.3 0.42
21 15.0 0.44
22 15.7 0.46
23 16.5 0.48
24 17.2 0.50
25 17.9 0.52
26 18.6 0.54
27 19.3 0.56
28 20.0 0.58
29 20.8 0.60
30 21.5 0.63
31 22.2 0.65
32 22.9 0.67
33 23.6 0.69
34 24.3 0.71
35 25.0 0.73
36 25.8 0.75
37 26.5 0.77
38 27.2 0.79
39 27.9 0.81
40 28.6 0.83
41 29.3 0.85
42 30.1 0.88
43 30.8 0.90
44 31.5 0.92
45 32.2 0.94
46 32.9 0.96
47 33.6 0.98
48 34.4 1.00
49 35.1 1.02
50 35.8 1.04
51 36.5 1.06
52 37.2 1.08
53 37.9 1.10
54 38.6 1.13
55 39.4 1.15
56 40.1 1.17
57 40.8 1.19
58 41.5 1.21
59 42.2 1.23
60 42.9 1.25
61 43.7 1.27
62 44.4 1.29
63 45.1 1.31
64 45.8 1.33
65 46.5 1.35
1cm=0.029112082[msec] 1STEP distance=0.715625[cm]
STEP
Distance
Time
STEP
Distance
Time
[cm] [msec]
66 47.2 1.38
67 47.9 1.40
68 48.7 1.42
69 49.4 1.44
70 50.1 1.46
71 50.8 1.48
72 51.5 1.50
73 52.2 1.52
74 53.0 1.54
75 53.7 1.56
76 54.4 1.58
77 55.1 1.60
78 55.8 1.63
79 56.5 1.65
80 57.3 1.67
81 58.0 1.69
82 58.7 1.71
83 59.4 1.73
84 60.1 1.75
85 60.8 1.77
86 61.5 1.79
87 62.3 1.81
88 63.0 1.83
89 63.7 1.85
90 64.4 1.88
91 65.1 1.90
92 65.8 1.92
93 66.6 1.94
94 67.3 1.96
95 68.0 1.98
96 68.7 2.00
97 69.4 2.02
98 70.1 2.04
99 70.8 2.06
100 71.6 2.08
101 72.3 2.10
102 73.0 2.13
103 73.7 2.15
104 74.4 2.17
105 75.1 2.19
106 75.9 2.21
107 76.6 2.23
108 77.3 2.25
109 78.0 2.27
110 78.7 2.29
111 79.4 2.31
112 80.2 2.33
113 80.9 2.35
114 81.6 2.38
115 82.3 2.40
116 83.0 2.42
117 83.7 2.44
118 84.4 2.46
119 85.2 2.48
120 85.9 2.50
121 86.6 2.52
122 87.3 2.54
123 88.0 2.56
124 88.7 2.58
125 89.5 2.60
126 90.2 2.63
127 90.9 2.65
128 91.6 2.67
129 92.3 2.69
130 93.0 2.71
131 93.7 2.73
[cm] [msec]
132 94.5 2.75
133 95.2 2.77
134 95.9 2.79
135 96.6 2.81
136 97.3 2.83
137 98.0 2.85
138 98.8 2.88
139 99.5 2.90
140 100.2 2.92
141 100.9 2.94
142 101.6 2.96
143 102.3 2.98
144 103.1 3.00
145 103.8 3.02
146 104.5 3.04
147 105.2 3.06
148 105.9 3.08
149 106.6 3.10
150 107.3 3.13
151 108.1 3.15
152 108.8 3.17
153 109.5 3.19
154 110.2 3.21
155 110.9 3.23
156 111.6 3.25
157 112.4 3.27
158 113.1 3.29
159 113.8 3.31
160 114.5 3.33
161 115.2 3.35
162 115.9 3.38
163 116.6 3.40
164 117.4 3.42
165 118.1 3.44
166 118.8 3.46
167 119.5 3.48
168 120.2 3.50
169 120.9 3.52
170 121.7 3.54
171 122.4 3.56
172 123.1 3.58
173 123.8 3.60
174 124.5 3.63
175 125.2 3.65
176 126.0 3.67
177 126.7 3.69
178 127.4 3.71
179 128.1 3.73
180 128.8 3.75
181 129.5 3.77
182 130.2 3.79
183 131.0 3.81
184 131.7 3.83
185 132.4 3.85
186 133.1 3.88
187 133.8 3.90
188 134.5 3.92
189 135.3 3.94
190 136.0 3.96
191 136.7 3.98
192 137.4 4.00
193 138.1 4.02
194 138.8 4.04
195 139.5 4.06
196 140.3 4.08
197 141.0 4.10
STEP
198 141.7 4.13
199 142.4 4.15
200 143.1 4.17
201 143.8 4.19
202 144.6 4.21
203 145.3 4.23
204 146.0 4.25
205 146.7 4.27
206 147.4 4.29
207 148.1 4.31
208 148.9 4.33
209 149.6 4.35
210 150.3 4.38
211 151.0 4.40
212 151.7 4.42
213 152.4 4.44
214 153.1 4.46
215 153.9 4.48
216 154.6 4.50
217 155.3 4.52
218 156.0 4.54
219 156.7 4.56
220 157.4 4.58
221 158.2 4.60
222 158.9 4.63
223 159.6 4.65
224 160.3 4.67
225 161.0 4.69
226 161.7 4.71
227 162.4 4.73
228 163.2 4.75
229 163.9 4.77
230 164.6 4.79
231 165.3 4.81
232 166.0 4.83
233 166.7 4.85
234 167.5 4.88
235 168.2 4.90
236 168.9 4.92
237 169.6 4.94
238 170.3 4.96
239 171.0 4.98
240 171.8 5.00
241 172.5 5.02
242 173.2 5.04
243 173.9 5.06
244 174.6 5.08
245 175.3 5.10
246 176.0 5.13
247 176.8 5.15
248 177.5 5.17
249 178.2 5.19
250 178.9 5.21
251 179.6 5.23
252 180.3 5.25
253 181.1 5.27
254 181.8 5.29
255 182.5 5.31
256 183.2 5.33
257 183.9 5.35
258 184.6 5.38
259 185.3 5.40
260 186.1 5.42
261 186.8 5.44
262 187.5 5.46
263 188.2 5.48
Distance
[cm] [msec]
Time
STEP
Distance
Time
[cm] [msec]
264 188.9 5.50
265 189.6 5.52
266 190.4 5.54
267 191.1 5.56
268 191.8 5.58
269 192.5 5.60
270 193.2 5.63
271 193.9 5.65
272 194.7 5.67
273 195.4 5.69
274 196.1 5.71
275 196.8 5.73
276 197.5 5.75
277 198.2 5.77
278 198.9 5.79
279 199.7 5.81
280 200.4 5.83
281 201.1 5.85
282 201.8 5.88
283 202.5 5.90
284 203.2 5.92
285 204.0 5.94
286 204.7 5.96
287 205.4 5.98
288 206.1 6.00
289 206.8 6.02
290 207.5 6.04
291 208.2 6.06
292 209.0 6.08
293 209.7 6.10
294 210.4 6.13
295 211.1 6.15
296 211.8 6.17
297 212.5 6.19
298 213.3 6.21
299 214.0 6.23
300 214.7 6.25
301 215.4 6.27
302 216.1 6.29
303 216.8 6.31
304 217.6 6.33
305 218.3 6.35
306 219.0 6.38
307 219.7 6.40
308 220.4 6.42
309 221.1 6.44
310 221.8 6.46
311 222.6 6.48
312 223.3 6.50
313 224.0 6.52
314 224.7 6.54
315 225.4 6.56
316 226.1 6.58
317 226.9 6.60
318 227.6 6.63
319 228.3 6.65
320 229.0 6.67
321 229.7 6.69
322 230.4 6.71
323 231.1 6.73
324 231.9 6.75
325 232.6 6.77
326 233.3 6.79
327 234.0 6.81
328 234.7 6.83
329 235.4 6.85
STEP
Distance
[cm] [msec]
330 236.2 6.88
331 236.9 6.90
332 237.6 6.92
333 238.3 6.94
334 239.0 6.96
335 239.7 6.98
336 240.5 7.00
337 241.2 7.02
338 241.9 7.04
339 242.6 7.06
340 243.3 7.08
341 244.0 7.10
342 244.7 7.13
343 245.5 7.15
344 246.2 7.17
345 246.9 7.19
346 247.6 7.21
347 248.3 7.23
348 249.0 7.25
349 249.8 7.27
350 250.5 7.29
351 251.2 7.31
352 251.9 7.33
353 252.6 7.35
354 253.3 7.38
355 254.0 7.40
356 254.8 7.42
357 255.5 7.44
358 256.2 7.46
359 256.9 7.48
360 257.6 7.50
361 258.3 7.52
362 259.1 7.54
363 259.8 7.56
364 260.5 7.58
365 261.2 7.60
366 261.9 7.63
367 262.6 7.65
368 263.4 7.67
369 264.1 7.69
370 264.8 7.71
371 265.5 7.73
372 266.2 7.75
373 266.9 7.77
374 267.6 7.79
375 268.4 7.81
376 269.1 7.83
377 269.8 7.85
378 270.5 7.88
379 271.2 7.90
380 271.9 7.92
381 272.7 7.94
382 273.4 7.96
383 274.1 7.98
384 274.8 8.00
385 275.5 8.02
386 276.2 8.04
387 276.9 8.06
388 277.7 8.08
389 278.4 8.10
390 279.1 8.13
391 279.8 8.15
392 280.5 8.17
393 281.2 8.19
394 282.0 8.21
395 282.7 8.23
396 283.4 8.25
397 284.1 8.27
398 284.8 8.29
399 285.5 8.31
400 286.3 8.33
401 287.0 8.35
402 287.7 8.38
403 288.4 8.40
404 289.1 8.42
405 289.8 8.44
406 290.5 8.46
407 291.3 8.48
408 292.0 8.50
409 292.7 8.52
Time
STEP
Distance
Time
[cm] [msec]
410 293.4 8.54
411 294.1 8.56
412 294.8 8.58
413 295.6 8.60
414 296.3 8.63
415 297.0 8.65
416 297.7 8.67
417 298.4 8.69
418 299.1 8.71
419 299.8 8.73
420 300.6 8.75
421 301.3 8.77
422 302.0 8.79
423 302.7 8.81
424 303.4 8.83
425 304.1 8.85
426 304.9 8.88
427 305.6 8.90
428 306.3 8.92
429 307.0 8.94
430 307.7 8.96
431 308.4 8.98
432 309.2 9.00
433 309.9 9.02
434 310.6 9.04
435 311.3 9.06
436 312.0 9.08
437 312.7 9.10
438 313.4 9.13
439 314.2 9.15
440 314.9 9.17
441 315.6 9.19
442 316.3 9.21
443 317.0 9.23
444 317.7 9.25
445 318.5 9.27
446 319.2 9.29
447 319.9 9.31
448 320.6 9.33
449 321.3 9.35
450 322.0 9.38
451 322.7 9.40
452 323.5 9.42
453 324.2 9.44
454 324.9 9.46
455 325.6 9.48
456 326.3 9.50
457 327.0 9.52
458 327.8 9.54
459 328.5 9.56
460 329.2 9.58
461 329.9 9.60
462 330.6 9.63
463 331.3 9.65
464 332.1 9.67
465 332.8 9.69
466 333.5 9.71
467 334.2 9.73
468 334.9 9.75
469 335.6 9.77
470 336.3 9.79
471 337.1 9.81
472 337.8 9.83
473 338.5 9.85
474 339.2 9.88
475 339.9 9.90
476 340.6 9.92
477 341.4 9.94
478 342.1 9.96
479 342.8 9.98
480 343.5 10.00
481 344.2 10.02
482 344.9 10.04
483 345.6 10.06
484 346.4 10.08
485 347.1 10.10
486 347.8 10.13
487 348.5 10.15
488 349.2 10.17
489 349.9 10.19
STEP
Distance
Time
[cm] [msec]
490 350.7 10.21
491 351.4 10.23
492 352.1 10.25
493 352.8 10.27
494 353.5 10.29
495 354.2 10.31
496 355.0 10.33
497 355.7 10.35
498 356.4 10.38
499 357.1 10.40
500 357.8 10.42
501 358.5 10.44
502 359.2 10.46
503 360.0 10.48
504 360.7 10.50
505 361.4 10.52
506 362.1 10.54
507 362.8 10.56
508 363.5 10.58
509 364.3 10.60
510 365.0 10.63
511 365.7 10.65
512 366.4 10.67
513 367.1 10.69
514 367.8 10.71
515 368.5 10.73
516 369.3 10.75
517 370.0 10.77
518 370.7 10.79
519 371.4 10.81
520 372.1 10.83
521 372.8 10.85
522 373.6 10.88
523 374.3 10.90
524 375.0 10.92
525 375.7 10.94
526 376.4 10.96
527 377.1 10.98
528 377.9 11.00
529 378.6 11.02
530 379.3 11.04
531 380.0 11.06
532 380.7 11.08
533 381.4 11.10
534 382.1 11.13
535 382.9 11.15
536 383.6 11.17
537 384.3 11.19
538 385.0 11.21
539 385.7 11.23
540 386.4 11.25
541 387.2 11.27
542 387.9 11.29
543 388.6 11.31
544 389.3 11.33
545 390.0 11.35
546 390.7 11.38
547 391.4 11.40
548 392.2 11.42
549 392.9 11.44
550 393.6 11.46
551 394.3 11.48
552 395.0 11.50
553 395.7 11.52
554 396.5 11.54
555 397.2 11.56
556 397.9 11.58
557 398.6 11.60
558 399.3 11.63
559 400.0 11.65
560 400.8 11.67
561 401.5 11.69
562 402.2 11.71
563 402.9 11.73
564 403.6 11.75
565 404.3 11.77
566 405.0 11.79
567 405.8 11.81
568 406.5 11.83
569 407.2 11.85
STEP
Distance
Time
[cm] [msec]
570 407.9 11.88
571 408.6 11.90
572 409.3 11.92
573 410.1 11.94
574 410.8 11.96
575 411.5 11.98
576 412.2 12.00
577 412.9 12.02
578 413.6 12.04
579 414.3 12.06
580 415.1 12.08
581 415.8 12.10
582 416.5 12.13
583 417.2 12.15
584 417.9 12.17
585 418.6 12.19
586 419.4 12.21
587 420.1 12.23
588 420.8 12.25
589 421.5 12.27
590 422.2 12.29
591 422.9 12.31
592 423.7 12.33
593 424.4 12.35
594 425.1 12.38
595 425.8 12.40
596 426.5 12.42
597 427.2 12.44
598 427.9 12.46
599 428.7 12.48
600 429.4 12.50
601 430.1 12.52
602 430.8 12.54
603 431.5 12.56
604 432.2 12.58
605 433.0 12.60
606 433.7 12.63
607 434.4 12.65
608 435.1 12.67
609 435.8 12.69
610 436.5 12.71
611 437.2 12.73
612 438.0 12.75
613 438.7 12.77
614 439.4 12.79
615 440.1 12.81
616 440.8 12.83
617 441.5 12.85
618 442.3 12.88
619 443.0 12.90
620 443.7 12.92
621 444.4 12.94
622 445.1 12.96
623 445.8 12.98
624 446.6 13.00
625 447.3 13.02
626 448.0 13.04
627 448.7 13.06
628 449.4 13.08
629 450.1 13.10
630 450.8 13.13
631 451.6 13.15
632 452.3 13.17
633 453.0 13.19
634 453.7 13.21
635 454.4 13.23
636 455.1 13.25
637 455.9 13.27
638 456.6 13.29
639 457.3 13.31
640 458.0 13.33
641 458.7 13.35
642 459.4 13.38
643 460.1 13.40
644 460.9 13.42
645 461.6 13.44
646 462.3 13.46
647 463.0 13.48
648 463.7 13.50
649 464.4 13.52
STEP
Distance
Time
[cm] [msec]
650 465.2 13.54
651 465.9 13.56
652 466.6 13.58
653 467.3 13.60
654 468.0 13.63
655 468.7 13.65
656 469.5 13.67
657 470.2 13.69
658 470.9 13.71
659 471.6 13.73
660 472.3 13.75
661 473.0 13.77
662 473.7 13.79
663 474.5 13.81
664 475.2 13.83
665 475.9 13.85
666 476.6 13.88
667 477.3 13.90
668 478.0 13.92
669 478.8 13.94
670 479.5 13.96
671 480.2 13.98
672 480.9 14.00
673 481.6 14.02
674 482.3 14.04
675 483.0 14.06
676 483.8 14.08
677 484.5 14.10
678 485.2 14.13
679 485.9 14.15
680 486.6 14.17
681 487.3 14.19
682 488.1 14.21
683 488.8 14.23
684 489.5 14.25
685 490.2 14.27
686 490.9 14.29
687 491.6 14.31
688 492.4 14.33
689 493.1 14.35
690 493.8 14.38
691 494.5 14.40
692 495.2 14.42
693 495.9 14.44
694 496.6 14.46
695 497.4 14.48
696 498.1 14.50
697 498.8 14.52
698 499.5 14.54
699 500.2 14.56
700 500.9 14.58
701 501.7 14.60
702 502.4 14.63
703 503.1 14.65
704 503.8 14.67
705 504.5 14.69
706 505.2 14.71
707 505.9 14.73
708 506.7 14.75
709 507.4 14.77
710 508.1 14.79
711 508.8 14.81
712 509.5 14.83
713 510.2 14.85
714 511.0 14.88
715 511.7 14.90
716 512.4 14.92
English
32 DRZ9255
DRZ9255 33
Page 20
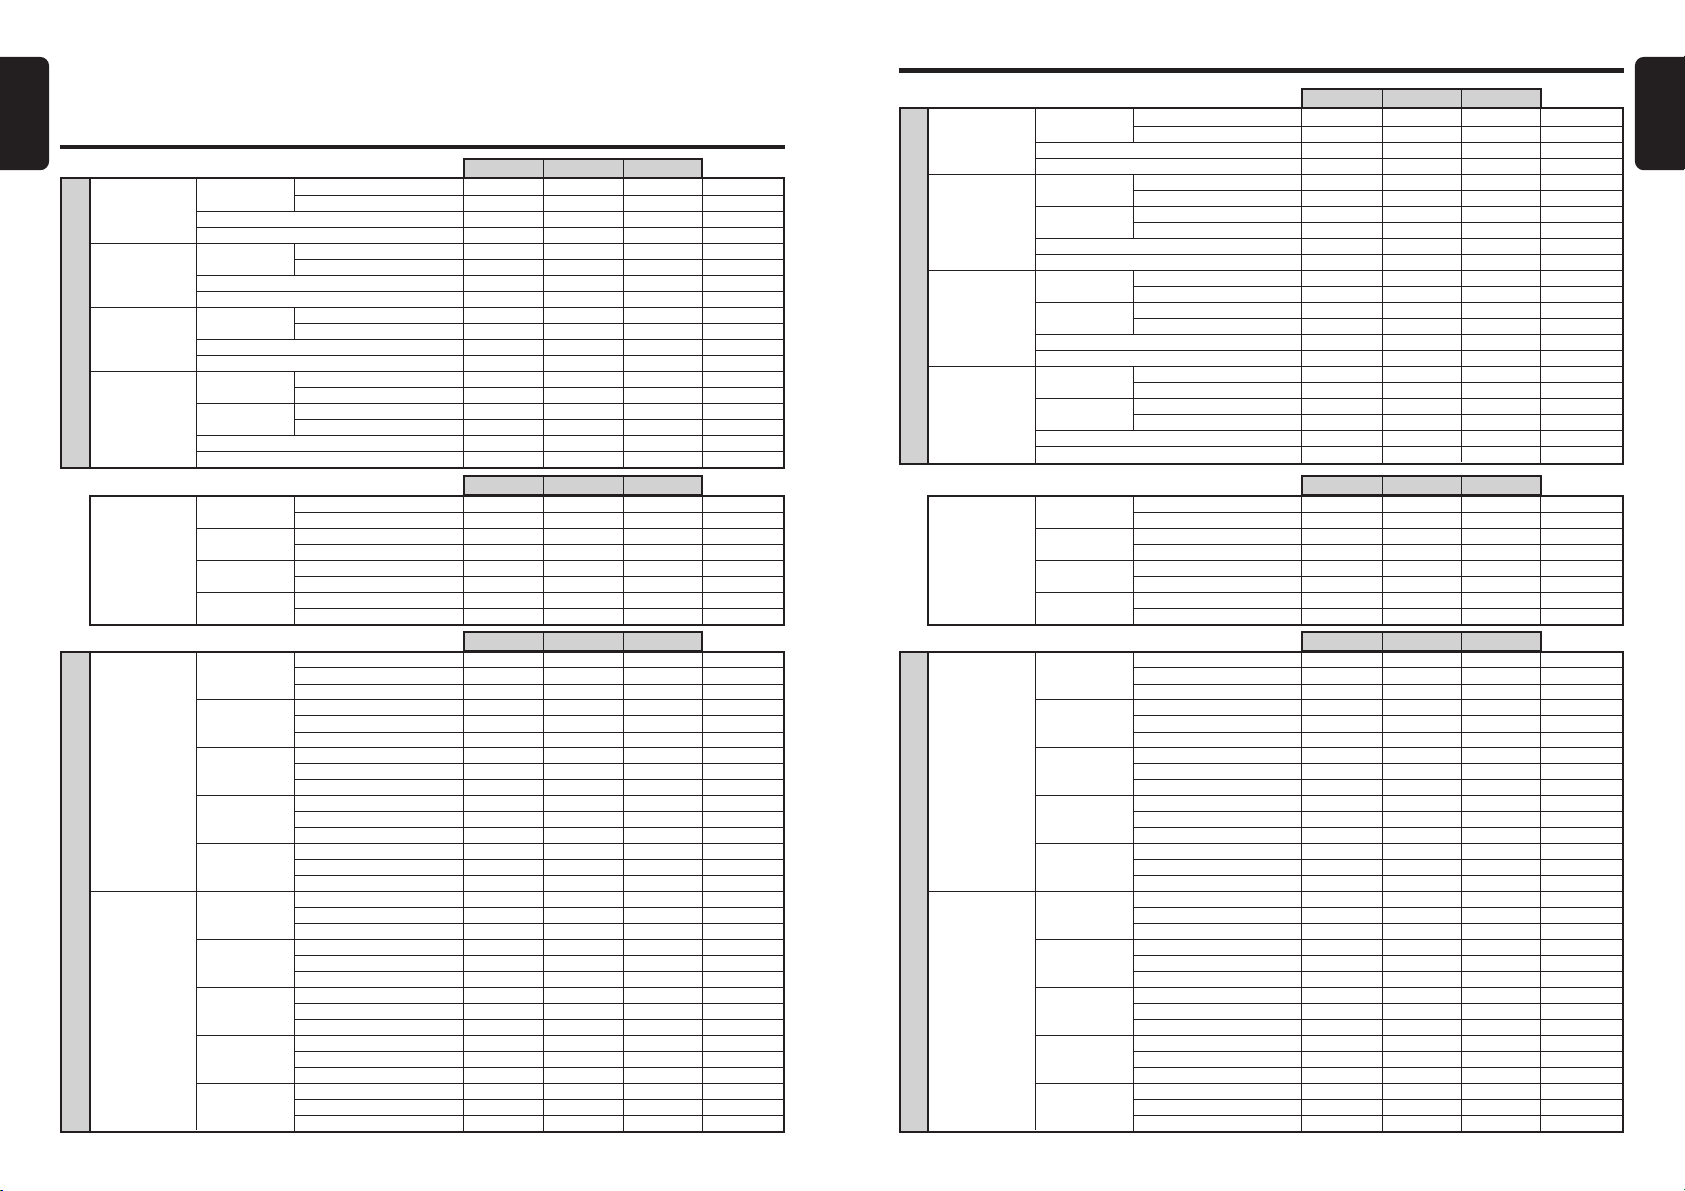
English
MEMO : SOUND SETUP MEMO
Standard Mode
MEMORY1 MEMORY2 MEMORY3
MEMORY1 MEMORY2 MEMORY3
MEMORY1 MEMORY2 MEMORY3
FRONT-HIGH
FRONT-LOW
FILTER
REAR
SUB-W
TIME Alignment
LEFT
P. E Q
RIGHT
HPF
LPF
HPF
LPF
HPF
FRONT-HIGH
FRONT-LOW
REAR
SUB-W
BAND1 Gain dB
BAND2 Gain dB
BAND3 Gain dB
BAND4 Gain dB
BAND5 Gain dB
BAND1 Gain dB
BAND2 Gain dB
BAND3 Gain dB
BAND4 Gain dB
BAND5 Gain dB
Filter frequency(fc) Hz
Slope dB/oct
Gain dB
Phase NOR/REV NOR/REV NOR/REV
Filter frequency(fc) Hz
Slope dB/oct
Gain dB
Phase NOR/REV NOR/REV NOR/REV
Filter frequency(fc) Hz
Slope dB/oct
Gain dB
Phase NOR/REV NOR/REV NOR/REV
Filter frequency(fc) Hz
Slope dB/oct
Filter frequency(fc) Hz
Slope dB/oct
Gain dB
Phase NOR/REV NOR/REV NOR/REV
Lch cm
Rch cm
Lch cm
Rch cm
Lch cm
Rch cm
Lch cm
Rch cm
Center frequency(fo) Hz
Center frequency(fo) Hz
Center frequency(fo) Hz
Center frequency(fo) Hz
Center frequency(fo) Hz
Center frequency(fo) Hz
Center frequency(fo) Hz
Center frequency(fo) Hz
Center frequency(fo) Hz
Center frequency(fo) Hz
Q
Q
Q
Q
Q
Q
Q
Q
Q
Q
Multi Mode
HIGH
MID
LOW
X-OVER
SUB-W
TIME Alignment
LEFT
P. E Q
RIGHT
HPF
LPF
HPF
LPF
HPF
LPF
HPF
HIGH
MID
LOW
SUB-W
BAND1 Gain dB
BAND2 Gain dB
BAND3 Gain dB
BAND4 Gain dB
BAND5 Gain dB
BAND1 Gain dB
BAND2 Gain dB
BAND3 Gain dB
BAND4 Gain dB
BAND5 Gain dB
Filter frequency(fc) Hz
Slope dB/oct
Gain dB
Phase NOR/REV NOR/REV NOR/REV
Filter frequency(fc) Hz
Slope dB/oct
Filter frequency(fc) Hz
Slope dB/oct
Gain dB
Phase NOR/REV NOR/REV NOR/REV
Filter frequency(fc) Hz
Slope dB/oct
Filter frequency(fc) Hz
Slope dB/oct
Gain dB
Phase NOR/REV NOR/REV NOR/REV
Filter frequency(fc) Hz
Slope dB/oct
Filter frequency(fc) Hz
Slope dB/oct
Gain dB
Phase NOR/REV NOR/REV NOR/REV
Lch cm
Rch cm
Lch cm
Rch cm
Lch cm
Rch cm
Lch cm
Rch cm
Center frequency(fo) Hz
Center frequency(fo) Hz
Center frequency(fo) Hz
Center frequency(fo) Hz
Center frequency(fo) Hz
Center frequency(fo) Hz
Center frequency(fo) Hz
Center frequency(fo) Hz
Center frequency(fo) Hz
Center frequency(fo) Hz
Q
Q
Q
Q
Q
Q
Q
Q
Q
Q
MEMORY1 MEMORY2 MEMORY3
MEMORY1 MEMORY2 MEMORY3
MEMORY1 MEMORY2 MEMORY3
English
34 DRZ9255
DRZ9255 35
 Loading...