

Page 1
7
English
Owner’s Guide
This unit has been designed specifically for playback of compact discs bearing the mark.
No other discs can be played.
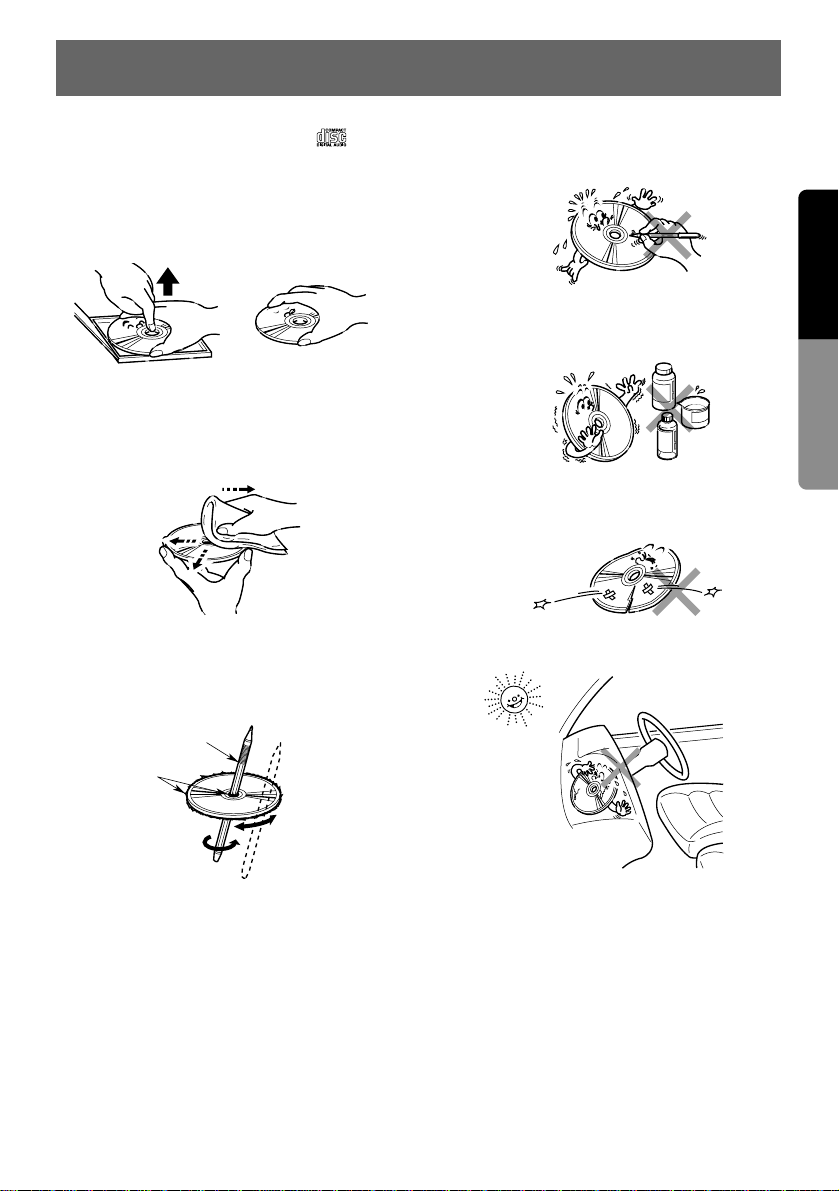
To remove the compact disc from its storage
case, press down on the center of the case and
lift the disc out, holding it carefully by the edges.
Always handle the compact disc by the edges.
Never touch the surface.
To remove fingermarks and dust, use a soft
cloth, and wipe in a straight line from the center
of the compact disc to the circumference.
New discs may have some roughness around
the edges. The unit may not work or the sound
may skip if such discs are used. Use a ball-point
pen, etc. to remove roughness from the edge of
the disc.
Note on Compact Discs
Never stick labels on the surface of the compact
disc or mark the surface with a pencil or pen.
Do not use any solvents such as commercially
available cleaners, anti-static spray, or thinner to
clean compact discs.
Do not use compact discs that have large
scratches, are misshapen, or cracked, etc. Use
of such discs will cause misoperation or damage.
Do not expose compact discs to direct sunlight
or any heat source.
No
No
No
No
Ball-point pen
Roughness
Proper way to hold
the compact disc
Z
Z
Z
Removing the disc
4. HANDLING COMPACT DISCS
Note:
Do not use commercially available CD protection sheets or discs equipped with stabilizers, etc. These
may get caught in the internal mechanism and damage the disc.
Page 2
8
English
Owner’s Guide
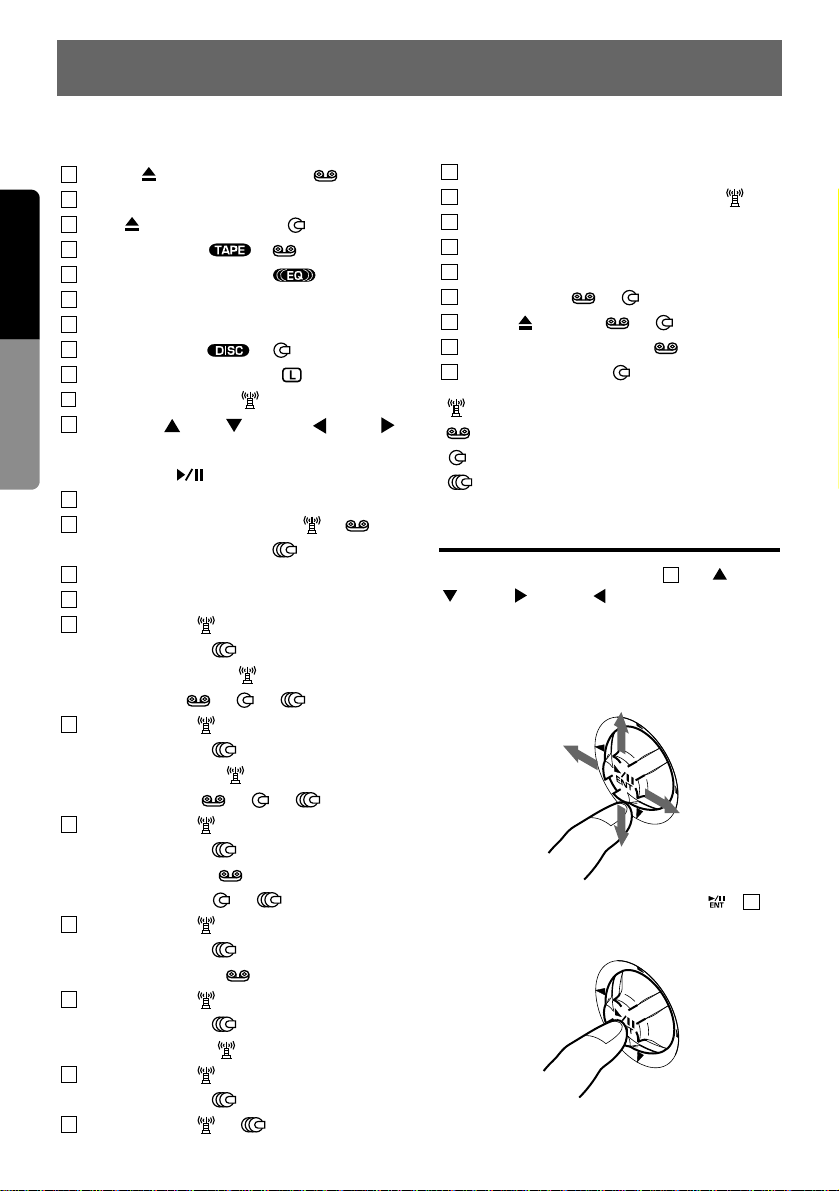
5. BUTTON TERMINOLOGY
Note: Be sure to read this chapter referring to the front diagrams of chapter “2. CONTROLS” on page
5 (spread).
TAPE ( : Tape Eject) Button [ ]
SLOPE Button
CD ( : CD Eject) Button [ ]
TAPE Indicator ( ) [ ]
EQ (Equalizer) Indicator ( )
A-M (Audio Mode) Button
VISU (Visual) Button
DISC Indicator ( ) [ ]
L (Monitor Lock) Indicator ( )
ADJ (Adjust) Button [ ]
Up/Down ( (Up)/ (Down), (Left)/
(Right)) Buttons
ENT (Enter ) Button
FUNC (Power/Function) Button
BND (Band/Program) Button [ ], [ ]
MAG (Magazine) Button [ ]
Receiver for remote control unit
EQ (Equalizer) Button
Preset Button [ ]
Disc No. Button [ ]
Preset Scan Button [ ]
Scan Button [ ], [ ], [ ]
Preset Button [ ]
Disc No. Button [ ]
Auto Store Button [ ]
Repeat Button [ ], [ ], [ ]
Preset Button [ ]
Disc No. Button [ ]
Dolby NR Button [ ]
Random Button [ ], [ ]
Preset Button [ ]
Disc No. Button [ ]
Blank Skip Button [ ]
Preset Button [ ]
Disc No. Button [ ]
Monaural Button [ ]
Preset Button [ ]
Disc No. Button [ ]
SHIFT Button [ ], [ ]
TITLE Button
ISR (Instant Station Recall) Button [ ]
MONI (Monitor) Button
DISP (Display) Button
Display
Close Button [ ], [ ]
Eject ( ) Button [ ], [ ]
Cassette Insertion Slot []
CD Insertion Slot []
[ ] : In Radio Mode
[ ] : In Tape Mode
[ ] : In CD Mode
[ ] : In CD Changer Mode
First Finger Control Operation
By sliding the Up/Down button up , down
, right , or left , you can select various
items and make settings. This function is called
the First Finger Control Operation. With this
function, you can select a menu or track, control
the volume, or change a frequency according to
the operation mode.
Press the center of the ENT button ( ) to
execute a selected menu, play/pause, or mute
on/off.
11
11
31
30
29
28
27
26
25
24
23
22
21
20
19
18
17
16
15
14
13
12
11
10
9
8
7
6
5
4
3
2
1
Page 3
9
English
Owner’s Guide
Functions of Remote Control Unit Buttons
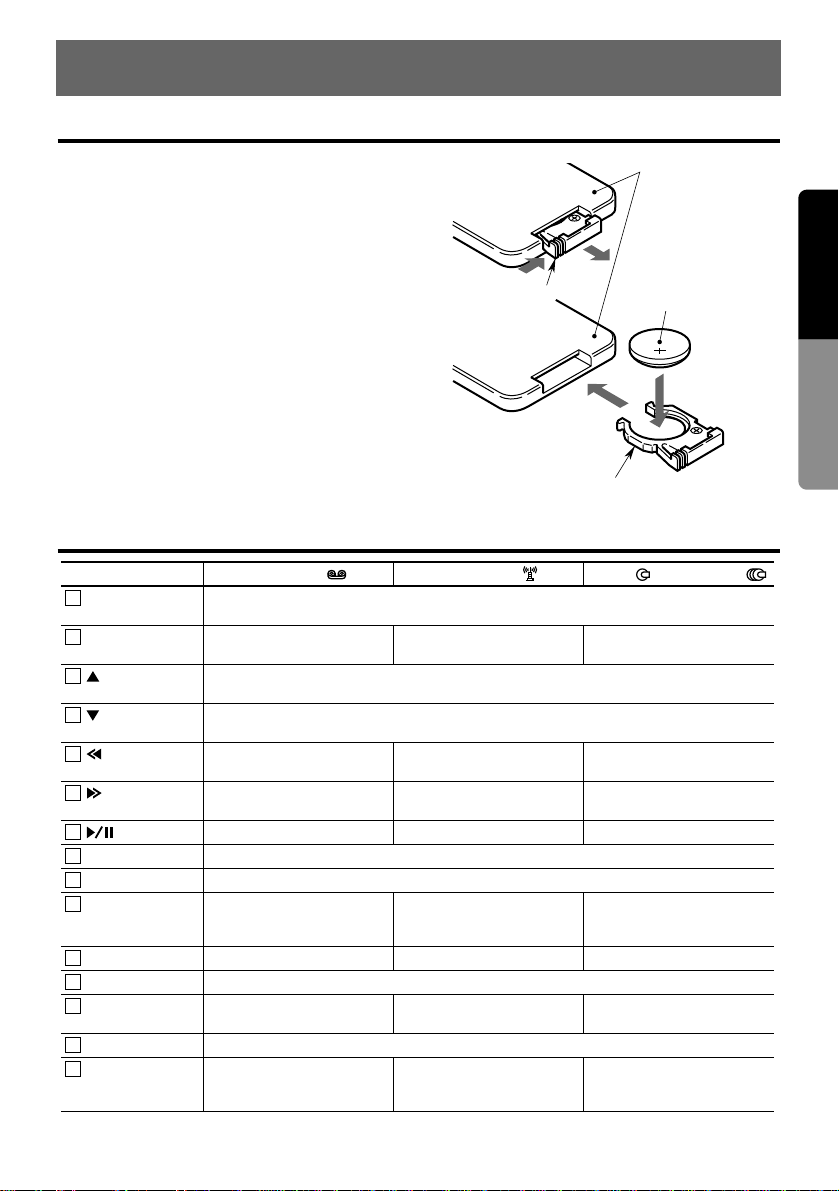
6. REMOTE CONTROL
Inserting the Battery
1) Turn the remote control unit upside down,
push the lock in the direction of the arrow,
and pull out the battery holder.
2) Insert the enclosed battery (CR2025) with
the “+” side facing up.
3) Push the battery holder back in securely until
a click is heard.
Notes:
Using batteries improperly can cause them to
explode. Take note of the following points:
•
When replacing the battery, be sure to set the new
battery with the “+” side facing up.
•
Do not short-circuit, disassemble or heat batteries.
•
Do not dispose of batteries in flames.
•
Dispose of spent batteries in the proper place.
C
R
2
0
2
5
1)
3)
2)
Remote Control Unit
Enclosed battery
(CR2025)
Battery holder
Lock
Rear side
Button Tape Mode [ ] Radio Mode [ ]
CD Mode [ ]/CD Changer Mode [ ]
FUNC (POWER) Turns power on, switches between tape, radio, and CD, and turns power off when pressed
for 1 second or longer.
BAND (BAND/
DISC/PROG)
Switches playback direction
and cancels scan play.
Switches reception band. Switches the disc (only in CD
changer mode).
(VOLUME UP)
Turns volume up.
(VOLUME DOWN)
Turns volume down.
(SEARCH DOWN)
REW, APC-REW Preset channel down Search down
(SEARCH UP)
FF, APC-FF Preset channel up Search up
Play/Pause Switches mute on and off. Play/Pause
VISU (VISUAL) Switches the display to monitor.
DISP Displays and switches the spectrum analyzer patterns.
ISR Calls ISR. Calls ISR and stores a chan-
nel when pressed for about 2
seconds.
Calls ISR.
RPT (REPEAT) Repeat None Repeat
EQ (EQ PROG) Calls the EQ USER display.
RDM (RANDOM/
DOLBY NR)
Switches Dolby NR mode on
and off.
None Random
MONI (MONITOR) Switches the monitor on and off.
SCN
(SCAN PS/AS)
Scan Preset scan, stores a station
when pressed for about 2
seconds.
Scan
1
2
3
4
5
6
7
8
9
10
11
12
13
14
15
Note:
Functions of the source unit and the remote control unit differ slightly.
Page 4
10
English
Owner’s Guide
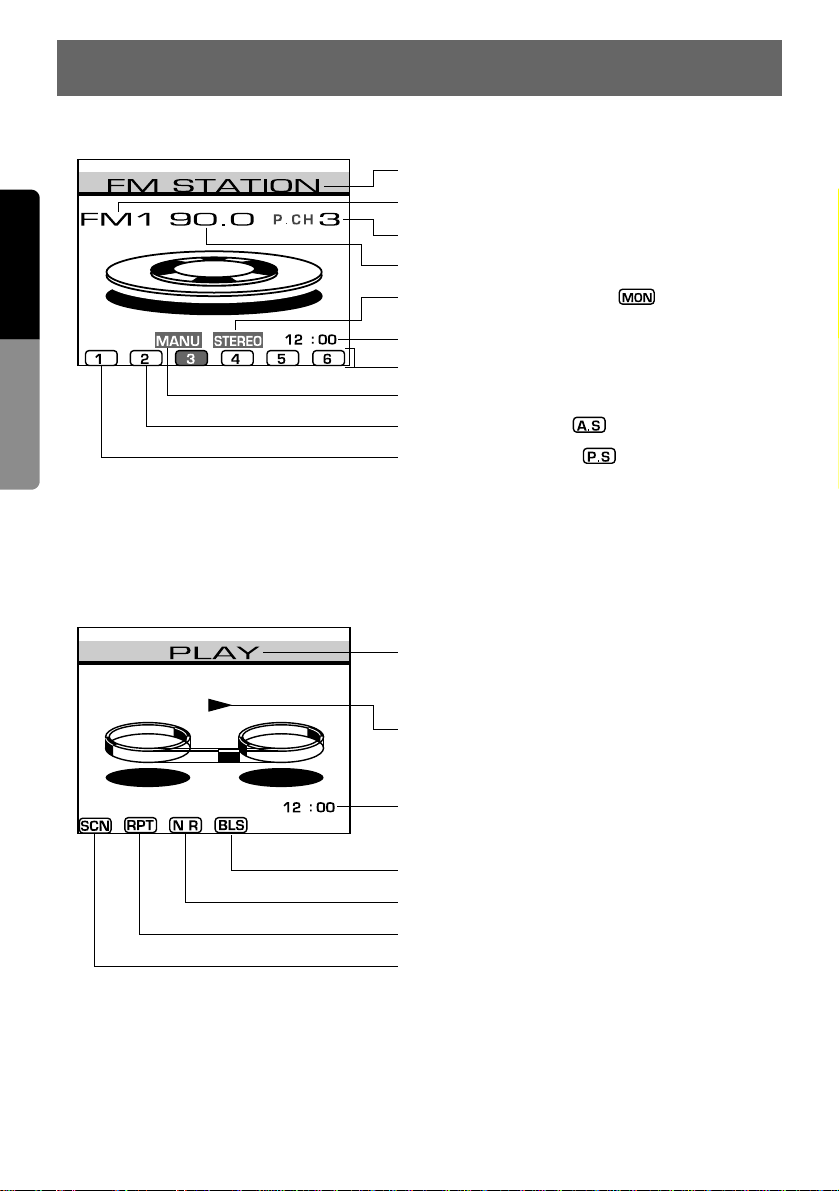
7. MODE DISPLAY
<Radio Mode>
<Tape Mode>
Station title
Preset channel
Frequency
Stereo/Monaural indication ( )
Current time
Preset Nos.
Manual indication
Preset scan indication ( )
Auto store indication ( )
Band
Playback direction
Tape status
PLAY, FF, REW, APC-FF, APC-REW,
PAUSE, EJECT, NO CASSETTE
Current time
Blank skip ON/OFF indication
Dolby NR ON/OFF indication
Repeat ON/OFF indication
Scan ON/OFF indication
Page 5
11
English
Owner’s Guide
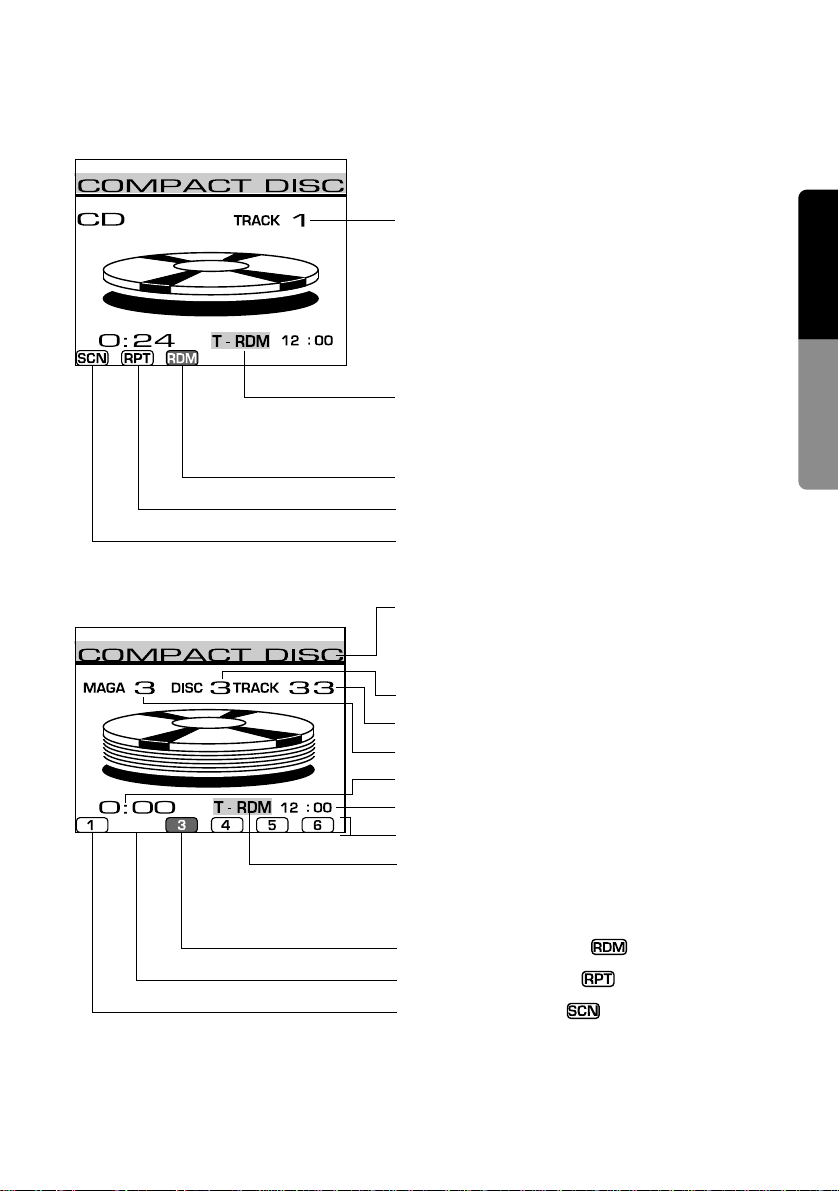
CD title
<CD Mode>
<CD Changer Mode>
Track No.
Display about track
Track random: “T-RDM”
Track repeat : “T-RPT”
Track scan : “T-SCN”
Random play indication
Repeat play indication
Scan play indication
Scan play indication ( )
Repeat play indication ( )
Random play indication ( )
Display about track
Track random: “T-RDM”
Track repeat : “T-RPT”
Track scan : “T-SCN”
Stored disc Nos.
Current time
Playback time counter
Magazine No.
Track No.
Disc No.
When a CD magazine is not loaded in the CD changer,
“NO MAGAZINE” is displayed and “DISC CHECK” is
displayed after that until the playback starts.
Page 6
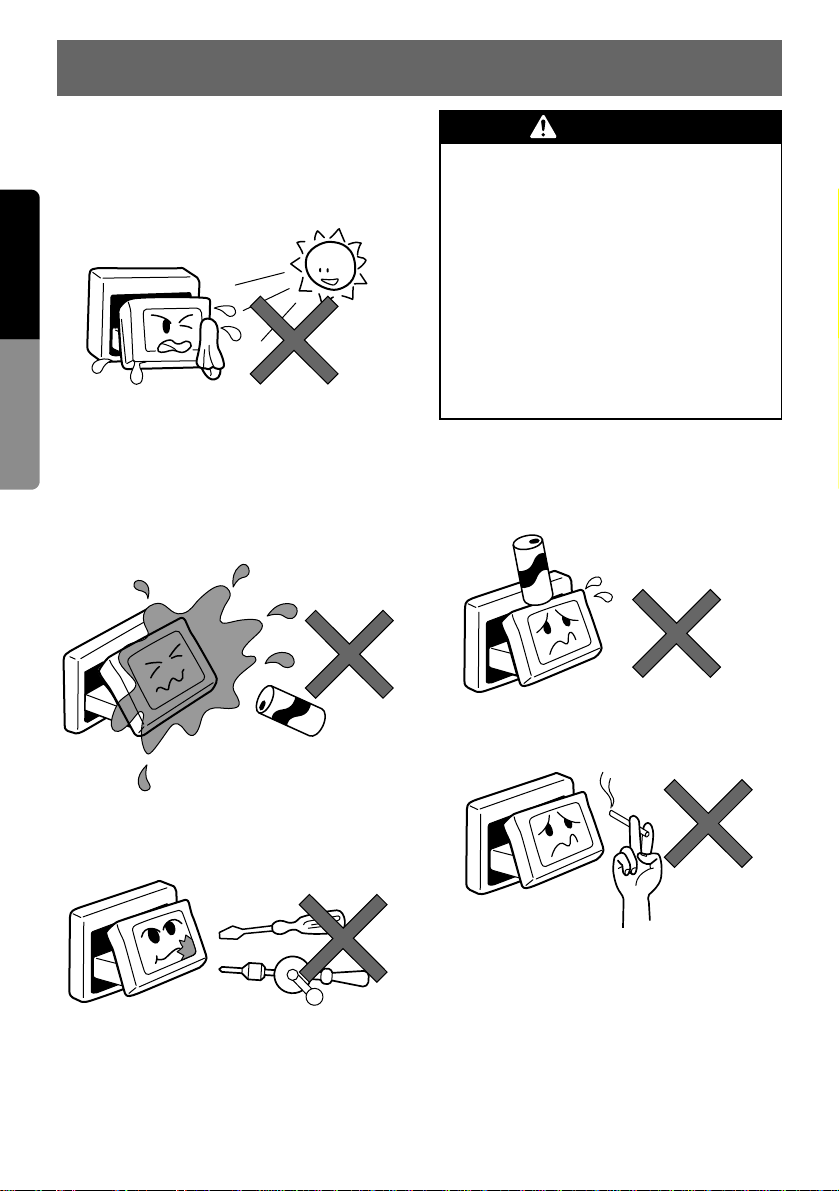
For a longer service life, be sure to read the following cautions.
•
Be sure to store the LCD panel inside the
source unit when parking the car outdoors for
long periods of time.
The LCD panel will operate properly in a temperature range of 32°F (0°C) to 140°F
(60°C).
•
Don’t allow any liquids on the set from drinks,
umbrellas etc. Doing so may damage the
internal circuitry.
•
Do not disassemble or modify the set in any
way. Doing so may result in damage.
•
Do not draw the LCD panel out and use it as
a tray. Also, subjecting the LCD panel to
shocks may result in breakage, deformation
or other damage.
•
Do not let cigarettes burn the LCD panel.
Doing so may damage or deform the cabinet.
•
If a problem should occur, have the set
inspected at your store of purchase.
•
Do not insert objects or poke in the space
between the LCD panel and the source unit
when the panel is tilted.
•
Do not place anything on the LCD panel
when the LCD panel is tilted.
No
No
No
No
No
12
English
Owner’s Guide
8. CAUTIONS ON HANDLING
THIS PRODUCT IS NOT INTENDED FOR
VIEWING TELEVISION BROADCASTS OR
VIDEO TAPES OR FOR PLAYING VIDEO
GAMES. Such uses of this product may
distract the driver or interfere with the driver’s safe operation of the motor vehicle
and may violate state law. CLARION DISCLAIMS ANY LIABILITY FOR ANY BODILY
INJURY, INCLUDING FATALITIES, OR
PROPERTY DAMAGE THAT MAY RESULT
FROM ANY SUCH UNINTENDED USES OR
FROM ANY IMPROPER USE OF THIS
PRODUCT.
WARNING
Page 7
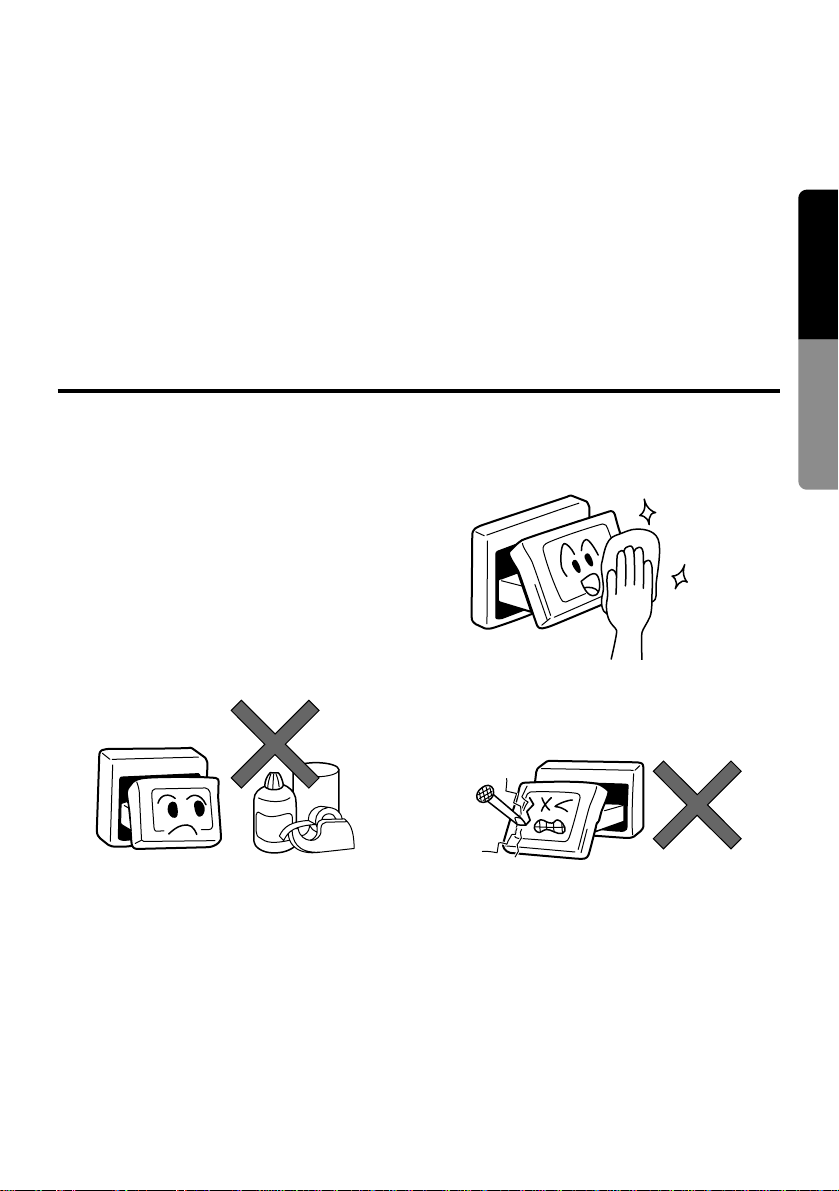
•
Cleaning the cabinet
Use a soft, dry cloth and gently wipe off the
dirt.
For tough dirt, apply some neutral detergent
diluted in water to a soft cloth, wipe off the dirt
gently, then wipe again with a dry cloth.
Do not use benzene, thinner, car cleaner,
etc., as these substances may damage the
cabinet or cause the paint to peel. Also, leaving rubber of plastic products in contact with
the cabinet for long periods of time may
cause stains.
•
Cleaning the LCD panel
The LCD panel tends to collect dust, so wipe
it off occasionally with a soft cloth.
The surface is easily scratched, so do not rub
it with hard objects.
No
Scratch
Good
No
13
English
Owner’s Guide
Cleaning
•
Do not hold on the display when adjusting the
angle of the LCD panel. Doing so may damage it.
•
The remote controller may not work if the
remote control sensor is exposed to direct
sunlight.
•
In extremely cold weather, the movement of the
picture may be slow and the display may be
dark, but this is not a malfunction. The set will
work normally once the temperature increases.
•
Small black and shiny dots inside the LCD
panel are normal for LCD products.
•
The LCD panel may stop temporarily when it
is opened or closed when the engine is
stopped or when it is cold. This is not a malfunction. If this happens, repeat the operation.
Page 8
When this unit is turned on, starting and stopping the engine of a car with its volume raised
to the maximum level may harm your hearing.
Be careful about adjusting the volume.
NOTE: Use this unit after starting the engine.
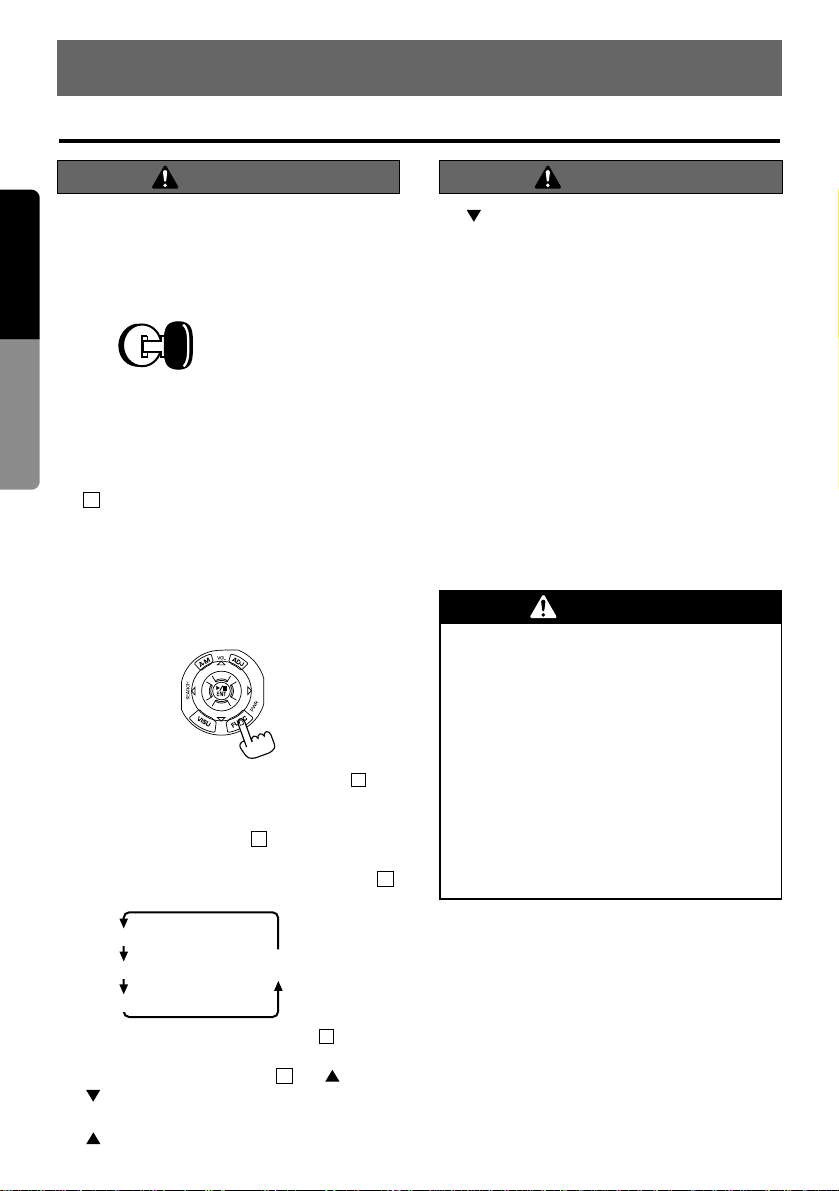
Turning on the power and adjusting
the volume
1) After tur ning the car’s ignition switch on and
starting the engine, press the FUNC button
to turn on the power to the unit.
*
The current mode is shown in Display .
*
This unit starts in the mode it was in when the
power was turned off last.
2) Press the FUNC button to select the operation mode.
Each time you press the FUNC button ,
the operation mode changes as follows:
*
Press and hold the FUNC button for about
1 second to turn off the power.
3) Slide the Up/Down button to (up) or
(down) to adjust the
volume.
: Increases the volume.
: Decreases the volume.
*
The volume level indicated is in the display in
a range from 0 (minimum) to 33 (maximum).
Note:
•
In the CONFIGURATION or BALANCE display,
the volume cannot be adjusted.
11
12
Tape mode
Radio mode
CD changer mode
(When the CD changer is connected)
CD mode
12
12
27
12
ACC or engine
ON position
14
English
Owner’s Guide
9. OPERATION
Basic Operations
CAUTION
Note: Be sure to read this chapter referring to the front diagrams of
chapter “2. CONTROLS” on page 5 (spread).
CAUTION
THIS PRODUCT IS NOT INTENDED FOR
VIEWING TELEVISION BROADCASTS OR
VIDEO TAPES OR FOR PLAYING VIDEO
GAMES. Such uses of this product may
distract the driver or interfere with the driver’s safe operation of the motor vehicle
and may violate state law. CLARION DISCLAIMS ANY LIABILITY FOR ANY BODILY
INJURY, INCLUDING FATALITIES, OR
PROPERTY DAMAGE THAT MAY RESULT
FROM ANY SUCH UNINTENDED USES OR
FROM ANY IMPROPER USE OF THIS
PRODUCT.
WARNING
Page 9
While driving, keep the volume to a level at
which external sounds can be heard.
Turning on and off the monitor
Each time you press the MONI button , the
monitor is turned on and off.
*
While using the rear vision camera, monitor-off
mode is canceled. When a button other than the
ENT button , the TAPE button , SLOPE button , or CD button is pressed, monitor-off
mode is canceled.
Mute
Each time you press (center) of the ENT
button , mute is turned on and off.
“MUTE” is displayed when mute is turned on in
radio mode, and “PAUSE” is displayed in tape,
CD or CD changer mode.
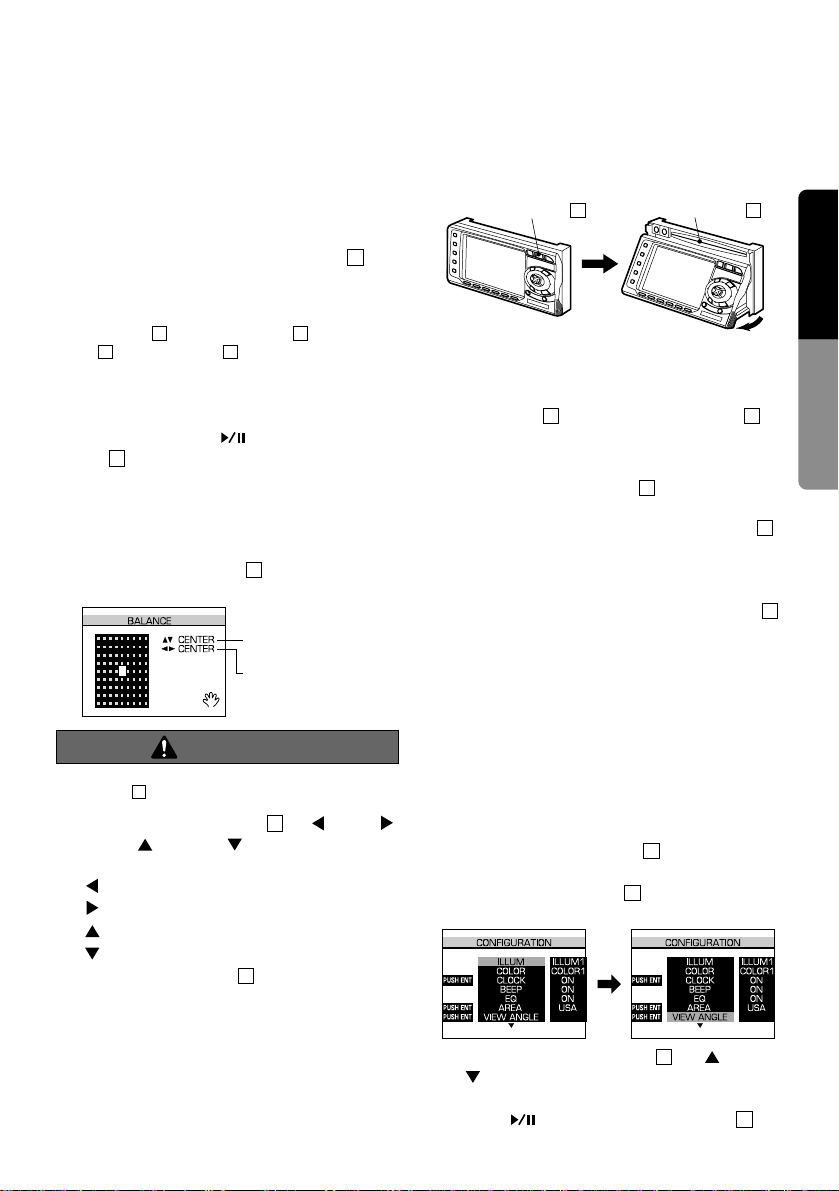
Adjusting the balance
1) Press the A-M button to go to the BALANCE display.
Note:
•
If no setting is made 5 seconds after pressing the AM button , the unit returns to the previous mode.
2) Slide the Up/Down button to (left),
(right), (up), or (down) to adjust the
balance of the speakers.
: Increases the volume of the left speaker.
: Increases the volume of the right speaker.
: Increases the volume of the front speaker.
: Increases the volume of the rear speaker .
3) Press the A-M button to return to the previous mode.
*
The tone is adjusted with the equalizer. For
information on equalizer operation, see the
section “Operating the Equalizer.”
Adjusting the operation panel to a
good viewing angle
Adjust the operation panel to an appropriate angle
to watch the display and operate the buttons.
Do not place foreign objects in the Cassette
Insertion slot or the CD Insertion slot .
When adjusting the angle of the panel, be careful not to let your fingers get caught in the panel.
1) While the SLOPE button is held down, the
operation panel tilts.
If you press and hold the SLOPE button ,
the panel turns upward to the maximum
angle and stops.
2) When the operation panel is set to the maximum angle, pressing the SLOPE button
closes the panel.
*
The operation panel angle can be stored. For
details, see the next subsection.
Notes:
•
Do not place any object on the operation panel.
•
Do not expose the operation panel to shocks.
Storing the operation panel angle
When the operation panel angle is stored, it is
set to that angle after a CD or cassette tape is
inserted.
1) Press the SLOPE button to set an appropriate operation panel angle.
2) Press the ADJ button to go to the CONFIGURATION display.
3) Slide the Up/Down button to (up) or
(down) to move the cursor to “VIEW
ANGLE.”
4) Press (center) of the ENT button .
11
11
10
2
2
2
2
3130
SLOPE button
2
CD Insertion slot
31
6
11
6
Balance of the front
and rear speakers
Balance of the left
and right speakers
6
11
32
1
11
25
15
English
Owner’s Guide
CAUTION
Page 10

The operation panel turns upward and downward several times and stops at the stored
angle.
5) Press the ADJ button to return to the previous mode.
*
If you want to change the stored angle, perform the same operation from step 1).
Notes:
•
In step 3) above, the operation panel turns upward
and downward several times to store the set
angle. During this operation, be careful not to let
your fingers get caught in the panel.
•
Under some operating conditions, the stored
angle may vary slightly.
•
If you press the Close button when the operation panel is turned downward (tape is ejected),
the panel will not be set to the stored angle.
Setting the clock
1) Press the ADJ button to go to the CONFIGURATION display.
2) Slide the Up/Down button to (down) or
(up) and move the cursor to “CLOCK.”
3) Press (center) of the ENT button to
go to clock setting mode.
4) Slide the Up/Down button to (left),
(right), (up), or (down) to set a time.
: Selects the hour (the hour becomes blue
and can be changed).
: Selects the minute (the minute becomes
blue and can be changed).
: The hour or minute increments while the
corresponding figure is blue.
: The hour or minute decrements while
the corresponding figure is blue.
5) After adjusting the time, press (center)
of the ENT button to set it.
*
Pressing (center) of the ENT button
resets the second to zero.
6) Pressing the ADJ button returns the mode
to the previous one.
Note:
•
The time is always displayed in radio, tape, CD,
and CD changer modes. (However, when the
“CITY LIGHTS” pattern in the spectrum analyzer
is selected or the security camera is used, the
time is not displayed.)
10
11
11
Increments the figure.
Selects the minute.Selects the hour.
Decrements the figure.
11
11
11
10
28
10
16
English
Owner’s Guide
Page 11

Listening to the radio
1) Press the FUNC button to select radio mode.
2) Press the BND button to select a band.
Each time you press the BND button , the
band changes in the following order:
*
Each time you press the Monaural button ,
the unit toggles between on (stereo) and off
(monaural).
3) Press one of the preset buttons to to
tune in to a station.
Seek tuning
1) While appears in the display, press
and hold the BND button for about 1 second to switch to the seek tuning.
2) Slide the Up/Down button to (right) or
(left) to start the seek tuning. When a sta-
tion is found, it is automatically tuned in.
: Seeks higher frequency stations.
: Seeks lower frequency stations.
*
To stop the seek tuning, slide the Up/Down
button to (left) or (right).
Manual tuning
1) When does not appear in the display,
press and hold the BND button for about
2 seconds to select manual tuning.
*
When manual tuning is selected,
appears in the display.
2) Slide the Up/Down button to (r ight) or
(left) to tune in to a station.
*
Each time you slide the Up/Down button ,
the frequency changes in 0.2 MHz increments
for the FM and in 10 kHz increments for the
AM band.
*
Press and hold the Up/Down button to
(right) and (left) to increase or decrease
the frequency continuously.
Preset memory function
A total of 24 stations can be preset, 6 each for
the FM1, FM2, FM3, and AM bands.
Note:
•
When a station is preset, the station previously
stored in the memory at that position is cleared.
Manual memory function
1) Press the BND button to select a band.
2) Slide the Up/Down button to (right) or
(left) to tune in to a station.
3) Press and hold for about 2 seconds one of
the Preset buttons to where you want
to store the station. When a beep sounds, the
station is stored in that button.
*
One station in each band can be preset to
each button.
Auto store function
1) Press the BND button to select a band.
2) Press the SHIFT button to select PS/AS
mode.
*
Press the SHIFT button again to return to
preset mode.
3) Press the Auto Store button . Stations with
good reception are automatically stored in
preset buttons starting from Preset button .
(After storing 6 stations, preset No. 1 station
is tuned in and auto storing ends.)
*
in the display becomes pink.
*
Stations with good reception are stored in the
order from the current station to stations with a
higher frequency . If there are fewer than 6 stations
with good reception, the auto storing returns to
the lowest frequency and resumes from there.
Note:
•
When stations are preset by the auto store function,
the station previously stored in the memory at that
position is cleared. If there are fewer than 6 stations
with good reception, the stations previously stored
at the remaining preset buttons are not cleared.
Preset scanning
1) Press the BND button to select a band.
2) Press the SHIFT button to select PS/AS
mode.
*
Press the SHIFT button to return to preset
mode.
3) When the Preset Scan button is pressed,
the preset stations are tuned in for 5 seconds
each from Preset button .
*
in the display becomes pink.
*
When a preset station has been tuned in, preset
scanning starts from the station after the current
one. When a preset station has not been tuned
in, preset scanning starts from preset No. 1.
P.S
16
16
22
22
13
A.S
16
17
22
22
13
2116
11
13
11
11
11
MANU
13
MANU
11
11
13
MANU
2116
20
FM1
FM2 FM3 AM
13
13
12
17
English
Owner’s Guide
Radio Mode Operations
Page 12

4) When a desirable station is tuned in, press
the SHIFT button to cancel PS/AS mode
and press the preset button to which the station is to be stored.
*
The preset scanning is canceled and you can
listen to the station.
Preset selection
1) Press the BND button to select a band.
2) Press one of the Preset buttons to to
select the stored station.
Note:
•
In PS/AS mode, do not perform the preset selection (excluding the preset scanning).
In PS/AS mode, when the Preset button is
pressed, the auto storing starts and all the stored
stations are cleared.
ISR memory
If an AM or FM station is stored in the ISR button, it can be directly tuned in by pressing the
ISR button from any other mode.
1) Press the BND button to select a band.
2) Press the Preset buttons to or the ENT
button to tune in to a station you want to
store.
3) Press and hold the ISR button for about 2
seconds.
When a beep sounds, the display turns to the
ISR (Instant Station Recall) display and the
frequency is stored.
4) Press the ISR button to return to the previous mode.
Calling the station with the ISR button
1) In any mode, pressing the ISR button
allows you to tune in to the stored station.
*
When the ISR is functioning, the ISR display
appears.
*
The default ISR setting is 87.9 MHz.
2) To cancel the ISR function, press the ISR button or FUNC button . The ISR function
is canceled and the previous mode returns.
Area change
When you listen to the radio outside the U.S.,
use this function.
Switchable frequency setting
This car stereo is initially set to tune in frequency intervals of 10 kHz for AM and 200 kHz for
FM, the standard calibrations in the U.S. When
using the unit outside the U.S., use the following
procedure to switch the frequency range.
The table below lists the frequency specifications for the U.S. and other countries.
Changing area
Depending on whether you use the unit in the
U.S. or outside the U.S., switch the area as follows:
1) Press the ADJ button to go to the CONFIGURATION display.
2) Slide the Up/Down button to (up) or
(down) and move the cursor to “AREA.”
3) Slide the Up/Down button to (right) to
switch the area (between in the U.S. and outside the U.S.).
4) Press the ADJ button to return to the previous mode.
*
The new setting returns to the initial setting.
10
11
11
10
New Setting
(outside U.S.)
Initial Setting
(U.S. standard)
9 kHz10 kHz
Frequency
spacing
531 to 1629 kHz530 to 1710 kHz
Frequency
range
50 kHz200 kHz
Frequency
spacing
87.5 to 108 MHz
87.9 to 107.9 MHz
Frequency
range
AM
FM
1224
24
24
24
11
2116
13
17
2116
13
22
18
English
Owner’s Guide
Page 13

Loading and playing a cassette tape
*
When a cassette tape is already inserted (When
the TAPE indicator lights), press the FUNC
button and select tape mode. Playback starts
automatically.
1) Press the TAPE button . The operation
panel turns downward and the Cassette
Insertion slot appears.
2) Insert a cassette tape into the Cassette
Insertion slot with the exposed side of the
tape facing right. Playback starts automatically.
*
After a cassette tape is inserted, the operation
panel closes. Adjust the operation panel angle
to an appropriate position.
When the operation panel angle is stored, it is
set to this angle automatically.
Do not put your hand or fingers into the
Cassette Insertion slot or CD Insertion slot,
as this may cause a breakdown.
Be careful not to let your fingers get caught
in the panel when it turns upward or downward.
Ejecting the cassette tape
Press the TAPE button or Eject button .
The operation panel turns downward so that the
tape can be ejected. After ejecting the cassette
tape, the operation panel closes automatically.
*
When the panel angle is stored, it is set to this angle.
*
The operation panel can be closed by pressing the
Close button .
Notes:
•
Do not leave a cassette tape in the ejected position (the operation panel is turned downward)
because it may cause a breakdown. Be sure to
remove the cassette tape or insert it and close the
operation panel.
•
Do not expose the operation panel to shocks.
Do not place foreign objects in the Cassette
Insertion slot or CD Insertion slot because it
may cause breakdown.
Be careful not to let your fingers get caught
in the panel when it turns upward or downward.
Stopping (pausing) playback
Press (center) of the ENT button .
Playback pauses. To resume playback, press
(center) of the ENT button again.
Fast-forwarding and rewinding
1) Slide the Up/Down button to (right) to
fast-forward the tape.
When the end of the tape is reached, the
other side of the tape is automatically played
back.
Slide the Up/Down button to (left) to
rewind the tape.
When the start of the tape is reached, that
side is automatically played back.
2) When the BND button is pressed at a
desired track (song), fast-forwarding or
rewinding is canceled and playback starts
from that point.
Auto metal function
When a metal or chrome tape is loaded, the unit
detects the type of the tape and selects the most
appropriate equalizer pattern.
*
appears in the display.
APC (Auto Program Control)
1) Slide the Up/Down button to (left)
twice to fast-forward the tape to the beginning
of the current track. Slide the Up/Down button
to (right) twice to fast-f orw ard the tape
to the beginning of the next track.
2) When (center) of the ENT button is
pressed at a desired track, the APC is canceled and playback starts from that point.
11
11
11
MTL
13
11
11
11
11
28
29
1
Cassette Insertion slot
30
30
30
1
12
4
19
English
Owner’s Guide
Tape Mode Operations
CAUTION
CAUTION
Page 14

Note:
•
When the (center) of the ENT button is
pressed at a location that is less than 15 seconds
from the start or end of the track, that track may be
skipped and the previous or the next track may be
selected instead.
Switching to the other side of the
tape
Press the BND button . Playback is switched
to the other side of the cassette tape.
Auto reverse mechanism
When the end of the cassette tape is reached,
the other side of the tape is played automatically without pressing the BND button .
FF scan function
1) Press the Scan button . The first 10 seconds of all the tracks on the cassette tape are
played repeatedly.
*
in the display becomes pink.
Note:
•
Scanning is performed only for the track after the
one that is currently being played.
2) Press the Scan button at the desired track
to cancel scanning and start playback from
that position.
*
in the display returns to the previous
color.
Repeat function
1) Press the Repeat button to play the current track repeatedly.
*
in the display becomes pink.
2) To cancel the repeat function, press the
Repeat button again to resume playback.
*
in the display returns to the previous
color.
Dolby Noise Reduction System
Press the Dolby NR button to turn on the
Dolby B NR.
*
in the display becomes pink.
•
The Dolby Noise Reduction System is manufactured under license of the Dolby Laboratories
Licensing Corporation.
•
DOLBY, and the double D mark are registered
trademarks of the Dolby Laboratories Licensing
Corporation.
*
To cancel the Dolby NR, press the Dolby NR button to turn off the Dolby B NR. in the
display returns to the previous color.
Blank skip function
Press the Blank Skip button to skip playback
to the beginning of the next recorded section
when there is a blank space of 12 seconds or
more between selections.
*
in the display becomes pink.
*
To cancel the blank skip function, press the Blank
Skip button again. Normal playback is
resumed and in the display returns to the
previous color.
Notes:
The APC, Scan, Repeat, and Blank skip functions
may not work normally with the following tapes:
•
Tapes on which the recording level is low.
•
Tapes on which there is less than 4 seconds of
blank space between selections.
•
Tapes on which there are long pauses in the middle of selections.
•
Tapes on which there is much noise between
selections.
BLS
19
BLS
19
N R
18
N R
18
RPT
17
RPT
17
SCN
16
SCN
16
13
13
11
20
English
Owner’s Guide
Page 15

Note:
•
CD-ROM discs cannot be played.
Loading and playing a CD
*
When a CD is already inserted (When the DISC
indicator lights), press the FUNC button
and select CD mode. Playback starts automatically.
1) Press the CD button . The operation panel
turns downward and the CD Insertion slot
appears.
Note:
•
When the operation panel angle has been adjusted with the SLOPE button (excluding the case
when it has been adjusted to the maximum
angle), a CD cannot be inserted because the
panel may damage it. Press the CD button or
press and hold the SLOPE button to set the
panel to the maximum angle and insert the CD.
2) Inser t the disc into the CD Insertion slot
with the label side facing up.
CD mode is set and playback begins automatically.
*
After a CD is inserted, the operation panel
closes automatically. Adjust the panel angle
with the SLOPE button . When an operation
panel angle has been stored, it is set to that
position automatically.
*
If the operation panel is turned downward after
ejecting a cassette tape or due to other operation, an alarm sounds, the operation panel
closes, and the CD playback begins automatically.
Do not put your hand or fingers into the
Cassette Insertion slot or CD Insertion slot,
as this may cause a breakdown.
Be careful not to let your fingers get caught
in the panel when it turns upward or downward.
3) Slide the Up/Down button to (right) or
(left) to select a track.
: Selects the next track. (Example: The
third track from the current one is selected by sliding the button 3 times.)
To return to the beginning of the current
track, slide the Up/Down button once
to (left).
: Selects the previous track. (Example:
The third track before the current one is
selected by sliding the button 1+3=4
times (the first sliding returns you to the
beginning of the current track).)
Ejecting the CD
1) Press the CD button to eject the CD.
2) Remove the CD.
Remove the CD only when the operation
panel is turned downward. The panel closes
automatically after a few seconds.
*
When the operation panel angle has been
stored, it is set to that position.
Notes:
•
Do not leave a disc in the ejected position. If the
unit is operated in such a condition, it may break
down or damage the disc.
•
When inserting a disc, insert it until it is fully drawn
into the slot.
•
When the operation panel is left in downward
position, a repeated beep sounds. Remove or fully
insert the CD or a tape and close the operation
panel.
•
Be careful not to let your fingers get caught in the
panel when it turns upward or downward.
•
When the CD button is pressed, the eject operation is performed even if a disc has not been
loaded. During the eject operation, the SLOPE
button and the TAPE button cannot be
operated.
•
If the operation panel is moved due to shock when
set to the maximum angle, it must be reset to the
maximum angle with the SLOPE button before
the CD can be ejected by pressing the CD button
.
3
2
12
3
3
11
11
2
31
For 5-inch (12 cm) CD
For 3-inch (8 cm) single CD
2
3
2
31
3
12
8
21
English
Owner’s Guide
CD Mode Operations
CAUTION
Page 16

Pausing playback
1) Press (center) of the ENT button to
pause playback.
*
“PAUSE” appears in the display.
2) Press (center) of the ENT button
again to resume playback.
Fast-forward and fast-backward
1) Slide and hold the Up/Down button to
(right) and (left). The CD fast-forwards
or fast-backwards while the button is being
held down.
: Moves forward 5 times faster than nor-
mal play when you slide it for about 1
second and 30 times faster than normal
play when you slide it for 5 seconds or
longer.
: Moves backward 5 times faster than nor-
mal play when you slide it for about 1
second and 30 times faster than normal
play when you slide it for 5 seconds or
longer.
2) Release the button when you reach the track
you want to listen to. Playback resumes.
Scan play
1) Press the Scan button . The first 10 seconds of all the tracks on the CD are played
repeatedly.
*
becomes pink and appears in
the display.
*
Scan play starts from the track after the current one.
*
When the power is turned off, scan play is canceled.
2) Press the Scan button when you reach
the track you want to listen to. Scan play is
canceled and playback starts.
Repeat play
1) Press the Repeat button to repeat playback of the current track.
*
becomes pink and appears in
the display.
*
To cancel repeat play, press the Repeat button
again. Playback resumes.
Random play
1) Press the Random button to start random
play.
*
becomes pink and appears in
the display.
*
To cancel random play, press the Random button again. Playback resumes.
18
T -RDM
RDM
18
17
T -RPT
RPT
17
16
T -SCN
SCN
16
11
11
11
22
English
Owner’s Guide
Page 17

This unit can control a separately sold CD
changer to store and play up to 18 CDs.
Note:
•
CD-ROM discs cannot be played.
Listening to a CD
1) Press the FUNC button and select CD
changer mode. Playback starts automatically.
2) Press one of the Disc No. buttons to
corresponding to each CD to select one.
*
The selected CD No. becomes pink in the display.
Note:
•
If a slot in a magazine is empty, that slot No. does
not appear in the display and cannot be selected.
3) Slide the Up/Down button to (right) or
(left) to select a track (song).
: Selects the next track. (Example: The
third track from the current one is selected by sliding the button 3 times.)
To return to the beginning of the current
track, slide the Up/Down button once
to (left).
: Selects the previous track.
(Example: The third track before the current one is selected by sliding the button
1+3=4 times (the first sliding returns you
to the beginning of the current track).)
Notes:
•
After CD No. 6 is played, CD No. 1 is played
again. However, when a CD changer capable of
storing 12 or 18 CDs is connected to the unit, all
CDs in all magazines are played sequentially
(unless the magazine is locked).
•
The empty slot No. is skipped and the next CD is
played.
Fast-forward and fast-backward
1) Slide and hold the Up/Down button to
(right) and (left). The CD fast-forw ards
or fast-backwards while the button is being
held.
: Moves forward 3 times faster than normal
play when you slide it for about 1 second
and 30 times faster than normal play
when you slide it for 5 seconds or longer.
: Moves backward 3 times faster than nor-
mal play when you slide it f or about 1 second and 30 times faster than normal play
when you slide it for 5 seconds or longer.
Note:
•
Slide the Up/Down button to (r ight) or
(left) for 1 second or shorter to switch the tracks.
2) Release the button when you reach the
desired track to start playback.
Pausing playback
1) Press (center) of the ENT button to
pause playback.
*
“PAUSE” appears in the display.
2) Press (center) of the ENT button
again to resume playback.
Scan play
This function plays the first 10 seconds of all the
tracks on the current CD (track scan) or first 10
seconds of the first track of all the CDs in the CD
changer (disc scan).
1) Press the SHIFT button to select SCN/
RPT/RDM mode.
2) Press the Scan button to start track scan.
Scanning starts from the next track of the current one.
Press the Scan button for about 2 seconds to start disc scan. Scanning starts from
the next disc of the current one.
*
becomes pink and or
appears in the display.
*
Turning off the power cancels scan play.
3) Press the Scan button when you reach
the track you want to listen to. Playback
resumes.
Repeat play
This function plays the current track (track repeat)
or the current CD (disc repeat) repeatedly.
1) Press the SHIFT button to select
SCN/RPT/RDM mode.
2) Press the Repeat button to start track
repeat or press it for about 2 seconds to start
disc repeat.
17
22
16
D-SCN
T -SCN
SCN
16
16
22
11
11
11
11
11
11
2116
12
23
English
Owner’s Guide
CD Changer Mode Operations
Page 18

*
becomes pink and or
appears in the display.
*
T o cancel tr ack repeat or disc repeat, press the
Repeat button again. Playback resumes.
Random play
This function plays all the tracks on the current
CD (track random) or plays the all CDs in the
magazine (disc random) in random order.
1) Press the SHIFT button to select
SCN/RPT/RDM mode.
2) Press the Random button to start track
random or press it for about 2 seconds to
start disc random.
*
becomes pink and or
appears in the display.
3) When a track that you want to listen to is
played, press the Random button again to
resume playback.
Switching the magazine
Note:
•
This function is not available with the CD changer
storing 6 CDs.
Press the MAG button to select a magazine.
Each time you press the MAG button , the
magazine switches in the following order:
Playback starts from No. 1 CD in the selected
magazine.
*
The selected magazine No., DISC No., and
TRACK No. appear in the display.
Locking the magazine
1) Press and hold the MAG button for about
2 seconds to play tracks on only the current
CD.
*
The selected magazine No. becomes pink in
the display.
Notes:
•
Even when the magazine is locked, pressing the
MAG button switches to the new magazine
which is locked.
•
When the magazine is locked, scanning and random playback are performed only for the locked
magazine.
2) To cancel, press and hold the MAG b utton
for about 2 seconds. Playback resumes.
13
13
13
Magazine No.
Magazine 3 (when a CD changer storing
3 magazines is connected)
Magazine 1 Magazine 2
13
13
18
D-RDM
T -RDM
RDM
18
22
17
D-RPTT -RPT
RPT
24
English
Owner’s Guide
Page 19
This unit has a built-in 7-band graphic equalizer
to adjust the sound level in each frequency
range. You can select one of the four preset patterns (basic equalizer), or can set four patterns
by yourself and select one (user equalizer).
Note:
•
In the following operation, when the hand mark ( )
appears in the display, the previous mode is
recalled if no operation is made within 5 seconds.
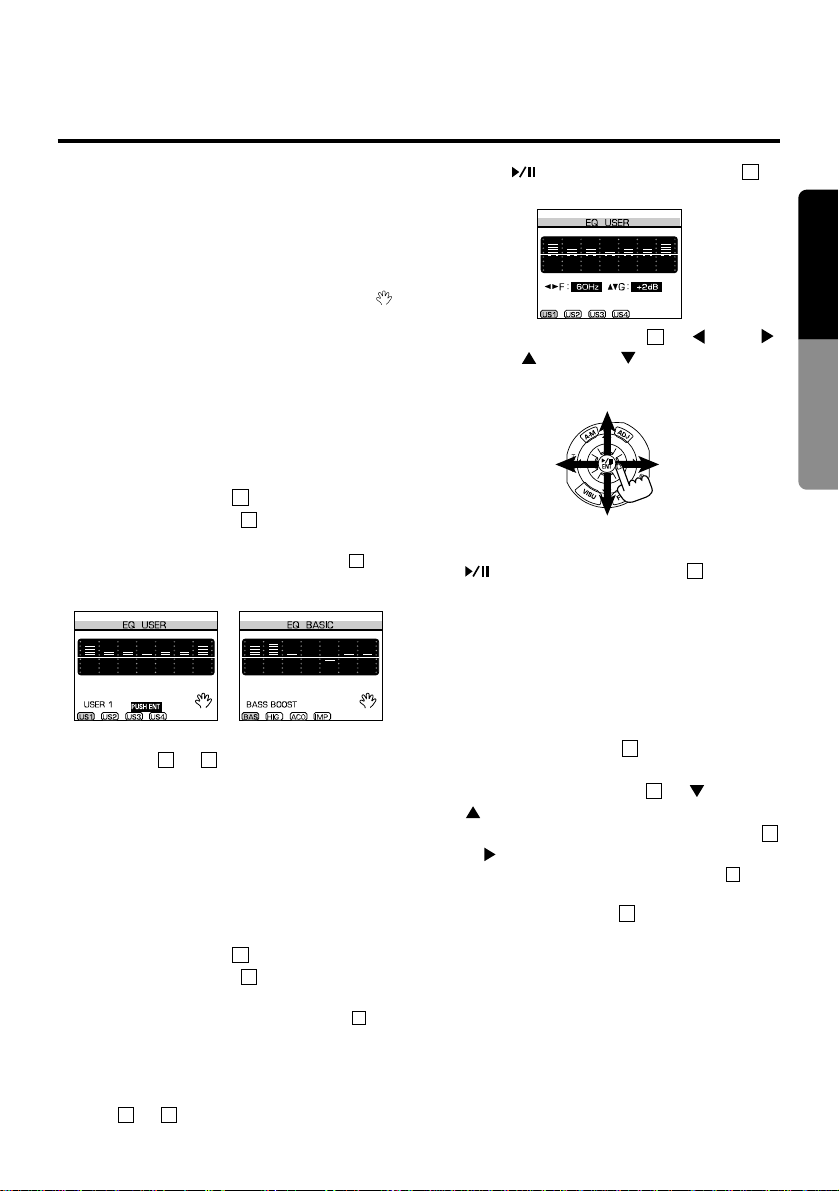
Selecting the equalizer pattern
Note:
•
In EQ USER display, design equalizer pattern by
yourself and store them. For further detail, see the
next subsection “Designing and storing equalizer
patterns.”
1) Press the EQ button .
2) Press the BND button to select EQ USER
or EQ BASIC.
*
Each time you press the BND button , display toggles between EQ BASIC and EQ
USER.
3) Select an equalizer patter n by pressing one
of buttons to .
Note:
•
Be sure to turn on the equalizer effect. Otherwise,
the equalizer effect is not available. For this operation, see the subsection “Turning on and off the
equalizer pattern.”
Designing and storing equalizer
patterns
1) Press the EQ button .
2) Press the BND button to select EQ USER
display.
*
Each time you press the BND button , the
display toggles between EQ BASIC and EQ
USER.
3) Select an equalizer pattern to be stored
(USER1 to USER4) by pressing one of buttons to .
4) Press (center) of the ENT button to
select the equalizer setting mode.
5) Slide the Up/Down button to (left),
(right), (up), or (down) to set an
equalizer pattern.
6) After setting the frequency pattern, press
(center) of the ENT button to store it.
Note:
•
The stored equalizer pattern can be selected in
the same procedure as described in the previous
subsection “Selecting the equalizer pattern.”
Turning on and off the equalizer
pattern
1) Press the ADJ button to select the CONFIGURATION display.
2) Slide the Up/Down button to (down) or
(up) to move the cursor to “EQ.”
3) Each time you slide the Up/Down button
to (right), “ON” and “OFF” toggles.
*
When “OFF” is set, the EQ indicator goes
off.
4) Press the ADJ button to return to the previous mode.
10
5
11
11
10
11
Increases the sound level.
Shifts the
frequency range
to the right.
Shifts the
frequency range
to the left.
Decreases the sound level.
11
11
1916
13
13
15
1916
13
13
15
25
English
Owner’s Guide
Operating the Equalizer
Page 20

26
English
Owner’s Guide
Note:
•
Use this camera as an auxiliary means to checking obstacles.
Monitoring the rear vision camera
The rear vision camera can be connected to this
unit.
For the power supply of the camera, mount the
power box sold separately (CCA-147-501).
1) Press the ADJ button to select the CONFIGURATION display.
2) Slide the Up/Down button to (down) or
(up) to move the cursor to “CAMERA.”
3) Slide the Up/Down button to (right) to
change “OFF” to “ON.”
Note:
•
When “CAMERA” in the CONFIGURATION display is turned on, the setting can be switched ev en
if the camera has not been connected.
4) Press the ADJ button to return to the previous mode.
5) Press the VISU button to switch to the
camera mode.
Note:
•
When you shift into the reverse gear, the rear
vision camera is automatically turned on.
*
To cancel the rear vision camera, change “ON” to
“OFF” of the “CAMERA” in step 3) above.
Listening to a CD or cassette tape in
rear vision camera mode (monitor lock)
You can listen to a CD or cassette tape while
monitoring the rear vision camera.
1) Press the FUNC button to select the
mode you want to listen to (CD, tape, or
radio).
2) Press the VISU button to monitor the rear
vision camera.
*
The L indicator lights.
Note:
•
When the monitor lock function is on, pressing the
(center) of the ENT button to mute the
sound causes the L indicator to flash.
*
To cancel the monitor lock, press the VISU button
. The mode returns to the previous one and the
L indicator goes off.
Connecting an external monitor
An output terminal for an external monitor is provided on the back of the unit to connect an external monitor.
1) Press the ADJ button to select the CONFIGURATION display.
2) Slide the Up/Down button to (down) or
(up) to move the cursor to “MONITOR.”
3) Slide the Up/Down button to (right)
and switch “AUDIO” to “VISUAL.”
*
Slide the Up/Down button to (right)
11
11
11
10
9
7
9
11
9
7
12
7
10
11
11
10
Rear Vision Camera
THIS PRODUCT IS NOT INTENDED FOR
VIEWING TELEVISION BROADCASTS OR
VIDEO TAPES OR FOR PLAYING VIDEO
GAMES. Such uses of this product may
distract the driver or interfere with the driver’s safe operation of the motor vehicle
and may violate state law. CLARION DISCLAIMS ANY LIABILITY FOR ANY BODILY
INJURY, INCLUDING FATALITIES, OR
PROPERTY DAMAGE THAT MAY RESULT
FROM ANY SUCH UNINTENDED USES OR
FROM ANY IMPROPER USE OF THIS
PRODUCT.
WARNING
Page 21

27
English
Owner’s Guide
again to return to “AUDIO.”
AUDIO : Display becomes black.
VISUAL: The rear vision camera is moni-
tored on the display. (Applicable
only when the rear vision camera is
connected. When it has not been
connected, display becomes black
in radio, CD, or ISR mode.)
4) Press the ADJ button to return to the previous display.
Adjusting the brightness and tone
of color (when the rear vision
camera is connected)
1) Press the ADJ button to select the CONFIGURATION display.
2) Slide the Up/Down button to (down) or
(up) to move the cursor to “DISPLAY.”
3) Slide the Up/Down button to (right) to
select either of BRIGHT, COLOR, or HUE.
Each time you slide the Up/Down button
to (r ight), the adjustment mode switches
in the following order:
BRIGHT :Adjusts the brightness of the dis-
play.
COLOR :Adjusts the color saturation.
HUE :Adjusts the tone of color. (red is
emphasized ↔ green is emphasized.)
4) Press (center) of the ENT button to
select what to adjust.
5) Slide the Up/Down button to (right) or
(left) to adjust the brightness.
11
BRIGHT is selected.
Darken. Brighten.
11
BRIGHT
COLOR HUE
11
11
Adjusting the brightness
11
10
10
Page 22

28
English
Owner’s Guide
Switching the spectrum analyzer
display
The spectrum analyzer display pattern can be
switched in radio, tape, CD, or CD changer
mode.
Each time you press the DISP button , the
spectrum analyzer display pattern switches in
the following order:
Notes:
•
In ISR mode, the spectrum analyzer patterns cannot be displayed.
•
The spectrum analyzer turns off temporarily in
some mode or during some key operation.
Switching the button color
Button color can be switched between green and
amber.
1) Press the ADJ button to select the CON-
FIGURATION display.
2) Each time you slide the Up/Down button
to (right), the button color toggles
between green (ILLUMI1) and amber (ILLUMI2).
3) Press the ADJ button to return to the pre-
vious mode.
Switching the background color
The background color of the display can be
switched between blue and black.
1) Press the ADJ button to select the CON-
FIGURATION display.
2) Slide the Up/Down button to (down) or
(up) to move the cursor to “COLOR.”
3) Each time you slide the Up/Down button
to (right), the background color toggles
between blue (COLOR1) and black
(COLOR2).
4) Press the ADJ button to return to the pre-
vious mode.
Turning on and off the operation
sound
You can turn off the beep sound output during
operation.
1) Press the ADJ button to select the CON-
FIGURATION display.
10
10
11
11
10
10
11
10
SPECTRUM PEAKS
SPECTRUM
MIRROR IMAGE
AUDIO GAUGE
CITY LIGHTS
REV. SPECTRUM
Normal display
SPECTRUM
AUDIO GAUGE
CITY LIGHTS
MIRROR IMAGE REV. SPECTRUM
Normal display
SPECTRUM PEAKS
26
Other Functions
Page 23

29
English
Owner’s Guide
2) Slide the Up/Down button to (down) or
(up) to move the cursor to “BEEP.”
3) Each time you slide the Up/Down button
to (right), the beep sound is turned on
and off.
4) Press the ADJ button to return to the pre-
vious mode.
Titling
You can title a radio station or CD name (title)
and store them. When the titled station is tuned
in or the CD is played, its title appears in the display.
Entering a title
Notes:
•
Up to 30 FM band and 20 AM band stations can
be titled. Also 50 CDs can be titled.
•
If you try to input more than the specified number
of titles, “OVER FLO W” appears in the displa y and
further input becomes impossible. Delete unnecessary titles to input new ones.
1) Select a station or CD which you want to title.
2) Press the TITLE button and select the title
input display.
*
Each time you press the TITLE button , the
display switches in the following order.
3) Press button and to select the letter
type.
Button : Upper case letters and figures
Button : Lower case letters and symbols
4) Slide the Up/Down button to (up),
(down), (left), or (right) to move the
pink cursor to the letter you want to enter.
Press the (center) of the ENT button .
The selected letter is entered at the cursor
(black) on the top of the display.
*
Repeat steps 3) and 4) above to enter the title.
*
If you entered the wrong letter, press the button to backspace the cursor (black) and
enter the correct letter this time.
*
Press the button . The cursor (black) moves
to the right.
5) After enter ing the title, press and hold
(center) of the ENT button for about 2 seconds. The title is stored when the beep
sounds and the previous mode is recalled.
Note:
•
The title list in radio mode displays only titles for
the preset stations.
Clearing the title
1) Select the mode where the title you want to
clear is stored (radio or CD mode).
2) Press the TITLE button twice in CD mode
or 3 times in radio or CD changer mode to go
to the TITLE CLEAR display.
3) Slide the Up/Down button to (down) or
(up) to move the cursor to the title you
want to clear and press and hold (center)
of the ENT button for about 2 seconds.
The title is cleared when the beep sounds.
4) Press the TITLE button to retur n to the
previous mode.
Changing the title
1) Select the mode where the title you want to
change is stored (radio or CD mode).
2) Press the TITLE button to select the title
input display.
Change the title using the procedure
described in step 3) above and in the subsection “Entering a title.”
23
23
11
11
23
11
21
20
11
11
17
16
1716
Title input display TITLE SELECT
Previous mode TITLE CLEAR
23
23
10
11
11
Page 24
30
English
Owner’s Guide
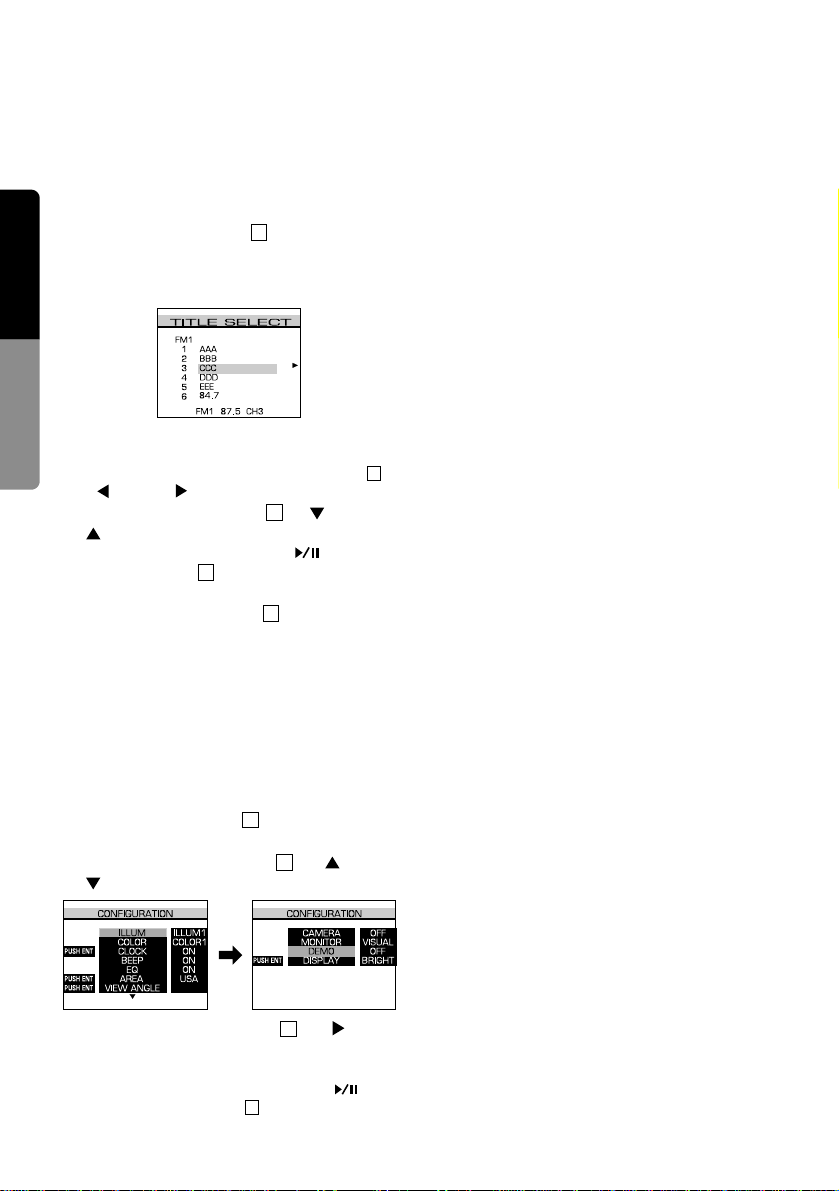
Selecting the title
1) Select the mode where the title you want to
select is stored (radio or CD mode).
2) Press the TITLE button twice to select the
TITLE SELECT display.
The entered titles appear after the title numbers.
*
In CD mode, the TITLE SELECT display cannot be selected.
*
In radio mode, slide the Up/Down button to
(left) or (right) to select a band.
3) Slide the Up/Down button to (down) or
(up) to move the cursor to
the title to be selected. Press (center) of
the ENT button to tune in to the selected
station.
*
Press the TITLE button twice to quit the
TITLE SELECT display.
DEMO (demonstration)
In this mode, the spectrum analyzer pattern and
equalizer pattern are switched sequentially.
Note:
•
Some key operations cannot be made during a
DEMO.
1) Press the ADJ button to select the CONFIGURATION display.
2) Slide the Up/Down button to (up) or
(down) to select “DEMO.”
3) Slide the Up/Down button to (right)
and turn “OFF” to “ON.” The demonstration
starts.
*
To cancel the demonstration, press (center) of the ENT button .
11
11
11
10
23
11
11
11
23
Page 25
31
English
Owner’s Guide
®
TUNER
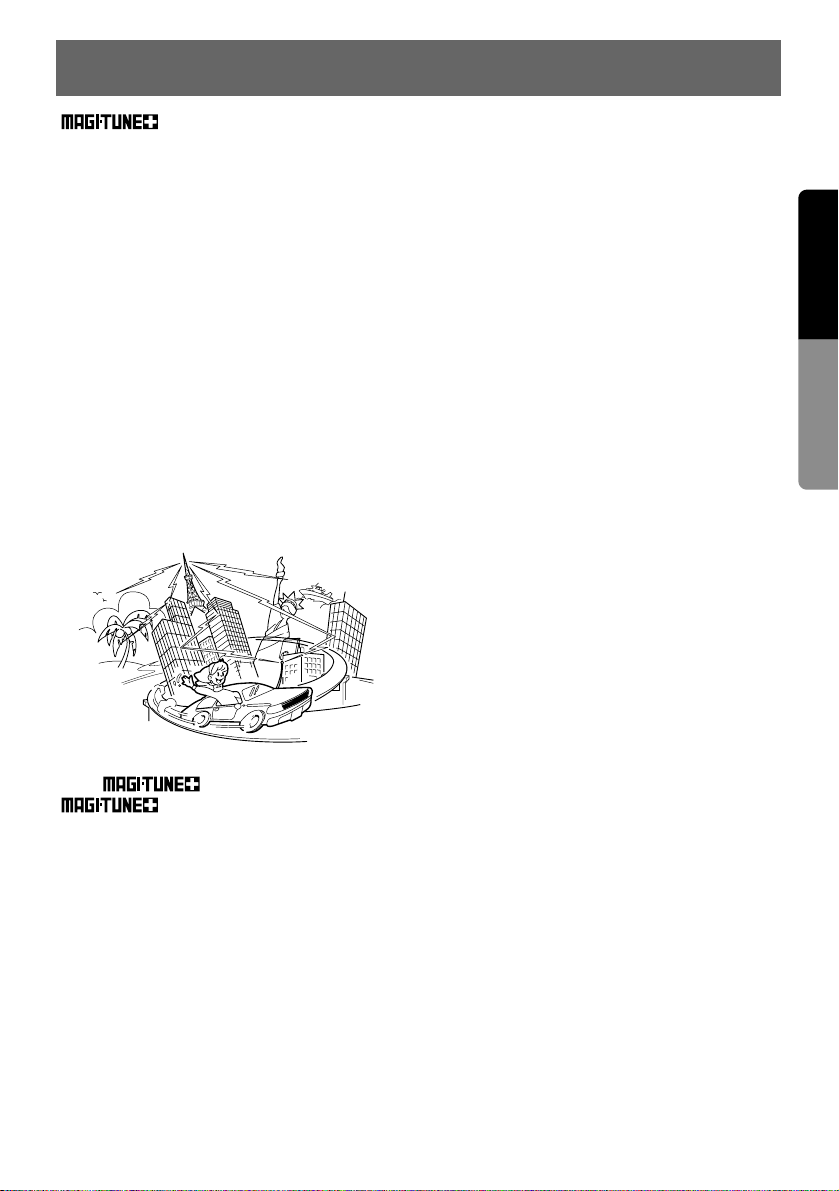
Understanding the Difficulties of
FM Reception in Your Car
FM radio waves are transmitted in the very high
frequency range (VHF). These waves move in
straight lines, much like light. Tall buildings, hills
and mountains, or other obstructions may cause
“shadows” or loss of signal, noted by a momentary “hissing” noise in the reception.
These obstructions found in day-to-day urban
travel can reflect or bounce the signal. When
reflected and direct signals arrive at the radio’s
antenna together, a similar noise problem may
occur, called multi-path interference.
In addition, the vehicle itself can be the culprit,
creating various types of impulse noise (usually
associated with the vehicle’s ignition and/or
other parts of the electrical system), which again
will deteriorate signal quality.
The
®
AM/FM Tuner
®
combines both AM and FM
tuners into one small, unique package. The
design incorporates many advanced technologies exclusively engineered to improve FM and
AM performance.
Signal Actuated Stereo Control
(SASC)
In weak signal conditions, the SASC circuit will
provide optimum, low noise reception. As the
signal weakens, stereo separation is smoothly
converted to a monaural signal with a gradual
“cut-back” on high frequency reproduction, minimizing “hiss” and noise.
Balanced Mixer FM Front-End –
Dual-Gate FET
The balanced mixer pre-amp section is designed
to provide a uniform signal to the tuner – creating the best possible noise-free reception. A
variable gain stage automatically controls the
amplitude of the signal according to the incoming signal strength. As the signal deteriorates or
weakens, the gain is “increased” to ensure the
highest quality signal with the least amount of
noise. When signal strength becomes very
strong, the gain is reduced, avoiding unnecessary distortion.
Triple Stage Narrow Band IF Filters
The new triple stage IF and ceramic filter system
enables the tuner to “focus” on the selected frequency – ignoring stronger or nearer stations to
prevent frequency “hopping.” With this type of
narrow band filtering, the selectivity of the tuner
can be increased.
10. FM RECEPTION
Page 26

32
English
Owner’s Guide
11. TROUBLESHOOTING
Symptom Cause Measure
Power does not switch on.
(There is no sound produced.)
The fuse has blown. Replace the fuse with one of the same rating.
If the fuse blows again, contact the store
where you purchased the unit.
Wiring is incomplete. See “Installation/Wire Connection Guide (es-
pecially, Section 6. Wire Connections)” of this
manual and connect properly.
Sound quality is poor. The head is dirty. Use a cleaning tape, etc. to clean the head.
The Dolby NR button is not
pressed.
Turn the Dolby NR button on when listening to
tapes recorded with the Dolby NR system.
Picture is dark. BRIGHT (brightness) adjust-
ment is not appropriate.
Select the CONFIGURATION display and adjust the BRIGHT (brightness) properly.
Poor usage conditions The temperature in the car may be below 32°F
(0°C) or above 140°F (60°C). Check the display again when the internal temperature is
between 32°F (0°C) to 140°F (60°C).
Colors are pale or hue is
poor.
COLOR (tone of color) and
HUE are not adjusted appropriately.
Select the CONFIGURATION display and adjust the color and hue density using the COLOR and HUE controls.
Nothing happens when
buttons are pressed, or the
display is not accurate.
Noise, etc., is causing the microprocessor to malfunction.
Press the reset button with the tip of a very
fine instrument for about 2 seconds.
Spots or stripes on picture Interference signals This may be caused by interference from other
cars, trains, high voltage lines, neon lights, etc.
Check again in another place.
The compact disc does not
enter.
There is already a compact disc
inside the disc insertion slot.
Eject the compact disc and then insert another
one.
The operation panel is not
set to the maximum angle.
Press CD (eject) button 3 or set the operation
panel to the maximum angle.
Sound skipping noise and
other noise are heard.
The compact disc is dirty. Wipe the compact disc with a soft cloth.
The compact disc is severely
scratched or warped.
Replace the compact disc with one that is in
good condition.
The sound is poor immediately after switching on
the power.
When the car is parked in a
humid place, dew might form
on the internal lens.
Turn the unit on and wait for about 1 hour before operating.
Reset button
Tip of a very fine
instrument
Page 27

33
English
Owner’s Guide
■ If an error occurs, the type of error is displayed.
Take the measures described below to eliminate the problem.
12. ERROR DISPLAYS
Display Cause Measure
TEMP Error Displayed when the temperature sur-
rounding the unit or the CD changer is
high and it may damage the semiconductor or laser part.
Lower the surrounding temperature and wait for a while
to cool off the unit and the
CD changer.
Mode
CD
CD changer
CD changer
Cassette tape
CD
Cassette tape
CD changer
CD
CD changer
CD
CD changer
Error 1 Displayed when the built-in battery of the
CD changer has run down.
Check the instruction manual of the CD changer.
Displayed when the cassette tape is
stuck and cannot be ejected.
Eliminate the cause of the
sticking.
Error 2 Displayed when the disc is stuck and
cannot be ejected.
Press the CD button 3 .
Displayed when the cassette tape is
wrong and can not be played properly.
Eject the tape.
Replace the tape with another one.
Displayed when an error occurred in the
CD changer mechanism, etc. (e.g. disc
cannot be changed).
Check the CD changer.
Error 3 Displayed when the pickup cannot focus
when the CD is played due to scratches
on the disc.
Check the disc.
Error 6 Displayed when the disc is loaded up-
side-down, or only the adapter for the 8
cm-disc is inserted.
Check the disc.
Page 28

34
English
Owner’s Guide
13. SPECIFICATIONS
Tape Player
Tracking system: 4-track compact cassette stereo
Frequency response: 20 Hz to 18 kHz
Signal-to-noise ratio (metal tape):
DOLBY NR OFF; 55 dB
DOLBY NR B ON; 64 dB
Channel separation: 45 dB (1 kHz)
Cross talk: 50 dB (1 kHz)
Wow and flutter: 0.06% (WRMS)
Fast-forw ard and rewind time: appro x. 100 seconds
(C-60)
FM Tuner
Frequency range: 87.9 MHz to 107.9 MHz (87.5 MHz
to 108 MHz)
Usable sensitivity: 12 dBf (new IHF)
50 dB quieting sensitivity: 18 dBf (new IHF)
Signal-to-noise ratio: (IHF.A) 70 dB
Frequency response: 30 to 15 kHz ±3 dB
Stereo separation: 35 dB (1 kHz, 60 dBf)
AM Tuner
Frequency range: 530 kHz to 1710 kHz (531 kHz
to 1629 kHz)
Usable sensitivity: 28 dB (µV)
Signal-to-noise ratio: 50 dB (monaural)
Audio Amplifier
Rated power output: 14 W ×4 (20 Hz to 20 kHz,
1%, 4 Ω)
Maximum power output: 30 W × 4 (EIAJ)
Equalizer control: ±10 dB (frequency: 60, 125,
250, 500, 1 k, 3 k, 10 kHz)
Speaker impedance: 4 Ω (4 to 8 Ω)
CD Player
Frequency response: 10 Hz to 20 kHz ±1 dB
(EIAJ)
Signal-to-noise ratio: 96 dB (EIAJ)
Dynamic range: 95 dB (EIAJ)
THD: 0.01% (EIAJ)
LCD Display
Screen size: Type 5 (4” (101.8 mm) Width × 2-
15/16” (74.4 mm) Height)
Display method: Transmission type TN liquid
crystal display
Drive method: TFT (thin–film transistor) active
matrix driving
Pixels: 224,640 (960 × 234)
General
Power source voltage: 14.4 V DC
Ground: Negative
Current consumption: 4.0 A (1 W)
Dimensions (source unit): 7” (178 mm) Width ×
3-15/16” (100 mm) Height × 6-3/8” (161 mm)
Depth
Dimensions (tuner amplifier unit): 7” (178 mm)
Width × 7-3/4” (196 mm) Depth × 1-1/2” (38
mm) Height
Weight (source unit): 6.17 lb. (2.8 kg)
Weight (tuner amplifier unit): 2.42 lb. (1.1 kg)
Source unit
Remote Control Unit
Infrared wireless remote control
Dimensions: 1-9/16” (40 mm) Width × 3-3/8”
(86 mm) Height × 9/32” (6.5 mm) Depth
Weight: 0.55 oz. (15.5 g) (excluding the battery)
Notes:
•
Specifications comply with EIAJ Standards.
•
Specifications and design are subject to change without notice for further improvement.
6-13/16
(172 mm)
7
(178 mm)
3-7/8
(98 mm)
3-15/16
(100 mm)
6-1/8
(155 mm)
1-7/16
(36 mm)
6-3/8
(161 mm)
 Loading...