

Page 1
Owner’s manual & Installation manual
Mode d’emploi et manuel d’installation
Bedienungs- & Installationsanleitung
Manuale d’Istruzioni e d’Installazione
Thank you for purchasing this Clarion product.
∗ Please read this owner’s manual in its entirety before operating this equipment.
English
∗ After reading this manual, be sure to keep it in a handy place (e.g., glove compartment).
∗ Check the contents of the enclosed warranty card and keep it carefully with this manual.
Contents
English
POWER
FUNC
MODE
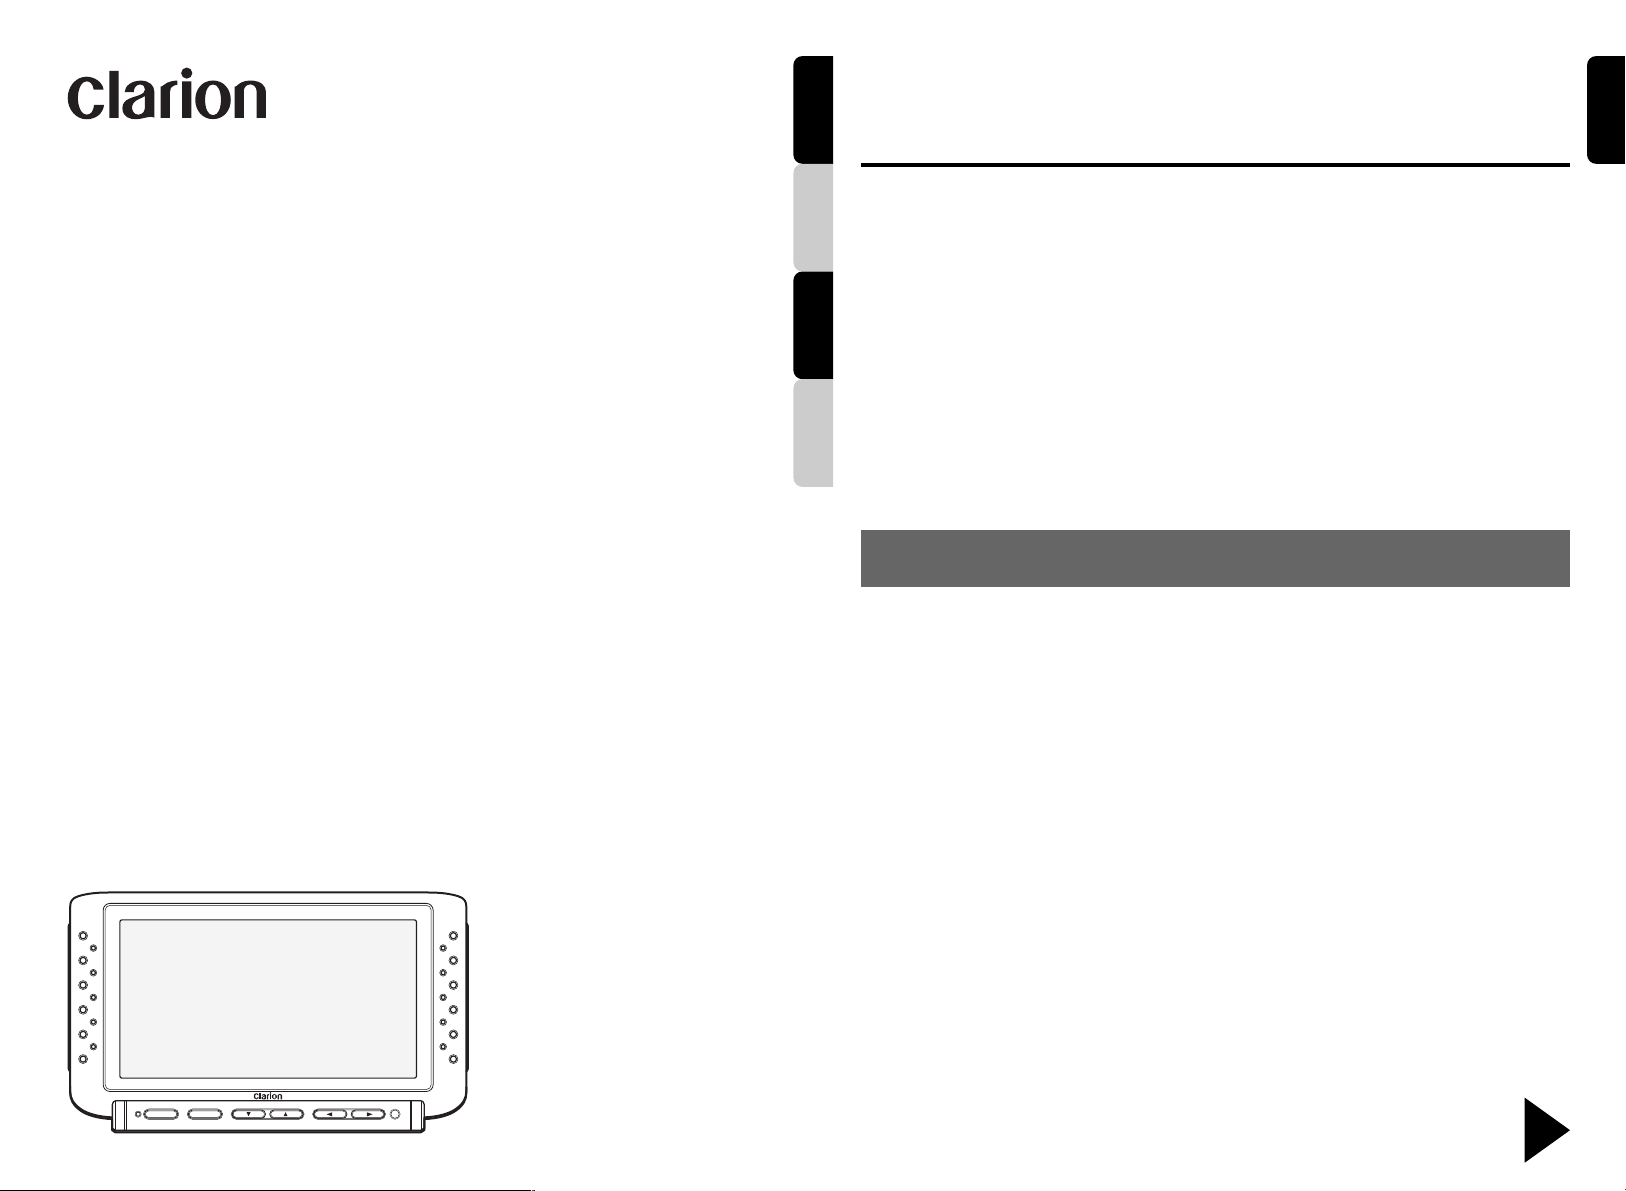
CJ-981E
6.5 LCD Color Monitor for Rear-View
Vehicular Camera Systems
Écran LCD couleur de 6,5 pouces pour
système rétro caméra automobile
6,5-Zoll-LCD-Farbmonitor für FahrzeugHeckkameraanlagen
1. FEATURES ............................................. 2
2. NAMES AND FUNCTIONS OF PARTS ...3
3. PRECAUTIONS ...................................... 5
Handling Precautions ............................... 5
4. OPERATIONS .......................................... 7
DeutschFrançais
Italiano
Adjusting the Image Quality .....................7
Selecting VTR Playback Mode
(NTSC/PAL) ..............................................7
Setting the Camera Function
(CAM TYPE) .............................................7
To Display Onscrren Scale Markers
(MARKER) ................................................ 8
Setting the Marker Pattern
(MARKER SELECT) ................................. 8
Adjusting the Bumper Position
(MARKER ADJUST) ................................. 9
Setting the Screen Saver
TIMER Function ..................................... 10
Setting the Camera Linked-Image Switch
(CAM AUTO/CAM HAZARD) ................. 10
Enlarging the CCD Camera’s Image
(ZOOM Function) ................................... 11
Backlight Compensation Function
(IRIS) ...................................................... 11
Using the Dimmer Function (DIM) ..........12
To Immediately Switch to
CAMERA1 Image ................................... 12
5. INSTALLATION ...................................... 13
Before Installing ...................................... 13
Installing the Monitor Stand/Display Unit ...
6. TROUBLRSHOOTING ........................... 15
7. SPECIFICATIONS ................................. 15
13
Monitor LCD a colori da 6,5” per telecamere
di retrovisione per automobili
SELECT
ADJ
IRIS
CAM1/DIM
ZOOM
1. FEATURES
■ 6.5" TFT active-matrix-drive wide colorLCD display
■ Reverse-gear linked display
When used to confirm the rear view, the monitor
can be set so that the rear view camera is
automatically selected when the vehicle’s
transmission is shifted to reverse gear.
■ Automatic Screen Saver Function
In manual mode (CAM mode), a timer can be
set to automatically turn off the screen after a
preset interval, thus helping preserve the
monitor.
■ Scale Marker Display
When using the camera image to confirm
safety, scale marks displayed onscreen assist
the driver in determining distances to obstacles.
■ Backlight compensation function
The camera’s aperture (iris) can be adjusted
to provide brighter viewing under adverse
backlighted conditions (e.g., when vehicle
shadow is cast in the camera path or when
entering a garage).
■ Screen brightness (DIMMER) linked to
parking lamp switch
2 CJ-981E
■ Supports use of CC-2000 series digital
1.4x zoom CCD cameras
Supports zoom function for 1.4x magnification
of image.
■ Supports DC 24V or DC 12V vehicles
Voltage can be switched at power supply box.
■ Auxiliary input (power supply box VIDEO/
IN) connector
Can be used to view images from sources
other than a camera (to prevent driver
distraction, auxiliary video images cannot be
viewed when vehicle is moving).
■ Image controls
Image adjustment controls include BRIGHT
(luminance), HUE (tint), COLOR (saturation),
and DIMMER.
■ Three camera input (power supply box
CAMERA/IN) connectors
An additional two cameras can be connected
in addition to the rear-view camera.
■ RGB video input (power supply box RGB/
IN) connectors
Allows viewing of images from an auto
navigation system, etc.
Be sure to unfold and read the next page.
Veuillez déplier et vous référer à la page suivante.
Bitte ausbreiten und die nächste Seite lesen.
Assicurarsi di aprire e leggere la pagina successiva.
Page 2
English
2.
NAMES AND FUNCTIONS OF PARTS
2.
NOM ET FONCTIONS DES ORGANES
Français
2.
BEZEICHNUNG UND FUNKTION DER TEILE
2.
NOME E FUNZIONE DELLE VARIE PARTI
Deutsch
Italiano
[IRIS] button
• During the “CAM” mode, pressing this button
[SELECT] button
• During the “CAM” mode, pressing this button
[POWER] indicator
• Light turns off when the power is turned ON,
Note: Be sure to unfold this page and refer to the front diagrams as you read each chapter.
Remarque: Veuillez déplier cette page et vous référer aux schémas quand vous lisez chaque chapitre.
Hinweis: Bitte diese Seite ausfalten und beim Lesen der einzelnen Kapitel die Frontdiagramme beachten.
Nota: Assicurarsi di aprire questa pagina e fare riferimento a questi diagrammi quando si legge ciascun capitolo.
[IRIS]
[SELECT]
POWER
[
POWER
causes the camera to alterate between
backlight compensation ON and OFF.
causes the screen mode to change in the
following order: CAMERA1 ➜ CAMERA2 ➜
CAMERA3 ➜ CAMERA1
and illuminates when power is turned OFF.
When unit is turned OFF, it enters the standby
mode, and if the vehicle’s transmission is
shifted to reverse gear, the monitor
automatically powers on and displays the
rear-view camera image.
]
[FUNC]
[MODE]
FUNC
MODE
SELECT
ADJ
ZOOM
CAM1/DIM
[Å], [Î]
[z], [w]
IRIS
[FUNC] button
• When power is OFF, pressing this button will
turn power ON.
• When power is ON, pressing this button will
switch unit alternately between “CAM”, “VTR”,
and “RGB” modes. If the button is held
depressed for about 1 second, power is
turned OFF.
[MODE] button
• In “CAM” mode, pressing this button causes
the setting menu screen to change (screen
size is fixed at “F-WIDE” (full wide)).
[ZOOM]
[CAM1/DIM]
CAM: displays image from camera
English
MARKER: displays setting menu for scale
markers
CAM TYPE: displays camera type setting menu
MARKER SELECT: displays marker pattern
setting menu
MARKER ADJUST: displays marker display
position setting menu
TIMER: displays timer operation menu
<Camera switching settings>
CAM1 AUTO: CAMERA1 image linked setting
CAM2 AUTO: CAMERA2 image linked setting
CAM3 AUTO: CAMERA3 image linked setting
CAM2 HAZARD:
CAMERA2 hazard linked setting
CAM3 HAZARD:
CAMERA3 hazard linked setting
∗ During display of images from
CAMERA
SELECT”, and “MARKER ADJUST”
setting menus do not appear.
3, the “MARKER”, “MARKER
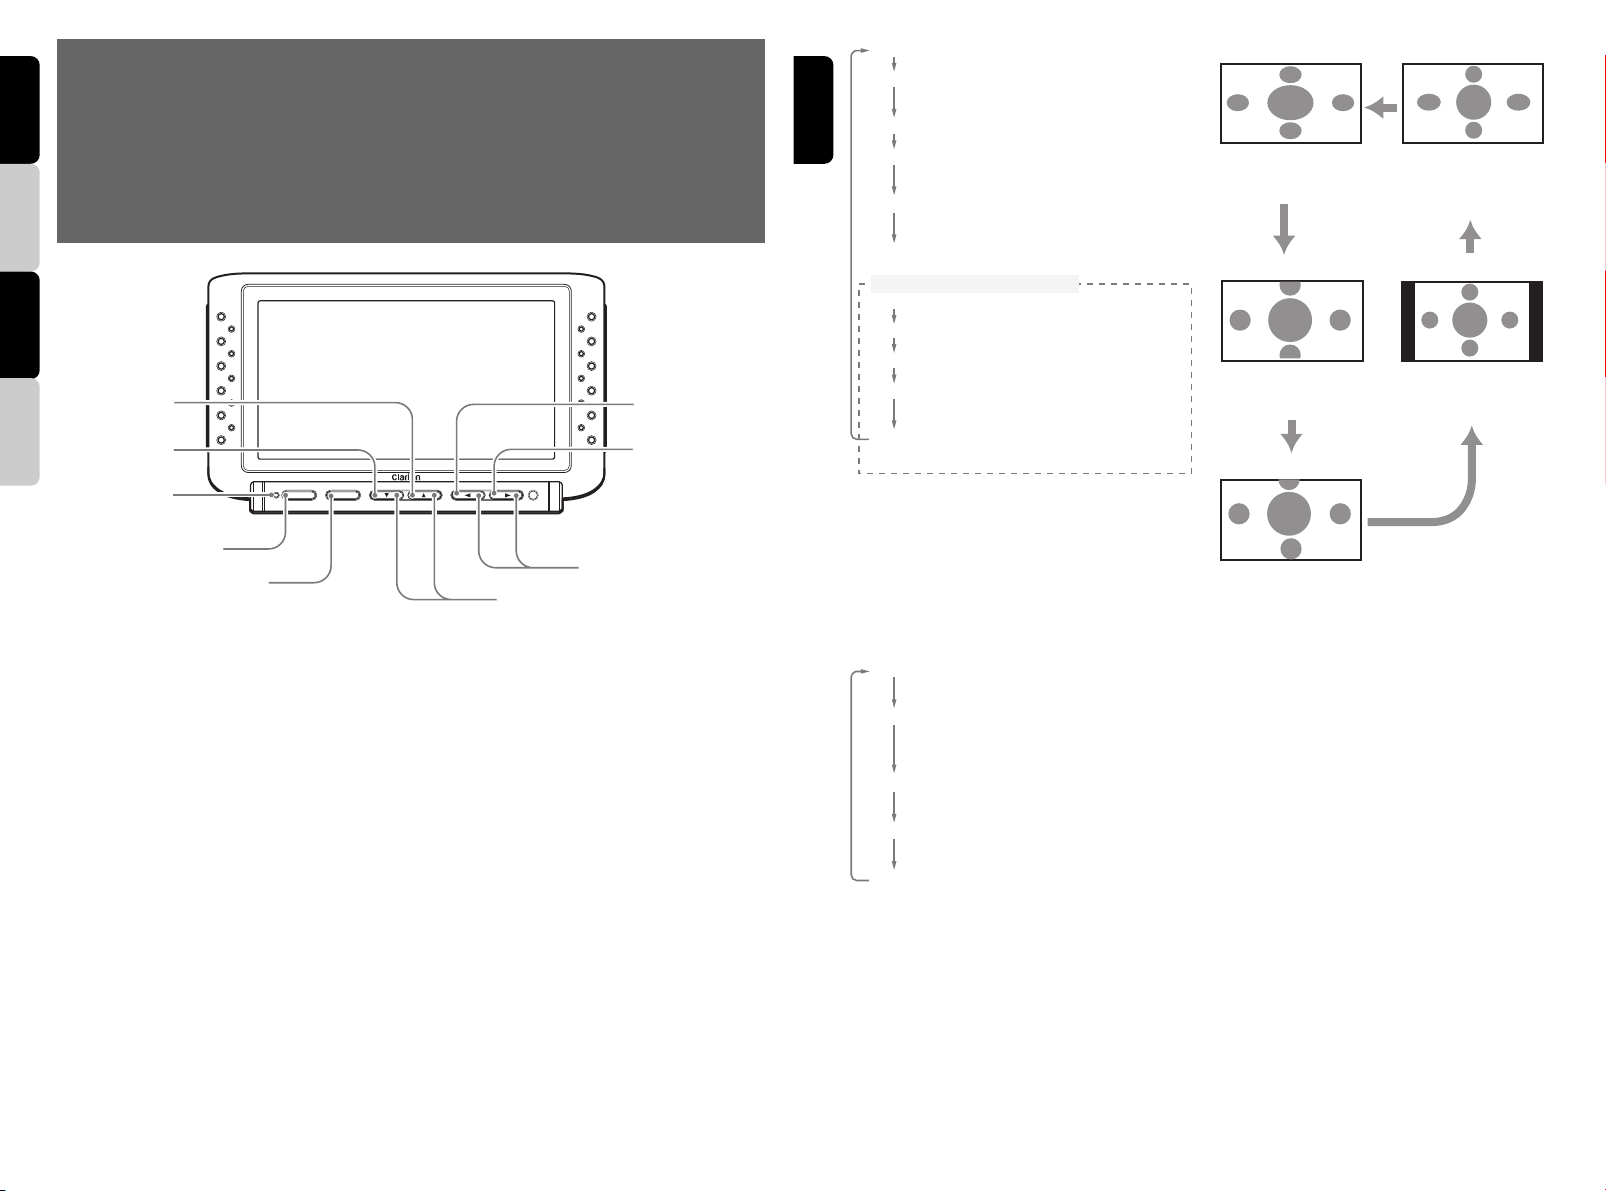
[MODE] button
• During “VTR” mode, pressing this button
causes the screen to change in the following
order:
F-WIDE: 4:3 ratio images are stretched
horizontally to fill the entire screen.
CINEMA 1: 4:3 ratio images are displayed
“letterbox” style, with black band at top
and bottom.
CINEMA 2: Use this mode if subtitles are cut off
when using “CINEMA 1”.
NORMAL: Normal 4:3 ratio television display
mode.
WIDE: 4:3 ratio images are stretched
horizontally on left and right sides only.
Note:
• Images displayed in “VTR” mode are those input
through the power supply box’s video input
connectors. In order to prevent distractions to the
driver, these images cannot be viewed unless the
vehicle is stopped and the parking brake applied.
■ When normal 4:3 ratio images are input,
the image shape will differ depending on
the display mode setting, as follows:
CAMERA
° F-WIDE mode
Entire image is
stretched
horizontally.
° CINEMA 1 mode
Top and bottom
portions of image
are cut off.
° CINEMA 2 mode
2 or
Top portion of
image is cut off.
°Regarding WIDE screen images
Wide television monitors are equipped with
controls allowing the user to select from a
variety of display modes. If the mode chosen
differs from the ratio of the original television
program or movie software, the screen image
will appear distorted from its original
appearance. This point should be taken into
account when selecting a video mode.
° WIDE mode
Left and right
sides of image are
stretched
horizontally.
° NORMAL mode
Right and left
edges of screen
appear as black
stripes.
[z], [w] buttons
• In the setting menu, use to move to different
menu selections or change adjustment levels.
[Å], [Î] buttons
• In the setting menu, use to change
adjustment levels.
[CAM1/DIM] button
• Switches to image from CAMERA1 input.
• When showing normal image, holding the
button depressed for about 1 second
switches dimmer between Light/Dark settings.
[ZOOM] button
• During the “CAM” mode, pressing this button
causes the camera to alternate between
camera zoom ON and OFF.
Page 3

3. PRECAUTIONS
English
WARNING
• Do Not Back Up Vehicle While Relying
Only on the Monitor Image
The rear-view monitor should be considered an
auxiliary device meant to help confirm the
presence of obstacles, but its field of view is
limited. Always back the vehicle only after
confirming with the naked eye that it conditions
are safe. Failure to do so could result in serious
injury or damage to persons or objects lying
outside the camera’s field of view.
• Use Slow Speeds When Backing Up
The rear-view camera utilizes a wide-angle
lens, with the result that the actual distance to
obstacles may be less than the perceived
onscreen distance; backing up quickly may
result in a serious accident involving damage
or injuries to property or persons.
• Always Park in a Safe Area When Viewing
Television or Videos
To prevent distraction to the driver, vehicular
video devices are designed to operate only
when the vehicle is stopped and the parking
brake applied.
• Do Not Attempt to Disassemble or Modify
this Device
Disassembly may result in accidents, fire, or
electrical shock.
CAUTION
• The rear-view monitor image has the same
right-left inversion as your vehicle’s rearview mirrors. Depending on the vehicle,
the field and angle of view may differ.
• Do not attempt to use this device for
applications other those for which it was
designed.
Electrical shock or other injury may result.
• Never attach or detach cables and wires while
the system is operating, since accidents may
result. Always turn off the vehicle’s power
(ACC-OFF) before connecting or
disconnecting cables.
• This component is a video monitor; it does not
operate alone, and must be combined with
separately purchased power supply box and
CCD camera.
• The miniature fluorescent tubes installed in
this type of LCD panel are considered
consumable parts. If the screen image
appears dark or flickers, the tubes may
require replacement (median lifetime is about
5,000 hours).
Handling Precautions
■
Regarding the LCD screen
• In very cold climates, the screen updating
may become slower or the image may appear
darker than usual; this is not a malfunction.
Operation should return to normal when the
temperature rises.
• Small black or bright pixel points may appear
within the LCD, but this is a characteristic of
LCD monitors, and not a malfunction.
• The LCD panel is easily scratched, so do not
rub or strike it with hard objects.
• Do not leave the LCD panel while it is wet,
since discoloration or stains may occur, or
moisture may invade the interior of the unit,
resulting in damage. In the event water drops
are splashed on the unit, wipe them away with
cotton or soft cloth.
• During summer months, temperatures inside
a vehicle may rise precipitously; in such
cases, allow the vehicle interior to cool before
using the unit. The permissible temperature
range during use is 0 ˚C to 40 ˚C.
CJ-981E 5
Page 4

■
Care of the Enclosure
English
Remove dust with a soft, dry cloth. In event of
severe soiling, dip a soft cloth in a diluted
detergent solution and wipe the unit, finishing by
drying with a soft dry cloth.
Note:
• Do not use chemically impregnated cleaning
cloths or solutions meant for automobile interiors,
since they may cause deformation or peeling of
the monitor case. Also, do not allow rubber or
vinyl objects to remain in contact with the cabinet
for extended periods of time, since they may
leave stains.
■
Cleaning the LCD screen
Dust adheres easily to the screen, so
occasional dusting with a soft cloth is
recommended.
Note:
• Never use benzene, thinner or other volatile
chemical cleaners to clean the screen.
This equipment has been tested and found
to comply with the limits for a Class B digital
device, pursuant to Part 15 of the FCC
Rules. These limits are designed to provide
reasonable protection against harmful
interference in a residential installation. This
equipment generates, uses, and can radiate
radio frequency energy and, if not installed
andused in accordance with the instructions,
may cause harmful interference to radio
communication. However, there is no
guarantee that interference will not occur in a
particular installation. If this equipment does
cause harmful interference to radio or
television reception, which can be
determined by turning the equipment off and
on, the user is encouraged to consult the
dealer or an experienced radio/TV technician
for help.
6 CJ-981E
Page 5
4. OPERATIONS
English
Adjusting the Image Quality
The CJ-981E is equipped with functions to allow
adjustment of luminance (BRIGHT), color tone
(HUE), color saturation (COLOR), and screen
brightness (DIMMER) in each of the screen
modes, thus letting you view the image under
optimum conditions.
∗ In “RGB” mode, only luminance (BRIGHT) and
screen brightness (DIMMER) controls are
supported.
The screen brightness (DIMMER) function can be
adjusted separately for the vehicle’s parking lamp
switch positions.
The Dimmer’s default settings are as follows:
• Day (vehicle’s parking lamp switch OFF): +29
• Night (vehicle’s parking lamp switch ON): 0
1. Press the [FUNC] button, and switch to the
“CAM” mode.
• This adjustment can also be performed in
the “VTR” or “RGB” mode.
2. Hold the [MODE] button depressed for about
1 second to display the setting adjustment
menu screen.
3. Use the [z] and [w] buttons to select the
desired adjustment item (BRIGHT, HUE,
COLOR, DIMMER).
4. Use the [Å] and [Î] buttons to adjust the
setting as desired.
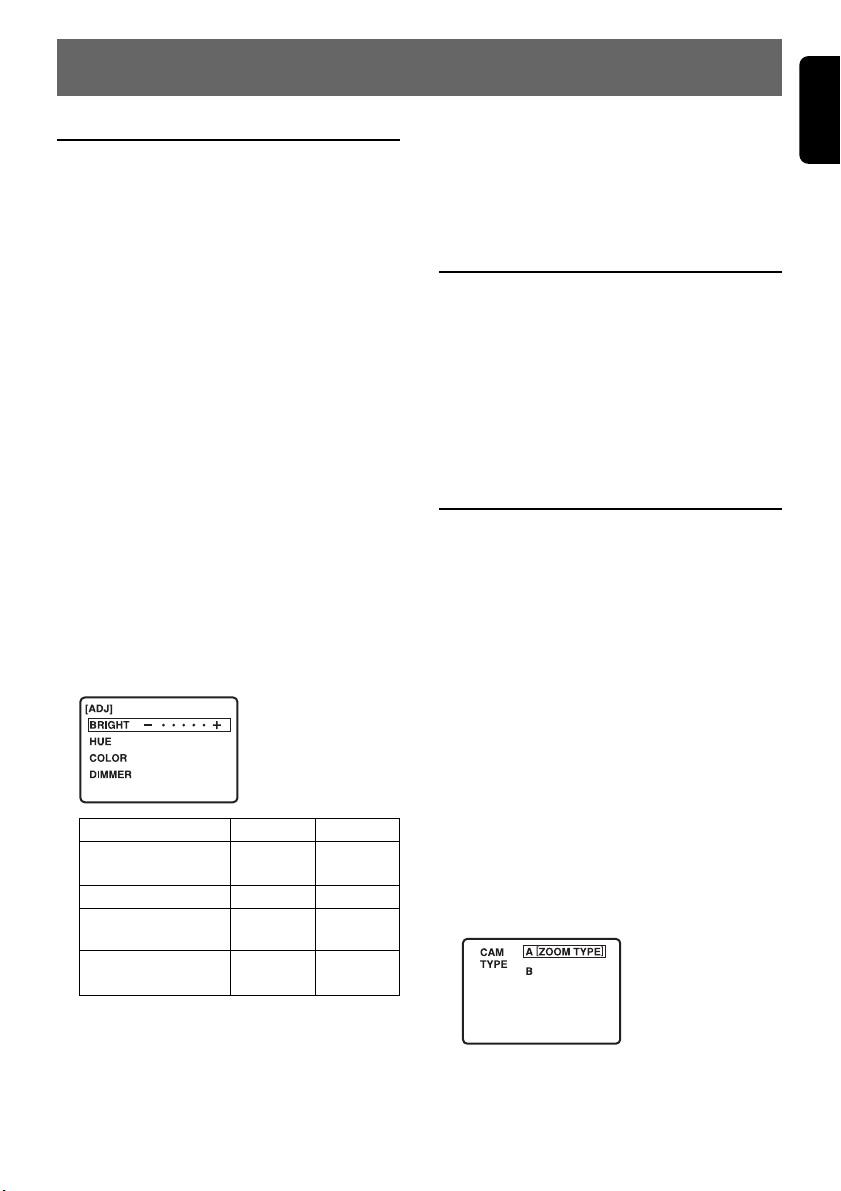
Setting Item
BRIGHT
(luminance)
HUE (color tone)
COLOR
(saturation)
DIMMER (screen
brightness)
ÅÅ
– (
Å)
ÅÅ
Darker
Redder
Less
Darker
ÎÎ
+ (
Î)
ÎÎ
Lighter
Greener
More
Lighter
• When in the “VTR” mode, the screen will
change to step 2 of the following topic
“Selecting VTR Playback Mode (NTSC/
PAL).”
Selecting VTR Playback Mode (NTSC/PAL)
1. Perform steps 1-5 of the previous topic
section “Adjusting the Image Quality,” and
display the NTSC/PAL setting screen.
2. Use the [z] or [w] button to highlight the
desired playback mode (“NTSC” or “PAL”).
3. Hold the [MODE] button depressed for about
1 second to return to the “VTR” mode.
Setting the Camera Function (CAM TYPE)
The zoom function can be set only when using a
CC-2000 series camera equipped with zoom
function. Set this item only after confirming your
camera’s type and specifications.
∗ Default setting is “ZOOM TYPE” for a camera
with zoom lens.
1. Press the [FUNC] button and switch to the
“CAM” mode menu.
• The screen will be fixed at the full wide
(F.WIDE) setting.
2. Press the [MODE] button to switch to the
“CAM TYPE” setting menu.
Each time the [MODE] button is pressed, the
menu alternates in the following order: “CAM”
➜ “MARKER” ➜ “CAM TYPE” … ➜ “CAM”.
3. Use the [z] or [w] button to highlight the
desired camera type:
• A [ZOOM TYPE]: for cameras equipped
with zoom function
• B: for cameras w/o zoom function.
• To continue setting other items, use the
[z] and [Î] buttons to select the desired
item.
5. Hold the [MODE] button depressed for about
1 second to return to the “CAM” mode
screen.
4. Press the [MODE] button to return to the
“CAM” mode screen.
CJ-981E 7
Page 6

To Display Onscrren Scale
English
Markers (MARKER)
∗ Default value is “OFF” (no markers displayed)
WARNING
• The onscreen scale markers should be
considered as general referents to assist
the driver in assessing the distances
depicted on the screen. The scale markers
have been designed based on the “CCD
camera installation conditions” listed in
the next section, but differences in vehicle
design and construction may result in the
actual installation condition or location
being different from the conditions listed.
In such cases, the display location should
be set at the closest marker No.
• Do not set or use scale markers when
using a CCD camera made by a company
other than Clarion.
Notes:
• Different camera types produce different patterns
of scale marker. Be sure to set the camera
function (CAM TYPE) before setting the markers
in this section (MARKER).
• The markers are not designed to ensure safety by
indicating the actual position of the bumper, the
vehicle’s width or the distance to the rear.
1. Press the [FUNC] button and switch to
“CAM” mode.
2. Use the [SELECT] (z) button to select the
CAMERA1 image.
3. Press the [MODE] button to switch to the
“MARKER” menu.
Each time the [MODE] button is pressed, the
mode cycles through the modes in the order
“CAM” ➜ “MARKER” ➜ … “CAM”.
4. Use the [z] or [w] button to select “ON”.
5. Press the [MODE] button to return to the
“CAM” mode screen.
Setting the Marker Pattern (MARKER SELECT)
Notes:
• Different camera types produce different patterns
of scale marker. Be sure to set the camera
function (CAM TYPE) before setting the markers
in this section (MARKER SELECT).
1. Press the [FUNC] button and switch to
“CAM” mode.
2. Use the [SELECT] (z) button to select the
CAMERA1 image.
3. Press the [MODE] button to switch to the
“MARKER SELECT” menu.
Each time the [MODE] button is pressed, the
mode cycles through the modes in the order
“CAM” ➜ “MARKER” ➜ … “MARKER
SELECT” … ➜ “CAM”.
Vehicle width
MARKER
SELECT
■
CCD camera installation
conditions (scale marker input
conditions)
Marker No.
(Pattern)
P1
P2
P3
P4
P5
P6
P7
4. Use the [z] or [w] button to select the
desired marker pattern.
• When the [z] button is pressed, the
marker pattern cycles in descending order,
from P1 ➜ P7 ➜ P6 …
• When the [w] button is pressed, the
marker pattern cycles in ascending order,
from P1 ➜ P2 ➜ P3 …
(From bumper toward rear)
7m
P1
5m
3m
1m
Bumper position
Camera Install
Height
2000
2250
2500
2750
3000
3250
3500
Unit: mm
Vehicle
Width
2500
2300
2500
8 CJ-981E
Page 7

MARKER
SELECT
MARKER
SELECT
MARKER
SELECT
MARKER
SELECT
MARKER
P1
SELECT
P7
MARKER
SELECT
P6
MARKER
SELECT
MARKER
P1
SELECT
P1
P2
P3
P7
5. Press the [MODE] button to return to the
“CAM” mode screen.
Adjusting the Bumper Position (MARKER ADJUST)
The display position of the scale markers set on
the screen can be adjusted to more closely
match the actual position of the vehicle’s
bumper.
Note:
• Different camera types are equipped with different
scale marker patterns. Be sure to set the “CAM
TYPE” first, and only then set the marker adjust.
1. Press the [FUNC] button and switch to the
“CAM” mode screen.
2. Press the [SELECT] (z) button and switch
to the CAMERA1 image.
3. Press the [MODE] button and switch to the
“MARKER ADJUST” setting menu.
Each time the [MODE] button is pressed the
menu alternates in the following order:
“CAM” ➜ “MARKER” ➜ … “MARKER
ADJUST” … ➜ “CAM”
4. Press the [z] and [w] buttons as required
to adjust the scale marker position up/down.
• The marker display position can be moved
10 steps above (V+1 to +10) and 10 steps
below (V-1 to -10) the default position. The
amount of perpendicular movement is
indicated on the screen.
• When the markers are moved from their
default position, the more the onscreen
markers move, the more they vary from
representing their actual physical position.
In such cases, it is safest to adjust the
bumper position marker a bit above the
actual position of the bumper as shown in
the screen.
MARKER
ADJUST
H+10
V -5
P1
English
Bumper position
marker
Bumper image
5. Use the [Å] and [Î] buttons to adjust the
marker positions left/right.
• The marker display position can be moved
10 steps to the left (H+1 to +10) and 10
steps to the right (H-1 to -10) from the
default position. The amount of horizontal
movement is indicated on the screen.
6. Press the [MODE] button to return to the
“CAM” mode screen.
CJ-981E 9
Page 8

Setting the Screen Saver
English
TIMER Function
In order to avoid forgetting to turn off the screen
in “CAM” mode, a timer function can be set to
automatically turn off the image after a set time.
∗ Default value is “5M” (five minutes).
1. Press the [FUNC] button and switch to the
“CAM” mode.
2. Press the [MODE] button to display the
“TIMER” setting menu.
Each time the [MODE] button is pressed the
menu switches alternately in the order
“CAM” ➜ “MARKER” ➜ … “TIMER” … ➜
“CAM”.
3. Use the [z] and [w] buttons to move the
cursor and highlight the desired timer value.
TIMER
OFF
1M
2M
3M
4M
5M
4. Press the [MODE] button to return to the
“CAM” mode screen.
• After setting the timer, a numeral will
appear in the upper right corner of the
“CAM” mode screen to indicate the
number of minutes until the screen turns
off (5 ➜ 4 ➜ 3 ➜ 2 ➜ 1). Also, when the
countdown time reaches ten seconds, the
remaining time numeral “1” will flash.
Notes:
The automatic screen saver timer OFF does not
operate under the following conditions:
• When the transmission is placed in reverse gear
so that the rear-view camera image is displayed.
• When a video (VTR) image is being viewed from
the video input connector.
• When menu screens are displayed. (After one of
the above operations is performed, the “CAM”
mode timer is reset, and restarts from the newly
reset time.)
Setting the Camera LinkedImage Switch (CAM AUTO/
CAM HAZARD)
°Automatic linked display
This setting is used to select whether the
camera image is automatically displayed when
the vehicle’s transmission is switched into
reverse gear or linked to the turn signal
circuit.
∗ Default setting is “ON” (linked display).
°Hazard switch linked display
This setting is used to select whether the
camera image linked to the turn signal circuit
automatically appears when the vehicle’s
hazard switch is engaged.
∗ Default setting is “ON” (no linked display).
1. Press the [FUNC] button to switch to the
“CAM” mode screen.
2. Press the [MODE] button to switch to the
“CAM1 AUTO” menu.
Each time the [MODE] button is pressed the
menu switches alternately in the order
“CAM” ➜ “MARKER” ➜ … “CAM1 AUTO” ➜
“CAM2 AUTO” ➜ “CAM3 AUTO” ➜ “CAM2
HAZARD” ➜ “CAM3 HAZARD” ➜ “CAM”.
CAM1
AUTO
°
Automatic linked display setting
• Linked switching with reverse gear (CAM1
AUTO)
This setting determines whether the
CAMERA1 image signal is automatically
displayed whenever the transmission is
shifted into reverse (when the power supply
box’s CAMERA1 link wire has been wired to
the reverse gear signal).
• Turn-signal linked display (CAM2 AUTO/
CAM3 AUTO)
This setting determines whether the
CAMERA2 or CAMERA3 image signal is
automatically displayed when the turn signals
are used (when the power supply box’s
CAMERA2 or CAMERA3 link wire has been
wired to the turn signal circuit)
ON
OFF
10 CJ-981E
Page 9

3-1. Press the [SELECT] (z) button to choose
either “ON” or “OFF”.
• ON: camera display is automatically linked
to the circuit operation.
• OFF: camera display is not automatically
linked to the circuit operation.
°
Hazard Switch Linked Switching
• CAMERA2 Hazard-Switch Linked Display
(CAM2 HAZARD)
When the power supply box’s CAMERA2 link
wire has been wired to the vehicle’s left-turn
signal wire, this setting determines whether
the CAMERA2 image signal is automatically
displayed when the vehicle’s hazard switch is
activated.
• CAMERA3 Hazard-Switch Linked Display
(CAM3 HAZARD)
When the power supply box’s CAMERA3 link
wire has been wired to the vehicle’s left-turn
signal wire, this setting determines whether
the CAMERA3 image signal is automatically
displayed when the vehicle’s hazard switch is
activated.
3-1. Press the [SELECT] (z) button to choose
either “ON” or “OFF”.
• ON: camera display is not automatically
linked to the circuit operation.
• OFF: camera display is automatically
linked to the circuit operation.
Note:
• If the CAMERA2 and CAMERA3 link wires are
wired to a circuit other than the turn-signal, set
both “CAM2 HAZARD” and “CAM3 HAZARD” to
“OFF”.
4. Press the [MODE] button to return to the
“CAM” mode screen.
Enlarging the CCD Camera’s Image (ZOOM Function)
This function operates only when a zoomequipped CCD camera is connected, and when
the “CAM TYPE” setting has been used to
select a zoom-equipped camera.
1. Press the [ZOOM] button.
The CCD camera’s image is enlarged by a
ratio of 1.4x. During operation of the zoom
function the word “ZOOM” will appear in the
upper left corner of the screen.
2. To return to the normally sized image, press
the [ZOOM] button once again.
Backlight Compensation Function (IRIS)
Under conditions of backlight, it may become
difficult to visually confirm on screen the position
of the bumper or people and objects in the
vicinity of the vehicle. In such cases, this
function automatically adjusts the size of the
CCD camera’s aperture (iris) to allow for easier
viewing conditions.
1. Press the [IRIS] (w) button.
The CCD camera’s aperture is automatically
adjusted to produce a brighter image.
2. To return to the normal aperture, press the
[IRIS] (w) button once again.
Notes:
• When the backlight compensation function
operates, the entire monitor screen will become
brighter, with the result that bright areas
recognizable under normal conditions may
become excessively washed out and more
difficult to see.
Do not use the backlight compensation function
except for temporarily improving visibility of dark
areas of the screen.
• The backlight compensation function operates
when the connected CCD camera is
manufactured by Clarion.
English
CJ-981E 11
Page 10

Using the Dimmer Function
English
(DIM)
When the power supply box’s parking-lamp
switch wire is wired to the vehicle’s parking lamp
switch, the screen is dimmed automatically for
ease of viewing whenever the parking lamp
switch is activated.
1. Hold the [CAM1/DIM] switch depressed for
about 1 second to switch the dimmer
between Light/Dark.
2. In the event that parking lamps are used
during the daytime, making the screen too
dark, hold the [CAM1/DIM] button depressed
for about 1 second (the “DIM” message will
not appear on the screen). Hold the button
depressed once again (about 1 second) to
return to the ordinary dimmed screen (the
indicator “DIM” will once again appear at the
top of the screen).
3. To dim the screen when the parking lamps
are OFF, hold the [CAM1/DIM] button
depressed for about 1 second (the “DIM”
message will appear on the screen). Hold
the button depressed once again (about 1
second) to return to the ordinary bright
screen.
Notes:
Regarding dimmer function when ignition switch
ACC is moved from OFF to ON.
• If parking lamp switch is OFF, the screen will
appear bright.
• If the parking lamp switch is ON, the screen will
appear dimmed.
To Immediately Switch to CAMERA1 Image
If the screen image has turned off or images
from other sources (CAMERA2, CAMERA3,
VTR, RGB) are currently showing, you can
switch immediately to the CAMERA1 image with
a single button press:
1. Press the [CAM1/DIM] button.
12 CJ-981E
Page 11

5. INSTALLATION
English
Before Installing
WARNING
• Always disconnect the negative
terminal cable from the vehicle battery
before performing any installation work.
If the battery is not disconnected, a shortcircuit could occur during installation due to
accidental contact between + and - wires,
causing vehicular damage or personal injury.
• Do not install in any location that may
impede the operation of air bags.
Installing the monitor or wiring in any location
that impedes the free operation of airbags
may result in improper operation in the event
of a vehicle accident, resulting in personal
injury.
• Do not install in any location that impedes
forward vision of the driver, that interferes
with vehicle operation, or that presents a
safety danger to passengers of the vehicle.
Installing the monitor in such locations could
result in dangerous accidents or injuries.
--
-
--
Installing the Monitor Stand/ Display Unit
Note:
• Clean away all dust and dirt from the installation
surface before installing.
1. Lift up the guide holder while pressing down
on the unlock knob to remove the guide
holder.
2. Slide the guide holder into the groove
provided in the back of the display unit.
Tighten the screw on the guide holder using
the Allen key provided with the display unit.
Guide holder
Allen key (provided)
3. Install the display unit on the monitor stand,
and determine its attachment position.
Insert the guide holder into the monitor stand
until you hear it click into place.
Determine the attachment position after
adjusting the angle.
Note:
• Do not remove the peel-off sheet from the base of
stand base.
Guide holder
Adjust the angle
of the stand.
Stand base
Guide holder
Unlock knob
4. Align the stand base with the profile of the
attachment surface and bend the stand
base.
Notes:
• Bend the stand base so that it contact-fits the
profile of the attachment surface. Gaps in the
attachment may cause the stand base to come
away from the attachment surface.
• Do not remove the peel-off sheet from the base of
stand base.
CJ-981E 13
Page 12

English
5. Temporarily remove the display unit.
Lift up the display unit while pressing down
on the unlock knob to temporarily remove the
display unit.
depending on the material of the attachment
surface or heat. For extra safety, firmly fasten the
stand base in place using the self-tapping screws.
(In this case, note that screw holes will be drilled
into the attachment surface.)
Self-tapping screws
(provided)
While pressing down
Lift up.
6. Attach the stand base to the determined
location on the attachment surface.
Remove the peel-off sheet from the base of
the stand base, and firmly attach the stand
base to the determined location (e.g. glove
compartment).
Notes:
• Before attaching the stand base, be sure to wipe
the attachment surface clean.
• After attaching the stand base, press down hard
so that the stand base is firmly attached to the
attachment surface.
8. After about 24 hours, install the display unit
and adjust its angle for ease of viewing.
Front/back, left/right:
Loosen the angle adjustment screw to
adjust the angle.
Top/bottom:
Temporarily remove the display unit from
the monitor stand, and loosen the screw
with the Allen key (provided) and adjust the
position of the guide holder.
Loose the angle
adjustment screw,
and adjust the
front/back and
left/right angles.
After adjusting the angle, firmly tighten the
screws to fasten the display unit in place.
After adjustment,
tighten and fasten.
7. After attaching the stand base, fasten in
place with screws.
Fasten the stand base using the self-tapping
screws (provided).
Note:
• Sometimes strong adhesion between the stand
base and the attachment surface cannot be
obtained by the double-sided adhesive tape alone
14 CJ-981E
Note:
• Vibration sometimes causes the monitor stand
screws to become loose. Periodically inspect and
re-tighten any loose screws.
Page 13

6. TROUBLESHOOTING
■ In event of a malfunction, check the following symptoms and remedies before calling for professional
repair:
Symptom Cause Remedy
No image
Image is dark
BRIGHT/DIMMER setting is
adjusted to minimum setting.
BRIGHT/DIMMER setting is
incorrect.
[CAM1/DIM] button has
been pressed.
Set BRIGHT/DIMMER adjustment properly. See
section “Adjusting the Image Quality” (p. 7).
Check to be sure BRIGHT and DIMMER controls are
adjusted properly.
If the “DIM” indicator appears on the screen, hold the
[CAM1/DIM] button depressed for about 1 second to
set dimmer to OFF.
Colors are thin
Poor operating environment
This may occur when internal vehicle temperatures
are below 0°C or above 60°C. Adjust vehicle
passenger compartment to an appropriate level
(around 25°C).
Hues are poor
Improper color adjustment.
Check to be sure HUE and COLOR controls are
adjusted properly.
7. SPECIFICATIONS
Screen Dimensions: 6.5 inch [146.7 (W) x 79.1 (H) mm]
Display Type: Transmissive TN LCD panel
Drive Method: TFT (thin-film transistor) active matrix
Display Format: NTSC/PAL (during VTR mode only)
Resolution: 336,960 pixels
234 (V) x 1440 (H)
Power Supply: DC 13.2V (10.8V – 15.6V)
Current Consumption: 2.0A or less
Weight: About 500 g
External Dimensions: 194 (W) x 116 (H) x 28.3 (D) mm
194
25.6
English
116
POWER
SELECT
ADJ
FUNC
MODE
CAM1/DIM
IRIS
ZOOM
28.3
CJ-981E 15
Page 14

English
16 CJ-981E
Page 15

2005/7 (A·K)
Clarion Co., Ltd.
All Rights Reserved. Copyright © 2005: Clarion Co., Ltd.
Printed in Japan / Imprimé au Japon / Gedruckt in Japan / Stampato in Giappone
CJ-981E
280-8293-00
 Loading...