

Citronic CDUSB-1, CDUSB-1 MKII Owner's Manual
OWNERS MANUAL
Version 1.0
Safety information
1. Read these instructions.
2. Keep these instructions.
3. Heed all warnings.
4. Follow all instructions.
5. Do not use this item near moisture.
6. Clean only with dry cloth.
7. Do not block any of the ventilation openings. Install in accordance with the
manufacture’s instructions.
8. Do not install near any heat sources such as radiators, stoves or other items (including
amplifiers) that produce heat.
9. Do not defeat the safety purpose of the polarised plug. The wide blade is provided for
your safety. If the provided plug does not fit into the item or the mains socket, consult
an electrician for replacement.
10. Protect the power cord from being walked on or pinched particularly at plug, convenience
receptacles, and point where they exit from the item.
11. Only use attachments/accessories specified by the manufacturer.
12. Use only with a stand, tripod, bracket or table suitable for support.
13. Unplug this item during lightning storms or when unused for long periods of time.
14. Refer all servicing to qualified service personnel. Servicing is required when the item has
been damaged in any way, such as power supply cord or plug is damaged, liquid has
been spilled or objects have fallen onto the item, the item has been exposed to rain or
moisture, does not operate normally, or has been dropped (Note: Accidental or cosmetic
damage is not covered by the items 12 month warranty)
15. Please keep the unit in a safe environment.
16. Do not store anything on top of the item
CAUTION: To reduce the risk of electric shock, do not
remove any cover. No user-serviceable parts inside. Refer
servicing to qualified service personnel only.
The lightning flash with arrowhead symbol within the equilateral triangle is intended to
alert the user to the presence of un-insulated “dangerous voltage” within the product’s
enclosure that may be of sufficient magnitude to constitute a risk of electric shock.
The exclamation point within the equilateral triangle is intended to alert the user to the
presence of important operation and maintenance (servicing) instructions in the
literature accompanying this appliance.
DO NOT OPEN
RISK OF ELECTRIC SHOCK

CITRONIC CDUSB-1
Main Features:
1 x USB front and 1 x USB rear inputs which can be read by both players simultaneously
Single front load CD player with 20 seconds anti-shock protection
MP3/WAV compatible from CD or USB (ID3 tags)
IR Remote control operation
Auto Cue
Single/Continuous playback
+10 Track skip search
Pitch control and pitch display
High quality easy read LCD display
Easy-to-use folder and file search
Jog wheel for frame search
Selectable elapsed, remain and total remain time display
Seamless loop with fine tune adjustment
Instant start (sound is produced immediately when the play button is pressed)
Pitch controlled ±4, 8, 16%, ±100% (CDDA)
Pitch lock function
Auto/Manual tap BPM
19” rack mountable
Accessories
1 x UK power cable
1 x EU power cable
1 x Remote control
1 x Instruction manual
General Checks and Advice
1) Before switching off the power ensure there is no CD in the draw, the disc tray is fully
closed and the LCD display reads “NO DISC”.
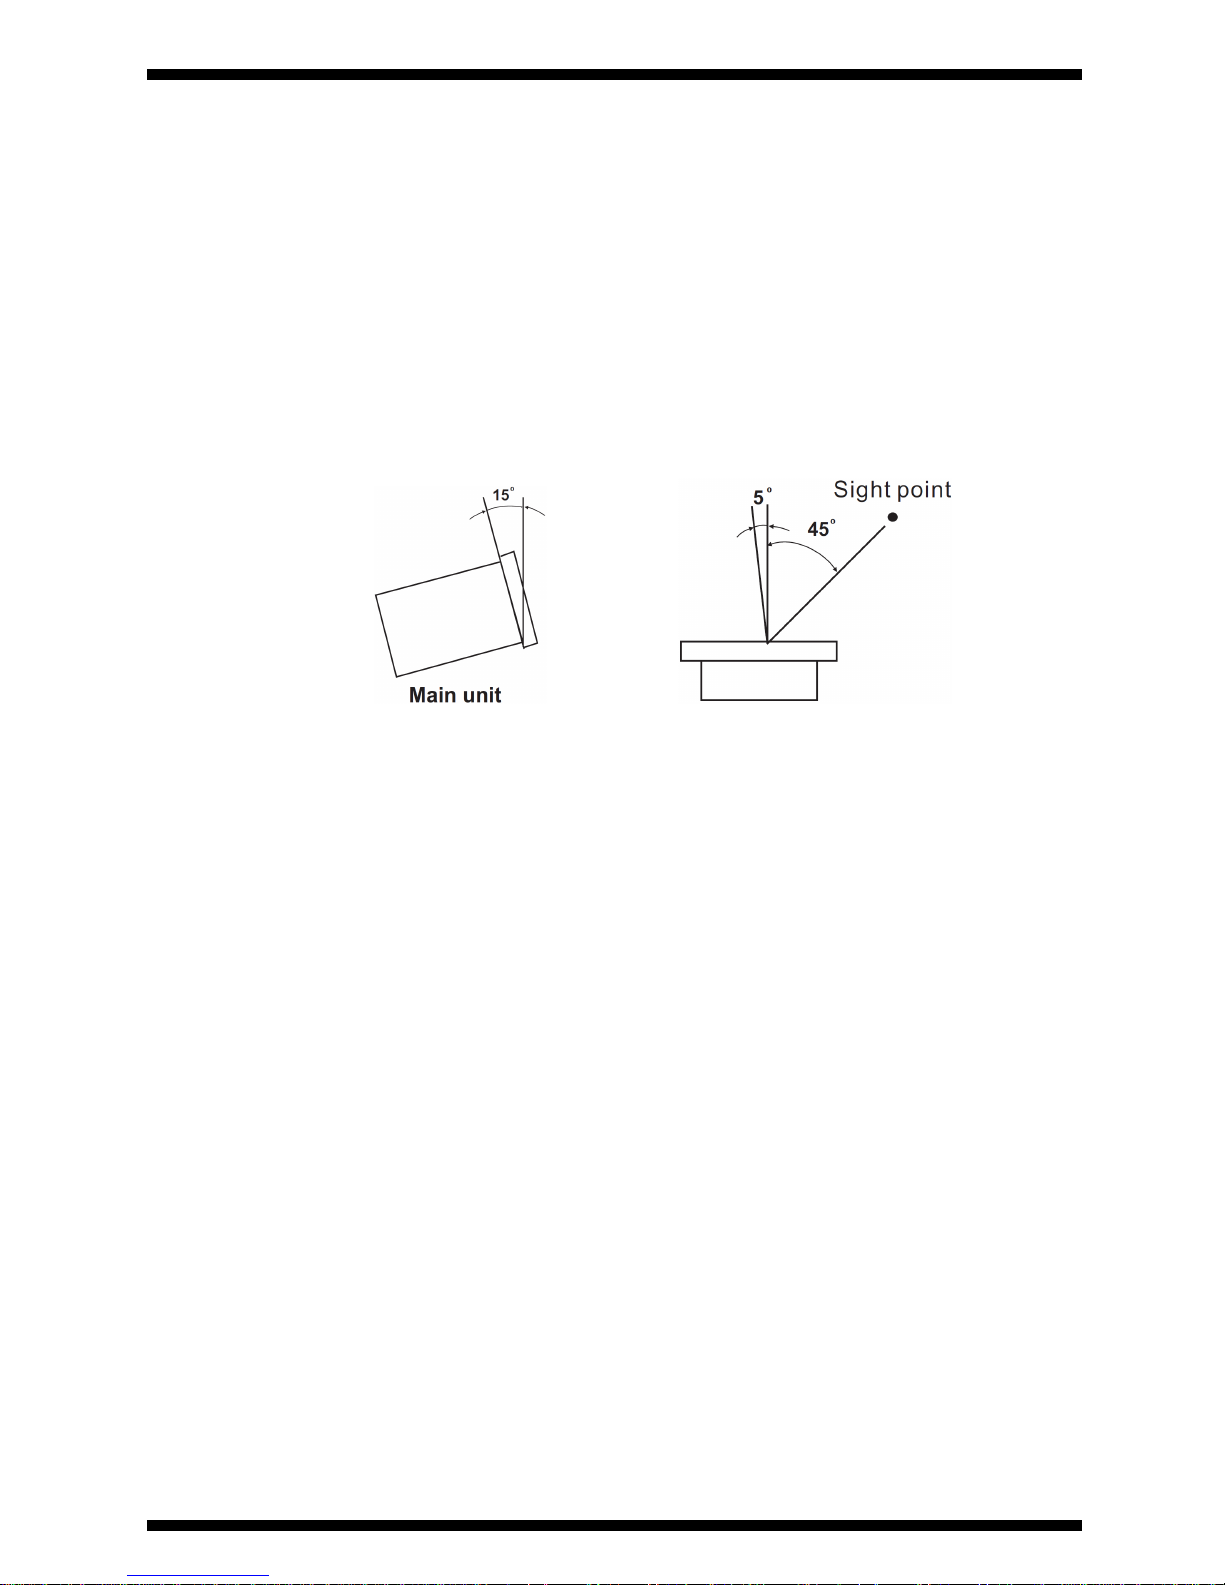
2) Installation
• Place the unit on a flat surface or mount in a secure rack case.
• The CD unit will work normally when it is mounted when the front panel is within
15° of the vertical plane. If tilted excessively discs may not be loaded properly.
Also ensure the head unit at a similar to the one shown below for the best visual
results.
• Be sure the player is mounted in a well ventilated area and is not exposed to direct
sunlight, high temperatures or high humidity.
• Keep the unit as far away as possible from TVs and tuners as the unit may cause
undesirable interference to these devices.
3) Compact Discs
• DO NOT allow fingerprints, oil or dust to get on to the surface of the disc.
• If the disc is dirty, wipe it clean with a soft dry cloth.
• DO NOT use benzene, white spirit, electrostatic-proof chemical or silicone-treated
cloths to clean discs.
• Always handle discs carefully to prevent damaging the surface; in particular when
removing a disc from its case or returning it.
• DO NOT bend the disc.
• DO NOT enlarge the hole in the centre of the disc.
• DO NOT write on the printed side of the disc with hard tipped implements such as a
pencil or ball point pen as it could effect playback.
• Condensation will form if a disc is brought in to a warm area from a colder one.
• DO NOT attempt to dry the disc with a hair dryer etc.
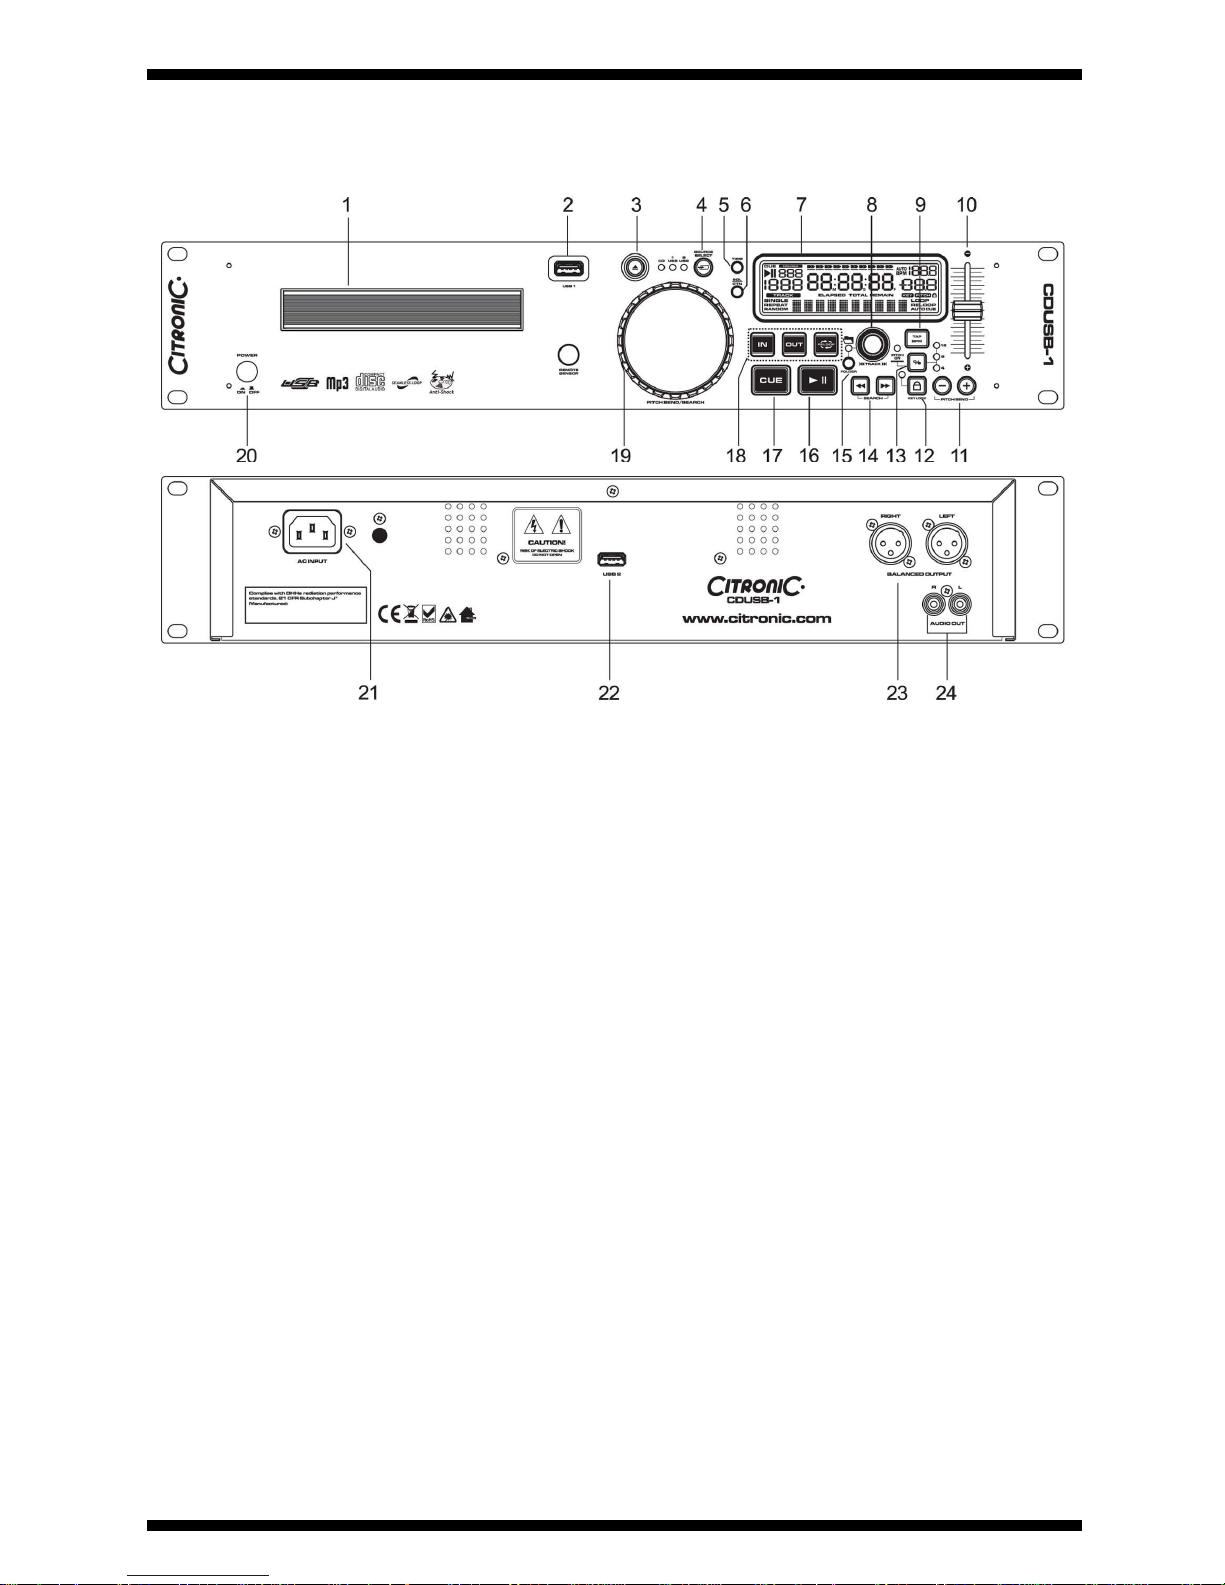
General Functions and Controls
1. DISC TRAY – This tray is used to load and unload a compact disc into the drive mechanism.
The tray is opened and closed by pressing the OPEN/CLOSE BUTTON. Never attempt to
force the disc tray open or close when the power is turned off.
2. USB PORT 1 (FRONT) – Insert a USB mass storage device for playing MP3 files.
3. OPEN/CLOSE (Transport Tray Open / Close) – This button is used to open and close
the disc tray. NOTE: When a disc is loaded, the tray will not open unless the unit is in
PAUSE or CUE mode.
4. SOURCE SELECT BUTTON – This button lets you toggle between the CD tray and USB
port 1 and 2. The selection is indicated by LEDs.
5. TIME BUTTON - The button will switch the time value described in the TIME METER
between ELAPSED playing time, TRACK remaining time and TOTAL remaining time.
6. SGL/CTN BUTTON - This function allows you to choose between single track play or
continuous track play (all tracks in order with no pause between). This function also
operates in RELAY mode. With this button you can switch auto cue on and off, by holding
the button down for 2 seconds.
7. LCD DISPLAY – The high quality LCD display gives a clear indication of all the functions
as they occur (see LCD display section for more details).
8. TRACK / FOLDER KNOB - This knob has three functions:
a. You can use it to select the next or previous track/folder by turning the knob
forwards or backwards.
b. Holding down and turning the knob forwards or backwards will rapidly skip through
the tracks/folders on your CD/USB by 10 tracks per click.
c. Press track knob to read the ID3 tags on the file name. Switch between: File name
/ Title name / Artist / Bit rate on the LCD display.
 Loading...