

CITROEN 2 CV4 1975, 2 CV6 1975, 2 CV4, 2 CV6 Owner's Manual

CONTENTS
Notices
Important Points
Driving
Maintenance
Minor Repairs
Miscellaneous Information
Service-station Reminder
2 CV4 - 2 CV6
ALPHABETICAL INDEX
07516
JULY 1975
AZ-KB AZ-KA
2 CV4 2 CV6
NOTICES
Positions are described as
Right-Hand (RH) or LeftHand (LH), as seen by a
person standing behind
the car and looking
forward towards the
bonnet (hood).
Descriptions of the various
items fitted to the car
cover standard fittings and
optional extras. The
inclusion of a description
does not therefore imply
that the item described is
fitted to all models for any
particular model.
2 CV4 - 2 CV6

[Contents] [Notices] [Important Points] [Driving] [Maintenance] [Minor Repairs] [Miscellaneous Information]
CONTENTS
Notices
Important Points
Driving
Maintenance
Minor Repairs
Miscellaneous Information
Service-station Reminder
2 CV4 - 2 CV6
ALPHABETICAL INDEX
07516
JULY 1975
AZ-KB AZ-KA
2 CV4 2 CV6
IMPORTANT POINTS
During the first 1,200 mi (2,000 km): Keep a little below the speed limits indicated
by the red marks on the speedometer.
At 600 mi (1,000 km): by any Citroën Dealer.
Before setting out on a long journey, check: The engine oil level; the level of the
brake fluid and top up if necessary.
Every 3,000 mi (5,000 km): Engine sump - drain and refill
Every 12,000 mi (20,000 km): Gearbox - change the oil
On "2 CV6", pay attention to the red warning lamp, (engine oil pressure). If it lights
up while driving, stop immediately.
Always keep in your vehicle: complete set of spare bulbs; set of fuses (10 & 15
amps).
Check inflation pressures regularly.
Changing a wheel: Tools and spare
wheel in boot (trunk).
From the very beginning make
yourself acquainted with the
handling operations specified in the
Tyre (tire) changing section.
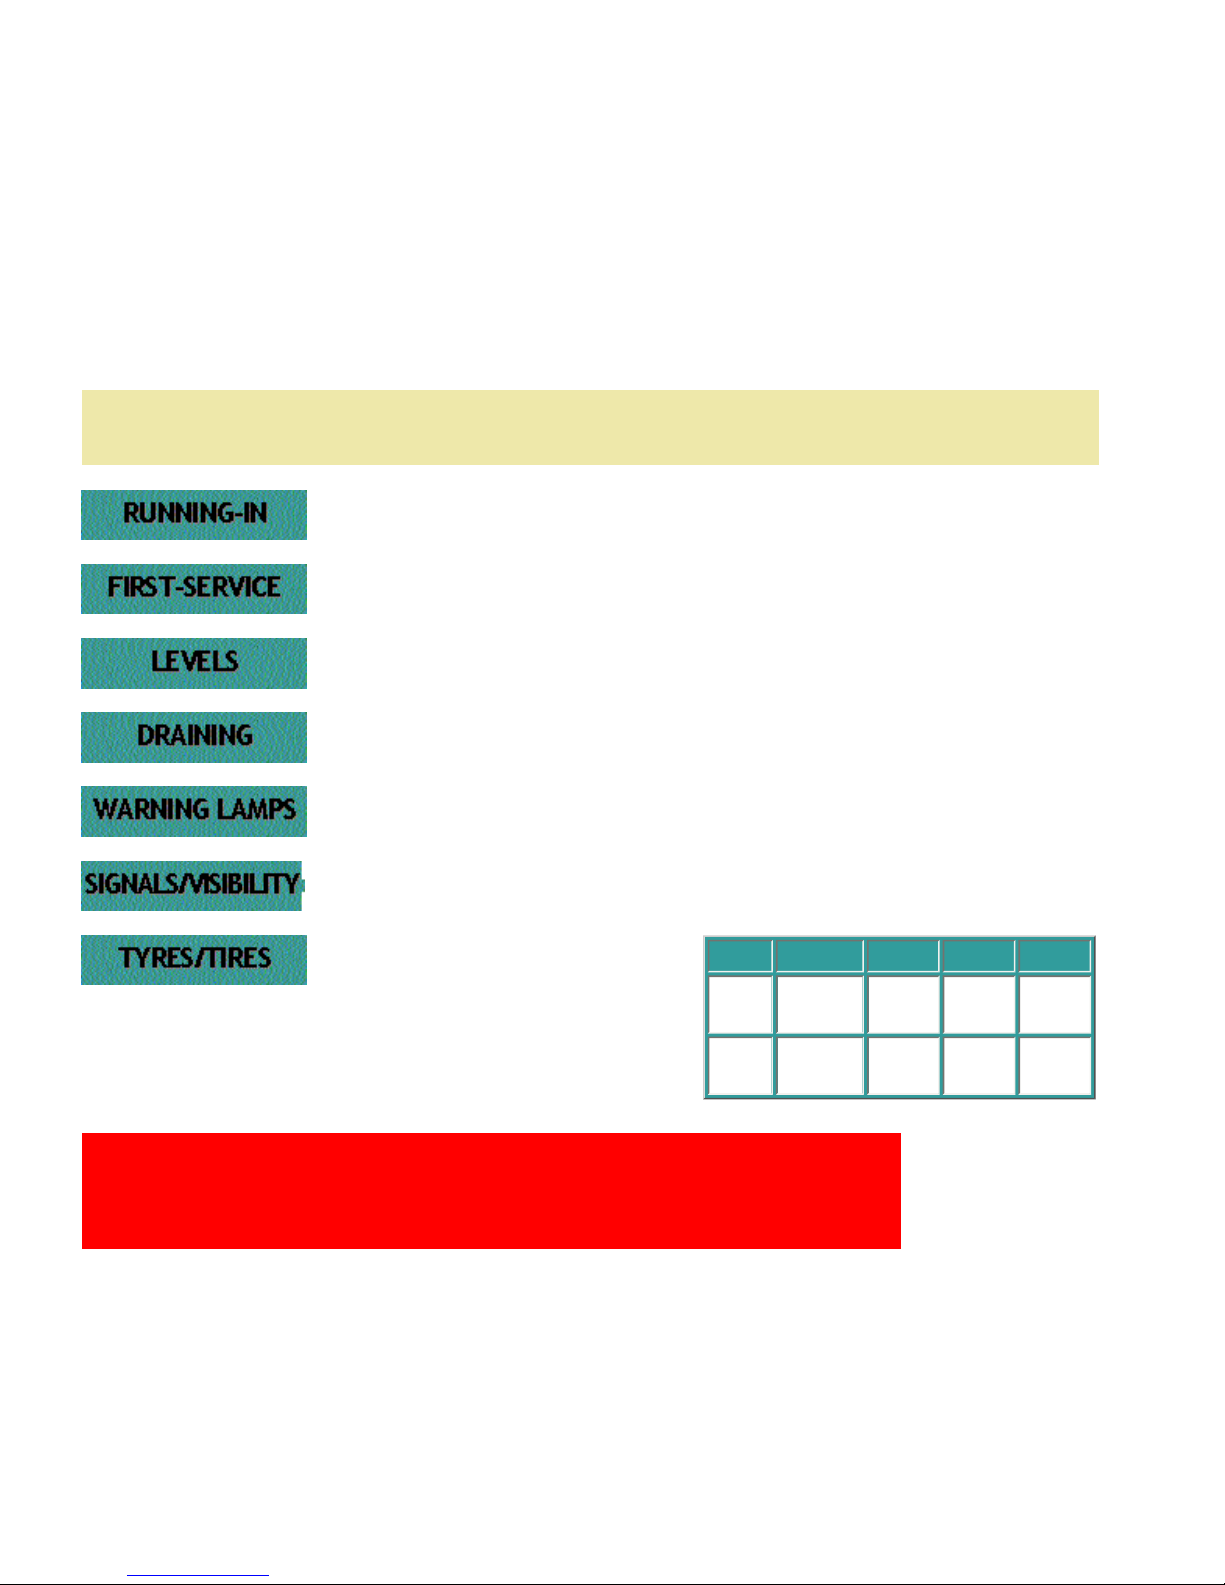
Model Michelin Front Rear Spare
2 CV4 125-15X
1.4 bar
20 psi
1.8 bar
26 psi
2 bar
29 psi
2 CV6 125-15X
1.4 bar
20 psi
1.8 bar
26 psi
2 bar
29 psi
In order to ensure a longer life for your vehicle, and, for your safety,
"Citroën" advises you to adhere to these most important points,
systematically.
[Contents] [Notices] [Important Points] [Driving] [Maintenance] [Minor Repairs] [Miscellaneous Information]

DRIVING
This first section contains all
you need to know about
driving your car and taking
advantage of the comfort it
offers: the panel instruments
are all described
here, so that
you can find out the meaning
of their signals with a
minimum of effort, should the
need arise.
We also advise you to read
here before taking the car on
the road for the first time.
DRIVING
2 CV4 - 2 CV6
Opening and locking:
Doors, Boot, Bonnet
Driving Position:
Controls and accessories (LH)
Controls and accessories (RH)
Dashboard instruments
Seats, rear-view mirrors, seat belts
Starting:
Anti-theft, ignition, starter
Gears, clutch, brakes
Signals and visibility:
Lights, signals, windscreen wipers/
washer
Air conditioning:
Ventilation, heating, de-misting
Comfort:
Folding canvas hood
Accessories
07516
JULY 1975
AZ-KB AZ-KA
2 CV4 2 CV6
[Contents] [Notices] [Important Points] [Driving] [Maintenance] [Minor Repairs] [Miscellaneous Information]
DRIVING
DRIVING POSITION
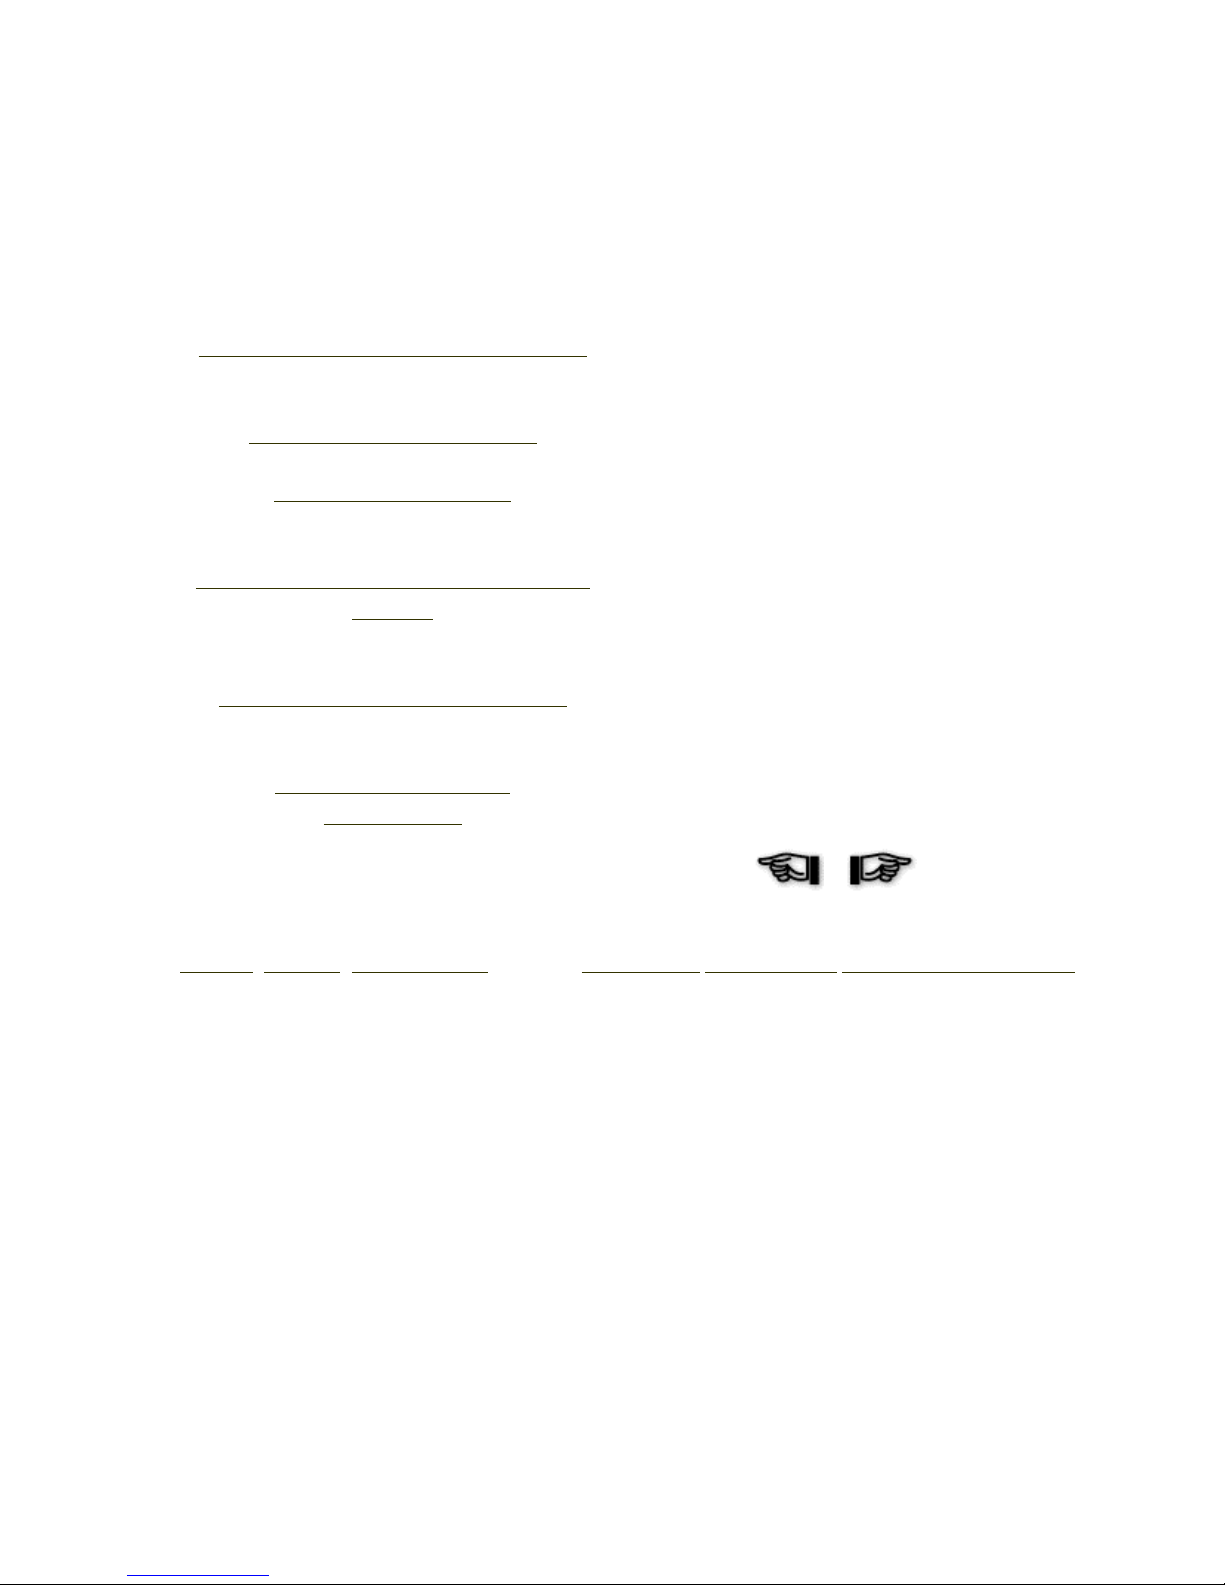
Dashboard Instruments

With the exception of the warning lamps for engine oil pressure (2) and hazard warning device (6),
the illumination of the following dashboard instruments is controlled by the exterior lighting switch.
These instruments do not function when the ignition is off, with the exception of the hazard warning
device (6).
1 - Speedometer: The red marks indicate maximum speed permitted in each gear.
2 - Engine oil pressure warning lamp (2 CV6 only): This lights up when the ignition is switched on
and goes out as soon as the engine is running. If it lights up when driving, stop the engine
immediately and top up the level of oil if necessary. If the lamp remains alight despite the oil level
being correct, stop again and contact a Citroën dealer.
3 - Fuel gauge: Tank capacity: 4 1/2 Imp. Gal. (20 litres)
4 - Total mileage indicator
5 - Charge indicator: At normal engine running speed, the needle should remain in the white sector.
If the needle should remain in either of the red sectors, consult a Citroën dealer. It is possible that,
when driving with the headlamps on, the needle may stay in the white cross-hatched zone - indication
that the battery is insufficiently charged. In normal circumstances, when driving, the generator should
charge the battery and within two hours the needle should return to the white zone. If this does not
occur, consult a Citroën dealer.
6 - Hazard warning lamp: Flashes throughout the operation. If it does not function, check the
direction indicators.
[Contents] [Notices] [Important Points] [Driving] [Maintenance] [Minor Repairs] [Miscellaneous Information]
DRIVING
DRIVING POSITION
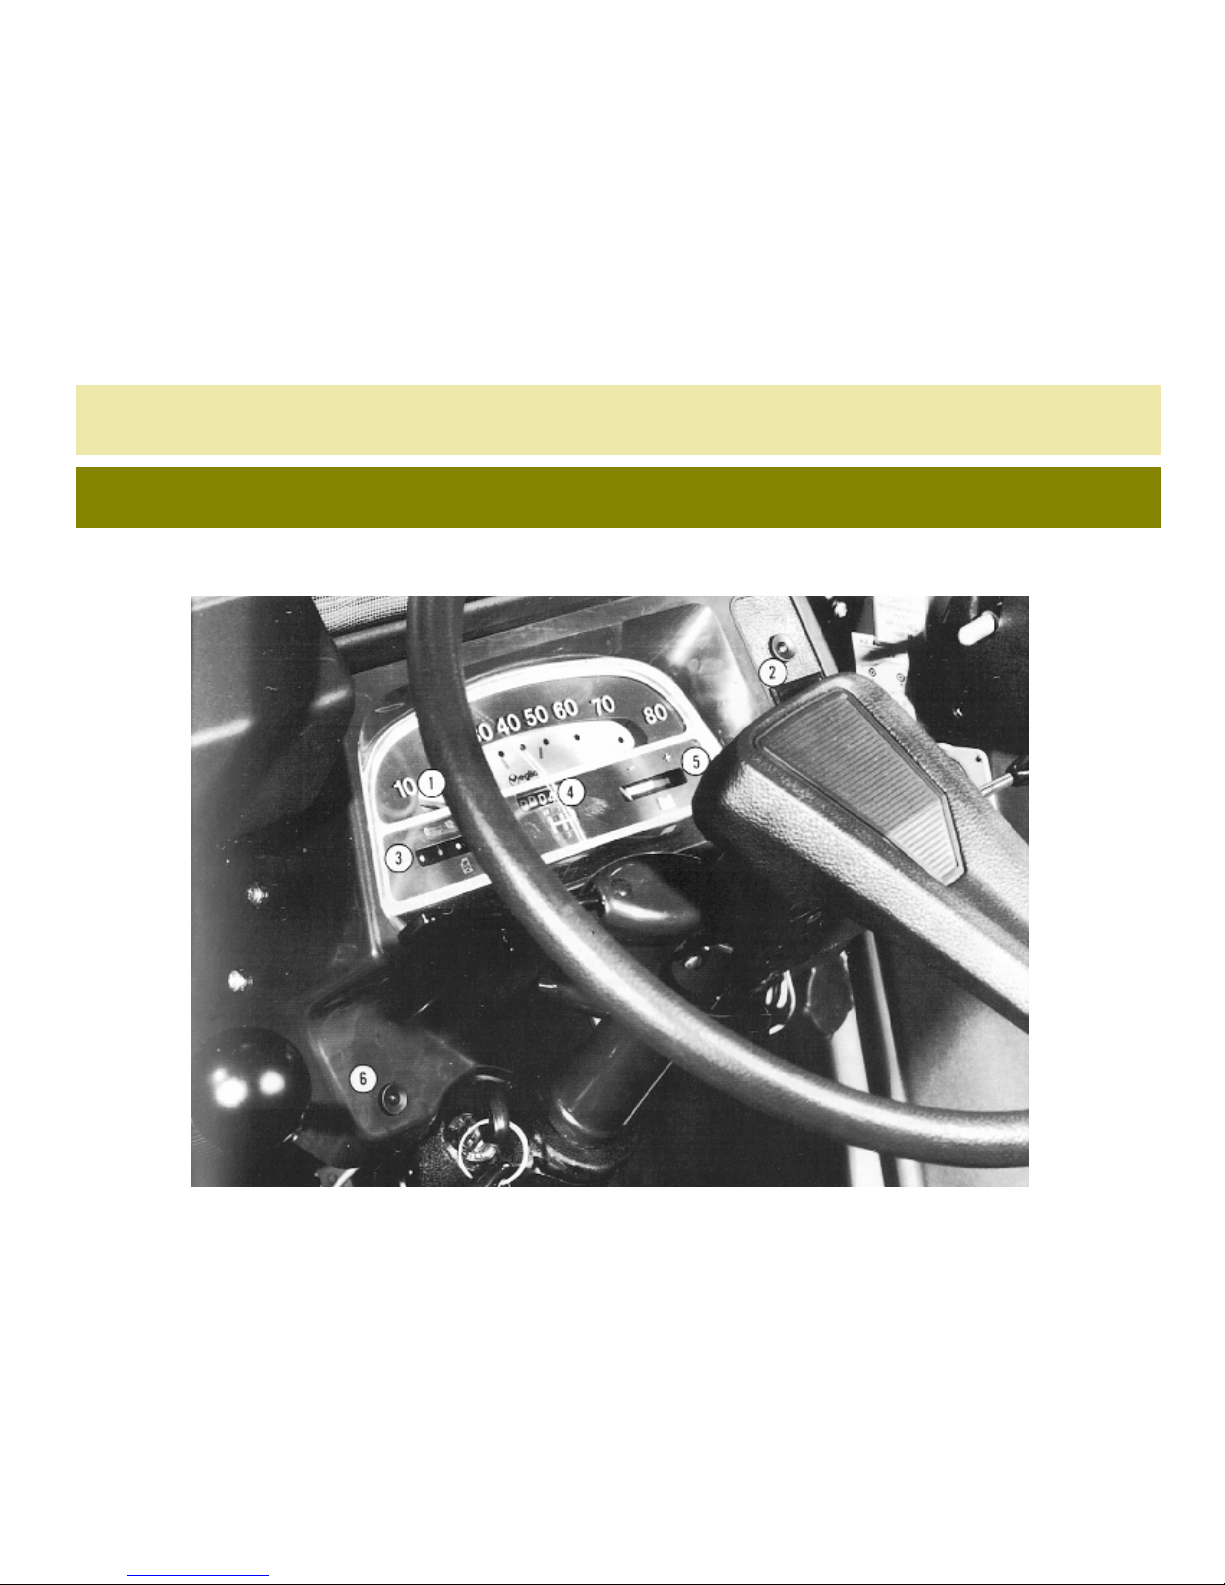
Controls and Accessories (RHD)

1 - Control for direction indicators
2 - Left ventilation aperature
3 - Demister-defroster outlet for windscreen
4 - Switch for hazard warning lamps
5 - Switch for electric windscreen wipers
6 - Control for lighting and horn
7 - Control for ventilation shutter
8 - Control for heating
9 - Ashtray
10 - Right ventilation aperature
11 - Control for headlamp height adjustment
12 - Combined anti-theft-ignition-starter switch
13 - Control for windscreen washer
14 - Emergency and parking brake
15 - Choke control
16 - Control for air distribution between windscreen and floor
17 - Gear-change lever
18 - Glove compartment
[Contents] [Notices] [Important Points] [Driving] [Maintenance] [Minor Repairs] [Miscellaneous Information]
DRIVING
DRIVING POSITION
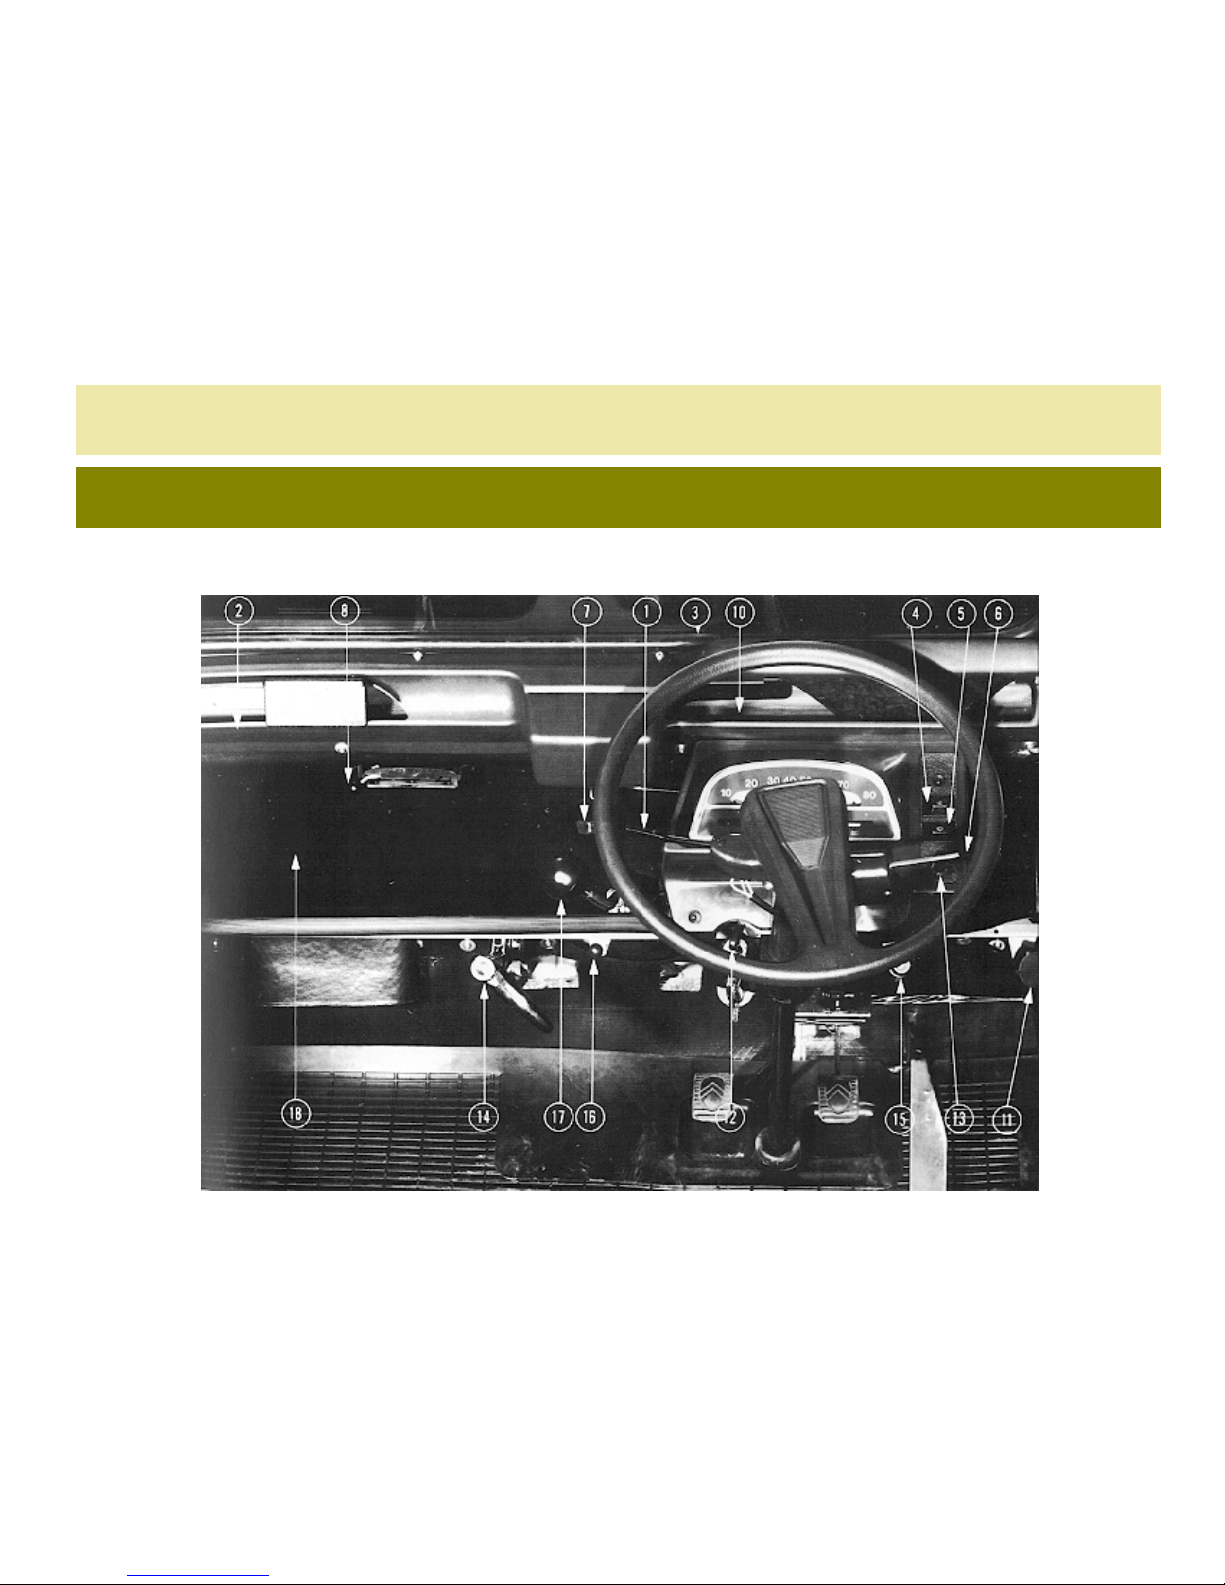
Controls and Accessories (LHD)

1 - Control for direction indicators
2 - Left ventilation aperature
3 - Demister-defroster outlet for windscreen
4 - Switch for hazard warning lamps
5 - Switch for electric windscreen wipers
6 - Control for lighting and horn
7 - Control for ventilation shutter
8 - Control for heating
9 - Ashtray
10 - Right ventilation aperature
11 - Control for headlamp height adjustment
12 - Combined anti-theft-ignition-starter switch
13 - Control for windscreen washer
14 - Emergency and parking brake
15 - Choke control
16 - Control for air distribution between windscreen and floor
17 - Gear-change lever
18 - Glove compartment
[Contents] [Notices] [Important Points] [Driving] [Maintenance] [Minor Repairs] [Miscellaneous Information]
DRIVING
OPENING and LOCKING
Doors, Boot (trunk), Bonnet (hood)
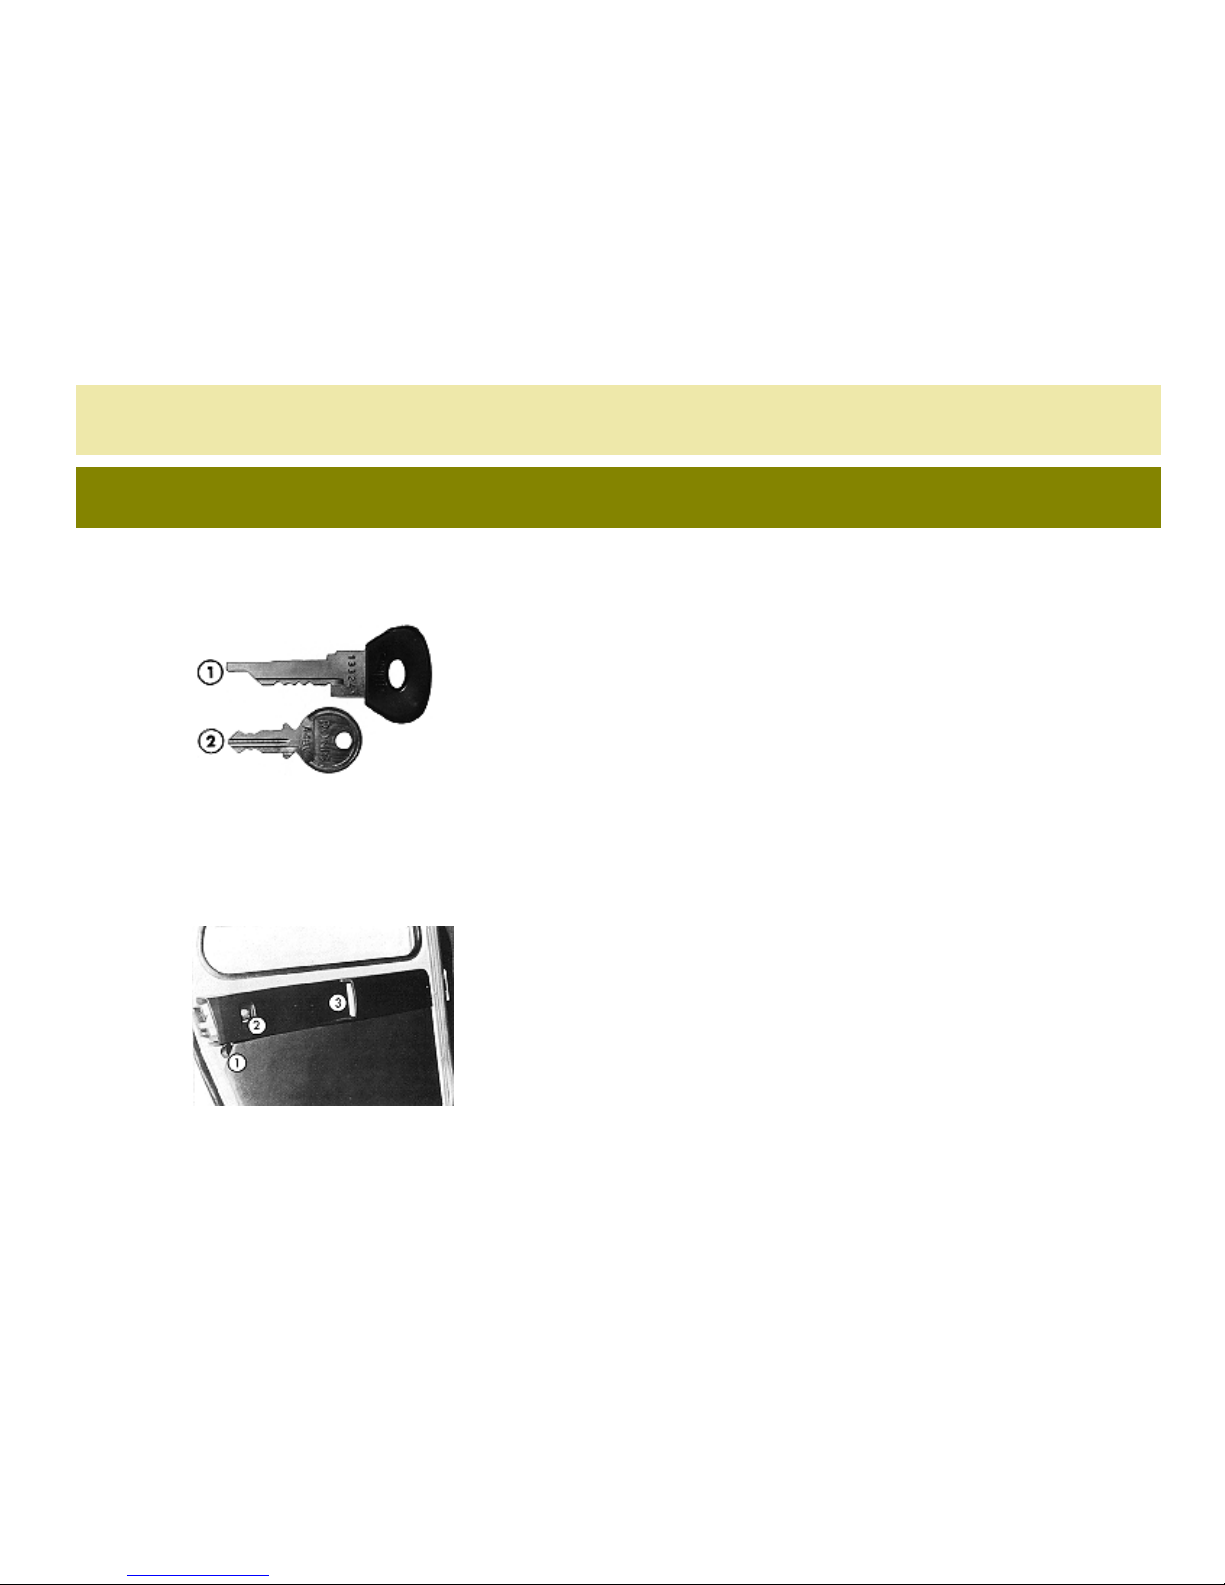
KEYS (Fig. 1)
The larger key (1) operates the "Anti-theft-ignition-starter" device.
The smaller key (2) locks the front side doors and the boot lid.
We recommend that note be taken of the key numbers in the space
provided in the "Maintenance Guide" which came with the car
when originally delivered or in a suitable spot for your convenience.
Fig. 1
Keys
1 - Anti-theft-ignition-starter
2 - Front side doors, boot lid
SIDE DOORS
From the outside:
To open: Turn the handle downwards.
To lock: With the key (for front doors only)
From the inside:
To open: Front doors: raise the lever situated at the front of the
doors. Rear doors: (Fig. 2): press the lever (1)
To lock: Lower the catch (2) (rear side doors only)
To unlock: Raise the catch (2) (rear side doors only)
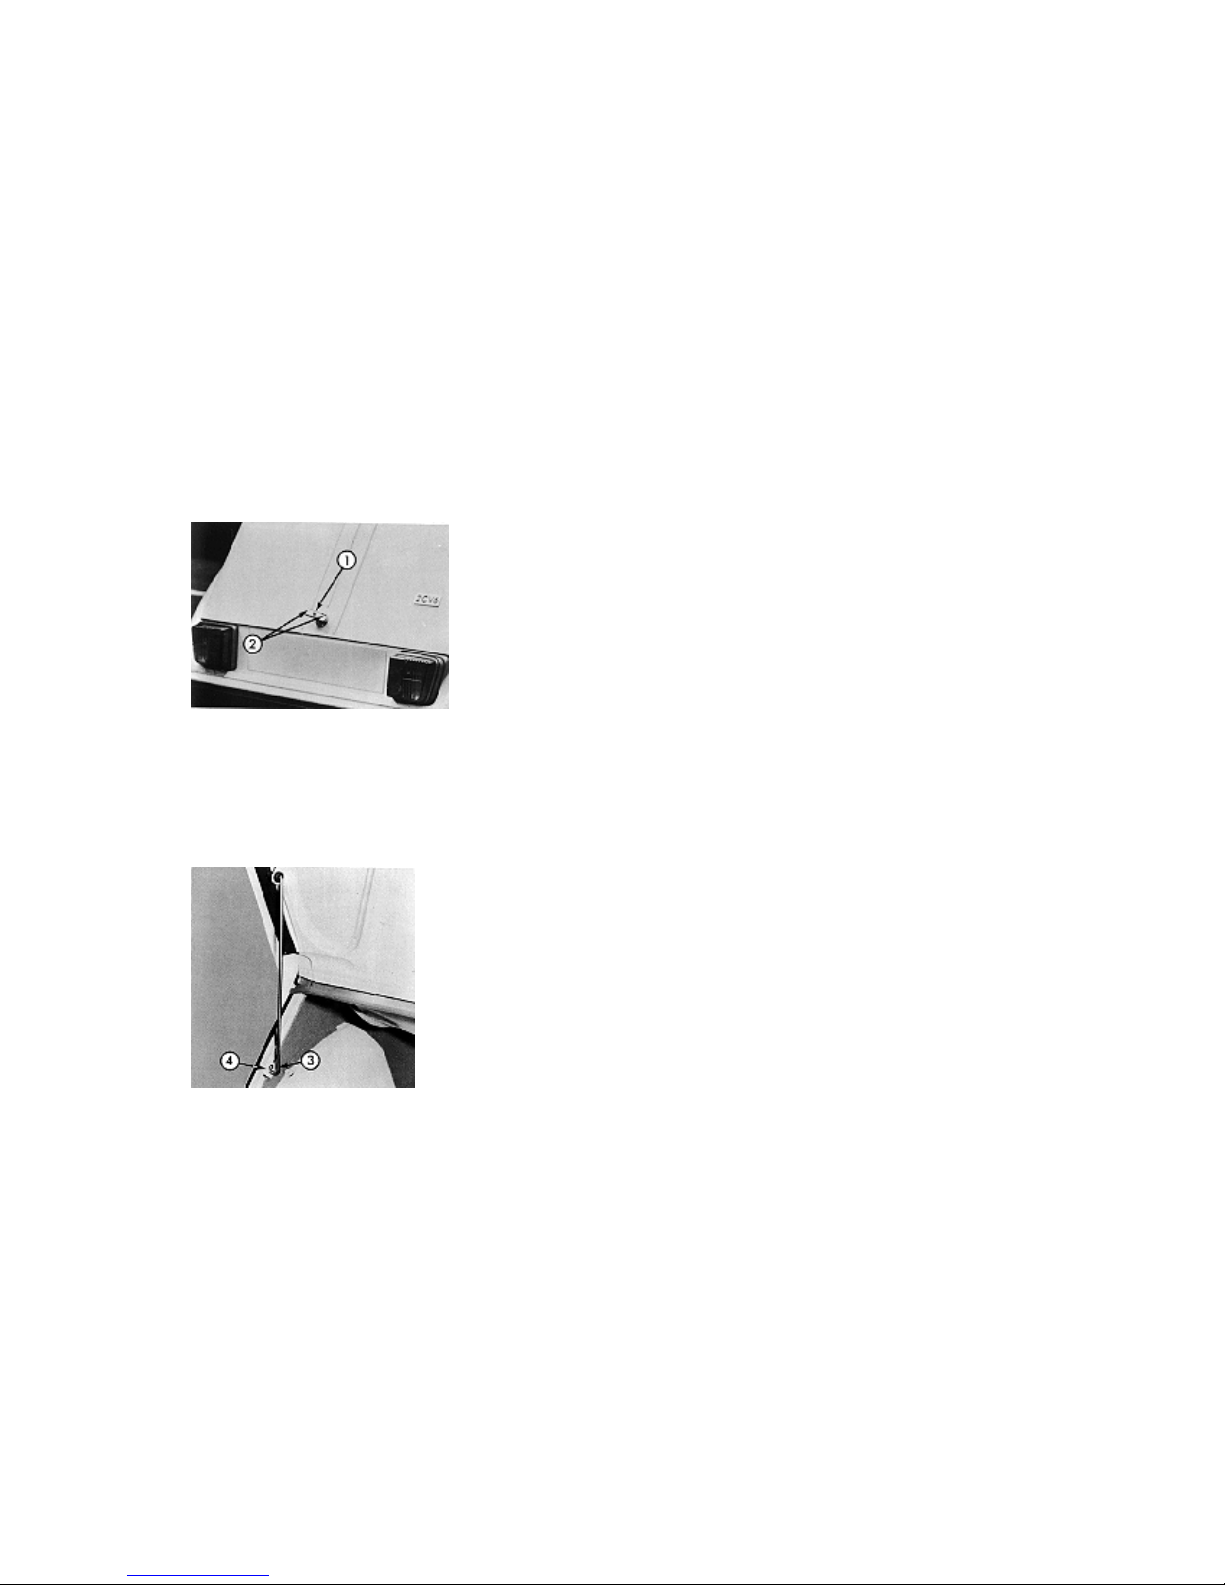
Fig. 2
Rear side doors
(inner door handle)
1 - Opening
2 - Locking
3 - Access for hand
BOOT (TRUNK) LID (Fig. 3 & 4)
To open: Insert the side door key into lock (1). Unlock and turn the
handle (2), the lid will open slightly. Completely raise the lid and
keep it open by engaging the end ot its stay (3) in the support (4).
To shut: Withdraw the stay from its support, secure it on the lid
and lower the lid slowly while holding it.
To lock: Use the side door key. With the lid locked, the handle
should turn loosely.
To remove: The boot lid can be removed completely by raising it
to its maximum extent and by sliding it in its hinges towards the left
or right.
Never drive the car with the boot lid open, supported by its stay.
Fig. 3
Boot Lid
1 - Lock
2 - Handle (opening)
Fig. 4
Rear Boot Lid
3 - Stay
4 - Support
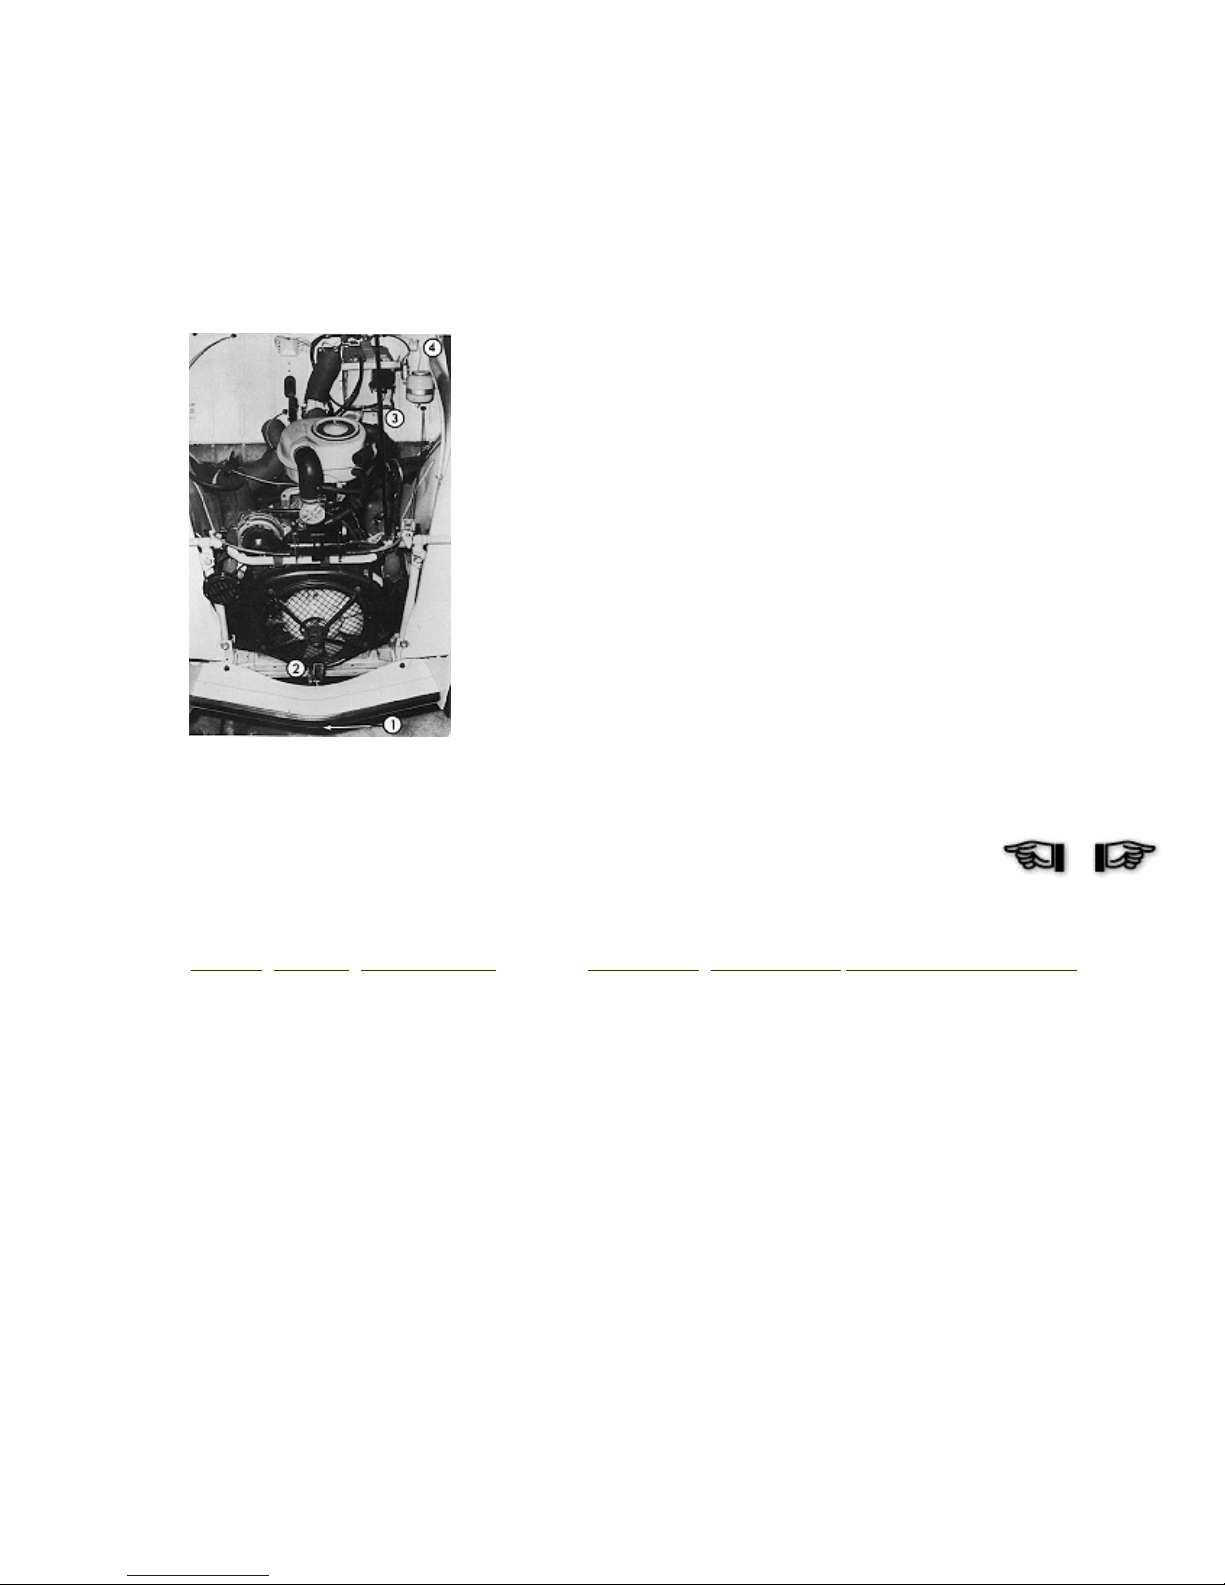
BONNET (Fig. 5)
Lift the lever situated under the centre part of the front bumpers (1)
to disengage the safety catch (2).
Raise the bonnet and insert the end-peg of the stay (3) into the
rubber ring of the bonnet, pressing in if necessary.
Before closing the bonnet, do not forget to replace the stay in the
notch of its support (4).
FUEL FILLER
It is situated above the RH rear wing of the car.
Opening: Press the cap and turn anti-clockwise.
Closing: Press the cap and turn clockwise until it clicks.
Fig. 5
Opening the bonnet
1 - Location of the release
lever
2 - Safety catch
3 - Stay
4 - Support
[Contents] [Notices] [Important Points] [Driving] [Maintenance] [Minor Repairs] [Miscellaneous Information]
MAINTENANCE
This section deals with the small
points which are essential to
ensure the good condition of your
car: checking levels, keeping and
eye on the tyres, washing the
bodywork ...
Other maintenance operations,
such as greasing, oil changes,
adjustments - which the Citroën
network will competently carry out
for you, through is special Service
Stations - form the subject of the
"Maintenance Guide", which was
supplied with the vehicle when
originally delivered.
MAINTENANCE
2 CV4 - 2 CV6
Levels:
Oil, Brake Fluid - Checks and Topping
Up
Mechanical and Electrical
Bodywork
Interior
07516
JULY 1975
AZ-KB AZ-KA
2 CV4 2 CV6
[Contents] [Notices] [Important Points] [Driving] [Maintenance] [Minor Repairs] [Miscellaneous Information]
MAINTENANCE
Levels
Checks and Topping up
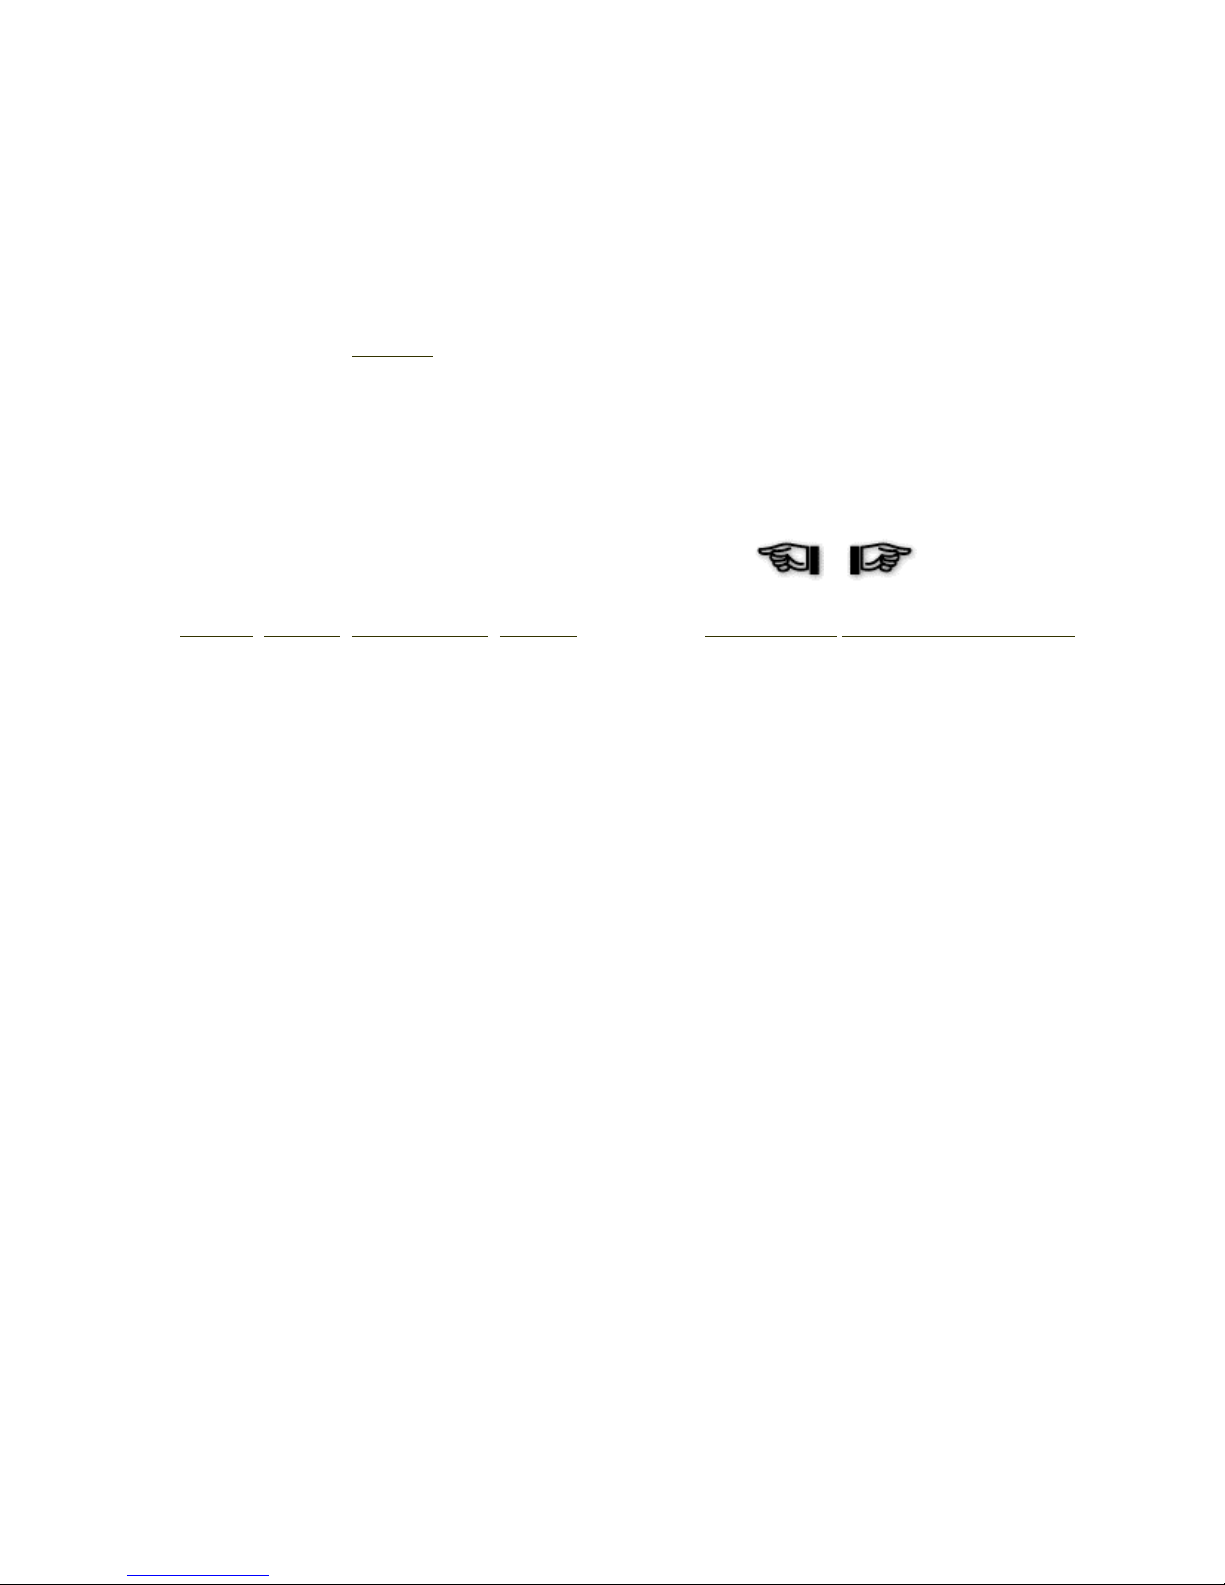
1 Engine oil dipstick
The engine oil level, which must lie between the ends of the cut-out
on the dipstick, must be checked from time to time between oil
changes and, in particular, before any long journey.
The check should be carried out with the car as level as possible,
after the engine has been stopped for at least 10 minutes.
To top up, add oil without the level going above the top end of the
dipstick cut-out. The length of the cut-out is equivalent to 7/8 imp.
pints (0,5 litre).
2 Engine oil filler pipe
In Summer, as in Winter, use "TOTAL Altigrade GT Spéciale
Autoroute 20 W 40" or "GTS 20 W 50" oil. If "TOTAL" oils are
not available, use equivalent grades of other reputable makes.
In very cold countries (temperatures often lower than -10C (14F),
use "TOTAL Altigrade GT Spéciale Autoroute 10 W 30" or "GTS
10 W 30" oil, or equivalent grades of other reputable makes.
Never use additives
Do not forget to tightly seal the oil filler cap.
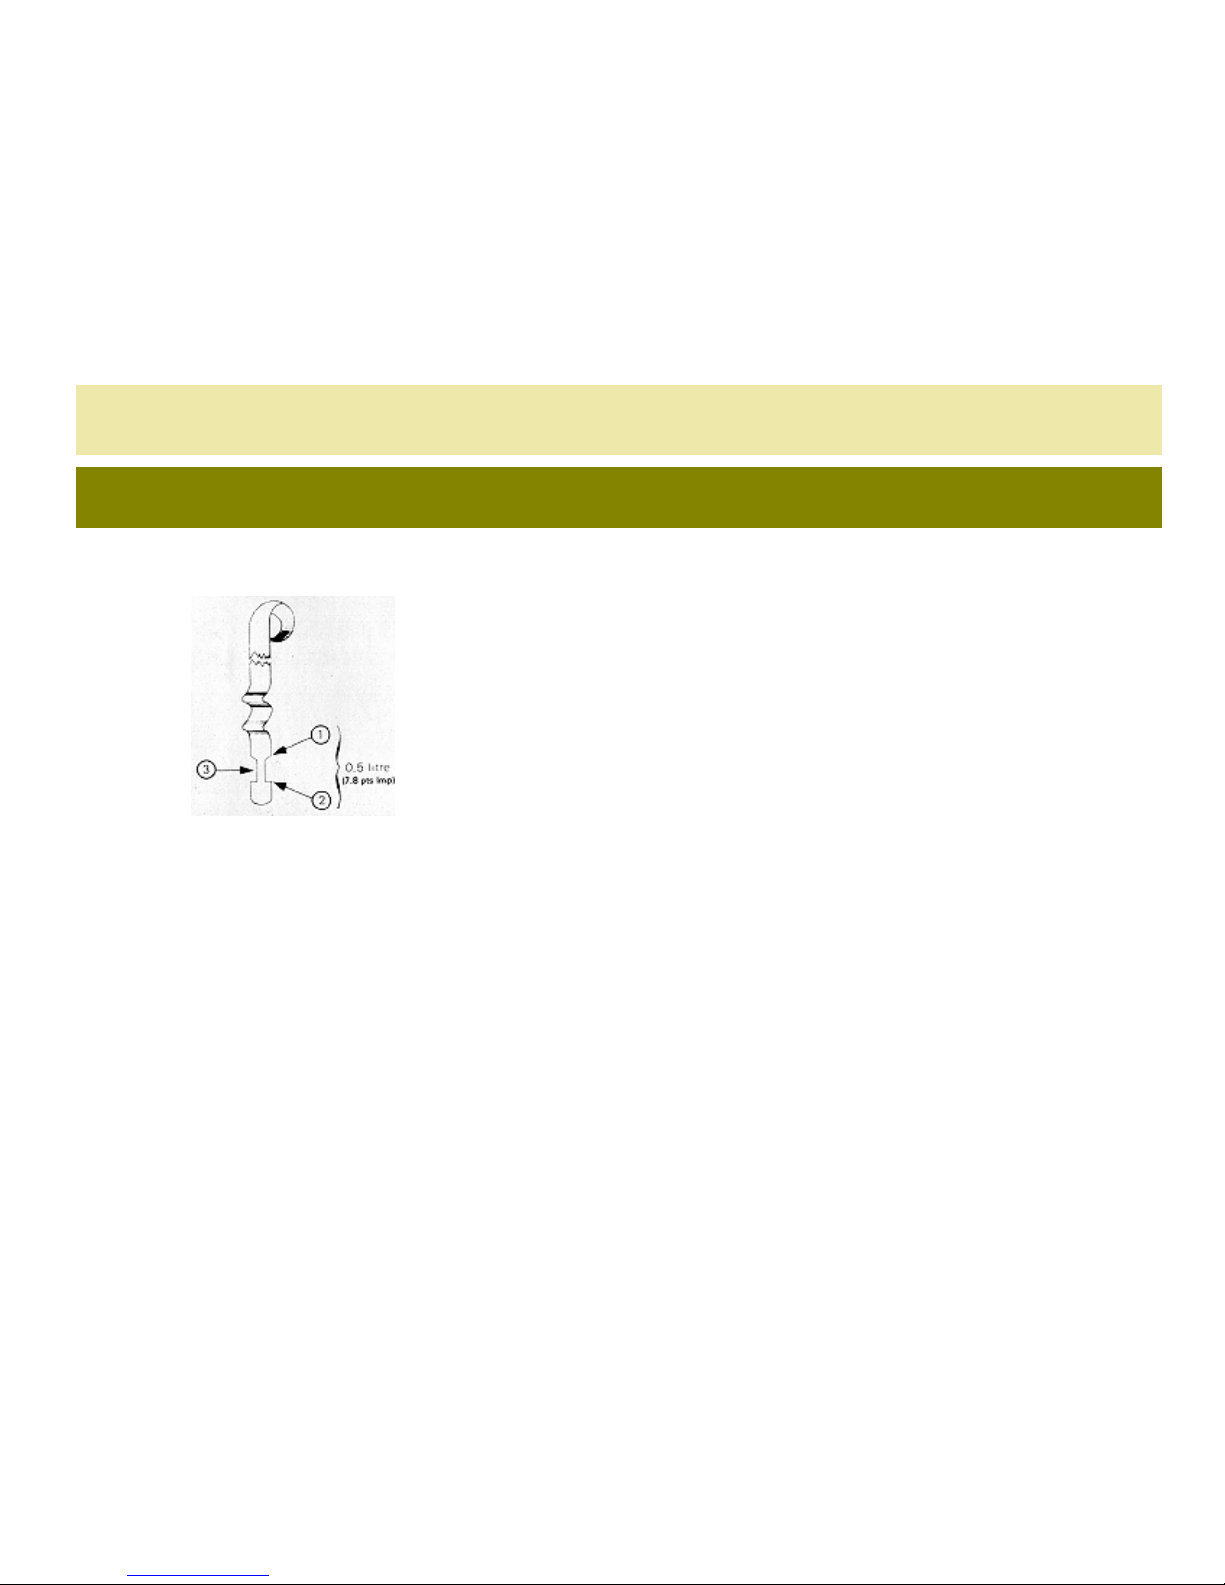
3 Brake fluid reservoir
Fig. 32
Engine Oil Dipstick
1 - Maximum
2 - Minimum
3 - Oil level reading
The level, visible through the transparent reservoir, must never go
below the "Danger" mark. If the level drops suddenly, consult a
Citroën dealer without delay. We recommend the "70 R 3" fluid,
distributed by TOTAL. If this product is not available, use fluids
with specification "S" or "V" : NF R 12640 or SAE J 1703 a.
4 Battery
Check the level of the electrolyte frequently, especially in Summer.
The level should be 3/8 to 3/4 in. (1 to 2 cm.) above the plates in
each of the six cells. Top up with distilled water. Never add acid.
Never bring a naked flame near a battery during checking.
5 Windscreen washer
Top up with clean water, to which may be added a product such as
"Clearalex", "Screen Clear" or "Stop-Clair" at any time, or a
solution such as "Stop-Gel" in Winter.
Fig. 32a
RHD Levels
3 - Brake fluid level
5 - Windscreen washer bottle

Fig. 32b
Levels
1 - Engine oil dipstick
2 - Engine oil filler tube
3 - Brake fluid reservoir
4 - Battery
5 - Windscreen washer bottle
[Contents] [Notices] [Important Points] [Driving] [Maintenance] [Minor Repairs] [Miscellaneous Information]

MAINTENANCE
Maintenance
Mechanical and Electrical
Periodic Maintenance Operations
These are indicated in the "Maintenance Guide", which
accompanied the car when first delivered. We would recommend
you to adhere to the frequencies indicated and would remind you
that we recommend "TOTAL" lubricants.
All mixtures and experiments are forbidden, and, in particular, the
use of oil additives of any kind, as these may lead to serious trouble.
Never grease or lubricate the rubber mounted link situated under the
bonnet, above the gear change lever. Never grease or lubricate the
gear change lever.
TYRES: "MICHELIN" (Do not use tyres other than those we
recommend.)
Series fitted: 125-15 X
Authorized series: 135-15 X, 125-15 X (M+S), 135-15 X (M+S),
135-15 ZX
Pressures: 20 psi (1,4 bar) at front, 26 psi (1,8 bar) at rear, 29 psi
(2 bars) on spare wheel.
These pressures apply to laden or empty vehicles, on an ordinary
road or on a motorway, whatever the speed. On authorized series
135-15 ZX, the pressures should be modified in certain cases: on

pebble road surfaces, 23 psi (1,6 bar) in front; in sandy area, 15 psi
(1 bar) at front and rear.
Do not forget to correct the pressure of the spare wheel as soon as
possible after fitting.
Tyre pressures must be checked at least once a month and before
any long journeys since safety depends on correct pressures; these
also have appreciable influence on the life of the tyres. The check
should be carried out when the tyres are cold, before they have been
heated by running: the pressure may in fact be increased by up to 7
psi (0,5 bar) on a loaded vehicle running at high speed.
Keep a check on wheel balancing, especially after a puncture.
Changing the wheels around, which evens out the wear on the five
tyres, should be frequent enough to prevent any appreciable
difference of wear between the two tyres on one axle.
Follow the plan opposite which shows the use of the spare wheel.
Then rest the pressures.Changing a wheel is described here.
Fig. 33
Tyre change-around
Tire Wear Indicators
These are located at regular intervals across the tread and show up
according to localised wear of the engraving when the rubber
reaches a certain degree of wear (see Fig. 34). The tyre concerned
should then be replaced as soon as possible.
Snow Tyres
125-15 X (M+S) and 135-15 X (M+S) tyres can be fitted with
studs. In which case, it is necessary to increase the pressures by 3
psi (0,2 bar). In some countries there are legal requirements on the
use of studded tyres; local Citroën dealers will supply you with
information on this point.
Battery Maintenance
Check the terminals and the leads for cleanliness. If they are
Fig. 34
Tyre wear indicators
1 - Position of
indicators
sulphated, unscrew them, clean them, and soak the felt insulating
washers in castor oil or in neutral vaseline oil. If the vehicle is not
in use, recharge the battery every month.
In Winter, a correct charge protects against frost. The battery
charged normally (a density of 1.25 to 1.27) resists to -50C (-58F),
whilst a discharged battery (density 1.07 to 1.09) may burst at -5C
(23F).
Do not disconnect the leads from the terminals when the engine
is running.
Never recharge the battery without first having disconnecting
the leads from the two terminals.
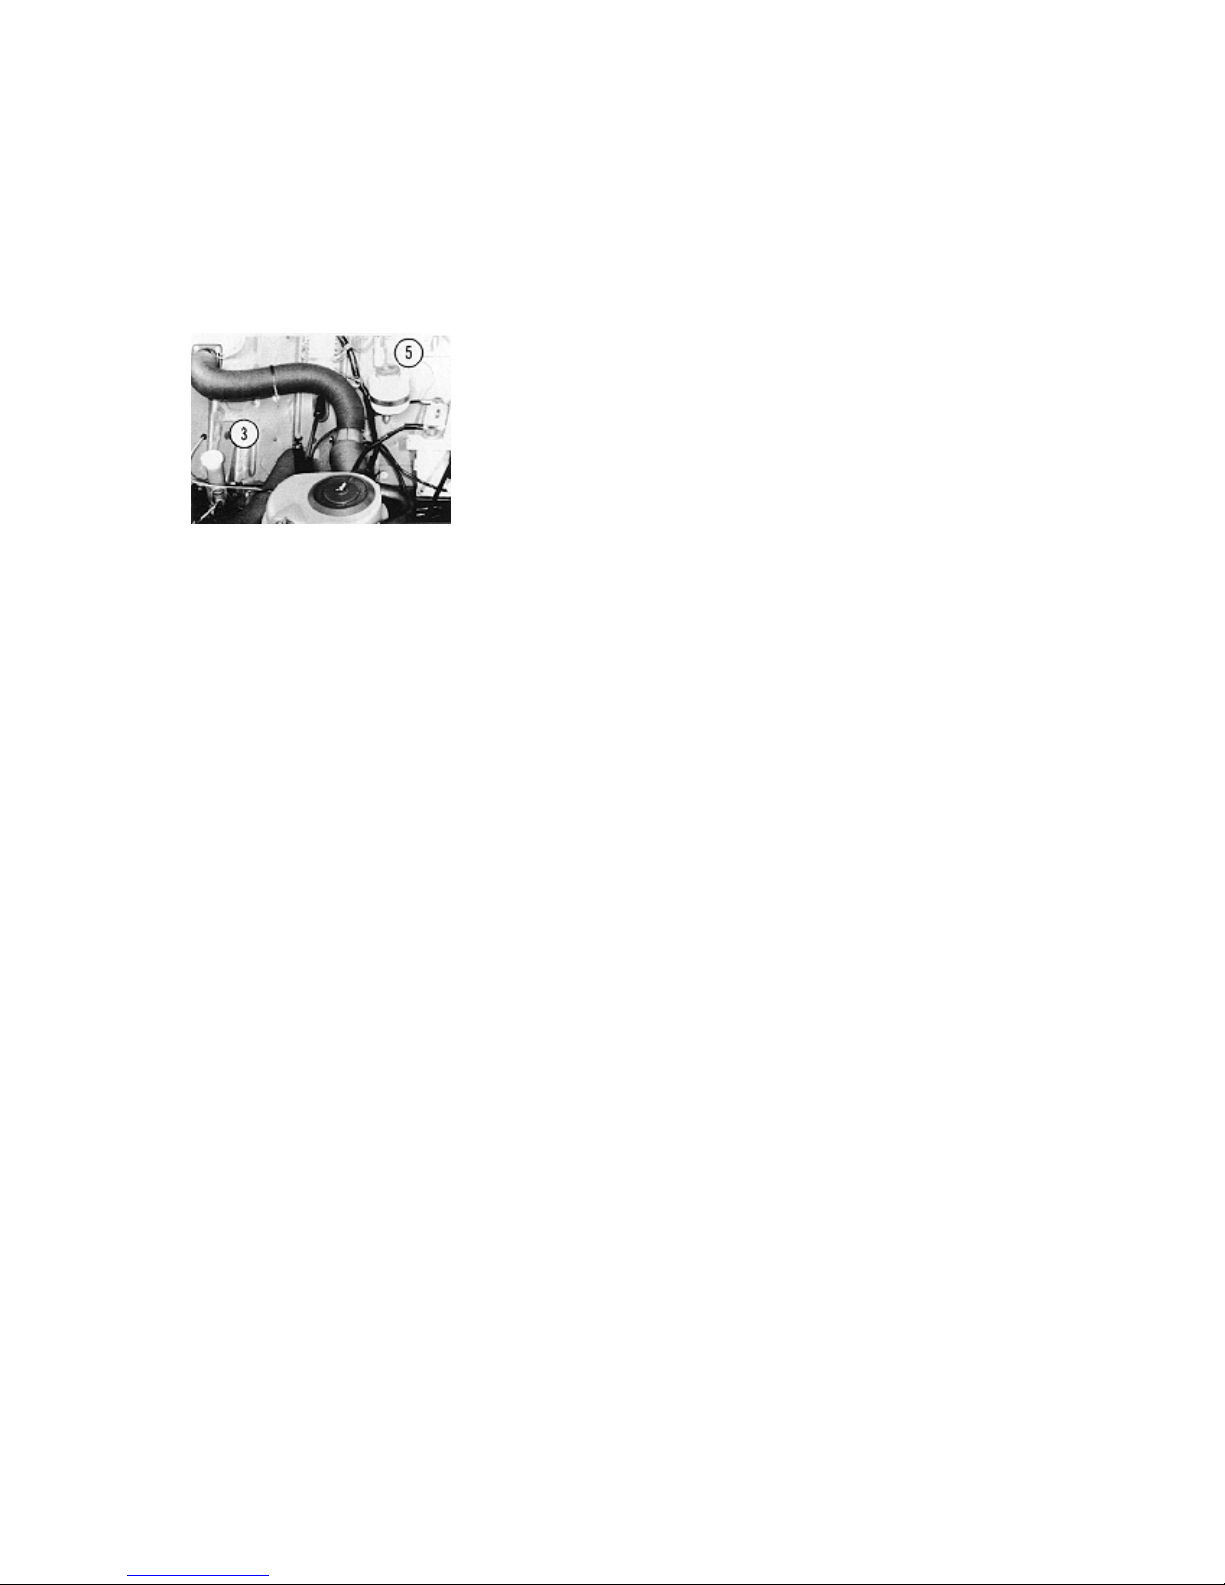
Air Filter Maintenance (Fig. 35)
Cleaning instructions are to be found on the filter cover (1).
Fig. 35
Air filter
1 - Cover
[Contents] [Notices] [Important Points] [Driving] [Maintenance] [Minor Repairs] [Miscellaneous Information]
MAINTENANCE
Maintenance
Bodywork
The bodywork should be looked after regularly, especially in
Winter. This maintenance should not only concentrate on the
paintwork and the metal embellishers but should take in the
underside of the car as well: advice in this connection can be
obtained from any Citroën dealer.
Never wipe the car when dry since this will scratch the finish.
Petrol, trichlorethylene and alcohol harm paint and transparent
plastic such as the sidelamp covers. Do not use strong detergent
solutions either.
Cleaning the Bodywork
Frequent washing is necessary to keep the paintwork in good
condition but it is nevertheless essential that certain precautions be
observed; here are some reminders:
Never wash the car in full sunlight nor during frost. If the car has
been exposed to the sun or if the bonnet is still warm after a
journey, wait until the surfaces have cooled down.
The body should first be rinsed with copious amounts of water
applied either with a soft sponge, exerting no pressure and rinsing
the sponge often, or with a low pressure jet. If a car shampoo is
used, risne afterwards with plenty of water.
Wipe the car dry with a clean chamois leather which is rinsed and
wrung out frequently, ensure that no spots of water are left on the
paintwork.
 Loading...