

Citizen JN98901, JN98911 Installation Manual
Side view
Hook
Top cover
Front top cover
AUTO-CUTTER UNIT INSTALLATION GUIDE
CL-S700 Series Model JN98901/JN98911
CITIZEN is a registered trademark of CITIZEN HOLDINGS CO., Japan.
CITIZEN es una marca registrada de CITIZEN HOLDINGS CO., Japón.
Copyright © 2008 by CITIZEN SYSTEMS JAPAN CO., LTD.
Caution
This guide is provided for use by service representatives. Service representatives
install the auto-cutter unit, so notify the supplier who sold it to you.
(1) Check to make sure that the printer’s power switch is turned off then disconnect the
power cord.
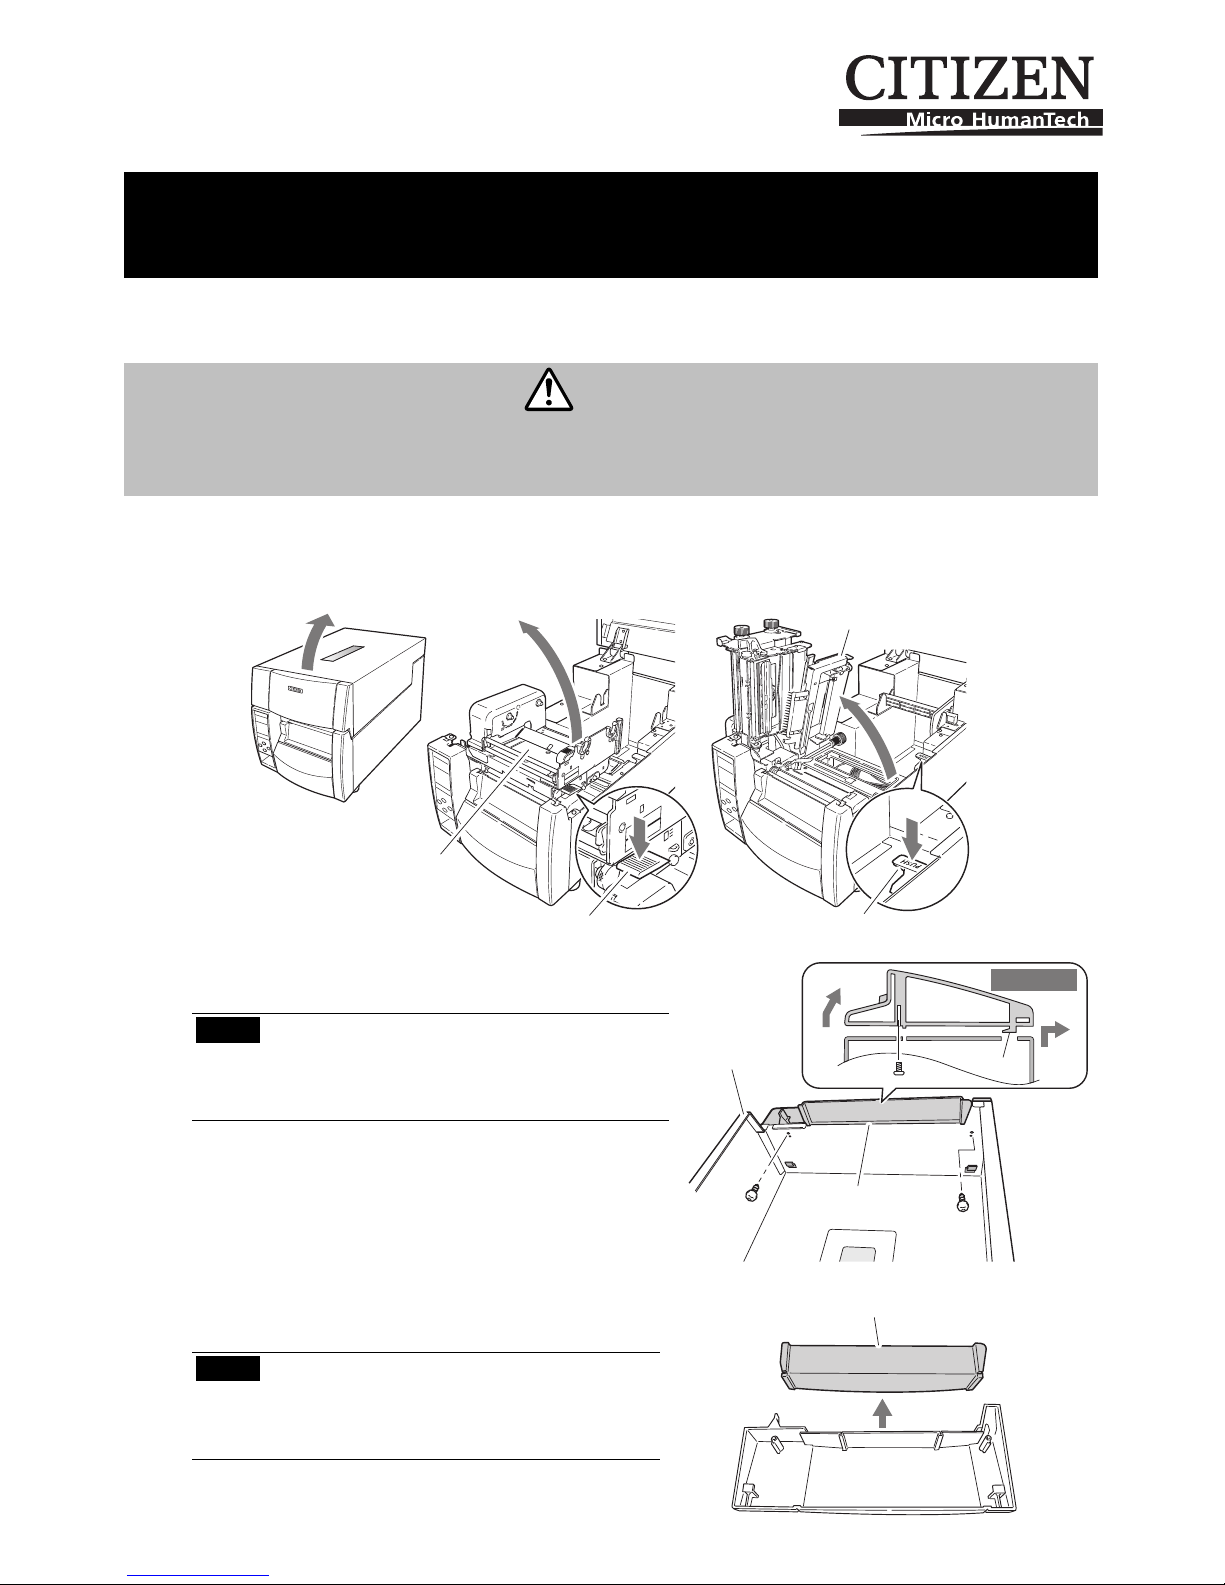
(2) Open the top cover and lift the thermal printhead and sensor arm.
(3) Remove the front top cover from the top
cover. (2 screws)
Note There is a hook on the front top cover.
Be careful not to bend the hook while
removing the front top cover from the
top cover.
(4) Remove the cutter attachment cover from
the front top cover that you have removed.
Note The cutter attachment cutter that
you have removed is used to remove
the auto-cutter unit, so store it
carefully.
Thermal printhead
Head open lever Sensor arm open lever
Sensor arm
Cutter attachment cover
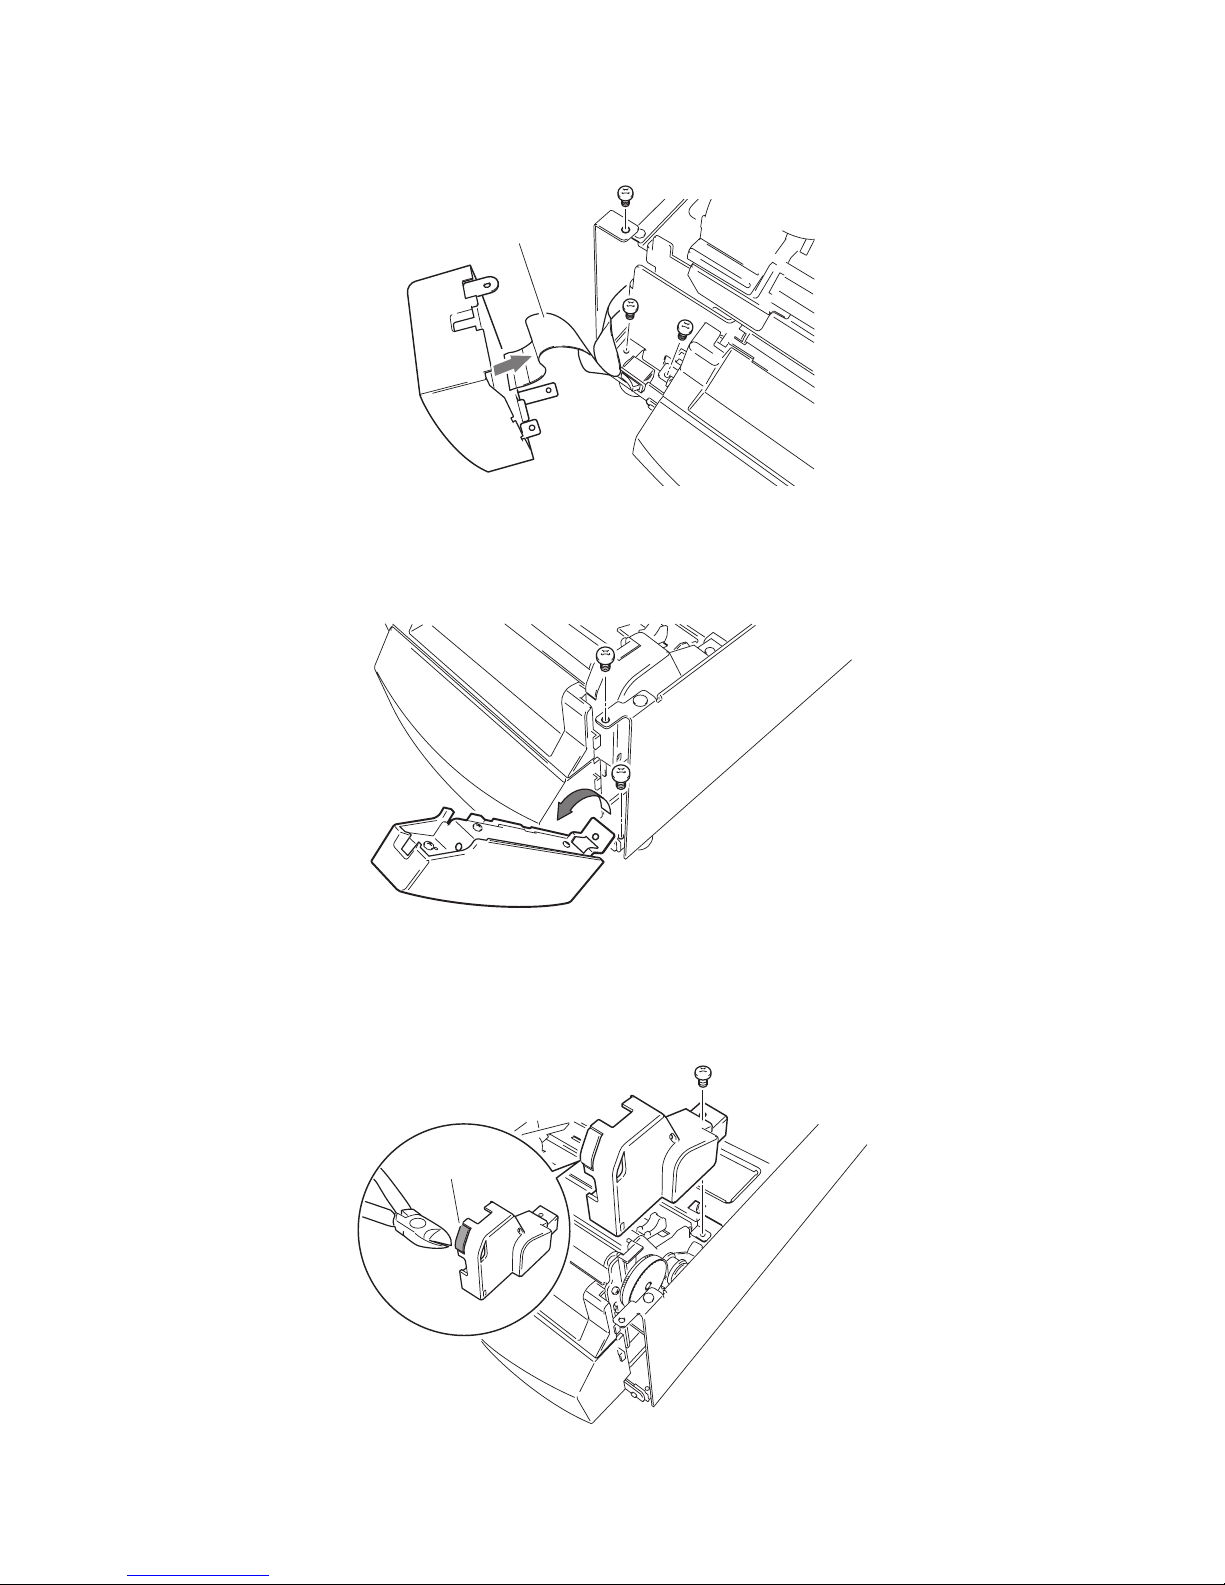
(5) Remove the operation panel on the front of the printer. (3 screws)
When doing this, remove the flexible cable that is connected to the operation panel.
(6) Remove the front right cover on the front of the printer. (2 screws)
(7) Remove the pulley cover (black) that is on the right front part of the printer. (1 screw)
Using nippers, cut out the notch on the pulley cover that you have removed.
Flexible cable
Notch
 Loading...