


 Loading...
MR46 Installation Guide
The Cisco Meraki MR46 are dual-band enterprise class 802.11ax cloud-managed access points. Designed for highest capacity and highest density, the MR46 meets the needs of the most demanding environments. The access point also includes a third radio dedicated to optimizing the RF environment and securing the airwaves.
About this Guide
This guide provides instruction on how to install and configure your MR46 access points. This guide also provides mounting instructions and limited troubleshooting procedures. For more wireless installation guides, refer to the wireless installation guides section on our documentation website.
Product Overview
Physical Specifications
MR46
Interfaces
•1x 1000/2.5G BASE-T Ethernet (RJ45)
•1x DC power connector (5.5 mm x 2.5 mm, center positive)
Power
•Power over Ethernet: 42.5 - 57 V (802.at compliant)
•Alternative: 12 V DC input
•Power consumption: 18W max (802.3at)
•Power over Ethernet injector and DC adapter sold separately
Environment
•Operating temperature: 32 °F to 104 °F (0 °C to 40 °C)
•Humidity: 5 to 95% non-condensing
Physical Security
•Two security screw options (included) (13.5 mm long and 2.5 mm diameter and 5 mm head)
•Kensington lock hard point
1
•Concealed mount plate with anti-tamper cable bay
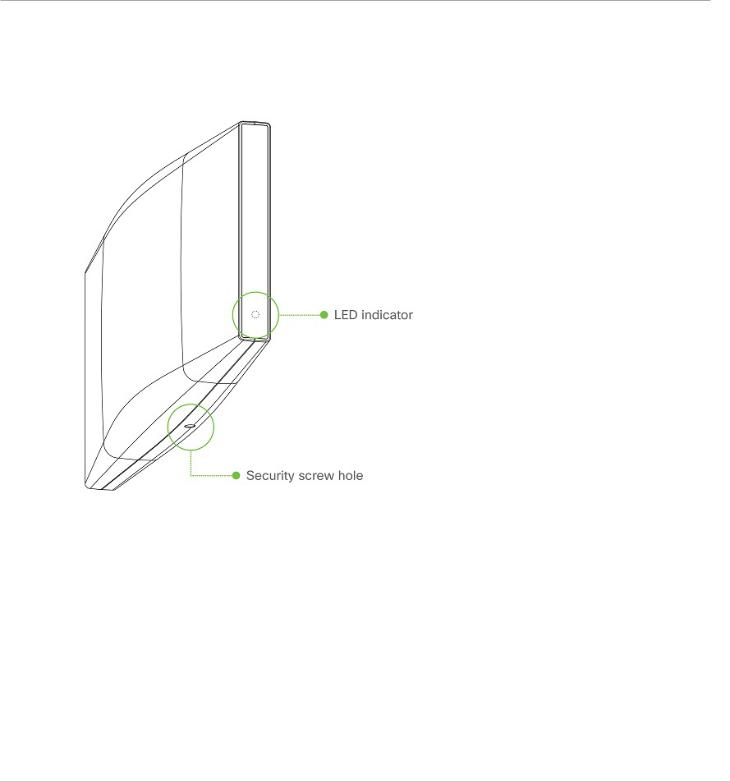
Product View and Physical Features
Your MR46 has the following features:
2
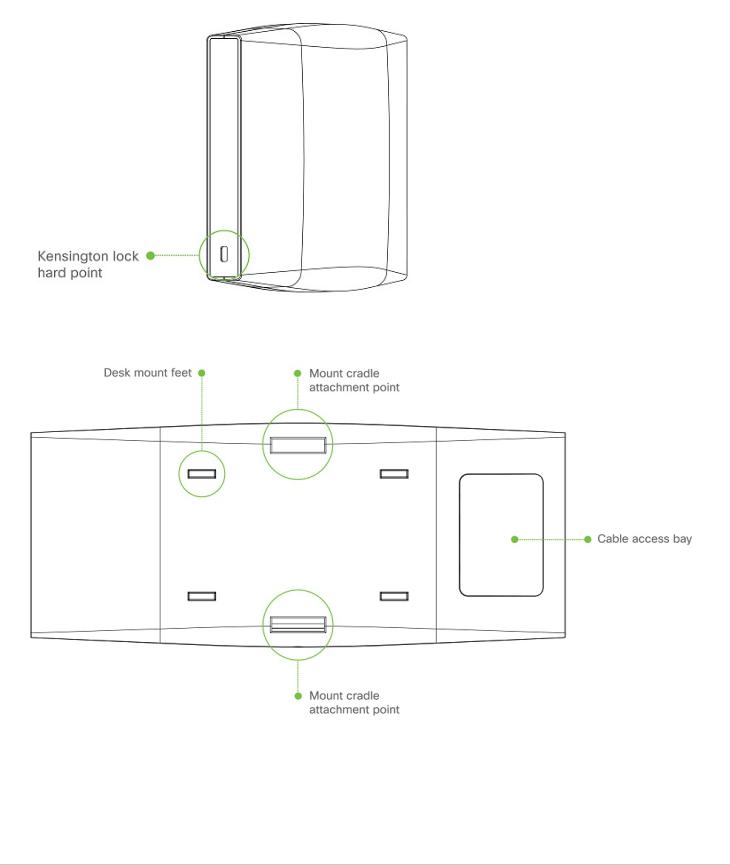
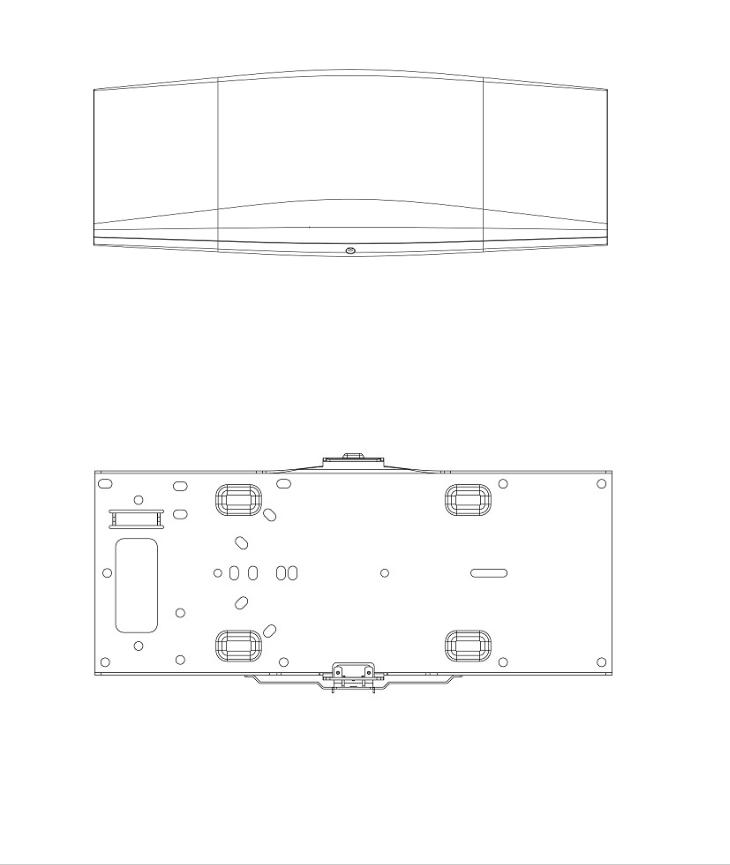
The mount cradle has the following features:
3

Security Features
The MR46 features multiple options for physically securing the access point after installation:
1.Security screw – The accessory kit includes screws that can be used to secure the access point to the mount cradle. Engaging the security screw prevents accidental dislodging and theft.
2.Kensington lock – The access point contains a hard point that allows it to be secured to any nearby permanent structure using a standard Kensington lock.
Ethernet Ports
The MR46 features a Gigabit Ethernet RJ45 port that accepts 802.3at power (labeled “Eth0, PoE”). This port should be used for uplink to your WAN connection.
4

The port labeled “PoE” accepts 802.3at power and should be used as the primary uplink to your LAN/WAN.
Power Source Options
The MR46 access point can be powered using either the Meraki AC Adapter, PoE Injector (both sold separately), or a third-party PoE switch.
Factory Reset Button
If the button is pressed and held for at least five seconds and then released, the AP will reboot and be restored to its original factory settings by deleting all configuration information stored on the unit.
LED Indicators and Run Dark Mode
Your access point is equipped with a multi-color LED light on the front of the unit to convey information about system functionality and performance:
•Orange - AP is booting (permanent Orange suggests hardware issue)
•Rainbow - AP is initializing/scanning
•Blinking Blue - AP is upgrading
•Green - AP in Gateway mode with no clients
•Blue - AP in Gateway mode with clients
•Blinking Orange - AP can't find uplink
NOTE: Blinking Green LED indicates that the device is in site survey mode. Please see the Conducting Site Surveys with MR Access Points for more details.
The MR46 access point may be operated in “Run Dark” mode for additional security and to reduce the visibility of the access point. In this mode, the LED will not be illuminated. This mode may be enabled through Meraki Dashboard.
Package Contents
The access point packages contain the following:
MR46 Cloud-Managed Access Point
5
Mount cradle including built-in level tool
Drop ceiling mount kit
6
Loading...