

Page 1

Cisco PGW 2200 Softswitch Release 9.8 Software Installation and Configuration Guide
November 2008
Americas Headquarters
Cisco Systems, Inc.
170 West Tasman Drive
San Jose, CA 95134-1706
USA
http://www.cisco.com
Tel: 408 526-4000
800 553-NETS (6387)
Fax: 408 527-0883
Text Part Number: OL-18083-01
Page 2

THE SPECIFICATIONS AND INFORMATION REGARDING THE PRODUCTS IN THIS MANUAL ARE SUBJECT TO CHANGE WITHOUT NOTICE. ALL
STATEMENTS, INFORMATION, AND RECOMMENDATIONS IN THIS MANUAL ARE BELIEVED TO BE ACCURATE BUT ARE PRESENTED WITHOUT
WARRANTY OF ANY KIND, EXPRESS OR IMPLIED. USERS MUST TAKE FULL RESPONSIBILITY FOR THEIR APPLICATION OF ANY PRODUCTS.
THE SOFTWARE LICENSE AND LIMITED WARRANTY FOR THE ACCOMPANYING PRODUCT ARE SET FORTH IN THE INFORMATION PACKET THAT
SHIPPED WITH THE PRODUCT AND ARE INCORPORATED HEREIN BY THIS REFERENCE. IF YOU ARE UNABLE TO LOCATE THE SOFTWARE LICENSE
OR LIMITED WARRANTY, CONTACT YOUR CISCO REPRESENTATIVE FOR A COPY.
The Cisco implementation of TCP header compression is an adaptation of a program developed by the University of California, Berkeley (UCB) as part of UCB’s public
domain version of the UNIX operating system. All rights reserved. Copyright © 1981, Regents of the University of California.
NOTWITHSTANDING ANY OTHER WARRANTY HEREIN, ALL DOCUMENT FILES AND SOFTWARE OF THESE SUPPLIERS ARE PROVIDED “AS IS” WITH
ALL FAULTS. CISCO AND THE ABOVE-NAMED SUPPLIERS DISCLAIM ALL WARRANTIES, EXPRESSED OR IMPLIED, INCLUDING, WITHOUT
LIMITATION, THOSE OF MERCHANTABILITY, FITNESS FOR A PARTICULAR PURPOSE AND NONINFRINGEMENT OR ARISING FROM A COURSE OF
DEALING, USAGE, OR TRADE PRACTICE.
IN NO EVENT SHALL CISCO OR ITS SUPPLIERS BE LIABLE FOR ANY INDIRECT, SPECIAL, CONSEQUENTIAL, OR INCIDENTAL DAMAGES, INCLUDING,
WITHOUT LIMITATION, LOST PROFITS OR LOSS OR DAMAGE TO DATA ARISING OUT OF THE USE OR INABILITY TO USE THIS MANUAL, EVEN IF CISCO
OR ITS SUPPLIERS HAVE BEEN ADVISED OF THE POSSIBILITY OF SUCH DAMAGES.
CCDE, CCENT, Cisco Eos, Cisco HealthPresence, the Cisco logo, Cisco Lumin, Cisco Nexus, Cisco StadiumVision, Cisco TelePresence, Cisco WebEx, DCE, and Welcome
to the Human Network are trademarks; Changing the Way We Work, Live, Play, and Learn and Cisco Store are service marks; and Access Registrar, Aironet, AsyncOS,
Bringing the Meeting To You, Catalyst, CCDA, CCDP, CCIE, CCIP, CCNA, CCNP, CCSP, CCVP, Cisco, the Cisco Certified Internetwork Expert logo, Cisco IOS,
Cisco Press, Cisco Systems, Cisco Systems Capital, the Cisco Systems logo, Cisco Unity, Collaboration Without Limitation, EtherFast, EtherSwitch, Event Center, Fast Step,
Follow Me Browsing, FormShare, GigaDrive, HomeLink, Internet Quotient, IOS, iPhone, iQuick Study, IronPort, the IronPort logo, LightStream, Linksys, MediaTone,
MeetingPlace, MeetingPlace Chime Sound, MGX, Networkers, Networking Academy, Network Registrar, PCNow, PIX, PowerPanels, ProConnect, ScriptShare, SenderBase,
SMARTnet, Spectrum Expert, StackWise, The Fastest Way to Increase Your Internet Quotient, TransPath, WebEx, and the WebEx logo are registered trademarks of
Cisco Systems, Inc. and/or its affiliates in the United States and certain other countries.
All other trademarks mentioned in this document or website are the property of their respective owners. The use of the word partner does not imply a partnership relationship
between Cisco and any other company. (0812R)
Any Internet Protocol (IP) addresses used in this document are not intended to be actual addresses. Any examples, command display output, and figures included in the
document are shown for illustrative purposes only. Any use of actual IP addresses in illustrative content is unintentional and coincidental.
Cisco PGW 2200 Softswitch Release 9.8 Software Installation and Configuration Guide
© <year> Cisco Systems, Inc. All rights reserved.
Customer Order Number:
Page 3

CONTENTS
Preface ix
Document Objectives ix
Audience ix
Related Documentation ix
Obtaining Documentation and Submitting a Service Request x
Document Change History x
Preparing for Sun Solaris Operating System and Cisco PGW 2200 Softswitch Software
Installation
Supported Platforms and Cisco Products 1-1
Solaris 10, Cisco PGW 2200 Softswitch Software Release 9.8 and Higher Software Release
Preinstallation Checklists
1-1
1-1
Required Software Media 1-2
Minimum System Requirements 1-2
Required Site-Specific Information 1-3
Required Machine-Specific Information 1-3
Required Tasks 1-3
Installing the Sun Solaris 10 Operating System 2-1
Supported Platforms 2-1
Supported Disk Drives 2-1
Before You Start 2-2
Cautions, Notes, and Tips 2-2
Loading the Sun Solaris 10 Operating System 2-2
Devices on Supported Platforms 2-3
Installing the Sun Solaris 10 Operating System for Sparc-based Platforms 2-3
Installing the Sun Solaris 10 Operating System for Opteron-based Platforms 2-13
Configuring Your Host 2-50
Platform-Specific Installation Procedures 2-62
Loading the Sun Solaris 10 Operating Environment 2-72
Installing the Sparc-based Solaris 10 Patches Package (CSCOh022) 2-73
Installing the Opteron-based Solaris 10 Patches Package (CSCOh032) 2-75
Installing the Solstice DiskSuite (CSCOh023) 2-77
Rebooting from the Mirrored (Secondary) Disk on Sparc-based Platforms 2-85
Rebooting from the Mirrored (Secondary) Disk on Opteron-based Platforms 2-87
OL-18083-01
Cisco PGW 2200 Softswitch Release 9.8 Software Installation and Configuration Guide
iii
Page 4

Contents
Removing the Solstice DiskSuite 2-88
Installing the Log and Spool File Systems (CSCOh024) 2-89
Uninstalling the Log and Spool File System 2-97
Installing Cisco BAMS Archive Partition (CSCOh027) 2-98
Installing the Sparc-based Communications and Alarm Software Package (CSCOh026) 2-103
Installing the Opteron-based Communications Software Package (CSCOh036) 2-118
Installing the Verification Test Suite Script Package (CSCOh021) 2-129
Using the SunVTS Test Package 2-131
Normal Unit Test 2-131
Running a Test in Brief Mode 2-135
Running a Test in Full Mode 2-136
vts_script Execution Times 2-136
Removing the VTS Package (CSCOh021) 2-137
Configuring Lights-Out Management (LOM) or the Integrated Lights Out Manager (ILOM) 2-138
Configuring LOM on Sun Fire V40z Platform 2-138
Configuring ILOM on Sun Fire X4600 Platform 2-141
Configuring ILOM on Sun Netra X4200 M2 Platform 2-143
Installing the Cisco PGW 2200 Softswitch Software Release 9.8 and Higher 3-1
Before You Start 3-1
Cautions, Notes, and Tips 3-2
Installing the Cisco PGW 2200 Softswitch Software Release 9.8 and Higher Releases 3-3
Installing Cisco PGW 2200 Softswitch Software on a Simplex System 3-3
Installing the Cisco Security Package (CSCOh020) 3-12
Enabling Sudo 3-15
Installing the License File 3-15
Installing the License File if the Cisco PGW 2200 Softswitch is NOT Running 3-16
Installing the License File if the Cisco PGW 2200 Softswitch is Running 3-16
Installing on a Fault Tolerant System 3-17
Configuring the Cisco PGW 2200 Softswitch Software 4-1
Quick Guide to Configuring the Cisco PGW 2200 Softswitch Software 4-1
Before You Start 4-2
Software Directory Structure 4-3
Initial Cisco PGW 2200 Softswitch Software Configuration 4-4
Parameters Required for Initial Setup 4-7
Using the Cisco MGC Environment Configuration Tool 4-8
iv
Configuring Groups and Users 4-11
Verifying the mgcgrp Group 4-11
Adding a User with Full MML Privileges 4-11
Cisco PGW 2200 Softswitch Release 9.8 Software Installation and Configuration Guide
OL-18083-01
Page 5

Adding a User with Minimal MML Privileges 4-12
Configuring SNMP Support Resources 4-13
Migrating the SNMP Configuration to a More Secure Environment (for Cisco PGW 2200 Softswitch
Release 9.3(2) or Later)
Basic Tasks 4-14
Before You Run the config-snmp Utility 4-14
Running the config-snmp Utility 4-15
Adding an SNMP Community Entry 4-17
Deleting an SNMP COMMUNITY 4-19
Adding a Trap Destination 4-20
Deleting a Trap Destination 4-22
Activating the New Settings 4-23
Verifying the SNMP Configuration Migration 4-24
Configuring the Execution Environment 4-25
Changing XECfgParm.dat File Parameters 4-26
Changing XECfgParm.dat File Parameters in a Running Fault Tolerant System 4-27
Configuring Basic System Information 4-28
Specifying IP Addresses 4-30
Configuring Engine Parameters 4-32
Setting the Call Cutoff Timer 4-34
Enabling Call Screening 4-34
Configuring Call Detail Record File Output 4-35
Configuring the Clearing Location and Default Location Parameters 4-36
Configuring Switchover 4-39
Initializing the Provisioning Object Manager 4-41
4-14
Contents
OL-18083-01
Configuring SCP Queries 4-42
Before You Start 4-43
Modifying trigger.dat file parameters with provisioning commands 4-43
Configuring the trigger.dat File Attributes 4-43
Configuring the Translation Type Attribute 4-44
Sample trigger.dat File 4-45
Initializing the Call Screening Database 4-82
.odbc.ini File Information 4-83
Setting Up Replication 4-83
Network Requirements 4-84
Initializing Database Replication 4-85
Verifying Database Replication 4-86
Troubleshooting the Main Memory Database Replication 4-87
Displaying the Main Memory Database Replication Status 4-87
Cisco PGW 2200 Softswitch Release 9.8 Software Installation and Configuration Guide
v
Page 6

Contents
Verifying Database Synchronization 4-87
Synchronizing Databases 4-88
Checking for Installation Errors 4-88
Reinstalling CSCOga002 4-89
Configuring Cisco ITP-Ls 4-89
Configuring Disk Monitor During Initial Software Configuration 4-89
Configuring the Data Dumper 4-90
Configuring the Data Dumper to Support Cisco BAMS 4-92
Migrating to Solaris 10 and Cisco PGW 2200 Softswitch Software Release 9.8 5-1
Conditions for Migration 5-1
Cautions and Notes 5-2
Required Software 5-3
License Installation 5-3
Recording System Data 5-3
Migration Overview 5-4
Migration from Release 9.5 or 9.6 to Release 9.8 without Platform Changes 5-5
Migrating the Second Cisco PGW 2200 Softswitch Software to Release 9.8 5-5
Backing Up the Cisco PGW 2200 Softswitch Configuration Files 5-5
Installing Sun Solaris 10 5-8
Loading the Sun Solaris 10 Operating Environment Packages 5-8
Restoring Data Files 5-9
Installing and Verifying the Cisco PGW 2200 Softswitch Software 5-9
Migrating the First Cisco PGW 2200 Softswitch Software to Release 9.8 5-10
Backing Up the Cisco PGW 2200 Softswitch Configuration Files 5-11
Installing Sun Solaris 10 5-13
Loading the Sun Solaris 10 Operating Environment Packages 5-14
Restoring Data Files 5-14
Installing and Verifying the Cisco PGW 2200 Softswitch Software 5-15
Transferring Additional Configuration Files 5-16
Migration from Release 9.7 to Release 9.8 without Platform Changes 5-20
Upgrading Lively from Sparc-based Platforms to Opteron-based Platforms 5-21
Before You Start 5-21
Live Upgrade Procedure 5-22
vi
Falling Back Overview 5-26
Falling Back to the Cisco PGW 2200 Softswitch Software Release 9.7 without Platform Changes 5-26
Falling Back to Solaris 8 and Cisco PGW 2200 Softswitch Release 9.5 or 9.6 5-27
Falling Back to Solaris 8 If Hard Drives Were Replaced During the Upgrade 5-27
Cisco PGW 2200 Softswitch Release 9.8 Software Installation and Configuration Guide
OL-18083-01
Page 7

Falling Back to Solaris 8 on the Second Disk Drive 5-28
Restoring the Original Cisco PGW 2200 Softswitch Software 5-32
Falling Back to Previous Cisco PGW 2200 Softswitch Software Releases with Platform Changes 5-32
Replacing Hard Disks on an Existing Solaris 10 Platform 5-33
Backup Procedure 5-34
Hard Disk Replacement Procedure 5-34
Loading the Solaris 10 Operating System 5-35
Loading the Sun Solaris 10 Operating Environment Packages 5-35
Installing the Cisco PGW 2200 Softswitch 5-35
Restoring the System 5-35
Configuring the Local Area Network Switch 6-1
LAN Switch Overview 6-1
Catalyst 2900 XL Series 6-2
Catalyst 5500 and 5000 Series 6-2
Contents
XECfgParm.dat File Parameters A-1
Understanding the XECfgParm.dat File Format A-1
Cisco PGW 2200 Softswitch XECfgParm.dat Files A-1
Facility Names A-1
Special Parameters A-2
Cisco PGW 2200 Softswitch 9.x XECfgParm.dat File Parameter Definitions A-2
Client/Server and Secure Connectivity Relationships B-1
Client/Server and Secure Connectivity Relationships B-1
Secure Connectivity Among Cisco PGW 2200 Softswitch Applications B-1
Secure Connectivity Between Cisco PGW 2200 Softswitch Application Platforms B-2
Secure Connectivity Between Cisco BAMS Application Platforms B-2
Secure Connectivity Between Cisco BAMS and Cisco PGW 2200 Softswitch Application
Platforms
B-3
HP OpenView Sample SNMP Configuration C-1
Configuring the Cisco PGW 2200 Softswitch to Send Alarms to HP OpenView C-1
Formatting Trap Messages C-3
Sample Installation Scripts D-1
OL-18083-01
Sample Output from install.sh D-1
Updated Configuration File Sample D-11
Sample Configured snmpd.cnf File D-13
Sample Configured XECfgParm.dat Files for Cisco PGW 2200 Softswitch Release 9.8(1) D-16
Cisco PGW 2200 Softswitch Release 9.8 Software Installation and Configuration Guide
vii
Page 8

Contents
Sample Configured XECfgParm.dat Files for Cisco PGW 2200 Softswitch Release 9.7(3) D-27
Sample Configured XECfgParm.dat Files for Cisco PGW 2200 Softswitch Release 9.6(1) D-37
Sample Uninstall Scripts E-1
Removing a Cisco PGW 2200 Softswitch Software Version: Sample Output for uninstall.sh E-1
Sample LAN Configurations F-1
Sample Configuration for Cisco Catalyst 5500 A F-1
Sample Configuration for Cisco Catalyst 5500 A RSM F-7
Sample Configuration for Cisco Catalyst 5500 B F-8
Sample Configuration for Cisco Catalyst 5500 B RSM F-15
viii
Cisco PGW 2200 Softswitch Release 9.8 Software Installation and Configuration Guide
OL-18083-01
Page 9

Preface
This preface describes the objectives of this document and explains how to find additional information
on related products and services. It contains the following sections:
• Document Objectives, page ix
• Audience, page ix
• Related Documentation, page ix
• Obtaining Documentation and Submitting a Service Request, page x
• Document Change History, page x
Document Objectives
This guide describes the steps necessary to install and configure the Sun Solaris 10 operating system,
and the Cisco PGW 2200 Softswitch software Release 9.8.
Note This guide does not cover media gateway (MGW) or Cisco PGW 2200 Softswitch hardware installation.
For instructions on installing these components, see the Cisco PGW 2200 Softswitch Hardware
Installation Guide.
Audience
The audience for this document is network operators and administrators. This audience is assumed to
have experience in telecommunications networks, protocols, and equipment, and a familiarity with data
communications networks, protocols, and equipment.
Related Documentation
This document contains information that is related to Cisco PGW 2200 Softswitch software installation
and configuration. For additional information on those subjects, see the documents at this URL:
http://www.cisco.com/en/US/products/hw/vcallcon/ps2027/tsd_products_support_series_home.html
OL-18083-01
You can also find the Cisco PGW 2200 Softswitch Documentation Map at the following URL:
Cisco PGW 2200 Softswitch Release 9.8 Software Installation and Configuration Guide
ix
Page 10

http://www.cisco.com/en/US/products/hw/vcallcon/ps2027/products_documentation_roadmaps_list.ht
ml
Other useful reference publications include
• Overviews of the related telephony solutions—Describe the Cisco telephony solutions with which
the Cisco PGW 2200 Softswitch node is associated
• Provisioning guides for the related telephony solutions—Describe the provisioning steps for the
Cisco telephony solutions with which the Cisco PGW 2200 Softswitch node is associated
• Solution gateway installation and configuration guides—Describe the steps for installing and
configuring the media gateway for a particular Cisco telephony solution
• Cisco IP Transfer Point - LinkExtender—Describes the Cisco IP Transfer Point - LinkExtender
(Cisco IPT-L, formerly known as the Cisco Signaling Link Terminal or Cisco SLT) and provides
configuration information
Obtaining Documentation and Submitting a Service Request
For information on obtaining documentation, submitting a service request, and gathering additional
information, see the monthly What’s New in Cisco Product Documentation, which also lists all new and
revised Cisco technical documentation at
http://www.cisco.com/en/US/docs/general/whatsnew/whatsnew.html
Subscribe to the What’s New in Cisco Product Documentation as a Really Simple Syndication (RSS) feed
and set content to be delivered directly to your desktop using a reader application. The RSS feeds are a free
service and Cisco currently supports RSS version 2.0.
Preface
Document Change History
Release Number Document Number Change Date Change Summary
9.8(1) OL-18083-01 November 2008 Initial release
Cisco PGW 2200 Softswitch Release 9.8 Software Installation and Configuration Guide
x
OL-18083-01
Page 11

CHAPTER
Preparing for Sun Solaris Operating System and
Cisco
PGW 2200 Softswitch Software
Installation
This chapter provides checklists describing the required and optional components, software media, and
information you must have on hand before installing the Sun Solaris operating system and the
Cisco PGW 2200 Softswitch software:
• Cisco PGW 2200 Softswitch Release 9.8 and up, which requires the Sun Solaris Operating System
10
Note The entire installation procedure takes approximately 2 hours to complete.
1
Supported Platforms and Cisco Products
The following Cisco products are supported by this software:
• Cisco PGW 2200 Softswitch
• Cisco Billing and Measurements Server (BAMS)
• Cisco H.323 Signaling Interface (HSI)
The platforms that are supported for these products are identified in the Cisco PGW 2200 Softswitch
Hardware Installation Guide (Release 7 & 9).
Solaris 10, Cisco PGW 2200 Softswitch Software Release 9.8 and Higher Software Release Preinstallation Checklists
Table 1-1 through Table 1-4 list the required and optional tasks, information, and software media for
installing the Solaris 10 operating system and the Cisco PGW 2200 Softswitch software Release 9.8 and
higher.
Before installing the Sun Solaris operating system, Solaris patches, and alarm card software, ensure that
you collect the information and complete tasks listed in the following tables.
OL-18083-01
Cisco PGW 2200 Softswitch Release 9.8 Software Installation and Configuration Guide
1-1
Page 12
Chapter 1 Preparing for Sun Solaris Operating System and Cisco PGW 2200 Softswitch Software Installation
Solaris 10, Cisco PGW 2200 Softswitch Software Release 9.8 and Higher Software Release Preinstallation Checklists
Note The target machine must have a terminal connected to the console port by means of a serial cable.
Required Software Media
Gather all of the appropriate software media listed in Table 1-1. For more information, see the
appropriate Sun documentation that shipped with your system.
Table 1-1 Solaris 10 Required Media Checklist
Media Version
The following CD-ROM disks are ordered from Cisco:
• Cisco Solaris 10 Operating System Jumpstart Disk
This disk installs the Sun Solaris 10 Operating System,
configured specifically to support the
Cisco PGW 2200 Softswitch software. There are two versions of
this disk, one for each of the supported platform types:
–
Cisco Solaris 10 Operating System Jumpstart Disk for
Sparc-based platforms
–
Cisco Solaris 10 Operating System Jumpstart Disk for
Opteron-based platforms
• Cisco Solaris 10 Operating Environment CD
This disk contains the following packages:
–
CSCOh020 (MGC Security package)
–
CSCOh021 (Verification Test Suite scripts)
–
CSCOh022 (Solaris 10 patches for Sparc-based platforms)
–
CSCOh023 (DiskSuite installation scripts)
–
CSCOh024 (Log/Spool installation for Sparc-based
platforms)
–
CSCOh026 (Xterm, ftp, ntp, and alarm software installation
for Sparc-based platforms)
–
CSCOh032 (Solaris 10 patches for Opteron-based platforms)
–
CSCOh036 (Xterm, ftp, and ntp installation for
Opteron-based platforms)
Minimum System Requirements
06/06
01/06
3.0(6)
1-2
Refer to the Cisco PGW 2200 Softswitch Hardware Installation Guide (Release 7 & 9) for the host
minimum hardware requirements. Before using the minimum hardware configuration, consult your
Cisco representative to determine the hardware that gives you the best performance results based on your
network configuration, proposed traffic, and desired processing power.
Cisco PGW 2200 Softswitch Release 9.8 Software Installation and Configuration Guide
OL-18083-01
Page 13
Chapter 1 Preparing for Sun Solaris Operating System and Cisco PGW 2200 Softswitch Software Installation
Solaris 10, Cisco PGW 2200 Softswitch Software Release 9.8 and Higher Software Release Preinstallation
Required Site-Specific Information
Your system site administrator can provide the required site-specific information in Table 1 -2. Use the
Notes column in this table to record the information. Several steps in the installation procedure in
Chapter 2, “Installing the Sun Solaris 10 Operating System” require you to provide this information.
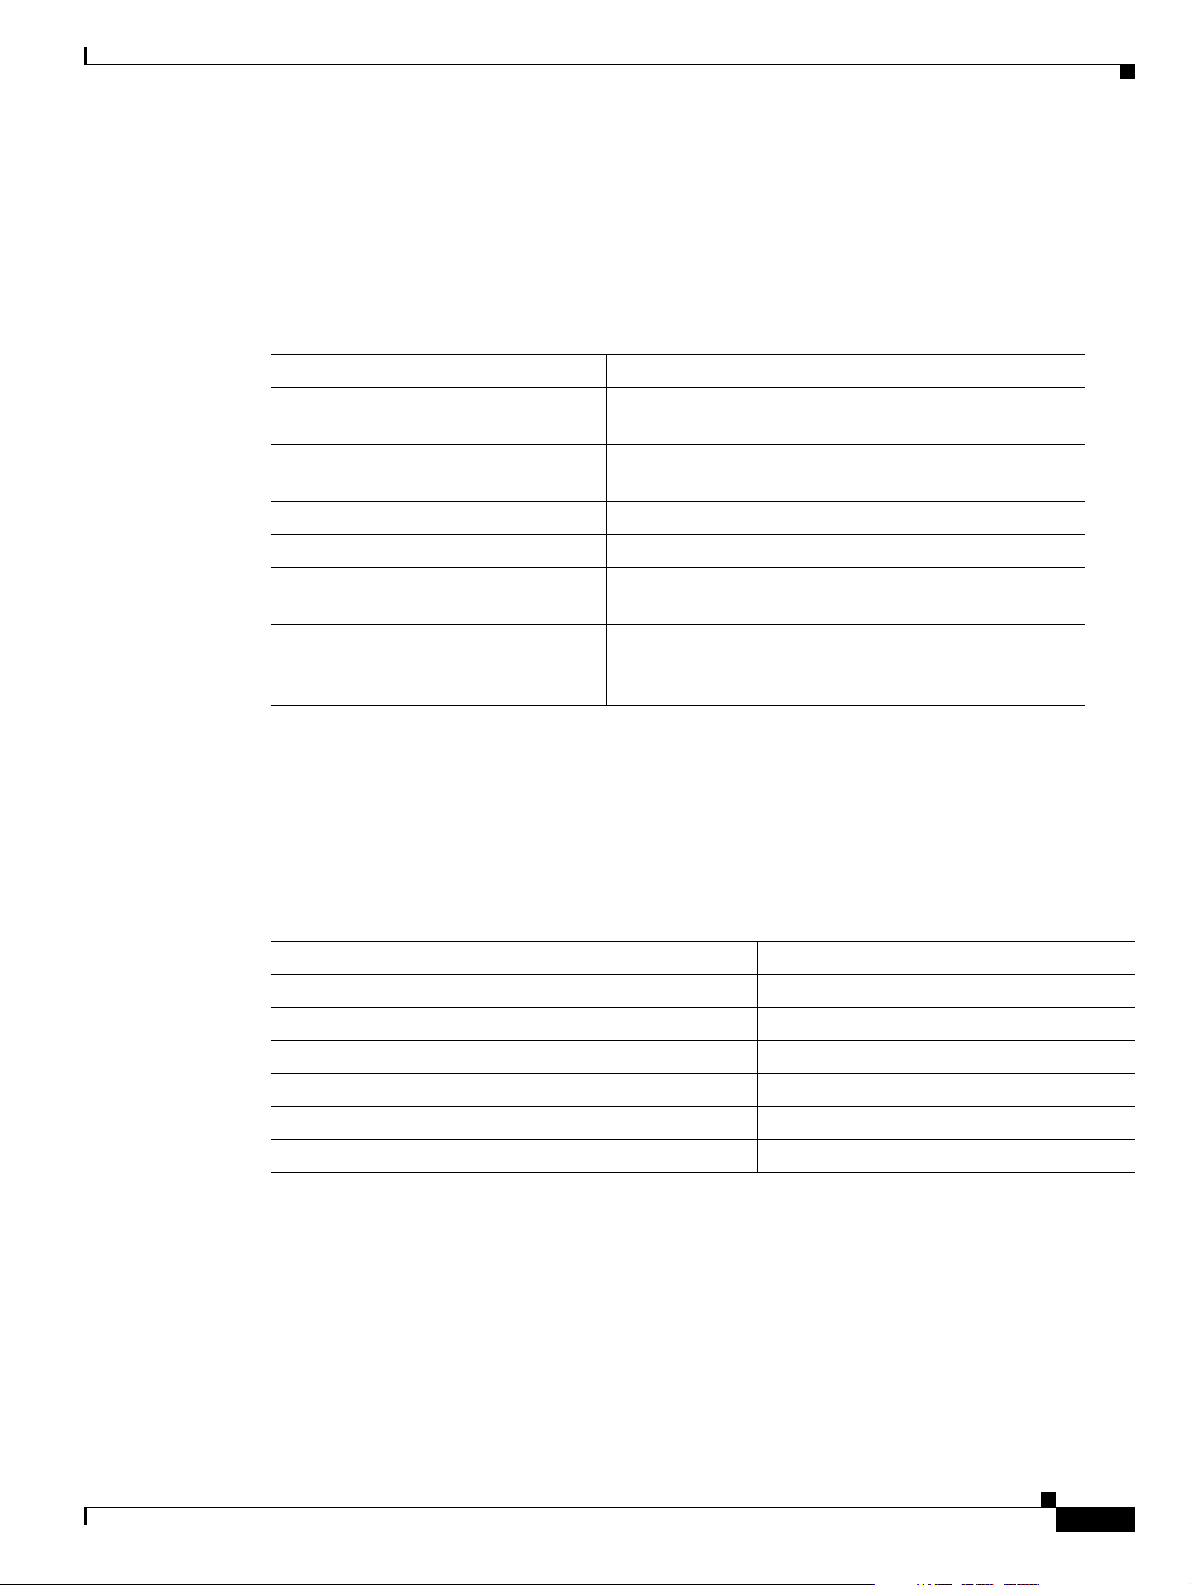
Table 1-2 Site-Specific Information
Required Information Notes
Subnet Mask
(Example: 255.255.255.0)
Default router
(Example: 111.11.xxx.1)
DNS server
NTP server IP address
Time zone
(Example: United States (Eastern))
Root password
(Assigned by your system site
administrator)
Required Machine-Specific Information
Your system site administrator can provide the information called for in Table 1 - 3 as it applies to your
target Sun Netra machine. Use the Notes column in this table to record the information. Several steps in
the installation procedure require you to provide this information.
Table 1-3 Machine-Specific Checklist
Information Notes
Host name of target machine
IP address of target machine
Default router IP address
Additional Ethernet IP address
Subnet address for each additional Ethernet IP address
Netmask address for each additional Ethernet IP address
Required Tasks
Before you begin installing the Solaris 10 operating system, perform the tasks listed in Tab l e 1-4.
OL-18083-01
Cisco PGW 2200 Softswitch Release 9.8 Software Installation and Configuration Guide
1-3
Page 14
Chapter 1 Preparing for Sun Solaris Operating System and Cisco PGW 2200 Softswitch Software Installation
Solaris 10, Cisco PGW 2200 Softswitch Software Release 9.8 and Higher Software Release Preinstallation Checklists
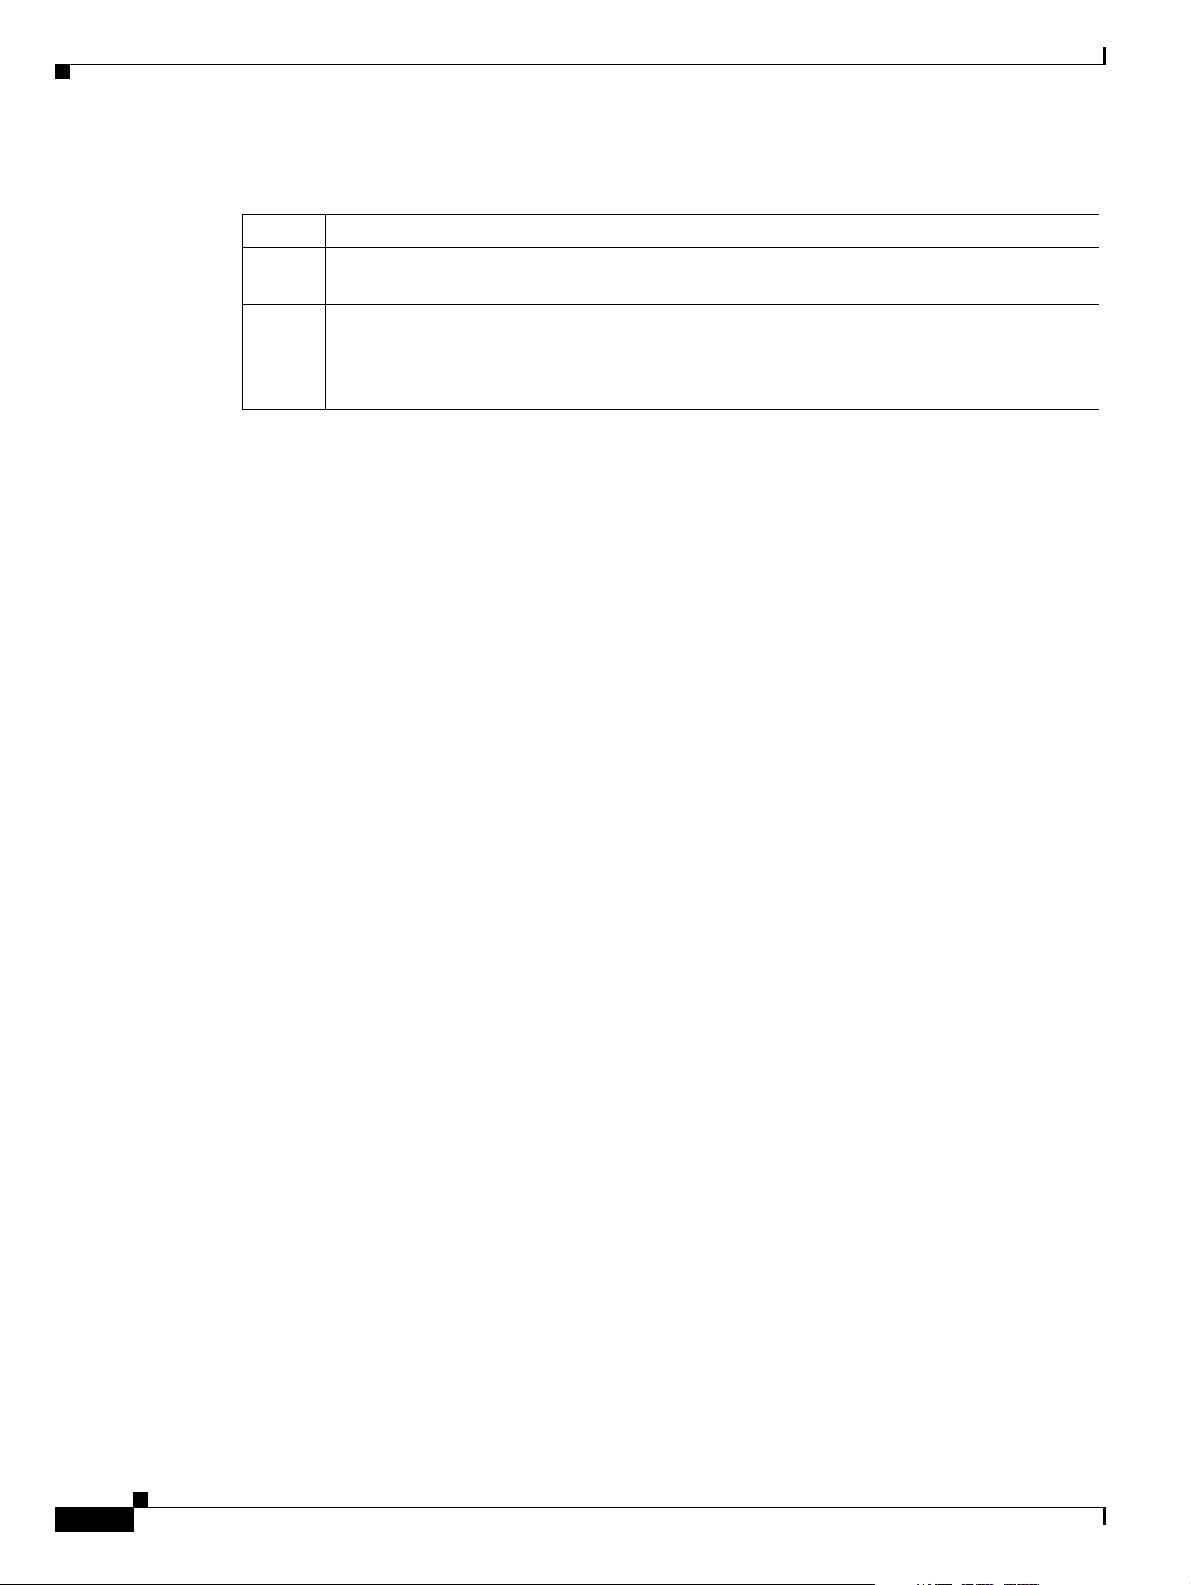
Table 1-4 Tasks Checklist
Check Tasks
Make sure that the target machine is connected to a terminal by a serial cable inserted into
the console port.
Have your company's internal support and Cisco support contact information readily
available so you can get help with the installation if needed. If you have questions or need
assistance, see the “Obtaining Documentation and Submitting a Service Request” section
on page x.
1-4
Cisco PGW 2200 Softswitch Release 9.8 Software Installation and Configuration Guide
OL-18083-01
Page 15

CHAPTER
2
Installing the Sun Solaris 10 Operating System
This chapter provides instructions for installing the packages that create the Sun Solaris 10 operating
system and its operating environment on the Sun Netra and Sun Fire platforms. The following sections
contain these instructions.
Note In the following procedures, your responses to prompts sometimes depend on the disk drive size or other
particulars of your system. These are pointed out as you follow the procedures.
• Supported Platforms, page 2-1
• Supported Disk Drives, page 2-1
• Before You Start, page 2-2
• Loading the Sun Solaris 10 Operating System, page 2-2
• Loading the Sun Solaris 10 Operating Environment, page 2-72
Note For procedures on migrating to Solaris 10 and Cisco PGW 2200 Softswitch software Release 9.8, see
Chapter 5, “Migrating to Solaris 10 and Cisco PGW 2200 Softswitch Software Release 9.8.”
Supported Platforms
This document describes the specific steps necessary for installing the Sun Solaris 10 operating system
and the operating environment on the Sun Netra and Sun Fire platforms. Two platform types are used:
Sparc-based and Opteron-based. The platforms that are supported for these products are identified in the
Cisco PGW 2200 Softswitch Hardware Installation Guide (Release 7 & 9).
Supported Disk Drives
The following disk drives are supported:
• 73 GB
• 146 GB
OL-18083-01
Cisco PGW 2200 Softswitch Release 9.8 Software Installation and Configuration Guide
2-1
Page 16
Before You Start
Before You Start
Be sure to read the following cautions, notes, and tips before installing the Sun Solaris 10 operating
system and the operating environment.
Cautions, Notes, and Tips
Note The procedures in this chapter require a working knowledge of the system administration procedures for
the Sun Solaris (UNIX) operating system.
Note Be sure to have the required information listed in Chapter 1, “Preparing for Sun Solaris Operating
System and Cisco PGW 2200 Softswitch Software Installation,” before you begin the installation
process.
Chapter 2 Installing the Sun Solaris 10 Operating System
Note Allow at least 2 hours downtime for the installation of the Cisco PGW 2200 Softswitch software
environment.
Note The text in the screens displayed throughout this document might differ slightly from the text displayed
on your console. The screen displays are for reference only and should be treated as examples.
Note Most of the steps in the installation process ask you to press F2 to continue. However, F2 does not apply
to all console types. If it does not apply on your system, you should press Esc-2 instead.
Tip During the installation process, monitor system output frequently for error messages and correct any
error conditions before continuing with the installation.
Loading the Sun Solaris 10 Operating System
This section provides the following instructions for loading the Sun Solaris 10 operating system:
• Devices on Supported Platforms, page 2-3
• Installing the Sun Solaris 10 Operating System for Sparc-based Platforms, page 2-3
• Installing the Sun Solaris 10 Operating System for Opteron-based Platforms, page 2-13
• Configuring Your Host, page 2-50
2-2
• Platform-Specific Installation Procedures, page 2-62
• Installing the Sparc-based Solaris 10 Patches Package (CSCOh022), page 2-73
• Installing the Opteron-based Solaris 10 Patches Package (CSCOh032), page 2-75
Cisco PGW 2200 Softswitch Release 9.8 Software Installation and Configuration Guide
OL-18083-01
Page 17

Chapter 2 Installing the Sun Solaris 10 Operating System
Loading the Sun Solaris 10 Operating System
• Installing the Solstice DiskSuite (CSCOh023), page 2-77
• Installing the Log and Spool File Systems (CSCOh024), page 2-89
• Installing Cisco BAMS Archive Partition (CSCOh027), page 2-98
• Installing the Sparc-based Communications and Alarm Software Package (CSCOh026), page 2-103
• Installing the Opteron-based Communications Software Package (CSCOh036), page 2-118
• Installing the Verification Test Suite Script Package (CSCOh021), page 2-129
Devices on Supported Platforms
Table 2-1 shows the Ethernet and disk drive device names for each platform type. This table is referenced
throughout this chapter.
Table 2-1 Device Names on Supported Host Platforms
Ethernet Interfaces Disk Drives
Platform Type
Sun Fire V210 /
Netra 210
Netra 240 bge0 bge1 bge2
Sun Fire V40z bge0 bge1 ce0 c1t0d0 c1t1d0 — —
Sun Fire X4600 e1000g0 e1000g1 e1000g2 e1000g3 c3t0d0 c3t1d0 — —
Sun Fire X4600 M2e1000g0 e1000g1 e1000g2 e1000g3 c3t0d0 c3t1d0 — —
First Second Third Fourth First Second Third Fourth
bge0 bge1 bge2 bge3 c1t0d0 c1t1d0 — —
1
bge3
1
c1t0d0 c1t1d0 — —
Netra 440 ce0 ce1 — — c1t0d0 c1t1d0 c1t2d0
1
c1t3d0
Netra X4200 M2 nge0 nge1 e1000g0 e1000g1 c3t0d0 c3t1d0 — —
1. This device is not used currently.
Note If your platform has multiple disk drives, install the Solaris 10 Operating System on the first disk drive
only.
Installing the Sun Solaris 10 Operating System for Sparc-based Platforms
The instructions in this section were written to correspond with the instructions in the Cisco Solaris 10
Operating System Jumpstart Disk for Sparc-based Platforms. Other Solaris installations are similar, with
slight variations. These instructions will note the differences between the sets of installation instructions.
Step 1 Choose one of the following options to connect the Cisco PGW 2200 Softswitch:
• Connect to the Cisco PGW 2200 Softswitch through a console port.
• Connect a keyboard and monitor to the Cisco PGW 2200 Softswitch.
Step 2 This step is optional—if you decide to skip this step, go to Step 3.
a. Place the system in single-user mode by shutting down the standby machine.
1
OL-18083-01
Cisco PGW 2200 Softswitch Release 9.8 Software Installation and Configuration Guide
2-3
Page 18
Loading the Sun Solaris 10 Operating System
b. When the machine prompts for a password, type either ^ -d to proceed with normal startup, or the
root password for system maintenance.
Step 3 Load the appropriate version of the CD-ROM labeled Cisco Solaris 10 Operating System Jumpstart Disk
for Sparc-based Platforms into the CD-ROM drive.
Step 4 If the system is currently running, log in as root.
Step 5 Bring the system to the ok prompt by entering the following command:
# init 0
Note If you are prompted to select a language before booting from the CD, go to the ok prompt by
sending a break on the console port. On Sun Sparc-based platforms, the key sequence <cr>#.
gets you to the system controller prompt.
From the system controller prompt, use the break -y command to break out of the operating
system and console -f command to return to the console display. You should see the ok prompt.
Step 6 Boot the system from the CD-ROM drive by entering the appropriate command:
ok boot cdrom - install
Chapter 2 Installing the Sun Solaris 10 Operating System
Information similar to the following is displayed:
ok boot cdrom - install
SC Alert: Host System has Reset
Probing system devices
Probing memory
Probing I/O buses
Sun Fire V210, No Keyboard
Copyright 2005 Sun Microsystems, Inc. All rights reserved.
OpenBoot 4.18.5, 2048 MB memory installed, Serial #52030991.
Ethernet address 0:3:ba:19:ee:f, Host ID: 8319ee0f.
Initializing 1MB of memory at addr 103feec000
Initializing 1MB of memory at addr 103fee0000
Initializing 1MB of memory at addr 103f002000
Initializing 1MB of memory at addr 103e002000
Initializing 1MB of memory at addr 1000000000
Initializing 1MB of memory at addr 0
Rebooting with command: boot cdrom - install
Boot device: /pci@1e,600000/ide@d/cdrom@0,0:f File and args: - install
SunOS Release 5.10 Version Generic_118833-17 64-bit
Copyright 1983-2005 Sun Microsystems, Inc. All rights reserved.
Use is subject to license terms.
Hardware watchdog enabled
Configuring devices.
Using RPC Bootparams for network configuration information.
Attempting to configure interface bge3...
Skipped interface bge3
Attempting to configure interface bge2...
Skipped interface bge2
Attempting to configure interface bge1...
Skipped interface bge1
Attempting to configure interface bge0...
2-4
Cisco PGW 2200 Softswitch Release 9.8 Software Installation and Configuration Guide
OL-18083-01
Page 19

Chapter 2 Installing the Sun Solaris 10 Operating System
Skipped interface bge0
Beginning system identification...
Searching for configuration file(s)...
Search complete.
Discovering additional network configuration...
Completing system identification...
Starting remote procedure call (RPC) services: done.
System identification complete.
Starting Solaris installation program...
Searching for JumpStart directory...
<<< using cdrom install_config >>>
Checking rules.ok file...
Using profile: any_machine
Using finish script: any_finish
Executing JumpStart preinstall phase...
Searching for SolStart directory...
Checking rules.ok file...
Using begin script: install_begin
Using finish script: patch_finish
Executing SolStart preinstall phase...
Executing begin script "install_begin"...
Begin script install_begin execution completed.
Loading the Sun Solaris 10 Operating System
Processing profile
- Selecting cluster (SUNWCrnet)
- Selecting package (SUNWadmc)
- Selecting package (SUNWadmfw)
- Selecting package (SUNWcpc)
- Selecting package (SUNWcpcu)
- Selecting package (SUNWcstl)
- Selecting package (SUNWless)
- Selecting package (SUNWlur)
- Selecting package (SUNWluu)
- Selecting package (SUNWmkcd)
- Selecting package (SUNWmipu)
- Selecting package (SUNWmipr)
- Selecting package (SUNWocf)
- Selecting package (SUNWocfr)
- Selecting package (SUNWspnego)
- Selecting package (SUNWter)
- Selecting package (SUNWtnfc)
- Selecting package (SUNWucbt)
- Selecting package (SUNWvld)
- Selecting package (SUNWvldu)
- Selecting package (SUNWzsh)
- Selecting package (SUNWsacom)
- Selecting package (SUNWroute)
- Selecting package (SUNWxwfnt)
- Selecting package (SUNWxwdv)
- Selecting package (SUNWctpls)
- Selecting package (SUNWgssdh)
- Selecting package (SUNWm64cf)
- Selecting package (SUNWj5rt)
- Selecting package (SUNWxwplt)
- Selecting package (SUNWxwplr)
- Selecting package (SUNWdtcor)
- Selecting package (SUNWxwice)
- Selecting package (SUNWxwrtl)
- Selecting package (SUNWlibC)
- Selecting package (SUNWmfrun)
- Selecting package (SUNWi15rf)
- Selecting package (SUNWmdu)
- Selecting package (SUNWadmfr)
OL-18083-01
Cisco PGW 2200 Softswitch Release 9.8 Software Installation and Configuration Guide
2-5
Page 20

Loading the Sun Solaris 10 Operating System
- Selecting package (SUNWrsg)
- Selecting package (SUNWsadmi)
- Selecting package (SUNWsasnm)
- Selecting package (SUNWmibii)
- Selecting package (SUNWxi18n)
- Selecting package (SUNWtoo)
- Selecting package (SUNWsprot)
- Selecting package (SUNWbip)
- Selecting package (SUNWbind)
- Selecting package (SUNWbindr)
- Selecting package (SUNWgzip)
- Selecting package (SUNWzip)
- Selecting package (SUNWbash)
- Selecting package (SUNWtcsh)
- Selecting package (SUNWgss)
- Selecting package (SUNWgssc)
- Selecting package (SUNWgssk)
- Selecting package (SUNWqos)
- Selecting package (SUNWqosu)
- Selecting package (SUNWmdb)
- Selecting package (SUNWmdbr)
- Selecting package (SUNWmdbdm)
- Selecting package (SUNWnfsckr)
- Selecting package (SUNWnfscr)
- Selecting package (SUNWnfscu)
- Selecting package (SUNWifp)
- Selecting package (SUNWged)
- Selecting package (SUNW1394)
- Selecting package (SUNWqfed)
- Selecting package (SUNWaccr)
- Selecting package (SUNWaccu)
- Selecting package (SUNWus)
- Selecting package (SUNWrsgk)
- Selecting package (SUNWzebrar)
- Selecting package (SUNWzebrau)
- Selecting package (SUNWeurf)
- Selecting package (SUNWgcmn)
- Selecting package (SUNWeuodf)
- Selecting package (SUNWxwacx)
- Selecting package (SUNWpoolr)
- Selecting package (SUNWpool)
- Selecting package (SUNWluzone)
- Selecting package (SUNWzoner)
- Selecting package (SUNWzoneu)
- Selecting package (SUNWbtool)
- Selecting package (SUNWdtrc)
- Selecting package (SUNWdtrp)
- Selecting package (SUNWfss)
- Selecting package (SUNWinst)
- Selecting package (SUNWipc)
- Selecting package (SUNWqus)
- Selecting package (SUNWqusu)
- Selecting package (SUNWrcmdc)
- Selecting package (SUNWdtdmr)
- Selecting package (SUNWtltk)
- Selecting package (SUNWtnetc)
- Selecting package (SUNWtnfd)
- Selecting package (SUNWtnetd)
- Selecting package (SUNWtnetr)
- Selecting package (SUNWsshcu)
- Selecting package (SUNWsshdr)
- Selecting package (SUNWsshdu)
- Selecting package (SUNWsshr)
- Selecting package (SUNWsshu)
Chapter 2 Installing the Sun Solaris 10 Operating System
2-6
Cisco PGW 2200 Softswitch Release 9.8 Software Installation and Configuration Guide
OL-18083-01
Page 21

Chapter 2 Installing the Sun Solaris 10 Operating System
- Selecting package (SUNWpd)
- Selecting package (SUNWced)
- Selecting package (SUNWcart200)
- Selecting package (SUNWkvmt200)
- Selecting package (SUNWust1)
- Selecting package (SUNWatfsr)
- Selecting package (SUNWatfsu)
- Selecting package (SUNWrcmdr)
- Selecting package (SUNWrcmds)
- Selecting package (SUNWxcu4)
- Selecting package (SUNWefc)
- Selecting package (SUNWglmr)
- Selecting package (SUNWi2cr)
- Selecting package (SUNWpstl)
- Selecting package (SUNWbart)
- Selecting package (SUNWpiclu)
- Selecting package (SUNWpiclr)
- Selecting package (SUNWopensslr)
- Selecting package (SUNWopenssl-commands)
- Selecting all disks
- Configuring boot device
- Using disk (c1t0d0) for "rootdisk"
- Configuring / (c1t0d0s0)
- Configuring /var (c1t0d0s1)
- Configuring swap (c1t0d0s3)
- Configuring (c1t0d0s4)
- Configuring (c1t0d0s6)
- Configuring /opt (c1t0d0s5)
- Deselecting unmodified disk (c1t1d0)
Loading the Sun Solaris 10 Operating System
Verifying disk configuration
- WARNING: Changing the system's default boot device in the EEPROM
Verifying space allocation
- Total software size: 376.86 Mbytes
Preparing system for Solaris install
Configuring disk (c1t0d0)
- Creating Solaris disk label (VTOC)
Creating and checking UFS file systems
- Creating / (c1t0d0s0)
- Creating /var (c1t0d0s1)
- Creating /opt (c1t0d0s5)
Beginning Solaris software installation
Starting software installation
SUNWcsu..........................done. 363.07 Mbytes remaining.
SUNWcsr..........................done. 359.22 Mbytes remaining.
SUNWcsl..........................done. 347.35 Mbytes remaining.
SUNWcnetr........................done. 347.23 Mbytes remaining.
SUNWckr..........................done. 337.09 Mbytes remaining.
SUNWkvm.u........................done. 335.16 Mbytes remaining.
SUNWcar.u........................done. 334.65 Mbytes remaining.
SUNWcakr.u.......................done. 315.55 Mbytes remaining.
SUNWxwice........................done. 315.27 Mbytes remaining.
SUNWcsd..........................done. 315.01 Mbytes remaining.
SUNWxwrtl........................done. 314.87 Mbytes remaining.
SUNWzlib.........................done. 314.62 Mbytes remaining.
SUNWbzip.........................done. 314.36 Mbytes remaining.
SUNWlibmsr.......................done. 311.13 Mbytes remaining.
OL-18083-01
Cisco PGW 2200 Softswitch Release 9.8 Software Installation and Configuration Guide
2-7
Page 22

Loading the Sun Solaris 10 Operating System
SUNWlibms........................done. 311.09 Mbytes remaining.
SUNWxwfnt........................done. 299.39 Mbytes remaining.
SUNWxwdv.........................done. 299.34 Mbytes remaining.
SUNWxwplr........................done. 299.28 Mbytes remaining.
SUNWperl584core..................done. 293.83 Mbytes remaining.
SUNWperl584usr...................done. 272.69 Mbytes remaining.
SUNWesu..........................done. 270.73 Mbytes remaining.
SUNWcpp..........................done. 270.63 Mbytes remaining.
SUNWdtcor........................done. 270.60 Mbytes remaining.
SUNWxwplt........................done. 249.87 Mbytes remaining.
SUNWlibC.........................done. 244.13 Mbytes remaining.
SUNWctpls........................done. 244.05 Mbytes remaining.
SUNWmfrun........................done. 234.11 Mbytes remaining.
SUNWtcsh.........................done. 233.72 Mbytes remaining.
SUNWtecla........................done. 233.09 Mbytes remaining.
SUNWter..........................done. 231.47 Mbytes remaining.
SUNWgcmn.........................done. 231.44 Mbytes remaining.
SUNWpr...........................done. 230.35 Mbytes remaining.
SUNWtls..........................done. 222.76 Mbytes remaining.
SUNWdtdmr........................done. 222.73 Mbytes remaining.
SUNWtltk.........................done. 219.66 Mbytes remaining.
SUNWkrbr.........................done. 219.58 Mbytes remaining.
SUNWkrbu.........................done. 217.09 Mbytes remaining.
SUNWtnetc........................done. 216.92 Mbytes remaining.
SUNWtnetd........................done. 216.84 Mbytes remaining.
SUNWtnetr........................done. 216.79 Mbytes remaining.
SUNWtnfc.........................done. 216.29 Mbytes remaining.
SUNWtnfd.........................done. 216.20 Mbytes remaining.
SUNWtoo..........................done. 215.12 Mbytes remaining.
SUNWucbt.........................done. 215.09 Mbytes remaining.
SUNWudaplr.......................done. 215.06 Mbytes remaining.
SUNWudaplu.......................done. 214.81 Mbytes remaining.
SUNWib...........................done. 213.14 Mbytes remaining.
SUNWipoib........................done. 213.00 Mbytes remaining.
SUNWtavor........................done. 212.20 Mbytes remaining.
SUNWudapltu......................done. 211.75 Mbytes remaining.
SUNWudapltr......................done. 211.50 Mbytes remaining.
SUNWaudd.........................done. 210.84 Mbytes remaining.
SUNWusb..........................done. 209.47 Mbytes remaining.
SUNWusbs.........................done. 209.39 Mbytes remaining.
SUNWuedg.........................done. 209.21 Mbytes remaining.
SUNWugen.........................done. 209.15 Mbytes remaining.
SUNWuksp.........................done. 209.07 Mbytes remaining.
SUNWopenssl-libraries............done. 202.10 Mbytes remaining.
SUNWwbsup........................done. 201.74 Mbytes remaining.
SUNWinstall-patch-utils-root.....done. 201.71 Mbytes remaining.
SUNWswmt.........................done. 201.00 Mbytes remaining.
SUNWuprl.........................done. 200.94 Mbytes remaining.
SUNWj5rt.........................done. 118.41 Mbytes remaining.
SUNWocfr.........................done. 118.34 Mbytes remaining.
SUNWocf..........................done. 117.76 Mbytes remaining.
SUNWxi18n........................done. 116.78 Mbytes remaining.
SUNWvld..........................done. 116.73 Mbytes remaining.
SUNWvldu.........................done. 116.68 Mbytes remaining.
SUNWnfscr........................done. 116.53 Mbytes remaining.
SUNWnfsckr.......................done. 115.12 Mbytes remaining.
SUNWnfscu........................done. 114.83 Mbytes remaining.
SUNWgzip.........................done. 114.73 Mbytes remaining.
SUNWgssc.........................done. 114.68 Mbytes remaining.
SUNWgss..........................done. 114.31 Mbytes remaining.
SUNWbip..........................done. 114.12 Mbytes remaining.
SUNWrcmdc........................done. 113.25 Mbytes remaining.
SUNWrcmds........................done. 112.95 Mbytes remaining.
SUNWproduct-registry-root........done. 112.93 Mbytes remaining.
Chapter 2 Installing the Sun Solaris 10 Operating System
2-8
Cisco PGW 2200 Softswitch Release 9.8 Software Installation and Configuration Guide
OL-18083-01
Page 23

Chapter 2 Installing the Sun Solaris 10 Operating System
SUNWwsr2.........................done. 112.59 Mbytes remaining.
SUNWlxml.........................done. 109.19 Mbytes remaining.
SUNWlexpt........................done. 108.61 Mbytes remaining.
SUNWxge..........................done. 108.08 Mbytes remaining.
SUNWxcu4.........................done. 106.87 Mbytes remaining.
SUNWxwacx........................done. 106.69 Mbytes remaining.
SUNWsprot........................done. 105.21 Mbytes remaining.
SUNWzfskr........................done. 104.39 Mbytes remaining.
SUNWzfsr.........................done. 103.43 Mbytes remaining.
SUNWsmapi........................done. 102.80 Mbytes remaining.
SUNWzfsu.........................done. 101.29 Mbytes remaining.
SUNWrsg..........................done. 101.16 Mbytes remaining.
SUNWgssdh........................done. 100.84 Mbytes remaining.
SUNWgssk.........................done. 100.60 Mbytes remaining.
SUNWeurf.........................done. 96.30 Mbytes remaining.
SUNWi15rf........................done. 96.16 Mbytes remaining.
SUNWnisr.........................done. 96.02 Mbytes remaining.
SUNWnisu.........................done. 93.70 Mbytes remaining.
SUNWzebrar.......................done. 93.63 Mbytes remaining.
SUNWzebrau.......................done. 91.44 Mbytes remaining.
SUNWcpcu.........................done. 90.90 Mbytes remaining.
SUNWfmdr.........................done. 90.84 Mbytes remaining.
SUNWfmd..........................done. 86.92 Mbytes remaining.
SUNWcslr.........................done. 72.42 Mbytes remaining.
SUNWidnl.........................done. 71.86 Mbytes remaining.
SUNWmdb..........................done. 66.94 Mbytes remaining.
SUNWzip..........................done. 66.75 Mbytes remaining.
SUNWmdbr.........................done. 63.97 Mbytes remaining.
SUNWpiclu........................done. 60.17 Mbytes remaining.
SUNWzoner........................done. 60.11 Mbytes remaining.
SUNWmdr..........................done. 57.74 Mbytes remaining.
SUNWmdu..........................done. 57.04 Mbytes remaining.
SUNWadmc.........................done. 55.16 Mbytes remaining.
SUNWadmfr........................done. 55.14 Mbytes remaining.
SUNWadmfw........................done. 54.43 Mbytes remaining.
SUNWadmlib-sysid.................done. 54.17 Mbytes remaining.
SUNWadmr.........................done. 54.09 Mbytes remaining.
SUNWadmap........................done. 53.21 Mbytes remaining.
SUNWlur..........................done. 51.67 Mbytes remaining.
SUNWluu..........................done. 50.48 Mbytes remaining.
SUNWluzone.......................done. 50.11 Mbytes remaining.
SUNWpoolr........................done. 50.08 Mbytes remaining.
SUNWpool.........................done. 49.24 Mbytes remaining.
SUNWzoneu........................done. 48.61 Mbytes remaining.
SUNWluxop........................done. 47.86 Mbytes remaining.
SUNWses..........................done. 47.76 Mbytes remaining.
SUNWssad.........................done. 47.45 Mbytes remaining.
SUNWifp..........................done. 47.17 Mbytes remaining.
SUNWzsh..........................done. 44.04 Mbytes remaining.
SUNW1394.........................done. 43.27 Mbytes remaining.
SUNWinst.........................done. 42.77 Mbytes remaining.
SUNWintgige......................done. 42.51 Mbytes remaining.
SUNWipc..........................done. 42.45 Mbytes remaining.
SUNWipfr.........................done. 42.31 Mbytes remaining.
SUNWipfu.........................done. 41.04 Mbytes remaining.
SUNWipged........................done. 40.54 Mbytes remaining.
SUNWced.u........................done. 39.90 Mbytes remaining.
SUNWcpc.u........................done. 39.84 Mbytes remaining.
SUNWbash.........................done. 39.11 Mbytes remaining.
SUNWaccr.........................done. 39.01 Mbytes remaining.
SUNWaccu.........................done. 38.64 Mbytes remaining.
SUNWefc.u........................done. 38.36 Mbytes remaining.
SUNWiscsir.......................done. 37.68 Mbytes remaining.
SUNWiscsiu.......................done. 37.12 Mbytes remaining.
Loading the Sun Solaris 10 Operating System
OL-18083-01
Cisco PGW 2200 Softswitch Release 9.8 Software Installation and Configuration Guide
2-9
Page 24

Loading the Sun Solaris 10 Operating System
SUNWglmr.u.......................done. 37.04 Mbytes remaining.
SUNWi2cr.u.......................done. 36.85 Mbytes remaining.
SUNWloc..........................done. 36.34 Mbytes remaining.
SUNWpstl.u.......................done. 36.21 Mbytes remaining.
SUNWus.u.........................done. 36.16 Mbytes remaining.
SUNWbtool........................done. 34.83 Mbytes remaining.
SUNWjfca.........................done. 33.98 Mbytes remaining.
SUNWjfcau........................done. 33.90 Mbytes remaining.
SUNWjss..........................done. 29.54 Mbytes remaining.
SUNWkey..........................done. 29.16 Mbytes remaining.
SUNWatfsr........................done. 29.09 Mbytes remaining.
SUNWatfsu........................done. 28.81 Mbytes remaining.
SUNWbart.........................done. 28.76 Mbytes remaining.
SUNWbindr........................done. 28.71 Mbytes remaining.
SUNWbind.........................done. 25.60 Mbytes remaining.
SUNWless.........................done. 25.44 Mbytes remaining.
SUNWcfcl.........................done. 25.30 Mbytes remaining.
SUNWcfclr........................done. 25.28 Mbytes remaining.
SUNWcfpl.........................done. 24.92 Mbytes remaining.
SUNWcfplr........................done. 24.87 Mbytes remaining.
SUNWlibsasl......................done. 24.28 Mbytes remaining.
SUNWchxge........................done. 24.04 Mbytes remaining.
SUNWlldap........................done. 23.84 Mbytes remaining.
SUNWluxopr.......................done. 23.17 Mbytes remaining.
SUNWm64cf........................done. 23.11 Mbytes remaining.
SUNWcstl.........................done. 22.96 Mbytes remaining.
SUNWmdbdm........................done. 22.90 Mbytes remaining.
SUNWmibii........................done. 22.78 Mbytes remaining.
SUNWsasnm........................done. 21.91 Mbytes remaining.
SUNWsadmi........................done. 20.91 Mbytes remaining.
SUNWsacom........................done. 20.61 Mbytes remaining.
SUNWmipr.........................done. 20.53 Mbytes remaining.
SUNWmipu.........................done. 20.25 Mbytes remaining.
SUNWmkcd.........................done. 18.95 Mbytes remaining.
SUNWdtrc.........................done. 16.86 Mbytes remaining.
SUNWdtrp.........................done. 16.41 Mbytes remaining.
SUNWfctl.........................done. 15.97 Mbytes remaining.
SUNWemlxs........................done. 13.19 Mbytes remaining.
SUNWemlxu........................done. 12.50 Mbytes remaining.
SUNWerid.........................done. 12.35 Mbytes remaining.
SUNWeuodf........................done. 12.23 Mbytes remaining.
SUNWfchbar.......................done. 12.20 Mbytes remaining.
SUNWfchba........................done. 10.63 Mbytes remaining.
SUNWfcip.........................done. 10.44 Mbytes remaining.
SUNWfcmdb........................done. 10.24 Mbytes remaining.
SUNWfcp..........................done. 9.95 Mbytes remaining.
SUNWfcprt........................done. 9.88 Mbytes remaining.
SUNWfcsm.........................done. 9.73 Mbytes remaining.
SUNWopenssl-commands.............done. 9.35 Mbytes remaining.
SUNWopensslr.....................done. 9.30 Mbytes remaining.
SUNWpd...........................done. 8.64 Mbytes remaining.
SUNWfss..........................done. 8.53 Mbytes remaining.
SUNWpiclr........................done. 8.50 Mbytes remaining.
SUNWpkgcmdsr.....................done. 8.46 Mbytes remaining.
SUNWpkgcmdsu.....................done. 5.72 Mbytes remaining.
SUNWged..........................done. 5.47 Mbytes remaining.
SUNWqfed.........................done. 5.25 Mbytes remaining.
SUNWqlc..........................done. 4.05 Mbytes remaining.
SUNWqlcu.........................done. 4.00 Mbytes remaining.
SUNWqos..........................done. 3.83 Mbytes remaining.
SUNWqosu.........................done. 3.71 Mbytes remaining.
SUNWqus..........................done. 3.48 Mbytes remaining.
SUNWqusu.........................done. 3.45 Mbytes remaining.
SUNWrcmdr........................done. 3.37 Mbytes remaining.
Chapter 2 Installing the Sun Solaris 10 Operating System
2-10
Cisco PGW 2200 Softswitch Release 9.8 Software Installation and Configuration Guide
OL-18083-01
Page 25

Chapter 2 Installing the Sun Solaris 10 Operating System
SUNWrge..........................done. 3.26 Mbytes remaining.
SUNWroute........................done. 2.94 Mbytes remaining.
SUNWrpcib........................done. 2.79 Mbytes remaining.
SUNWrsgk.........................done. 2.72 Mbytes remaining.
SUNWsolnm........................done. 2.70 Mbytes remaining.
SUNWsshcu........................done. 2.27 Mbytes remaining.
SUNWsshdr........................done. 2.20 Mbytes remaining.
SUNWsshdu........................done. 1.79 Mbytes remaining.
SUNWspnego.......................done. 1.68 Mbytes remaining.
SUNWsshr.........................done. 1.57 Mbytes remaining.
SUNWsshu.........................done. 1.00 Mbytes remaining.
Completed software installation
Solaris 10 software installation succeeded
Customizing system files
- Mount points table (/etc/vfstab)
- Unselected disk mount points (/var/sadm/system/data/vfstab.unselected)
- Network host addresses (/etc/hosts)
- Network host addresses (/etc/hosts)
- Environment variables (/etc/default/init)
Cleaning devices
Loading the Sun Solaris 10 Operating System
Customizing system devices
- Physical devices (/devices)
- Logical devices (/dev)
Installing boot information
- Installing boot blocks (c1t0d0s0)
- Updating system firmware for automatic rebooting
Installation log location
- /a/var/sadm/system/logs/install_log (before reboot)
- /var/sadm/system/logs/install_log (after reboot)
Installation complete
Executing SolStart postinstall phase...
Executing finish script "patch_finish"...
Finish script patch_finish execution completed.
Executing JumpStart postinstall phase...
Executing finish script "any_finish"...
any_finish started with SI_CONFIG_DIR = /tmp/install_config
any_finish completed
Finish script any_finish execution completed.
The begin script log 'begin.log'
is located in /var/sadm/system/logs after reboot.
OL-18083-01
The finish script log 'finish.log'
is located in /var/sadm/system/logs after reboot.
syncing file systems... done
rebooting...
SC Alert: Host System has Reset
Probing system devices
Probing memory
Probing I/O buses
Cisco PGW 2200 Softswitch Release 9.8 Software Installation and Configuration Guide
2-11
Page 26

Loading the Sun Solaris 10 Operating System
Sun Fire V210, No Keyboard
Copyright 2005 Sun Microsystems, Inc. All rights reserved.
OpenBoot 4.18.5, 2048 MB memory installed, Serial #52030991.
Ethernet address 0:3:ba:19:ee:f, Host ID: 8319ee0f.
Initializing 1MB of memory at addr 103feec000
Initializing 1MB of memory at addr 103fee0000
Initializing 15MB of memory at addr 103f002000
Initializing 16MB of memory at addr 103e002000
Initializing 992MB of memory at addr 1000000000
Initializing 1024MB of memory at addr 0
Rebooting with command: boot
Boot device: /pci@1c,600000/scsi@2/disk@0,0:a File and args:
SunOS Release 5.10 Version Generic_118833-17 64-bit
Copyright 1983-2005 Sun Microsystems, Inc. All rights reserved.
Use is subject to license terms.
Hardware watchdog enabled
Hostname: vtghost
Configuring devices.
Loading smf(5) service descriptions: 1/85
2/85
3/85
Chapter 2 Installing the Sun Solaris 10 Operating System
...
84/85
85/85
checking ufs filesystems
/dev/rdsk/c1t0d0s5: is logging.
Creating new rsa public/private host key pair
Creating new dsa public/private host key pair
This system is configured with NFS version 4, which uses a domain
name that is automatically derived from the system's name services.
The derived domain name is sufficient for most configurations. In a
few cases, mounts that cross different domains might cause files to
be owned by "nobody" due to the lack of a common domain name.
Do you need to override the system's default NFS version 4 domain
name (yes/no) ? [no] :
Step 7 Enter no to continue the reconfiguration process and press Enter.
The system displays information similar to the following:
For more information about how the NFS version 4 default domain
name is derived and its impact, refer to the man pages for nfs(4)
and nfsmapid(1m), and the System Administration Guide: Network
Services.
vtghost console login:
2-12
This completes the installation of the Sun Solaris 10 operating system. Proceed to the “Configuring Your
Host” section on page 2-50.
Cisco PGW 2200 Softswitch Release 9.8 Software Installation and Configuration Guide
OL-18083-01
Page 27

Chapter 2 Installing the Sun Solaris 10 Operating System
Loading the Sun Solaris 10 Operating System
Installing the Sun Solaris 10 Operating System for Opteron-based Platforms
The instructions in this section were written to correspond with the instructions in the Cisco Solaris 10
Operating System Startup Disk for Opteron-based Platforms. Other Solaris installations are similar, with
slight variations. These instructions will note the differences between the sets of installation instructions.
Step 1 Choose one of the following options to connect the Cisco PGW 2200 Softswitch:
• Connect to the Cisco PGW 2200 Softswitch through a console port.
• Connect a keyboard and monitor to the Cisco PGW 2200 Softswitch.
Note Cisco recommends that you connect to the Cisco PGW 2200 Softswitch using a keyboard and monitor.
If you choose to connect through the console port, you need to ensure that Console Redirection is
enabled as instructed in Step 6.
Step 2 Follow these steps to connect to the target system through a serial port:
a. Log in to the SP (Service Processor) as an Administrator:
login: root
password: changeme
b. Type the following command to start the ILOM Service Processor (SP) GUI:
start /SP/console
Step 3 This step is optional—if you decide to skip this, go to Step 4.
a. Place the system in single-user mode by shutting down the standby machine.
b. When the machine prompts for a password, type either ^ -d to proceed with normal startup, or the
root password for system maintenance.
Step 4 Load the appropriate version of the CD-ROM labeled Cisco Solaris 10 Operating Software Startup Disk
for Opteron-based Platforms into the CD-ROM drive.
Step 5 If the system is currently running, log in as root.
Step 6 Boot the system from the CD-ROM drive by entering the appropriate command:
# reboot
Note You may be prompted during the reboot to enter Ctrl-B or Ctrl-C to open configuration tools for your
hardware. You do not need to open any of these tools to complete this installation.
Perform the following steps once the reboot starts:
a. Press the F2 key to open the Setup menu. The Setup menu opens after the self-tests have been
completed.
b. Go to the BOOT setup information.
c. Ensure that the CD-ROM is the first bootable device in the list.
OL-18083-01
d. Choose the Advanced menu from the category selections at the top of the screen.
e. If you connected to the Cisco PGW 2200 Softswitch using the console port, ensure Console
Redirection is set to enable or always.
Cisco PGW 2200 Softswitch Release 9.8 Software Installation and Configuration Guide
2-13
Page 28
Loading the Sun Solaris 10 Operating System
f. Save your changes and exit the Setup menu.
Information similar to the following is displayed:
SSC Alert: Host System has Reset
screen not found.
keyboard not found.
Keyboard not present. Using ttya for input and output.
Caution Ensure that the selected display device is set to the corresponding console device. If you use a monitor,
choose solaris. If you use serial console, select solaris ttya.
SunFire V40z, No Keyboard
Copyright 1998-2004 Sun Microsystems, Inc. All rights reserved.
OpenBoot 4.13.0, 8192 MB memory installed, Serial #58524225.
Ethernet address 0:3:ba:7d:2:41, Host ID: 837d0241.
Rebooting with command: boot cdrom - install
Boot device: /pci@1e,600000/ide@d/cdrom@0,0:f File and args: - install
SunOS Release 5.10 Version Generic 64-bit
Copyright 1983-2005 Sun Microsystems, Inc. All rights reserved.
Use is subject to license terms.
Hardware watchdog enabled
Configuring devices.
Using RPC Bootparams for network configuration information.
Attempting to configure interface ce2...
Skipped interface ce2
Attempting to configure interface ce1...
Skipped interface ce1
Attempting to configure interface ce0...
Skipped interface ce0
Beginning system identification...
Searching for configuration file(s)...
Search complete.
Discovering additional network configuration...
Completing system identification...
Starting remote procedure call (RPC) services: done.
System identification complete.
Starting Solaris installation program...
Searching for JumpStart directory...
<<< using cdrom install_config >>>
not found
Checking rules.ok file...
Using profile: any_machine
Using finish script: any_finish
Executing JumpStart preinstall phase...
Searching for SolStart directory...
Checking rules.ok file...
Executing profile begin script...
Completed profile begin script.
Chapter 2 Installing the Sun Solaris 10 Operating System
2-14
Processing profile
- Selecting cluster (SUNWCreq)
- Deselecting cluster (SUNWCudf)
- Deselecting cluster (SUNWCbs)
- Deselecting cluster (SUNWCnfss)
- Deselecting cluster (SUNWCsndm)
- Deselecting cluster (SUNWCpcmc)
- Deselecting cluster (SUNWCpicl)
- Selecting cluster (SUNWCacc)
Cisco PGW 2200 Softswitch Release 9.8 Software Installation and Configuration Guide
OL-18083-01
Page 29

Chapter 2 Installing the Sun Solaris 10 Operating System
- Selecting cluster (SUNWCssh)
- Selecting cluster (SUNWCpool)
- Selecting cluster (SUNWCvld)
- Selecting cluster (SUNWCfwshl)
- Selecting cluster (SUNWClu)
- Selecting cluster (SUNWCcpc)
- Selecting cluster (SUNWCsea)
- Selecting cluster (SUNWCstl)
- Selecting cluster (SUNWCmip)
- Selecting cluster (SUNWCqos)
- Selecting cluster (SUNWCzone)
- Selecting cluster (SUNWCzebra)
- Deselecting package (SUNWauda)
- Deselecting package (SUNWad810)
- Deselecting package (SUNWvia823x)
- Deselecting package (SUNWcnsu)
- Deselecting package (SUNWtnamd)
- Deselecting package (SUNWtnamr)
- Deselecting package (SUNWrcmdr)
- Deselecting package (SUNWrcmds)
- Deselecting package (SUNWtftp)
- Deselecting package (SUNWtftpr)
- Deselecting package (SUNWcnsr)
- Deselecting package (SUNWatfsr)
- Deselecting package (SUNWatfsu)
- Deselecting package (SUNWftpr)
- Deselecting package (SUNWftpu)
- Deselecting package (SUNWipmi)
- Deselecting package (SUNWxsvc)
- Deselecting package (SUNWflexruntime)
- Deselecting package (SUNWxwmod)
- Selecting package (SUNWadmc)
- Selecting package (SUNWadmfr)
- Selecting package (SUNWadmfw)
- Selecting package (SUNWdtdmr)
- Selecting package (SUNWxwfnt)
- Selecting package (SUNWzip)
- Selecting package (SUNWless)
- Selecting package (SUNWeurf)
- Selecting package (SUNWj5rt)
- Selecting package (SUNWxwacx)
- Selecting package (SUNWxwice)
- Selecting package (SUNWxwplr)
- Selecting package (SUNWxwrtl)
- Selecting package (SUNWxwplt)
- Selecting package (SUNWxi18n)
- Selecting package (SUNWtltk)
- Selecting package (SUNWeuodf)
- Selecting package (SUNWocf)
- Selecting package (SUNWocfr)
- Selecting package (SUNWbtool)
- Selecting package (SUNWsprot)
- Selecting package (SUNWmdbdm)
- Selecting package (SUNWmkcd)
- Selecting package (SUNWspnego)
- Selecting package (SUNWtnfc)
- Selecting package (SUNWtnfd)
- Selecting package (SUNWbind)
- Selecting package (SUNWbindr)
- Selecting package (SUNWctpls)
- Selecting package (SUNWfss)
- Selecting package (SUNWgcmn)
- Selecting package (SUNWgssdh)
- Selecting package (SUNWgssk)
Loading the Sun Solaris 10 Operating System
OL-18083-01
Cisco PGW 2200 Softswitch Release 9.8 Software Installation and Configuration Guide
2-15
Page 30

Loading the Sun Solaris 10 Operating System
- Selecting package (SUNWinst)
- Selecting package (SUNWi15rf)
- Selecting package (SUNWipc)
- Selecting package (SUNWmdbr)
- Selecting package (SUNWmfrun)
- Selecting package (SUNWrsg)
- Selecting package (SUNWrsgk)
- Selecting package (SUNWter)
- Selecting package (SUNWtoo)
- Selecting package (SUNW1394)
- Selecting all disks
- Configuring boot device
- Using disk (c1t0d0) for "rootdisk"
- Deleting Solaris fdisk partition (c1t0d0)
- Deleting Solaris fdisk partition (c1t1d0)
- Creating "all" Solaris fdisk partition (c1t0d0)
- Creating "all" Solaris fdisk partition (c1t1d0)
- Configuring / (c1t0d0s0)
- Configuring /var (c1t0d0s1)
- Configuring swap (c1t0d0s3)
- Configuring (c1t0d0s4)
- Configuring (c1t0d0s6)
- Configuring /opt (c1t0d0s5)
- Deselecting unmodified disk (c1t1d0)
Chapter 2 Installing the Sun Solaris 10 Operating System
Verifying disk configuration
Verifying space allocation
- Total software size: 420.10 Mbytes
You may need to eject the CD or select a different
boot device after reboot to avoid repeating the
installation process.
Configuring disk (c1t0d0)
- Creating Fdisk partition table
Fdisk partition table for disk c1t0d0 (input file for fdisk(1M))
type: 130 active: 128 offset: 16065 size: 143347995
type: 100 active: 0 offset: 0 size: 0
type: 100 active: 0 offset: 0 size: 0
type: 100 active: 0 offset: 0 size: 0
- Creating Solaris disk label (VTOC)
Creating and checking UFS file systems
- Creating / (c1t0d0s0)
Warning: 1474 sector(s) in last cylinder unallocated
/dev/rdsk/c1t0d0s0:4096574 sectors in 667 cylinders of 48 tracks, 128 sectors
2000.3MB in 42 cyl groups (16 c/g, 48.00MB/g, 11648 i/g)
super-block backups (for fsck -F ufs -o b=#) at:
32, 98464, 196896, 295328, 393760, 492192, 590624, 689056, 787488, 885920,
3149856, 3248288, 3346720, 3445152, 3543584, 3642016, 3740448, 3838880,
3937312, 4035744
- Creating /var (c1t0d0s1)
Warning: 4866 sector(s) in last cylinder unallocated
/dev/rdsk/c1t0d0s1:10249470 sectors in 1669 cylinders of 48 tracks, 128 sectors
5004.6MB in 105 cyl groups (16 c/g, 48.00MB/g, 5824 i/g)
super-block backups (for fsck -F ufs -o b=#) at:
32, 98464, 196896, 295328, 393760, 492192, 590624, 689056, 787488, 885920,
9342880, 9441312, 9539744, 9638176, 9736608, 9835040, 9933472, 10031904,
10130336, 10228768
- Creating /opt (c1t0d0s5)
2-16
Cisco PGW 2200 Softswitch Release 9.8 Software Installation and Configuration Guide
OL-18083-01
Page 31

Chapter 2 Installing the Sun Solaris 10 Operating System
Warning: 1062 sector(s) in last cylinder unallocated
/dev/rdsk/c1t0d0s5:116599770 sectors in 18978 cylinders of 48 tracks, 128 sectors
56933.5MB in 1187 cyl groups (16 c/g, 48.00MB/g, 5824 i/g)
super-block backups (for fsck -F ufs -o b=#) at:
32, 98464, 196896, 295328, 393760, 492192, 590624, 689056, 787488, 885920,
Initializing cylinder groups:
.......................
super-block backups for last 10 cylinder groups at:
115707040, 115805472, 115903904, 116002336, 116100768, 116199200, 116297632,
116396064, 116494496, 116592928
Beginning Solaris software installation
23303 blocks
Installation of <SUNWcsu> was successful.
5043 blocks
Installation of <SUNWcsr> was successful.
21985 blocks
Installation of <SUNWcsl> was successful.
75 blocks
Installation of <SUNWcnetr> was successful.
43978 blocks
Loading the Sun Solaris 10 Operating System
Installation of <SUNWckr> was successful.
30 blocks
Installation of <SUNWkvm> was successful.
Installation of <SUNWcar> was successful.
Installation of <SUNWcakr> was successful.
7 blocks
add c devices/pseudo/arp@0:arp (44, 0) 0666 root sys
add link /dev/arp=../devices/pseudo/arp@0:arp
add c devices/pseudo/clone@0:ibd (11, 170) 0666 root sys
add link /dev/ibd=../devices/pseudo/clone@0:ibd
add c devices/pseudo/icmp@0:icmp (5, 0) 0666 root sys
add link /dev/icmp=../devices/pseudo/icmp@0:icmp
add c devices/pseudo/icmp@0:icmp (5, 0) 0666 root sys
add link /dev/rawip=../devices/pseudo/icmp@0:icmp
add c devices/pseudo/icmp6@0:icmp6 (140, 1) 0666 root sys
add link /dev/icmp6=../devices/pseudo/icmp6@0:icmp6
add c devices/pseudo/icmp6@0:icmp6 (140, 1) 0666 root sys
add link /dev/rawip6=../devices/pseudo/icmp6@0:icmp6
add c devices/pseudo/ip@0:ip (3, 0) 0666 root sys
add link /dev/ip=../devices/pseudo/ip@0:ip
add c devices/pseudo/ip6@0:ip6 (139, 1) 0666 root sys
add link /dev/ip6=../devices/pseudo/ip6@0:ip6
add c devices/pseudo/rts@0:rts (43, 0) 0666 root sys
add link /dev/rts=../devices/pseudo/rts@0:rts
add c devices/pseudo/tcp@0:tcp (42, 2) 0666 root sys
add link /dev/tcp=../devices/pseudo/tcp@0:tcp
add c devices/pseudo/tcp6@0:tcp6 (142, 3) 0666 root sys
add link /dev/tcp6=../devices/pseudo/tcp6@0:tcp6
add c devices/pseudo/udp@0:udp (41, 0) 0666 root sys
add link /dev/udp=../devices/pseudo/udp@0:udp
add c devices/pseudo/udp6@0:udp6 (141, 1) 0666 root sys
add link /dev/udp6=../devices/pseudo/udp6@0:udp6
add c devices/pseudo/ipsecah@0:ipsecah (137, 1) 0666 root sys
add link /dev/ipsecah=../devices/pseudo/ipsecah@0:ipsecah
add c devices/pseudo/ipsecesp@0:ipsecesp (138, 1) 0666 root sys
OL-18083-01
Cisco PGW 2200 Softswitch Release 9.8 Software Installation and Configuration Guide
2-17
Page 32

Loading the Sun Solaris 10 Operating System
add link /dev/ipsecesp=../devices/pseudo/ipsecesp@0:ipsecesp
add c devices/pseudo/keysock@0:keysock (136, 0) 0666 root sys
add link /dev/keysock=../devices/pseudo/keysock@0:keysock
add c devices/pseudo/cn@0:console (0, 0) 0620 root tty
add link /dev/console=../devices/pseudo/cn@0:console
add c devices/pseudo/cn@0:syscon (0, 0) 0620 root tty
add link /dev/syscon=../devices/pseudo/cn@0:syscon
add c devices/pseudo/cn@0:systty (0, 0) 0620 root tty
add link /dev/systty=../devices/pseudo/cn@0:systty
add c devices/pseudo/devinfo@0:devinfo (88, 0) 0640 root sys
add c devices/pseudo/ksyms@0:ksyms (72, 0) 0666 root sys
add link /dev/ksyms=../devices/pseudo/ksyms@0:ksyms
add c devices/pseudo/log@0:conslog (21, 0) 0666 root sys
add link /dev/conslog=../devices/pseudo/log@0:conslog
add c devices/pseudo/log@0:log (21, 5) 0640 root sys
add link /dev/log=../devices/pseudo/log@0:log
add c devices/pseudo/mm@0:mem (13, 0) 0640 root sys
add link /dev/mem=../devices/pseudo/mm@0:mem
add c devices/pseudo/mm@0:kmem (13, 1) 0640 root sys
add link /dev/kmem=../devices/pseudo/mm@0:kmem
add c devices/pseudo/mm@0:null (13, 2) 0666 root sys
add link /dev/null=../devices/pseudo/mm@0:null
add c devices/pseudo/mm@0:allkmem (13, 3) 0600 root sys
add link /dev/allkmem=../devices/pseudo/mm@0:allkmem
add c devices/pseudo/mm@0:zero (13, 12) 0666 root sys
add link /dev/zero=../devices/pseudo/mm@0:zero
add c devices/pseudo/openeepr@0:openprom (6, 0) 0640 root sys
add link /dev/openprom=../devices/pseudo/openeepr@0:openprom
add c devices/pseudo/sad@0:admin (12, 1) 0666 root sys
add link /dev/sad/admin=../../devices/pseudo/sad@0:admin
add c devices/pseudo/sad@0:user (12, 0) 0666 root sys
add link /dev/sad/user=../../devices/pseudo/sad@0:user
add c devices/pseudo/sy@0:tty (22, 0) 0666 root tty
add link /dev/tty=../devices/pseudo/sy@0:tty
add c devices/pseudo/sysevent@0:sysevent (152, 0) 0600 root sys
add link /dev/sysevent=../devices/pseudo/sysevent@0:sysevent
add c devices/pseudo/sysmsg@0:msglog (97, 1) 0600 root sys
add link /dev/msglog=../devices/pseudo/sysmsg@0:msglog
add c devices/pseudo/sysmsg@0:sysmsg (97, 0) 0600 root sys
add link /dev/sysmsg=../devices/pseudo/sysmsg@0:sysmsg
add c devices/pseudo/tl@0:ticots (105, 0) 0666 root sys
add link /dev/ticots=../devices/pseudo/tl@0:ticots
add c devices/pseudo/tl@0:ticotsord (105, 1) 0666 root sys
add link /dev/ticotsord=../devices/pseudo/tl@0:ticotsord
add c devices/pseudo/tl@0:ticlts (105, 2) 0666 root sys
add link /dev/ticlts=../devices/pseudo/tl@0:ticlts
add c devices/pseudo/wc@0:wscons (15, 0) 0600 root sys
add link /dev/wscons=../devices/pseudo/wc@0:wscons
add c devices/pseudo/conskbd@0:kbd (103, 0) 0666 root sys
add link /dev/kbd=../devices/pseudo/conskbd@0:kbd
Chapter 2 Installing the Sun Solaris 10 Operating System
2-18
Installation of <SUNWcsd> was successful.
422 blocks
Installation of <SUNWzlib> was successful.
3826 blocks
Installation of <SUNWlibmsr> was successful.
Installation of <SUNWlibms> was successful.
5495 blocks
Installation of <SUNWlxml> was successful.
Cisco PGW 2200 Softswitch Release 9.8 Software Installation and Configuration Guide
OL-18083-01
Page 33

Chapter 2 Installing the Sun Solaris 10 Operating System
Installation of <SUNWxwrtl> was successful.
Installation of <SUNWbzip> was successful.
22155 blocks
Installation of <SUNWxwfnt> was successful.
440 blocks
Installation of <SUNWxwice> was successful.
63 blocks
Installation of <SUNWxwdv> was successful.
3 blocks
Installation of <SUNWxwplr> was successful.
8688 blocks
Installation of <SUNWperl584core> was successful.
39013 blocks
Installation of <SUNWperl584usr> was successful.
3641 blocks
Installation of <SUNWesu> was successful.
118 blocks
Loading the Sun Solaris 10 Operating System
Installation of <SUNWcpp> was successful.
Installation of <SUNWdtcor> was successful.
31656 blocks
Installation of <SUNWxwplt> was successful.
1019 blocks
Installation of <SUNWlexpt> was successful.
Installation of <SUNWgcmn> was successful.
116 blocks
Installation of <SUNWctpls> was successful.
18841 blocks
Installation of <SUNWmfrun> was successful.
260 blocks
Installation of <SUNWxwacx> was successful.
3 blocks
Installation of <SUNWsshdr> was successful.
390 blocks
Installation of <SUNWadmlib-sysid> was successful.
27 blocks
Installation of <SUNWadmr> was successful.
3755 blocks
OL-18083-01
Installation of <SUNWadmap> was successful.
Installation of <SUNWgssc> was successful.
554 blocks
Installation of <SUNWgss> was successful.
11613 blocks
Cisco PGW 2200 Softswitch Release 9.8 Software Installation and Configuration Guide
2-19
Page 34

Loading the Sun Solaris 10 Operating System
Installation of <SUNWopenssl-libraries> was successful.
687 blocks
Installation of <SUNWsshcu> was successful.
694 blocks
Installation of <SUNWsshdu> was successful.
Installation of <SUNWdtdmr> was successful.
6063 blocks
Installation of <SUNWtltk> was successful.
134 blocks
Installation of <SUNWgzip> was successful.
173 blocks
Installation of <SUNWsshr> was successful.
970 blocks
Installation of <SUNWsshu> was successful.
11214 blocks
Chapter 2 Installing the Sun Solaris 10 Operating System
Installation of <SUNWlibC> was successful.
151975 blocks
Installation of <SUNWj5rt> was successful.
580 blocks
Installation of <SUNWwbsup> was successful.
Installation of <SUNWinstall-patch-utils-root> was successful.
Installation of <SUNWswmt> was successful.
5206 blocks
Installation of <SUNWmdr> was successful.
1139 blocks
Installation of <SUNWmdu> was successful.
2937 blocks
Installation of <SUNWadmc> was successful.
4275 blocks
Installation of <SUNWnfsckr> was successful.
89 blocks
Installation of <SUNWnfscr> was successful.
426 blocks
Installation of <SUNWnfscu> was successful.
8 blocks
2-20
Installation of <SUNWkrbr> was successful.
3840 blocks
Installation of <SUNWkrbu> was successful.
259 blocks
Installation of <SUNWbip> was successful.
237 blocks
Cisco PGW 2200 Softswitch Release 9.8 Software Installation and Configuration Guide
OL-18083-01
Page 35

Chapter 2 Installing the Sun Solaris 10 Operating System
Installation of <SUNWtnetc> was successful.
1498 blocks
Installation of <SUNWrcmdc> was successful.
4857 blocks
Reboot client to install driver.
Installation of <SUNWib> was successful.
2431 blocks
Reboot client to install driver.
Installation of <SUNWtavor> was successful.
599 blocks
Installation of <SUNWtcsh> was successful.
1085 blocks
Installation of <SUNWtecla> was successful.
1978 blocks
Installation of <SUNWter> was successful.
1975 blocks
Installation of <SUNWpr> was successful.
10669 blocks
Loading the Sun Solaris 10 Operating System
Installation of <SUNWtls> was successful.
90 blocks
Installation of <SUNWtnetd> was successful.
Installation of <SUNWtnetr> was successful.
1039 blocks
Installation of <SUNWtnfc> was successful.
97 blocks
Installation of <SUNWtnfd> was successful.
1784 blocks
Installation of <SUNWtoo> was successful.
Installation of <SUNWucbt> was successful.
Installation of <SUNWudaplr> was successful.
382 blocks
Installation of <SUNWudaplu> was successful.
256 blocks
Installation of <SUNWipoib> was successful.
680 blocks
Installation of <SUNWudapltu> was successful.
559 blocks
Reboot client to install driver.
OL-18083-01
Installation of <SUNWudapltr> was successful.
Installation of <SUNWocfr> was successful.
974 blocks
Installation of <SUNWocf> was successful.
1580 blocks
Cisco PGW 2200 Softswitch Release 9.8 Software Installation and Configuration Guide
2-21
Page 36

Loading the Sun Solaris 10 Operating System
Reboot client to install driver.
Reboot client to install driver.
Reboot client to install driver.
Reboot client to install driver.
Reboot client to install driver.
Reboot client to install driver.
Reboot client to install driver.
Reboot client to install driver.
Reboot client to install driver.
Removing empty OWconfig
Installation of <SUNWos86r> was successful.
Installation of <SUNWrmodr> was successful.
Reboot client to install driver.
Installation of <CADP160> was successful.
1069 blocks
Reboot client to install driver.
Installation of <SUNWaudd> was successful.
3863 blocks
Reboot client to install driver.
Reboot client to install driver.
Reboot client to install driver.
Reboot client to install driver.
Reboot client to install driver.
Reboot client to install driver.
Reboot client to install driver.
Reboot client to install driver.
Reboot client to install driver.
Reboot client to install driver.
Chapter 2 Installing the Sun Solaris 10 Operating System
Installation of <SUNWusb> was successful.
138 blocks
Installation of <SUNWusbs> was successful.
465 blocks
Reboot client to install driver.
Installation of <SUNWuedg> was successful.
732 blocks
Modifying /a/kernel/drv/sd.conf
Reboot client to install driver.
Installation of <HPFC> was successful.
66 blocks
Installation of <NCRos86r> was successful.
151 blocks
Reboot client to install driver.
Installation of <SUNWugen> was successful.
379 blocks
Reboot client to install driver.
Installation of <SK98sol> was successful.
679 blocks
Reboot client to install driver.
Installation of <SKfp> was successful.
8309 blocks
2-22
Installation of <SUNWeurf> was successful.
Cisco PGW 2200 Softswitch Release 9.8 Software Installation and Configuration Guide
OL-18083-01
Page 37

Chapter 2 Installing the Sun Solaris 10 Operating System
2429 blocks
Reboot client to install driver.
Installation of <SUNW1394> was successful.
1423 blocks
Installation of <SUNWxi18n> was successful.
95 blocks
Installation of <SUNWvld> was successful.
40 blocks
Installation of <SUNWvldu> was successful.
1198 blocks
Installation of <SUNWbash> was successful.
Installation of <SUNWproduct-registry-root> was successful.
817 blocks
registry conversion not required
Installation of <SUNWwsr2> was successful.
158 blocks
Reboot client to install driver.
Loading the Sun Solaris 10 Operating System
Installation of <SUNWaac> was successful.
3 blocks
Installation of <SUNWaccr> was successful.
511 blocks
Installation of <SUNWaccu> was successful.
Installation of <SUNWgrub> was successful.
Installation of <SUNWadmfr> was successful.
1167 blocks
Installation of <SUNWadmfw> was successful.
80 blocks
Installation of <SUNWi15rf> was successful.
Reboot client to install driver.
Installation of <SUNWadp> was successful.
Installation of <SUNWradpu320> was successful.
1216 blocks
Reboot client to install driver.
Installation of <SUNWadpu320> was successful.
136 blocks
Reboot client to install driver.
OL-18083-01
Installation of <SUNWamr> was successful.
2519 blocks
Installation of <SUNWsprot> was successful.
190 blocks
Installation of <SUNWrsg> was successful.
453 blocks
Installation of <SUNWgssdh> was successful.
Cisco PGW 2200 Softswitch Release 9.8 Software Installation and Configuration Guide
2-23
Page 38

Loading the Sun Solaris 10 Operating System
671 blocks
Installation of <SUNWgssk> was successful.
1251 blocks
Reboot client to install driver.
Installation of <SUNWxge> was successful.
2194 blocks
Installation of <SUNWbtool> was successful.
24616 blocks
Installation of <SUNWcslr> was successful.
1022 blocks
Installation of <SUNWidnl> was successful.
1830 blocks
Installation of <SUNWinst> was successful.
596 blocks
Reboot client to install driver.
Installation of <SUNWintgige> was successful.
41 blocks
Chapter 2 Installing the Sun Solaris 10 Operating System
Installation of <SUNWipc> was successful.
119 blocks
Installation of <SUNWipfr> was successful.
3499 blocks
Installation of <SUNWipfu> was successful.
6407 blocks
/a/etc/lu/synclist
Installing /a/etc/default/lu
Installation of <SUNWlur> was successful.
3495 blocks
Installation of <SUNWluu> was successful.
Reboot client to install driver.
Installation of <SUNWiscsir> was successful.
Installation of <SUNWiscsiu> was successful.
790 blocks
Installation of <SUNWloc> was successful.
83 blocks
Installation of <SUNWnisr> was successful.
3891 blocks
Installation of <SUNWnisu> was successful.
45 blocks
2-24
Installation of <SUNWzebrar> was successful.
4056 blocks
Installation of <SUNWzebrau> was successful.
267 blocks
Installation of <SUNWzip> was successful.
9 blocks
Cisco PGW 2200 Softswitch Release 9.8 Software Installation and Configuration Guide
OL-18083-01
Page 39

Chapter 2 Installing the Sun Solaris 10 Operating System
Installation of <SUNWzoner> was successful.
606 blocks
Installation of <SUNWluzone> was successful.
Installation of <SUNWpoolr> was successful.
1366 blocks
Installation of <SUNWpool> was successful.
878 blocks
Installation of <SUNWzoneu> was successful.
4985 blocks
Installation of <SUNWzsh> was successful.
Reboot client to install driver.
Installation of <SYMhisl> was successful.
72 blocks
Installation of <SUNWcpc> was successful.
Installation of <SUNWbindr> was successful.
4546 blocks
Loading the Sun Solaris 10 Operating System
Installation of <SUNWbind> was successful.
Installation of <SUNWbipr> was successful.
Reboot client to install driver.
Installation of <SUNWcadp> was successful.
955 blocks
Reboot client to install driver.
Installation of <SUNWced> was successful.
161 blocks
Installation of <SUNWcfcl> was successful.
Installation of <SUNWcfclr> was successful.
253 blocks
Installation of <SUNWluxop> was successful.
594 blocks
Installation of <SUNWcfpl> was successful.
2 blocks
Installation of <SUNWcfplr> was successful.
3979 blocks
Installation of <SUNWjss> was successful.
918 blocks
Installation of <SUNWcpcu> was successful.
29 blocks
Reboot client to install driver.
OL-18083-01
Installation of <SUNWcqhpc> was successful.
215 blocks
Installation of <SUNWkey> was successful.
128 blocks
Cisco PGW 2200 Softswitch Release 9.8 Software Installation and Configuration Guide
2-25
Page 40

Loading the Sun Solaris 10 Operating System
Installation of <SUNWeuodf> was successful.
231 blocks
Installation of <SUNWless> was successful.
184 blocks
Installation of <SUNWcstl> was successful.
928 blocks
Installation of <SUNWlibsasl> was successful.
314 blocks
Installation of <SUNWlldap> was successful.
228 blocks
Reboot client to install driver.
Installation of <SUNWlsimega> was successful.
10159 blocks
Installation of <SUNWmdb> was successful.
29 blocks
Installation of <SUNWmdbdm> was successful.
6853 blocks
Chapter 2 Installing the Sun Solaris 10 Operating System
Installation of <SUNWmdbr> was successful.
3972 blocks
Installation of <SUNWdtrc> was successful.
1313 blocks
Installation of <SUNWdtrp> was successful.
1227 blocks
Reboot client to install driver.
Installation of <SUNWfctl> was successful.
3552 blocks
Reboot client to install driver.
Installation of <SUNWemlxs> was successful.
2568 blocks
Installation of <SUNWemlxu> was successful.
174 blocks
Installation of <SUNWmibii> was successful.
1332 blocks
Installation of <SUNWsasnm> was successful.
1106 blocks
Installation of <SUNWsadmi> was successful.
328 blocks
Installation of <SUNWsacom> was successful.
40 blocks
2-26
Installation of <SUNWmipr> was successful.
468 blocks
Installation of <SUNWmipu> was successful.
844 blocks
Cisco PGW 2200 Softswitch Release 9.8 Software Installation and Configuration Guide
OL-18083-01
Page 41

Chapter 2 Installing the Sun Solaris 10 Operating System
Installation of <SUNWmkcd> was successful.
Modifying /a/etc/hba.conf
Installation of <SUNWfchbar> was successful.
3366 blocks
Installation of <SUNWfchba> was successful.
537 blocks
Reboot client to install driver.
Installation of <SUNWfcip> was successful.
312 blocks
Installation of <SUNWfcmdb> was successful.
803 blocks
Reboot client to install driver.
Installation of <SUNWfcp> was successful.
79 blocks
Installation of <SUNWfcprt> was successful.
361 blocks
Reboot client to install driver.
Loading the Sun Solaris 10 Operating System
Installation of <SUNWfcsm> was successful.
3020 blocks
Installation of <SUNWfmd> was successful.
197 blocks
Installation of <SUNWfss> was successful.
275 blocks
Reboot client to install driver.
Installation of <SUNWnge> was successful.
1 blocks
Installation of <SUNWpkgcmdsr> was successful.
4530 blocks
Installation of <SUNWpkgcmdsu> was successful.
1509 blocks
Reboot client to install driver.
Installation of <SUNWpsdcr> was successful.
Installation of <SUNWsolnm> was successful.
590 blocks
Reboot client to install driver.
Installation of <SUNWpsdir> was successful.
3866 blocks
Reboot client to install driver.
OL-18083-01
Installation of <SUNWqlc> was successful.
387 blocks
Installation of <SUNWqos> was successful.
136 blocks
Installation of <SUNWqosu> was successful.
2 blocks
Installation of <SUNWrmodu> was successful.
Cisco PGW 2200 Softswitch Release 9.8 Software Installation and Configuration Guide
2-27
Page 42

Loading the Sun Solaris 10 Operating System
497 blocks
Installation of <SUNWroute> was successful.
271 blocks
Reboot client to install driver.
Installation of <SUNWrpcib> was successful.
145 blocks
Installation of <SUNWrsgk> was successful.
89 blocks
Reboot client to install driver.
Installation of <SUNWrtls> was successful.
125 blocks
Installation of <SUNWspnego> was successful.
Solaris 10 software installation succeeded
Chapter 2 Installing the Sun Solaris 10 Operating System
Solaris 10 packages fully installed
SUNWcsu
SUNWcsr
SUNWcsl
SUNWcnetr
SUNWckr
SUNWkvm
SUNWcar
SUNWcakr
SUNWcsd
SUNWzlib
SUNWlibmsr
SUNWlibms
SUNWlxml
SUNWxwrtl
SUNWbzip
SUNWxwfnt
SUNWxwice
SUNWxwdv
SUNWxwplr
SUNWperl584core
SUNWperl584usr
SUNWesu
SUNWcpp
SUNWdtcor
SUNWxwplt
SUNWlexpt
SUNWgcmn
SUNWctpls
SUNWmfrun
SUNWxwacx
SUNWsshdr
SUNWadmlib-sysid
SUNWadmr
SUNWadmap
SUNWgssc
SUNWgss
SUNWopenssl-libraries
SUNWsshcu
SUNWsshdu
SUNWdtdmr
SUNWtltk
SUNWgzip
SUNWsshr
2-28
Cisco PGW 2200 Softswitch Release 9.8 Software Installation and Configuration Guide
OL-18083-01
Page 43

Chapter 2 Installing the Sun Solaris 10 Operating System
SUNWsshu
SUNWlibC
SUNWj5rt
SUNWwbsup
SUNWinstall-patch-utils-root
SUNWswmt
SUNWmdr
SUNWmdu
SUNWadmc
SUNWnfsckr
SUNWnfscr
SUNWnfscu
SUNWkrbr
SUNWkrbu
SUNWbip
SUNWtnetc
SUNWrcmdc
SUNWib
SUNWtavor
SUNWtcsh
SUNWtecla
SUNWter
SUNWpr
SUNWtls
SUNWtnetd
SUNWtnetr
SUNWtnfc
SUNWtnfd
SUNWtoo
SUNWucbt
SUNWudaplr
SUNWudaplu
SUNWipoib
SUNWudapltu
SUNWudapltr
SUNWocfr
SUNWocf
SUNWos86r
SUNWrmodr
CADP160
SUNWaudd
SUNWusb
SUNWusbs
SUNWuedg
HPFC
NCRos86r
SUNWugen
SK98sol
SKfp
SUNWeurf
SUNW1394
SUNWxi18n
SUNWvld
SUNWvldu
SUNWbash
SUNWproduct-registry-root
SUNWwsr2
SUNWaac
SUNWaccr
SUNWaccu
SUNWgrub
SUNWadmfr
SUNWadmfw
SUNWi15rf
Loading the Sun Solaris 10 Operating System
OL-18083-01
Cisco PGW 2200 Softswitch Release 9.8 Software Installation and Configuration Guide
2-29
Page 44

Loading the Sun Solaris 10 Operating System
SUNWadp
SUNWradpu320
SUNWadpu320
SUNWamr
SUNWsprot
SUNWrsg
SUNWgssdh
SUNWgssk
SUNWxge
SUNWbtool
SUNWcslr
SUNWidnl
SUNWinst
SUNWintgige
SUNWipc
SUNWipfr
SUNWipfu
SUNWlur
SUNWluu
SUNWiscsir
SUNWiscsiu
SUNWloc
SUNWnisr
SUNWnisu
SUNWzebrar
SUNWzebrau
SUNWzip
SUNWzoner
SUNWluzone
SUNWpoolr
SUNWpool
SUNWzoneu
SUNWzsh
SYMhisl
SUNWcpc
SUNWbindr
SUNWbind
SUNWbipr
SUNWcadp
SUNWced
SUNWcfcl
SUNWcfclr
SUNWluxop
SUNWcfpl
SUNWcfplr
SUNWjss
SUNWcpcu
SUNWcqhpc
SUNWkey
SUNWeuodf
SUNWless
SUNWcstl
SUNWlibsasl
SUNWlldap
SUNWlsimega
SUNWmdb
SUNWmdbdm
SUNWmdbr
SUNWdtrc
SUNWdtrp
SUNWfctl
SUNWemlxs
SUNWemlxu
SUNWmibii
Chapter 2 Installing the Sun Solaris 10 Operating System
2-30
Cisco PGW 2200 Softswitch Release 9.8 Software Installation and Configuration Guide
OL-18083-01
Page 45

Chapter 2 Installing the Sun Solaris 10 Operating System
SUNWsasnm
SUNWsadmi
SUNWsacom
SUNWmipr
SUNWmipu
SUNWmkcd
SUNWfchbar
SUNWfchba
SUNWfcip
SUNWfcmdb
SUNWfcp
SUNWfcprt
SUNWfcsm
SUNWfmd
SUNWfss
SUNWnge
SUNWpkgcmdsr
SUNWpkgcmdsu
SUNWpsdcr
SUNWsolnm
SUNWpsdir
SUNWqlc
SUNWqos
SUNWqosu
SUNWrmodu
SUNWroute
SUNWrpcib
SUNWrsgk
SUNWrtls
SUNWspnego
Loading the Sun Solaris 10 Operating System
Customizing system files
- Mount points table (/etc/vfstab)
fd- /dev/fdfd- no /proc-/procproc- no /dev/dsk/c1t0d0s3--swap-no /dev/dsk/c1t0d0s0/dev/rdsk/c1t0d0s0/ufs1no /dev/dsk/c1t0d0s1/dev/rdsk/c1t0d0s1/varufs1no /dev/dsk/c1t0d0s5/dev/rdsk/c1t0d0s5/optufs2yes /devices-/devicesdevfs-no ctfs- /system/contractctfs-no objfs-/system/objectobjfs-no swap- /tmptmpfs- yes -
- Network host addresses (/etc/hosts)
- Network host addresses (/etc/hosts)
- Environment variables (/etc/default/init)
Cleaning devices
Customizing system devices
- Physical devices (/devices)
- Logical devices (/dev)
Installing boot information
- Updating boot environment configuration file
- Installing boot blocks (c1t0d0)
OL-18083-01
Executing profile begin script...
Cisco PGW 2200 Softswitch Release 9.8 Software Installation and Configuration Guide
2-31
Page 46

Loading the Sun Solaris 10 Operating System
Completed profile begin script.
Processing profile
- Selecting cluster (SUNWCreq)
- Deselecting cluster (SUNWCudf)
- Deselecting cluster (SUNWCbs)
- Deselecting cluster (SUNWCnfss)
- Deselecting cluster (SUNWCsndm)
- Deselecting cluster (SUNWCpcmc)
- Deselecting cluster (SUNWCpicl)
- Selecting cluster (SUNWCacc)
- Selecting cluster (SUNWCssh)
- Selecting cluster (SUNWCpool)
- Selecting cluster (SUNWCvld)
- Selecting cluster (SUNWCfwshl)
- Selecting cluster (SUNWClu)
- Selecting cluster (SUNWCcpc)
- Selecting cluster (SUNWCsea)
- Selecting cluster (SUNWCstl)
- Selecting cluster (SUNWCmip)
- Selecting cluster (SUNWCqos)
- Selecting cluster (SUNWCzone)
- Selecting cluster (SUNWCzebra)
- Deselecting package (SUNWauda)
- Deselecting package (SUNWad810)
- Deselecting package (SUNWvia823x)
- Deselecting package (SUNWcnsu)
- Deselecting package (SUNWtnamd)
- Deselecting package (SUNWtnamr)
- Deselecting package (SUNWrcmdr)
- Deselecting package (SUNWrcmds)
- Deselecting package (SUNWtftp)
- Deselecting package (SUNWtftpr)
- Deselecting package (SUNWcnsr)
- Deselecting package (SUNWatfsr)
- Deselecting package (SUNWatfsu)
- Deselecting package (SUNWftpr)
- Deselecting package (SUNWftpu)
- Deselecting package (SUNWipmi)
- Deselecting package (SUNWxsvc)
- Deselecting package (SUNWflexruntime)
- Deselecting package (SUNWxwmod)
- Selecting package (SUNWadmc)
- Selecting package (SUNWadmfr)
- Selecting package (SUNWadmfw)
- Selecting package (SUNWdtdmr)
- Selecting package (SUNWxwfnt)
- Selecting package (SUNWzip)
- Selecting package (SUNWless)
- Selecting package (SUNWeurf)
- Selecting package (SUNWj5rt)
- Selecting package (SUNWxwacx)
- Selecting package (SUNWxwice)
- Selecting package (SUNWxwplr)
- Selecting package (SUNWxwrtl)
- Selecting package (SUNWxwplt)
- Selecting package (SUNWxi18n)
- Selecting package (SUNWtltk)
- Selecting package (SUNWeuodf)
- Selecting package (SUNWocf)
- Selecting package (SUNWocfr)
- Selecting package (SUNWbtool)
- Selecting package (SUNWsprot)
- Selecting package (SUNWmdbdm)
Chapter 2 Installing the Sun Solaris 10 Operating System
2-32
Cisco PGW 2200 Softswitch Release 9.8 Software Installation and Configuration Guide
OL-18083-01
Page 47

Chapter 2 Installing the Sun Solaris 10 Operating System
- Selecting package (SUNWmkcd)
- Selecting package (SUNWspnego)
- Selecting package (SUNWtnfc)
- Selecting package (SUNWtnfd)
- Selecting package (SUNWbind)
- Selecting package (SUNWbindr)
- Selecting package (SUNWctpls)
- Selecting package (SUNWfss)
- Selecting package (SUNWgcmn)
- Selecting package (SUNWgssdh)
- Selecting package (SUNWgssk)
- Selecting package (SUNWinst)
- Selecting package (SUNWi15rf)
- Selecting package (SUNWipc)
- Selecting package (SUNWmdbr)
- Selecting package (SUNWmfrun)
- Selecting package (SUNWrsg)
- Selecting package (SUNWrsgk)
- Selecting package (SUNWter)
- Selecting package (SUNWtoo)
- Selecting package (SUNW1394)
- Selecting all disks
- Configuring boot device
- Using disk (c1t0d0) for "rootdisk"
- Deleting Solaris fdisk partition (c1t0d0)
- Deleting Solaris fdisk partition (c1t1d0)
- Creating "all" Solaris fdisk partition (c1t0d0)
- Creating "all" Solaris fdisk partition (c1t1d0)
- Configuring / (c1t0d0s0)
- Configuring /var (c1t0d0s1)
- Configuring swap (c1t0d0s3)
- Configuring (c1t0d0s4)
- Configuring (c1t0d0s6)
- Configuring /opt (c1t0d0s5)
- Deselecting unmodified disk (c1t1d0)
Loading the Sun Solaris 10 Operating System
Verifying disk configuration
Verifying space allocation
- Total software size: 420.10 Mbytes
You may need to eject the CD or select a different
boot device after reboot to avoid repeating the
installation process.
Configuring disk (c1t0d0)
- Creating Fdisk partition table
Fdisk partition table for disk c1t0d0 (input file for fdisk(1M))
type: 130 active: 128 offset: 16065 size: 143347995
type: 100 active: 0 offset: 0 size: 0
type: 100 active: 0 offset: 0 size: 0
type: 100 active: 0 offset: 0 size: 0
- Creating Solaris disk label (VTOC)
Creating and checking UFS file systems
- Creating / (c1t0d0s0)
Warning: 1474 sector(s) in last cylinder unallocated
/dev/rdsk/c1t0d0s0:4096574 sectors in 667 cylinders of 48 tracks, 128 sectors
2000.3MB in 42 cyl groups (16 c/g, 48.00MB/g, 11648 i/g)
super-block backups (for fsck -F ufs -o b=#) at:
32, 98464, 196896, 295328, 393760, 492192, 590624, 689056, 787488, 885920,
OL-18083-01
Cisco PGW 2200 Softswitch Release 9.8 Software Installation and Configuration Guide
2-33
Page 48

Loading the Sun Solaris 10 Operating System
3149856, 3248288, 3346720, 3445152, 3543584, 3642016, 3740448, 3838880,
3937312, 4035744
- Creating /var (c1t0d0s1)
Warning: 4866 sector(s) in last cylinder unallocated
/dev/rdsk/c1t0d0s1:10249470 sectors in 1669 cylinders of 48 tracks, 128 sectors
5004.6MB in 105 cyl groups (16 c/g, 48.00MB/g, 5824 i/g)
super-block backups (for fsck -F ufs -o b=#) at:
32, 98464, 196896, 295328, 393760, 492192, 590624, 689056, 787488, 885920,
9342880, 9441312, 9539744, 9638176, 9736608, 9835040, 9933472, 10031904,
10130336, 10228768
- Creating /opt (c1t0d0s5)
Warning: 1062 sector(s) in last cylinder unallocated
/dev/rdsk/c1t0d0s5:116599770 sectors in 18978 cylinders of 48 tracks, 128 sectors
56933.5MB in 1187 cyl groups (16 c/g, 48.00MB/g, 5824 i/g)
super-block backups (for fsck -F ufs -o b=#) at:
32, 98464, 196896, 295328, 393760, 492192, 590624, 689056, 787488, 885920,
Initializing cylinder groups:
.......................
super-block backups for last 10 cylinder groups at:
115707040, 115805472, 115903904, 116002336, 116100768, 116199200, 116297632,
116396064, 116494496, 116592928
Beginning Solaris software installation
23303 blocks
Chapter 2 Installing the Sun Solaris 10 Operating System
Installation of <SUNWcsu> was successful.
5043 blocks
Installation of <SUNWcsr> was successful.
21985 blocks
Installation of <SUNWcsl> was successful.
75 blocks
Installation of <SUNWcnetr> was successful.
43978 blocks
Installation of <SUNWckr> was successful.
30 blocks
Installation of <SUNWkvm> was successful.
Installation of <SUNWcar> was successful.
Installation of <SUNWcakr> was successful.
7 blocks
add c devices/pseudo/arp@0:arp (44, 0) 0666 root sys
add link /dev/arp=../devices/pseudo/arp@0:arp
add c devices/pseudo/clone@0:ibd (11, 170) 0666 root sys
add link /dev/ibd=../devices/pseudo/clone@0:ibd
add c devices/pseudo/icmp@0:icmp (5, 0) 0666 root sys
add link /dev/icmp=../devices/pseudo/icmp@0:icmp
add c devices/pseudo/icmp@0:icmp (5, 0) 0666 root sys
add link /dev/rawip=../devices/pseudo/icmp@0:icmp
add c devices/pseudo/icmp6@0:icmp6 (140, 1) 0666 root sys
add link /dev/icmp6=../devices/pseudo/icmp6@0:icmp6
add c devices/pseudo/icmp6@0:icmp6 (140, 1) 0666 root sys
add link /dev/rawip6=../devices/pseudo/icmp6@0:icmp6
add c devices/pseudo/ip@0:ip (3, 0) 0666 root sys
add link /dev/ip=../devices/pseudo/ip@0:ip
add c devices/pseudo/ip6@0:ip6 (139, 1) 0666 root sys
add link /dev/ip6=../devices/pseudo/ip6@0:ip6
add c devices/pseudo/rts@0:rts (43, 0) 0666 root sys
add link /dev/rts=../devices/pseudo/rts@0:rts
2-34
Cisco PGW 2200 Softswitch Release 9.8 Software Installation and Configuration Guide
OL-18083-01
Page 49

Chapter 2 Installing the Sun Solaris 10 Operating System
add c devices/pseudo/tcp@0:tcp (42, 2) 0666 root sys
add link /dev/tcp=../devices/pseudo/tcp@0:tcp
add c devices/pseudo/tcp6@0:tcp6 (142, 3) 0666 root sys
add link /dev/tcp6=../devices/pseudo/tcp6@0:tcp6
add c devices/pseudo/udp@0:udp (41, 0) 0666 root sys
add link /dev/udp=../devices/pseudo/udp@0:udp
add c devices/pseudo/udp6@0:udp6 (141, 1) 0666 root sys
add link /dev/udp6=../devices/pseudo/udp6@0:udp6
add c devices/pseudo/ipsecah@0:ipsecah (137, 1) 0666 root sys
add link /dev/ipsecah=../devices/pseudo/ipsecah@0:ipsecah
add c devices/pseudo/ipsecesp@0:ipsecesp (138, 1) 0666 root sys
add link /dev/ipsecesp=../devices/pseudo/ipsecesp@0:ipsecesp
add c devices/pseudo/keysock@0:keysock (136, 0) 0666 root sys
add link /dev/keysock=../devices/pseudo/keysock@0:keysock
add c devices/pseudo/cn@0:console (0, 0) 0620 root tty
add link /dev/console=../devices/pseudo/cn@0:console
add c devices/pseudo/cn@0:syscon (0, 0) 0620 root tty
add link /dev/syscon=../devices/pseudo/cn@0:syscon
add c devices/pseudo/cn@0:systty (0, 0) 0620 root tty
add link /dev/systty=../devices/pseudo/cn@0:systty
add c devices/pseudo/devinfo@0:devinfo (88, 0) 0640 root sys
add c devices/pseudo/ksyms@0:ksyms (72, 0) 0666 root sys
add link /dev/ksyms=../devices/pseudo/ksyms@0:ksyms
add c devices/pseudo/log@0:conslog (21, 0) 0666 root sys
add link /dev/conslog=../devices/pseudo/log@0:conslog
add c devices/pseudo/log@0:log (21, 5) 0640 root sys
add link /dev/log=../devices/pseudo/log@0:log
add c devices/pseudo/mm@0:mem (13, 0) 0640 root sys
add link /dev/mem=../devices/pseudo/mm@0:mem
add c devices/pseudo/mm@0:kmem (13, 1) 0640 root sys
add link /dev/kmem=../devices/pseudo/mm@0:kmem
add c devices/pseudo/mm@0:null (13, 2) 0666 root sys
add link /dev/null=../devices/pseudo/mm@0:null
add c devices/pseudo/mm@0:allkmem (13, 3) 0600 root sys
add link /dev/allkmem=../devices/pseudo/mm@0:allkmem
add c devices/pseudo/mm@0:zero (13, 12) 0666 root sys
add link /dev/zero=../devices/pseudo/mm@0:zero
add c devices/pseudo/openeepr@0:openprom (6, 0) 0640 root sys
add link /dev/openprom=../devices/pseudo/openeepr@0:openprom
add c devices/pseudo/sad@0:admin (12, 1) 0666 root sys
add link /dev/sad/admin=../../devices/pseudo/sad@0:admin
add c devices/pseudo/sad@0:user (12, 0) 0666 root sys
add link /dev/sad/user=../../devices/pseudo/sad@0:user
add c devices/pseudo/sy@0:tty (22, 0) 0666 root tty
add link /dev/tty=../devices/pseudo/sy@0:tty
add c devices/pseudo/sysevent@0:sysevent (152, 0) 0600 root sys
add link /dev/sysevent=../devices/pseudo/sysevent@0:sysevent
add c devices/pseudo/sysmsg@0:msglog (97, 1) 0600 root sys
add link /dev/msglog=../devices/pseudo/sysmsg@0:msglog
add c devices/pseudo/sysmsg@0:sysmsg (97, 0) 0600 root sys
add link /dev/sysmsg=../devices/pseudo/sysmsg@0:sysmsg
add c devices/pseudo/tl@0:ticots (105, 0) 0666 root sys
add link /dev/ticots=../devices/pseudo/tl@0:ticots
add c devices/pseudo/tl@0:ticotsord (105, 1) 0666 root sys
add link /dev/ticotsord=../devices/pseudo/tl@0:ticotsord
add c devices/pseudo/tl@0:ticlts (105, 2) 0666 root sys
add link /dev/ticlts=../devices/pseudo/tl@0:ticlts
add c devices/pseudo/wc@0:wscons (15, 0) 0600 root sys
add link /dev/wscons=../devices/pseudo/wc@0:wscons
add c devices/pseudo/conskbd@0:kbd (103, 0) 0666 root sys
add link /dev/kbd=../devices/pseudo/conskbd@0:kbd
Loading the Sun Solaris 10 Operating System
OL-18083-01
Installation of <SUNWcsd> was successful.
422 blocks
Cisco PGW 2200 Softswitch Release 9.8 Software Installation and Configuration Guide
2-35
Page 50

Loading the Sun Solaris 10 Operating System
Installation of <SUNWzlib> was successful.
3826 blocks
Installation of <SUNWlibmsr> was successful.
Installation of <SUNWlibms> was successful.
5495 blocks
Installation of <SUNWlxml> was successful.
Installation of <SUNWxwrtl> was successful.
Installation of <SUNWbzip> was successful.
22155 blocks
Installation of <SUNWxwfnt> was successful.
440 blocks
Installation of <SUNWxwice> was successful.
63 blocks
Installation of <SUNWxwdv> was successful.
3 blocks
Chapter 2 Installing the Sun Solaris 10 Operating System
Installation of <SUNWxwplr> was successful.
8688 blocks
Installation of <SUNWperl584core> was successful.
39013 blocks
Installation of <SUNWperl584usr> was successful.
3641 blocks
Installation of <SUNWesu> was successful.
118 blocks
Installation of <SUNWcpp> was successful.
Installation of <SUNWdtcor> was successful.
31656 blocks
Installation of <SUNWxwplt> was successful.
1019 blocks
Installation of <SUNWlexpt> was successful.
Installation of <SUNWgcmn> was successful.
116 blocks
Installation of <SUNWctpls> was successful.
18841 blocks
Installation of <SUNWmfrun> was successful.
260 blocks
2-36
Installation of <SUNWxwacx> was successful.
3 blocks
Installation of <SUNWsshdr> was successful.
390 blocks
Installation of <SUNWadmlib-sysid> was successful.
27 blocks
Cisco PGW 2200 Softswitch Release 9.8 Software Installation and Configuration Guide
OL-18083-01
Page 51

Chapter 2 Installing the Sun Solaris 10 Operating System
Installation of <SUNWadmr> was successful.
3755 blocks
Installation of <SUNWadmap> was successful.
Installation of <SUNWgssc> was successful.
554 blocks
Installation of <SUNWgss> was successful.
11613 blocks
Installation of <SUNWopenssl-libraries> was successful.
687 blocks
Installation of <SUNWsshcu> was successful.
694 blocks
Installation of <SUNWsshdu> was successful.
Installation of <SUNWdtdmr> was successful.
6063 blocks
Installation of <SUNWtltk> was successful.
134 blocks
Loading the Sun Solaris 10 Operating System
Installation of <SUNWgzip> was successful.
173 blocks
Installation of <SUNWsshr> was successful.
970 blocks
Installation of <SUNWsshu> was successful.
11214 blocks
Installation of <SUNWlibC> was successful.
151975 blocks
Installation of <SUNWj5rt> was successful.
580 blocks
Installation of <SUNWwbsup> was successful.
Installation of <SUNWinstall-patch-utils-root> was successful.
Installation of <SUNWswmt> was successful.
5206 blocks
Installation of <SUNWmdr> was successful.
1139 blocks
Installation of <SUNWmdu> was successful.
2937 blocks
Installation of <SUNWadmc> was successful.
4275 blocks
OL-18083-01
Installation of <SUNWnfsckr> was successful.
89 blocks
Installation of <SUNWnfscr> was successful.
426 blocks
Installation of <SUNWnfscu> was successful.
Cisco PGW 2200 Softswitch Release 9.8 Software Installation and Configuration Guide
2-37
Page 52

Loading the Sun Solaris 10 Operating System
8 blocks
Installation of <SUNWkrbr> was successful.
3840 blocks
Installation of <SUNWkrbu> was successful.
259 blocks
Installation of <SUNWbip> was successful.
237 blocks
Installation of <SUNWtnetc> was successful.
1498 blocks
Installation of <SUNWrcmdc> was successful.
4857 blocks
Reboot client to install driver.
Installation of <SUNWib> was successful.
2431 blocks
Reboot client to install driver.
Installation of <SUNWtavor> was successful.
599 blocks
Chapter 2 Installing the Sun Solaris 10 Operating System
Installation of <SUNWtcsh> was successful.
1085 blocks
Installation of <SUNWtecla> was successful.
1978 blocks
Installation of <SUNWter> was successful.
1975 blocks
Installation of <SUNWpr> was successful.
10669 blocks
Installation of <SUNWtls> was successful.
90 blocks
Installation of <SUNWtnetd> was successful.
Installation of <SUNWtnetr> was successful.
1039 blocks
Installation of <SUNWtnfc> was successful.
97 blocks
Installation of <SUNWtnfd> was successful.
1784 blocks
Installation of <SUNWtoo> was successful.
Installation of <SUNWucbt> was successful.
2-38
Installation of <SUNWudaplr> was successful.
382 blocks
Installation of <SUNWudaplu> was successful.
256 blocks
Installation of <SUNWipoib> was successful.
680 blocks
Cisco PGW 2200 Softswitch Release 9.8 Software Installation and Configuration Guide
OL-18083-01
Page 53

Chapter 2 Installing the Sun Solaris 10 Operating System
Installation of <SUNWudapltu> was successful.
559 blocks
Reboot client to install driver.
Installation of <SUNWudapltr> was successful.
Installation of <SUNWocfr> was successful.
974 blocks
Installation of <SUNWocf> was successful.
1580 blocks
Reboot client to install driver.
Reboot client to install driver.
Reboot client to install driver.
Reboot client to install driver.
Reboot client to install driver.
Reboot client to install driver.
Reboot client to install driver.
Reboot client to install driver.
Reboot client to install driver.
Removing empty OWconfig
Installation of <SUNWos86r> was successful.
Loading the Sun Solaris 10 Operating System
Installation of <SUNWrmodr> was successful.
Reboot client to install driver.
Installation of <CADP160> was successful.
1069 blocks
Reboot client to install driver.
Installation of <SUNWaudd> was successful.
3863 blocks
Reboot client to install driver.
Reboot client to install driver.
Reboot client to install driver.
Reboot client to install driver.
Reboot client to install driver.
Reboot client to install driver.
Reboot client to install driver.
Reboot client to install driver.
Reboot client to install driver.
Reboot client to install driver.
Installation of <SUNWusb> was successful.
138 blocks
Installation of <SUNWusbs> was successful.
465 blocks
Reboot client to install driver.
Installation of <SUNWuedg> was successful.
732 blocks
Modifying /a/kernel/drv/sd.conf
Reboot client to install driver.
OL-18083-01
Installation of <HPFC> was successful.
66 blocks
Installation of <NCRos86r> was successful.
151 blocks
Reboot client to install driver.
Installation of <SUNWugen> was successful.
Cisco PGW 2200 Softswitch Release 9.8 Software Installation and Configuration Guide
2-39
Page 54

Loading the Sun Solaris 10 Operating System
379 blocks
Reboot client to install driver.
Installation of <SK98sol> was successful.
679 blocks
Reboot client to install driver.
Installation of <SKfp> was successful.
8309 blocks
Installation of <SUNWeurf> was successful.
2429 blocks
Reboot client to install driver.
Installation of <SUNW1394> was successful.
1423 blocks
Installation of <SUNWxi18n> was successful.
95 blocks
Installation of <SUNWvld> was successful.
40 blocks
Installation of <SUNWvldu> was successful.
1198 blocks
Chapter 2 Installing the Sun Solaris 10 Operating System
Installation of <SUNWbash> was successful.
Installation of <SUNWproduct-registry-root> was successful.
817 blocks
registry conversion not required
Installation of <SUNWwsr2> was successful.
158 blocks
Reboot client to install driver.
Installation of <SUNWaac> was successful.
3 blocks
Installation of <SUNWaccr> was successful.
511 blocks
Installation of <SUNWaccu> was successful.
Installation of <SUNWgrub> was successful.
Installation of <SUNWadmfr> was successful.
1167 blocks
Installation of <SUNWadmfw> was successful.
80 blocks
Installation of <SUNWi15rf> was successful.
Reboot client to install driver.
Installation of <SUNWadp> was successful.
2-40
Installation of <SUNWradpu320> was successful.
1216 blocks
Reboot client to install driver.
Installation of <SUNWadpu320> was successful.
136 blocks
Reboot client to install driver.
Cisco PGW 2200 Softswitch Release 9.8 Software Installation and Configuration Guide
OL-18083-01
Page 55

Chapter 2 Installing the Sun Solaris 10 Operating System
Installation of <SUNWamr> was successful.
2519 blocks
Installation of <SUNWsprot> was successful.
190 blocks
Installation of <SUNWrsg> was successful.
453 blocks
Installation of <SUNWgssdh> was successful.
671 blocks
Installation of <SUNWgssk> was successful.
1251 blocks
Reboot client to install driver.
Installation of <SUNWxge> was successful.
2194 blocks
Installation of <SUNWbtool> was successful.
24616 blocks
Installation of <SUNWcslr> was successful.
1022 blocks
Loading the Sun Solaris 10 Operating System
Installation of <SUNWidnl> was successful.
1830 blocks
Installation of <SUNWinst> was successful.
596 blocks
Reboot client to install driver.
Installation of <SUNWintgige> was successful.
41 blocks
Installation of <SUNWipc> was successful.
119 blocks
Installation of <SUNWipfr> was successful.
3499 blocks
Installation of <SUNWipfu> was successful.
6407 blocks
/a/etc/lu/synclist
Installing /a/etc/default/lu
Installation of <SUNWlur> was successful.
3495 blocks
Installation of <SUNWluu> was successful.
Reboot client to install driver.
Installation of <SUNWiscsir> was successful.
Installation of <SUNWiscsiu> was successful.
790 blocks
OL-18083-01
Installation of <SUNWloc> was successful.
83 blocks
Installation of <SUNWnisr> was successful.
3891 blocks
Cisco PGW 2200 Softswitch Release 9.8 Software Installation and Configuration Guide
2-41
Page 56

Loading the Sun Solaris 10 Operating System
Installation of <SUNWnisu> was successful.
45 blocks
Installation of <SUNWzebrar> was successful.
4056 blocks
Installation of <SUNWzebrau> was successful.
267 blocks
Installation of <SUNWzip> was successful.
9 blocks
Installation of <SUNWzoner> was successful.
606 blocks
Installation of <SUNWluzone> was successful.
Installation of <SUNWpoolr> was successful.
1366 blocks
Installation of <SUNWpool> was successful.
878 blocks
Installation of <SUNWzoneu> was successful.
4985 blocks
Chapter 2 Installing the Sun Solaris 10 Operating System
Installation of <SUNWzsh> was successful.
Reboot client to install driver.
Installation of <SYMhisl> was successful.
72 blocks
Installation of <SUNWcpc> was successful.
Installation of <SUNWbindr> was successful.
4546 blocks
Installation of <SUNWbind> was successful.
Installation of <SUNWbipr> was successful.
Reboot client to install driver.
Installation of <SUNWcadp> was successful.
955 blocks
Reboot client to install driver.
Installation of <SUNWced> was successful.
161 blocks
Installation of <SUNWcfcl> was successful.
Installation of <SUNWcfclr> was successful.
253 blocks
Installation of <SUNWluxop> was successful.
594 blocks
2-42
Installation of <SUNWcfpl> was successful.
2 blocks
Installation of <SUNWcfplr> was successful.
3979 blocks
Installation of <SUNWjss> was successful.
Cisco PGW 2200 Softswitch Release 9.8 Software Installation and Configuration Guide
OL-18083-01
Page 57

Chapter 2 Installing the Sun Solaris 10 Operating System
918 blocks
Installation of <SUNWcpcu> was successful.
29 blocks
Reboot client to install driver.
Installation of <SUNWcqhpc> was successful.
215 blocks
Installation of <SUNWkey> was successful.
128 blocks
Installation of <SUNWeuodf> was successful.
231 blocks
Installation of <SUNWless> was successful.
184 blocks
Installation of <SUNWcstl> was successful.
928 blocks
Installation of <SUNWlibsasl> was successful.
314 blocks
Loading the Sun Solaris 10 Operating System
Installation of <SUNWlldap> was successful.
228 blocks
Reboot client to install driver.
Installation of <SUNWlsimega> was successful.
10159 blocks
Installation of <SUNWmdb> was successful.
29 blocks
Installation of <SUNWmdbdm> was successful.
6853 blocks
Installation of <SUNWmdbr> was successful.
3972 blocks
Installation of <SUNWdtrc> was successful.
1313 blocks
Installation of <SUNWdtrp> was successful.
1227 blocks
Reboot client to install driver.
Installation of <SUNWfctl> was successful.
3552 blocks
Reboot client to install driver.
Installation of <SUNWemlxs> was successful.
2568 blocks
OL-18083-01
Installation of <SUNWemlxu> was successful.
174 blocks
Installation of <SUNWmibii> was successful.
1332 blocks
Installation of <SUNWsasnm> was successful.
1106 blocks
Installation of <SUNWsadmi> was successful.
Cisco PGW 2200 Softswitch Release 9.8 Software Installation and Configuration Guide
2-43
Page 58

Loading the Sun Solaris 10 Operating System
328 blocks
Installation of <SUNWsacom> was successful.
40 blocks
Installation of <SUNWmipr> was successful.
468 blocks
Installation of <SUNWmipu> was successful.
844 blocks
Installation of <SUNWmkcd> was successful.
Modifying /a/etc/hba.conf
Installation of <SUNWfchbar> was successful.
3366 blocks
Installation of <SUNWfchba> was successful.
537 blocks
Reboot client to install driver.
Installation of <SUNWfcip> was successful.
312 blocks
Chapter 2 Installing the Sun Solaris 10 Operating System
Installation of <SUNWfcmdb> was successful.
803 blocks
Reboot client to install driver.
Installation of <SUNWfcp> was successful.
79 blocks
Installation of <SUNWfcprt> was successful.
361 blocks
Reboot client to install driver.
Installation of <SUNWfcsm> was successful.
3020 blocks
Installation of <SUNWfmd> was successful.
197 blocks
Installation of <SUNWfss> was successful.
275 blocks
Reboot client to install driver.
Installation of <SUNWnge> was successful.
1 blocks
Installation of <SUNWpkgcmdsr> was successful.
4530 blocks
Installation of <SUNWpkgcmdsu> was successful.
1509 blocks
Reboot client to install driver.
2-44
Installation of <SUNWpsdcr> was successful.
Installation of <SUNWsolnm> was successful.
590 blocks
Reboot client to install driver.
Installation of <SUNWpsdir> was successful.
3866 blocks
Reboot client to install driver.
Cisco PGW 2200 Softswitch Release 9.8 Software Installation and Configuration Guide
OL-18083-01
Page 59

Chapter 2 Installing the Sun Solaris 10 Operating System
Installation of <SUNWqlc> was successful.
387 blocks
Installation of <SUNWqos> was successful.
136 blocks
Installation of <SUNWqosu> was successful.
2 blocks
Installation of <SUNWrmodu> was successful.
497 blocks
Installation of <SUNWroute> was successful.
271 blocks
Reboot client to install driver.
Installation of <SUNWrpcib> was successful.
145 blocks
Installation of <SUNWrsgk> was successful.
89 blocks
Reboot client to install driver.
Loading the Sun Solaris 10 Operating System
Installation of <SUNWrtls> was successful.
125 blocks
Installation of <SUNWspnego> was successful.
Solaris 10 software installation succeeded
Solaris 10 packages fully installed
SUNWcsu
SUNWcsr
SUNWcsl
SUNWcnetr
SUNWckr
SUNWkvm
SUNWcar
SUNWcakr
SUNWcsd
SUNWzlib
SUNWlibmsr
SUNWlibms
SUNWlxml
SUNWxwrtl
SUNWbzip
SUNWxwfnt
SUNWxwice
SUNWxwdv
SUNWxwplr
SUNWperl584core
SUNWperl584usr
SUNWesu
SUNWcpp
SUNWdtcor
SUNWxwplt
SUNWlexpt
SUNWgcmn
SUNWctpls
SUNWmfrun
SUNWxwacx
SUNWsshdr
SUNWadmlib-sysid
OL-18083-01
Cisco PGW 2200 Softswitch Release 9.8 Software Installation and Configuration Guide
2-45
Page 60

Loading the Sun Solaris 10 Operating System
SUNWadmr
SUNWadmap
SUNWgssc
SUNWgss
SUNWopenssl-libraries
SUNWsshcu
SUNWsshdu
SUNWdtdmr
SUNWtltk
SUNWgzip
SUNWsshr
SUNWsshu
SUNWlibC
SUNWj5rt
SUNWwbsup
SUNWinstall-patch-utils-root
SUNWswmt
SUNWmdr
SUNWmdu
SUNWadmc
SUNWnfsckr
SUNWnfscr
SUNWnfscu
SUNWkrbr
SUNWkrbu
SUNWbip
SUNWtnetc
SUNWrcmdc
SUNWib
SUNWtavor
SUNWtcsh
SUNWtecla
SUNWter
SUNWpr
SUNWtls
SUNWtnetd
SUNWtnetr
SUNWtnfc
SUNWtnfd
SUNWtoo
SUNWucbt
SUNWudaplr
SUNWudaplu
SUNWipoib
SUNWudapltu
SUNWudapltr
SUNWocfr
SUNWocf
SUNWos86r
SUNWrmodr
CADP160
SUNWaudd
SUNWusb
SUNWusbs
SUNWuedg
HPFC
NCRos86r
SUNWugen
SK98sol
SKfp
SUNWeurf
SUNW1394
SUNWxi18n
SUNWvld
Chapter 2 Installing the Sun Solaris 10 Operating System
2-46
Cisco PGW 2200 Softswitch Release 9.8 Software Installation and Configuration Guide
OL-18083-01
Page 61

Chapter 2 Installing the Sun Solaris 10 Operating System
SUNWvldu
SUNWbash
SUNWproduct-registry-root
SUNWwsr2
SUNWaac
SUNWaccr
SUNWaccu
SUNWgrub
SUNWadmfr
SUNWadmfw
SUNWi15rf
SUNWadp
SUNWradpu320
SUNWadpu320
SUNWamr
SUNWsprot
SUNWrsg
SUNWgssdh
SUNWgssk
SUNWxge
SUNWbtool
SUNWcslr
SUNWidnl
SUNWinst
SUNWintgige
SUNWipc
SUNWipfr
SUNWipfu
SUNWlur
SUNWluu
SUNWiscsir
SUNWiscsiu
SUNWloc
SUNWnisr
SUNWnisu
SUNWzebrar
SUNWzebrau
SUNWzip
SUNWzoner
SUNWluzone
SUNWpoolr
SUNWpool
SUNWzoneu
SUNWzsh
SYMhisl
SUNWcpc
SUNWbindr
SUNWbind
SUNWbipr
SUNWcadp
SUNWced
SUNWcfcl
SUNWcfclr
SUNWluxop
SUNWcfpl
SUNWcfplr
SUNWjss
SUNWcpcu
SUNWcqhpc
SUNWkey
SUNWeuodf
SUNWless
SUNWcstl
SUNWlibsasl
Loading the Sun Solaris 10 Operating System
OL-18083-01
Cisco PGW 2200 Softswitch Release 9.8 Software Installation and Configuration Guide
2-47
Page 62

Loading the Sun Solaris 10 Operating System
SUNWlldap
SUNWlsimega
SUNWmdb
SUNWmdbdm
SUNWmdbr
SUNWdtrc
SUNWdtrp
SUNWfctl
SUNWemlxs
SUNWemlxu
SUNWmibii
SUNWsasnm
SUNWsadmi
SUNWsacom
SUNWmipr
SUNWmipu
SUNWmkcd
SUNWfchbar
SUNWfchba
SUNWfcip
SUNWfcmdb
SUNWfcp
SUNWfcprt
SUNWfcsm
SUNWfmd
SUNWfss
SUNWnge
SUNWpkgcmdsr
SUNWpkgcmdsu
SUNWpsdcr
SUNWsolnm
SUNWpsdir
SUNWqlc
SUNWqos
SUNWqosu
SUNWrmodu
SUNWroute
SUNWrpcib
SUNWrsgk
SUNWrtls
SUNWspnego
Chapter 2 Installing the Sun Solaris 10 Operating System
2-48
Customizing system files
- Mount points table (/etc/vfstab)
fd- /dev/fdfd- no /proc-/procproc- no /dev/dsk/c1t0d0s3--swap-no /dev/dsk/c1t0d0s0/dev/rdsk/c1t0d0s0/ufs1no /dev/dsk/c1t0d0s1/dev/rdsk/c1t0d0s1/varufs1no /dev/dsk/c1t0d0s5/dev/rdsk/c1t0d0s5/optufs2yes /devices-/devicesdevfs-no ctfs- /system/contractctfs-no objfs-/system/objectobjfs-no swap- /tmptmpfs- yes -
- Network host addresses (/etc/hosts)
- Network host addresses (/etc/hosts)
- Environment variables (/etc/default/init)
Cleaning devices
Customizing system devices
- Physical devices (/devices)
- Logical devices (/dev)
Cisco PGW 2200 Softswitch Release 9.8 Software Installation and Configuration Guide
OL-18083-01
Page 63

Chapter 2 Installing the Sun Solaris 10 Operating System
Installing boot information
- Updating boot environment configuration file
- Installing boot blocks (c1t0d0)
Installation complete
Executing SolStart postinstall phase...
Executing finish script "patch_finish"...
Finish script patch_finish execution completed.
Executing JumpStart postinstall phase...
all finished
Finish script any_finish execution completed.
The begin script log 'begin.log'
is located in /var/sadm/system/logs after reboot.
The finish script log 'finish.log'
is located in /var/sadm/system/logs after reboot.
Note You may be prompted during the reboot to enter Ctrl-B or Ctrl-C to open configuration tools for your
hardware. You do not need to open any of these tools to complete this installation.
Loading the Sun Solaris 10 Operating System
Caution The CD is automatically ejected from the CD-ROM drive prior to rebooting to ensure that the host is
rebooted from the newly installed operating system. Do not reinsert the CD into the CD-ROM drive at
this time.
syncing file systems... done
rebooting...
Resetting ...
Note You can select your terminal type from the picklist or the default terminal type (from the serial
port). Cisco recommends that you use the default terminal while you are installing software.
screen not found.
Can't open input device.
Keyboard not present. Using ttya for input and output.
SunFire V40z, No Keyboard
OpenBoot 3.23, 4096 MB memory installed, Serial #12797485.
Ethernet address 8:0:20:c3:46:2d, Host ID: 80c3462d.
Rebooting with command: boot
Boot device: /pci@1f,4000/scsi@3/disk@0,0:a File and args:
SunOS Release 5.10 Version Generic 64-bit
Copyright 1983-2005 Sun Microsystems, Inc. All rights reserved.
Use is subject to license terms.
Hostname: va-host
Configuring devices.
Loading smf(5) service descriptions: 67/67
checking ufs filesystems
/dev/rdsk/c0t0d0s5: is logging.
Creating new rsa public/private host key pair
Creating new dsa public/private host key pair
Configuring network interface addresses: ce0 hme0 hme1
OL-18083-01
Cisco PGW 2200 Softswitch Release 9.8 Software Installation and Configuration Guide
2-49
Page 64

Loading the Sun Solaris 10 Operating System
This system is configured with NFS version 4, which uses a domain
name that is automatically derived from the system's name services.
The derived domain name is sufficient for most configurations. In a
few cases, mounts that cross different domains might cause files to
be owned by "nobody" due to the lack of a common domain name.
Do you need to override the system's default NFS version 4 domain
name (yes/no) ? [no] :
Step 7 Enter no to continue the reconfiguration process and press Enter.
The system displays information similar to the following:
For more information about how the NFS version 4 default domain
name is derived and its impact, refer to the man pages for nfs(4)
and nfsmapid(1m), and the System Administration Guide: Network
Services.
vtghost console login:
This completes the installation of the Sun Solaris 10 operating system. Proceed to the “Configuring Your
Host” section on page 2-50.
Chapter 2 Installing the Sun Solaris 10 Operating System
Configuring Your Host
Step 1 If you are already logged in to your host platform, proceed to Step 2. Otherwise log in as root and use
the default password, vtghost. The system displays something similar to the following:
Sep 8 01:15:08 vtghost login: ROOT LOGIN /dev/console
Sun Microsystems Inc. SunOS 5.10 Generic January 2005.
#
Step 2 Reconfigure the system by entering the sys-unconfig command and pressing Enter.
A screen similar to the following is displayed:
WARNING
This program will unconfigure your system. It will cause it
to revert to a "blank" system - it will not have a name or know
about other systems or networks.
This program will also halt the system.
Do you want to continue (y/n) ?
Step 3 Enter y to continue the reconfiguration process and press Enter.
The system displays information similar to the following:
svc.startd: The system is coming down. Please wait.
svc.startd: 57 system services are now being stopped.
Sep 8 01:22:21 vtghost rpcbind: rpcbind terminating on signal.
2-50
svc.startd: The system is down.
syncing file systems... done
Program terminated
{1} ok
Cisco PGW 2200 Softswitch Release 9.8 Software Installation and Configuration Guide
OL-18083-01
Page 65

Chapter 2 Installing the Sun Solaris 10 Operating System
Step 4 Reboot your system using the method identified for your platform type:
• Sparc-based platforms—Enter the boot command and press Enter to reboot the system.
• Opteron-based platforms—Press any key to reboot the system.
Note If you are installing Solaris 10 on an Opteron-based platform, you might be prompted during the reboot
to enter Ctrl-B or Ctrl-C to open configuration tools for your hardware. You do not need to open any of
these tools to complete this installation.
The system displays information similar to the following:
SC Alert: Host System has Reset
Probing system devices
Probing memory
Probing I/O buses
Sun Fire V210, No Keyboard
Copyright 2005 Sun Microsystems, Inc. All rights reserved.
OpenBoot 4.18.5, 2048 MB memory installed, Serial #52030991.
Ethernet address 0:3:ba:19:ee:f, Host ID: 8319ee0f.
Loading the Sun Solaris 10 Operating System
Initializing 1MB of memory at addr 103feec000
Initializing 1MB of memory at addr 103fee0000
Initializing 15MB of memory at addr 103f002000
Initializing 16MB of memory at addr 103e002000
Initializing 992MB of memory at addr 1000000000
Initializing 1024MB of memory at addr 0
Rebooting with command: boot
Boot device: /pci@1c,600000/scsi@2/disk@0,0:a File and args:
SunOS Release 5.10 Version Generic_118833-17 64-bit
Copyright 1983-2005 Sun Microsystems, Inc. All rights reserved.
Use is subject to license terms.
Hardware watchdog enabled
Hostname: unknown
Configuring devices.
checking ufs filesystems
/dev/rdsk/c1t0d0s5: is logging.
Step 5 If you are installing on a Sparc-based platform, you must select your terminal type when a screen similar
to the following is displayed:
What type of terminal are you using?
1) ANSI Standard CRT
2) DEC VT52
3) DEC VT100
4) Heathkit 19
5) Lear Siegler ADM31
6) PC Console
7) Sun Command Tool
8) Sun Workstation
9) Televideo 910
10) Televideo 925
11) Wyse Model 50
12) X Terminal Emulator (xterms)
13) CDE Terminal Emulator (dtterm)
13) Other
Type the number of your choice and press Return:
OL-18083-01
Cisco PGW 2200 Softswitch Release 9.8 Software Installation and Configuration Guide
2-51
Page 66

Loading the Sun Solaris 10 Operating System
Note On Opteron-based platforms, you can select a terminal type from the picklist, or the default
terminal type (from the serial port) is used. We recommend that you use the default terminal
while you are installing software.
Enter the number that corresponds to the terminal you are using and press Enter. For example, if you
are using an X terminal emulator, type 12 and press Enter.
The system displays information similar to the following:
Creating new rsa public/private host key pair
Creating new dsa public/private host key pair
Configuring network interface addresses: bge0 bge1 bge2 bge3.
Text similar to the following is displayed:
in.rdisc: No interfaces up
- Network Connectivity --------------------------------------------------------
Specify Yes if the system is connected to the network by one of the Solaris
or vendor network/communication Ethernet cards that are supported on the
Solaris CD. Refer to your hardware documentation for the current list of
supported cards.
Specify No if the system is connected to a network/communication card that
is not supported on the Solaris CD, and follow the instructions listed under
Help.
Chapter 2 Installing the Sun Solaris 10 Operating System
Networked
-------- [X] Yes
[ ] No
-------------------------------------------------------------------------------
ESC-2_Continue ESC-6_Help
Step 6 Use the arrow keys to navigate, and press the spacebar to make your selection. Verify that Yes is selected,
and press ESC-2 to continue.
Text similar to the following is displayed:
- Configure Multiple Network Interfaces ---------------------------------------
Multiple network interfaces have been detected on this system. Specify all
of the network interfaces you want to configure.
Note: You must choose at least one interface to configure.
Network interfaces
----------------- [ ] bge0
[ ] bge1
[ ] bge2
[ ] bge3
------------------------------------------------------------------------------ ESC-2_Continue ESC-6_Help
2-52
Cisco PGW 2200 Softswitch Release 9.8 Software Installation and Configuration Guide
OL-18083-01
Page 67

Chapter 2 Installing the Sun Solaris 10 Operating System
Note This screen may show a different interface, depending on the platform and PCI card that are
installed. For details, see Table 2-1 on page 2-3 (“Device Names on Supported Host Platforms”).
Caution The interface configuration prompts do not provide an option to return to a previous step or exit interface
configuration. If you enter an incorrect value, power down the Cisco PGW 2200 Softswitch, power up
the Cisco PGW 2200 Softswitch, and return to Step 4.
Step 7 Select the interface(s) you want to configure and press ESC-2 to continue.
If you chose to configure a single interface, proceed to Step 9.
If you chose to configure multiple interfaces, proceed to Step 8.
Step 8 Text similar to the following is displayed:
- Primary Network Interface ---------------------------------------------------
On this screen you must specify which of the following network adapters is
the system's primary network interface. Usually the correct choice is the
lowest number. However, do not guess; ask your system administrator if
you're not sure.
Loading the Sun Solaris 10 Operating System
> To make a selection, use the arrow keys to highlight the option and
press Return to mark it [X].
Primary network interface
--------------- [ ] bge0
[ ] bge1
[ ] bge2
[ ] bge3
------------------------------------------------------------------------------ ESC-2_Continue ESC-6_Help
Select your primary network interface and press ESC-2 to continue.
Step 9 Text similar to the following is displayed:
- DHCP for bge0 -----------------------------------------------------------------
Specify whether or not this network interface should use DHCP to configure
itself. Choose Yes if DHCP is to be used, or No if the network interface is
to be configured manually.
NOTE: DHCP support will not be enabled, if selected, until after the system
reboots.
Use DHCP for bge0
--------------- [ ] Yes
[X] No
OL-18083-01
------------------------------------------------------------------------------ ESC-2_Continue ESC-6_Help
Step 10 Verify that No is selected and press ESC-2 to continue.
Cisco PGW 2200 Softswitch Release 9.8 Software Installation and Configuration Guide
2-53
Page 68

Loading the Sun Solaris 10 Operating System
Text similar to the following is displayed:
- Host Name for bge0 -----------------------------------------------------------
Enter the host name which identifies this system on the network. The name
must be unique within your domain; creating a duplicate host name will cause
problems on the network after you install Solaris.
A host name must be at least two characters; it can contain letters, digits,
and minus signs (-).
Host name for bge0:
------------------------------------------------------------------------------ ESC-2_Continue ESC-6_Help
Caution If you are configuring your system with multiple interfaces, remember that each interface must have a
unique name. Using the same name for multiple interfaces causes the installation script to enter a loop,
forcing you to reboot your system.
Chapter 2 Installing the Sun Solaris 10 Operating System
Step 11 Ty p e the host name of the target Netra machine, and press ESC-2 to continue.
Note For machine-specific information such as host name, see your notes in “Preparing for Sun
Solaris Operating System and Cisco PGW 2200 Softswitch Software Installation” Table 1-3 ,
“Machine-Specific Checklist” if you used the checklist to note the host name.
Text similar to the following is displayed:
- IP Address for bge0 -----------------------------------------------------------
Enter the Internet Protocol (IP) address for this network interface. It
must be unique and follow your site's address conventions, or a
system/network failure could result.
IP addresses contain four sets of numbers separated by periods (for example
129.200.9.1).
IP address:
------------------------------------------------------------------------------- ESC-2_Continue ESC-6_Help
Step 12 Enter the IP address of this interface in dotted decimal format and press ESC-2 to continue.
Note See “Machine-Specific Checklist” in Table 1 -3 if you used the checklist to record the IP address.
2-54
Text similar to the following is displayed:
- Subnet for bge0 --------------------------------------------------------------
On this screen you must specify whether this system is part of a subnet. If
you specify incorrectly, the system will have problems communicating on the
network after you reboot.
> To make a selection, use the arrow keys to highlight the option and
press Return to mark it [X].
Cisco PGW 2200 Softswitch Release 9.8 Software Installation and Configuration Guide
OL-18083-01
Page 69

Chapter 2 Installing the Sun Solaris 10 Operating System
System part of a subnet
---------------------- [X] Yes
[ ] No
------------------------------------------------------------------------------ ESC-2_Continue ESC-6_Help
Note If you need to modify your IP addresses after you have installed Sun Solaris 10, there are three
files you need to update, instead of the two files required in previous releases of Sun Solaris
operating system software. The following files must be edited to in order to modify the IP
address for an interface:
/etc/inet/hosts
/etc/hostname.inf_name
/etc/inet/ipnodes
Where inf_name is the name of the interface, such as bge1.
Loading the Sun Solaris 10 Operating System
Step 13 Verify that Ye s is selected (use the arrow keys to move the cursor to Yes and press the spacebar to select
it). Press ESC-2 to continue.
A screen similar to the following is displayed:
- Netmask for bge0 -------------------------------------------------------------
On this screen you must specify the netmask of your subnet. A default
netmask is shown; do not accept the default unless you are sure it is
correct for your subnet. A netmask must contain four sets of numbers
separated by periods (for example 255.255.255.0).
Netmask:
--------------------------------------------------------------------------------- ESC-2_Continue ESC-6_Help
Step 14 Enter the site-specific Subnet Mask for the subnet (see “Site-Specific Information” in Table 1 - 2 , if you
recorded the information provided by your site administrator in this table). Press ESC-2 to continue.
Text similar to the following is displayed:
- IPv6 for bge0 -----------------------------------------------------------------
Specify whether or not you want to enable IPv6, the next generation Internet
Protocol, on this network interface. Enabling IPv6 will have no effect if
this machine is not on a network that provides IPv6 service. IPv4 service
will not be affected if IPv6 is enabled.
OL-18083-01
> To make a selection, use the arrow keys to highlight the option and
press Return to mark it [X].
Enable IPv6 for bge0
------------------ [ ] Yes
[X] No
Cisco PGW 2200 Softswitch Release 9.8 Software Installation and Configuration Guide
2-55
Page 70

Loading the Sun Solaris 10 Operating System
------------------------------------------------------------------------------ ESC-2_Continue ESC-6_Help
Note The system takes approximately 30 seconds to process this selection. A countdown appears in the
display after you activate your choice.
Step 15 Ve r i f y t ha t No is selected and press ESC-2 to continue.
Text similar to the following is displayed:
- Set the Default Route for bge0 -----------------------------------------------
To specify the default route, you can let the software try to detect one
upon reboot, you can specify the IP address of the router, or you can choose
None. Choose None if you do not have a router on your subnet.
> To make a selection, use the arrow keys to select your choice and press
Return to mark it [X].
Default Route for bge0
------------------------- [ ] Detect one upon reboot
[X] Specify one
[ ] None
Chapter 2 Installing the Sun Solaris 10 Operating System
------------------------------------------------------------------------------ ESC-2_Continue ESC-6_Help
Step 16 Ve r i f y t ha t Specify one is selected and press ESC-2 to continue.
Text similar to the following is displayed:
- Default Route IP Address for bge0 --------------------------------------------
Enter the IP address of the default route. This entry will be placed in the
/etc/defaultrouter file and will be the default route after you reboot
(example 129.146.89.225).
Router IP Address for bge0
------------------------------------------------------------------------------ ESC_Continue ESC-6_Help
Step 17 Enter the Router IP address of this interface in dotted decimal format and press ESC-2 to continue.
Note See “Solaris 10 Required Media Checklist” in Table 1-2 if you used the checklist to record the
router IP address.
Text similar to the following is displayed:
- Confirm Information for bge0 -------------------------------------------------
2-56
> Confirm the following information. If it is correct, press F2;
to change any information, press F4.
Cisco PGW 2200 Softswitch Release 9.8 Software Installation and Configuration Guide
OL-18083-01
Page 71

Chapter 2 Installing the Sun Solaris 10 Operating System
Primary network interface: Yes
Use DHCP: No
Host name: va-host
IP address: 10.74.49.153
System part of a subnet: Yes
Netmask: 255.255.255.224
Enable IPv6: No
Default Route: Specify one
Router IP Address: 10.74.49.129
------------------------------------------------------------------------------ ESC-2_Continue ESC-4_Change ESC-6_Help
Step 18 Confirm the information displayed. Press ESC-2 to accept the information and continue, or press ESC-4
to go back and make changes.
Note The system takes approximately 30 seconds to process this selection. A countdown appears in the
display after you activate your choice.
If you chose to configure a single interface, proceed to Step 20.
If you chose to configure multiple interfaces, proceed to Step 19.
Step 19 Repeat steps 9 through 18 for your next interface. These steps should be repeated until all of your
interfaces are configured.
Step 20 Text similar to the following is displayed:
- Configure Security Policy: --------------------------------------------------
Loading the Sun Solaris 10 Operating System
Specify Yes if the system will use the Kerberos security mechanism.
Specify No if this system will use standard UNIX security.
Configure Kerberos Security
-------------------------- [ ] Yes
[X] No
------------------------------------------------------------------------------ ESC-2_Continue ESC-6_Help
Step 21 Verify that No is selected and press ESC-2 to continue.
Text similar to the following is displayed:
- Confirm Information -
> Confirm the following information. If it is correct, press F2;
to change any information, press F4.
Configure Kerberos Security: No
------------------------------------------------------------------------------ ESC-2_Continue ESC-4_Change ESC-6_Help
Step 22 Confirm your previous answer of No and press ESC-2 to continue.
OL-18083-01
Text similar to the following is displayed:
Cisco PGW 2200 Softswitch Release 9.8 Software Installation and Configuration Guide
2-57
Page 72

Loading the Sun Solaris 10 Operating System
- Name Service ----------------------------------------------------------------
On this screen you must provide name service information. Select the name
service that will be used by this system, or None if your system will either
not use a name service at all, or if it will use a name service not listed
here.
> To make a selection, use the arrow keys to highlight the option
and press Return to mark it [X].
Name service
----------- [ ] NIS+
[ ] NIS
[ ] DNS
[ ] LDAP
[X] None
------------------------------------------------------------------------------ ESC-2_Continue ESC-6_Help
Chapter 2 Installing the Sun Solaris 10 Operating System
Step 23 Use the arrow keys to move the cursor to None and press the spacebar to select it. Press ESC-2 to
continue. Text similar to the following is displayed:
- DNS Search List -------------------------------------------------------------
On this screen you can enter a list of domains that will be searched when a
DNS query is made. If you do not enter any domains, DNS will only search
the DNS domain chosen for this system. The domains entered, when
concatenated, may not be longer than 250 characters.
Search domain: yourdomain.com
Search domain:
Search domain:
Search domain:
Search domain:
Search domain:
------------------------------------------------------------------------------ ESC-2_Continue ESC-6_Help
Step 24 Enter the names of the search domains for this system and press ESC-2 to continue.
Note See “Machine-Specific Checklist”, Ta b l e 1-3, if you used the checklist to record the names of
the search domains.
2-58
Text similar to the following is displayed:
- Confirm Information ---------------------------------------------------------
> Confirm the following information. If it is correct, press F2;
to change any information, press F4.
Cisco PGW 2200 Softswitch Release 9.8 Software Installation and Configuration Guide
OL-18083-01
Page 73

Chapter 2 Installing the Sun Solaris 10 Operating System
Name service: NONE
Domain name:
Server address(es):
Search domain(s): yourdomain.com
------------------------------------------------------------------------------ ESC-2_Continue ESC-4_Change ESC-6_Help
Step 25 Confirm your previous answers and press ESC-2 to continue.
Text similar to the following is displayed:
- Time Zone -------------------------------------------------------------------
On this screen you must specify your default time zone. You can specify a
time zone in three ways: select one of the continents or oceans from the
list, select other - offset from GMT, or other - specify time zone file.
> To make a selection, use the arrow keys to highlight the option and
press Return to mark it [X].
Continents and Oceans
---------------------------------------
- [ ] Africa
x [ ] Americas
x [ ] Antarctica
x [ ] Arctic Ocean
x [ ] Asia
x [ ] Atlantic Ocean
x [ ] Australia
x [ ] Europe
v [ ] Indian Ocean
------------------------------------------------------------------------------ ESC-2_Continue ESC-6_Help
Loading the Sun Solaris 10 Operating System
Step 26 Select the time zone where the system is located.
Note The following two steps show how to set the time zone. The example shows United States
Eastern time.
a. Use the arrow keys to move the cursor to Americas and press the spacebar to select it, then press
ESC-2 to continue.
Text similar to the following is displayed:
- Country or Region -------------------------------------------------------
> To make a selection, use the arrow keys to highlight the option and
press Return to mark it [X].
Countries and Regions
--------------------------
- [ ] United States
x [ ] Anguilla
x [ ] Antigua & Barbuda
x [ ] Argentina
x [ ] Aruba
x [ ] Bahamas
x [ ] Barbados
OL-18083-01
Cisco PGW 2200 Softswitch Release 9.8 Software Installation and Configuration Guide
2-59
Page 74

Loading the Sun Solaris 10 Operating System
x [ ] Belize
x [ ] Bolivia
x [ ] Brazil
x [ ] Canada
x [ ] Cayman Islands
v [ ] Chile press Return to mark it [X].
------------------------------------------------------------------------------ ESC-2_Continue ESC-6_Help
b. Use the arrow keys to move the cursor to United States and press the spacebar to select it, then press
ESC-2 to continue.
Text similar to the following is displayed:
- Time Zone -------------------------------------------------------------------
> To make a selection, use the arrow keys to highlight the option and
press Return to mark it [X].
Time zones
--------------------------------------------------------
- [ ] Eastern Time
x [ ] Eastern Time - Michigan - most locations
x [ ] Eastern Time - Kentucky - Louisville area
x [ ] Eastern Time - Kentucky - Wayne County
x [ ] Eastern Standard Time - Indiana - most locations
x [ ] Eastern Standard Time - Indiana - Crawford County
x [ ] Eastern Standard Time - Indiana - Starke County
x [ ] Eastern Standard Time - Indiana - Switzerland County
x [ ] Central Time
x [ ] Central Time - Michigan - Wisconsin border
x [ ] Central Time - North Dakota - Oliver County
x [ ] Mountain Time
v [ ] Mountain Time - south Idaho & east Oregon
Chapter 2 Installing the Sun Solaris 10 Operating System
-------------------------------------------------------------------------------
ESC-2_Continue ESC-6_Help
c. Use the arrow keys to move the cursor to your time zone (in this example, “Eastern Time” is
selected) and press the space bar to select it. Press ESC-2 to continue.
Text similar to the following is displayed:
- Date and Time ---------------------------------------------------------------
> Accept the default date and time or enter
new values.
Date and time: 2008-09-08 02:58
Year (4 digits) : 2008
Month (1-12) : 09
Day (1-31) : 08
Hour (0-23) : 02
Minute (0-59) : 58
-------------------------------------------------------------------------------
ESC-2_Continue ESC-6_Help
Step 27 Enter the correct date and time and press ESC-2 to continue.
Text similar to the following is displayed:
2-60
Cisco PGW 2200 Softswitch Release 9.8 Software Installation and Configuration Guide
OL-18083-01
Page 75

Chapter 2 Installing the Sun Solaris 10 Operating System
- Confirm Information ---------------------------------------------------------
> Confirm the following information. If it is correct, press F2;
to change any information, press F4.
Time zone: Eastern Time
(US/Eastern)
Date and time: 2008-09-08 02:58:00
------------------------------------------------------------------------------ ESC-2_Continue ESC-4_Change ESC-6_Help
Step 28 Verify the information and press ESC-2 to continue.
Text similar to the following might be displayed:
This system is configured with NFS version 4, which uses a domain
name that is automatically derived from the system's name services.
The derived domain name is sufficient for most configurations. In a
few cases, mounts that cross different domains might cause files to
be owned by "nobody" due to the lack of a common domain name.
Loading the Sun Solaris 10 Operating System
Do you need to override the system's default NFS version 4 domain
name (yes/no) ? [no] :
Step 29 Enter no to continue the reconfiguration process and press Enter.
Text similar to the following is displayed:
For more information about how the NFS version 4 default domain
name is derived and its impact, see the man pages for nfs(4)
and nfsmapid(1m), and the System Administration Guide: Network
Services.
rebooting system due to change(s) in /etc/default/init
syncing file systems... done
rebooting...
SC Alert: Host System has Reset
Probing system devices
Probing memory
Probing I/O buses
Note On Opteron-based platforms, you can select a terminal type from the picklist, or the default
terminal type (serial port). We recommend that you use the default terminal type while you are
installing software.
OL-18083-01
Sun Fire V210, No Keyboard
Copyright 2005 Sun Microsystems, Inc. All rights reserved.
OpenBoot 4.18.5, 2048 MB memory installed, Serial #52030991.
Ethernet address 0:3:ba:19:ee:f, Host ID: 8319ee0f.
Initializing 1MB of memory at addr 103feec000
Initializing 1MB of memory at addr 103fee0000
Initializing 15MB of memory at addr 103f002000
Initializing 16MB of memory at addr 103e002000
Cisco PGW 2200 Softswitch Release 9.8 Software Installation and Configuration Guide
2-61
Page 76

Loading the Sun Solaris 10 Operating System
Initializing 992MB of memory at addr 1000000000
Initializing 1024MB of memory at addr 0
Rebooting with command: boot
Boot device: /pci@1c,600000/scsi@2/disk@0,0:a File and args:
SunOS Release 5.10 Version Generic_118833-17 64-bit
Copyright 1983-2005 Sun Microsystems, Inc. All rights reserved.
Use is subject to license terms.
Hardware watchdog enabled
Hostname: bge0
checking ufs filesystems
/dev/rdsk/c1t0d0s5: is logging.
bge0 console login: root
Sep 8 03:00:15 bge0 login: ROOT LOGIN /dev/console
Step 30 If you want to enable root access to the Cisco PGW 2200 Softswitch via telnet, follow these steps:
a. Edit the /etc/default/login file, and make the following changes:
–
Comment out the line starting with “CONSOLE=” by inserting a “#” in front of this line.
–
Add the line “svcadm enable telnet” if you want to enable telnet.
–
Add the line “svcadm enable rlogin” if you want to enable remote login.
b. Save your changes to this file.
Step 31 If you want to enable root access to the Cisco PGW 2200 Softswitch via SSH, follow these steps:
Chapter 2 Installing the Sun Solaris 10 Operating System
a. Edit the /etc/ssh/sshd_config file and change the value of the PermitRootLogin parameter from no
to yes.
b. Save your changes to this file.
c. Identify the process ID of the sshd process by entering the following command:
ps -ef | grep ssh
d. Restart the sshd process and activate your changes by entering the following command:
kill -l process_id
Where process_id is the ssh process ID number identified in the previous step.
You have completed configuring your host. Proceed to the “Platform-Specific Installation Procedures”
section on page 2-62.
Platform-Specific Installation Procedures
Complete the following steps to install files specific to your Cisco platform:
Step 1 Log in as root and use the default password, vtghost. The system displays something similar to the
following:
Sep 8 03:05:15 bge0 login: ROOT LOGIN /dev/console
Last login: Mon Sep 8 03:00:22 on console
Sun Microsystems Inc. SunOS 5.10 Generic January 2005
2-62
Step 2 Reinsert the CD into the CD-ROM drive.
Cisco PGW 2200 Softswitch Release 9.8 Software Installation and Configuration Guide
OL-18083-01
Page 77

Chapter 2 Installing the Sun Solaris 10 Operating System
Step 3 Mount the CD-ROM in the cdrom directory by entering the following command:
# mount -F hsfs -o ro /dev/dsk/devname /cdrom
Where devname is the device name for the primary CD-ROM drive. The following device names are
valid:
• c0t0d0s0—Device name for primary CD-ROM on a Sparc-based platform.
• c0t0d0p0—Device name for primary CD-ROM on an Opteron-based platform.
Step 4 Run the core_finish script by entering the appropriate command:
• For Sparc-based platforms: ./cdrom/core_finish/core_finish.sh
• For Opteron-based platforms: ./cdrom/core_finish/core_finish.sh
Step 5 Enter the name of your host and press Enter as prompted.
Note Entering the name of your host at this time does not set the UNIX host name value. The value
you enter here is used to set up a crash directory: /var/hostname/crash
Loading the Sun Solaris 10 Operating System
The system returns a response similar to the following:
Start installation of core extra packages
Adding <SUNWvts>
Processing package instance <SUNWvts> from </opt/xtrapkgs>
SunVTS Framework(sparc) 6.2,REV=2006.05.04.11.52
Using </opt> as the package base directory.
## Processing package information.
## Processing system information.
Installing SunVTS Framework as <SUNWvts>
## Installing part 1 of 1.
/opt/SUNWvts/README
/opt/SUNWvts/bin/.platform_table
/opt/SUNWvts/bin/.sunvts_release
/opt/SUNWvts/bin/.sunvts_sec
/opt/SUNWvts/bin/.sunvts_sec_gss
/opt/SUNWvts/bin/.version
...
/opt/SUNWvts/lib/sparcv9/libvtsutil.so <symbolic link>
/opt/SUNWvts/lib/sparcv9/libvtsutil.so.1
[ verifying class <none> ]
Copyright 2006 Sun Microsystems, Inc. All rights reserved.
Use is subject to license terms.
OL-18083-01
Installation of <SUNWvts> was successful.
Adding <SUNWvtsr>
Processing package instance <SUNWvtsr> from </opt/xtrapkgs>
SunVTS Framework (Root)(sparc) 6.2,REV=2006.05.04.11.52
Using </> as the package base directory.
## Processing package information.
## Processing system information.
2 package pathnames are already properly installed.
Cisco PGW 2200 Softswitch Release 9.8 Software Installation and Configuration Guide
2-63
Page 78

Loading the Sun Solaris 10 Operating System
Installing SunVTS Framework (Root) as <SUNWvtsr>
## Installing part 1 of 1.
/etc/opt/SUNWvts/sunvts.conf.example
[ verifying class <none> ]
Copyright 2006 Sun Microsystems, Inc. All rights reserved.
Use is subject to license terms.
Installation of <SUNWvtsr> was successful.
Adding <SUNWvtsts>
Processing package instance <SUNWvtsts> from </opt/xtrapkgs>
SunVTS for Tests(sparc) 6.2,REV=2006.05.04.11.52
Using </opt> as the package base directory.
## Processing package information.
## Processing system information.
14 package pathnames are already properly installed.
Installing SunVTS for Tests as <SUNWvtsts>
## Installing part 1 of 1.
/opt/SUNWvts/bin/bios.bin <symbolic link>
/opt/SUNWvts/bin/cmos.bin <symbolic link>
/opt/SUNWvts/bin/env6test
/opt/SUNWvts/bin/hsclbtest
/opt/SUNWvts/bin/i2c2test
/opt/SUNWvts/bin/nalmtest
Chapter 2 Installing the Sun Solaris 10 Operating System
...
/opt/SUNWvts/lib/probe/sparcv9/vmemtest_probe.so
/opt/SUNWvts/lib/probe/ssptest_probe.so
/opt/SUNWvts/lib/probe/sunlink_probe.so
[ verifying class <none> ]
Copyright 2006 Sun Microsystems, Inc. All rights reserved.
Use is subject to license terms.
Installation of <SUNWvtsts> was successful.
Adding <SUNWexplo>
Processing package instance <SUNWexplo> from </opt/xtrapkgs>
Sun(TM) Explorer Data Collector(all) 5.5,REV=2006.07.14.01.46
## Executing checkinstall script.
Copyright 1996-2006 Sun Microsystems, Inc.
All rights reserved.
Using </opt> as the package base directory.
## Processing package information.
## Processing system information.
Installing Sun(TM) Explorer Data Collector as <SUNWexplo>
## Executing preinstall script.
## Installing part 1 of 1.
/opt/SUNWexplo/LICENSEREADME/LICENSE.txt
/opt/SUNWexplo/LICENSEREADME/THIRDPARTYLICENSEREADME.txt
/opt/SUNWexplo/LICENSEREADME/gzip-1.2.4a.tar.gz
/opt/SUNWexplo/bin/capture.sparc
2-64
...
/opt/SUNWexplo/tools/var
/opt/SUNWexplo/tools/vtsst
Cisco PGW 2200 Softswitch Release 9.8 Software Installation and Configuration Guide
OL-18083-01
Page 79

Chapter 2 Installing the Sun Solaris 10 Operating System
/opt/SUNWexplo/tools/vxfs
/opt/SUNWexplo/tools/vxvm
[ verifying class <none> ]
## Executing postinstall script.
/usr/bin/catman is not available for use
Please run: catman -w -M /opt/SUNWexplo/man manually
Installation of <SUNWexplo> was successful.
Adding <SUNWexplu>
Processing package instance <SUNWexplu> from </opt/xtrapkgs>
Sun(TM) Explorer Data Collector Config Files(all) 5.5,REV=2006.07.14.01.46
## Executing checkinstall script.
Copyright 1996-2006 Sun Microsystems, Inc.
All rights reserved.
Using </> as the package base directory.
## Processing package information.
## Processing system information.
2 package pathnames are already properly installed.
Installing Sun(TM) Explorer Data Collector Config Files as <SUNWexplu>
## Installing part 1 of 1.
/etc/opt/SUNWexplo/LICENSEREADME/LICENSE.txt
/etc/opt/SUNWexplo/t3files.txt
[ verifying class <none> ]
Modifying /etc/opt/SUNWexplo/1280input.txt
Modifying /etc/opt/SUNWexplo/alominput.txt
Modifying /etc/opt/SUNWexplo/b1600input.txt
Modifying /etc/opt/SUNWexplo/b1600switchinput.txt
Modifying /etc/opt/SUNWexplo/ilominput.txt
Modifying /etc/opt/SUNWexplo/indyinput.txt
Modifying /etc/opt/SUNWexplo/ipmiinput.txt
Modifying /etc/opt/SUNWexplo/saninput.txt
Modifying /etc/opt/SUNWexplo/scinput.txt
Modifying /etc/opt/SUNWexplo/se3kinput.txt
Modifying /etc/opt/SUNWexplo/se6320input.txt
Modifying /etc/opt/SUNWexplo/se6920input.txt
Modifying /etc/opt/SUNWexplo/srscinput.txt
Modifying /etc/opt/SUNWexplo/t3input.txt
[ verifying class <build> ]
## Executing postinstall script.
Loading the Sun Solaris 10 Operating System
OL-18083-01
Installation of <SUNWexplu> was successful.
Adding <SUNWpsr>
Processing package instance <SUNWpsr> from </opt/xtrapkgs>
Solaris Print - LP Server, (root)(sparc) 13.1,REV=2005.01.21.15.53
Using </> as the package base directory.
## Processing system information.
11 package pathnames are already properly installed.
Installing Solaris Print - LP Server, (root) as <SUNWpsr>
## Executing preinstall script.
Copyright 2005 Sun Microsystems, Inc. All rights reserved.
Use is subject to license terms.
## Installing part 1 of 1.
19 blocks
[ verifying class <renameold> ]
[ verifying class <preserve> ]
[ verifying class <manifest> ]
Cisco PGW 2200 Softswitch Release 9.8 Software Installation and Configuration Guide
2-65
Page 80

Loading the Sun Solaris 10 Operating System
## Executing postinstall script.
Installation of <SUNWpsr> was successful.
Adding <SUNWpcr>
Processing package instance <SUNWpcr> from </opt/xtrapkgs>
Solaris Print - Client, (root)(sparc) 13.1,REV=2005.01.21.15.53
Using </> as the package base directory.
## Processing package information.
## Processing system information.
10 package pathnames are already properly installed.
Installing Solaris Print - Client, (root) as <SUNWpcr>
## Installing part 1 of 1.
Copyright 2005 Sun Microsystems, Inc. All rights reserved.
Use is subject to license terms.
2 blocks
[ verifying class <preserve> ]
[ verifying class <manifest> ]
## Executing postinstall script.
Installation of <SUNWpcr> was successful.
Adding <SUNWpcu>
Chapter 2 Installing the Sun Solaris 10 Operating System
Processing package instance <SUNWpcu> from </opt/xtrapkgs>
Solaris Print - Client, (usr)(sparc) 13.1,REV=2005.01.21.15.53
Using </> as the package base directory.
## Processing package information.
## Processing system information.
4 package pathnames are already properly installed.
Installing Solaris Print - Client, (usr) as <SUNWpcu>
## Installing part 1 of 1.
Copyright 2005 Sun Microsystems, Inc. All rights reserved.
Use is subject to license terms.
541 blocks
Installation of <SUNWpcu> was successful.
Adding <SUNWpsu>
Processing package instance <SUNWpsu> from </opt/xtrapkgs>
Solaris Print - LP Server, (usr)(sparc) 13.1,REV=2005.01.21.15.53
Using </> as the package base directory.
## Processing package information.
## Processing system information.
12 package pathnames are already properly installed.
Installing Solaris Print - LP Server, (usr) as <SUNWpsu>
## Installing part 1 of 1.
Copyright 2005 Sun Microsystems, Inc. All rights reserved.
Use is subject to license terms.
3090 blocks
2-66
Installation of <SUNWpsu> was successful.
Adding <SFWsudo>
Processing package instance <SFWsudo> from </opt/xtrapkgs>
Cisco PGW 2200 Softswitch Release 9.8 Software Installation and Configuration Guide
OL-18083-01
Page 81

Chapter 2 Installing the Sun Solaris 10 Operating System
Sudo - superuser do(sparc) 1.6.8.5,REV=2006.03.26.16.30
Using </opt> as the package base directory.
## Processing package information.
## Processing system information.
Installing Sudo - superuser do as <SFWsudo>
## Installing part 1 of 1.
/opt/sfw/READMEs/README.SFWsudo
/opt/sfw/bin/sudo
/opt/sfw/etc/sudoers
/opt/sfw/man/man1m/sudo.1m
/opt/sfw/man/man1m/visudo.1m
/opt/sfw/man/man4/sudoers.4
/opt/sfw/sbin/visudo
[ verifying class <none> ]
Sudo is distributed under the following ISC-style license:
Copyright (c) 1994-1996,1998-2004 Todd C. Miller <Todd.Miller@courtesan.com>
Permission to use, copy, modify, and distribute this software for any
purpose with or without fee is hereby granted, provided that the above
copyright notice and this permission notice appear in all copies.
Loading the Sun Solaris 10 Operating System
THE SOFTWARE IS PROVIDED "AS IS" AND THE AUTHOR DISCLAIMS ALL WARRANTIES
WITH REGARD TO THIS SOFTWARE INCLUDING ALL IMPLIED WARRANTIES OF
MERCHANTABILITY AND FITNESS. IN NO EVENT SHALL THE AUTHOR BE LIABLE FOR
ANY SPECIAL, DIRECT, INDIRECT, OR CONSEQUENTIAL DAMAGES OR ANY DAMAGES
WHATSOEVER RESULTING FROM LOSS OF USE, DATA OR PROFITS, WHETHER IN AN
ACTION OF CONTRACT, NEGLIGENCE OR OTHER TORTIOUS ACTION, ARISING OUT OF
OR IN CONNECTION WITH THE USE OR PERFORMANCE OF THIS SOFTWARE.
Sponsored in part by the Defense Advanced Research Projects
Agency (DARPA) and Air Force Research Laboratory, Air Force
Materiel Command, USAF, under agreement number F39502-99-1-0512.
Additionally, err.c, lsearch.c, fnmatch.c, getcwd.c, snprintf.c, strcasecmp.c,
fnmatch.h, err.h, and fnmatch.3 bear the following UCB license:
Copyright (c) 1987, 1989, 1990, 1991, 1993, 1994
The Regents of the University of California. All rights reserved.
Redistribution and use in source and binary forms, with or without
modification, are permitted provided that the following conditions
are met:
1. Redistributions of source code must retain the above copyright
notice, this list of conditions and the following disclaimer.
2. Redistributions in binary form must reproduce the above copyright
notice, this list of conditions and the following disclaimer in the
documentation and/or other materials provided with the distribution.
3. Neither the name of the University nor the names of its contributors
may be used to endorse or promote products derived from this software
without specific prior written permission.
OL-18083-01
THIS SOFTWARE IS PROVIDED BY THE REGENTS AND CONTRIBUTORS ``AS IS'' AND
ANY EXPRESS OR IMPLIED WARRANTIES, INCLUDING, BUT NOT LIMITED TO, THE
IMPLIED WARRANTIES OF MERCHANTABILITY AND FITNESS FOR A PARTICULAR PURPOSE
ARE DISCLAIMED. IN NO EVENT SHALL THE REGENTS OR CONTRIBUTORS BE LIABLE
FOR ANY DIRECT, INDIRECT, INCIDENTAL, SPECIAL, EXEMPLARY, OR CONSEQUENTIAL
DAMAGES (INCLUDING, BUT NOT LIMITED TO, PROCUREMENT OF SUBSTITUTE GOODS
OR SERVICES; LOSS OF USE, DATA, OR PROFITS; OR BUSINESS INTERRUPTION)
HOWEVER CAUSED AND ON ANY THEORY OF LIABILITY, WHETHER IN CONTRACT, STRICT
LIABILITY, OR TORT (INCLUDING NEGLIGENCE OR OTHERWISE) ARISING IN ANY WAY
OUT OF THE USE OF THIS SOFTWARE, EVEN IF ADVISED OF THE POSSIBILITY OF
Cisco PGW 2200 Softswitch Release 9.8 Software Installation and Configuration Guide
2-67
Page 82

Loading the Sun Solaris 10 Operating System
SUCH DAMAGE.
YOU MUST OBSERVE ANY AUTHORS' CONDITIONS WITH RESPECT TO
INDIVIDUAL COMPONENTS PROVIDED WITHIN THIS CODE. SUPPORT
FOR THE TECHNOLOGIES AND DOCUMENTATION IS NOT PROVIDED
BY SUN MICROSYSTEMS, INC.
THE TECHNOLOGIES AND DOCUMENTATION ARE PROVIDED "AS IS" WITHOUT TECHNICAL
SUPPORT OR WARRANTY OF ANY KIND, EITHER EXPRESS OR IMPLIED, INCLUDING, BUT NOT
LIMITED TO, THE IMPLIED WARRANTIES OF MERCHANTABILITY, FITNESS FOR A
PARTICULAR PURPOSE, OR NON-INFRINGEMENT.
Installation of <SFWsudo> was successful.
SUNW,Sun-Fire-V210 does not need LOM packages
Validating patches...
Loading patches installed on the system...
Done!
Chapter 2 Installing the Sun Solaris 10 Operating System
Loading patches requested to install.
Done!
Checking patches that you specified for installation.
Done!
Approved patches will be installed in this order:
123526-01
Checking installed patches...
Verifying sufficient filesystem capacity (dry run method)...
Installing patch packages...
Patch 123526-01 has been successfully installed.
See /var/sadm/patch/123526-01/log for details
Patch packages installed:
SUNWcslr
Validating patches...
Loading patches installed on the system...
Done!
2-68
Loading patches requested to install.
Done!
Checking patches that you specified for installation.
Done!
Approved patches will be installed in this order:
Cisco PGW 2200 Softswitch Release 9.8 Software Installation and Configuration Guide
OL-18083-01
Page 83

Chapter 2 Installing the Sun Solaris 10 Operating System
119963-08
Checking installed patches...
Verifying sufficient filesystem capacity (dry run method)...
Installing patch packages...
Patch 119963-08 has been successfully installed.
See /var/sadm/patch/119963-08/log for details
Patch packages installed:
SUNWlibC
Validating patches...
Loading patches installed on the system...
Done!
Loading patches requested to install.
Done!
The following requested patches have packages not installed on the system
Package SUNWarc from directory SUNWarc in patch 119578-30 is not installed on the system.
Changes for package SUNWarc will not be applied to the system.
Package SUNWhea from directory SUNWhea in patch 119578-30 is not installed on the system.
Changes for package SUNWhea will not be applied to the system.
Package FJSVfmd from directory FJSVfmd in patch 119578-30 is not installed on the system.
Changes for package FJSVfmd will not be applied to the system.
Loading the Sun Solaris 10 Operating System
Checking patches that you specified for installation.
Done!
Approved patches will be installed in this order:
119578-30
Checking installed patches...
Executing prepatch script...
Temporarily disabling fmd(1M)
Verifying sufficient filesystem capacity (dry run method)...
Installing patch packages...
Patch 119578-30 has been successfully installed.
See /var/sadm/patch/119578-30/log for details
Executing postpatch script...
Re-enabling fmd(1M)
Patch packages installed:
SUNWckr
SUNWcsl
SUNWcsu
SUNWfmd
Validating patches...
Loading patches installed on the system...
OL-18083-01
Done!
Loading patches requested to install.
Cisco PGW 2200 Softswitch Release 9.8 Software Installation and Configuration Guide
2-69
Page 84

Loading the Sun Solaris 10 Operating System
Done!
The following requested patches have packages not installed on the system
Package SUNWarc from directory SUNWarc in patch 118833-36 is not installed on the system.
Changes for package SUNWarc will not be applied to the system.
Package SUNWarcr from directory SUNWarcr in patch 118833-36 is not installed on the
system. Changes for package SUNWarcr will not be applied to the system.
...
Package FJSVpiclu from directory FJSVpiclu in patch 118833-36 is not installed on the
system. Changes for package FJSVpiclu will not be applied to the system.
Checking patches that you specified for installation.
Done!
Approved patches will be installed in this order:
118833-36
Executing prePatch script...
Checking installed patches...
Executing prepatch script...
Disabling kernel module unloading ...
Chapter 2 Installing the Sun Solaris 10 Operating System
Verifying sufficient filesystem capacity (dry run method)...
Installing patch packages...
Patch 118833-36 has been successfully installed.
See /var/sadm/patch/118833-36/log for details
Executing postpatch script...
Patch packages installed:
SUNW1394
SUNWatfsr
SUNWatfsu
SUNWaudd
SUNWbart
SUNWbtool
SUNWcakr
SUNWcar
SUNWckr
SUNWcnetr
SUNWcpcu
SUNWcsd
SUNWcsl
SUNWcslr
SUNWcsr
SUNWcsu
SUNWdtrc
SUNWdtrp
SUNWefc
SUNWesu
SUNWib
SUNWintgige
SUNWipfr
SUNWipfu
SUNWipoib
SUNWkey
SUNWkrbr
SUNWkrbu
SUNWkvm
SUNWmdb
2-70
Cisco PGW 2200 Softswitch Release 9.8 Software Installation and Configuration Guide
OL-18083-01
Page 85

Chapter 2 Installing the Sun Solaris 10 Operating System
SUNWmdbr
SUNWmdr
SUNWmdu
SUNWnfsckr
SUNWnfscr
SUNWnfscu
SUNWnisu
SUNWopenssl-commands
SUNWopenssl-libraries
SUNWpcu
SUNWpd
SUNWpiclu
SUNWpsu
SUNWqos
SUNWrcmdc
SUNWroute
SUNWrpcib
SUNWsacom
SUNWses
SUNWsmapi
SUNWssad
SUNWtavor
SUNWtoo
SUNWudapltr
SUNWudapltu
SUNWuedg
SUNWugen
SUNWuksp
SUNWuprl
SUNWusb
SUNWusbs
SUNWwbsup
SUNWxcu4
SUNWxge
Loading the Sun Solaris 10 Operating System
Completed installation of core extra packages
Start core hardening
Changing EEPROM settings..
Enable recording of failed login attempts
Dump content: kernel pages
Dump device: /dev/dsk/c1t0d0s3 (swap)
Savecore directory: /var/crash/sh-jingan
Savecore enabled: yes
Completed core hardening
CORE CD installation completed
Ejecting CORE CD...
Rebooting ..
Step 6 If you are installing on a Sparc-based platform, perform the following steps. Otherwise, proceed to
Step 7.
a. Change to the root directory by entering the following command and pressing Enter:
# cd /
b. Unmount the cdrom directory from the CD-ROM drive by entering the following command and
pressing Enter:
# umount /cdrom
c. Eject the CD from the CD-ROM by entering the following command and pressing Enter:
# eject /dev/dsk/c0t0d0s0
OL-18083-01
Cisco PGW 2200 Softswitch Release 9.8 Software Installation and Configuration Guide
2-71
Page 86

Chapter 2 Installing the Sun Solaris 10 Operating System
Loading the Sun Solaris 10 Operating Environment
Step 7 Remove the CD from the CD-ROM drive.
This completes the installation of platform-specific data. Proceed to the “Loading the Sun Solaris 10
Operating Environment” section on page 2-72.
Loading the Sun Solaris 10 Operating Environment
This section contains the procedures used to load the software packages that create the Sun Solaris 10
operating environment on your host platforms. Tabl e 2 - 2 lists the order in which the software packages
should loaded onto your system, broken down by platform type.
The currently deployed Solaris 10 patch set is release 3.0(6) which is available on Cisco.com.
• For Sparc-based platforms, go to
http://www.cisco.com/cgi-bin/tablebuild.pl/mgc-sol10-sparc
• For Opteron-based platforms, go to
http://www.cisco.com/cgi-bin/tablebuild.pl/mgc-sol10-opteron
Table 2-2 Sun Solaris 10 Operating Environment Package Installation Order
Products
Cisco
HSI
Cisco
BAMS
Sparc-based Platforms Opteron-based PlatformsCisco PGW 2200 Softswitch
XXXInstalling the Sparc-based Solaris 10
Patches Package (CSCOh022)
Configuring Disk Drives—One of
XX—
the following:
• Systems with 36 GB, 73 GB, and
146 GB disk drives—Installing
the Solstice DiskSuite
(CSCOh023)
X——
• Systems with 18 GB disk
drives—Installing the Log and
Spool File Systems
(CSCOh024)
——X
• Cisco BAMS
platforms—Installing Cisco
BAMS Archive Partition
(CSCOh027)
XXXInstalling the Sparc-based
Communications and Alarm
Software Package (CSCOh026)
XXXInstalling the Verification Test Suite
Script Package (CSCOh021)
Installing the Opteron-based Solaris
10 Patches Package (CSCOh032)
Configuring Disk Drives—One of
the following:
• Systems with 36 GB, 73 GB, or
146 GB disk drives—Installing
the Solstice DiskSuite
(CSCOh023)
Installing the Opteron-based
Communications Software Package
(CSCOh036)
Installing the Verification Test Suite
Script Package (CSCOh021)
2-72
Cisco PGW 2200 Softswitch Release 9.8 Software Installation and Configuration Guide
OL-18083-01
Page 87

Chapter 2 Installing the Sun Solaris 10 Operating System
Loading the Sun Solaris 10 Operating Environment
Installing the Sparc-based Solaris 10 Patches Package (CSCOh022)
To install the Sparc-based Solaris 10 Operating System Patches package (CSCOh022):
Step 1 If you are using the CD-ROM, load the Cisco Solaris 10 Operating Environment CD into the CD-ROM
drive. Enter the following command
# pkgadd -d /cdrom/cdrom0/CSCOh022.pkg
Text similar to the following is displayed:
The following packages are available:
1 CSCOh022 Media Gateway Controller Solaris 10 Patch Cluster
(sparc) 3.0(6)
Select package(s) you wish to process (or 'all' to process
all packages). (default: all) [?,??,q]:
Note You can also download the Sparc-based Solaris 10 operating system patches package
(CSCOh022) from Cisco.com. For example, download the CSCOh022 package to the /opt/SW
folder on the Sparc-based platform and use the command, pkgadd -d /opt/SW/CSCOh022.pkg.
Step 2 Press Enter to select the default value. Text similar to the following is displayed:
Processing package instance <CSCOh022> from </var/tmp/CSCOh022.pkg>
Media Gateway Controller Solaris 10 Patch Cluster(sparc) 3.0(6)
Cisco Systems, Inc.
## Executing checkinstall script.
CSCOh022 checkinstall log file at /var/tmp/CSCOh022.checkinstall.log
Platform is SUNW,Sun-Fire-V210
Using </opt/sun_install> as the package base directory.
## Processing package information.
## Processing system information.
1 package pathname is already properly installed.
## Verifying disk space requirements.
## Checking for conflicts with packages already installed.
The following files are already installed on the system and are being
used by another package:
* /opt/sun_install <attribute change only>
* - conflict with a file which does not belong to any package.
Do you want to install these conflicting files [y,n,?,q]
Step 3 Type y and press Enter to continue. Text similar to the following is displayed:
## Checking for setuid/setgid programs.
This package contains scripts which will be executed with super-user
permission during the process of installing this package.
OL-18083-01
Do you want to continue with the installation of <CSCOh022> [y,n,?]
Step 4 Type y and press Enter to continue. Text similar to the following is displayed:
Installing Media Gateway Controller Solaris 10 Patch Cluster as <CSCOh0022>
Cisco PGW 2200 Softswitch Release 9.8 Software Installation and Configuration Guide
2-73
Page 88
Loading the Sun Solaris 10 Operating Environment
The system lists the patches that it will install. This list will vary over time. A screen similar to the
following is displayed:
….
!!
!! You must now change directories to /opt/sun_install and
!! run the installPatches.sh script as root.
!!
Installation of <CSCOh022> was successful.
Step 5 Change directory to /opt/sun_install and run the installPatches script by entering the following
commands:
# cd /opt/sun_install
# ./installPatches.sh
Note During the installation of the Solaris 10 patch cluster, some patches might fail with return codes
2, 8, or 35. This is normal and does not indicate a problem with the installation. The following
is an explanation of these error codes:
2—Attempting to apply a patch that is already applied.
8—Attempting to patch a package that is not installed.
35—A later version of the patch has already been installed.
Chapter 2 Installing the Sun Solaris 10 Operating System
Text similar to the following is displayed:
You are running as root - Good...
*** InstallPatches10 begins Wed Sep 10 01:16:25 EDT 2008 ***
VERSION='3.0(6)'
Platform is SUNW,Sun-Fire-V210
Install Solaris 10 patches from set 1 ...
Changed to /var/tmp directory
Now installing each patch from the patch cluster. There are a large
number of these patches, and the install could take an hour or longer
to complete. Please be patient. You can follow the progress of the
install in the following log: /opt/sun_install/installPatches10.log
At least one patch failed to install. This may or may
not indicate a problem. Please look at the log file
after the rest of the patches are applied
Install Solaris 10 patches from set 2 ...
Changed to /var/tmp directory
*** InstallPatches10 ends Wed Sep 10 01:34:40 EDT 2008 ***
*************************************************
* It is necessary to reboot this machine *
* for these patches to be incorporated *
* the operating system. Enter the following *
* command and press Enter: reboot -- -r *
*************************************************
Step 6 Type the following command and press Enter to reboot the target machine.
#reboot -- -r
2-74
Cisco PGW 2200 Softswitch Release 9.8 Software Installation and Configuration Guide
OL-18083-01
Page 89

Chapter 2 Installing the Sun Solaris 10 Operating System
Loading the Sun Solaris 10 Operating Environment
Note If you used the CD-ROM drive to load the Solaris 10 patch cluster, eject the CD prior to
rebooting.
This completes the procedures for installing the Solaris 10 patches for Sparc-based platforms. Go to
Table 2-2 on page 2-72 if you want to continue with the list for package installation. If you have
questions or need assistance, see the “Obtaining Documentation and Submitting a Service Request”
section on page x.
Installing the Opteron-based Solaris 10 Patches Package (CSCOh032)
Note If you install CSCOh032 release 3.0(6) on top of release 3.0(5), run the CSCOh032 installation script
once and reboot the system. See the following installation procedure.
If you do NOT install CSCOh032 release 3.0(6) on top of release 3.0(5), you need to run the CSCOh032
installation script twice. First run the CSCOh032 installation script, then reboot the system. Then run
the CSCOh032 installation script again and reboot the system. After the second reboot is complete, use
the uname -a command to verify the patch level. If the patch level is 127128-11, CSCOh032 is
successfully installed.
To install the Opteron-based Solaris 10 Operating System Patches package (CSCOh032):
Step 1 If you are using the CD-ROM, load the Cisco Solaris 10 Operating Environment CD into the CD-ROM
drive. Enter the following command:
# pkgadd -d /cdrom/cdrom0/CSCOh032.pkg
Text similar to the following is displayed:
The following packages are available:
1 CSCOh032 Media Gateway Controller Solaris 10 Patch Cluster
(i386) 3.0(6)
Select package(s) you wish to process (or 'all' to process
all packages). (default: all) [?,??,q]:
Note You can also download the Opteron-based Solaris 10 operating system patches package
(CSCOh032) from Cisco.com. For example, download the CSCOh032 package to the /opt/SW
folder on the Opteron-based platform and use the command, pkgadd -d
/opt/SW/CSCOh032.pkg.
Step 2 Press Enter to select the default value. Text similar to the following is displayed:
Processing package instance <CSCOh032> from </var/tmp/CSCOh032.pkg>
Media Gateway Controller PGW Specific Solaris 10 packages(i386) 3.0(6)
Cisco Systems, Inc.
## Executing checkinstall script.
CSCOh032 checkinstall log file at /var/tmp/CSCOh032.checkinstall.log
Platform is i86pc
This machine is running Solaris 5.10
OL-18083-01
Cisco PGW 2200 Softswitch Release 9.8 Software Installation and Configuration Guide
2-75
Page 90

Loading the Sun Solaris 10 Operating Environment
Using </opt/sun_install> as the package base directory.
## Processing package information.
## Processing system information.
10 package pathnames are already properly installed.
## Verifying disk space requirements.
## Checking for conflicts with packages already installed.
## Checking for setuid/setgid programs.
This package contains scripts which will be executed with super-user
permission during the process of installing this package.
Do you want to continue with the installation of <CSCOh032> [y,n,?]
Step 3 Type y and press Enter to continue. Text similar to the following is displayed:
Installing Media Gateway Controller Solaris 10 Patch Cluster as <CSCOh0032>
The system lists the patches that it will install. This list varies over time. Text similar to the following is
displayed:
….
!!
!! You must now change directories to /opt/sun_install and
!! run the installPatches.sh script as root.
!!
Chapter 2 Installing the Sun Solaris 10 Operating System
Installation of <CSCOh032> was successful.
Step 4 Change directory to /opt/sun_install and run the installPatches script by entering the following
commands:
# cd /opt/sun_install
# ./installPatches.sh
Note During the installation of the Solaris 10 patch cluster, some patches might fail with return codes
1, 2, 8, and 35. This is normal and does not indicate a problem with the installation. The
following is an explanation of these error codes:
1—The patch has been installed before.
2—Attempting to apply a patch that is already applied.
8—Attempting to patch a package that is not installed.
35—A later version of the patch has already been installed.
Text similar to the following is displayed:
You are running as root - Good...
*** InstallPatches10 begins Tue Jul 8 11:14:25 GMT+8 2008 ***
VERSION='3.0(6)'
2-76
Platform is i86pc
Install Solaris 10 patches from set 1 ...
Changed to /var/tmp directory
Now installing each patch from the patch cluster. There are a large
number of these patches, and the install could take an hour or longer
to complete. Please be patient. You can follow the progress of the
install in the following log: /opt/sun_install/installPatches10.log
At least one patch failed to install. This may or may
Cisco PGW 2200 Softswitch Release 9.8 Software Installation and Configuration Guide
OL-18083-01
Page 91

Chapter 2 Installing the Sun Solaris 10 Operating System
not indicate a problem. Please look at the log file
after the rest of the patches are applied
Install Solaris 10 patches from set 2 ...
Changed to /var/tmp directory
*** InstallPatches10 ends Tue Jul 8 11:14:41 GMT+8 2008 ***
*************************************************
* It is necessary to reboot this machine *
* for these patches to be incorporated *
* the operating system. Enter the following *
* command and press Enter: reboot -- -r *
*************************************************
Step 5 Type the following command and press Enter to reboot the target machine.
#reboot -- -r
Note If you used the CD-ROM drive to load the Solaris 10 patch cluster, eject the CD prior to
rebooting.
Note If you have installed the Solaris DiskSuite package (CSCOh023) on your system, the messages
below are displayed during system boot. They are normal Solaris DiskSuite startup messages
and do not indicate any problem with your system.
WARNING force load of misc /md-trans failed
WARNING force load of misc /md-raid failed
WARNING force load of misc /md-hotspares failed
WARNING force load of misc /md-sp failed
Loading the Sun Solaris 10 Operating Environment
This completes the procedures for installing the Solaris 10 patches for Opteron-based platforms. Go to
Table 2-2 on page 2-72 if you want to continue with the list for package installation. If you have
questions or need assistance, see the “Obtaining Documentation and Submitting a Service Request”
section on page x.
Installing the Solstice DiskSuite (CSCOh023)
The Sun Solstice DiskSuite program enables you to use the second disk drive as a mirror of the first to
increase the availability of the system.You can install the DiskSuite program by running the scripts
described below. The machine reboots several times during the installation process. The scripts minimize
the possibility of running the scripts in the wrong order. However, you should ensure that the program
is properly installed and take reasonable precautions to run the scripts correctly.
Note You must log in as root to run the following DiskSuite installation script.
Note For Sun Fire X4600 and Sun Netra X4200 M2 platforms, do not change the default hard disk boot order
in the BIOS settings. If the primary disk is changed from the default of c3t0d0, the DiskSuite installation
fails.
OL-18083-01
Cisco PGW 2200 Softswitch Release 9.8 Software Installation and Configuration Guide
2-77
Page 92

Loading the Sun Solaris 10 Operating Environment
Step 1 Load the Cisco Solaris 10 Operating Environment CD into the CD-ROM drive. Enter the following
command to install the DiskSuite installation scripts:
# pkgadd -d /cdrom/cdrom0/CSCOh023.pkg
Text similar to the following is displayed.
The following packages are available:
1 CSCOh023 Media Gateway Controller Solaris 10 DiskSuite
(sparc,i386) 3.0(6)
Select package(s) you wish to process (or 'all' to process
all packages). (default: all) [?,??,q]:
Note You can also download the Solaris 10 DiskSuite package (CSCOh023) from Cisco.com. For
example, download the CSCOh023 package to the /opt/SW folder on the platform and use the
command, pkgadd -d /opt/SW/CSCOh023.pkg. Make sure you downloads the platform-specific
package for your platform (Sparc-based or Opteron-based).
Step 2 Press Enter to accept the default answer all. Text similar to the following is displayed:
Processing package instance <CSCOh023> from </var/tmp/CSCOh023.pkg>
Chapter 2 Installing the Sun Solaris 10 Operating System
Media Gateway Controller Solaris 10 DiskSuite(sparc,i386) 3.0(6)
Cisco Systems, Inc.
## Executing checkinstall script.
CSCOh023 checkinstall log file at /var/tmp/CSCOh023.checkinstall.log
Platform is SUNW,Sun-Fire-V210
This machine is running Solaris 5.10
Using </opt/sun_install> as the package base directory.
## Processing package information.
## Processing system information.
2 package pathnames are already properly installed.
## Verifying disk space requirements.
## Checking for conflicts with packages already installed.
## Checking for setuid/setgid programs.
This package contains scripts which will be executed with super-user
permission during the process of installing this package.
Do you want to continue with the installation of <CSCOh023> [y,n,?]
Step 3 Enter y and press Enter to continue with the installation.
Installing Media Gateway Controller Solaris 10 DiskSuite as <CSCOh023>
## Executing preinstall script.
No PGW software found - this package can be installed
## Installing part 1 of 1.
/opt/sun_install/DiskSuite/admin.file
/opt/sun_install/DiskSuite/install_disksuite_1.sh
/opt/sun_install/DiskSuite/install_disksuite_2.sh
/opt/sun_install/DiskSuite/query_2nd_disk.cmd
/opt/sun_install/DiskSuite/rm_disksuite_1.sh
/opt/sun_install/DiskSuite/rm_disksuite_2.sh
[ verifying class <none> ]
## Executing postinstall script.
2-78
!!
!! You must now change directories to
Cisco PGW 2200 Softswitch Release 9.8 Software Installation and Configuration Guide
OL-18083-01
Page 93

Chapter 2 Installing the Sun Solaris 10 Operating System
!! /opt/sun_install/DiskSuite and run the
!! install_disksuite_1.sh script as root.
!!
Installation of <CSCOh023> was successful.
Step 4 Change directories. Enter the following command:
cd /opt/sun_install/DiskSuite
Step 5 Run the first script. Enter the following command:
./install_disksuite_1.sh
Text similar to the following is displayed:
You are running as root - Good...
Output will be logged in /opt/sun_install/DiskSuite/DiskSuite_1.log
This script installs Disk Suite on an PGW system.
It assumes that Solaris 10 is installed and the disks
are correctly formatted and ready to go.
Loading the Sun Solaris 10 Operating Environment
**** IMPORTANT NOTE ****
In order to install DiskSuite, you MUST HAVE allocated
an unassigned, 15-30Mb disk partition in disk slice 4
of your primary disk. IF THIS PARTITION DOES NOT EXIST
YOUR DISKSUITE INSTALLATION WILL FAIL, and IT MAY
CORRUPT YOUR DISK!
I will now run a command which will show you the
current disk partitions. You can see the number of
sectors allocated in the column marked Sector Count
If you do not see a line which shows that partition 4
is allocated DO NOT CONTINUE WITH THIS INSTALLATION!
You can see the number of sectors allocated in the
column marked Sector Count. Sectors may vary in size
from 512 bytes to 4096 bytes and perhaps even larger
Warning: Current Disk has mounted partitions.
/dev/dsk/c1t0d0s0 is currently mounted on /. Please see umount(1M).
/dev/dsk/c1t0d0s1 is currently mounted on /var. Please see umount(1M).
/dev/dsk/c1t0d0s3 is currently used by swap. Please see swap(1M).
/dev/dsk/c1t0d0s5 is currently mounted on /opt. Please see umount(1M).
Using Disk Controller c1
If this is not the correct controller, please
exit this script and contact tech support
OL-18083-01
Here is your current disk partition setup. Look
for partition 4
* /dev/dsk/c1t0d0s0 partition map
*
* Dimensions:
* 512 bytes/sector
* 424 sectors/track
* 24 tracks/cylinder
* 10176 sectors/cylinder
* 14089 cylinders
Cisco PGW 2200 Softswitch Release 9.8 Software Installation and Configuration Guide
2-79
Page 94

Loading the Sun Solaris 10 Operating Environment
* 14087 accessible cylinders
*
* Flags:
* 1: unmountable
* 10: read-only
*
* First Sector Last
* Partition Tag Flags Sector Count Sector Mount Directory
0 2 00 8201856 4100928 12302783 /
1 7 00 12302784 10247232 22550015 /var
2 5 00 0 143349312 143349311
3 3 01 0 8201856 8201855
4 0 00 22550016 50880 22600895
5 0 00 22600896 116647488 139248383 /opt
6 0 00 139248384 4100928 143349311
Do you want to continue? (y/n) [N]
Step 6 Type y and press Enter to continue the installation. Text similar to the following is displayed:
Searching for disks...done
Chapter 2 Installing the Sun Solaris 10 Operating System
AVAILABLE DISK SELECTIONS:
0. c1t0d0 <SUN72G cyl 14087 alt 2 hd 24 sec 424>
/pci@1c,600000/scsi@2/sd@0,0
1. c1t1d0 <SUN72G cyl 14087 alt 2 hd 24 sec 424>
/pci@1c,600000/scsi@2/sd@1,0
Specify disk (enter its number): selecting c1t0d0
[disk formatted]
Warning: Current Disk has mounted partitions.
/dev/dsk/c1t0d0s0 is currently mounted on /. Please see umount(1M).
/dev/dsk/c1t0d0s1 is currently mounted on /var. Please see umount(1M).
/dev/dsk/c1t0d0s3 is currently used by swap. Please see swap(1M).
/dev/dsk/c1t0d0s5 is currently mounted on /opt. Please see umount(1M).
FORMAT MENU:
disk - select a disk
type - select (define) a disk type
partition - select (define) a partition table
current - describe the current disk
format - format and analyze the disk
repair - repair a defective sector
label - write label to the disk
analyze - surface analysis
defect - defect list management
backup - search for backup labels
verify - read and display labels
save - save new disk/partition definitions
inquiry - show vendor, product and revision
volname - set 8-character volume name
!<cmd> - execute <cmd>, then return
quit
format>
2-80
PARTITION MENU:
0 - change `0' partition
1 - change `1' partition
2 - change `2' partition
3 - change `3' partition
4 - change `4' partition
5 - change `5' partition
Cisco PGW 2200 Softswitch Release 9.8 Software Installation and Configuration Guide
OL-18083-01
Page 95

Chapter 2 Installing the Sun Solaris 10 Operating System
6 - change `6' partition
7 - change `7' partition
select - select a predefined table
modify - modify a predefined partition table
name - name the current table
print - display the current table
label - write partition map and label to the disk
!<cmd> - execute <cmd>, then return
quit
partition> Enter table name (remember quotes):
partition>
FORMAT MENU:
disk - select a disk
type - select (define) a disk type
partition - select (define) a partition table
current - describe the current disk
format - format and analyze the disk
fdisk - run the fdisk program
repair - repair a defective sector
label - write label to the disk
analyze - surface analysis
defect - defect list management
backup - search for backup labels
verify - read and display labels
save - save new disk/partition definitions
inquiry - show vendor, product and revision
volname - set 8-character volume name
!<cmd> - execute <cmd>, then return
quit
format> Saving new disk and partition definitions
Enter file name["./format.dat"]: format> Searching for disks...done
Loading the Sun Solaris 10 Operating Environment
AVAILABLE DISK SELECTIONS:
0. c1t0d0 <SUN72G cyl 14087 alt 2 hd 24 sec 424>
/pci@1c,600000/scsi@2/sd@0,0
1. c1t1d0 <SUN72G cyl 14087 alt 2 hd 24 sec 424>
/pci@1c,600000/scsi@2/sd@1,0
Specify disk (enter its number): selecting c1t1d0
[disk formatted]
FORMAT MENU:
disk - select a disk
type - select (define) a disk type
partition - select (define) a partition table
current - describe the current disk
format - format and analyze the disk
fdisk - run the fdisk program
repair - repair a defective sector
label - write label to the disk
analyze - surface analysis
defect - defect list management
backup - search for backup labels
verify - read and display labels
save - save new disk/partition definitions
inquiry - show vendor, product and revision
volname - set 8-character volume name
!<cmd> - execute <cmd>, then return
quit
format>
OL-18083-01
PARTITION MENU:
Cisco PGW 2200 Softswitch Release 9.8 Software Installation and Configuration Guide
2-81
Page 96

Loading the Sun Solaris 10 Operating Environment
0 - change `0' partition
1 - change `1' partition
2 - change `2' partition
3 - change `3' partition
4 - change `4' partition
5 - change `5' partition
6 - change `6' partition
7 - change `7' partition
select - select a predefined table
modify - modify a predefined partition table
name - name the current table
print - display the current table
label - write partition map and label to the disk
!<cmd> - execute <cmd>, then return
quit
partition> 0. CISCO
1. original
Specify table (enter its number)[1]:
partition> Current partition table (CISCO):
Total disk cylinders available: 14087 + 2 (reserved cylinders)
Part Tag Flag Cylinders Size Blocks
0 root wm 806 - 1208 1.96GB (403/0/0) 4100928
1 var wm 1209 - 2215 4.89GB (1007/0/0) 10247232
2 backup wm 0 - 14086 68.35GB (14087/0/0) 143349312
3 swap wu 0 - 805 3.91GB (806/0/0) 8201856
4 unassigned wm 2216 - 2220 24.84MB (5/0/0) 50880
5 unassigned wm 2221 - 13683 55.62GB (11463/0/0) 116647488
6 unassigned wm 13684 - 14086 1.96GB (403/0/0) 4100928
7 unassigned wm 0 0 (0/0/0) 0
Chapter 2 Installing the Sun Solaris 10 Operating System
partition> Ready to label disk, continue?
partition>
FORMAT MENU:
disk - select a disk
type - select (define) a disk type
partition - select (define) a partition table
current - describe the current disk
format - format and analyze the disk
fdisk - run the fdisk program
repair - repair a defective sector
label - write label to the disk
analyze - surface analysis
defect - defect list management
backup - search for backup labels
verify - read and display labels
save - save new disk/partition definitions
inquiry - show vendor, product and revision
volname - set 8-character volume name
!<cmd> - execute <cmd>, then return
quit
format> Finished disk partitioning...
metadb: waiting on /etc/lvm/lock
d1: Concat/Stripe is setup
d2: Concat/Stripe is setup
d4: Concat/Stripe is setup
d5: Concat/Stripe is setup
d7: Concat/Stripe is setup
d8: Concat/Stripe is setup
d10: Concat/Stripe is setup
d11: Concat/Stripe is setup
d13: Concat/Stripe is setup
d14: Concat/Stripe is setup
2-82
Cisco PGW 2200 Softswitch Release 9.8 Software Installation and Configuration Guide
OL-18083-01
Page 97

Chapter 2 Installing the Sun Solaris 10 Operating System
d3: Mirror is setup
d6: Mirror is setup
d9: Mirror is setup
d12: Mirror is setup
d15: Mirror is setup
The machine will now reboot.
Wait for the system to come up. Then log in as root,
cd /opt/sun_install/DiskSuite and continue by
executing the script install_disksuite_2.sh
Press the ENTER key to continue:
Step 7 Press Enter to reboot your system.
Step 8 Once the system has completed its reboot, log in as root and change directories to
/opt/sun_install/DiskSuite. Enter the following command:
cd /opt/sun_install/DiskSuite
Step 9 Run the second script. Enter the following command:
./install_disksuite_2.sh
Loading the Sun Solaris 10 Operating Environment
Text similar to the following is displayed:
You are running as root - Good...
Output will be logged in /opt/sun_install/DiskSuite/DiskSuite_2.log
This is part 2 of the script that installs
Disk Suite on an PGW system.
It assumes that Solaris 10 is installed
You should have already run install_disksuite_1.sh
which installs and configures the disks
This script attaches the second disk and starts
the disk replication process
Do you want to continue? (y/n) [N] y
Step 10 Ty p e y and press Enter to continue the installation. Text similar to the following is displayed:
/dev/dsk/c1t0d0s0 is part of SVM volume stripe:d1. Please see metaclear(1M).
/dev/dsk/c1t0d0s1 is part of SVM volume stripe:d4. Please see metaclear(1M).
/dev/dsk/c1t0d0s3 is part of SVM volume stripe:d7. Please see metaclear(1M).
/dev/dsk/c1t0d0s4 contains an SVM mdb. Please see metadb(1M).
/dev/dsk/c1t0d0s5 is part of SVM volume stripe:d10. Please see metaclear(1M).
/dev/dsk/c1t0d0s6 is part of SVM volume stripe:d13. Please see metaclear(1M).
/dev/dsk/c1t1d0s0 is part of SVM volume stripe:d2. Please see metaclear(1M).
/dev/dsk/c1t1d0s1 is part of SVM volume stripe:d5. Please see metaclear(1M).
/dev/dsk/c1t1d0s3 is part of SVM volume stripe:d8. Please see metaclear(1M).
/dev/dsk/c1t1d0s4 contains an SVM mdb. Please see metadb(1M).
/dev/dsk/c1t1d0s5 is part of SVM volume stripe:d11. Please see metaclear(1M).
/dev/dsk/c1t1d0s6 is part of SVM volume stripe:d14. Please see metaclear(1M).
d3: submirror d2 is attached
d6: submirror d5 is attached
d9: submirror d8 is attached
d12: submirror d11 is attached
d15: submirror d14 is attached
Disk Suite is now configured and will start to
OL-18083-01
Cisco PGW 2200 Softswitch Release 9.8 Software Installation and Configuration Guide
2-83
Page 98

Loading the Sun Solaris 10 Operating Environment
mirror to the second disk. It will take some
time for the disk to be completely mirrored.
Depending on the size of the disk, it may take
up to several hours
The system will repeatedly execute the command:
/usr/sbin/metastat |grep done
When there is no output from this command, the replication
will be complete and this script will terminate
At that time, it will be safe to reboot the machine
Resync in progress: 0 % done Resync in progress: 0 % done Resync in progress: 0
% done Resync in progress: 0 % done Resync in progress: 0 % done
Resync in progress: 0 % done Resync in progress: 0 % done Resync in progress: 0
% done Resync in progress: 2 % done Resync in progress: 0 % done
Resync in progress: 0 % done Resync in progress: 1 % done Resync in progress: 1
% done Resync in progress: 4 % done Resync in progress: 1 % done
Note The system continues to issue these re-synchronization messages until the replication is
complete. Once the replication is complete, the system returns a prompt.
Chapter 2 Installing the Sun Solaris 10 Operating System
Note This portion of the installation is time-intensive. The amount of time required to complete the
replication is dependent upon the size of the disk drives in your host. It may take several hours.
Resync in progress: 94 % done
Resync in progress: 96 % done
Resync in progress: 98 % done
The Disk Suite installation is now complete
Press the ENTER key to continue:
Step 11 Press Enter to continue the installation. Text similar to the following is displayed:
The following procedure should be used to add an
alias in the boot rom so you can boot off of the
secondary disk if necessary
Get the information from the system on the second disk
# prtconf -vp |grep pci |grep disk1
NOTE: disk1 is a system maintained standard for the system's
second hard disk. If the prtconf command returns this
information, it can be used to boot the second disk
without any additional changes
To create an alias name other than disk1 for the second
boot disk in the NVRAM, use the information from the
prtconf command (above)
2-84
# eeprom nvramrc='devalias backup_root /pci@1f,0/pci@1/scsi@8/disk@1,0'
Check the alias
eeprom |grep nvramrc
#use-nvramrc?=true
Cisco PGW 2200 Softswitch Release 9.8 Software Installation and Configuration Guide
OL-18083-01
Page 99

Chapter 2 Installing the Sun Solaris 10 Operating System
nvramrc=devalias backup_root /pci@1f,0/pci@1/scsi@8/disk@1,0
Then bring the machine down to the boot prompt
# /usr/sbin/shutdown -g0 -y -i0
.... system shuts down....
ok boot backup_root
The machine should reboot from the second disk. The following
text will be found in the boot output. This ensures that the
machine was working from the second drive:
a) Executing last command: boot backup_root
b) Boot device: /pci@1f,0/pci@1/scsi@8/disk@1,0 File and args:
The boot device listed should match the output from the
nvramrc= output from above
Step 12 If you want to set up your system to be able to reboot from the second disk, proceed to the “Rebooting
from the Mirrored (Secondary) Disk on Sparc-based Platforms” section on page 2-85 or the “Rebooting
from the Mirrored (Secondary) Disk on Opteron-based Platforms” section on page 2-87. Otherwise,
proceed to Step 15.
Step 13 Type the following command and press Enter to reboot your system.
#/usr/sbin/shutdown -g0 -y -i6
Loading the Sun Solaris 10 Operating Environment
The DiskSuite installation is now complete. If you want to configure your system to reboot from the
mirrored disk, go to the “Rebooting from the Mirrored (Secondary) Disk on Sparc-based Platforms”
section on page 2-85 or the “Rebooting from the Mirrored (Secondary) Disk on Opteron-based
Platforms” section on page 2-87. If you want to return to the list for package installation, go to Table 2-2
on page 2-72.
Rebooting from the Mirrored (Secondary) Disk on Sparc-based Platforms
Caution Rebooting from the mirrored (secondary) disk is normally done only after a catastrophic failure of the
primary disk.
Perform the following procedure to add an alias in the boot ROM so you can boot from the secondary
disk, if necessary.
Step 1 Get the information from the system on the second disk that you will boot from. Type the following
command and press Enter:
# prtconf -vp | grep pci | grep disk1
Text similar to the following is displayed:
disk1: ‘/pci@1f,0/pc1@1/scsi@8/disk1,0’
OL-18083-01
Cisco PGW 2200 Softswitch Release 9.8 Software Installation and Configuration Guide
2-85
Page 100

Loading the Sun Solaris 10 Operating Environment
Note Disk1 is a system-maintained standard for the system's second hard disk.
a. If the prtconf command returns the above information, you can use it to boot the second disk
without any additional changes. Proceed to Step 4.
b. If you do not wish to use the above default information, create an alias name other than disk1 for
the second boot disk in the NVRAM by using the information from the prtconf command (above).
# eeprom nvramrc='devalias backup_root /pci@1f,0/pci@1/scsi@8/disk@1,0'
Step 2 Check the alias you created by typing the following commands and pressing Enter:
eeprom |grep nvramrc
Text similar to the following is displayed:
use-nvramrc?=true
nvramrc=devalias backup_root /pci@1f,0/pci@1/scsi@8/disk@1,0
Note In the steps that follow, wherever you see “disk1” replace it with the alias you configured above.
Chapter 2 Installing the Sun Solaris 10 Operating System
Step 3 Before shutting down the system, check the progress of the mirroring to make sure that replication is
complete. Type the following the command to check the progress of the mirroring. An Okay response
means that disk mirroring is complete.
/usr/sbin/metastat
Warning
DO NOT REBOOT
until the replication is complete and the mirrors are in the
Okay
state.
Step 4 When the replication is complete, bring the machine down to the boot prompt. Type the following
command and press Enter:
# /usr/sbin/shutdown -g0 -y -i0
Text similar to the following is displayed:
The system is coming down. Please wait.
System services are now being stopped.
.
.
.
The system is down.
.
.
.
Program terminated
ok
Step 5 In OK mode, enter the following command and press Enter:
ok boot disk1
2-86
Text similar to the following is displayed:
Res
LOM event: +0h5m53s host resetting
.
.
Cisco PGW 2200 Softswitch Release 9.8 Software Installation and Configuration Guide
OL-18083-01
 Loading...