

Page 1
A Division of Cisco Systems, Inc.
®
Model No.
Quick Installation
Model No.
Wireless
WVC54G (UK)
Internet Video Camera
Wireless-G
1
2
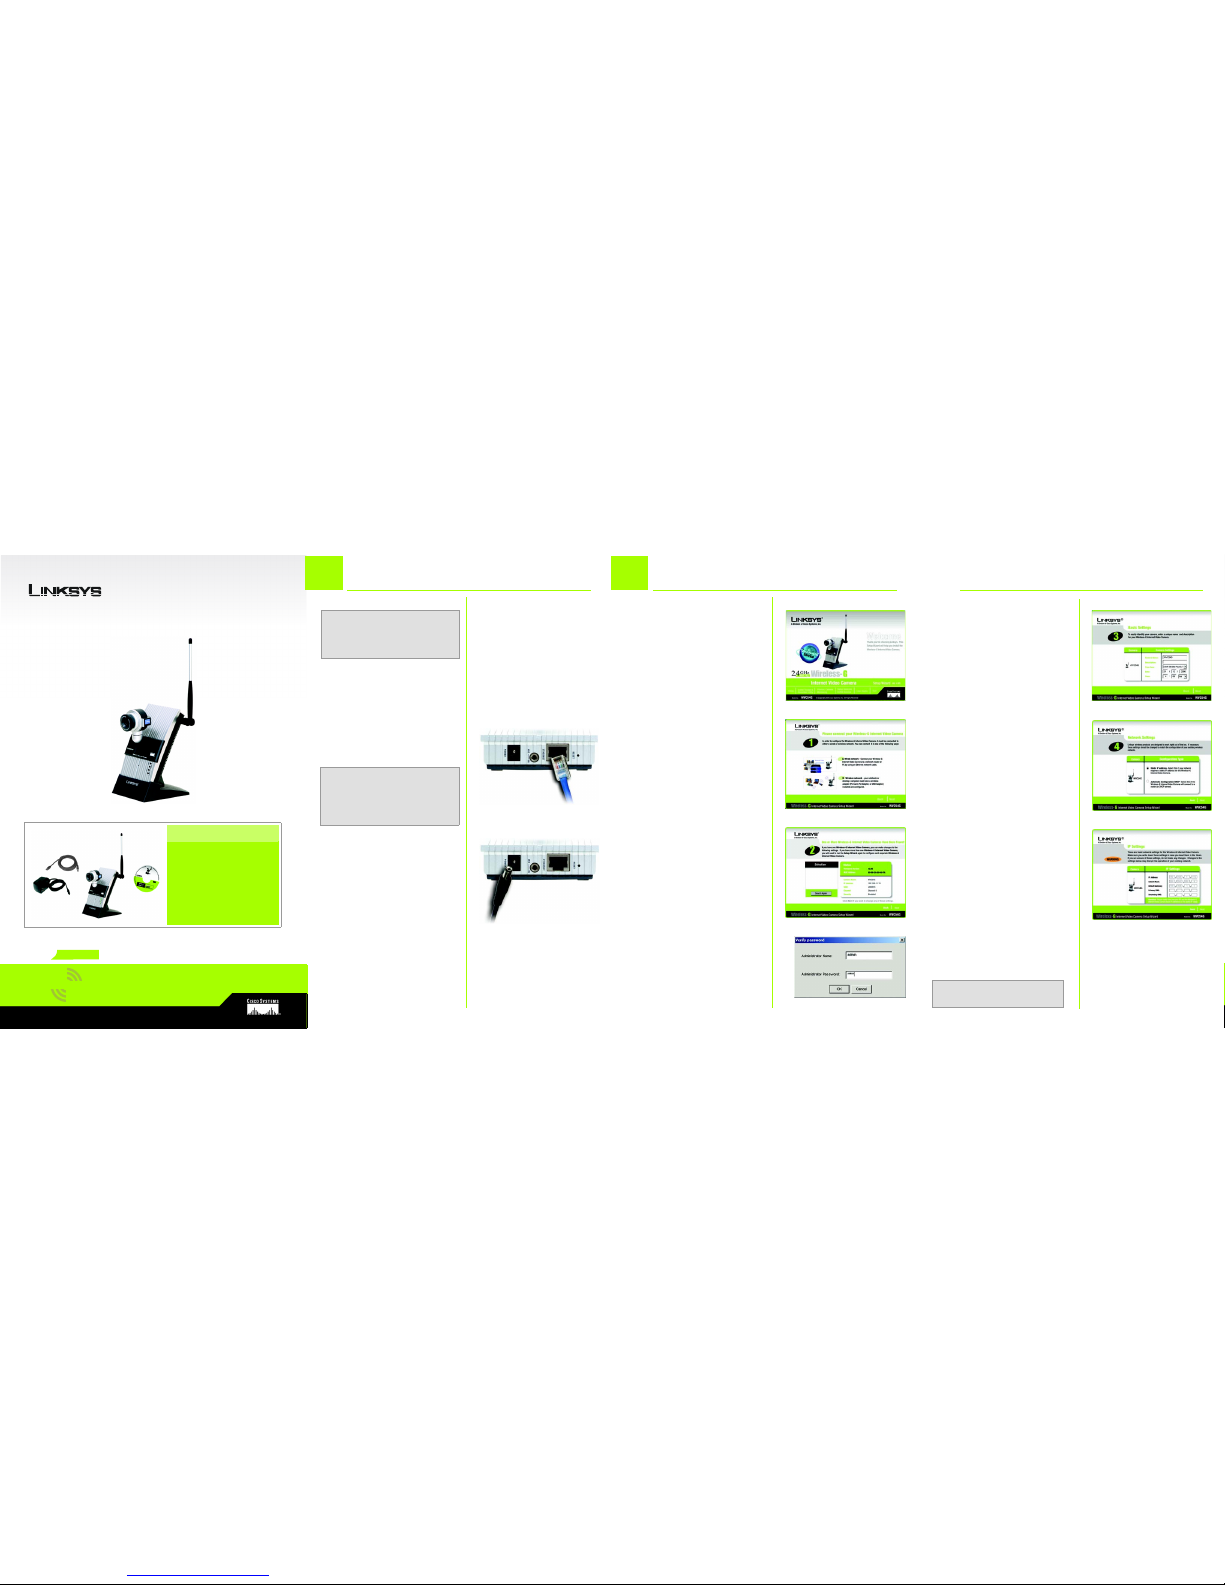
A Attach the antenna.
B Connect the included Ethernet
network cable to your router,
switch, or computer.
C Connect the other end of the
cable to the Ethernet port on
the Camera.
D Connect the included power
adapter to the Power port on
the Camera.
E Plug the power ada pter into
an electrical outlet.
The Ready LED flashes while
the Camera is initializing. When
the Camera is ready for setup,
the Ready and Ethernet LEDs
are solidly lit.
F Enter a unique name for the
Camera in the Camera Name
field, and complete the
Description field. Select your
time zone, and enter the date
and time. Then click Next.
G If your network has a router or
other DHCP server, select
Automatic ConfigurationDHCP. If the Camera requires a
static IP address, keep the
default setting, Static IP
address.
Click Next.
H If you selected Automatic
Configuration-DHCP in step G,
then proceed to step I.
If you selected Static IP
address, the IP Settings screen
will appear. Enter an IP
Address, Subnet Mask, and
Default Gateway appropriate
for your network. You must
specify an IP Address and
Subnet Mask. If you are unsure
about the Default Gateway,
then leave this field blank.
Complete the Primary DN S
and/or Secondary DNS fields.
Enter at least one DNS address,
which you can obtain from
your ISP. Click Next.
A
H
C
G
A Insert the Setup CD-ROM into
your CD-ROM drive. The Setup
Wizard should run
automatically, and the
Welcome screen should
appear. If it does not, click
Start and then Run. In the field
provided, enter D:\wvc54g.exe
(if “D” is the letter of your CDROM drive).
B Click Setup to begin the setup
process.
C Make sure the Camera is
properly connected to your
network. Click Next.
D The screen will display a list of
Wireless-G Internet Video
Cameras on your network and
status information. In the
Selection box, click the name
of the Camera you are
currently installing. Click Next.
E A verify password screen will
appear. In lowercase letters,
enter admin in the
Administrator Name and
Password fields. Click OK.
NOTE: The default IP address of the
Camera is 192.168.1.115.
NOTE: If you want to connect the
Camera to a wireless network for
setup, refer to the User Guide on the
Setup CD-ROM for instructions.
IMPORTANT: You MUST connect the
Camera to a router, switch, or PC using
an Ethernet network cable BEFORE
powering on the Camera. Otherwise, the
Camera will not function.
D
C
D
E
Connect the Camera to a Wired
Network for Setup
Set up the Video Camera
Package Contents
• Wireless-G Internet Video Camera
• Camera Desktop Stand
• Detachable Antenna
• Power Adapter
• Ethernet Network Cable
• Setup CD-ROM with User Guide
(English only)
• User Guide (English only) on CD
• Quick Installation Guides
• SoloLink DDNS Free Trial Card
F
GHz
2
802.11g
4
,
Page 2
J
L
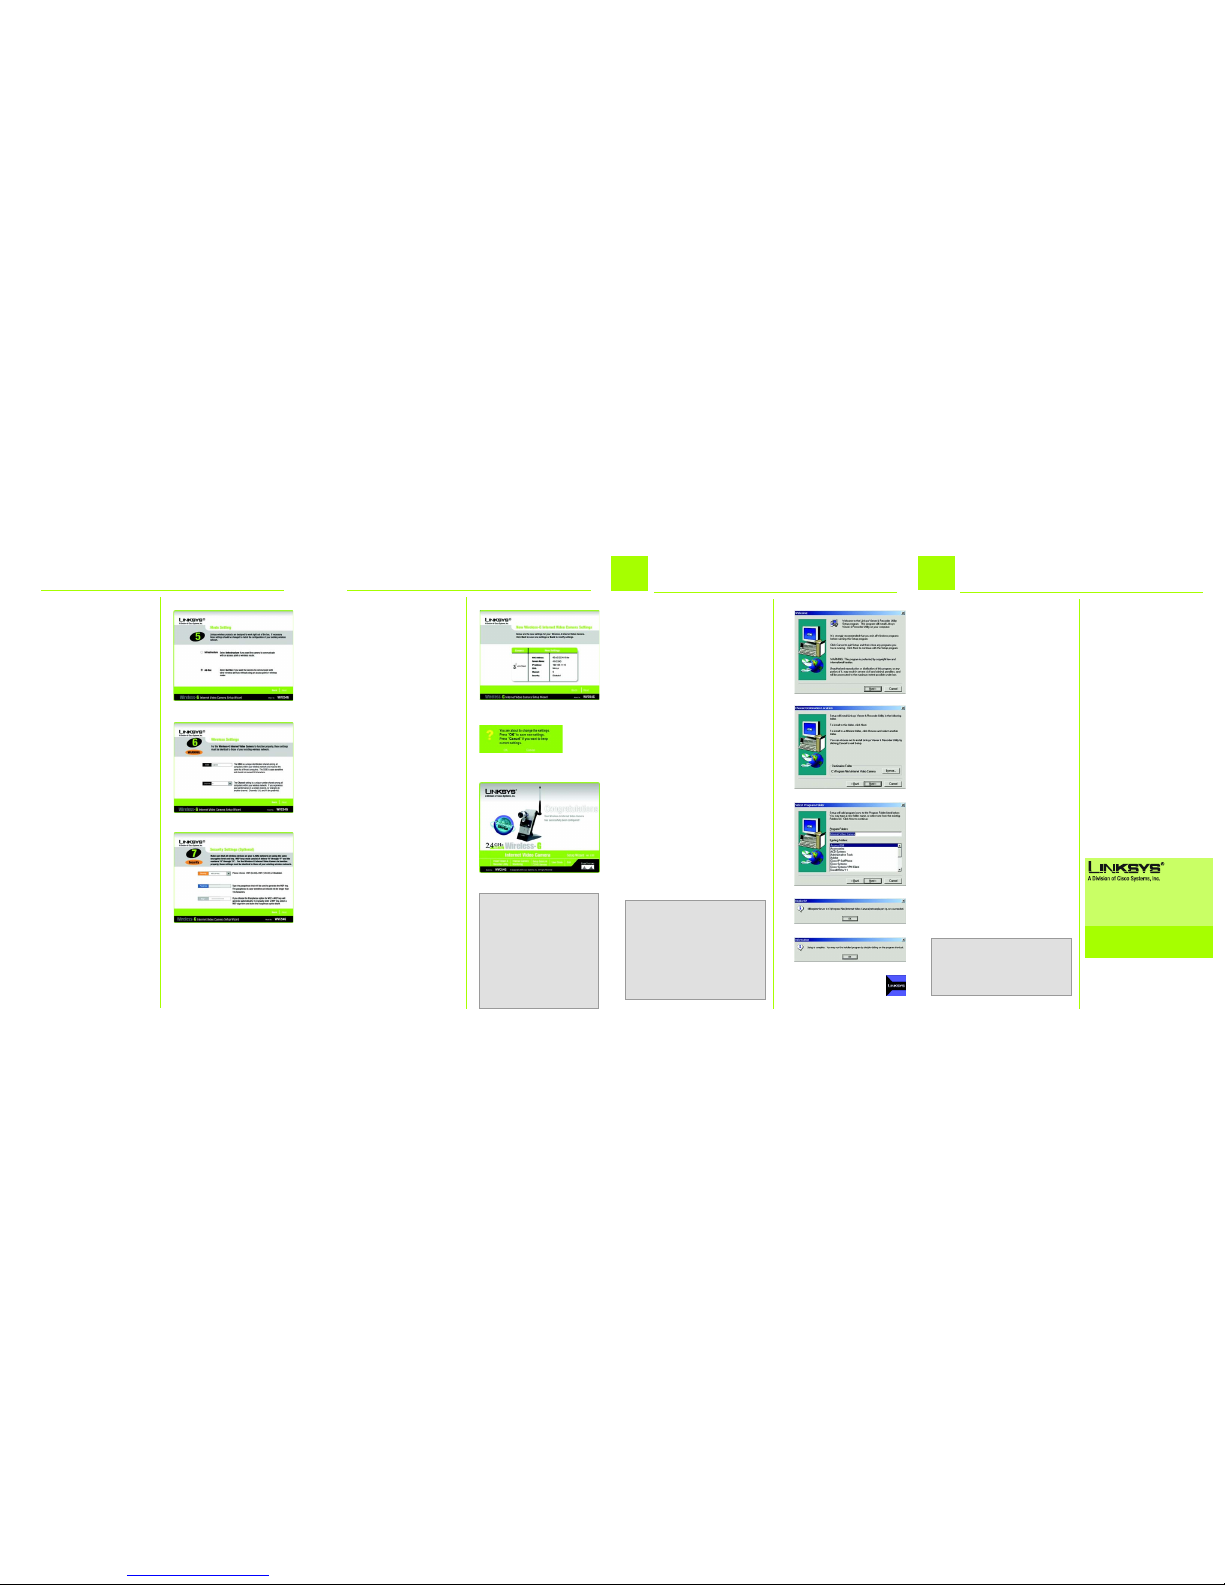
Review your settings before the
Setup Wizard starts to copy
your files. Click Next.
M Click the OK button to confirm
that you want to save the new
settings.
N After the files have been
successfully copied, the
Congratulations screen will
appear.
Click the Install Viewer &
Recorder Utility button to install
the Camera’s Utility on your PC.
This Utility provides a
convenient way to view and
record the Camera’s video.
N
I Click the Infrastructure radio
button if you want the Camera
to communicate using an
access point or wireless router.
Click the Ad-Hoc radio button
if you want the Camera to
communicate without using an
access point or wireless router.
Click Next.
J Enter your wireless network’s
SSID or network name. If you
chose Ad-Hoc mode, select
the channel at which the
network broadcasts its wireless
signal. Then click Next.
K The Security Settings screen will
appear. If your network has
WEP encryption enabled, then
select the level of WEP
encryption and enter a
Passphrase. If you do not have
a Passphrase and want to
manually enter a WEP key,
leave the Passphrase field
blank and complete the Key 1
field.
If your network has WEP
encryption disabled, keep the
default, Disabled.
Then click Next.
4
A Unplug the power adapter
from the electrical outlet.
B Unplug the Ethernet network
cable from the Camera as well
as the PC, router, or switch.
C Place the Camera in the
location you want.
D Plug the power adapter into a
local electrical outlet.
The Ready LED flashes while
the Camera is initializing. When
the Ready and Wireless LEDs
are solidly lit, the Camera is
ready for use.
E Aim and focus the Camera
accordingly.
Congratulations! The installation of
the Wireless-G Internet Video
Camera is complete.
To view the Camera’s video, open
your web browser, and enter the
Camera’s IP address. (Use Internet
Explorer version 5.5 or higher.
Netscape users should use the
Viewer & Recorder Utility.)
A After you clicked the Install
Viewer & Recorder Utility
button, the Welcome screen
will appear. Click Next.
B To install the Utility files in the
default folder, click Next. To
select a different folder, click
Browse and follow the onscreen directions.
C To add program icons to the
default folder, click Next. To
add program icons to an
existing folder, select one from
the Existing Folders listed, and
then click Next.
D When the ActiveX plug-in has
been installed, you will see the
screen shown in Figure D. Then
click OK.
E When the setup is complete,
click OK.
F To open the Utility, double-click
its shortcut on your desktop.
WVC54G-UK-QI-41222NC JL
M
For additional information or troubleshooting
help, refer to the User Guide on the CD-ROM
or the Technical Support Insert. You can also
e-mail for further support.
Website
http://www.linksys.com/international
Linksys is a registered trademark or trademark
and SoloLink is a trademark of Cisco Systems,
Inc. and/or its affiliates in the U.S. and certain
other countries. Copyright © 2005 Cisco Systems,
Inc. All rights reserved.
Model No.
3
K
L
NOTE: On the Congratulations screen of
the Setup Wizard, you can click the
Setup SoloLink DDNS Service button
to take advantage of the Camera’s
Dynamic Domain Name System (DDNS)
feature. This is useful for remote access
of the Camera via the Internet. Refer to
the SoloLink
™
Quick Installation for
more information.
F
Install the Viewer & Recorder Utility
Connect the Video Camera for
Wireless Network Use
I
A
B
D
C
E
NOTE: To use the Viewer & Recorder
Utility, double-click its icon. Click Find
to search for the Camera. Click Add to
add the Camera to the Utility’s list.
Then click View.
NOTE: On the Congratulations
screen of the Setup Wizard, you
can click the Intamac Camera
Monitoring button to take
advantage of the Intamac
Monitoring service. Having the
Camera monitored by Intamac
enhances the security of your
home. Refer to the Intamac
Quick Installation for more
information.
 Loading...