

Page 1
Self Help Guide
®
®
Self Help Guide
IMPORTANT!
This Guide refers to the
following Products:
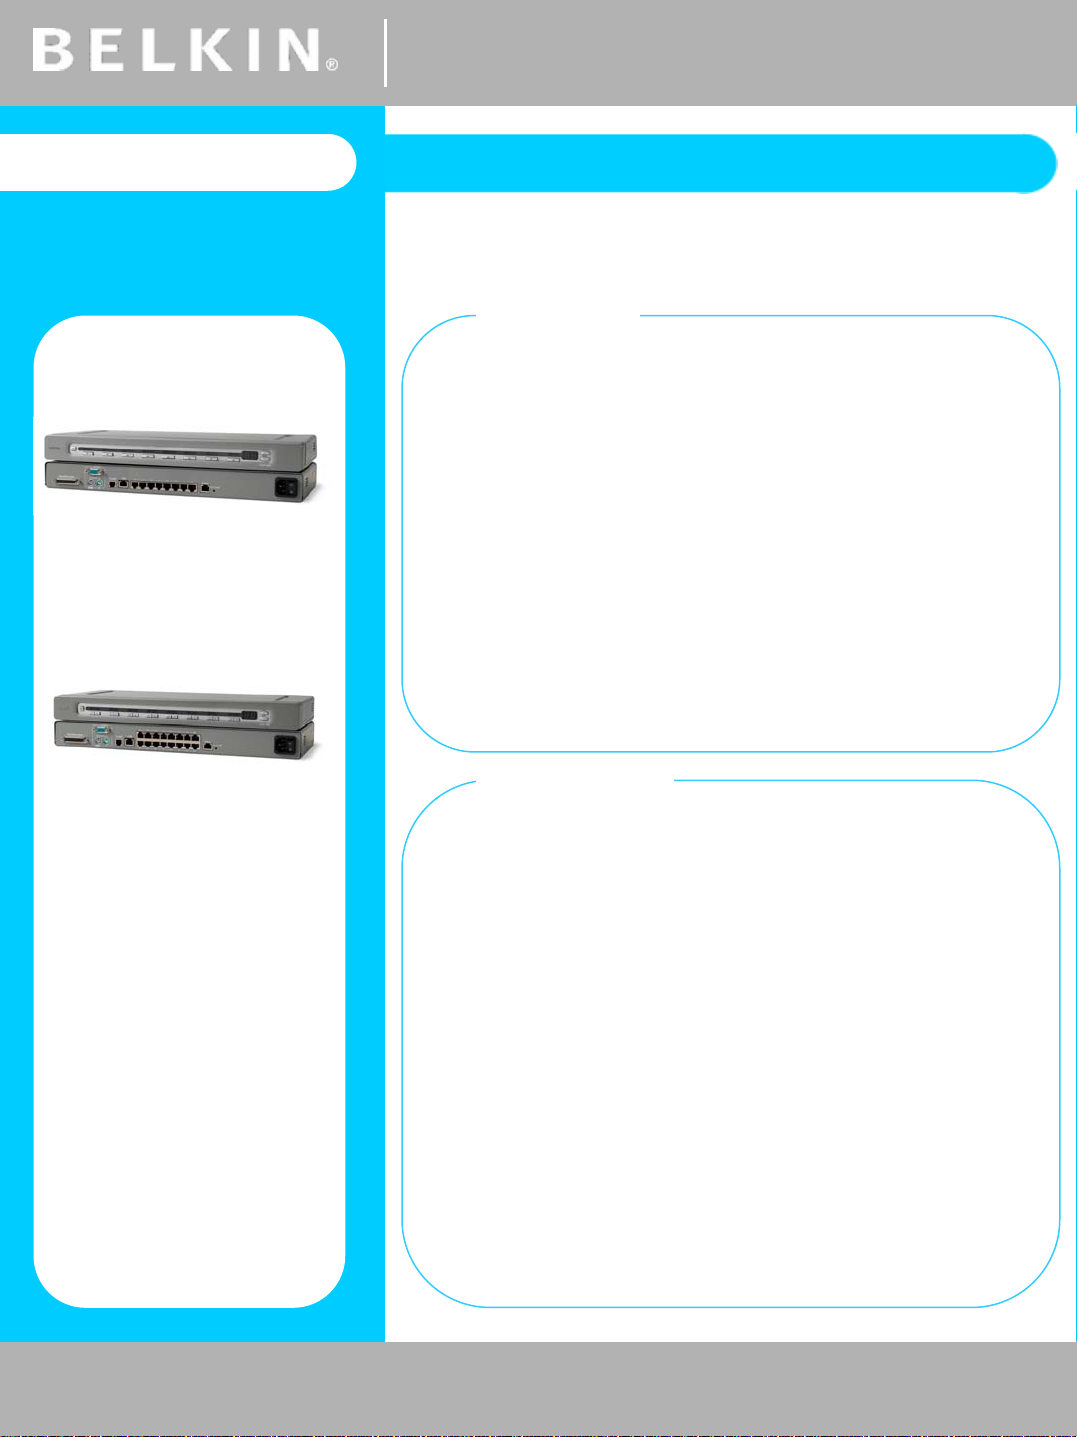
F1DP108G
KVM-Over-IP Mouse Synchronisation Guide
Please read the following carefully;
Synopsis:
This guide is designed to help you configure the
mouse settings to overcome the problems of
poorly synchronised local and remote mice via the
SMB Cat 5 KVM-Over-IP.
The guide is based on a remote session being
established from a Windows 2000 or XP machine.
F1DP116G
Requirements:
This guide assumes that you are an Administrator
or Owner of an SMB Cat 5 KVM-Over-IP (F1DP108G
or F1DP116G) and have access to the KVM and its
connected Hardware.
• SMB Cat 5 KVM-Over-IP Unit
• IEC Power Cord for KVM
• Minimum 1 Host Machine
• Minimum 1 Server Interface Module (SIM)
• Ethernet Cable (To connect KVM to LAN)
• LAN Client PC with remote access to KVM
TSG-UK-1-001 | www.belkin.com | Page 1 of 1
TSG-UK-2-002 | www.belkin.com | Page 1 of 4
Page 2
Self Help Guide
®
®
Self Help Guide
KVM-Over-IP Mouse Synchronisation Guide | Step 1
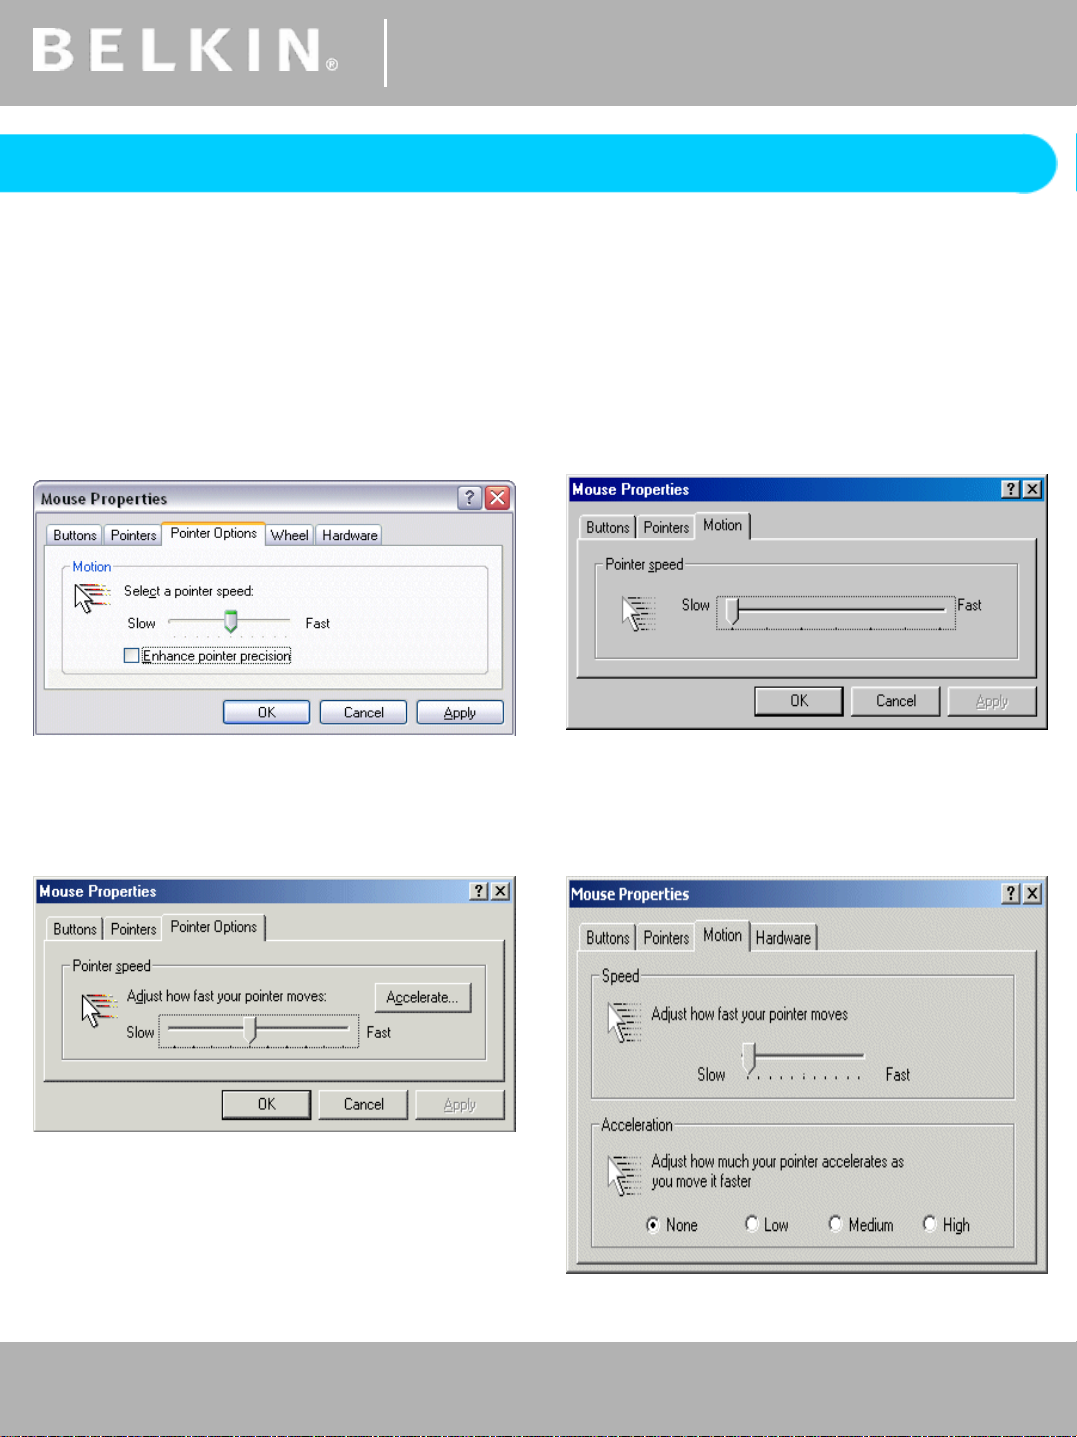
First it is necessary to check the ‘Mouse Settings’ on the Servers connected to the KVM
to ensure that ‘Mouse Acceleration’ is adjusted to suit remote access. The ‘Mouse
Settings’ are accessed via ‘Control Panel’
Windows XP | 2003 Server | Vista
Set ‘Pointer Speed’ is set half-way and
ensure the checkbox for ‘Enhance Pointer
Precision’ is un-ticked.
Windows ME
Set ‘Pointer Speed’ to half-way and make
sure that acceleration is turned off.
Windows 98 | 98SE | NT
Check that the ‘Pointer Speed’ is set to its
slowest position and leave trails off.
Windows 2000
Set ‘Speed’ to slow and ensure that the
acceleration is set to ‘None’.
TSG-UK-1-001 | www.belkin.com | Page 1 of 1
TSG-UK-2-002 | www.belkin.com | Page 2 of 4
Page 3

Self Help Guide
®
®
Self Help Guide
KVM-Over-IP Mouse Synchronisation Guide | Step 2
You can now login to the SMB Cat 5 KVM-Over-IP via its IP Address (e.g.
https://192.168.2.155). Once the Remote Access Session has been established, locate
the ‘Quick Access Toolbar’, choose ‘Server List’ and then select ‘Port 1’.
Next, select the ‘Mouse Settings’ Icon in the ‘Quick Access Toolbar’ and choose the
‘Manual Settings’ option from the drop down list.
In the ‘Mouse Settings’ section verify that the correct Operating System has been
selected from the options provided. For Windows 2000 un-check the ‘Default’ option
and set ‘Mouse Acceleration’ to none.
The ‘USB’ box on the bottom-left corner should only be ticked if the Host Machine
(Server) is attached to the KVM via a USB Server Interface Module (SIM).
TSG-UK-1-001 | www.belkin.com | Page 1 of 1
TSG-UK-2-002 | www.belkin.com | Page 3 of 4
Page 4

Self Help Guide
®
®
Self Help Guide
KVM-Over-IP Mouse Synchronisation Guide | Step 3
In the same ‘Mouse Settings’ window click on the ‘Advanced’ button;
Ensure that the ‘Mouse Emulation’ settings are as follows;
Once the settings have been changed accordingly click ‘OK’ on the ‘Mouse Emulation’
screen, and click ‘OK’ again on the ‘Mouse Settings’ screen.
Next, press the key combination LEFT CTRL + M to align the mouse.
Once complete, check that the local and remote mice are now synchronised.
Repeat these steps for all affected Host Server Ports.
TSG-UK-1-001 | www.belkin.com | Page 1 of 1
TSG-UK-2-002 | www.belkin.com | Page 4 of 4
 Loading...