

Page 1
Title: Blanketroll II Rev: 3-04-2010
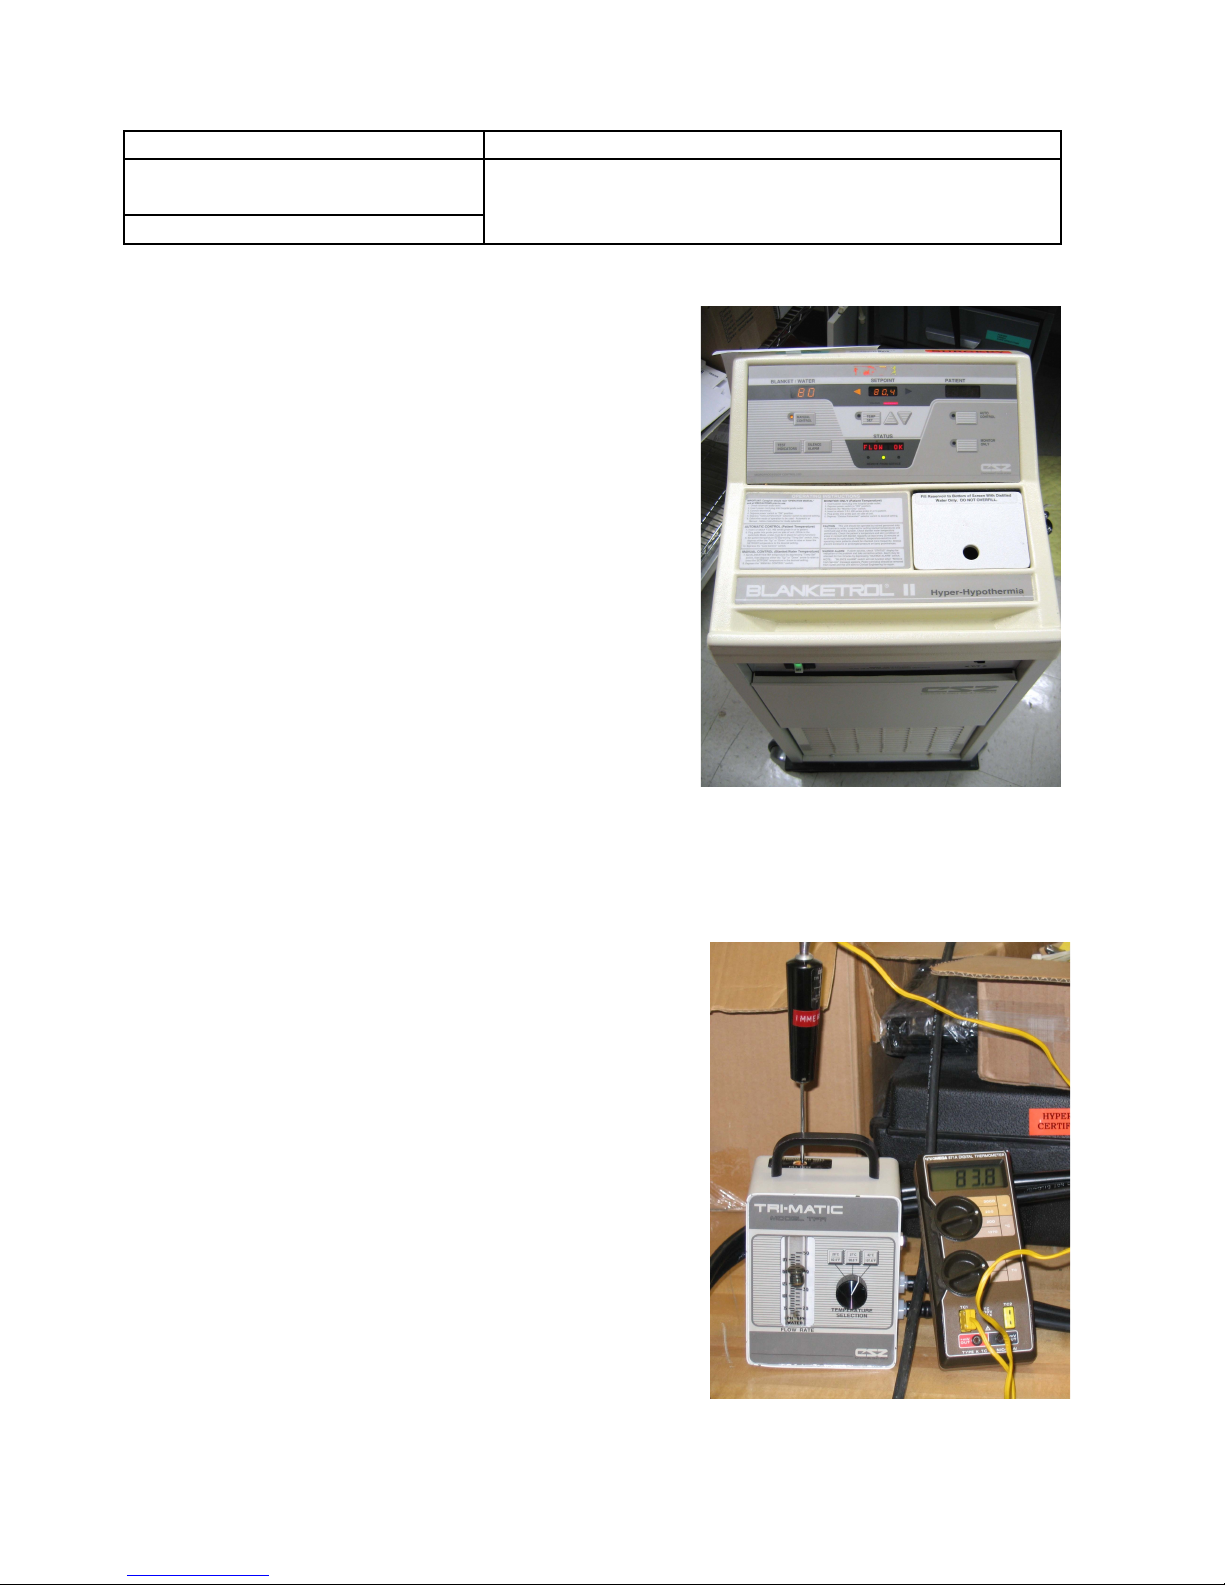
Model 222, 222A by Cincinnati
Sub Zero Products
File = blanketroll.pdf
1. General
This unit heats and cools a water filled blanket between 39
and 107 degrees F. Typical inspection interval: 365 days.
2. Reference Documents
Operation and Technical Manual, Cincinnati-Sub-Zero
P/N B2OTM circa 1984
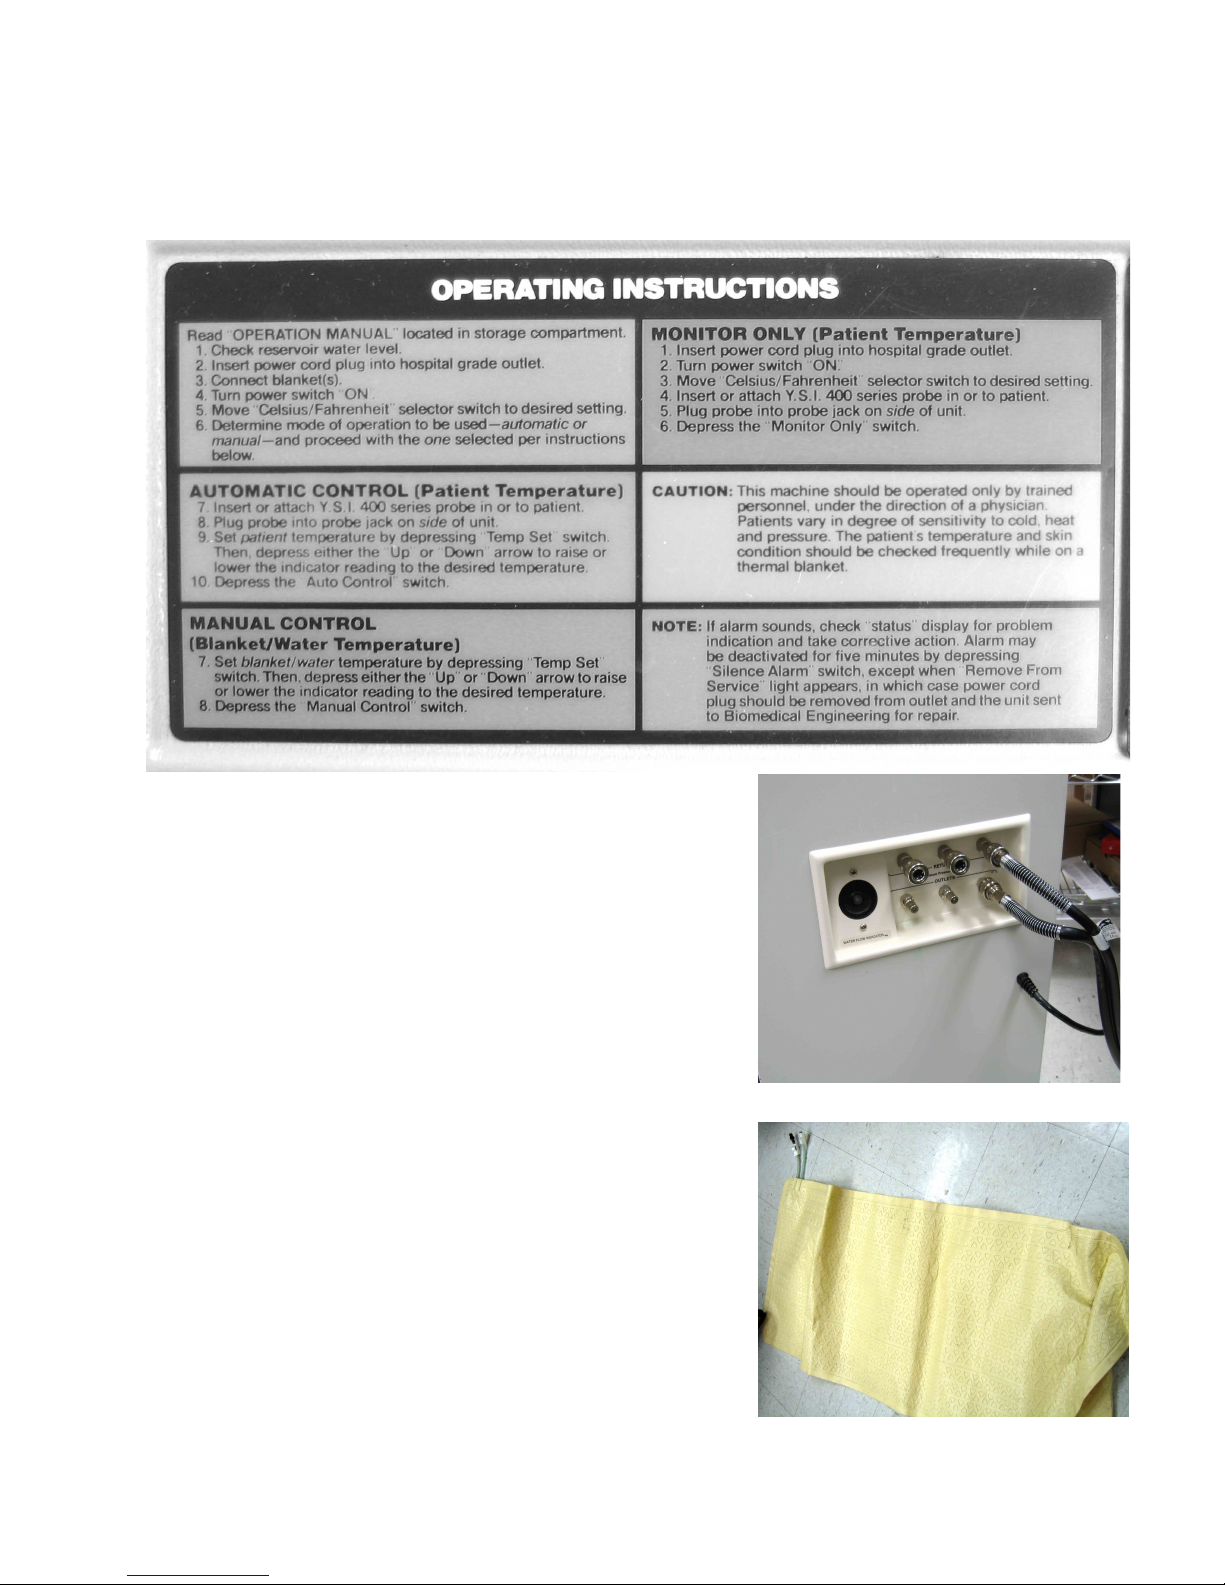
See photo of label instructions.
Note: Monitor mode refers to a mode used only to
measure/display patient temperature via an optional
external temperature probe (YSI 400 Series).
Automatic Control refers to a feedback mode where
control is based on a patient connected probe.
3. Tools / Fixtures
Temperature probe (ex: Fluke ________)
Adult Hypothermia blanket – see photo.
Flowmeter: Model TFR Tester
Safety Analyzer
Distilled water.
DISCLAIMER: THIS PROCEDURE PROVIDED "AS IS" AND
WITH POSSIBLE FAULTS. USER MUST VERIFY BEFORE USE.
NEITHER PROVIDER NOR WEBSITE ASSUMES ANY
RESPONSIBILITY FOR ITS USE.
4. Setup/Preliminaries
1.. Check the unit and accessories for cleanliness and damage.
2.. Remove panel and blow out dust.
3.. Check the date strip on the back of the unit to
determine if the water needs to be drained from the
unit.
4.. If the water was drained, refill the reservoir to the
screen level with distilled water; if screen is missing,
the minimum level is about 3/16” above the
plate/surface visible below the filling hole.
5.. Optional: Add the recommended disinfectant to the
water and place a new strip, dated one month ahead,
on the back of the unit.
6.. Check the castors for free movement; spray if
necessary.
7.. Check the hose outlet connectors.
8.. Check each of the switches.
9.. Check the control panel by pressing <Test
Indicators>.
10.. Check the manufacturer's labels.
11.. Check the power cord, strain relief, power plug, and
circuit breaker for operation.
Page 2
12.. Perform the ground resistance test (< 0.100 ohms).
13.. Perform case leakage test (< 100 uA).
14.. Clean condenser and fan.
15.. Refrigerant Check?
5. Functional Checkout
5.1. Connect the flowmeter to the unit with the hoses (see
illustrations
5.2. Plug the unit into an AC outlet and turn the unit on. Using
mech switch on lower panel, change, if necessary, the
readout to degrees F.
5.3. Press and hold the Test Indicators panel button to
confirm all display segments OK.
Notes:
The accepted temperature tracking spec (not Automatic mode) when measured with an external
digital temp probe is +/- 1 degree C (per outside vendor).
Model 222A has three LED’s below the display
corresponding to Cooling, At Setpoint, and Heating.
5.3 Heat Mode
Press Temp Set and the up/dn arrows to get to 90 F. Start
the unit by hitting “Manual Control”. Unit will begin
pumping and heating. The external thermometer must
reach the above setpoint at an approximate rate of 1 degree
F per minute.
• The display will show “HEATING”.
Page 3

• The flow rate, as indicated by the flowmeter, must exceed 25 gph.
• On later revisions of the model, the display will indicate “FLOW OK”.
5.4 Cooling Mode Press Temp Set and the up/dn arrows to get to 80 F. Start the unit by hitting
“Manual Control”.
The display should indicate “COOLING” and within several minutes should change to “AT
SET PT”.
5.5 No Flow Check:
Kink the hose coming from the Supply hose outlet connector.
The display must show “LOW FLOW” light, with a sounding of the alarm.
Unkink the hose. Unit should return to normal immediately.
 Loading...