

Chevrolet Enjoy Owner's Manual


Dear Customer,
Welcome to the Chevrolet family. We wish to thank you for choosing Chevrolet Enjoy.
It is our constant endeavor to provide you with products that offer excellent performance through out their ownership period. Which is
why, in addition to offering great cars, we have also set up an extensive, and very well equipped network of retailers and authorized
service centres across the country.
Naturally, these Chevrolet retailers knows everything there is to know about your car, and provides you with the best service possible. In
fact, every retailer is equipped with the most advanced technology, technicians specially trained by us, and genuine spares. Needless to
say, they are also committed to ensure your complete satisfaction.
So, please contact a Chevrolet retailer for any servicing need and make sure that only genuine spares are used for your car.
This Manual will familiarize you with the operation and maintenance of your new vehicle. It will also provide you with important safety
information. Please do read it carefully and follow the recommendations. In fact, the Manual is like a permanent part of your car. And it
would go a long way in ensuring a safe and trouble-free operation for your car.
Should you have any query please feel free to call our 24 hr. Helpline at 1800 3000 8080 or email us at : gmi.cac@gm.com.
Happy Motoring


CONTENTS
Introduction ................................ 1-1
Introduction ............................ 1-1
Using this Manual ................... 1-2
Danger, Warnings and
Cautions .................................. 1-2
Keys, Doors and Windows .......... 2-1
Keys and Locks ...................... 2-1
Doors ...................................... 2-8
Vehicle Security ...................... 2-9
Exterior Mirrors .................... 2-12
Interior Mirror ....................... 2-14
Windows ............................... 2-14
Sun Visors ..............................2-17
Seats and Restraints ................... 3-1
Head Restraints ....................... 3-2
Front Seats .............................. 3-3
Rear Seats ............................... 3-6
Safety Belts ........................... 3-11
Airbag System ...................... 3-18
Child Restraints ..................... 3-25
Storage ......................................... 4-1
Storage Compartments ............ 4-1
Seatback Hooks ........................4-3
Roof Paneling ......................... 4-3
Information on Loading the
Vehicle ..................................... 4-4
Instruments and Controls .......... 5-1
Instrument Panel Overview .... 5-2
Controls .................................. 5-3
Warning Lights, Gauges and
Indicators .............................. 5-10
Lighting......................................... 6-1
Exterior Lighting .................... 6-1
Interior Lighting ..................... 6-5
Climate Control System ............. 7-1
Air Vents ...................................7-2
A/C Control Panel ....................7-4
Air Conditioning System ..........7-8
Rear Window Defogger..........7-13
Air Outlets ..............................7-14
Maintenance............................7-15
Driving and Operating ............... 8-1
Driving Information ................ 8-2
Starting and Operating .......... 8-13
Manual Transmission ............ 8-18
Brakes ................................... 8-19
Object Detection Systems ..... 8-25
Fuel ....................................... 8-26
Vehicle Care ................................. 9-1
General Information ................ 9-2
Driver's Checklist ................... 9-3
Hood ....................................... 9-4
Engine Compartment
Overview ................................ 9-6
Engine Oil ............................... 9-7
Coolant .................................. 9-11
Brake Fluid ........................... 9-16
Transmission Fluid ............... 9-18
Power Steering Fluid ............ 9-18
Windshield Washer Fluid ...... 9-19
Windshield Wipers .................9-20
Air Filter ............................... 9-21
Drive Belt ............................. 9-22
Battery .................................. 9-22
Brake Pedal ........................... 9-24
Parking Brake ....................... 9-24
Bulb Replacement ................. 9-24
Electrical System .................. 9-26
Wheels and Tires .................. 9-29
Jump Starting ........................ 9-46
Towing .................................. 9-50
Engine Exhaust ..................... 8-30

Appearance Care ................... 9-55
Service and Maintenance ..........10-1
General Information............... 10-1
Scheduled Maintenance ........ 10-3
Recommended Fluids and
Lubricants ............................. 10-6
Technical Data.............................11-1
Vehicle Identification ............ 11-1
Vehicle Specifications ........... 11-3
Service and Warranty ...............12-1
Standard Limited Warranty
Coverage ............................... 12-2
Predelivery Inspection and
Vehicle Delivery ................... 12-9
Owner's Statement of
Acceptance .......................... 12-11
Chevrolet Service ................ 12-13
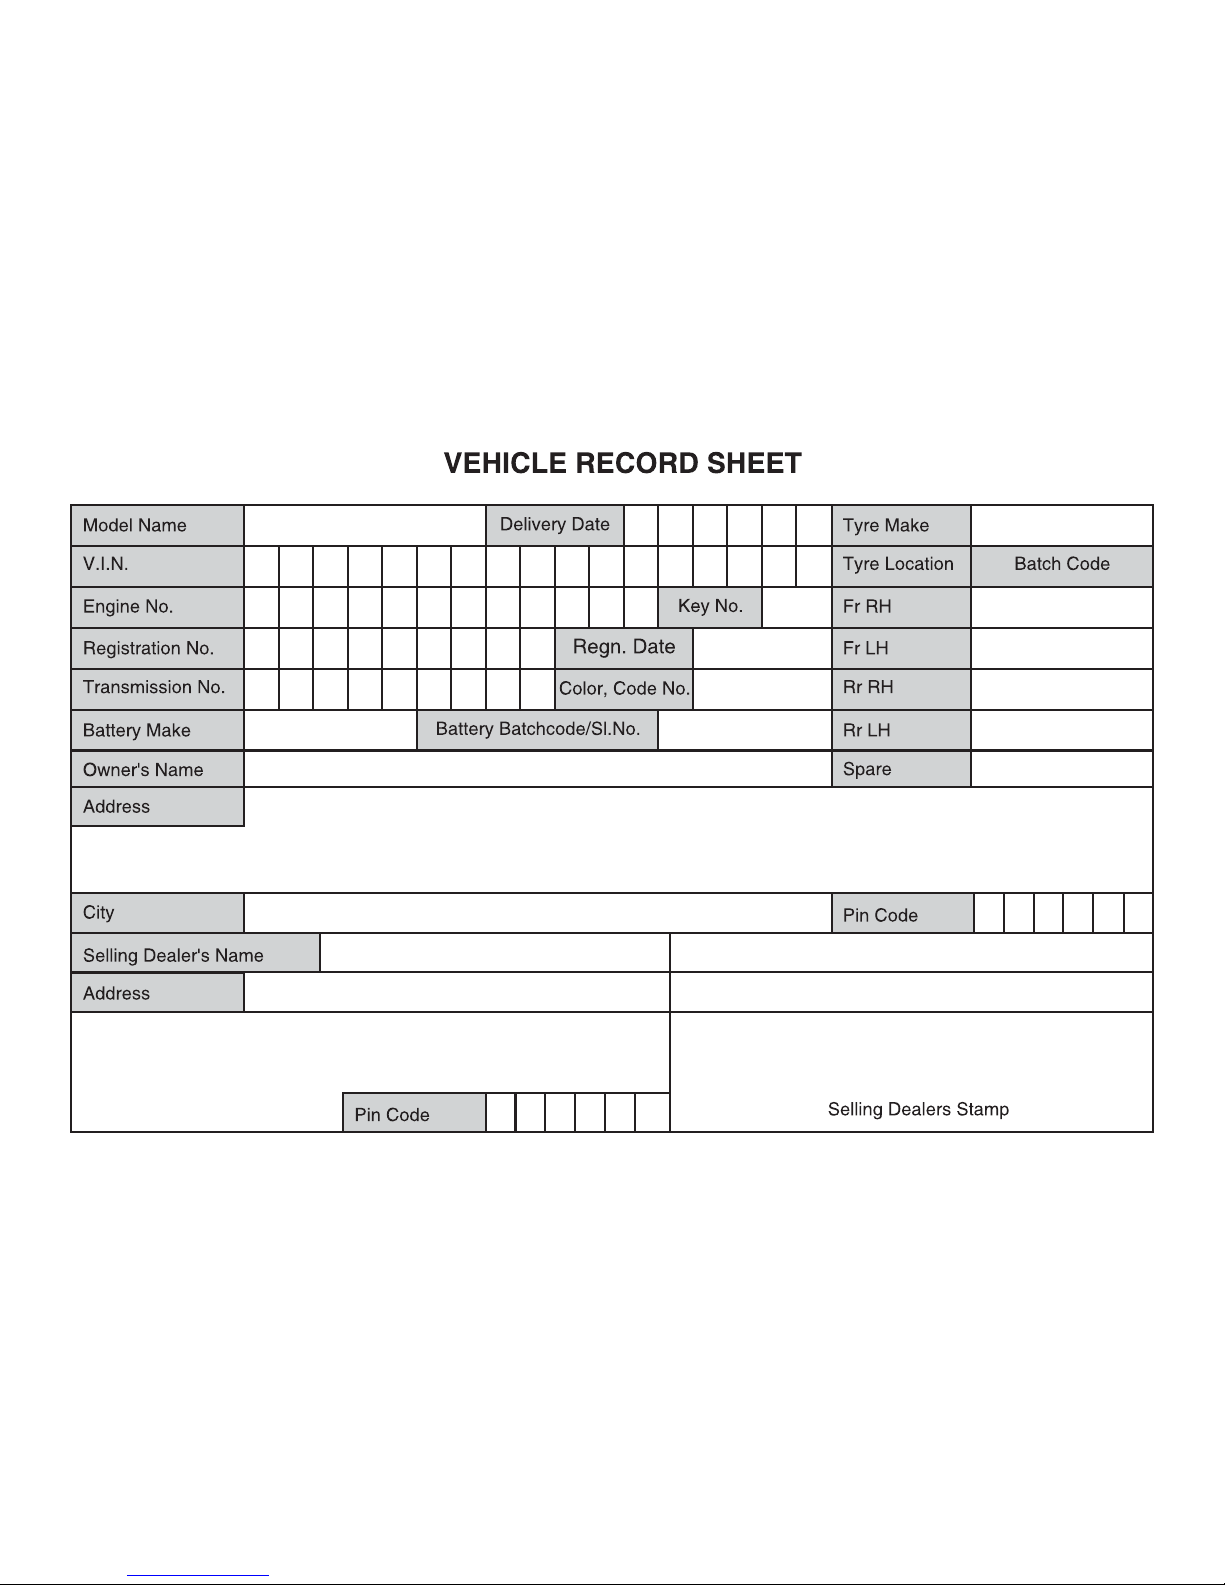
Maintenance Record Sheet ... 12-19
Battery ................................ 12-21
Separate Corrosion Protection
Service ................................ 12-22
Body Inspection Record ..... 12-23
Emission Warranty .............. 12-25
Annexure I ............................12-29
Annexure II...........................12-30
Service Network ........................ 13-1
Chevrolet Sales India
Sales and Service Network .....13-1
North Zone............................. 13-2
West Zone ............................. 13-8
South Zone .......................... 13-13
East Zone ............................ 13-19
International ........................ 13-22

Your vehicle is a designed combination
of advanced technology, safety, environmental friendliness, and economy.
This Owner's Manual provides you
with all the necessary information to
enable you to drive your vehicle safely
and efficiently.
Make sure your passengers are aware of
the possible risk of accident and injury
which may result from improper use of
the vehicle.
You must always comply with the
specific laws and regulations of the
country that you are in. These laws may
differ from the information in this
Owner’s Manual.
When this Owner's Manual refers to a
CHEVROLET retailer visit, we recommend your CHEVROLET Service
Partner.
All CHEVROLET Service Partners
provide first-class service at reasonable
prices. Experienced mechanics trained
by CHEVROLET work according to
specific CHEVROLET instructions.
The customer literature pack should
always be kept ready to hand in the
vehicle.
INTRODUCTION
Introduction ................................ 1-1
Using this Manual........................ 1-2
Danger, Warnings and
Cautions ....................................... 1-2
Introduction 1-1
INTRODUCTION
n The table of contents at the
beginning of this Manual and
within each section shows where
the information is located.
n Certain functions and configura-
tions described in this Manual do
not apply to all models, but are
dependent on the specific model.
n The Manual contains the latest
information available at the time of
printing. General Motors India Pvt.
Ltd. is responsible for revision and
clarification of this Manual, and has
reserved the rights to make changes
without notice after printing of this
Manual. Some pictures shown are
purely schematic diagrams for
reference only. If any picture does
not match the physical object, the
object itself is decisive.
n The vehicle display screens may
not support your specific language.
1-2 Introduction
Danger
Text marked Danger provides
information on risk of fatal injury.
Disregarding this information may
endanger life.
Warning
Text marked Warning provides
information on risk of accident or
injury. Disregarding this information
may lead to injury.
Caution
Text marked Caution provides
information on possible damage to
the vehicle. Disregarding this
information may lead to vehicle
damage.
DANGER, WARNINGS
AND CAUTIONS
USING THIS MANUAL
n
tory engine designations. The corresponding engine identification
code can be found in the chapter
"Technical Data".
n Directional data, e.g. left or right
refers to the direction of travel.
n Depending on the model variant,
country variant, integrated special
equipment and accessories, the
scope of equipment of your vehicle
can differ from the descriptions in
this Owner's Manual.
The Owner's Manual uses the fac-

Introduction 1-3
Note: Text marked Note indicates a
point to take into account when
operating the vehicle. Failure to
observe this may lead to incorrect
operation.
: This is a safety symbol which
means 'Do not', 'Do not do this', or
'Do not let this happen'.
* or (Option) : The asterisk in this
Manual signify an item of equipment that is not included on all
vehicles. Such items include engine
options, model variations specific
to one country, and optional
equipment.
All information, illustrations, and
specifications in this Manual are based
on the latest product information
available at the time of publication.
General Motors India Pvt. Ltd. reserves
the right to change specifications or
designs at any time without notice and
without incurring obligation.
This vehicle may not comply with the
standards or regulations of other
countries. Before attempting to register
this vehicle in any other country, check
all applicable regulations and make any
necessary modifications.
This Manual describes the options and
trims available at the time of publication. Some of the items covered may
not apply to your vehicle. Contact your
CHEVROLET retailer for information
on options and trims availability.
Non-General Motors India Pvt. Ltd.
genuine parts and accessories have not
been examined or approved by General
Motors India Pvt. Ltd. We can certify
neither the suitability nor the safety of
non-GMI genuine parts and accessories
and are not liable for damage caused by
their use.
Warning : Tampering of wiring
harness or fitment of non genuine
accessories in your vehicle may lead to
short circuit resulting in fire.
We wish you many hours of pleasurable
driving Chevrolet.

1-4 Introduction
Keys, Doors and Windows 2-1
KEYS, DOORS AND
WINDOWS
KEYS AND LOCKS
KEYS
Keys and Locks ........................... 2-1
Keys ........................................ 2-1
Remote Keyless Entry
(RKE) System* ........................2-2
Door Locks ............................. 2-5
Child Safety Locks ................. 2-7
Doors ............................................ 2-8
Tailgate ................................... 2-8
Vehicle Security ........................... 2-9
Central Locking System* ........2-9
Auto Door Relock* ................. 2-9
Automatic Door Locking* ...... 2-9
Automatic Door Unlocking* .. 2-9
Vehicle Locator Function* .... 2-10
Door Lock Reminder* .......... 2-10
Anti-Theft Alarm System* .. 2-10
Exterior Mirrors ...................... 2-12
Convex Mirrors ..................... 2-12
Power Rear View Mirrors* .. 2-12
Manual Rear View Mirrors .. 2-13
Interior Mirror ......................... 2-14
Manual Rear View Mirror ... 2-14
Windows .................................... 2-14
Power Windows .................... 2-14
Power Window Lock Switch..2-16
Tilt Quarter Window ........... 2-16
Sun Visors................................... 2-17
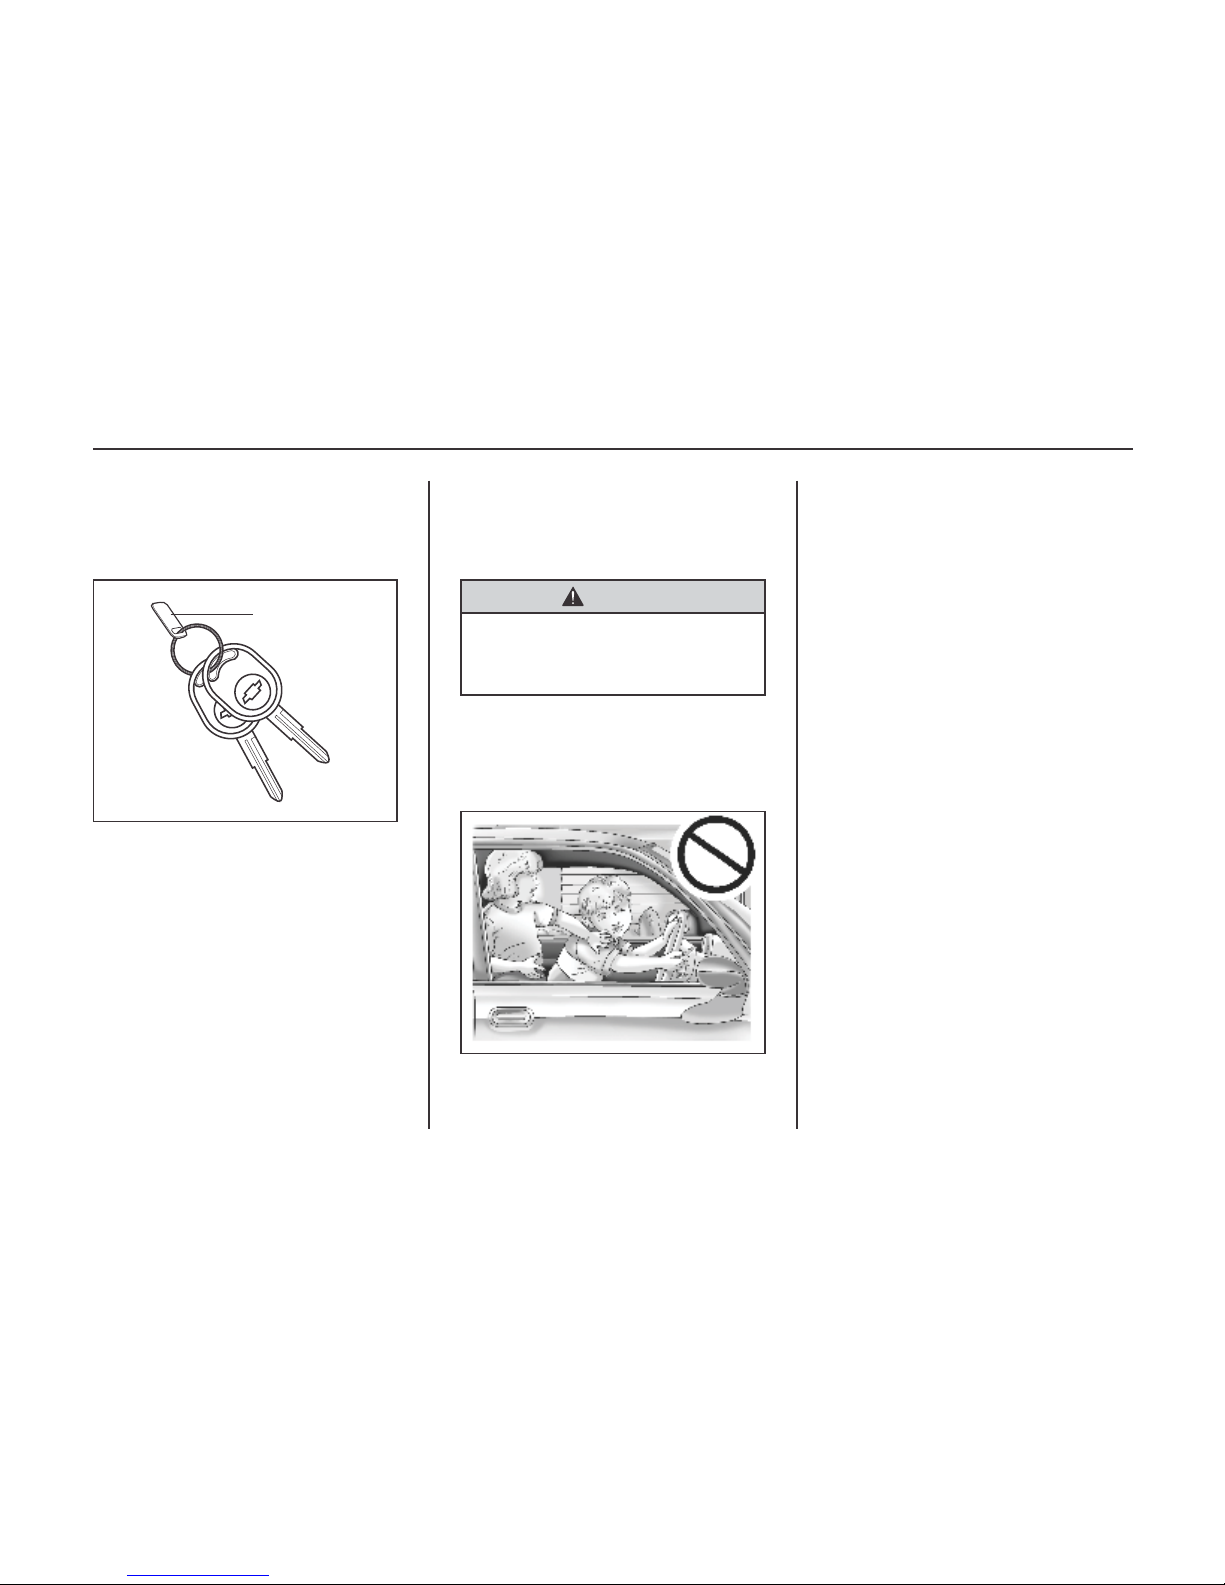
Warning
Leaving children in a vehicle with
the ignition key is dangerous for
many reasons. Children or others
could be badly injured or even killed.
They could operate the power
windows or other controls or even
make the vehicle move.
The windows will function with the
key in the ignition and children could
be seriously injured or killed if
caught in the path of a closing
window. Do not leave the keys in a
vehicle with children.
2-2 Keys, Doors and Windows
Two keys are provided with your new
Chevrolet vehicle.
Keep one of the two keys as a spare. The
key number is stamped on the key
number plate. For vehicle security, keep
the key number plate in a safe place, not
in the vehicle. You should also record
the key number in a safe place, not in
the vehicle.
This deters unauthorized persons from
obtaining a duplicate key.
Warning
Do not leave the key in the vehicle.
• Lock the vehicle.
• Take the key with you.
Key Number Plate
Note
In case of loss, replacement keys are
available with your CHEVROLET
retailer.
A key that is part of the Remote Keyless
Entry (RKE) transmitter can be used for
the ignition and all locks.
REMOTE KEYLESS ENTRY
(RKE) SYSTEM*
Changes or modifications to this
system by other than an authorized
service facility could void authorization to use this equipment. If there is a
decrease in the RKE operating range:
Ÿ Check the distance. The transmitter
may be too far from the vehicle.
Ÿ Check the location. Other vehicles
or objects may be blocking the
signal.
Ÿ Check the transmitter's battery. See
“Battery Replacement” later in this
section.
Ÿ If the transmitter is still not working
correctly, see your CHEVROLET
retailer for service.
Keys, Doors and Windows 2-3
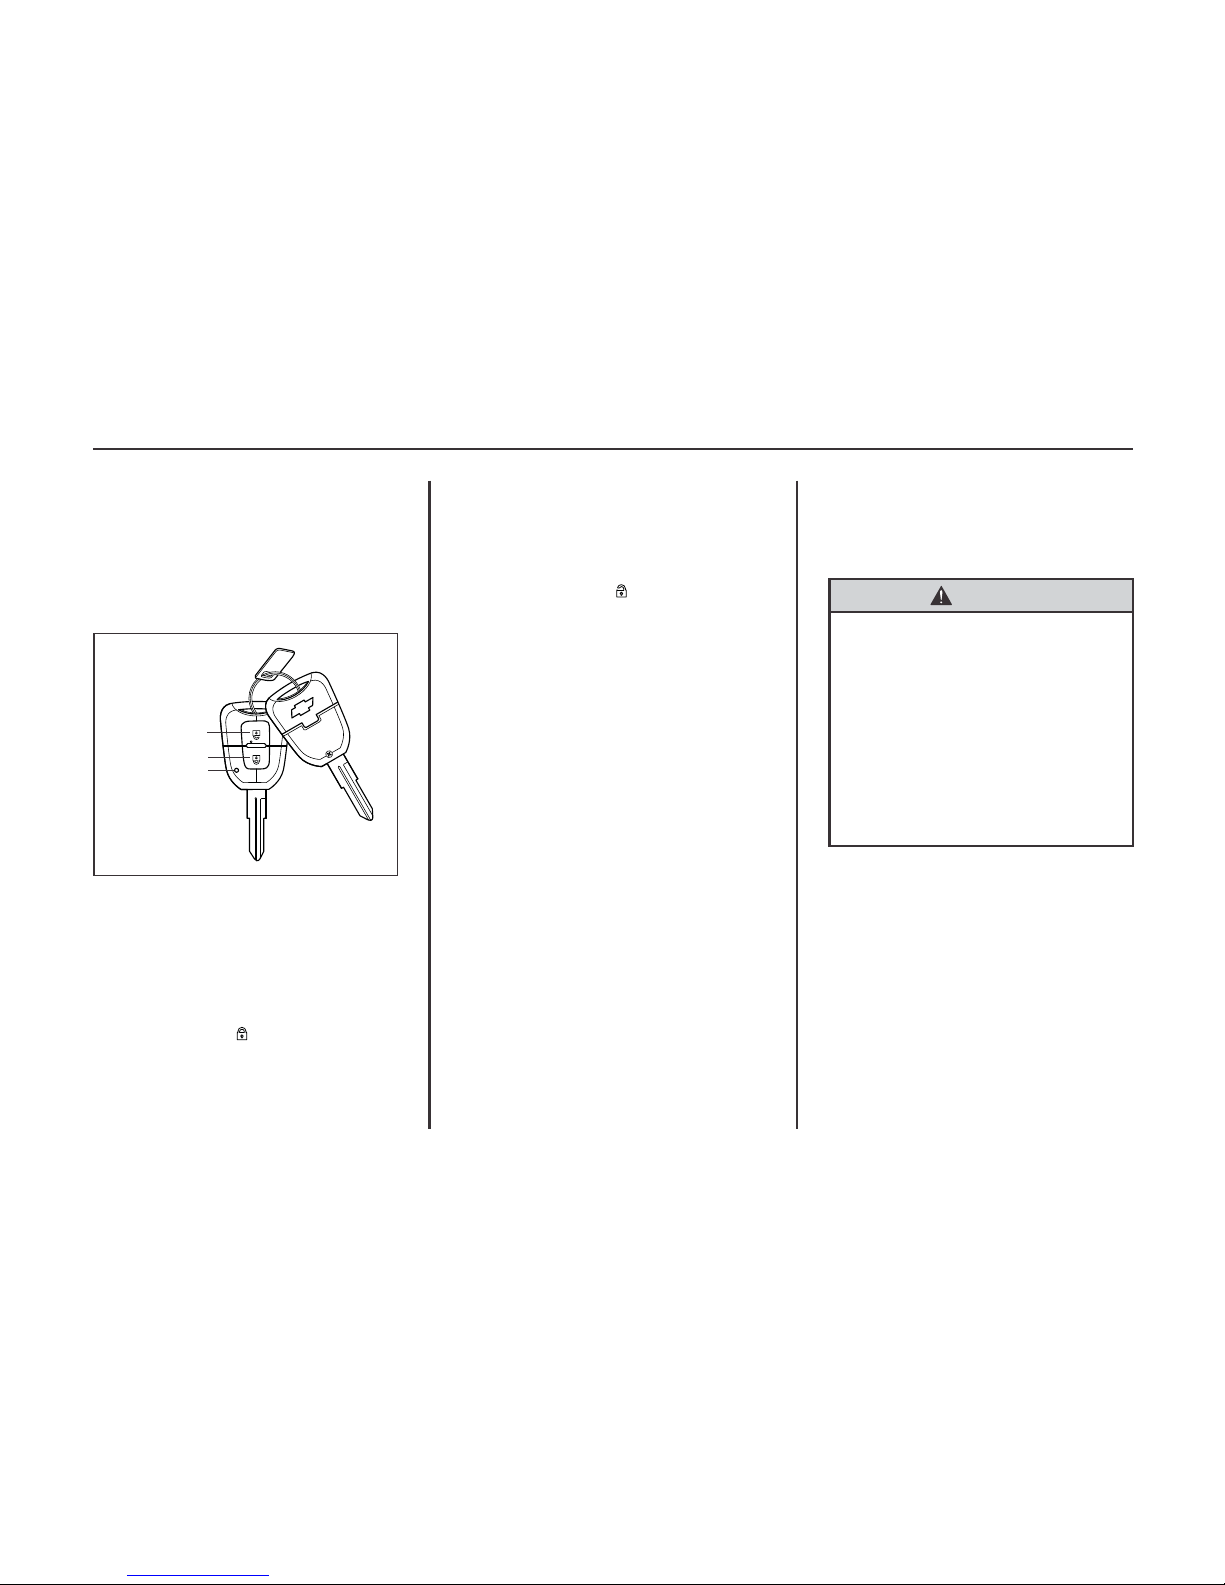
Unlock Button
Lock Button
LED
Remote Keyless Entry allows you to
lock and unlock doors using the
transmitter within valid operating
range. The LED on the transmitter
flashes to indicate an effective
operation.
Lock Button [ ]: Press to lock all
doors. The hazard warning lamps
flash twice and the horn sounds
once. The anti-theft alarm system
will be activated.
•
•
position II/ON or
III/START
Unlock Button [ ]: Press to unlock
all doors. The hazard warning
lamps flash once and the horn
sounds twice. The anti-theft alarm
system will be deactivated.
Note
If any of the door (except tailgate) is not
locked properly and Lock button is
pressed, hazard warning lamps flash
thrice and the horn sounds thrice to indicate that door is not locked properly.
Note
The transmitter operating range depends
on the environmental conditions.
Note
Lock and Unlock buttons on the transmitter are disabled while the key is in
the ignition switch
.
Warning
Do not lock the vehicle if anyone is
to be left inside the vehicle.
Never leave children or pets
unattended in your vehicle. The
temperature inside the vehicle can
increase more rapidly and reach
much higher levels than the temperature outside.
This can result in serious injury or
death.
REMOTE KEYLESS ENTRY
(RKE) SYSTEM OPERATION
2-4 Keys, Doors and Windows
TRANSMITTER
Each transmitter must be programmed
to prevent the vehicle from unlocking
with other transmitters.
Only RKE transmitters programmed to
this vehicle will work. If a transmitter is
lost or stolen, a replacement can be
purchased and programmed through
your CHEVROLET retailer. When the
replacement transmitter is programmed
to this vehicle, all remaining transmitters must also be reprogrammed.
Any lost or stolen transmitter will no
longer work once the new transmitter is
programmed.
Each vehicle can have up to two
transmitters programmed to it.
Note
If Unlock button is pressed and door is
not opened within 30 seconds, doors
will be locked automatically.
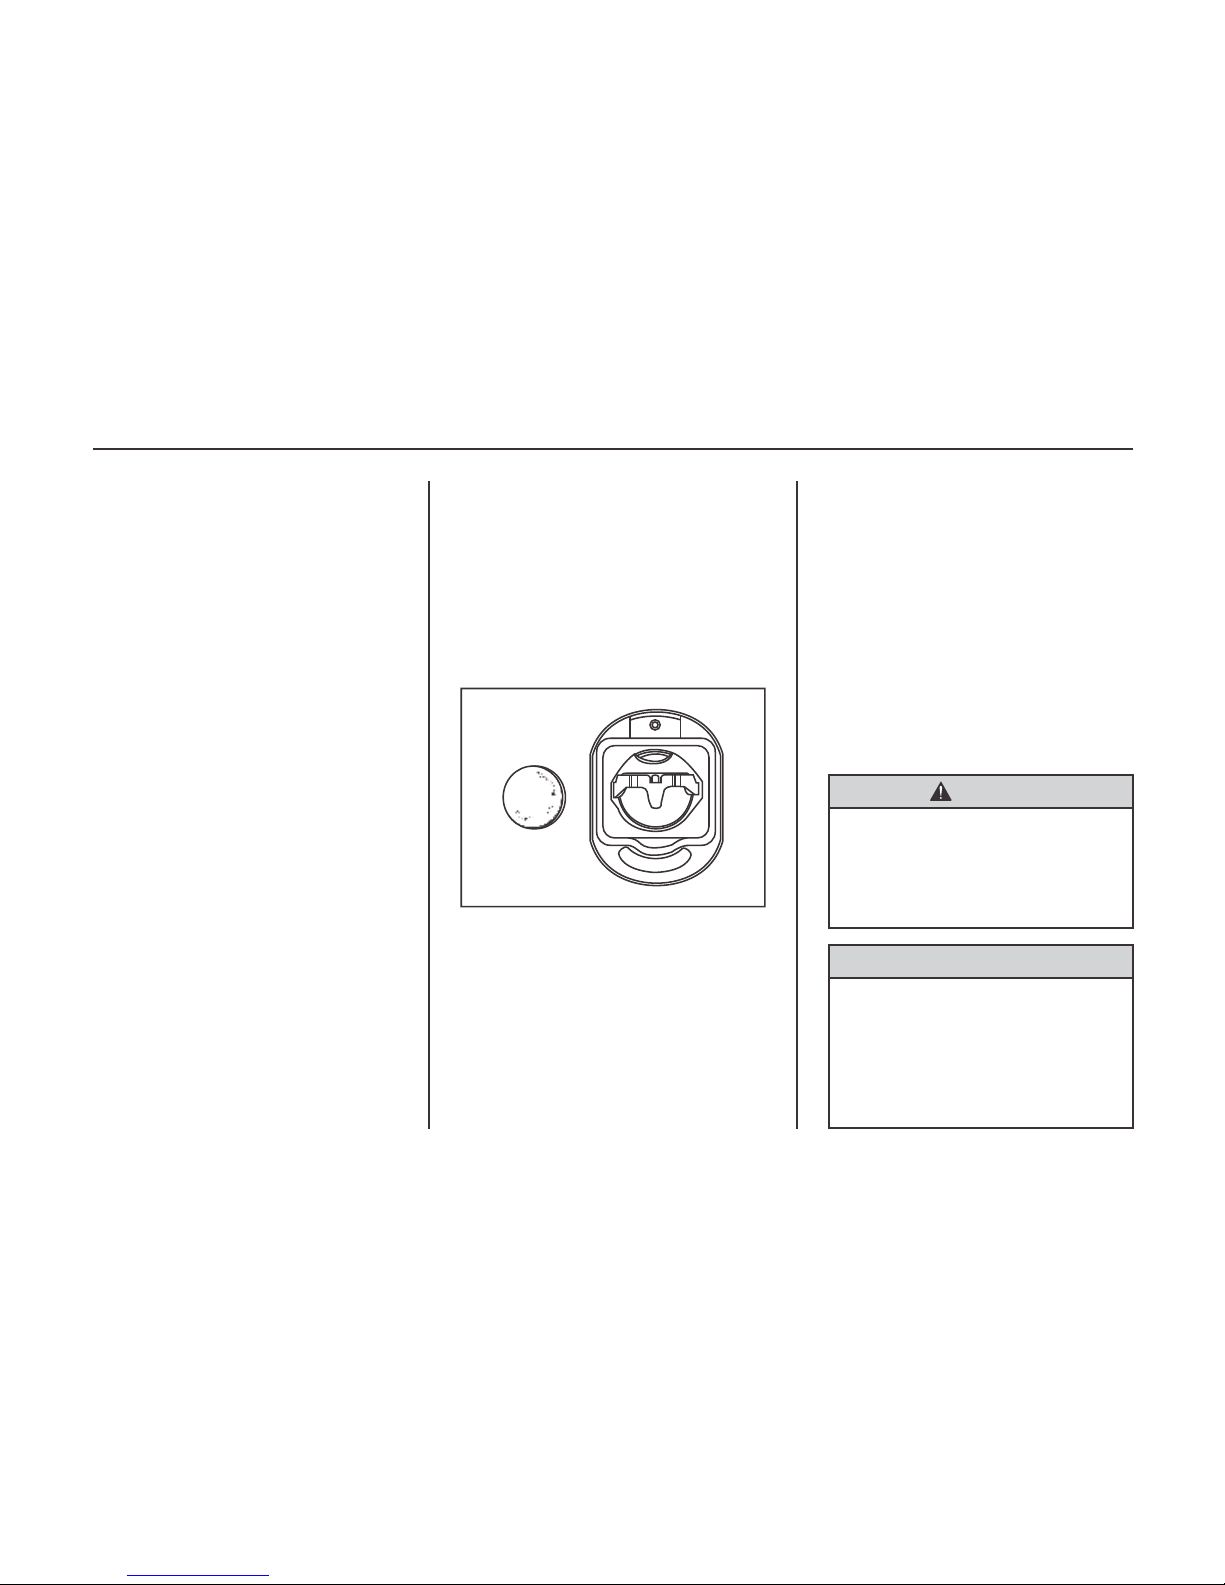
BATTERY REPLACEMENT
If the LED fails to illuminate or the
range is noticeably diminished, it is an
indication that a new battery is needed.
To Replace the Battery :
Note
Use CR2016 (or equivalent) replacement battery.
1. Remove the screw from the back of
the cover.
2. Open the transmitter cover.
3. Remove the used batteries. Avoid
Warning
Make sure that you dispose of old
batteries in accordance with environmental protection regulations to help
protect the environment and your
health.
Caution
When replacing the battery, do not
touch any of the circuitry on the
transmitter. Static from your body
could damage the transmitter.
Pay attention to the polarity of the
battery during replacement.
touching the circuit board to other
components.
4. Install the two new batteries of
same type. Be sure the positive side
(+) faces down towards the base.
5. Assemble the transmitter cover.
6. Check the operation of the transmitter with your vehicle.
To ensure proper operation of the
transmitter, do the following
instructions:
Ÿ Prevent the transmitter dropping.
Ÿ Do not put any heavy objects on
the transmitter.
Ÿ Prevent the transmitter from the
water and the direct sunlight. If
the transmitter contacts the
water, dry it with soft cloth.
Caution
Keys, Doors and Windows 2-5
DOOR LOCKS
Warning
Unlocked doors can be dangerous.
Ÿ Passengers, especially children,
can easily open the doors and fall
out of a moving vehicle. When a
door is locked, the handle will not
open it. The chance of being
thrown out of the vehicle in a crash
is increased if the doors are not
locked. So, all passengers should
wear safety belts properly and the
doors should be locked whenever
the vehicle is driven.
Ÿ Young children who get into
unlocked vehicles may be unable
to get out. A child can be overcome
by extreme heat and can suffer
permanent injuries or even death
from heat stroke. Always lock the
vehicle whenever leaving it.
Ÿ Outsiders can easily enter through
an unlocked door when you slow
down or stop the vehicle. Locking
the doors can help prevent this
from happening.
Driver door lock - Turn key clockwise
to lock and counter clockwise to unlock
the driver door.
Passenger door lock - Turn key clockwise to unlock and counter clockwise to
lock the passenger door. This will lock
or unlock passenger door only.
Note
If your vehicle is equipped with a RKE
system, lock or unlock the doors with
the remote keyless entry transmitter.
Lock
Unlock
Outside
Door
Handle
Front/Passenger Side
Do not touch the battery surface with
your fingers. Otherwise, it will
shorten the life of battery.
Caution

Caution
Do not leave children or pets alone in
the vehicle.
Serious injuries could occur. The
children could operate the power
windows or the controls and could
even make the vehicle move.
Do not leave children in the vehicle
with the ignition key. This can lead to
serious injury or accidents.
2-6 Keys, Doors and Windows
Front / Passenger Side
Unlock
Lock
Door
Lock
Button
Inside
Door
Handle
To lock any door from the inside, push
the door lock button.
To unlock any door from the inside,
the door lock button.
Note
The driver's door lock button cannot be
pushed when the door is open. This
prevents locking the driver's door when
you leave the key inside your car by
mistake.
pull
To open a door from outside or inside,
pull the door handle.
Note
Grease should be applied to the door
check latch and hinge at regular
intervals or if a noise can be heard when
opening, closing the door or during
driving.
Caution
Lock all doors and take the key with
you, while leaving the vehicle unattended.
Unlocked vehicle invite theft.
Keys, Doors and Windows 2-7
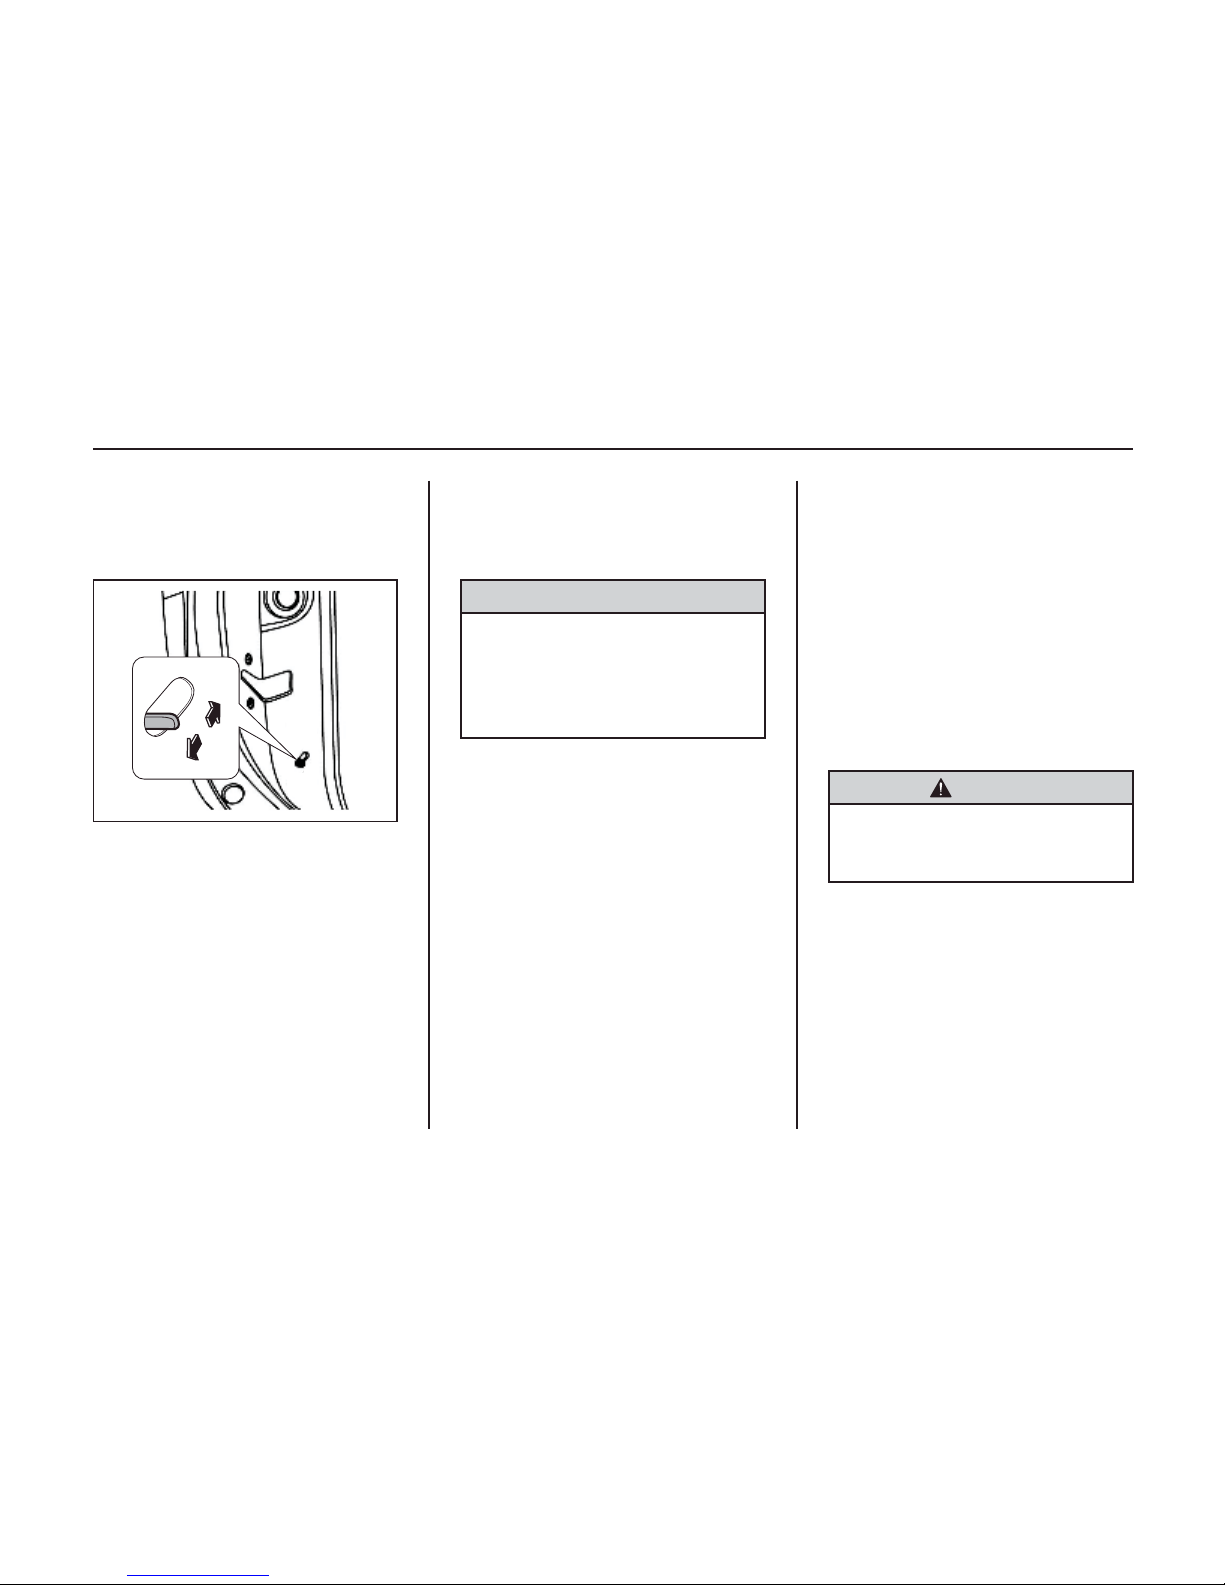
UNLOCK
LOCK
To Activate a Child Safety Lock:
1. Open the rear door you want to lock.
2. Find the child safety lock lever near
the center position on the door.
3. Slide the lever to LOCK position.
Note
Each rear door has its individual lock.
The child safety locks for the rear doors
must be individually, manually activated.
To open the rear door when the child
safety lock is activated, unlock the door
from inside by pulling out the door lock
button and then open the door from
outside.
To deactivate the child safety lock,
place the control lever to UNLOCK
position.
Use the child security door locks
whenever children are occupying the
rear seats.
Warning
Each rear door of this vehicle is
equipped with a child safety lock.
The child safety lock is intended to
prevent the rear doors from being
accidentally opened by passengers
(especially children) pulling the door
handles from inside.
Caution
When the child safety lock is set at
LOCK position, do not pull the door
handle from inside the vehicle.
The handle could be damaged
otherwise.
CHILD SAFETY LOCKS
2-8 Keys, Doors and Windows
DOORS
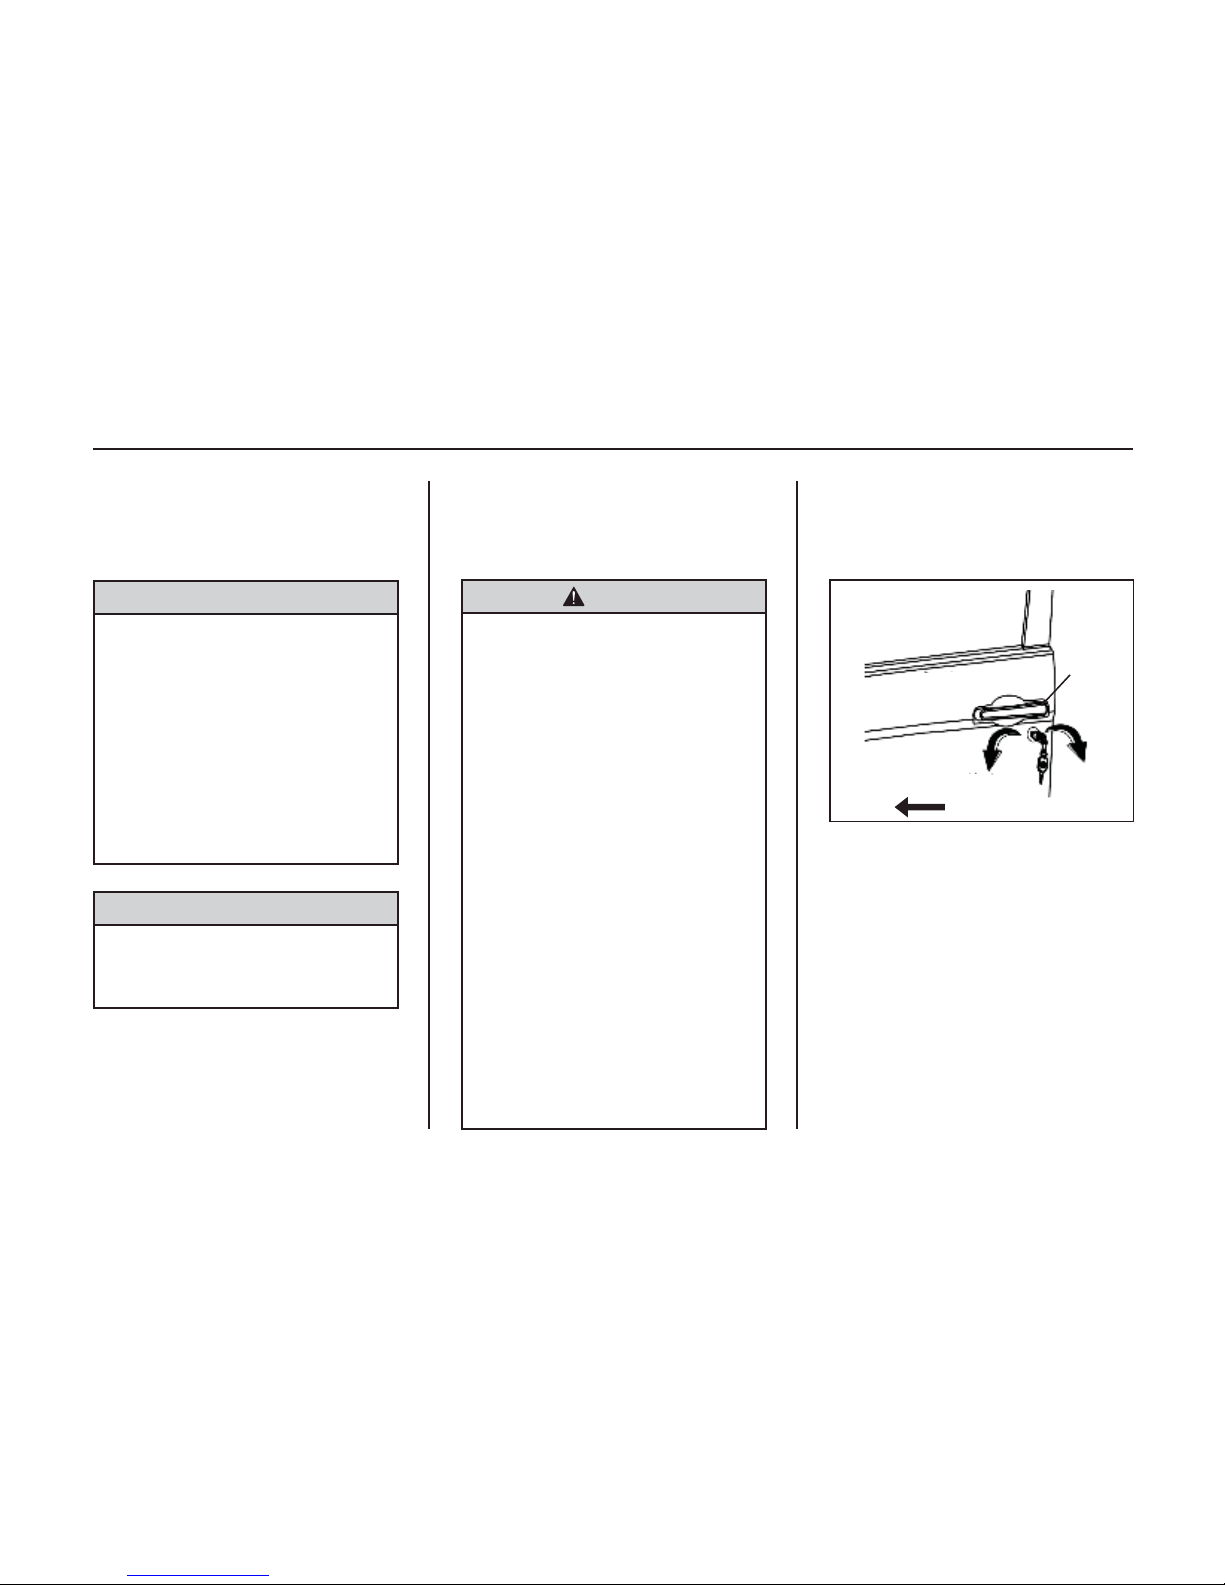
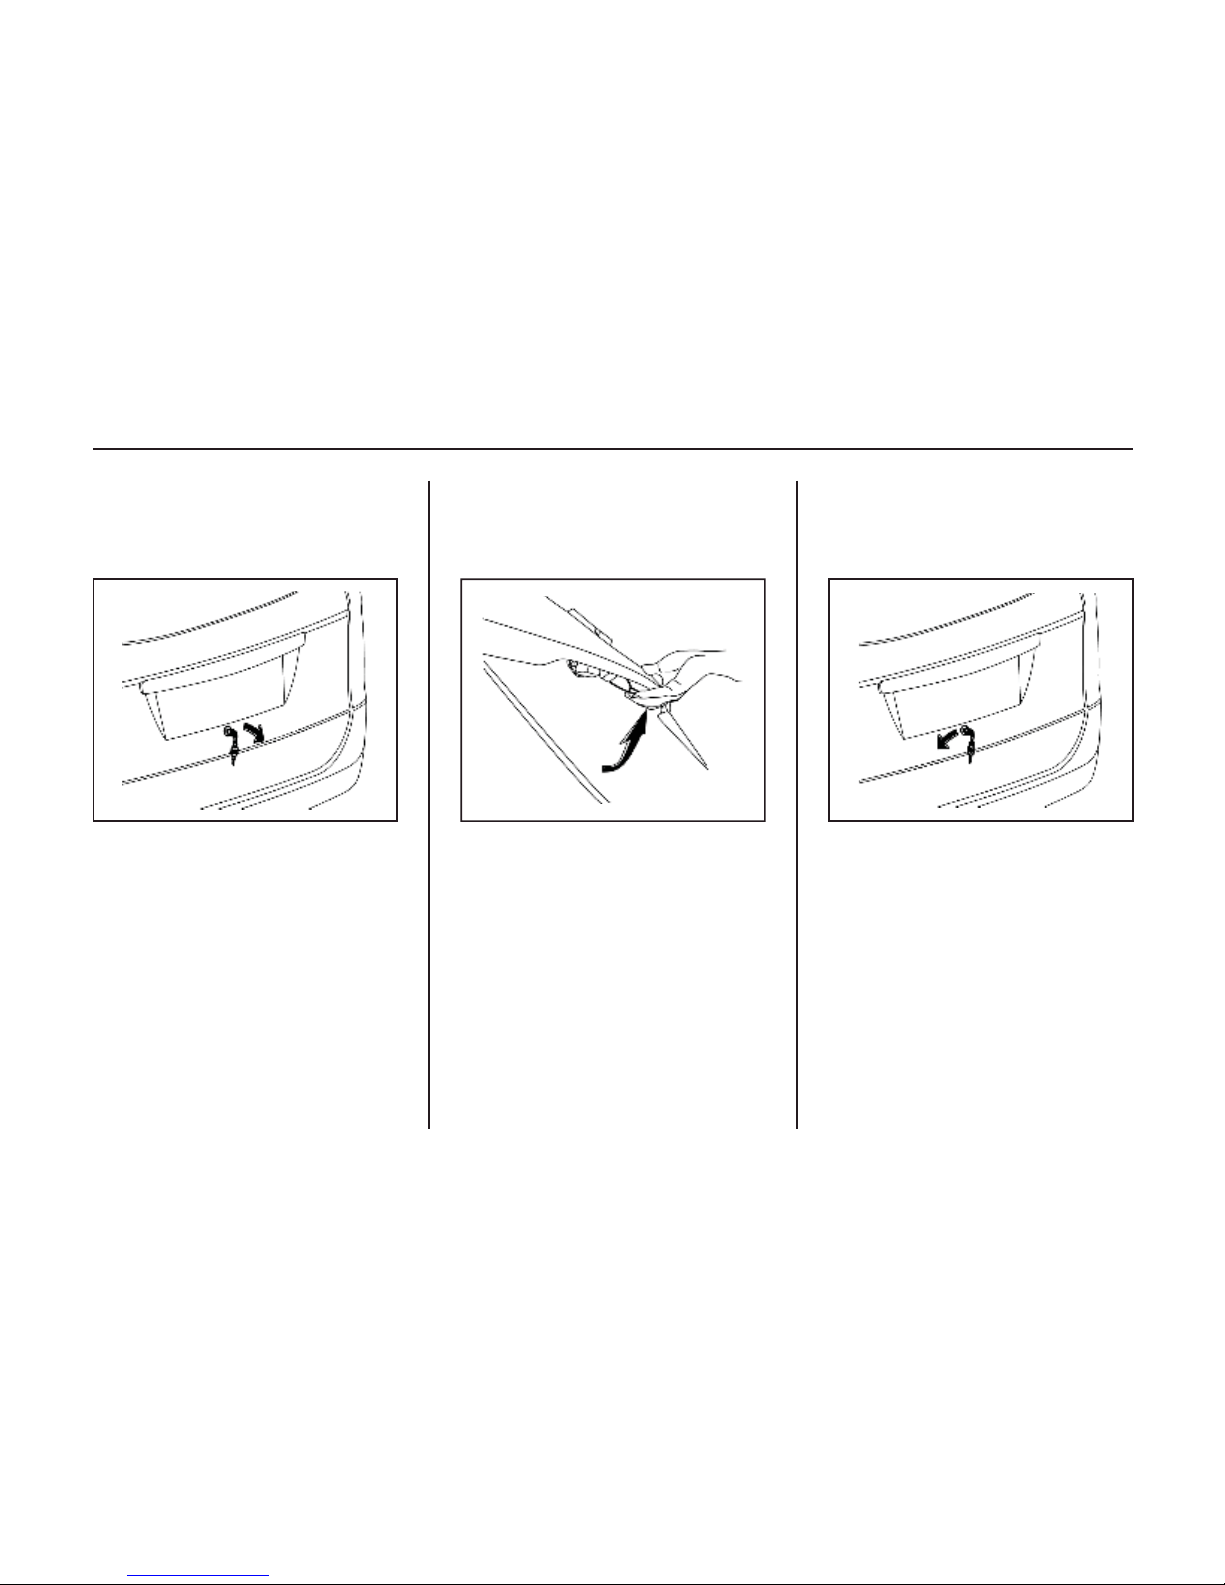
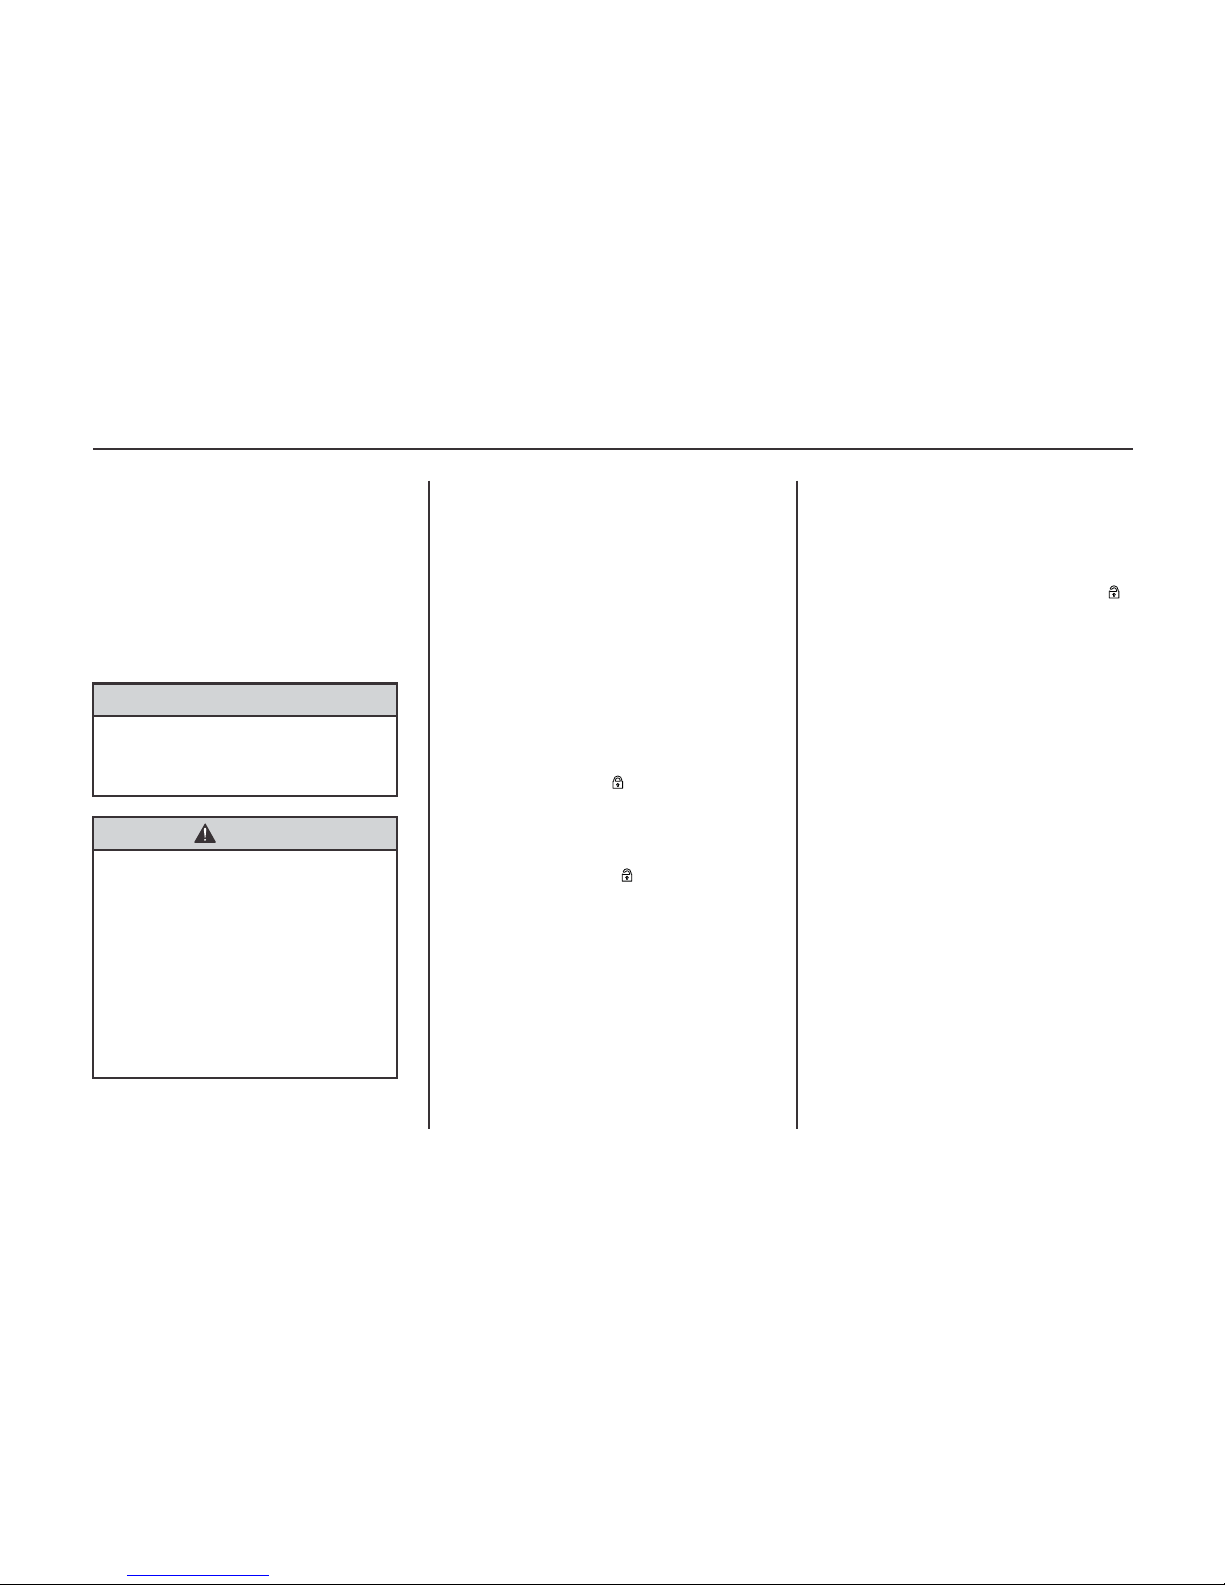
TAILGATE
Unlock
UNLOCK :
Ÿ To unlock the tailgate, insert the key
into the key slot and turn it
clockwise.
Ÿ Pull up the tailgate handle located
above the license plate and lift the
tailgate.
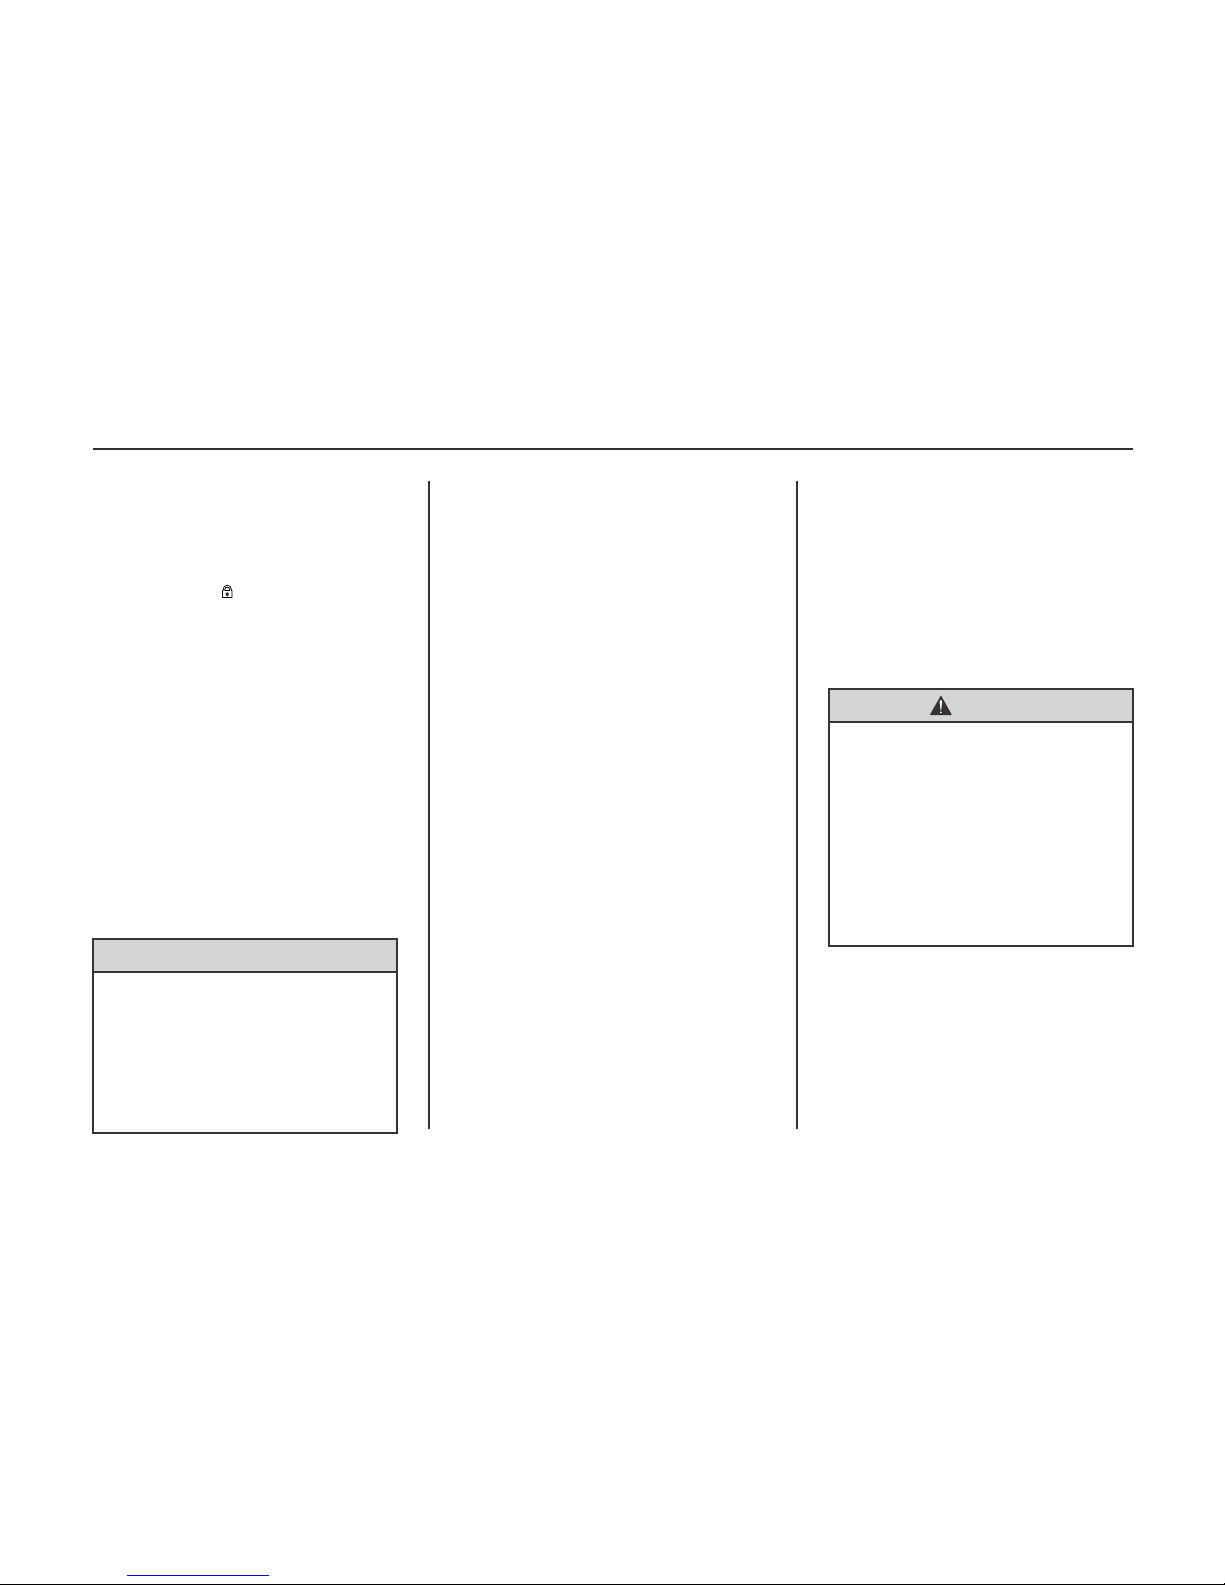
Lock
LOCK :
Ÿ To close the tailgate, push it down so
it latches securely and insert the key
into the key slot and turn it counter
clockwise to lock the tailgate.
Note
If your vehicle is equipped with a RKE
system, lock or unlock the tailgate with
the remote keyless entry transmitter.
Note
The tailgate door is not featured with
door lock reminder and anti-theft alarm
system.
Keys, Doors and Windows 2-9
Make sure your hands and any other
body parts, as well as those of other
persons, are completely away from the
closure area.tailgate
Caution
When opening or closing the ,
be sure to check it is free from
obstructions.
tailgate
Warning
Exhaust gases can enter the vehicle if
it is driven with the tailgate open, or
with any objects that pass through
the seal between the body and the
tailgate. Engine exhaust contains
carbon monoxide (CO) which
cannot be seen or smelled. It can
cause unconsciousness and even
death.
See “Engine Exhaust” on page 8-30.
VEHICLE SECURITY
CENTRAL LOCKING
SYSTEM*
You can activate the central locking
system from the driver’s door. This
system will allow you to lock or unlock
all the doors and tailgate at once by
using your key (from outside) or the
driver’s door lock button (from inside).
Using RKE Transmitter* :
Press the Lock [ ] button on the
transmitter to lock all doors and
tailgate. The hazard warning lamps
flash twice and horn sounds once.
Press the Unlock [ ] button on the
transmitter to unlock all doors and
tailgate. The hazard warning lamps
flash once and horn sounds twice.
If this feature is equipped, all the doors
will be automatically locked once the
vehicle starts moving above 10km/h.
AUTO DOOR RELOCK*
In anti-theft mode, if the Unlock [ ]
button on the transmitter is pressed and
door is not opened within 30 seconds,
doors will be locked automatically and
anti-theft alarm system will be
activated. The hazard warning lamps
flash twice and the horn sounds once.
AUTOMATIC DOOR
LOCKING*
Once the doors are locked automatically through automatic door locking
feature, turn the ignition key to
B/LOCK position, all the doors will be
unlocked automatically.
AUTOMATIC DOOR
UNLOCKING*
VEHICLE LOCATOR
FUNCTION*
Press the Lock [ ] button on the transmitter for 3 seconds, the vehicle locator
function is activated. The hazard warning lamps flash for 15 seconds and
horn sounds for 4 times with interval to
locate your vehicle.
2-10 Keys, Doors and Windows
DOOR LOCK REMINDER*
After unlocking, if the door is opened
and closed without locking, hazard
warning lamps flash thrice and horn
sounds thrice after 10 seconds, to
remind that doors are not locked.
This feature reminds everytime whenever the door is opened and closed without locking.
ANTI-THEFT ALARM
SYSTEM*
DOOR LOCK AND ANTI-THEFT
MODE ACTIVATION
1. Close all windows.
2. Turn the ignition key to B/LOCK
position and remove the key.
3. Have all passengers exit the vehicle.
4. Close all doors.
5. Press and release Lock button on
the transmitter.
Ÿ The LED on the transmitter will
flash.
Ÿ All doors lock.
Ÿ Hazard warning lamps flash
twice and the horn sounds once.
Ÿ Anti-theft mode is activated.
If the key is in the ignition switch
position II/ON or III/START, the
transmitter will not operate the antitheft system.
Note
The system can be activated even if the
windows are open. Close all the windows
and doors before leaving the vehicle.
Warning
Do not lock the vehicle if anyone is to
be left inside the vehicle.
Never leave children or pets unattended
in your vehicle. The temperature inside
the vehicle can increase more rapidly
and reach much higher levels than the
temperature outside.
This can result in serious injury or
death.
Caution
Do not unlock the door while driving. If
a passenger opens the door by accident,
it can result in serious injury or death in
case of an unexpected accident.
If the door is unlocked manually, lock it
again using the door lock button for
safety.
Keys, Doors and Windows 2-11
Note
If pressing the Lock button on the transmitter when all the doors are not completely closed, the anti-theft system is in
the open or disarmed state at this point
and the hazard warning lamps flash thrice
and horn sounds thrice. The anti-theft
system transits to the locked or armed
state when all the doors are completely
closed and Lock button on the transmitter
is pressed again. The hazard warning
lamps flash twice and horn sounds once.
Note
The anti-theft system is activated only
with the remote keyless entry transmitter.
ALARM SOUND*
The system provides visual (hazard
warning lamps flashing) and audible
(horn sound) signals for about 30
seconds when any of the doors (except
tailgate) are opened without pressing
the Unlock button on the transmitter.
The alarm sound is also activated, if the
doors are locked by pressing the Lock
button on the transmitter and key is
inserted in the ignition switch and
turned to II/ON position.
To stop the alarm and disable the antitheft system :
Ÿ Press the Unlock button on the
transmitter.
Ÿ Turn the ignition key switch from
B/OFF to II/ON position for 8 times
within 20 seconds.
If the unauthorized entry still exists, the
alarm sound will be activated.
Note
To stop the alarm and enable the antitheft system, press the Lock button on
the transmitter.
If the system does not operate as
described above, have it checked by
your CHEVROLET retailer.
Note
Tap the key hole or heat the key if the
door does not open with freezing key
hole in cold weather.
Warning
Do not use the transmitter to lock the
vehicle if anyone is to be left inside.
Never leave children or pets alone in
your vehicle.
The temperature inside the vehicle
can increase more rapidly and reach
much higher levels than the temperature outside.
This can result in serious injury or
death.
L
L
R
R
2-12 Keys, Doors and Windows
DOOR UNLOCK AND ANTITHEFT MODE DEACTIVATION
1. Press and release Unlock button on
the transmitter.
Ÿ The LED on the transmitter will
flash.
Ÿ All the doors unlock.
Ÿ Hazard warning lamps flash
once and horn sounds twice.
Ÿ Anti-theft mode is deactivated.
EXTERIOR MIRRORS
CONVEX MIRRORS
Warning
A convex mirror can make things,
like other vehicles, look farther away
than they really are. If you cut too
sharply into the right lane, you could
hit a vehicle on the right. Check the
inside mirror or glance over your
shoulder before changing lanes.
Both passenger and driver side outside
mirrors are convex shaped.
The convex exterior mirror reduces
blind spots. The shape of the mirror
makes object appear smaller, which
affects the ability to estimate distances.
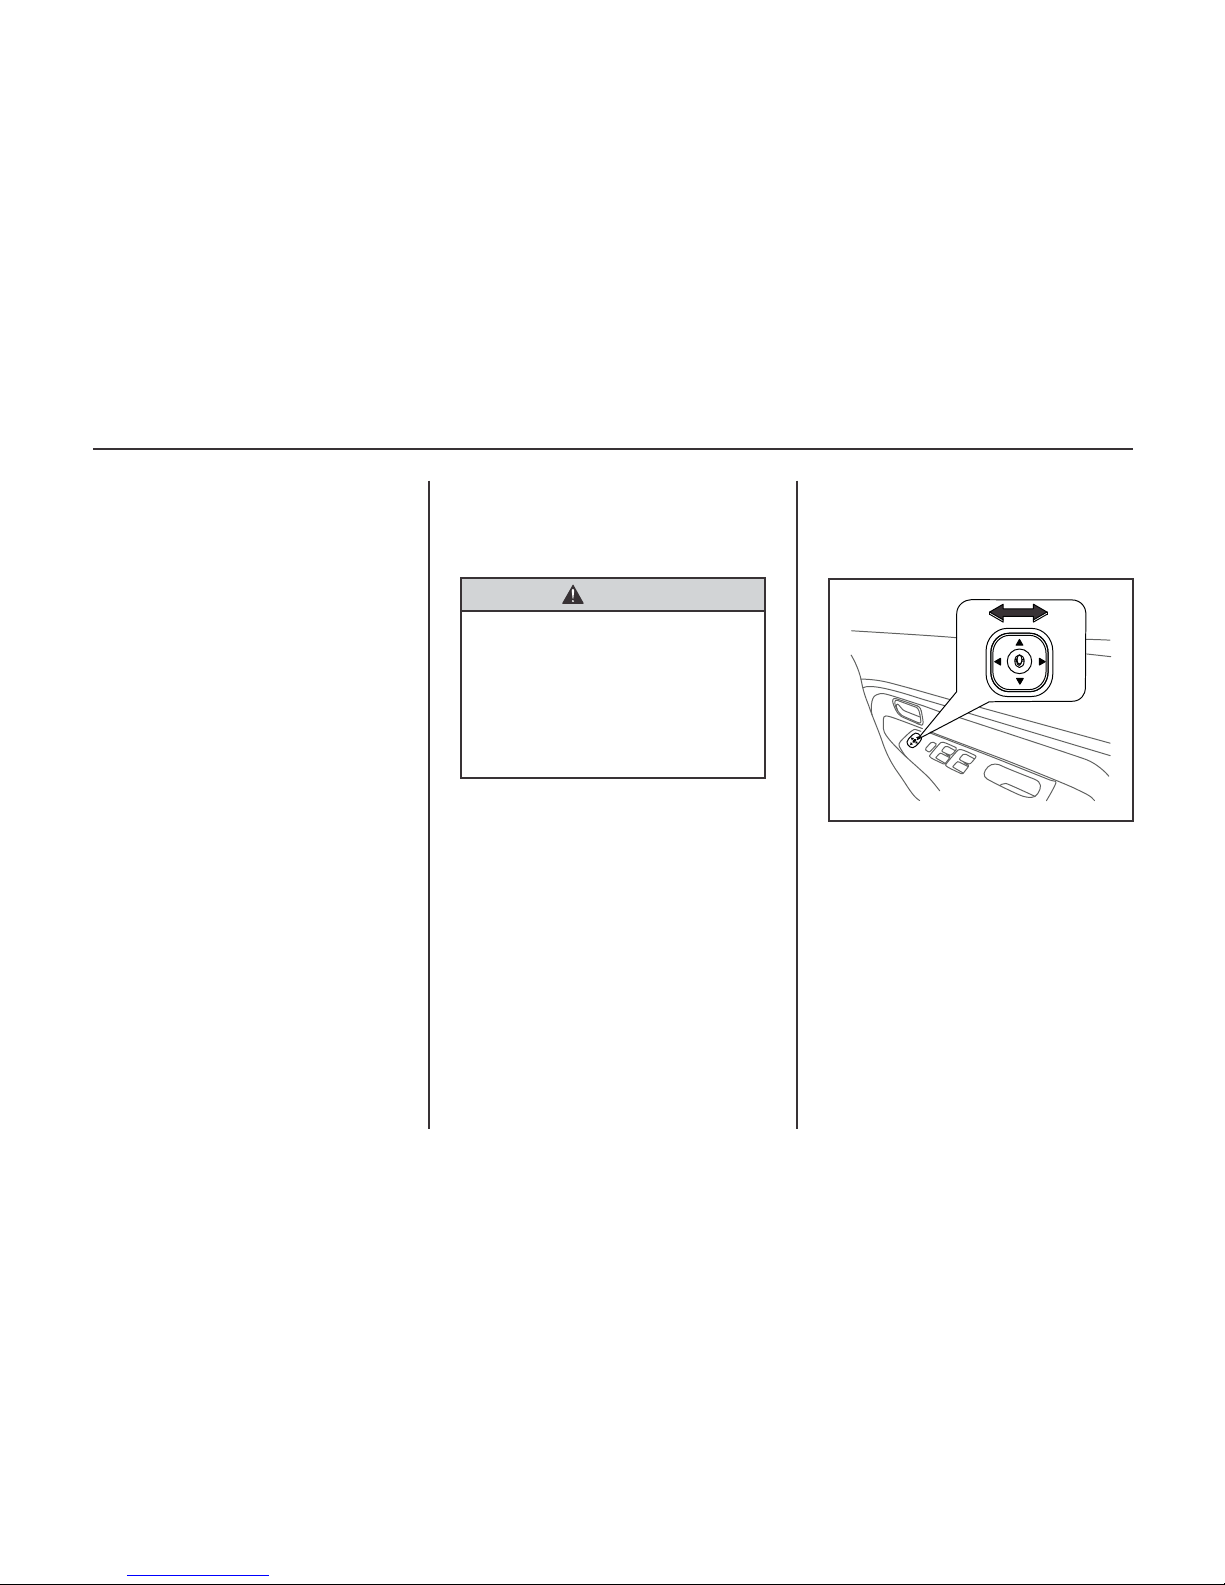
POWER REAR VIEW
MIRRORS*
The outside power rear view mirrors
can be adjusted by using the mirror
switch that is located on the driver side
door panel. The ignition switch must be
at II/ON position for this feature to
work.
1. Choose the left or right mirror by
moving the center control knob to L
(Left) or R (Right).
Note
In this model, unlocking the doors
(except tailgate) with a key will sound
alarm in anti-theft mode. Make sure to
press the Unlock button on the transmitter to unlock the doors and disable the
anti-theft system.
Keys, Doors and Windows 2-13
2. Adjust the selected mirror in four
directions: up, down, left or right
using the corresponding control
keys-up (p), down (q),left (t) or
right (u),so that the side and the
area behind the vehicle can be seen.
3. Return the control knob to the
center position so that the mirror
cannot be moved.
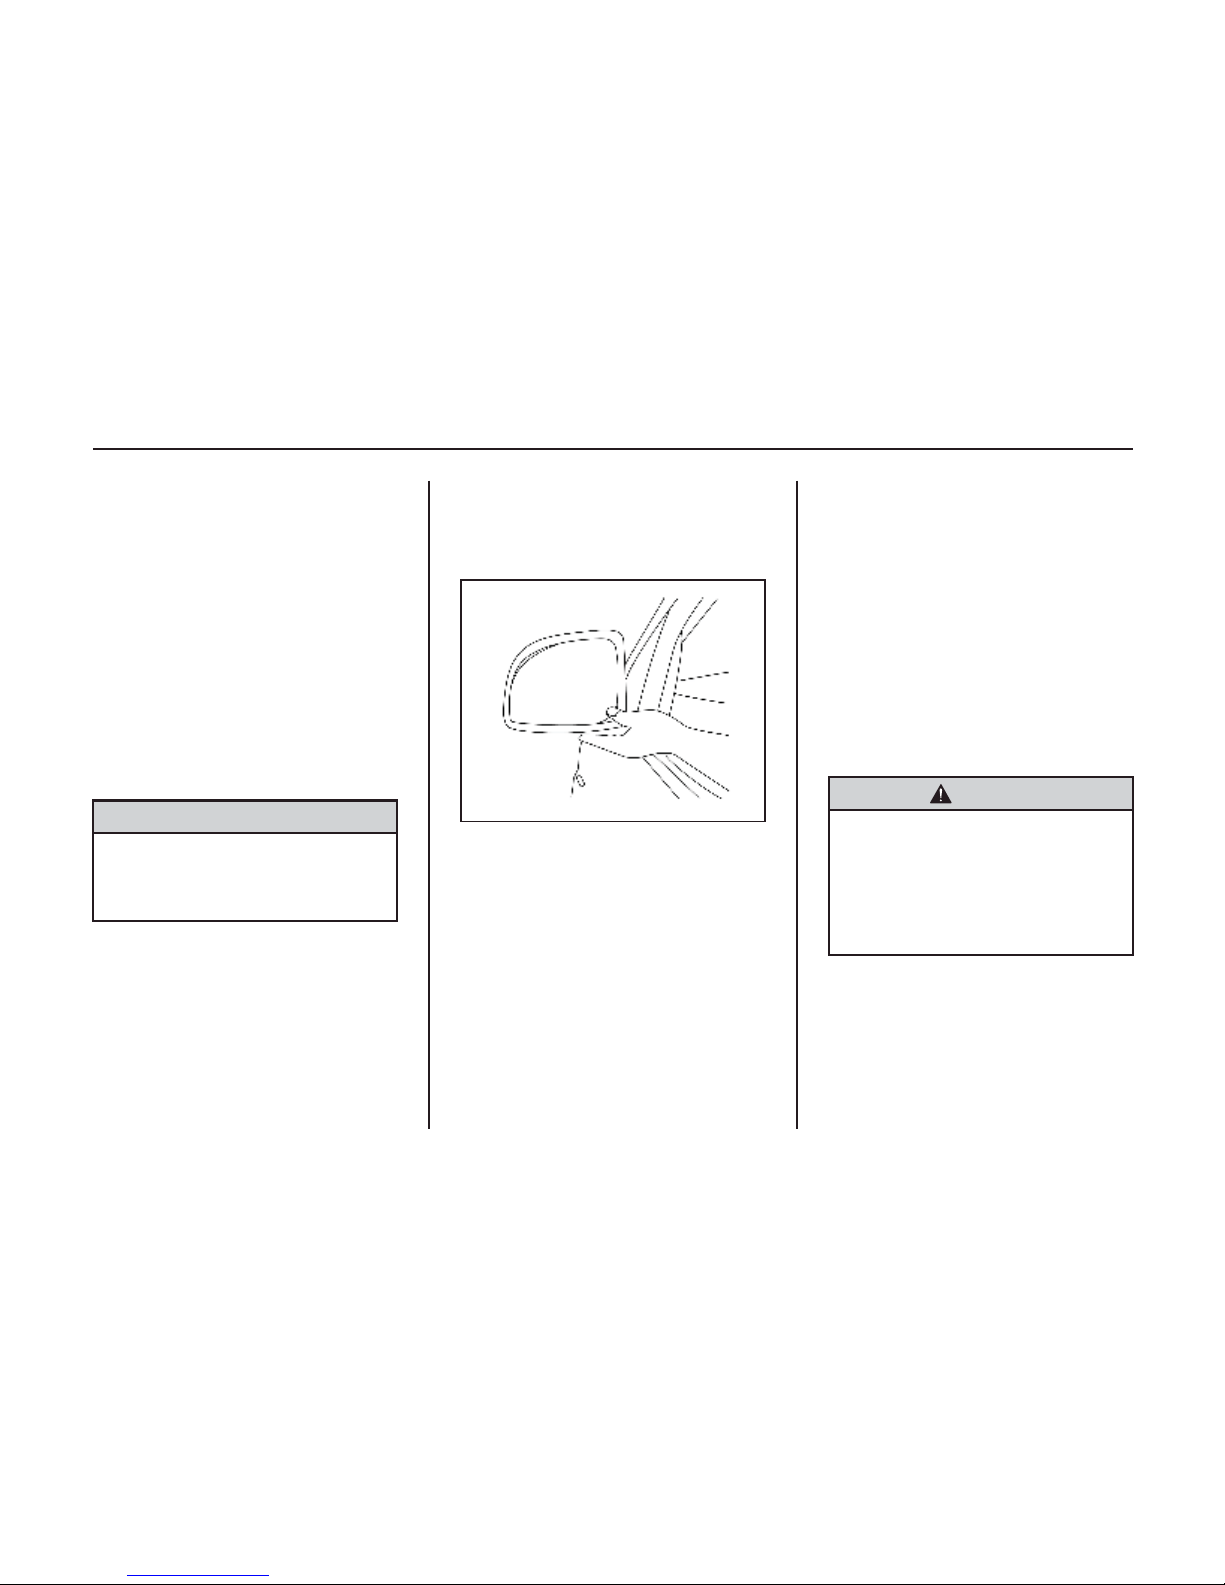
MANUAL REAR VIEW
MIRRORS
As shown in above the illustration,
press the four corners of outside manual
rear view mirror, so that the side and the
area behind the vehicle can be seen.
FOLDING MIRRORS
Manually fold the outside mirrors in, to
prevent damage when going through an
automatic car wash or for pedestrian
safety. To fold, while sitting in the
vehicle, pull the mirrors towards the
vehicle. Push out, to return the mirrors
to their original position.
Warning
Always keep your mirrors properly
adjusted, and use them while driving
to increase your visibility of objects
and other vehicles around you. Do
not drive while either outside
rearview mirror is folded back.
Caution
Do not operate mirror continuous
while the engine is not running.
This will discharge the battery.

2-14 Keys, Doors and Windows
INTERIOR MIRROR
MANUAL REAR VIEW
MIRROR
Night
Day
Warning
Your view through the mirror may
lose some clarity when it is adjusted
for night vision.
Take special care with using your
inside rearview mirror when it is
adjusted for night vision.
Failure to ensure a clear rear view
while driving may result in a
collision causing damage to your
vehicle or other property, and/or
personal injury.
The interior rear view mirror can be
manually adjusted in four directions.
Interior rear view mirror can be
adjusted to Day/Night mode to reduce
glaring from the following vehicles.
Turn the adjustment knob located under
the interior rear view mirror to
clockwise for Day mode and counter
clockwise for Night mode.
WINDOWS
POWER WINDOWS
The power windows (front & rear) are
controlled by the power window
switches located on the driver side door
panel as shown in the above illustration.
There is also a switch on front
passenger side door panel to operate the
front passenger window and a switch
on each rear door panel for rear seat
passengers to operate the rear windows.
Keys, Doors and Windows 2-15
Power windows can be operated with
key in ignition II/ON position.
Operate the switch for the respective
window by pressing down to open or
lifting up to close.
OPERATION
You may operate the power windows
when the ignition switch is in II/ON
position by using the power window
switches on each door panel.
To open the window, press down on the
switch. To close the window, lift up on
the switch. Release the switch when the
window reaches the desired position.
Warning
Do not operate the power window
switch with no purpose.
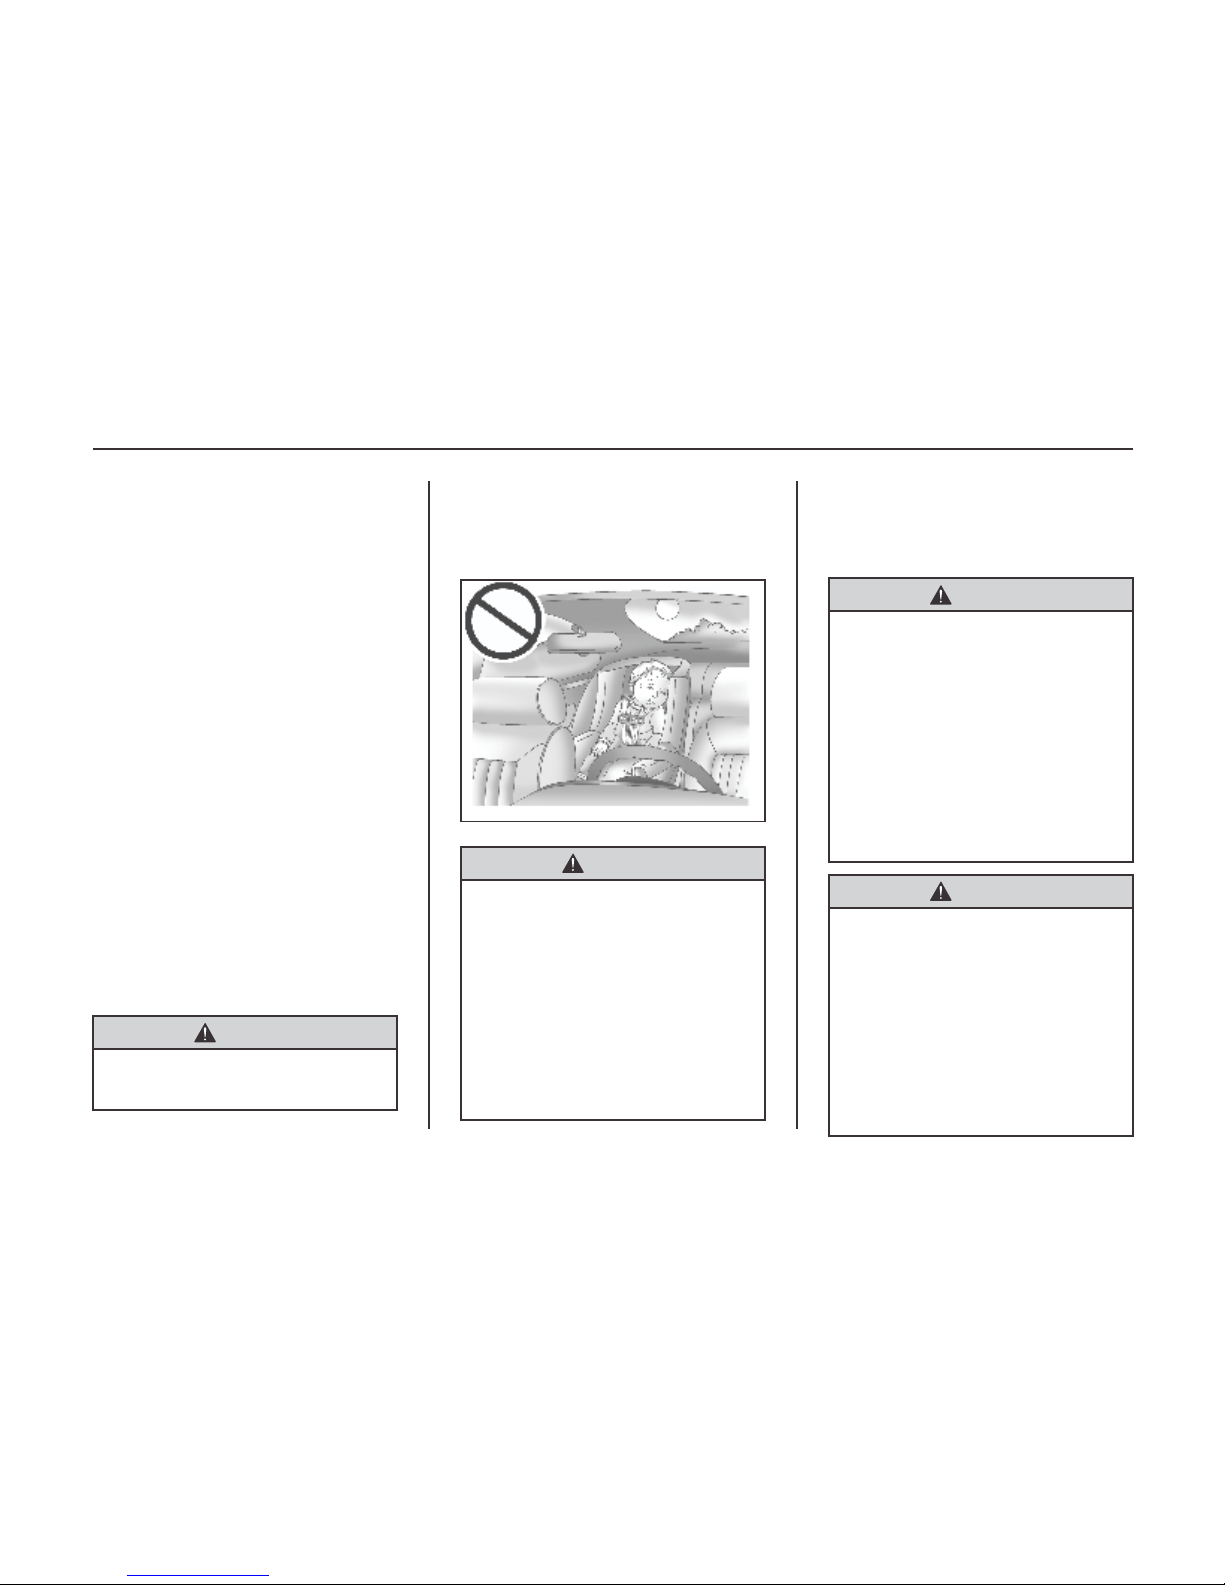
Warning
Leaving children, helpless adults, or
pets in a vehicle with the windows
closed is dangerous.
They can be overcome by the
extreme heat and suffer permanent
injuries or even death from heat
stroke. Never leave a child, a helpless adult, or a pet alone in a vehicle,
especially with the windows closed
in warm or hot weather.
Warning
Take care when operating the power
windows. Risk of injury, particularly
to children.
If there are children on the rear seat,
switch on the child safety system for
the power windows.
Keep a close watch on the windows
when closing them.
Ensure that nothing becomes trapped
in them as they move.
Warning
Body parts outside vehicle can be
struck by passing objects. Keep all
parts of body inside vehicle.
Children can operate and become
entrapped in power windows.
Do not leave your keys or unattended
children in your car.
Serious injury or death can occur
from misuse of power windows.
Note
The rear windows cannot be fully
opened.
2-16 Keys, Doors and Windows
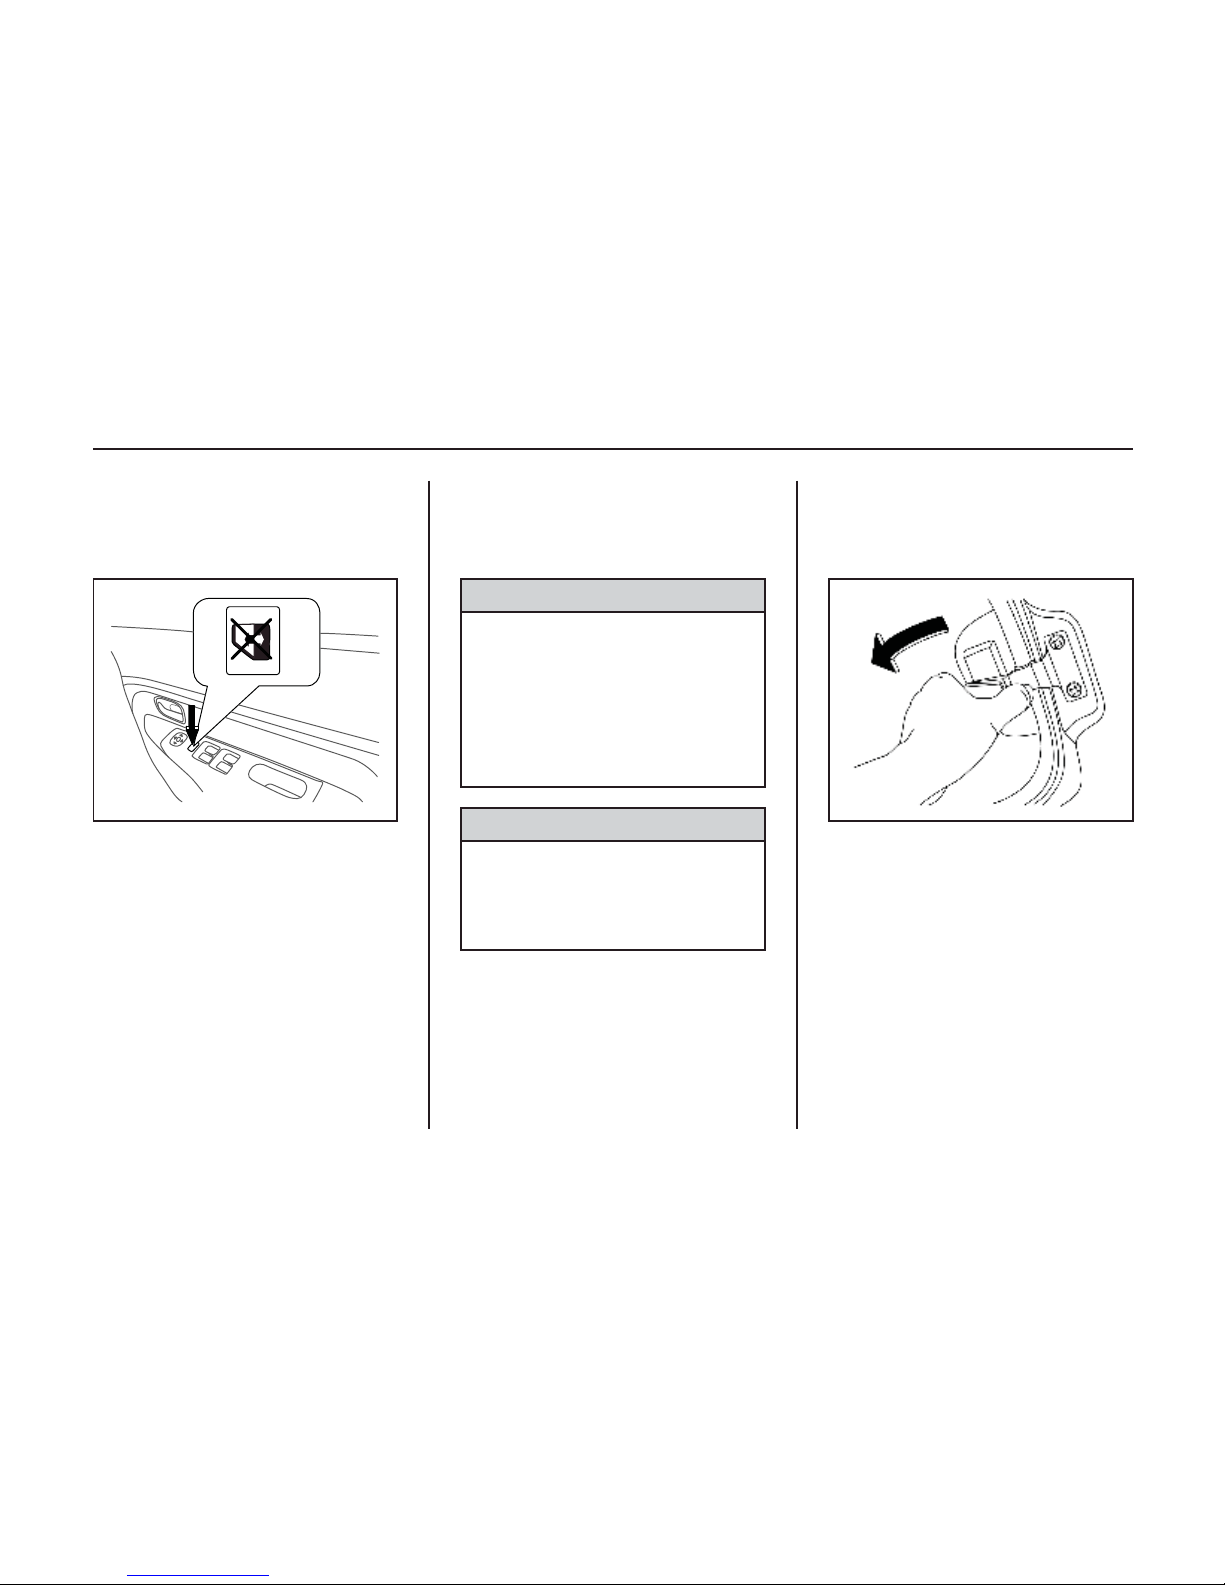
POWER WINDOW LOCK
SWITCH
The power window lock switch allows
you to lock the rear and passenger
window switches. Press the lock switch
to deactivate the rear and passenger side
window switches. The rear and passenger windows can only be operated from
the driver’s door control panel.
Caution
Children could operate the power
windows and become trapped by the
windows, resulting in serious
injuries.
Use the power window lock switch
when children are traveling in the rear
seats.
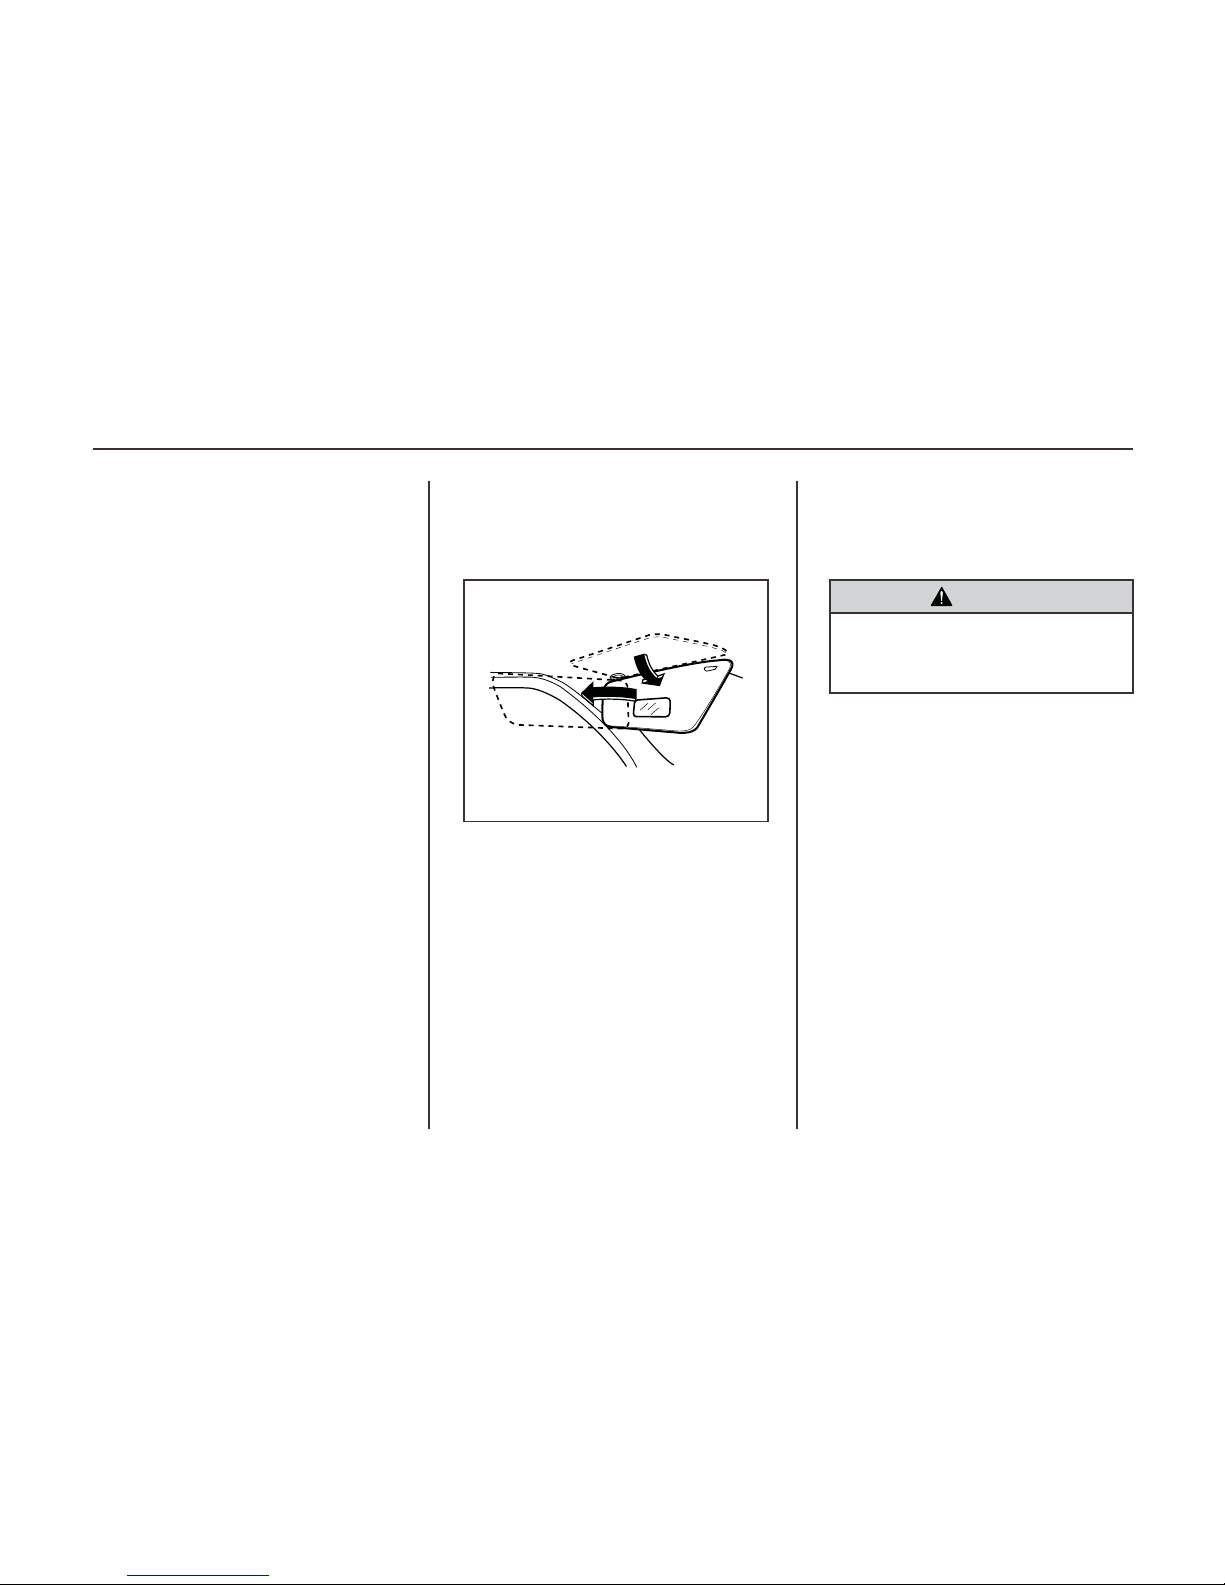
TILT QUARTER WINDOW
OPEN :
1. Pull the handle inward to unlock the
window in the direction as shown.
2. Push the handle outwards to open
the window.
3. To hold the window in the open
position, secure the handle in lock
position by pressing it till a click
sound is heard.
Caution
The unattended vehicle could be
stolen with the windows open.
Close all the windows before leaving
the vehicle.
Keys, Doors and Windows 2-17
CLOSE :
1. Unsecure the handle and pull the
handle inwards to close the
window.
2. To lock the window in closed
position, press the handle till the
click sound is heard.
SUN VISORS
Warning
Do not place the sun visor in such a
manner that it obscures visibility of
the roadway, traffic or other objects.
Your vehicle is equipped with sun
visors to protect the driver and
passengers from dazzling.
The sun visors can be folded down or
swiveled to the side to prevent dazzling.
The passenger side sun visor has vanity
mirror.

2-18 Keys, Doors and Windows

Seats and Restraints 3-1
SEATS AND
RESTRAINTS
Head Restraints ........................... 3-2
Head Restraints Position ......... 3-2
Head Restraints ....................... 3-2
Front Seats ................................... 3-3
Seat Position ........................... 3-3
Seat Horizontal Position
Adjustment .............................. 3-4
Seat Height Adjustment* ........ 3-4
Seatback Adjustment .............. 3-4
Rear Seats..................................... 3-6
Second Row Seats
(60:40 Split Seats*) ................. 3-6
Second Row Seats
(Captain Seats*)....................... 3-8
Third Row Seat...................... 3-10
Safety Belts ................................ 3-11
Safety Belts ........................... 3-11
How to Wear Safety Belts
Properly ................................ 3-13
Lap-Shoulder Belt ................. 3-14
Safety Belt Use During
Pregnancy ............................. 3-15
Lap Belt ................................ 3-16
Safety System Check ............ 3-17
Safety Belt Care .................... 3-17
Replacing Safety Belt System
Parts after a Crash ................. 3-17
Airbag System* ......................... 3-18
Front Airbag System ............. 3-18
Where are the Airbags?......... 3-20
When Should an Airbag
Inflate? .................................. 3-21
What Makes an Airbag
Inflate? ................................... 3-22
How Does an Airbag
Restrain? ............................... 3-22
What Will You See After
an Airbag Inflates? ................ 3-22
Servicing the Airbag -
Equipped Vehicle .................. 3-24
Airbag System Check ........... 3-24
Replacing Airbag System
Parts After a Crash ................ 3-24
Child Restraints* ...................... 3-25
Older Children ...................... 3-25
Infants and Young
Children ................................ 3-27
Child Restraint Systems ........ 3-29
Where to Put the Restraint .... 3-31
3-2 Seats and Restraints
HEAD RESTRAINTS
HEAD RESTRAINTS
POSITION
Warning
Only drive with the head restraint set
to the proper position.
Removed or improperly adjusted
head restraints can result in serious
head and neck injuries in case of a
collision.
Make sure that the head restraints are
adjusted before driving.
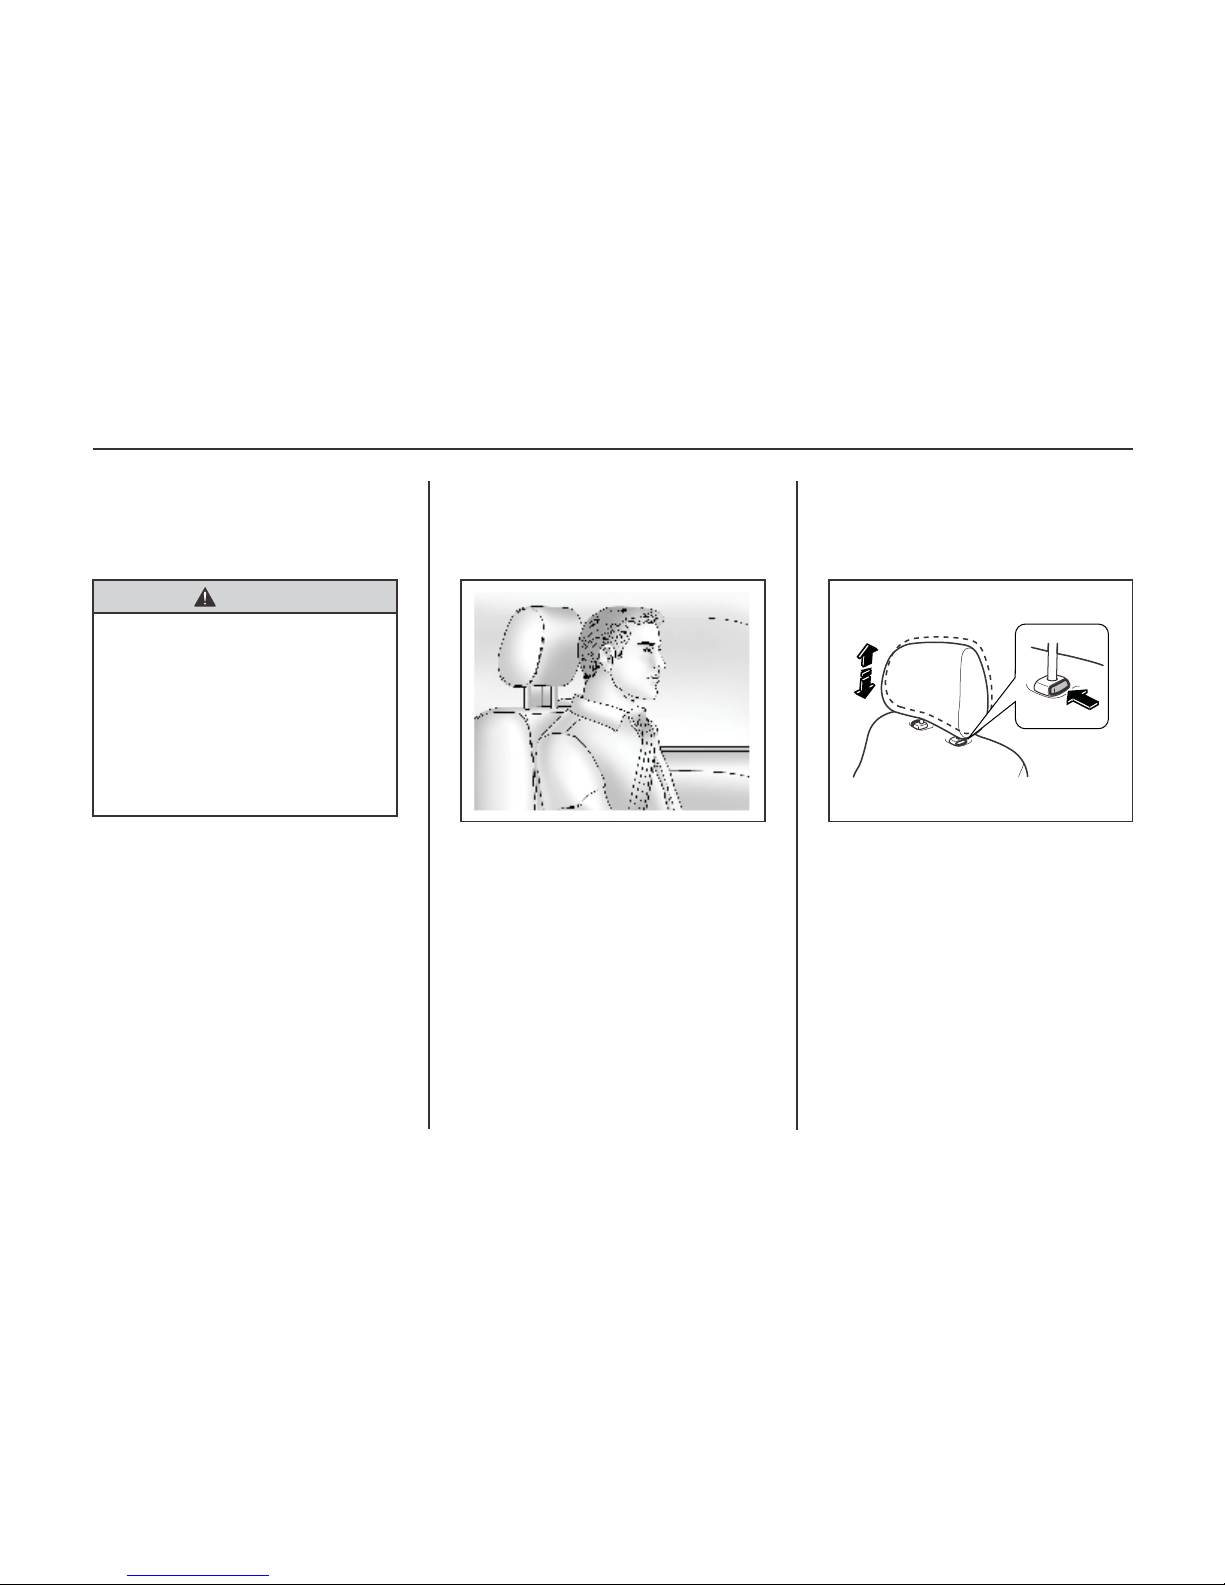
Adjust the headrest so that the top of the
headrest is at the same height as the top
of the occupant’s head. This position
reduces the chance of a neck injury in a
crash.
HEAD RESTRAINTS
(Front & Rear Seats)
HEIGHT ADJUSTMENT
Press the lock release button, at the
same time adjust the headrest upwards
or downwards to an appropriate position, and release the button to lock it.
Try to move the headrest to make sure
that it is locked in place.
HEADREST REMOVAL
To remove the headrest, press the lock
release button and pull the headrest
upward.
 Loading...