

Chevrolet DURAMAX DIESEL 2011 User Manual

Black plate (1,1)
DURAMAX Diesel Engine (LML/LGH) - 2011
2011 DURAMAX Diesel Engine (LML/LGH) M
In Brief . . . . . . . . . .. . . . . . . . . . .. . . 1-1
Initial Drive Information . . . . . . . .1-1
Performance and
Maintenance . . . . . . . . . . . . . . . . . 1-2
Instruments and Controls . . . . 5-1
Warning Lights, Gauges, and
Indicators . . . . . . . . . . . . . . . . . . . . 5-2
Information Displays . . . . . . . .. . 5-10
Vehicle Messages.. . . . . . . . . . . 5-11
Vehicle Personalization.. . . . . . 5-15
Driving and Operating . . . . . . . . 9-1
Starting and Operating . . . . . . . . .9-1
Engine Exhaust . . . . . . . . . . . . . . 9-10
Brakes . . . . . . . . . . . . . . . . . . . . . . . 9-16
Fuel . . . . . . . . . . . . . . . . . . . . . . . . . . 9-17
Towing . . . . . . . . . . . . . . . . . . . . . . . 9-37
Conversions and
Add-Ons . . . . . . . . . . . . . . . . . . . . 9-42
Vehicle Care .... . . . . . . . . . . . . . 10-1
General Information . . . . . . . . . .10-2
Vehicle Checks.. . . . . . . . . . . . . . 10-4
Electrical System . . . . . . . . . . . . 10-29
Service and Maintenance . . . 11-1
General Information . . . . . . . . . . 11-1
Scheduled Maintenance . . . . . . 11-2
Recommended Fluids,
Lubricants, and Parts . . . . . . . 11-8
Maintenance Records . . . . . . . 11-12
Technical Data . . . . . . ......... 12-1
Vehicle Data. . . . . . . . . . . . . . . . . . 12-2
Index . . . . . . . . . . . . . . . . . . . . . i-1

Black plate (2,1)
DURAMAX Diesel Engine (LML/LGH) - 2011
ii Introduction
The names, logos, emblems,
slogans, vehicle model names, and
vehicle body designs appearing in
this manual including, but not limited
to, GM, the GM logo, CHEVROLET,
GMC, the CHEVROLET and GMC
Truck Emblems, SILVERADO,
SIERRA, DENALI, EXPRESS,
SAVANA, and Duramax are
trademarks and/or service marks
of General Motors LLC, its
subsidiaries, affiliates, or licensors.
This manual describes features that
may or may not be on your specific
vehicle either because they are
options that you did not purchase or
due to changes subsequent to the
printing of this owner manual.
Litho in U.S.A.
Part No. 22743552 A First Printing
Please refer to the purchase
documentation relating to your
specific vehicle to confirm each of
the features found on your vehicle.
For vehicles first sold in Canada,
substitute the name “General
Motors of Canada Limited” for GMC
and Chevrolet Motor Division
wherever it appears in this manual.
This manual contains information
that pertains to the operation of your
diesel engine. It also contains your
Diesel Maintenance Schedule.
The sections in this manual
correspond to the sections in your
owner manual. This manual, along
with your owner manual, will assist
you in the proper use and
maintenance of your vehicle.
Keep this manual in the vehicle for
quick reference.
©
2010 General Motors LLC. All Rights Reserved.
Canadian Vehicle Owners
Propriétaires Canadiens
A French language copy of this
manual can be obtained from your
dealer or from:
On peut obtenir un exemplaire de
ce guide en français auprès du
concessionnaire ou à l'adresse
suivante:
Helm, Incorporated
P.O. Box 07130
Detroit, MI 48207
1-800-551-4123
Numéro de poste 6438 de
langue française
www.helminc.com

Black plate (3,1)
DURAMAX Diesel Engine (LML/LGH) - 2011
Using this Supplement
This supplement contains
information specific to the unique
components of the vehicle. It does
not explain everything you need to
know about the vehicle. Read this
supplement along with the owner
manual to learn about the vehicle's
features and controls.
Index
A good place to look for what you
need is the Index in back of this
supplement. It is an alphabetical list
of what is in the supplement, and
the page number where you will
find it.
Introduction iii

Black plate (4,1)
DURAMAX Diesel Engine (LML/LGH) - 2011
iv Introduction
2 NOTES

Black plate (1,1)
DURAMAX Diesel Engine (LML/LGH) - 2011
In Brief 1-1
In Brief
Initial Drive Information
Transmission . . . . . . . . . . . . . . . . . . 1-1
Performance and
Maintenance
Engine Oil Life System . . . . . . . . 1-2
Diesel Particulate Filter
(Exhaust Filter) . . . . . . . . . . . . . . 1-3
Diesel Exhaust Fluid . . . . . . . . . . 1-5
Initial Drive
Information
Transmission
Cold Operation
(Allison Transmission)
When temperatures are very cold,
the transmission will prevent certain
operations to protect against
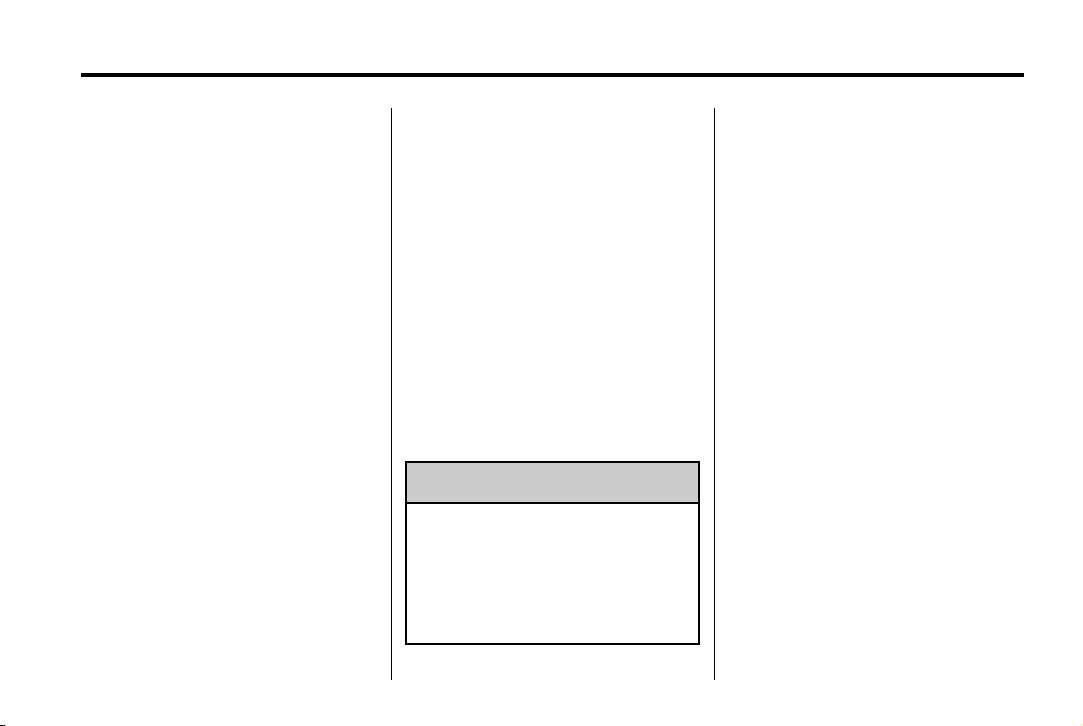
damage. The chart below shows
shift range availability based on
transmission oil temperature:
.
All shift ranges available at
−25 C (−13 F) or above.
.
2 (Second) and 3 (Third) shift
ranges only at −35 C (−31 F) to
−25 C (−13 F).
.
2 (Second) shift range only at
−35 C (−31 F) or lower.
Torque converter clutch operation
will also be prevented when air or
transmission oil temperatures are
below certain levels.
For areas where ambient
temperatures are below
−40 C (−40 F), use synthetic
transmission fluid approved to
Allison Transmission specification
TES‐295. See Recommended
Fluids and Lubricants on page 11‑8
and Automatic Transmission Fluid
on page 10‑11.
Adaptive Shift Controls
The shift quality of a new vehicle
may not be ideal because the
Adaptive Shift Control process may
not have determined the best
settings for a particular shift or
condition. Shift quality will improve
with continued driving.
Low Traction Mode
(Allison Transmission)
Low Traction Mode aids in vehicle
acceleration on slippery road
surfaces such as ice or snow.
By selecting 2 (Second) using
Range Selection Mode while at a
stop, the transmission will limit
torque to the drive wheels to
prevent slippage.

Black plate (2,1)
DURAMAX Diesel Engine (LML/LGH) - 2011
1-2 In Brief
Heater Performance Mode
(Allison Transmission)
When cold weather conditions are
detected, the transmission raises
part throttle upshift points after
the 1 (First) to 2 (Second) upshift
to increase engine speed.
This feature shortens engine and
cab warm up times.
When the transmission is in this
mode, upshifts may be delayed.
This is normal and does not
indicate an operational problem.
Four Wheel Drive
(Allison Transmission)
When operating in 4
(Four-Wheel-Drive Low), there
is a very deep gear reduction.
The resulting shifts will feel
exaggerated.
↓
Performance and Maintenance
Engine Oil Life System
The engine oil life system calculates
engine oil life based on vehicle use
and, on most vehicles, displays a
DIC message when it is necessary
to change the engine oil and filter.
The oil life system should be reset
only following an oil change.
Resetting the Oil Life System
To reset the Engine Oil Life System
on van models:
1. Display the OIL LIFE
REMAINING on the DIC.
2. Press and hold the SET/RESET
button on the DIC for more than
five seconds. The oil life will
change to 100%.
To reset the Engine Oil Life System
on most pickup models:
1. Display the OIL LIFE
REMAINING on the DIC. If the
vehicle does not have DIC
buttons, the vehicle must be in
P (Park) to access this display.
2. Press and hold the SET/RESET
button on the DIC, or the trip
odometer reset stem if the
vehicle does not have DIC
buttons, for more than
five seconds. The oil life will
change to 100%.

Black plate (3,1)
DURAMAX Diesel Engine (LML/LGH) - 2011
In Brief 1-3
On all models, the Engine Oil Life
System can be reset as follows:
1. Turn the ignition to ON/RUN with
the engine off
2. Fully press the accelerator pedal
slowly three times within
five seconds.
3. Display the OIL LIFE
REMAINING on the DIC. If the
display shows 100%, the system
is reset.
4. Turn the key to LOCK/OFF.
See Engine Oil Life System on
page 10‑10.
Diesel Particulate Filter (Exhaust Filter)
The Duramax engine is equipped
with a Diesel Particulate Filter (DPF)
that, by design, will filter or trap
particulates. The DPF is located
under the vehicle in the exhaust
system and looks like a catalyst.
Depending on a number of factors
monitored by the engine computer,
the DPF will need to be cleaned of
accumulated solids. When a
cleaning is needed, the engine
computer will initiate a cleaning
action by warming the exhaust gas
temperature. This feature has been
designed to operate automatically,
with limited operator involvement or
awareness.
Cleaning the DPF
(Exhaust Filter)
While the DPF cleaning is
automatically controlled by the
engine computer, the vehicle will
need to operate continuously for
approximately 30 minutes and at
speeds greater than 48 km/h
(30 mph) to clean the DPF
effectively. If the vehicle is returned
to idle during the cleaning process,
the driver may notice a slightly
different sound or a slightly elevated
engine idle speed. This is normal.
No action is required on the part of
the driver during a regular DPF
cleaning. See Diesel Particulate
Filter (Exhaust Filter) on page 9‑10.

Black plate (4,1)
DURAMAX Diesel Engine (LML/LGH) - 2011
1-4 In Brief
Special DPF Driver Messages
If the vehicle is used for numerous
short trips or extended slow-speed
operation, the engine computer may
not be able to adequately heat up
the exhaust system to clean the
DPF effectively. The engine
computer has been designed to
continuously monitor the condition
of the DPF. When the engine
computer detects that the DPF is
nearly full of particulates and that
the vehicle is not being operated in
a manner that would allow effective
automatic DPF cleaning, the Driver
Information Center will display the
message CLEANING EXHAUST
FILTER KEEP DRIVING UNTIL
MESSAGE IS CLEARED.
If the vehicle continues to be
driven in a manner that prevents
effective DPF cleaning, the DPF will
become plugged with particulates.
If this occurs, the engine computer
will turn on the Service Engine Soon
Light in the instrument cluster and
the DIC will display the message
REDUCED ENGINE POWER.
See Diesel Particulate Filter
(Exhaust Filter) on page 9‑10
and Engine Power Messages on
page 5‑11.
Fuel
Use Ultra-Low Sulfur Diesel
Fuel (ULSD)
Use Ultra-Low Sulfur Diesel Fuel
(ULSD) only. The emission control
hardware used on the vehicle may
be damaged by using fuel with high
sulfur levels. Use only fuel that is
dispensed from pumps bearing the
ULSD label.
Do Not Use Low Sulfur Diesel
Fuel (LSD)
Do not use fuel that is dispensed
from pumps bearing the LSD label.
Do Not Use Non-Highway Fuel
Fuel labeled as off road or
non-highway is typically very
high in sulfur content and will
damage the emission control
system. Non-Highway fuel is not
intended for use in on-highway
vehicles and does not have the
fuel properties needed by the
DPF-equipped Duramax Diesel.
In addition:
.
Use the correct engine oil.
.
Do not add gasoline to
diesel fuel.
.
Do not modify the induction or
exhaust systems.
See Fuel for Diesel Engines on
page 9‑17 and Engine Oil on
page 10‑7.

Black plate (5,1)
DURAMAX Diesel Engine (LML/LGH) - 2011
In Brief 1-5
Diesel Exhaust Fluid
Diesel Exhaust Fluid (DEF) is used
with diesel engines to reduce the
amount of regulated emissions
produced. The DEF system must be
maintained for the vehicle to run
properly.
Locating Diesel Exhaust Fluid
DEF can be purchased at a
Chevrolet or GMC dealer. It can
also be purchased at authorized
vehicle and truck dealerships.
Additionally, some diesel truck
fuelling stations or retailers may
also have DEF for purchase. For
vehicles with an active OnStar
subscription, OnStar can help to
locate a DEF retailer. For more
information on locating DEF see
www.afdc.energy.gov/afdc/vehicles/
diesels_fluid.html. See “Customer
Assistance Offices” in the owner
manual for phone numbers to assist
you in contacting a GM dealer.
See Recommended Fluids and
Lubricants on page 11‑8.
®
As the DEF tank becomes low
on fluid, warnings begin with
approximately 1600 km (1000 miles)
of remaining range. These warnings
will increase in intensity as the tank
becomes empty. Once the tank is
empty, the vehicle will be speed
limited to 89 km/h (55 mph) and
eventually to 7km/h (4 mph).
The tank should be refilled to
avoid vehicle speed limitation.
If there is an issue with the quality
of the fluid or the exhaust fluid
system, warnings will be displayed
in the Driver Information Center
(DIC). The vehicle will have 322 km
(200 miles) before being speed
limited to 89 km/h (55 mph). If the
vehicle continues to be driven in this
condition, it will become speed
limited to 7km/h (4 mph). See Diesel
Exhaust Fluid on page 9‑12.
Black plate (6,1)
DURAMAX Diesel Engine (LML/LGH) - 2011
1-6 In Brief
2 NOTES

Black plate (1,1)
DURAMAX Diesel Engine (LML/LGH) - 2011
Instruments and Controls 5-1
Instruments and Controls
Warning Lights, Gauges, and
Indicators
Instrument Cluster . . . . . . . . . . . . 5-2
Fuel Gauge . . . . . . . . . . . . . . . . .. . 5-4
Engine Oil Pressure Gauge . . . 5-5
Malfunction Indicator Lamp . . . 5-6
Wait-to-Start Light . . . . . . . . . .. . . 5-9
Diesel Exhaust Fluid (DEF)
Warning Light . . . . . . . . . . . . . . . . 5-9
Information Displays
Driver Information
Center (DIC) . . . . . . . . . . . . . . . 5-10
Vehicle Messages
Vehicle Messages . . . . . . . . . . . 5-11
Engine Cooling System
Messages . . . . . . . . . . . . . . . . . . 5-11
Engine Oil Messages . . . . . . . . 5-11
Engine Power Messages . . . . 5-11
Fuel System Messages . . . . . . 5-12
Diesel Exhaust Fluid
Messages . . . . . . . . . .. . . . . . .. 5-12
Diesel Particulate Filter
Messages . . . . . . . . . .. . . . . . .. 5-12
Service Vehicle Messages . . . 5-13
Starting the Vehicle
Messages . . . . . . . . . .. . . . . . .. 5-13
Transmission Messages . . . . . 5-14
Vehicle Speed Messages . . .. 5-14
Vehicle Personalization
Vehicle Personalization . . . . . . 5-15
Black plate (2,1)
DURAMAX Diesel Engine (LML/LGH) - 2011
5-2 Instruments and Controls
Warning Lights, Gauges, and Indicators
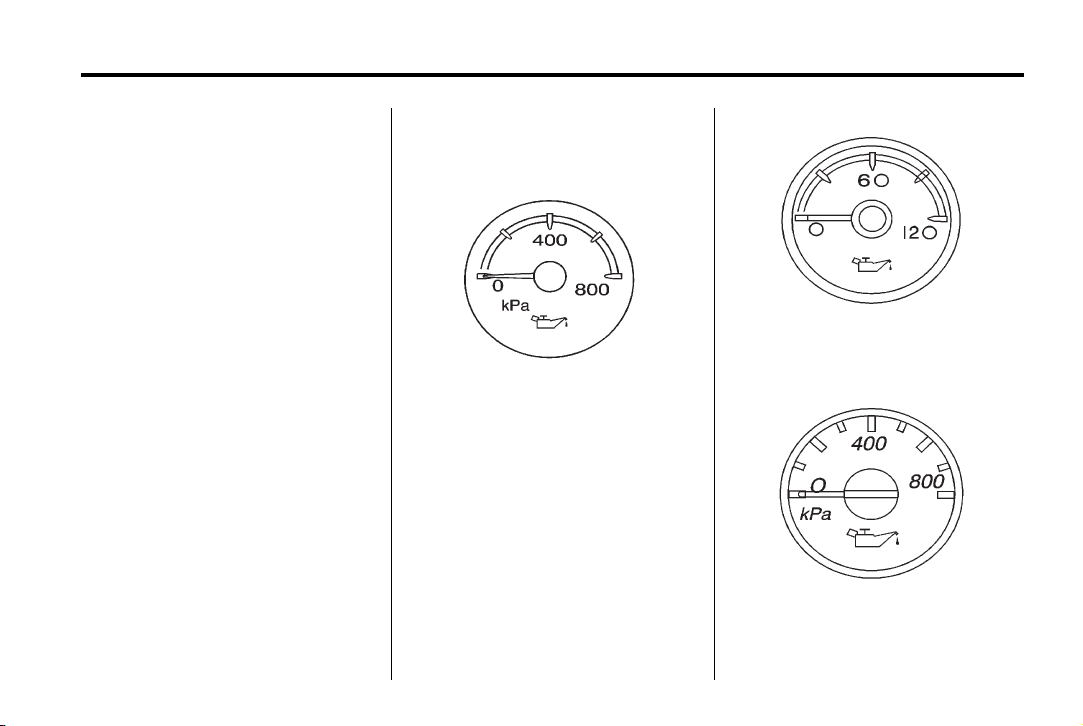
Instrument Cluster
English Pickup Shown, Metric Similar
Black plate (3,1)
DURAMAX Diesel Engine (LML/LGH) - 2011
Instruments and Controls 5-3
English Van Shown, Metric Similar
Black plate (4,1)
DURAMAX Diesel Engine (LML/LGH) - 2011
5-4 Instruments and Controls
See the owner manual for
telltales and gauges not listed in
supplement.
Fuel Gauge
Metric Pickup Models
English Pickup Models
Metric Van Models
English Van Models
When the ignition is on, the fuel
gauge shows approximately how
much fuel the vehicle has left in the
tank. The gauge will first indicate
E (empty) before the vehicle is out
of fuel, but the vehicle's fuel tank
should be filled soon.
An arrow on the fuel gauge
indicates the side of the vehicle
the fuel door is on.
Black plate (5,1)
DURAMAX Diesel Engine (LML/LGH) - 2011
Instruments and Controls 5-5
Listed are four situations customers
may experience with the fuel gauge:
.
At the gas station, the fuel pump
shuts off before the gauge reads
F (full).
.
It takes a little more or less fuel
to fill up than the fuel gauge
indicated. For example, the
gauge may have indicated the
tank was half full, but it actually
took a little more or less than
half the tank's capacity to fill
the tank.
.
The gauge moves a little while
turning a corner or speeding up.
.
The gauge does not go back to
E (empty) when the ignition is
turned off.
None of these indicate a problem
with the fuel gauge.
For information on how to fill the
fuel tank, see Filling the Tank on
page 9‑35.
The vehicle also has a fuel cooler.
To clean, powerwash the bottom of
the vehicle.
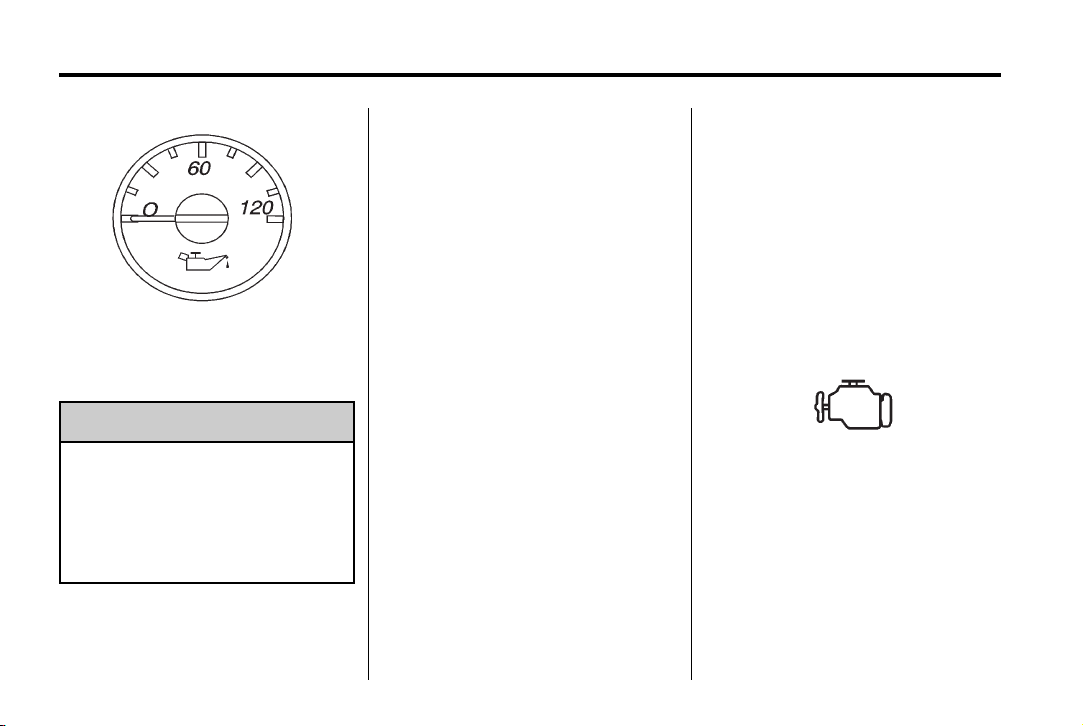
Engine Oil Pressure Gauge
English Pickup Models
Metric Pickup Models
Metric Van Models
Black plate (6,1)
DURAMAX Diesel Engine (LML/LGH) - 2011
5-6 Instruments and Controls
English Van Models
WARNING
{
Do not keep driving if the oil
pressure is low. The engine can
become so hot that it catches fire.
Someone could be burned. Check
the oil as soon as possible and
have the vehicle serviced.
Notice: Lack of proper engine oil
maintenance can damage the
engine. The repairs would not be
covered by the vehicle warranty.
Always follow the maintenance
schedule for changing engine oil.
The engine oil pressure gauge
reads in kPa (kilopascals) or psi
(pounds per square inch) when the
engine is running. Oil pressure may
vary with engine speed, outside
temperature and oil viscosity.
If readings are outside the normal
operating range, the low oil
pressure message may display on
the Driver Information Center (DIC),
or for vehicles without DIC the oil
pressure light comes on. If the oil
level is outside the normal operating
range of 0-548 kPa (0-80 psi), check
the oil level immediately. DO NOT
operate the engine with the oil
pressure warning light on or a
ENGINE OIL LOW ADD OIL
message displayed.
Malfunction Indicator Lamp
A computer system called OBD II
(On-Board Diagnostics-Second
Generation) monitors operation of
the fuel, ignition, and emission
control systems. It makes sure that
emissions are at acceptable levels
for the life of the vehicle, helping to
produce a cleaner environment.
This light comes on when the
ignition is on, but the engine is not
running, as a check to show it is
working. If it does not, have the
vehicle serviced by your dealer.

Black plate (7,1)
DURAMAX Diesel Engine (LML/LGH) - 2011
Instruments and Controls 5-7
If the check engine light comes on
and stays on, while the engine is
running, this indicates that there is
an OBD II problem and service is
required.
This light also comes on when the
Diesel Exhaust Fluid (DEF) is not
working. See Diesel Exhaust Fluid
on page 9‑12 for more information.
Malfunctions often are indicated by
the system before any problem is
apparent. Heeding the light can
prevent more serious damage to the
vehicle. This system assists the
service technician in correctly
diagnosing any malfunction.
Notice: If the vehicle is
continually driven with this light
on, after a while, the emission
controls might not work as well,
the vehicle fuel economy might
not be as good, and the engine
might not run as smoothly.
This could lead to costly repairs
that might not be covered by the
vehicle warranty.
Notice: Modifications made to the
engine, transmission, exhaust,
intake, or fuel system of the
vehicle or the replacement of
the original tires with other
than those of the same Tire
Performance Criteria (TPC) can
affect the vehicle's emission
controls and can cause this light
to come on. Modifications to
these systems could lead to
costly repairs not covered by
the vehicle warranty. This could
also result in a failure to
pass a required Emission
Inspection/Maintenance test.
See Accessories and
Modifications on page 10‑2.
This light comes on during a
malfunction in one of two ways:
Light Flashing: A misfire condition
has been detected. A misfire
increases vehicle emissions and
could damage the emission control
system on the vehicle. Diagnosis
and service might be required.
The following can prevent more
serious damage to the vehicle:
.
Reduce vehicle speed.
.
Avoid hard accelerations.
.
Avoid steep uphill grades.
.
If towing a trailer, reduce the
amount of cargo being hauled as
soon as it is possible.
If the light continues to flash, when
it is safe to do so, stop the vehicle.
Find a safe place to park the
vehicle. Turn the vehicle off, wait at
least 10 seconds, and restart the
engine. If the light is still flashing,
follow the previous steps and see
your dealer for service as soon as
possible.
Black plate (8,1)
DURAMAX Diesel Engine (LML/LGH) - 2011
5-8 Instruments and Controls
Light On Steady: An emission
control system malfunction has
been detected on the vehicle.
Diagnosis and service might be
required.
An emission system malfunction
might be corrected by doing the
following:
.
If the vehicle has been driven
through a deep puddle of water,
the vehicle's electrical system
might be wet. The condition is
usually corrected when the
electrical system dries out.
A few driving trips should turn
the light off.
.
Make sure to fuel the vehicle
with quality fuel. Poor fuel quality
causes the engine not to run as
efficiently as designed and may
cause: stalling after start-up,
stalling when the vehicle is
changed into gear, misfiring,
hesitation on acceleration,
or stumbling on acceleration.
These conditions might go away
once the engine is warmed up.
If one or more of these
conditions occurs, change the
fuel brand used. It will require at
least one full tank of the proper
fuel to turn the light off.
See Fuel for Diesel Engines on
page 9‑17.
If none of the above have made the
light turn off, your dealer can check
the vehicle. The dealer has the
proper test equipment and
diagnostic tools to fix any
mechanical or electrical problems
that might have developed.
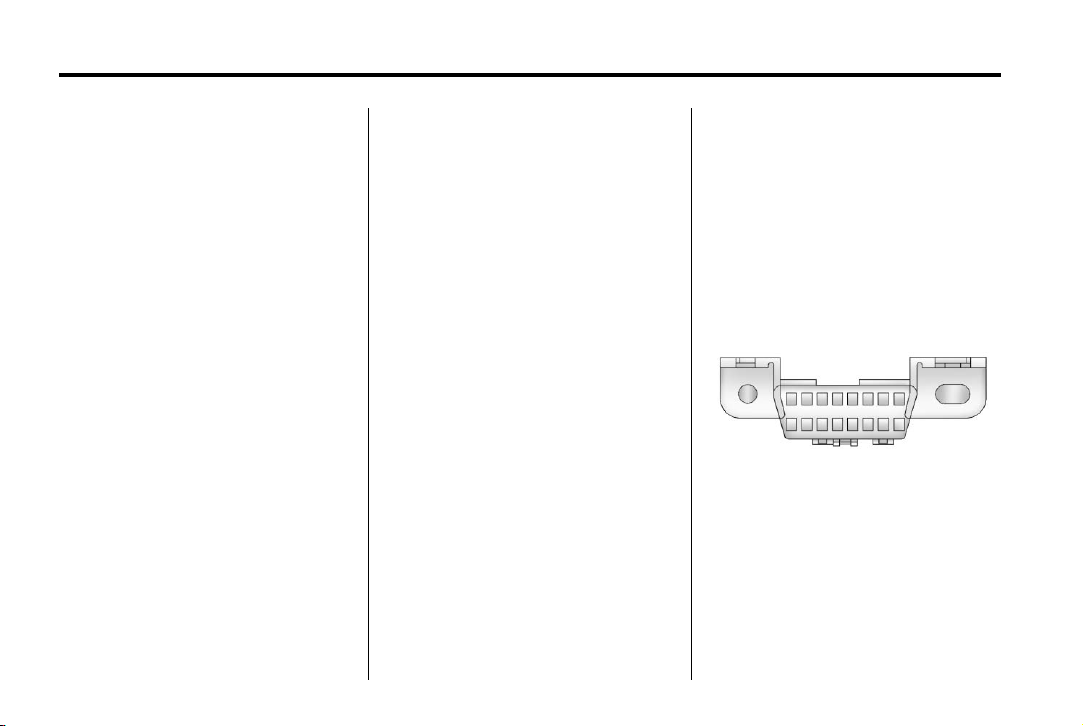
Emissions Inspection and
Maintenance Programs
Some state/provincial and
local governments may have
programs to inspect the on-vehicle
emission control equipment
For the inspection, the emission
system test equipment is
connected to the vehicle’s
Data Link Connector (DLC).
The DLC is under the instrument
panel to the left of the steering
wheel. See your dealer if assistance
is needed.
Black plate (9,1)
DURAMAX Diesel Engine (LML/LGH) - 2011
Instruments and Controls 5-9
The vehicle may not pass
inspection if:
.
the check engine light is on with
the engine running, or if the light
does not come on when the
ignition is turned to ON/RUN
while the engine is off.
.
the critical emission control
systems have not been
completely diagnosed by the
system. This can happen if the
battery has recently been
replaced or if the battery has
run down. The diagnostic
system evaluates critical
emission control systems during
normal driving. This can take
several days of routine driving.
If this has been done and the
vehicle still does not pass the
inspection , your dealer can
prepare the vehicle for
inspection.
Wait-to-Start Light
The wait to start light shows that the
engine is functioning properly and
indicates when the engine can be
started.
The fast warm-up glow plug system
makes the wait to start light stay on
for a shorter amount of time than
most diesel engines.
For more information, see Starting
the Diesel Engine on page 9‑1.
Diesel Exhaust Fluid (DEF) Warning Light
This light, a Driver Information
Center (DIC) Message, and a chime
come on when there is an issue with
the Diesel Exhaust Fluid.
See Diesel Exhaust Fluid Messages
on page 5‑12 for information on the
specific message displaying with the
light.
If the DEF fluid level has not been
corrected, the light will continue to
flash when the vehicle is started or
after a fuel refill. The vehicle's
speed may also be limited.
Also see Diesel Exhaust Fluid on
page 9‑12 for more information.

Black plate (10,1)
DURAMAX Diesel Engine (LML/LGH) - 2011
5-10 Instruments and Controls
Information Displays
Driver Information Center (DIC)
The Driver Information Center (DIC)
is located on the instrument panel
above the steering wheel. The DIC
comes on when the ignition is on.
A Duramax Diesel vehicle may have
the following additional DIC menu
items.
FUEL FILTER LIFE REMAINING
To access this display, the vehicle
must be in P (Park). If your vehicle
has DIC buttons, press the vehicle
information button until FUEL
FILTER LIFE REMAINING displays.
If your vehicle does not have DIC
buttons, press the trip stem until
FUEL FILTER LIFE REMAINING
displays. This display shows an
estimate of the fuel filter's remaining
useful life. If you see 90% FUEL
FILTER LIFE REMAINING on the
display, it means 90% of the current
fuel filter life remains. The fuel filter
life system will alert you to change
your fuel filter on a schedule
consistent with your driving
conditions.
When the remaining fuel filter life is
low, the CHANGE FUEL FILTER
message will appear on the display.
You should change your fuel filter as
soon as you can.
FUEL FILTER LIFE RESET
You must reset the FUEL FILTER
LIFE REMAINING display after each
fuel filter change. It will not reset
itself. Also, be careful not to reset
the FUEL FILTER LIFE REMAINING
display at any time other than
when the fuel filter has just been
changed because it cannot be reset
accurately until the next fuel filter
change. The fuel filter life will
change to 100% when the system
has been reset. To reset the system,
press and hold the set/reset button,
or the trip stem if there are no DIC
buttons, for two seconds while
FUEL FILTER LIFE REMAINING is
displayed on the DIC.

Black plate (11,1)
DURAMAX Diesel Engine (LML/LGH) - 2011
Instruments and Controls 5-11
Vehicle Messages
The Driver Information Center (DIC)
will display warning messages if a
problem is detected. Pressing the
select button or the set/reset button
for vehicle with DIC buttons, or the
trip odometer reset stem for
vehicles without DIC buttons,
will acknowledge some current
warning or service messages.
Other messages are more urgent
and cannot be cleared from the
display until the issue is corrected.
The following are some additional
messages that the Duramax Diesel
vehicle can display.
Engine Cooling System Messages
COOLANT LEVEL LOW
ADD COOLANT
Notice: Engine damage from
running your engine without
coolant is not covered by your
warranty. See “Overheated
Engine Protection Operating
Mode” in the Index of your
owner's manual for information
on driving to a safe place in an
emergency.
If your vehicle has a low coolant
level sensor, this message will
appear on the DIC if the engine
coolant level is low. Adding coolant
to the coolant recovery tank will
clear the message. See “Engine
Coolant” in the owner manual.
Engine Oil Messages
ENGINE OIL LOW ADD OIL
If your vehicle has an oil level
sensor, this message displays
if the oil level in the vehicle is low.
Check the oil level and correct it as
necessary. You may need to let the
vehicle cool or warm up and cycle
the ignition to be sure this message
clears.
This message clears itself after
10 seconds, until the next ignition
cycle. See Engine Oil on page 10‑7
for additional information.
Engine Power Messages
ENGINE POWER IS REDUCED
A computer monitors the operation
of the electric accelerator. If the
ENGINE POWER IS REDUCED
message comes on while driving,
there will be a reduction in
performance and acceleration.
You should take the vehicle in
for service.

Black plate (12,1)
DURAMAX Diesel Engine (LML/LGH) - 2011
5-12 Instruments and Controls
Fuel System Messages
CHANGE FUEL FILTER
This message will appear on the
DIC for 10 seconds when a fuel filter
change is required. See Fuel Filter
Replacement on page 9‑33 for more
information.
WATER IN FUEL SERVICE
REQUIRED
This message will come on to warn
you if there is water in the diesel
fuel system. For more information
on how this message works, see
Water in Fuel on page 9‑27.
Diesel Exhaust Fluid Messages
EXHAUST FLUID EMPTY
REFILL NOW
This message will be displayed
when the exhaust fluid is empty.
This message may be accompanied
by other messages that provide
more information.
EXHAUST FLUID LOW SPEED
LIMITED SOON
When the exhaust fluid range is less
than 120 km (75 miles) this message
will be displayed.
EXHAUST FLUID RANGE: XXX
When the exhaust fluid is getting
low, the range will be displayed in
either kilometers or miles. It is
normal for the EXHAUST FLUID
RANGE to vary based on vehicle
and environmental driving
conditions.
EXHAUST FLUID QUALITY
POOR SEE OWNERS
MANUAL NOW
This message displays when the
exhaust fluid is of poor quality.
This message may be accompanied
by other messages that provide
more information.
Diesel Particulate Filter Messages
CLEANING EXHAUST FILTER
KEEP DRIVING UNTIL
MESSAGE IS CLEARED
This message will appear on the
DIC when an exhaust particulate
filter cleaning is required. To clean
the filter, drive the vehicle above
50 km/h (30 mph) until the warning
message goes off. This will take
about 30 minutes.
If the filter is not cleaned, the
malfunction indicator lamp will come
on and the REDUCED ENGINE
POWER message will be displayed.
Vehicle performance will be limited.
See Diesel Particulate Filter
(Exhaust Filter) on page 9‑10 for
more information.

Black plate (13,1)
DURAMAX Diesel Engine (LML/LGH) - 2011
Instruments and Controls 5-13
Service Vehicle Messages
SERVICE EXHAUST FLUID
SYSTEM SEE OWNERS
MANUAL NOW
This message displays when the
exhaust fluid system needs service.
This message may be accompanied
by other messages that provide
more information.
Starting the Vehicle Messages
ELEVATED IDLE OFF
If your vehicle does not have DIC
buttons, this message will appear
when the elevated idle/exhaust
restrictor feature has been turned
off. This feature can be turned on
or off by pressing the pedals.
For more information on the
elevated idle/exhaust restrictor
feature, see “Elevated Idle” under
Starting the Diesel Engine on
page 9‑1.
If your vehicle has DIC buttons, this
message will not be displayed.
The Elevated Idle can be turned on
or off using the customization
menus. Press the customization
button until ELEVATED IDLE
appears on the DIC display. Press
the set/reset button once to access
the settings for this feature. Then
press the customization button to
scroll through the following settings:
OFF, ON or NO CHANGE. Choose
one of the available settings and
press the set/reset button while it is
displayed on the DIC to select it.
ELEVATED IDLE ON
If your vehicle does not have DIC
buttons, this message will appear
when the elevated idle/exhaust
restrictor feature has been turned
on. This feature can be turned on
or off by pressing the pedals.
For more information on the
elevated idle/exhaust restrictor
feature, see “Elevated Idle” under
Starting the Diesel Engine on
page 9‑1.
If your vehicle has DIC buttons,
this message will not be displayed.
The Elevated Idle can be turned on
or off using the customization
menus. Press the customization
button until ELEVATED IDLE
appears on the DIC display. Press
the set/reset button once to access
the settings for this feature. Then
press the customization button to
scroll through the following settings:
OFF, ON or NO CHANGE. Choose
one of the available settings and
press the set/reset button while it is
displayed on the DIC to select it.

Black plate (14,1)
DURAMAX Diesel Engine (LML/LGH) - 2011
5-14 Instruments and Controls
FAST IDLE ON
If your vehicle has this feature, this
message displays when the fast idle
feature is on. See “Fast Idle Control”
under Starting the Diesel Engine on
page 9‑1.
Transmission Messages
SHIFT INHIBITED SELECT N
TO RESET (Pickup Models)
If the transmission is unable to
shift into a selected gear, this
message will appear on the DIC.
The electronic shift position
indicator on the instrument panel
cluster may blink when this occurs.
To make the vehicle shift to the
requested gear, you may have to
shift back to P (Park) or N (Neutral)
and re-select the desired gear.
Vehicle Speed Messages
89 KM/H (55 MPH) MAX SPEED
UPON RESTART
This message will be displayed
along with other messages.
These messages include EXHAUST
FLUID EMPTY REFILL NOW,
EXHAUST FLUID QUALITY POOR,
or SERVICE EXHAUST FLUID
SYSTEM. The vehicle speed will be
limited to 89 KM/H (55 MPH) at the
next restart.
7 KM/H (4 MPH) MAX SPEED
NEXT FUEL FILL
This message will be displayed
along with other messages.
These messages include EXHAUST
FLUID EMPTY REFILL NOW,
EXHAUST FLUID QUALITY POOR,
or SERVICE EXHAUST FLUID
SYSTEM. The vehicle speed will be
limited to 7 KM/H (4 MPH) at the
next fuel fill.
SPEED LIMITED TO
89 KM/H (55 MPH)
This message will be displayed
along with other messages.
These messages include EXHAUST
FLUID EMPTY REFILL NOW,
EXHAUST FLUID QUALITY POOR,
or SERVICE EXHAUST FLUID
SYSTEM. When this message is
displayed, the vehicle speed is
being limited to 89 KM/H (55 MPH).
SPEED LIMITED TO
7 KM/H (4 MPH)
This message will be displayed
along with other messages.
These messages include EXHAUST
FLUID EMPTY REFILL NOW,
EXHAUST FLUID QUALITY POOR,
or SERVICE EXHAUST FLUID
SYSTEM. When this message is
displayed, the vehicle speed is
being limited to 7 KM/H (4 MPH).

Black plate (15,1)
DURAMAX Diesel Engine (LML/LGH) - 2011
Instruments and Controls 5-15
Vehicle Personalization
Your Duramax Diesel vehicle may
have additional customizable
features for Power Take-Off (PTO).
See Power Take-Off (PTO) on
page 9‑42 for more information.
Entering the Feature
Settings Menu
1. Turn the ignition on and place
the vehicle in P (Park).
To avoid excessive drain on the
battery, it is recommended that
the headlamps are turned off.
2. Press the customization button
to scroll through the available
customizable options.
Feature Settings Menu Items
PTO STANDBY SPEED
This feature allows you to select the
PTO standby speed.
Press the customization button until
the PTO STANDBY SPEED screen
appears on the DIC display. Press
the set/reset button once to access
the settings for this feature. Then
press the customization button to
scroll through the following choices:
.
800 RPM
.
900 RPM
.
1000 RPM
.
1100 RPM
.
1200 RPM
.
1300 RPM
.
1400 RPM
.
1500 RPM
.
NO CHANGE
To select a setting, press the
set/reset button while the desired
setting is displayed on the DIC.
PTO SET 1 SPEED
This feature allows you to select the
PTO 1 set speed.
Press the customization button until
the PTO SET 1 SPEED screen
appears on the DIC display. Press
the set/reset button once to access
the settings for this feature. Then
press the customization button to
scroll through the following choices:
.
1000 RPM
.
1200 RPM
.
1400 RPM
.
1600 RPM
.
1800 RPM
.
2000 RPM
.
2200 RPM
.
2400 RPM
.
NO CHANGE
To select a setting, press the
set/reset button while the desired
setting is displayed on the DIC.

Black plate (16,1)
DURAMAX Diesel Engine (LML/LGH) - 2011
5-16 Instruments and Controls
PTO SET 2 SPEED
This feature allows you to select the
PTO 2 set speed.
Press the customization button until
the PTO SET 2 SPEED screen
appears on the DIC display. Press
the set/reset button once to access
the settings for this feature. Then
press the customization button to
scroll through the following choices:
.
1800 RPM
.
2000 RPM
.
2200 RPM
.
2400 RPM
.
2600 RPM
.
2800 RPM
.
3000 RPM
.
3200 RPM
.
NO CHANGE
To select a setting, press the
set/reset button while the desired
setting is displayed on the DIC.
PTO TAP STEP
This feature allows you to select the
PTO tap step.
Press the customization button
until the PTO TAP STEP screen
appears on the DIC display. Press
the set/reset button once to access
the settings for this feature. Then
press the customization button to
scroll through the following choices:
.
25 RPM
.
75 RPM
.
100 RPM
.
150 RPM
.
200 RPM
.
250 RPM
.
350 RPM
.
NO CHANGE
To select a setting, press the
set/reset button while the desired
setting is displayed on the DIC.
PTO SHUTDOWN TIME
This feature allows you to select the
PTO shutdown time.
Press the customization button until
the PTO SHUTDOWN TIME screen
appears on the DIC display. Press
the set/reset button once to access
the settings for this feature. Then
press the customization button to
scroll through the following choices:
.
OFF
.
20 MINUTES
.
35 MINUTES
.
50 MINUTES
.
65 MINUTES
.
80 MINUTES
.
95 MINUTES
.
110 MINUTES
.
NO CHANGE
To select a setting, press the
set/reset button while the desired
setting is displayed on the DIC.

Black plate (1,1)
DURAMAX Diesel Engine (LML/LGH) - 2011
Driving and Operating 9-1
Driving and Operating
Starting and Operating
Starting the Diesel Engine . . . . 9-1
Winter Cover . . . . .. . . . . . . . .. . . . 9-5
Engine Heater . . . . . . . .. . . . . . . . . 9-9
Fuel Operated Heater (FOH)
(Van Models Only) . . . . . . . . . 9-10
Parking Over Things
That Burn . . . . . . . . . . . . . . . . . . 9-10
Engine Exhaust
Diesel Particulate Filter
(Exhaust Filter) . . . . . .. . . .. . . 9-10
Diesel Exhaust Fluid . . . . . . . . . 9-12
Brakes
Exhaust Brake
(Pickup Models Only) . . . . . . 9-16
Fuel
Fuel for Diesel Engines . . . . . . 9-17
What Fuel to Use in
The U.S. . . . . . . . . . . . . . . . . . . . 9-18
What Fuel to Use in
Canada and Mexico . . . . . . . . 9-22
Cold Weather Operation . . . . . 9-27
Water in Fuel . . . . . . . . . . . . . . . . 9-27
Running Out of Fuel . . . . . . . . . 9-32
Fuel Filter Replacement . . . . . 9-33
Filling the Tank . . . . . . . . . . . . . . 9-35
Filling a Portable Fuel
Container . . . . . . . .. . . . . . . . . . . 9-37
Towing
Trailer Towing . . . . . . . . . . . . . . . . 9-37
Conversions and Add-Ons
Power Take-Off (PTO) . . . . . . . 9-42
Starting and
Operating
Starting the Diesel Engine
The diesel engine starts differently
than a gasoline engine. The vehicle
will only start in the P (Park) or the
N (Neutral) position.
Move the shift lever to P (Park) or
N (Neutral). To restart the engine
when the vehicle is already moving,
use N (Neutral) only.
Notice: Do not try to shift to
P (Park) if the vehicle is moving.
If you do, you could damage the
transmission. Shift to P (Park)
only when the vehicle is stopped.

Black plate (2,1)
DURAMAX Diesel Engine (LML/LGH) - 2011
9-2 Driving and Operating
Starting the Engine
1. Turn the ignition key to ON/RUN.
Observe the wait to start light.
See Wait-to-Start Light on
page 5‑9. This light may not
come on if the engine is warm.
2. As soon as the wait to start light
goes off, immediately turn the
ignition key to START. When the
engine starts, let go of the key.
The engine has a fast warm-up
glow plug system. The wait to
start light will illuminate for a
much shorter time than most
diesel engines, due to the rapid
heating of the glow plug system.
Notice: If the wait to start light
stays on after starting the vehicle,
the vehicle may not run properly.
Have the vehicle serviced
right away.
3. If the engine does not start after
15 seconds of cranking, turn the
ignition switch to LOCK/OFF.
Wait one minute for the starter to
cool, then try the same steps
again.
If you are trying to start the engine
after you have run out of fuel, follow
the steps in Running Out of Fuel on
page 9‑32.
When the engine is cold, let it run
for a few minutes before you move
the vehicle. This lets oil pressure
build up. The engine will sound
louder when it's cold.
Notice: If you are not in an idling
vehicle and the engine overheats,
you would not be there to see the
overheated engine indication.
This could damage the vehicle.
Do not let the engine run when
you are not in the vehicle.
Cold Weather Starting
(Diesel Engine)
The following tips will help with
cold weather starting.
Use the recommended engine oil
when the outside temperature
drops below freezing. See Engine
Oil on page 10‑7. When the
outside temperature drops below
–18°C (0°F), use of the engine
coolant heater is recommended.
If you experience longer cranking
times, notice an unusual amount of
exhaust smoke or are at higher
elevations (over 2 135 m or
7,000 ft.), you may use the engine
coolant heater. See Engine Heater
on page 9‑9.
See Fuel for Diesel Engines on
page 9‑17 for information on what
fuel to use in cold weather.
Black plate (3,1)
DURAMAX Diesel Engine (LML/LGH) - 2011
Driving and Operating 9-3
If the Diesel Engine Will Not
Start
If you have run out of fuel, see
Running Out of Fuel on page 9‑32.
If the vehicle is not out of fuel, and
the engine will not start, do this:
Turn the ignition key to ON/RUN.
Immediately after the wait to start
light goes off, turn the ignition key
to START.
If the light does not go off, wait a
few seconds, then try starting the
engine again. See your dealer as
soon as you can for a starting
system check.
If the light comes on and then goes
off and you know the batteries are
charged, but the engine still will not
start, the vehicle needs service.
If the light does not come on when
the engine is cold, the vehicle
needs service.
If the batteries don't have enough
charge to start the engine, see
“Battery” in the Index of the vehicle
owner manual.
Be sure you have the right oil for the
engine, and that you have changed
the oil at the proper times. If you
use the wrong oil, the engine may
be harder to start.
Be sure you are using the proper
fuel for existing weather conditions.
See Fuel for Diesel Engines on
page 9‑17.
If the engine starts, runs a short
time, then stops, the vehicle needs
service.
WARNING
{
Do not use gasoline or starting
aids, such as ether, in the air
intake. They could damage the
engine. There could also be a
fire, which could cause serious
personal injury.
Elevated Idle
The engine has a cold temperature
high idle feature which elevates the
engine idle speed from base idle
to 1050 rpm for pickup models or
1200 rpm for van models when
outside temperatures are below
0°C (32°F), and the engine coolant
temperature is below 65°C (150°F).
This feature enhances heater
performance by raising the engine
coolant temperature faster.
This feature can be turned on or off
using the DIC buttons. If the vehicle
is not equipped with DIC buttons, do
the following to turn this feature on
or off:
1. Turn the ignition to ON/RUN,
with the vehicle off.
2. Press the accelerator pedal to
the floor and hold while quickly
pressing the brake pedal three
times in less than eight seconds.
3. Release the accelerator pedal
and start the engine.

Black plate (4,1)
DURAMAX Diesel Engine (LML/LGH) - 2011
9-4 Driving and Operating
When the engine is started, it will
slowly ramp up to the high idle
speed after a delay of a few
seconds up to approximately
two minutes. For this method to
work properly there must be no
throttle or brake pedal faults.
The engine idle speed will return to
normal once the following conditions
are met:
.
Once engine coolant
temperature reaches
65°C (150°F).
.
Air intake temperature
reaches 0°C (32°F).
The high idle speed will be
temporarily interrupted and the
engine speed will return to normal
if any of the following conditions
occur:
.
The brake pedal is applied.
.
The accelerator pedal is
pressed.
.
The transmission is shifted out
of P (Park) or N (Neutral).
.
Vehicle speed is detected.
Once these inputs are removed, the
engine idle speed will slowly ramp
back up to high idle after the normal
delay, if the conditions for engine
coolant temperature and air intake
temperature are still met.
Fast Idle Control
The vehicle may have this system
which can be used to increase the
engine idle speed.
Fast Idle control will be enabled
when the following conditions
are met:
.
The park brake is set.
.
The transmission is in P (Park)
or N (Neutral).
.
The vehicle speed is about
0 km/h (0 mph).
.
The cruise control is in the On
position. See “Cruise Control” in
the Index of the vehicle owner
manual.
.
The cruise control Set switch is
pressed and released for Preset
Fast Idle Speed (1200 rpm).
Fast Idle control will be disabled
when one or more of the following
conditions occur:
.
The cruise control is in the Off
position.
.
The cruise control Set switch is
pressed and released. See
“Cruise Control” in the Index of
the vehicle owner manual.
.
The cruise control Cancel switch
is pressed.
.
The brake pedal is pressed.
.
The transmission is shifted out
of P (Park) or N (Neutral).
.
The park brake is released.
.
The vehicle speed is not
0 km/h (0 mph).
When Fast Idle is active, a FAST
IDLE ON message will be displayed
in Driver Information Center (DIC).
See Starting the Vehicle Messages
on page 5‑13.
 Loading...