


AMPLIFIER OWNERS MANUAL

INTRODUCTION
Dear Cerwin-Vega Mobile Customer,
Thank you for making Cerwin-Vega Mobile your choice for high performance car audio products. At Cerwin-Vega Mobile, our goal is to produce products of unsurpassed quality. We believe you will not fi nd a better value anywhere in the mobile audio environment.
To ensure that your new Cerwin-Vega Mobile amplifi er provides years of enjoyment, you should consider having it installed by a professionally trained technician. They have the knowledge to make your new amplifi er perform its very best.
WARNING: Prolonged exposure to sound pressure levels in excess of 100dB can cause permanent hearing loss. Cerwin-Vega Mobile amplifi ers can exceed that level so please exercise restraint when listening and enjoying your new amplifi er.
GENERAL PRECAUTIONS
•This unit is designed for negative ground 12V DC operation only.
•Total system impedance must not be less than (2ohms for SX220.2 & SX440.4)(1ohm for SX500.1).
•Avoid installing the unit where:
-It would be subject to high temperatures, such as from direct sunlight or hot air from the heater.
-It would be exposed to rain or moisture.
-It would be subject to dust or dirt.
•Do not cover the unit with carpet or wires.
•Do not use the unit with a weak auto battery. Optimum performance depends on a normal battery supply voltage.
•For safety reasons, keep the volume of your car audio system moderate while driving your vehicle so that you can still hear normal traffi c sounds outside your car.
MOUNTING PRECAUTIONS
Although Cerwin-Vega Mobile amplifi ers incorporate heat sinks and protection circuits, mounting the amplifi er in a tight space without any air movement can still damage internal circuitry over time. Choose a location that provides adequate ventilation around the amplifi er. For easy system set-up, mount the amplifi er so the side panel controls will be accessible after installation. In addition, observe the following precautions:
1.For the most effi cient cooling, mount the amplifi er so that air runs along the length of the fi ns rather than across them. Remember, any moving air across the amplifi er will reduce heat.
2.Mount the amplifi er on a solid surface. Avoid mounting to subwoofer enclosures or areas prone to vibration. Do not install the amplifi er on plastic or other combustible materials.
3.Prior to mounting the amplifi er, make sure not to cut or drill into the fuel tank, fuel lines, brake lines (under chassis) or electrical wiring.
WIRING PRECAUTIONS
1.Before installation, make sure the source unit power switch is in the OFF position.
2.Disconnect the negative (-) lead of the battery before making any power connections.
3.When making connections, be sure that each one is clean and secure. Insulate all of your connections. Failure to do so may damage your equipment.
4.A secure clean ground connection is critical to the performance of your amplifi er. Connect the ground directly to the car chassis to minimize resistance and avoid any noise problems.
5.Add an external fuse on the amplifi er’s positive (+) power lead and connect it as close as possible to the vehicle’s (+) battery terminal. Use a rating that equals the total current consumption at full output of all amplifi ers in the system. This external fuse will protect the vehicle from short circuits that can cause a fi re.
WIRING INSTRUCTIONS Power Connection
The main power cable must be connected to the positive terminal of the vehicle battery to provide an adequate voltage source and minimize noise. There must be an inline fuse within 18 inches of the battery. Connecting the battery terminal lead to any other point will reduce the power output and may cause noise and distortion. Use only 4 gauge or larger wire for this lead and connect it to the (+) terminal of the battery with system fuse inline. Do not install the fuse in the fuse holder until the entire installation is completed.
Ground Connection
The ground terminal (GND) connection is also critical to the correct operation of the amplifi er. Use a wire of the same gauge as the power connection and connect it between the ground terminal (GND) of the amplifi er and a metal part of the vehicle close to the mounting location. This wire should be as short as possible and any paint or rust at the grounding point should be scraped away to provide a clean metal surface to which the end of the ground wire can be screwed or bolted.
Remote Turn-On Connection
The amplifi er is turned on by applying +12V to the remote turn-on terminal (REM). The wire lead to this terminal should be connected to the remote lead from the car stereo which will provide the +12V only when the car stereo is turned on. If the car stereo does not provide a remote lead, the remote turn-on lead may be wired to an accessory terminal in the car’s fuse block. This will turn the amplifi er on and off with the ignition key, regardless of whether the car stereo is on or off.
Speaker Connections
Depending on the type and number of speakers used with the amplifi er, wire them to the speaker terminals as per the appropriate wiring diagram (see below). For most applications 18 gauge wire is adequate for the speaker leads. For leads in excess of ten feet, 16 gauge wire is recommended. When wiring the speakers, pay careful attention to the polarity of the terminals on the speakers and make certain they correspond to the polarity on the amplifi er. Do not ground any speaker leads to the chassis of the vehicle. Please see your authorized Cerwin-Vega Mobile dealer for specifi c wire recommendations.
TYPICAL SPEAKER CONNECTIONS TO YOUR CERWIN-VEGA MOBILE AMPLIFIER
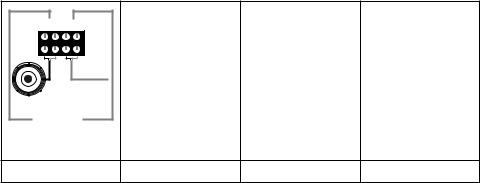
Most aftermarket source units will provide you with at least one pair of RCA outputs to provide a clean (low-level) input for your amplifi er.
|
|
|
RIGHT |
LEFT |
RIGHT |
LEFT |
RIGHT |
LEFT |
|
REAR |
|
REAR |
|
|
|
|
|
|
|
FRONT |
|
FRONT |
|
|
|
|
|
|
|
|
LF FULL RANGE |
|
|
|
RR FULL RANGE LR FULL RANGE
SX440.4 |
SX440.4 |
SX220.2 |
SX500.1 |
 Loading...