

Page 1
OTHER RECORDING FUNCTIONS
OTHER RECORDING FUNCTIONS
Recording a Single Image (1-Image)
With the 1-Image Mode, a single snapshot is recorded when
you press the shutter release button.
1.
Align the drive mode dial with (1-Image).
2.
Align the power/function switch with .
3.
Press the shutter release button to record the
image.
IMPORTANT!
• In any of the following cases, the message “One moment please...” appears on the display after you
record each image as it is saved to the memory card.
— When you are recording TIFF (uncompressed) im-
ages (page 95)
— When you are recording a movie or panorama
(pages 91, 93)
— When you are recording using certain Best Shot
scene setups (page 76)
— When the low battery indicator is on the dis-
play while you are using a CompactFlash card
(page 33)
— When the low battery indicator is on the dis-
play while you are using an IBM Microdrive (page
33).
Previewing the Last Image Recorded
Normally, you need to enter the PLAY mode (page 109) to
display an image on the camera’s monitor screen. The following procedure lets you view the image you just recorded
without leaving the REC mode.
Press PREVIEW to display the last image recorded.
• You can also use PREVIEW in the Movie Mode to view the
last frame you recorded.
• Pressing PREVIEW again returns to the REC mode
screen.
• Turning off the camera or switching to the PLAY mode
causes the preview image memory to be cleared. This
means nothing appears on the monitor screen if you press
PREVIEW immediately after you turn the camera on or reenter the REC mode.
54
Page 2

OTHER RECORDING FUNCTIONS
Deleting the Last Image Recorded in the REC Mode
Normally, you need to enter the PLAY mode (page 109) to
delete an image. The following procedure lets you delete the
image you just recorded without leaving the REC mode.
IMPORTANT!
• Note that the image delete operation cannot be undone. Make sure you really do not need an image before you delete it.
1.
In the REC mode, press PREVIEW to display
the last image you recorded.
2.
Press AE-L .
3.
In response to the confirmation message that
appears, select “Yes”.
• Select “No” to cancel the delete operation without deleting anything.
4.
Click the control button.
• This deletes the image and returns to the REC mode
screen.
Using the Flash
The following describes the flash settings you can make to
suit a variety of lighting needs.
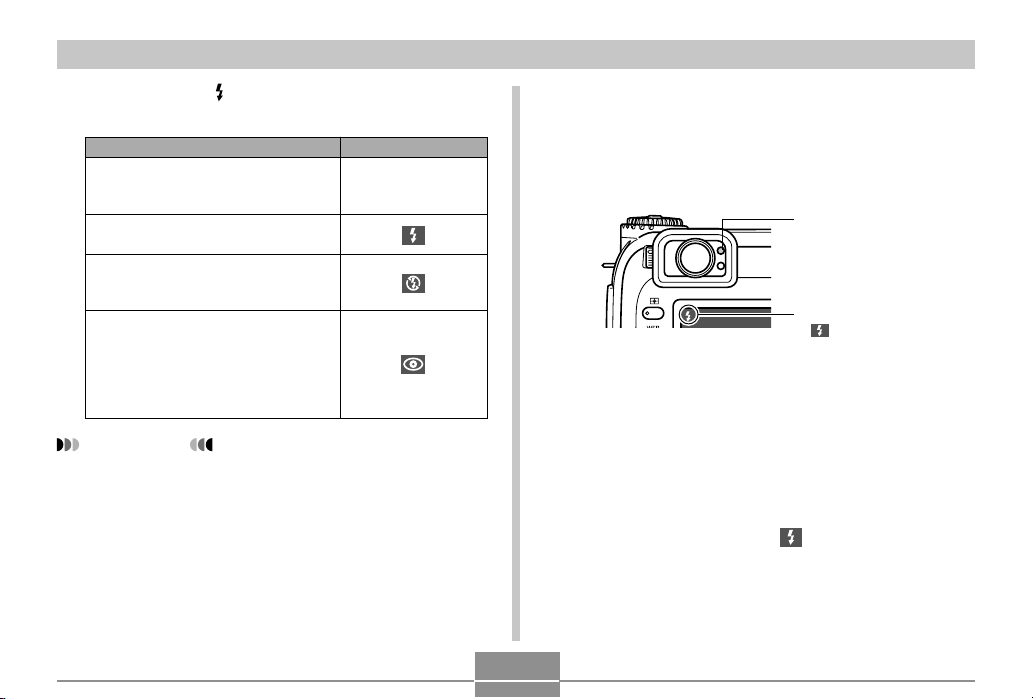
Selecting the Flash Mode
Use the following procedure to select the flash mode.
1.
Align the power/function switch with .
2.
Press to cycle through
the available flash modes
until the indicator for the
one you want is on the
monitor screen.
Flash
mode
55
Page 3
OTHER RECORDING FUNCTIONS
• Each press of cycles through the available flash
mode indicators on the monitor screen.
To do this:
Have the flash fire automatically in
accordance with subject brightness
(Auto Flash).
Always fire the flash, regardless of
subject brightness (Flash On).
Turn off the flash so it never fires,
regardless of subject brightness
(Flash Off).
Fire a pre-flash followed by image
recording with flash, reducing the
chance of red-eye in the image (Redeye Reduction). With this setting,
flash fires automatically in accordance with subject brightness.
Select this setting:
No display
IMPORTANT!
• The flash always fires automatically in accordance
with subject brightness when Full Auto is selected as
the exposure mode (page 82).
• When Best Shot is selected as the exposure mode
(page 76), the flash mode setting is determined by the
flash setting of the currently selected Best Shot scene.
You can change the flash mode setting in this case,
but the Best Shot scene flash mode setting is restored
when you change to another Best Shot scene or turn
camera power off and then back on again.
Flash Status Indicators
You can find out the current flash unit status by checking the
monitor screen indicator and the flash charge lamp while the
shutter release button is pressed about half way down.
Flash charge lamp
(amber)
Flashing :Charging
Lit :Ready
Monitor screen
indicates flash will fire.
■ Flash charge lamp
When you press the shutter release button half way, the
flash icon appears on the monitor screen and the flash
charge lamp indicates the status of the flash as shown
above.
■ Monitor screen
When you have Auto Flash or Red-Eye Reduction selected
as the flash mode, the indicator appears on the display
when you press the shutter release button about half way
down to indicate that available light is insufficient and the
flash will be fired.
56
Page 4
OTHER RECORDING FUNCTIONS
Adjusting the Flash Intensity
Use the following procedure to adjust the intensity of the
flash when it fires.
1.
Align the power/function switch with .
2.
Press MENU.
3.
Select “Flash Intensity” and then rock the control button to the right.
4.
Select the setting you want, and then click the
control button to apply it.
To do this:
Fire the flash with strong intensity
Fire the flash with normal intensity
Fire the flash with weak intensity
5.
Press MENU to exit the setting procedure.
Select this setting:
Strong
Normal
Weak
Changing the Sync Speed
You can use the following procedure to select a shutter
speed when using the flash.
1.
Align the power/function switch with .
2.
Press MENU.
3.
Select “Sync Speed” and then rock the control
button to the right.
4.
Select the setting you want, and then click the
control button to apply it.
To do this:
Shoot at a shutter speed of 1/125
second, which reduces blurring due to
subject or hand movement. Use this
setting when you want to record indoor
images of children playing, etc. (Highspeed sync)
Shoot at a shutter speed of 1/60 second.
Shoot at a shutter speed of 1/30 second,
which makes the background lighter but
increases the chance of blurring due to
hand movement. (Slow sync)
5.
Press MENU to exit the setting procedure.
57
Select this:
Fast
Normal
Slow
Page 5
OTHER RECORDING FUNCTIONS
IMPORTANT!
• In the Shutter Speed Priority AE Mode (S Mode) or
Manual Exposure Mode (M Mode), the manually set
shutter speed takes priority over the above setting.
Selecting a Flash Sync Setting
You can use the following procedure to change the timing of
the flash. By using the flash sync setting, you can control
blur produced by movement.
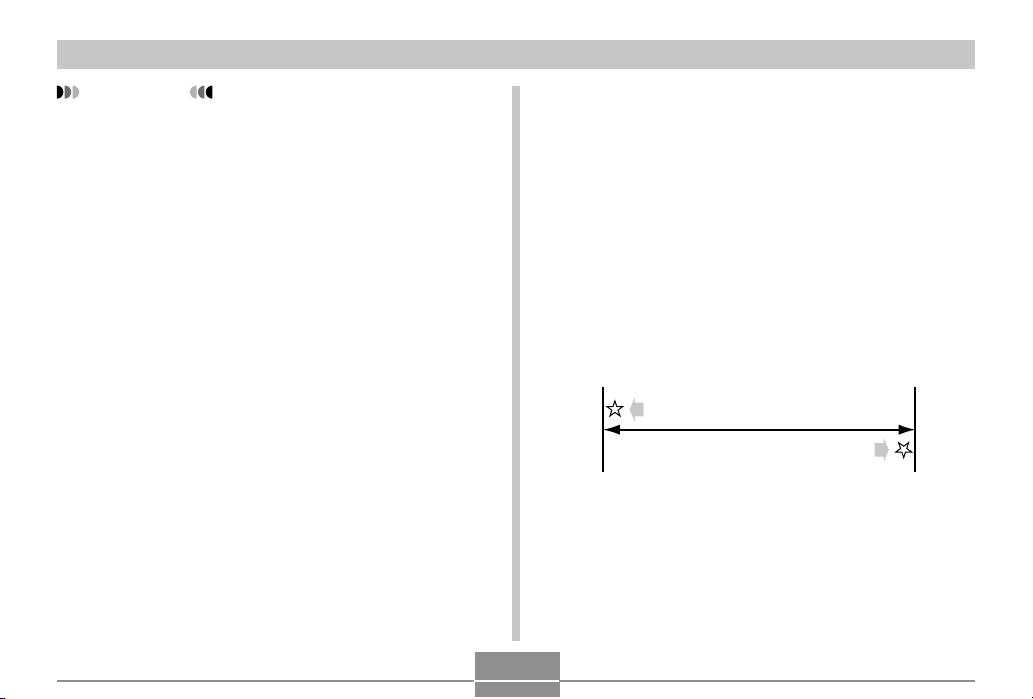
■ Front-curtain and Rear-curtain Sync
Front-curtain sync causes the flash to fire immediately after
the shutter opens. Because of this, the blur created by movement appears in front of the moving object (creating the impression that the object is moving backwards).
Rear-curtain sync causes the flash to fire immediately before
the shutter closes. In this case, the blur created by movement appears behind the moving object (creating the impression that the object is moving forward).
Flash fires
(Front-curtain sync)
Flash fires
(Rear-curtain sync)
Shutter
opens
58
Shutter
closes
Page 6
OTHER RECORDING FUNCTIONS
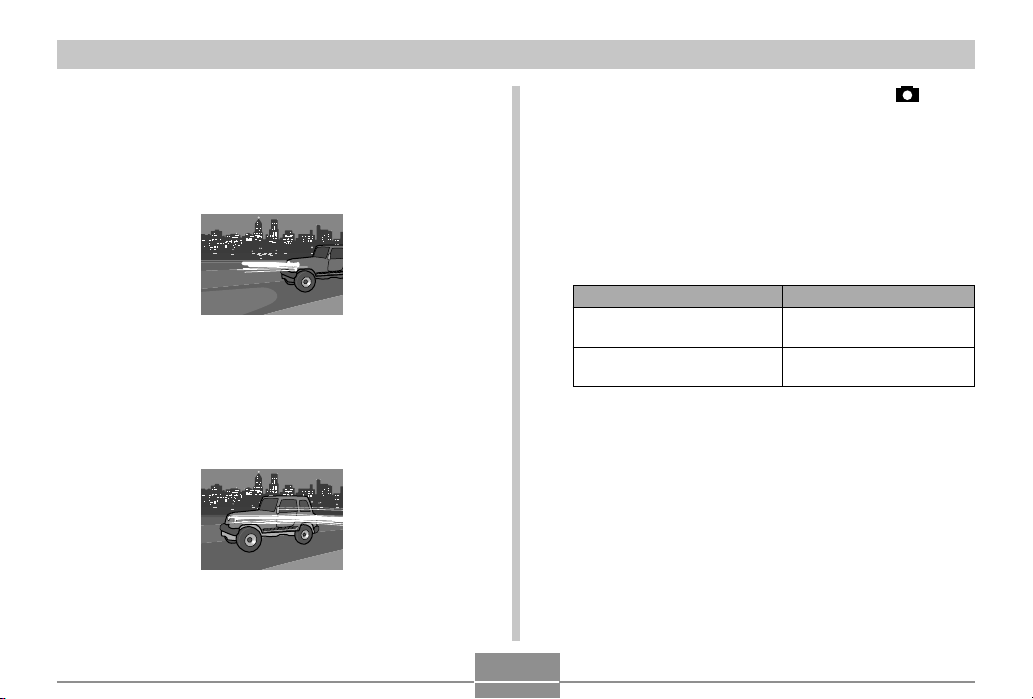
Example 1 : To use front-curtain sync to record the image
of cars running along a road at night
The images of the cars are recorded first when the flash
fires, followed by the headlights, so the blur of movement
extends from the front of the cars.
Example 2 :To use rear-curtain sync to record the image of
cars running along a road at night
The headlights are recorded first, followed by the images of
the cars when the flash fires, so the blur of movement extends from the back of the cars.
59
1.
Align the power/function switch with .
2.
Press MENU.
3.
Select “Flash Setting” and then rock the control button to the right.
4.
Select the setting you want, and then click the
control button to apply it.
If you want to do this:
Fire the flash immediately
after the shutter opens
Fire the flash immediately
before the shutter closes
5.
Press MENU to exit the setting procedure.
Select this setting:
Front-curtain Flashsync
Rear-curtain Flashsync
Page 7
OTHER RECORDING FUNCTIONS
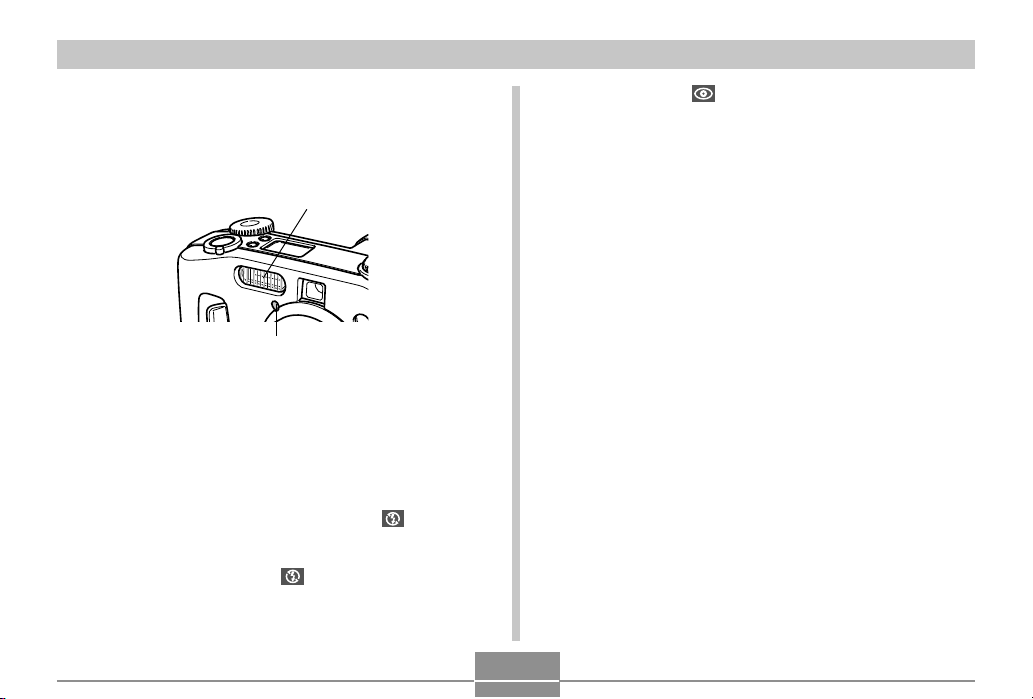
Precautions when Using Flash
• Make sure that you do not touch or block the flash or the
exposure sensor with your fingers. Doing so can soil these
components and interfere with correct flash operation.
Flash
Exposure sensor
• Flash is best used for distances within the range of about
0.5 meters to 3 meters (1.6´ to 9.8´) (fully open aperture).
Flash does not work well outside this range.
• Depending on operating conditions (type of batteries being
used, temperature, etc. ), it may take up to 40 seconds for
the flash unit to charge.
• Flash is disabled in the Continuous Mode, AEB Mode, and
Movie Mode. Disabled flash is indicated by (Flash Off)
on the monitor screen (pages 88, 89, 93).
• The flash unit does not charge when battery power is too
low to charge the flash. The (Flash Off) indicator appears in order to warn you that the flash will not fire correctly, which may affect exposure of the image. Replace
batteries as soon as possible when this happens.
• Red-eye reduction may not work well when the camera
is not pointed directly at the subject or when the subject is
far from the camera.
• White balance is fixed while the flash is being used, so sunlight, fluorescent lighting, or other sources of illumination in
the immediate area may affect the coloring of the recorded
image.
60
Page 8
OTHER RECORDING FUNCTIONS
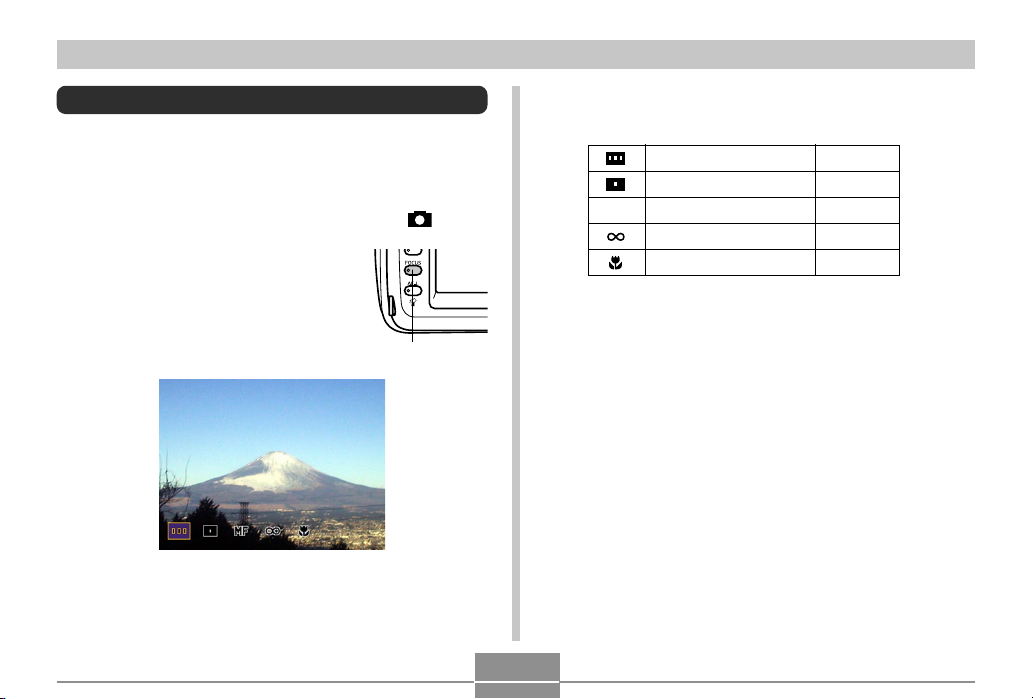
Selecting the Focus Mode
You can use the following procedure to select from among
five different focus modes: Multi-area AF, Spot AF, Manual,
Infinity, and Macro.
1.
Align the power/function switch with .
2.
Hold down FOCUS.
FOCUS button
3.
Rotate the selector dial to select the focus
mode, and then release FOCUS.
Multi-area AF page 62
Spot AF page 63
MF Manual Focus page 64
Infinity page 65
Macro page 65
61
Page 9
OTHER RECORDING FUNCTIONS
Using Auto Focus (Multi-area Auto Focus)
As its name suggests, the Auto Focus Mode adjusts focus
automatically. When you press the shutter release about half
way, the camera measures three distances and automatically focuses on the nearest subject. The following is the focusing range for Auto Focus.
Focusing Range: 30 cm to ∞ (11.8˝ to ∞).
1.
Use the selector dial to select “ ” as the focus
mode.
2.
Point the camera at the subject you want to
record, and then press the shutter release button about half way.
62
• The camera automatically selects and displays the focus frame that is best suited to the subject that is closest to the camera.
Focus frame
• You can find out the status of the Multi-area Auto Focus operation by checking the color of the displayed
focus frame and the status of the operation/card access lamp.
If you see this:
Focus frame: Green
Operation/card access lamp:
Green
Focus frame: Red
Operation/card access lamp:
Red
3.
Press the shutter release button the rest of the
It means this:
The image is in focus.
The image is not in focus.
way down to record the image.
Page 10
OTHER RECORDING FUNCTIONS
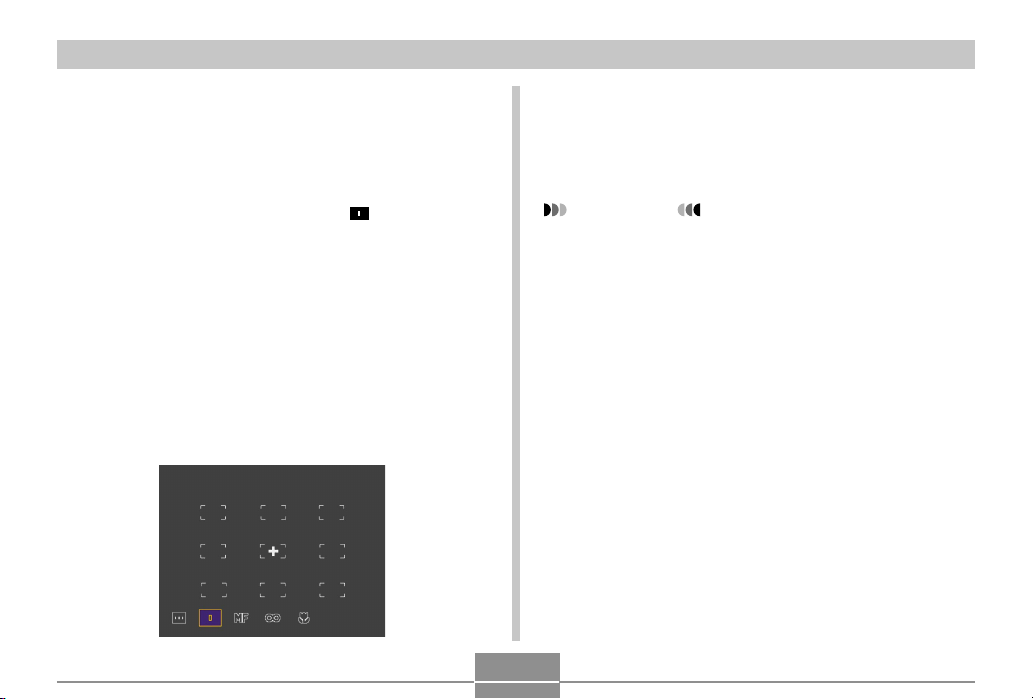
Using the Spot Auto Focus Mode
With Spot Auto Focus, you can select one of nine focus
frames to suit the object on which you want Auto Focus to be
performed.
4.
After selecting the focus frame you want, release FOCUS.
• This makes the focus frame you selected the active
focus frame.
1.
Use the selector dial to select “ ” as the focus
mode.
2.
Compose the image you want to record.
3.
While holding down FOCUS to display all of the
available focus frame positions, rock the control button left, right, up, or down to move the
[+] mark to the focus frame location you want
to use.
• The currently selected focus frame is the one where
the [+] mark is located.
IMPORTANT!
• Note that you cannot change the focus frame position
while a Best Shot Mode composition outline is on the
display.
• The focus frame position you specify with the above
procedure is also used as the area for focus area expansion (page 67), and center-weighted and spot metering (page 68).
• You can find out the status of the focus operation by
checking the color of the focus frame and the status of
the operation/card access lamp. See “Using Auto Focus (Multi-area Auto Focus)” on page 62 for more information.
63
Page 11
OTHER RECORDING FUNCTIONS
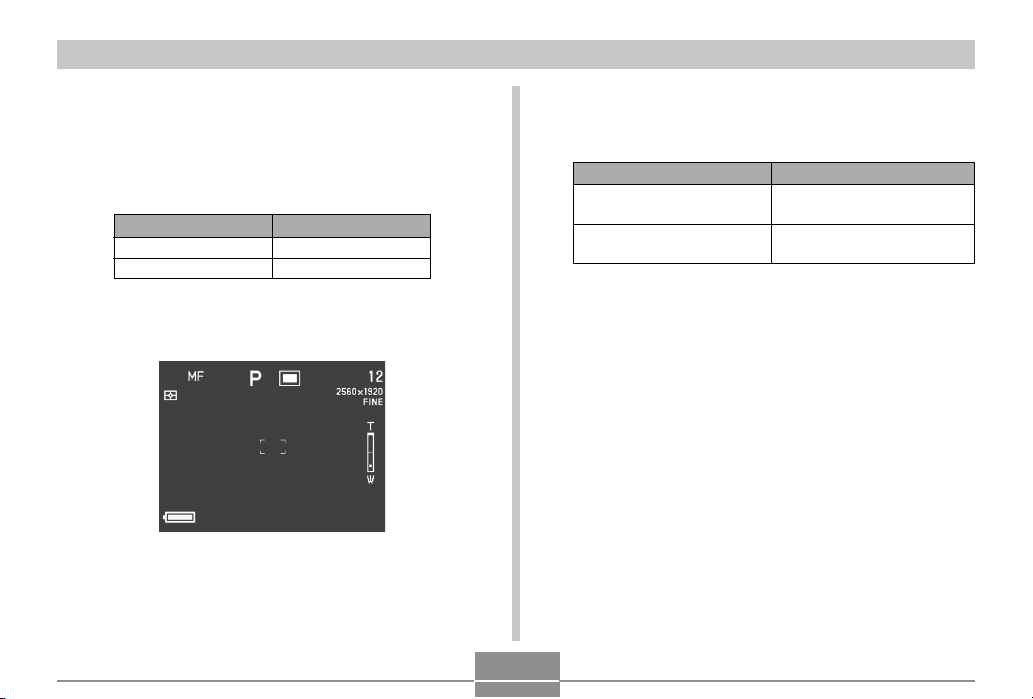
Using the Manual Focus Mode
With Manual Focus, you make the required focus settings by
hand. The following shows the relationship between the optical zoom factor and the focusing distance for the Manual
Focus Mode.
Optical Zoom Factor
1X
3X
1.
Use the selector dial to select “MF” as the focus mode.
Focusing Distance
6cm to ∞ (2.4˝ to ∞)
20cm to ∞ (7.9˝ to ∞)
2.
While watching the image on the monitor
screen, rock the control button up or down to
focus.
If you want to do this:
Move focus away from the
subject
Move focus towards the
subject
3.
Press the shutter release button to record the
Rock the control button up.
Rock the control button down.
Do this:
image.
• As with Spot AF (page 63), you can change the position of the focus frame for manual focus.
64
Page 12
OTHER RECORDING FUNCTIONS
Using the Infinity Mode
The Infinity Mode sets the focus near infinity. It is a good
choice for scenery and other far-off subjects. Focus adjustment starts automatically whenever you press the shutter
release button about half way down.
1.
Use the selector dial to select “ ” as the focus
mode.
2.
Compose the image and record it.
• See “Using the Spot Auto Focus Mode” on page 63 for
information about how to focus and record an image.
• You can find out the status of the focus operation by
checking the color of the focus frame and the status of
the operation/card access lamp. See “Using Auto Focus (Multi-area Auto Focus)” on page 62 for more information.
Using the Macro Mode
The Macro Mode automatically sets the focus for close-up
shooting. Focus adjustment starts automatically whenever
you press the shutter release button about half way down.
The following shows the relationship between the optical
zoom factor and the focusing distance for the Macro Mode.
Optical Zoom Factor
1X
2X
3X
• The above approximate focusing distances indicate the
distance from surface of the lens protector to the subject.
1.
Use the selector dial to select “ ” as the focus
Approximate Focusing Distance
6cm to 50cm
9cm to 50cm
20cm to 50cm
(2.4˝ to 19.7˝)
(3.5˝ to 19.7˝)
(7.9˝ to 19.7˝)
mode.
2.
Compose the image and record it.
• Focusing and image recording procedures are the
same as that for Spot AF (page 63).
• You can find out the status of the focus operation by
checking the color of the focus frame and the status of
the operation/card access lamp. See “Using Auto Focus (Multi-area Auto Focus)” on page 62 for more information.
65
Page 13
OTHER RECORDING FUNCTIONS
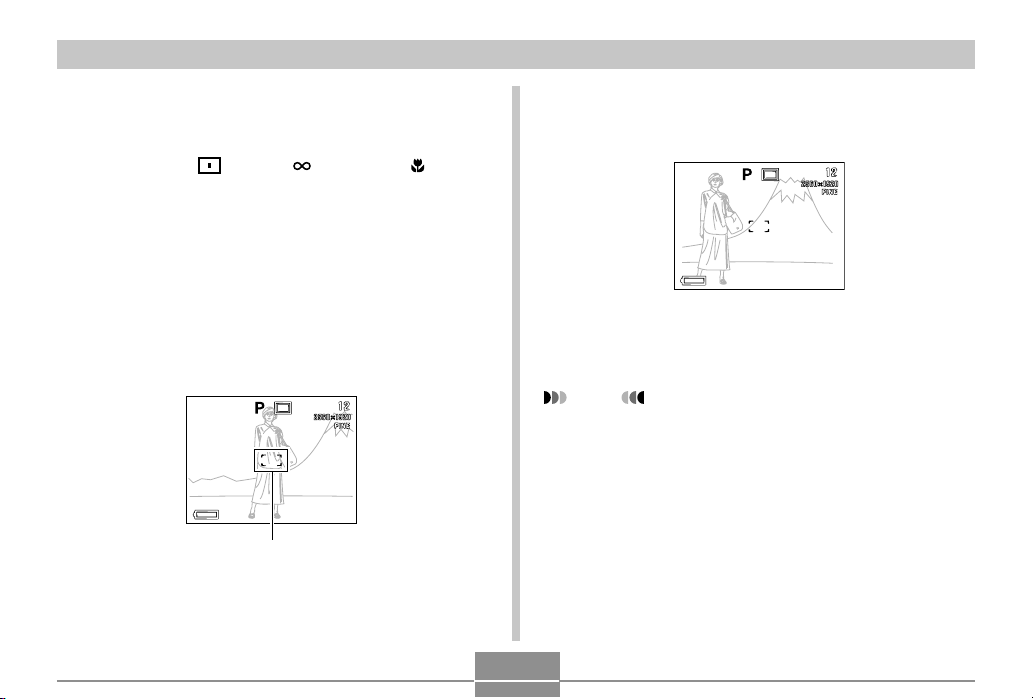
Using Focus Lock
Normally, Auto Focus automatically focuses on whatever is
inside the focus frame. Focus lock is a technique you can
use in the Spot AF ( ), Infinity ( ), and Macro ( ) modes
to lock the focus on a subject and then move the camera so
the focus frame is pointed at another subject when you
record. This keeps the original subject in focus, even though
a different subject is within the focus frame.
1.
While watching the image on the monitor
screen, press the shutter release button about
half way.
• The focus frame turns green when the image is in focus.
Focus frame
2.
While keeping the shutter release button depressed half way, move the camera and compose the image as you want.
3.
Press the shutter release button the rest of the
way down to record the image.
NOTE
• Locking the focus also locks the exposure setting.
66
Page 14
OTHER RECORDING FUNCTIONS
Expanding the Focus Area
You can use the following procedure to expand the focus
area used in all focus modes.
1.
Align the power/function switch with .
2.
Press MENU.
3.
Select “Focus Expansion” and then rock the
control button to the right.
4.
Select the setting you want, and then click the
control button to apply it.
If you want to do this:
Expand the focus area
Leave the focus area at its normal
(unexpanded) size
5.
Press MENU to exit the setting procedure.
Select this setting:
On
Off
NOTES
• Pressing the shutter release button half way while the
expanded focus area is turned on in the Multi-area AF
( ), Spot AF ( ), Infinity ( ), or Macro ( ) mode,
displays the enlarged focus area.
• In the Manual Focus (MF) mode, the expanded focus
area is always displayed if it is turned on.
Camera Shake Indicator
The (camera shake indicator) appears on the monitor
screen when all of the following conditions exist.
• Monitor screen is turned on.
• Flash is turned off.
• Shutter speed is too slow.
IMPORTANT!
• When the camera shake indicator ( ) appears,
mount the camera a tripod to steady it or change exposure settings.
67
Page 15
OTHER RECORDING FUNCTIONS
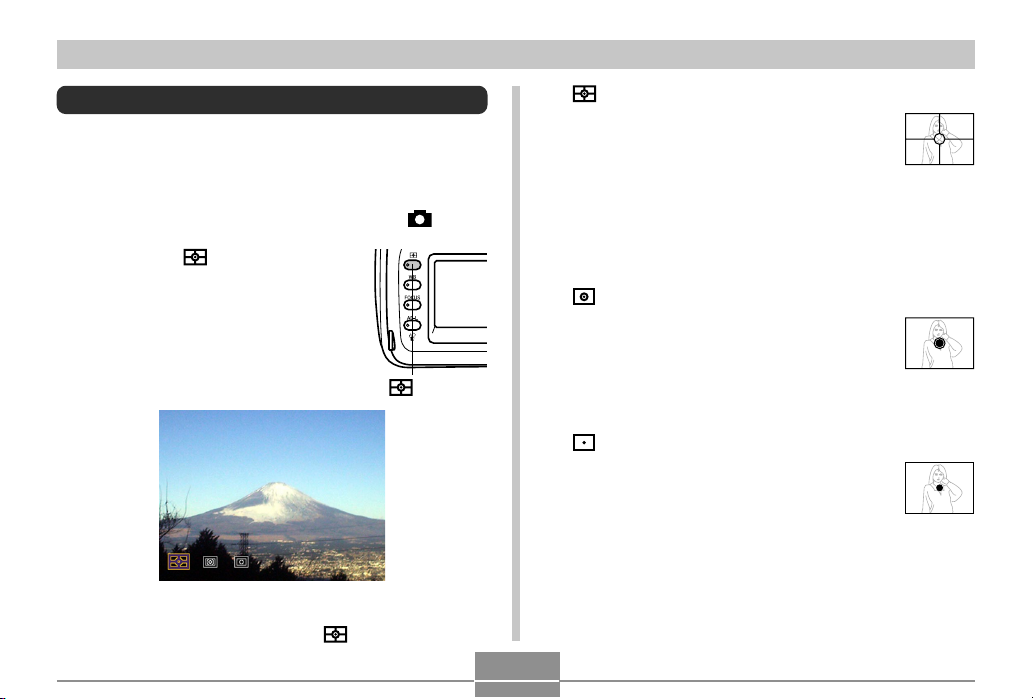
Selecting the Metering Mode
Use the following procedure to specify multi-pattern metering, spot metering, or center-weighted metering as the metering mode.
1.
Align the power/function switch with .
2.
Hold down .
button
3.
Rotate the selector dial to select the setting
you want, and then release .
Multi-pattern:
Multi-pattern metering divides the image
into sections and measures the light in
each section for a balanced exposure
reading. The camera automatically
determines shooting conditions according to the
measured lighting pattern, and makes exposure
settings accordingly. This type of metering provides
error-free exposure settings for a wide range of
shooting conditions.
Center-weighted:
Center-weighted metering measures
light concentrating on the center of the
focus area. Use this metering method
when you want to exert some control
over exposure, without leaving settings totally up to
the camera.
Spot:
Spot metering takes readings at a very
small area. Use this metering method
when you want exposure to be set
according to the brightness of a particular subject, without it being affected by surrounding
conditions.
• You can specify the position of the focus area used for center-weighted and spot metering. See page 63 for more information.
68
Page 16
OTHER RECORDING FUNCTIONS
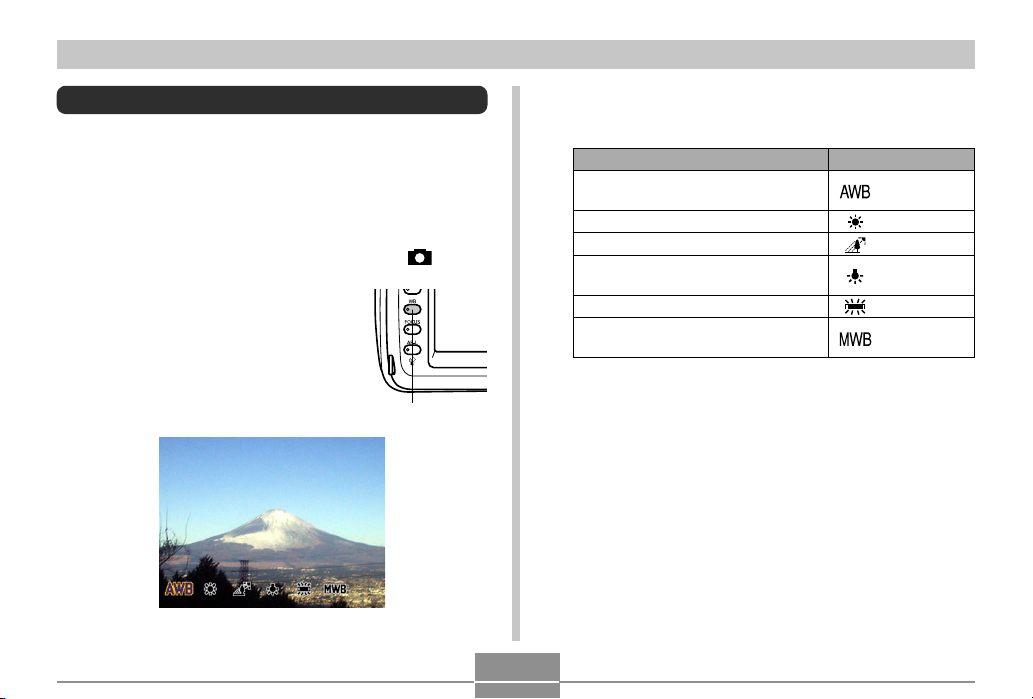
Selecting White Balance
Different types of light sources (sunlight, light bulbs, etc.)
emit light at various wavelengths, which can affect the color
of the recorded image. White balance lets you make adjustments to help ensure that the colors of a subject appear
most natural under the type of lighting that is available.
1.
Align the power/function switch with .
2.
Hold down WB.
WB button
3.
Use the selector dial to select the setting you
want, and then release WB.
To do this:
Let the camera adjust white balance
automatically
Shoot outdoors
Shoot in shady conditions
Shoot under incandescent (light bulb)
lighting
Shoot under fluorescent lighting
Adjust white balance normally for a
particular light source
Select this:
(Auto)
(Daylight)
(Shade)
(Tungsten)
(Fluorescent)
(Manual)
69
Page 17

OTHER RECORDING FUNCTIONS
Adjusting White Balance Manually
Under some light sources, automatic white balance under
the “Auto” setting can take a long time to complete. Also, the
auto white balance range (color temperature range) is limited. Manual white balance helps to ensure that colors are
recorded correctly for a particular light source.
Note that you must perform manual white balance under the
same conditions you will be shooting under. You must also
have a white piece of paper or other similar object on hand in
order to perform manual white balance.
1.
Align the power/function switch with .
2.
While holding down WB, align the selector dial
with “MWB” (Manual White Balance).
• This causes the object you last used to adjust manual
white balance to appear on the monitor screen. If you
want to use the same manual white balance setting,
release WB at this time. If you want to change the
manual white balance setting, proceed with the next
step 3.
3.
Point the camera at a piece of white paper or
other similar object so it completely fills the
monitor screen, and then click the control button.
4.
Release WB to return to the REC mode screen.
• Dark lighting or pointing the camera at a dark object
can cause manual white balance to take a very long
time to complete.
70
Page 18
OTHER RECORDING FUNCTIONS
Using AE Lock
When using any exposure modes besides the M (Manual)
Mode, pressing the shutter release button half way focuses
the image and fixes exposure settings. With AE lock, you
can fix exposure settings and then compose and focus the
image, which comes in handy in the following situations.
• When the subject you want to use for exposure settings is
different from the subject on which you want to Auto Focus
• When you are using a flash but want to record using the
pre-flash exposure (flash sync)
1.
Align the power/function switch with .
2.
Point the camera at the subject whose exposure you want to use.
3.
Hold down AE-L .
• This fixes the exposure (shutter
speed and aperture).
• Releasing AE-L cancels AE
lock.
4.
Press the shutter release button to record the
image.
AE-L button
NOTE
• AE lock is not canceled if you release AE-L while
holding the shutter release button half way.
71
Page 19
OTHER RECORDING FUNCTIONS
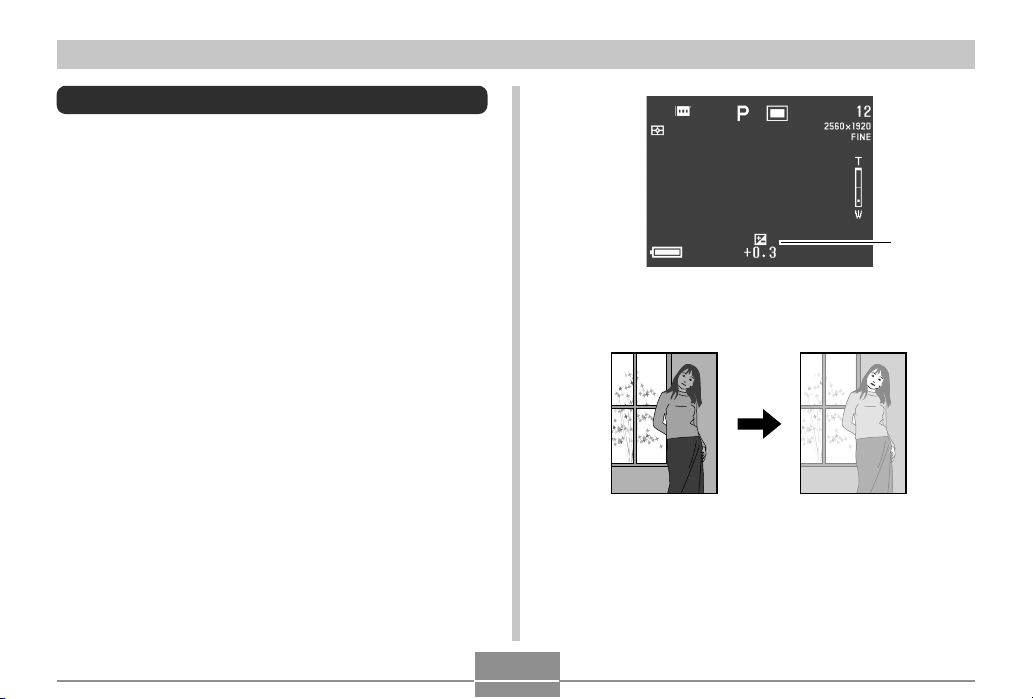
Exposure Compensation
Whenever the P Mode, A Mode, S Mode, or Best Shot Mode
is selected as the exposure mode, you can adjust the exposure compensation value (EV value) within the range shown
below in order to compensate for current lighting conditions.
As a rule of thumb, you should use a positive value to compensate for a bright colored subject and a negative value for
a dark colored subject.
• EV (no EV value displayed) represents optimal camera
setting for best balance of highlight and shadow detail.
EV Value Range: –2EV to +2EV
Steps: 1/3EV
1.
Select P Mode, A Mode, S Mode, or Best Shot
Mode as the exposure mode. See pages 76, 82.
2.
Rock the control button to the left or right to
change the exposure compensation value (EV
shift).
• The current EV value is shown on the monitor screen
and indicator display.
EV value
• Rocking the control button to the right increases the
EV value. A higher EV value is best for white and
brightly colored subjects.
72
Page 20
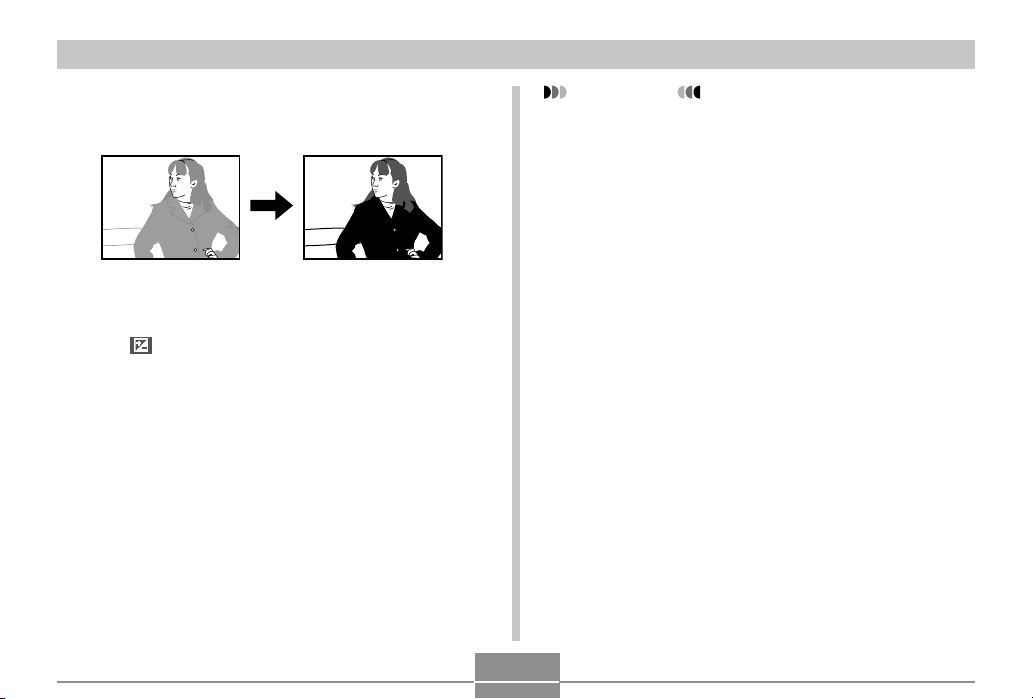
OTHER RECORDING FUNCTIONS
• Rocking the control button to the left decreases the EV
value. A lower EV value is best for black and dark colored subjects.
• An EV value setting you make remains in effect until
you change it. To cancel exposure compensation, use
the control button to change the EV value to zero so
the indicator disappears.
• The camera uses the exposure compensation value in
effect when the first image of a panorama is recorded
for recording all of the other images of the panorama
(page 91) .
3.
After the EV value is the way you want, press
the shutter release button to record the image.
IMPORTANT!
• You may not be able to obtain satisfactory results
even after performing exposure compensation when
shooting under very dark or very bright conditions.
73
Page 21

OTHER RECORDING FUNCTIONS
Using the Histogram
Using DISP to display the histogram on the monitor screen
makes it possible for you to check exposure conditions as
you record images (page 24).
The histogram is a graph of pixel brightness levels in terms
of the number of pixels. The vertical axis represents the
number of pixels, while the horizontal axis represents brightness. The information on the histogram can be used when
recording, correcting or editing an image to determine
whether image details include enough shadows (left side),
midtones (center), or highlights (right side).
If the histogram appears too lopsided in either direction, you
should use exposure compensation (page 72) to adjust the
EV value before recording the image.
IMPORTANT!
• Exposure conditions indicated by the histogram may
not be accurate when using the flash, when using
multi-pattern metering, or under certain other conditions.
• When using the Continuous Shutter Mode or AEB, the
histogram appears for the first image only (pages 88,
89).
• This histogram does not appear in the Movie Mode
(page 93).
74
Page 22

OTHER RECORDING FUNCTIONS
Using Digital Zoom
You can use digital zoom to enlarge the center portion of the
screen. Note that digital zoom becomes available only after
optical zoom reaches its maximum setting. The following
shows the range that is available with digital zoom.
Zoom Factor Range: 3x to 9.6x
1.
Align the power/function switch with .
2.
Press MENU.
3.
Select “Digital Zoom” and then rock the control button to the right.
4.
Select “On” to enable digital zoom, and then
click the control button.
• Selecting “Off” disable digital zoom.
5.
Press MENU to exit the setting procedure.
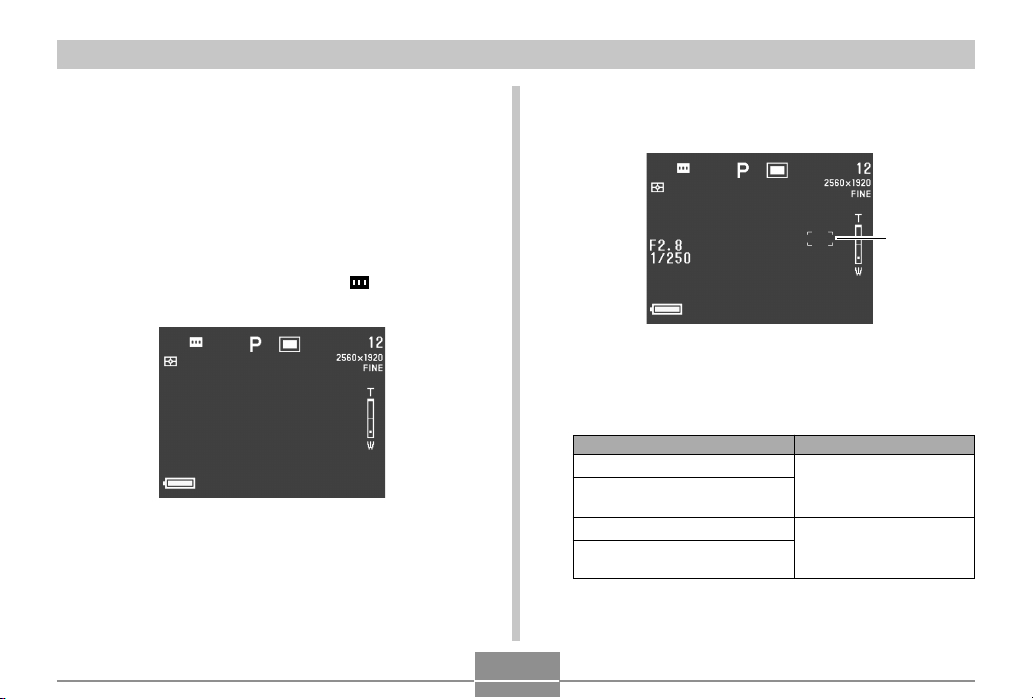
(combination with optical zoom)
6.
Push the zoom contoller upwards towards
(telephoto) to zoom in.
• The current zoom setting is indicated on the monitor
screen by a zoom bar. The current zoom setting
marker appears within the optical zoom bar when you
are using optical zoom only, and within the digital
zoom bar when you are using optical and digital zoom
in combination.
• When the zoom setting marker reaches the top of the
optical zoom bar (maximum optical zoom), it stops.
Release zoom controller and then push it upwards towards (telephoto) again to move the zoom setting marker into the digital zoom bar.
Digital
zoom bar
Optical
zoom bar
Current zoom
Setting marker
7.
Press the shutter release button to record the
image.
75
Page 23

OTHER RECORDING FUNCTIONS
Instant Setup Using the Best Shot Mode
The camera has five built-in Best Shot Mode scenes that you
can use for automatic set up the camera with the configuration required to record the selected scene.
1.
Align the power/function switch with .
2.
Align the exposure mode dial with (Best
Shot).
3.
Rock the control button to the left or right, or
rotate the selector dial to select the scene you
want to use.
4.
Press the shutter release button or click the
control button to select the currently displayed
scene.
5.
Press the shutter release button to record the
image.
76
Page 24

OTHER RECORDING FUNCTIONS
NOTES
• Best Shot Mode scenes are not images recorded using this camera. They are intended for reference purposes only.
• The actual conditions that are present when you
record your image may make it impossible to correctly
obtain all of the effects of the Best Shot scene you
select.
• After setting up the camera by selecting a Best Shot
scene, you can change the settings if you want. However, changing to another Best Shot scene or turning
the camera power off and then back on again restores
the Best Shot scene settings.
• Selecting Best Shot Mode in the Movie Mode enters
the Full Auto Movie Mode (page 93). Selecting Best
Shot Mode in the Panorama Mode enters the Full Auto
Panorama Mode (page 91).
Copying a Scene from the CD-ROM Best Shot Library
The CD-ROM that comes bundled with the camera has 100
Best Shot scene files that you can copy to a memory card
and use in the camera’s Best Shot Mode.
• See the catalog of Best Shot library scenes on the CDROM (page 78) for information about the types of scenes
that are available.
1.
Set up to access the memory card contents
from your computer. You can use either of the
following two methods to setup for memory
card access.
쐌 Connect the camera to the USB port of your com-
puter (page 147)
쐌 Read the images directly from the memory card
(page 149)
• Best Shot scene files are stored in a memory card
folder named “Scene”, so make sure that there is a
folder named “Scene” on the memory card.
• To create a “Scene” folder on a new memory card,
load the card into the camera, and then select or
with the power/function switch.
77
Page 25

OTHER RECORDING FUNCTIONS
2.
Place the bundled CD-ROM into your
computer’s CD-ROM drive.
• If you are running Windows, this causes a CD-ROM
menu to start up automatically.
3.
If you are running Windows, perform the following steps.
(1) Click the “BESTSHOT” button on the left side of
the CD-ROM menu, select “View list”, and then
click OK.
• This starts up your Web browser and displays a catalog of Best Shot library scenes.
(2) Select “Open Folder” on the right side of the CD-
ROM menu and then click OK.
• This opens the folder that contains the Best Shot Library files.
(3) Select “Open camera” on the right side of the CD-
ROM menu and then click OK.
• This opens the “Scene” folder that is on the memory
card loaded in the camera.
(4) Copy the Best Shot scene file you want to save to
the memory card’s “Scene” folder.
• Best Shot scene files are registered in file name sequence.
4.
If you are running a Macintosh, perform the following steps.
(1) Open “CASIO” “BestShot Library”
“QV5700”, and then double-click the file named
“index_english.htm”.
• This starts up your Web browser and displays a catalog of Best Shot library scenes.
(2) Double-click the “English” folder, which is lo-
cated inside of the “QV5700” folder.
• This opens the folder that contains the Best Shot Library files.
(3) Double click “untitled” “Scene”.
• This opens the “Scene” folder that is on the memory
card loaded in the camera.
(4) Copy the Best Shot scene file you want to save to
the memory card’s “Scene” folder.
• Best Shot scene files are registered in file name sequence.
78
Page 26

OTHER RECORDING FUNCTIONS
5.
Load the memory card into the camera.
6.
Specify either “Built-in + CF” or “CF” as the location of the Best Shot scenes on page 81.
7.
Use the same procedure as that on page 76 to
select a copied Best Shot scene and use it to
record an image.
IMPORTANT!
• When viewing Best Shot scenes on the camera, the
camera’s built-in scenes appear first, followed by
scenes copied from the CD-ROM, and then Best Shot
scenes registered by you.
• Formatting a memory card deletes all Best Shot scene
files stored on it. After formatting the card, you have to
re-copy the Best Shot scene files you want to the
memory card (page 39).
NOTE
• To delete a Best Shot scene copied to a memory card
from the CD-ROM, simply delete the scene file from
the memory card’s “Scene” folder (page 151).
■ Composition Outline
With certain Best Shot Mode
images, a composition outline
appears on the monitor
screen to aid you when
composing your image. The
focus frame is also adjusted
on the monitor screen, so it is
in the appropriate location to
suit the composition outline.
IMPORTANT!
• Focus area expansion is disabled while a composition
outline for a Best Shot portrait (one person or more)
scene is on the monitor screen (page 67).
79
Focus
frame
Example: Face and Chest
Composition
outline
Page 27
OTHER RECORDING FUNCTIONS
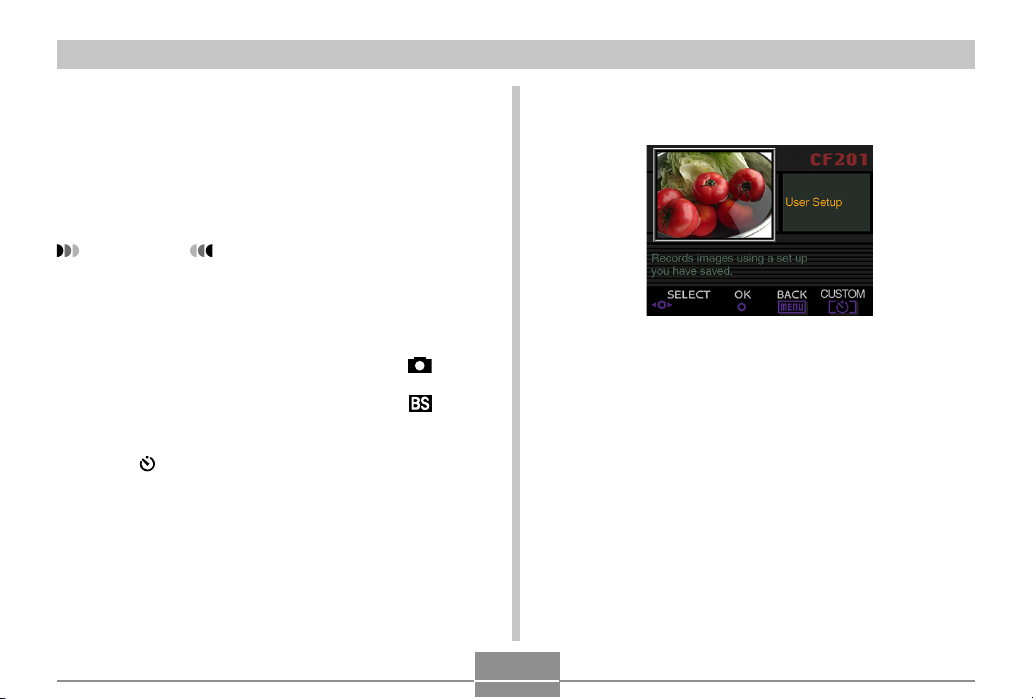
Registering Your Own Best Shot Scenes
You can register the settings of any image recorded with a
CASIO QV-5700 camera as a “user setup” for the Best Shot
Mode. After you register a user Best Shot scene, you can
recall it and use its setup just as you do with other Best Shot
scenes.
IMPORTANT!
• You must have either “Built-in + CF” or “CF” specified
as the Best Shot scene location in order to record an
image using a user Best Shot scene (page 81).
1.
Align the power/function switch with .
2.
Align the exposure mode dial with (Best
Shot).
3.
Press .
4.
Rock the control button to the left or right, or
rotate the selector dial to display the scene
you want to import.
5.
Click the control button.
• This completes scene registration.
6.
Click the control button.
• This returns to the normal REC mode. Now you can
use the procedure on page 76 to select the user Best
Shot scene you registered and use it for recording another image.
80
Page 28

OTHER RECORDING FUNCTIONS
NOTES
• Registering a user Best Shot scene stores the following settings: focus mode, EV shift, filter, metering
mode, white balance, color enhancement, flash intensity, sharpness, saturation, contrast, ISO sensitivity,
flash mode, flash setting, sync speed, digital zoom.
• You can use only images recorded with the CASIO
QV-5700 to register a user setup.
• You can register up to 250 Best Shot scenes, including those copied from the bundled CD-ROM.
• You can check the settings of a particular Best Shot
scene by using the menu to view the applicable setting
screens.
• User Best Shot scenes are automatically assigned file
names using the format: U5700nnn.jpe. “nnn” represents a sequential number in the range of 001 to 999.
• To delete a user Best Shot scene, simply delete the
scene file from the memory card’s “Scene” folder
(page 151).
Specifying the Location of Best Shot Mode Scenes
Use the following procedure to specify the location you want
to use when selecting scenes in the Best Shot Mode.
1.
Align the power/function switch with .
2.
Press MENU.
3.
Select “Bestshot Setting” and then rock the
control button to the right.
4.
Select the setting you want, and then click the
control button to apply it.
To have this appear when you scroll
through scenes:
Built-in scenes and memory card scenes
Built-in scenes only
Memory card scenes only
5.
Press MENU to exit the setting procedure.
Select this:
Built-in+CF
81
Built-in
CF
Page 29

OTHER RECORDING FUNCTIONS
NOTES
• See page 77 for information about copying Best Shot
scenes to a memory card.
• If there are no Best Shot scene files or user Best Shot
scenes on the memory card, you will be able to select
from among the built-in scenes only, even when the
“Built-in+CF” or “CF” option is selected.
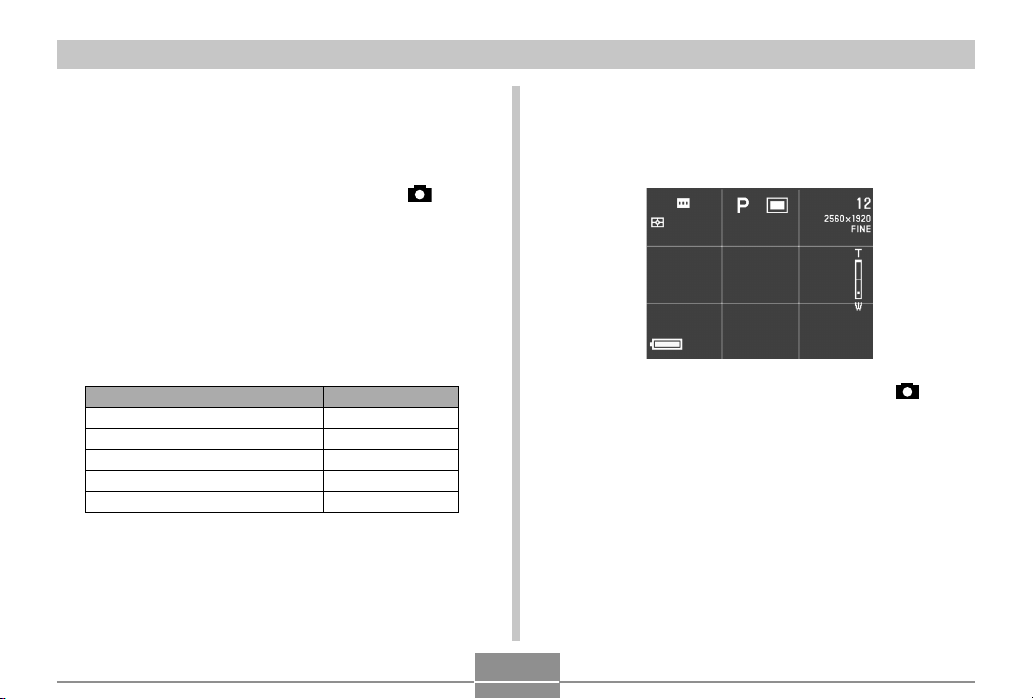
Specifying the Exposure Mode
You can use the exposure mode dial to select from among
the exposure modes listed below. The exposure mode determines the aperture and shutter speed used when you record
images.
Mode :Full Auto
P Mode :Program AE
A Mode :Aperture priority AE
S Mode :Shutter speed priority AE
M Mode : Manual Exposure
Full Auto
In the (Full Auto) Mode, the camera automatically adjusts shutter speed, aperture, flash intensity, and other settings in accordance with the brightness of the image and
other shooting conditions.
1.
Align the exposure mode dial with (Full
Auto).
2.
Align the power/function switch with .
3.
Press the shutter release button to record the
image.
82
Page 30

OTHER RECORDING FUNCTIONS
NOTE
• Recording images in the Full Auto Mode causes a
number of camera settings to be made automatically
in accordance with shooting conditions. See “Full Auto
Mode Settings” on page 163 for more information.
Program AE
In the P (Program AE) Mode, the camera automatically adjusts shutter speed and aperture in accordance with the
brightness of the image and other shooting conditions.
1.
Align the exposure mode dial with P (Program).
2.
Align the power/function switch with .
3.
Make other settings if you want (page 94).
4.
Press the shutter release button to record the
image.
■ Program AE vs Full Auto
With both Program AE and Full Auto, the camera automatically adjusts shutter speed and aperture settings. The table
below shows which other settings can be made for each
mode.
Setting
Flash mode (on, off, red eye
reduction) selection with
Exposure compensation
setting with the control button
Metering mode with
White balance setting with
WB
Focus mode setting with
FOCUS
AE lock setting with AE-L
Menu screen switching with
MENU
Monitor screen switching
with DISP
Program AE
Mode
Yes
Yes
Yes
Yes
Yes
Yes
Yes
4 patterns
83
Full Auto
Mode
No
No
No
No
No
No
No
2 patterns
Page 31

OTHER RECORDING FUNCTIONS
Aperture Priority AE
The A Mode (aperture priority AE) is the opposite of the S
Mode. It lets you specify an aperture setting and the camera
automatically adjusts shutter speed accordingly. A larger aperture decreases depth of field, which is the zone of sharp
focus in a scene. Conversely, a smaller aperture increases
depth of field.
Large Aperture Small Aperture
• Note that a smaller number indicates a larger aperture, and
a larger number indicates a smaller aperture.
■ Aperture Settings
1.
Align the exposure mode dial with A (Aperture
Priority).
2.
Align the power/function switch with .
3.
Rotate the selector dial to select the aperture
value you want.
Aperture
4.
Press the shutter release button to record the
image.
Aperture
Brightness
Focus
Larger Smaller
F2.0 • F2.3 • F2.8 • F4.0 • F5.6 • F8.0
Brighter Darker
Shallower Deeper
IMPORTANT!
• It is often difficult to obtain proper brightness when
shooting a subject that is very dark or very light. In
such a case, try different aperture settings to find the
one that produces the best results.
84
Page 32

OTHER RECORDING FUNCTIONS
Shutter Speed Priority AE
The S Mode (shutter speed priority AE) lets you specify a
shutter speed setting and the camera automatically adjusts
aperture accordingly.
Fast (1/1000)Slow (1/30)
■ Shutter Speed Settings
1.
Align the exposure mode dial with S (Shutter
Speed Priority).
2.
Align the power/function switch with .
3.
Rotate the selector dial to select the shutter
speed you want.
Shutter
speed
Shutter Speed
Brightness
Movement
Slow Fast
BULB, 60 seconds to 1/1000 second
Brighter Darker
Blur Stop
85
4.
Press the shutter release button to record the
image.
Page 33

OTHER RECORDING FUNCTIONS
IMPORTANT!
• It is often difficult to obtain proper brightness when
shooting a subject that is very dark or very light. In
such a case, try different shutter speed settings to find
the one that produces the best results.
• When shutter speed is set to “BULB”, exposure continues as long as you depress the shutter button. Because of this, use of the optional remote shutter release is recommended whenever using the “BULB”
setting (page 103).
• The slowest shutter speed when “BULB” is selected is
60 seconds.
• Note that using a slower shutter speed increases the
chance of static being present in your image, and the
amount of static visible in an image is inversely proportional to the shutter speed.
• At shutter speeds of one second or slower, the camera automatically performs internal data processing
intended to limit image static, so the image record operation takes longer at slow shutter speeds. At shutter
speeds of one second or greater, doubling the shutter
speed setting tells you about how long it takes for an
image to be recorded. For example, image recording
with a shutter speed of one second takes about two
seconds.
• A shutter speed slower than 1/8 second can cause the
brightness of the image on the monitor screen to be
different from the brightness of the image that is recorded.
• Note that the shutter speed used when actually recording an image is slightly off from the shutter speed
value you specify.
86
Page 34

OTHER RECORDING FUNCTIONS
Manual Exposure
The M Mode (Manual Exposure) lets you make the shutter
speed and aperture settings you want.
• The shutter speed settings you can make are the same as
those for shutter speed priority AE (page 85).
• The aperture settings you can make are the same as those
for aperture priority AE (page 84).
1.
Align the exposure mode dial with M (Manual).
2.
Align the power/function switch with .
3.
Rock the control button to the left or right to
specify the shutter speed, and rotate the selector dial to select the aperture you want.
Aperture
Shutter
Speed
4.
Press the shutter release button to record the
image.
IMPORTANT!
• Shutter speed and aperture values appear on the
monitor screen in amber if the image is overexposed
or underexposed.
• It is often difficult to obtain proper brightness when
shooting a subject that is very dark or very light. In
such a case, try different shutter speed settings to find
the one that produces the best results.
• When shutter speed is set to “BULB”, exposure continues as long as you depress the shutter button. Because of this, use of the optional remote shutter release is recommended whenever using the “BULB”
setting (page 103).
• The slowest shutter speed when “BULB” is selected is
60 seconds.
• Note that using a slower shutter speed increases the
chance of static being present in your image, and the
amount of static visible in an image is inversely proportional to the shutter speed.
87
Page 35

OTHER RECORDING FUNCTIONS
• At shutter speeds of one second or slower, the camera automatically performs internal data processing
intended to limit image static, so the image record operation takes longer at slow shutter speeds. At shutter
speeds of one second or greater, doubling the shutter
speed setting tells you about how long it takes for an
image to be recorded. For example, image recording
with a shutter speed of one second takes about two
seconds.
• A shutter speed slower than 1/8 second can cause the
brightness of the image on the monitor screen to be
different from the brightness of the image that is recorded.
Using the Continuous Shutter Mode
Holding down the shutter release button continuously
records images.
1.
Align the drive mode dial with (Continuous
Recording).
2.
Align the power/function switch with .
3.
Press the shutter release button to record the
image.
• Continuous shutter recording is not possible in the following cases.
— When the shutter speed setting is 1 second or
slower
— When “BULB” is selected for the shutter speed
(page 85)
— When the battery capacity indicator shows
(page 33)
— When the camera is set up using a Best Shot Mode
soft focus scene
— When recording TIFF (uncompressed) format im-
ages (page 95)
88
Page 36

OTHER RECORDING FUNCTIONS
• Note that the flash does not fire during continuous
shutter recording.
• You cannot use the self-timer in combination with the
Continuous Shutter Mode.
Using the AEB (Automatic Exposure Bracketing) Mode
The AEB Mode automatically records three or five images
when you press the shutter button. You can select from
among four different exposure value bracketing steps:
±1/3EV, ±1/2EV, ±2/3EV, ±1EV.
To configure AEB Mode settings
1.
Align the power/function switch with .
2.
Press MENU.
89
Page 37

OTHER RECORDING FUNCTIONS
3.
Select “AEB Setting” and then rock the control
button to the right.
4.
Select “EV Shift” or “Number of Exposures”
and then rock the control button to the right.
5.
Make the setting you want, and click the control button.
• EV Shift : 1/3, 1/2, 2/3, or 1.
• Number of Exposures : 3 or 5.
6.
Press MENU to exit the setting procedure.
IMPORTANT!
• Specifying three exposures causes images to be
recorded in the following sequence:
Optimum Exposure Minus Shift Exposure Plus
Shift Exposure.
• Specifying five exposures causes images to be
recorded in the following sequence:
Optimum Exposure Minus Shift x 1 Exposure
Plus Shift x 1 Exposure Minus Shift x 2 Exposure
Plus Shift x 2 Exposure.
To record an image using AEB
1.
Align the drive mode dial with AEB (Auto Exposure Bracketing).
2.
Align the power/function switch with .
• This causes the “AEB” indicator to appear on the
monitor screen.
90
Page 38

OTHER RECORDING FUNCTIONS
3.
Compose the image and then press the shutter
release button to record it.
• Keep the shutter release button depressed to record
the specified number of images.
• Releasing the shutter release button before all the images are recorded stops recording at that point.
IMPORTANT!
• You cannot use AEB in the following cases.
— When the shutter speed setting is 1 second or
slower
— When “BULB” is selected for the shutter speed
(page 85)
— When the battery capacity indicator shows
(page 33)
— When the camera is set up using a Best Shot Mode
soft focus scene
— When recording TIFF (uncompressed) format im-
ages (page 95)
• Note that the flash does not fire while you are using
AEB.
• You cannot use the self-timer in combination with the
AEB Mode.
• The length of the interval between shots depends on
the “Image Size” and “Quality” settings. Certain settings can cause the camera to require a very long interval or variable interval lengths between shots.
Creating a Panorama
The Panorama Mode lets you digitally stitch together multiple images to create a sweeping panorama.
1.
Align the drive mode dial with (Panorama).
2.
Align the power/function switch with .
91
Page 39

OTHER RECORDING FUNCTIONS
3.
Press the shutter release button to record the
first image.
• The right edge of the first image remains on the left
side of the monitor screen to help you compose the
second image of the panorama.
Right edge
of previous
image
4.
Shoot the other images that will make up the
panorama, each time using the right edge of
the previous image to compose the next image
correctly.
5.
After recording the images you want, press
MENU.
• You can group up to 10 images into a panorama.
NOTE
• The camera uses the same exposure and white balance settings in effect when the first image of the panorama is recorded for recording all of the other images
of the panorama.
92
Page 40

OTHER RECORDING FUNCTIONS
Recording a Movie
You can record movies that are approximately 30 seconds
long.
■ File Format: AVI
AVI format is the Motion JPEG format standard advocated
by the Open DML Consortium. Note, however, that this
camera does not record audio.
■ Size: 320 x 240 pixels
■ Movie File Size
File Size : Approximately 300KB/second
■ Maximum Movie Length
30 seconds
1.
Align the drive mode dial with (Movie).
2.
Align the power/function switch with .
3.
Point the camera at the subject and then press
the shutter release button about half way
down.
4.
Press the shutter release button all the way
down to start recording.
• Recording continues for 30 seconds.
• To record a movie that is shorter than 30 seconds,
press the shutter release button again when you want
to stop recording.
IMPORTANT!
• Flash is disabled during movie recording.
• You cannot change the focus mode while in the Movie
Mode (page 61).
• Digital zoom is disabled in the Movie Mode (page 75).
• To view an AVI file on a computer running Windows
2000 or 98, install QuickTime from the CD-ROM that
comes bundled with the camera.
• Windows Me users can play back AVI files using
MediaPlayer.
93
Page 41

OTHER RECORDING FUNCTIONS
REC Mode Camera Settings
The following are the settings you can make in the REC
mode when recording an image.
• Image size and quality
• ISO sensitivity
• Color enhancement
• Color filter
• Saturation
• Contrast
• Sharpness
• Screen grid on/off
• Time and date stamping
• Setup memory
Specifying Image Size and Quality
You can specify the image quality and image size to suit the
type of image you are recording.
1.
Align the power/function switch with .
2.
Press MENU.
3.
Select “Size”or “Quality” and then rock the
control button to the right.
4.
Select the size or quality setting you want, and
then click the control button to apply it.
5.
Press MENU to exit the setting procedure.
94
Page 42

OTHER RECORDING FUNCTIONS
■ Size/Quality Setting and Image Capacity
Image
size
(pixels)
2560
X
1920
2544
X
1696
(3:2)
1600
X
1200
1280
X
960
640
X
480
Quality
FINE
NORMAL
ECONOMY
TIFF
FINE
NORMAL
ECONOMY
TIFF
FINE
NORMAL
ECONOMY
TIFF
FINE
NORMAL
ECONOMY
TIFF
FINE
NORMAL
ECONOMY
TIFF
File size
2.3MB
1.8MB
1.3MB
14.4MB
2.0MB
1.6MB
1.1MB
12.64MB
1.02MB
0.68MB
0.34MB
5.625MB
0.65MB
0.43MB
0.22MB
3.6MB
0.16MB
0.11MB
0.06MB
0.9MB
*1 Maximum value displayed by the camera. Actual image capacity
is greater than this value.
16MB
memory
card
6 images
7 images
10 images
–
6 images
8 images
12 images
1 image
12 images
18 images
35 images
2 images
19 images
28 images
53 images
3 images
73 images
103 images
154 images
15 images
Number of images
64MB
memory
card
24 images
30 images
40 images
3 images
27 images
33 images
50 images
4 images
50 images
75 images
144 images
10 images
77 images
113 images
214 images
15 images
296 images
415 images
622 images
62 images
1GB
Microdrive
410 images
513 images
684 images
65 images
466 images
570 images
855 images
75 images
855 images
1266 images
2445 images
173 images
1314 images
1911 images
3625 images
270 images
5006 images
7009 images
9999 images*
1049 images
IMPORTANT!
• The values in the table are all approximate, and are
affected by the types of images you record and other
factors.
• To determine the number of images that can be stored
on a memory card of a different capacity, multiply the
capacities in the table by the appropriate value.
• The maximum number of stored images that can be
indicated on the camera’s display is 999. Depending
on the memory card capacity, more images can be
stored, but only up to 999 are indicated on the display.
• The number of images that can be recorded may differ
from the values shown above when you use Card
Browser (page 154).
• It takes longer to store a TIFF (uncompressed) image
than a JPEG (compressed) image.
• When you record a TIFF image, a JPEG format
ECONOMY version of the same image is also stored.
The ECONOMY version is the one that appears on the
camera’s monitor screen when you display the image
in the PLAY mode.
1
• You cannot transfer a TIFF image to a computer using
the bundled Photo Loader application (page 147).
95
Page 43

OTHER RECORDING FUNCTIONS
Specifying Sensitivity
Use the following procedure to select the sensitivity setting
that suits the type of image you are recording.
1.
Align the power/function switch with .
2.
Press MENU.
3.
Select “Sensitivity” and then rock the control
button to the right.
4.
Select the setting you want, and then click the
control button to apply it.
Auto : Automatic sensitivity selection
0 : Conforms with ISO50
+1 : Conforms with ISO100
+2 : Conforms with ISO200
+3 : Conforms with ISO400
+4 : Conforms with ISO800
5.
Press MENU to exit the setting procedure.
IMPORTANT!
• Increasing sensitivity can cause static to appear inside an image. Select the sensitivity setting that suits
your shooting needs.
Enhancing Certain Colors
Use the following procedure when you want to enhance a
particular color in your recorded image.
1.
Align the power/function switch with .
2.
Press MENU.
3.
Select “Enhancement” and then rock the control button to the right.
4.
Select the setting you want, and then click the
control button to apply it.
To do this:
Turn off color enhancement
Enhance reds
Enhance greens
Enhance blues
Enhance flesh tones
5.
Press MENU to exit the setting procedure.
Select this:
Off
Red
Green
Blue
Flesh Tones
96
Page 44

OTHER RECORDING FUNCTIONS
NOTES
• Enhancing a color produces the same effect as attaching a color enhancer lens filter to the lens.
• If color enhancement and the filter function (this page)
are both turned on at the same time, the filter function
is given priority (color enhancement is not performed).
Using the Filter Function
The camera’s filter function lets you alter the tint of an image
when you record it.
1.
Align the power/function switch with .
2.
Press MENU.
3.
Select “Filter” and then rock the control button
to the right.
4.
Select the setting you want, and then click the
control button to apply it.
• Available filter settings are: Off, B/W, Sepia, Red,
Green, Blue, Yellow, Pink, Purple
5.
Press MENU to exit the setting procedure.
NOTES
• Using the camera’s filter feature produces the same
effect as attaching a color filter to the lens.
• If color enhancement (page 96) and the filter function
are both turned on at the same time, the filter function
is given priority (color enhancement is not performed).
97
Page 45

OTHER RECORDING FUNCTIONS
Specifying Color Saturation
Use the following procedure to control the intensity of the
image you are recording.
1.
Align the power/function switch with .
2.
Press MENU.
3.
Select “Saturation” and then rock the control
button to the right.
4.
Select the setting you want, and then click the
control button to apply it.
To get this:
Maximum color saturation (intensity)
High color saturation (intensity)
Normal color saturation (intensity)
Low color saturation (intensity)
Minimum color saturation (intensity)
5.
Press MENU to exit the setting procedure.
Select this:
+2
+1
0
–1
–2
Specifying Contrast
Use this procedure to adjust the relative difference between
the light areas and dark areas of the image you are recording.
1.
Align the power/function switch with .
2.
Press MENU.
3.
Select “Contrast” and then rock the control
button to the right.
4.
Select the setting you want, and then click the
control button to apply it.
To get this:
Maximum contrast
Relatively high contrast
Normal contrast
Relatively low contrast
Minimum contrast
5.
Press MENU to exit the setting procedure.
Select this:
+2
+1
0
–1
–2
98
Page 46
OTHER RECORDING FUNCTIONS
Specifying Outline Sharpness
Use the following procedure to control the sharpness of image outlines.
1.
Align the power/function switch with .
2.
Press MENU.
3.
Select “Sharpness” and then rock the control
button to the right.
4.
Select the setting you want, and then click the
control button to apply it.
To get this:
Maximum sharpness
Relatively high sharpness
Normal sharpness
Relatively low sharpness
Minimum sharpness
5.
Press MENU to exit the setting procedure.
Select this:
+2
+1
0
–1
–2
Turning the On-screen Grid On and Off
You can display gridlines on the monitor screen to help you
compose images and ensure that the camera is straight
when recording.
1.
Align the power/function switch with .
2.
Press MENU.
3.
Select “Grid” and then rock the control button
to the right.
99
Page 47

OTHER RECORDING FUNCTIONS
4.
Select the setting you want, and then click the
control button to apply it.
To do this:
Turn the grid off
Turn the grid on
5.
Press MENU to exit the setting procedure.
Select this:
Off
On
Inserting a Time Stamp into an Image
When it is turned on, the time stamp function digitally stamps
the recording date and time in the lower right corner of each
image as it is recorded. Note that once an image is stamped,
the date and time cannot be deleted.
1.
Align the power/function switch with .
2.
Press MENU.
3.
Select “Time Stamp” and then rock the control
button to the right.
100
Page 48

OTHER RECORDING FUNCTIONS
4.
Select the setting you want, and then click the
control button to apply it.
Example:
Date: October 23, 2002
Time: 1:25pm
Off : No time stamping
2002/10/23 : Year/Month/Day
23 1:25pm : Day Hour:Minutes
2002/10/23 1:25pm : Year/Month/Day Hour:Minutes
5.
Press MENU to exit the setting procedure.
Specifying Power On Default Settings
Configuring the camera’s “mode memory” controls power on
default settings. Turning a mode memory item on specifies
that the current setting of the item when the camera is turned
off should be restored when the camera is turned back on
again. Turning a mode memory item off specifies that its factory default setting should be used whenever the camera is
turned on.
1.
Align the power/function switch with .
2.
Press MENU.
3.
Select “Mode Memory” and then rock the control button to the right.
4.
Select the item you want to change, and then
rock the control button to the right.
5.
Select the setting you want, and then click the
control button to apply it.
101
Page 49

OTHER RECORDING FUNCTIONS
To do this when the camera is turned on:
Restore the item’s last setting when
power was turned off
Restore the item’s factory default setting
6.
Press MENU to exit the setting procedure.
● Mode Memory Items and Settings
Item
Flash
White Balance
Metering
Focus
Sensitivity
Digital Zoom
EV Shift
● Resetting Mode Memory
In step 4 of the above procedure, select “Reset” “Yes”
and then click the control button. This returns the mode
memory settings to their initial defaults.
Setting at power off.
Memory Mode Status
On
Select this:
On
Off
Off (Initial Default)
Auto
Auto
Multi
Spot
0
On
None
Resetting the Camera
Use the following procedure to reset all of the camera’s settings to their initial defaults as shown under “Camera Menus”
on page 159.
1.
Align the power/function switch with or .
2.
Press MENU.
3.
Select “Reset” and then rock the control button to the right.
4.
In response to the confirmation message that
appears, rock the control button up or down to
select “Yes” to reset or “No” to exit and click
the control button.
102
Page 50

OTHER RECORDING FUNCTIONS
Using the Remote Shutter Release
You can use an optionally available remote shutter release
(WR-3C) to release the shutter without touching the camera.
By mounting the camera on a tripod and using the remote
shutter release, you can eliminate the chance of blurred images due to accidental hand movement. For full details, see
the instructions that come with the remote shutter release.
Supported Remote Shutter Release: WR-3C (option)
Cable Length: Approximately 1 meter (3.3˝)
1.
Turn off the camera and connect the remote
shutter release to the camera’s DIGITAL port
(shutter release terminal).
Remote shutter
release
DIGITAL
2.
Align the power/function switch with .
3.
Press MENU.
4.
Select “Release Setting” and then rock the
control button to the right.
5.
Select “On” and then click the control button.
• Selecting “Off” disables the remote shutter release.
6.
Press MENU to exit the setting procedure.
7.
Now you can use the remote shutter release to
record an image.
NOTE
• The remote shutter release can perform the following
camera operations: shutter release button half and full
press, zoom controller operation, control button left or
right rock.
103
Page 51

OTHER RECORDING FUNCTIONS
Using an External Flash
Use of a commercially available flash unit makes it possible
to obtain a higher level of brightness (guide number) than
you get when using the built-in flash alone. An external flash
also makes it possible to extend the effective range of flash
photography.
• The guide number of the internal flash is 6.5 (ISO 100/m).
External Flash Unit Requirements
Any external flash unit you use with this camera must satisfy
the following requirements.
• Variable flash intensity (AUTO)
• Flash Duration: Less than 1/1000 sec.
• Coverage Angle: Coverage of 33mm (13.0˝) equivalent
35mm (13.8˝) focal length lens (without wide conversion
lens)
IMPORTANT!
• Some flash performance may be lost when using a
ring flash or other type of unit with a long flash time.
• The aperture values and ISO sensitivity available with
some flash units may not match the values supported
by your camera. In such a case, make adjustments in
the aperture setting of the external flash and the camera until proper brightness is achieved.
Attaching an External Flash Unit
IMPORTANT!
• Always make sure that the external flash unit is turned
off before attaching it to or detaching it from the camera. Leaving the flash unit on can cause it to fire unexpectedly.
1.
Attach the flash unit’s sync cable to the camera’s
external flash sync terminal.
External flash
sync terminal
104
External
flash unit
Sync cable
Page 52

OTHER RECORDING FUNCTIONS
• When attaching an external flash unit to the camera,
you should also purchase and install a gripped
bracket that can be secured to the camera’s tripod
hole.
2.
Turn on camera power and make the required
camera settings.
• Exposure Mode: M (Manual Exposure)
• Shutter Speed: Around 1/60 (Actual setting should be
in accordance with aperture setting.)
• For maximum brightness of areas that are not reached
by flash illumination, use the camera’s maximum aperture opening (F2.0).
• White Balance: Sunlight
• Flash Mode: (Off)
3.
Turn on the external flash unit, and set it up for
the camera’s aperture (F) value (page 84) and
sensitivity (ISO 100 equivalent) value.
• Depending on shooting conditions, proper exposure
may not be obtained even if you properly set the auto
aperture (F) value and ISO sensitivity of the flash unit
to match those of the camera. If this happens, adjust
the auto aperture (F) value, ISO sensitivity, or other
settings of the flash unit. Also try adjusting the aperture of the camera.
IMPORTANT!
• The external flash connected to the external flash
sync terminal always fires. To record an image without
using external flash, disconnect the sync cable from
the terminal or turn off external flash unit power.
• To adjust the intensity of an external flash, use the
controls of the external flash unit. Changing the flash
intensity setting of the camera does not affect a connected external flash unit. If the exposure of a recorded image on the monitor screen is not what you
want, adjust the external flash unit’s aperture and ISO
sensitivity settings, or adjust the camera’s aperture
setting, and then try recording again.
• Close-up recording with an external flash unit may
produce over-exposed images. If this happens, adjust
the external flash unit’s aperture and ISO sensitivity
settings, or adjust the camera’s aperture setting, and
then try recording again.
• Note that the camera’s built in flash fires whenever its
Flash Mode setting is something other than (Off).
• The aperture (F) value indicated by the camera is the
value when optical zoom is at its widest (1X). Setting
optical zoom for telephoto causes the lens to become
somewhat darker. When using optical zoom, adjust
the external flash unit’s aperture and ISO sensitivity
settings, or adjust the camera’s aperture setting.
• When using a zoom flash, a coverage angle for a focal
distance of 33mm (1.3˝) or less for the flash unit is recommended.
105
Page 53

OTHER RECORDING FUNCTIONS
Attaching a Conversion Lens, Close-up Lens, or Filter
Threads in the camera’s lens allow connection of an optionally available Conversion Lens Adaptor (LU-35A). After installing the adaptor, you can attach one of the recommended
converter lenses, the recommended close-up lens, or an optionally available filter.
Installing a Conversion Lens or Close-up Lens
Installing a conversion lens lengthens the focal distance for
improved telephoto capabilities or shortens the focal distance for wider angle shots. Installing the close-up lens provides macro imaging.
IMPORTANT!
• The following Canon Inc. converter and close-up
lenses are recommended for use with this camera.
• These lenses may not be available in some geographic areas.
Canon Inc. Tele-Converter TC-DC58
•
Focal Distance: Digital camera focal distance x 1.5
Tele-Converter
(TC-DC58)
Conversion Lens
Adaptor
(LU-35A)
Canon Inc. Wide Converter WC-DC58
•
Focal Distance: Digital camera focal distance x 0.8
Wide Converter
(WC-DC58)
Conversion Lens
Adaptor
(LU-35A)
106
Page 54

OTHER RECORDING FUNCTIONS
Canon Inc. 58mm (2.3˝) Close-up Lens 250D
•
Focal Distance:
IMPORTANT!
• Be sure to use the Conversion Lens Adaptor (LU-35A)
whenever you install a conversion lens or 58mm (2.3˝)
close-up lens. If you don’t, the lens will come into contact with the conversion lens or 58mm (2.3˝) close-up
lens when it extends from the camera, resulting in
malfunction.
In the Macro Mode, 5 cm to 14 cm (2.0˝ to 5.5˝)
from the surface of the close up lens to the subject (when zoom is set to maximum wide
angle); 7 cm to 14 cm (2.8˝ to 5.5˝) in other
modes
Close-up Lens
(250D)
Conversion Lens
Adaptor
(LU-35A)
• Be sure to use the monitor screen to compose images
while a conversion lens or close-up lens is installed on
the camera. Do not use the viewfinder, because its
image is not changed by the lens you are using. Also,
a conversion lens or close-up lens can cause shadows in the viewfinder.
• Using the camera’s built-in flash while a conversion
lens or close-up lens is attached can cause shadows
around the periphery of images.
• Setting the camera to wide-angle while the tele-converter lens is installed causes shadows around the
periphery of the image due to light being blocked by
the frame of the attached lens. Because of this, you
should always set the camera to telephoto whenever
you are using the tele-converter lens.
• The effects of camera movement are always magnified while the tele-converter lens is being used.
Whenever you are using a conversion lens, install the
cushion that comes with it and mount the camera on a
tripod so it is secure.
• Due to certain characteristics of the wide converter
lens, you may notice some slight distortion in images
you record with it.
• You should keep the camera’s zoom setting at maximum wide-angle whenever you are using the wide
converter lens.
• When using the close-up lens, make sure to set the
camera’s focus mode to (Macro Mode) (page 65).
Proper focus of a close-up image is not possible with
any other focus mode.
107
Page 55

OTHER RECORDING FUNCTIONS
Using a Filter
This camera supports use of commercially available 58mm
(2.3˝) filters.
IMPORTANT!
• Be sure to use the Conversion Lens Adaptor (LU-35A)
whenever you install a filter. If you don’t, the lens will
come into contact with the filter when it extends from
the camera, resulting in malfunction.
• The designs of some filters can cause shadows
around the periphery of the image.
• Auto focus and flash may not produce desired results
while a filter is on the lens.
• Filters do not produce exactly the same results as
those obtained with a film-based camera.
• Do not use multiple filters in combination.
• Use of a commercially available lens hood causes
shadows around the periphery of images.
108
Page 56

PLAYBACK
PLAYBACK
You can use the camera’s built in monitor screen to play
back recorded images.
Basic Playback Operation
Use the following procedure to scroll through recorded images stored in the camera’s memory.
1.
Align the power/function switch with .
: PLAY mode for playing back images
2.
Rock the control button to the left or right, or
rotate the selector dial to scroll through images on the monitor screen.
If you want to do this:
Scroll forward
Scroll backward
Rock the control button to the right.
Rock the control button to the left.
Do this:
NOTES
• Keeping the control button pressed toward the left or
right scrolls through images at high speed.
• In order to allow for faster playback image scrolling,
the image that initially appears on the monitor screen
is a preview image, which is of somewhat lower quality
than the actual display image. The actual display image appears about two seconds after the preview image. Note that a fully detailed actual display image
may not be available in the case of some images copied from certain digital camera models.
109
Page 57

PLAYBACK
Playing a Movie
Use the following procedure to play back a movie recorded
in the Movie Mode.
1.
Align the power/function switch with .
2.
Rock the control button to the left or right, or
rotate the selector dial to scroll through the images on the monitor screen until the movie you
want to play is displayed.
Movie
Mode icon
3.
Click the control button to start movie playback.
• The following describes operations that are available
during movie playback.
If you want to do this:
Toggle the movie between
full screen and quarter
screen view
Playback forward
Playback in reverse
Pause playback
Skip to the next frame while
playback is paused
Skip to the previous frame
while playback is paused
Exit movie playback
Press DISP.
Rock the control button to
the right.
Rock the control button to
the left.
Click the control button.
Rock the control button to
the right.
Rock the control button to
the left.
Press MENU.
Do this:
110
Page 58

PLAYBACK
Playing a Panorama
Use the following procedure to play back a panorama recorded in the Panorama Mode.
1.
Align the power/function switch with .
2.
Rock the control button to the left or right, or
rotate the selector dial to scroll through the
images on the monitor screen until the panorama you want to play is displayed.
Panorama
Mode icon
3.
Click the control button to start panorama
playback.
• The following describes operations that are available
during panorama playback.
If you want to do this:
Toggle the panorama
between full screen and
compressed view
Scroll forward
Scroll backword
Pause playback
Skip to the next image while
playback is paused
Skip to the previous image
while playback is paused
Exit panorama playback
Press DISP.
Rock the control button to
the right.
Rock the control button to
the left.
Click the control button.
Rock the control button to
the right.
Rock the control button to
the left.
Press MENU.
Do this:
111
Page 59

PLAYBACK
Enlarging the Playback Image
Use the following procedure to enlarge the playback image
on the screen. You can enlarge the image up to 3.2 times its
normal size.
1.
Align the power/function switch with .
2.
Rock the control button to the left or right, or
rotate the selector dial to display the image
you want to enlarge.
3.
Push the zoom controller upwards towards
(telephoto) to zoom in on the imge.
• Push the zoom controller downwards towards
(wide-angle) to zoom back out.
2X
112
• The following describes operations that are available
while an enlarged image is on the playback screen.
If you want to do this:
Shift the view right
Shift the view left
Shift the view upwards
Shift the view downwards
Exit the enlargement screen
IMPORTANT!
• You cannot enlarge movie or panorama images.
NOTE
• Pushing the zoom controller downwards towards
(wide-angle) while a normal size (1X) image is on
the display switches to the 9-image view.
Rock the control button to
the right.
Rock the control button to
the left.
Rock the control button up.
Rock the control button down.
Press any button besides
the control button.
Do this:
Page 60
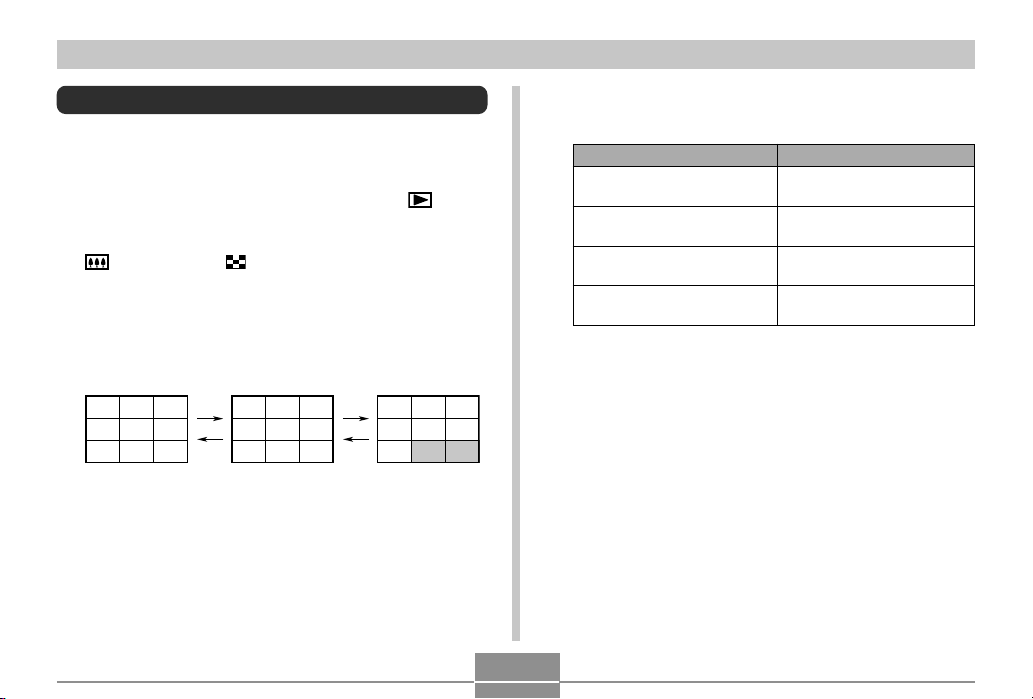
PLAYBACK
Displaying the 9-image View
The following procedure displays nine images on the monitor
screen at the same time.
1.
Align the power/function switch with .
2.
Push the zoom controller downwards towards
(wide-angle) .
• This displays the 9-image view, starting with the last
image you recorded.
3.
Rock the control button to the left or right to
scroll through images.
123
456
789
10 11 12
13 14 15
16 17 18
19 20 21
22 23 24
26 27
25
113
• The following describes operations that are available
while the 9-image view is on the monitor screen.
If you want to do this:
Scroll forward
Scroll backward
Display the selection pointer
(See following section. )
Exit the 9-image view
Rock the control button to
the right.
Rock the control button to
the left.
Press DISP.
Press any button besides
the control button or DISP.
Do this:
Page 61
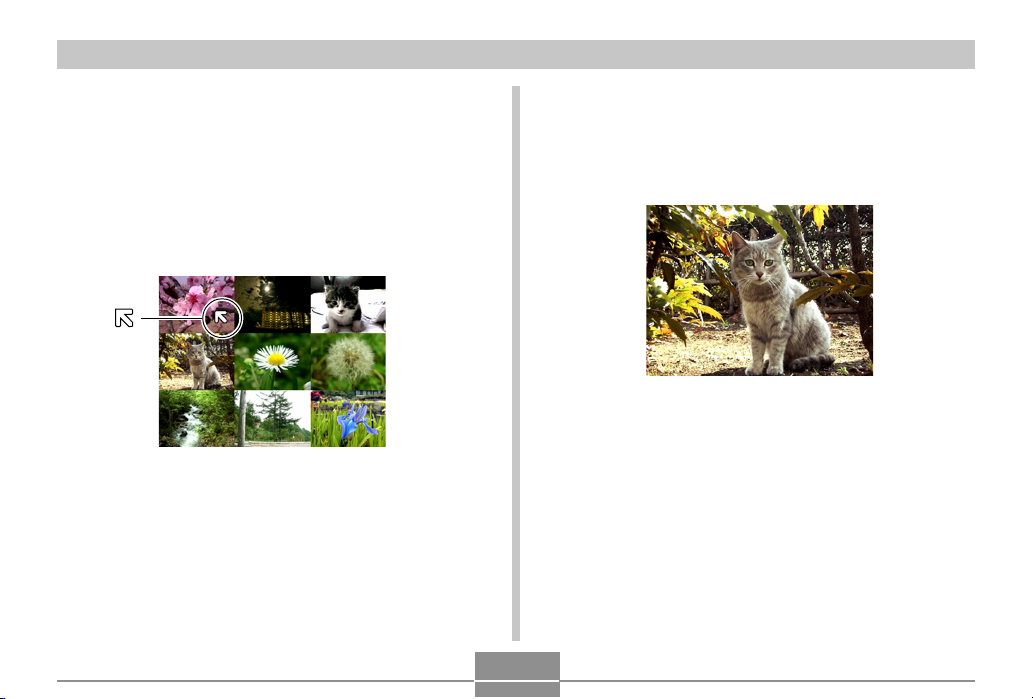
PLAYBACK
Selecting a Specific Image in the 9-image View
1.
Display the 9-image view.
2.
Press DISP.
• This causes a pointer to appear in the upper left corner of the monitor screen.
3.
Rock the control button left, right, up, or down
to move the pointer to the image you want to
select, and then click the control button.
• This displays the single-image view of the selected
image.
114
Page 62

PLAYBACK
Displaying the Histogram and Other Image Information
The camera saves the histogram and other image information along with the image itself. Use the following procedure
to view this other information.
1.
Align the power/function switch with .
2.
Press DISP to display the histogram and other
image information.
3
9
File size
Drive mode
4
Light
Metering
5
Flash
7
Shutter
Speed
2
Exposure
mode
1
Histogram
6
Aperture
8
White
balance
115
1 Histogram
2
Exposure mode
3 Drive mode
4 Light Metering
5 Flash
6 Aperture
7 Shutter Speed
Use the histogram to check exposure when
recording.
• Exposure conditions indicated by the
histogram may not be accurate when
using the flash, when using multi-pattern
metering, or under certain other
conditions.
:Full Auto Mode
:Best Shot Mode
:Program AE Mode
:Aperture Priority AE Mode
:Shutter Speed Priority AE Mode
:Manual Mode
:1-Image Mode
:Continuous Shutter Mode
:AEB (Auto Exposure Bracketing) Mode
:Movie Mode
:Panorama Mode
:Multi-pattern metering
:Center-weighted metering
:Spot metering
:Flash on
:Flash off
Page 63

PLAYBACK
8 White balance
9 File size
• Except for the histogram, “-----” is shown in place of
any item for which information is uncertain or otherwise unavailable.
3.
Rock the control button to the left or right, or
None:Auto
:Daylight
:Shade
:Tungsten
:Fluorescent
:Manual
rotate the selector dial to scroll through images on the monitor screen.
• It may take some time for the image data to appear
after you select an image.
4.
After you are finished, press DISP to clear display information.
IMPORTANT!
• The histogram does not appear during movie playback (page 110).
• In the case of a panorama image (page 111), the histogram is displayed for the first image of the panorama
only.
116
Page 64

PLAYBACK
Using the Slide Show Feature
Slide Show automatically plays back images in sequence at
a fixed interval.
1.
Align the power/function switch with .
2.
Press MENU.
3.
Select “Slide Show” and then click the control
button to apply it.
• This starts the slide show.
• Pressing MENU at this point displays a screen for set-
ting the interval between image changes within the
range of five to 30 seconds.
4.
To stop Slide Show, press any button besides
MENU.
IMPORTANT!
• Auto Power Off (page 35) is disabled whenever Slide
Show is being used. This means you should not leave
Slide Show running when using batteries to power the
camera. Doing so can rundown batteries. Be sure to
stop Slide Show and turn off the camera after you are
finished.
• Note that all buttons are disabled while an image
change is in progress. Wait until an image is stopped
on the monitor screen before performing a button operation, or hold down the button until the image stops.
• Images copied from another digital camera or a computer may take longer time to appear than the Slide
Show interval time you select.
117
Page 65

PLAYBACK
Resizing an Image
You can use the following procedure to change an image to
VGA size (640 x 480 pixels).
• VGA is the optimum image size for attachment to e-mail
messages or incorporation into Web pages.
1.
Align the power/function switch with .
2.
Rock the control button to the left or right, or
rotate the selector dial to display the image
you want to resize.
3.
Press MENU.
4.
Select “Resize” and then rock the control button to the right.
5.
Select “Yes” and then click the control button.
• Select “No” to exit the procedure without resizing the
image.
118
IMPORTANT!
• The resized version of the image is saved as a new
file.
• The original, pre-resized image is also retained in
memory.
• 2544 x 1696 (3:2) size images are resized for 640 x
427 pixels.
• Images smaller than 640 x 480 pixels cannot be
resized.
•
Movie Mode, Panorama Mode, and TIFF (uncompressed)
images cannot be resized.
• Resizing of an image cannot proceed if the message
“MEMORY FULL Delete unneeded images” appears.
 Loading...