

Page 1

BASIC IMAGE RECORDING
BASIC IMAGE RECORDING
This section describes the basic procedure for recording an
image.
Recording a Simple Snapshot
The camera’s Program AE Mode (P Mode) is for simple
snapshots. In this mode, the camera automatically sets the
shutter speed and aperture for you in accordance with subject brightness.
1.
Before turning on the camera, remove its lens
cap.
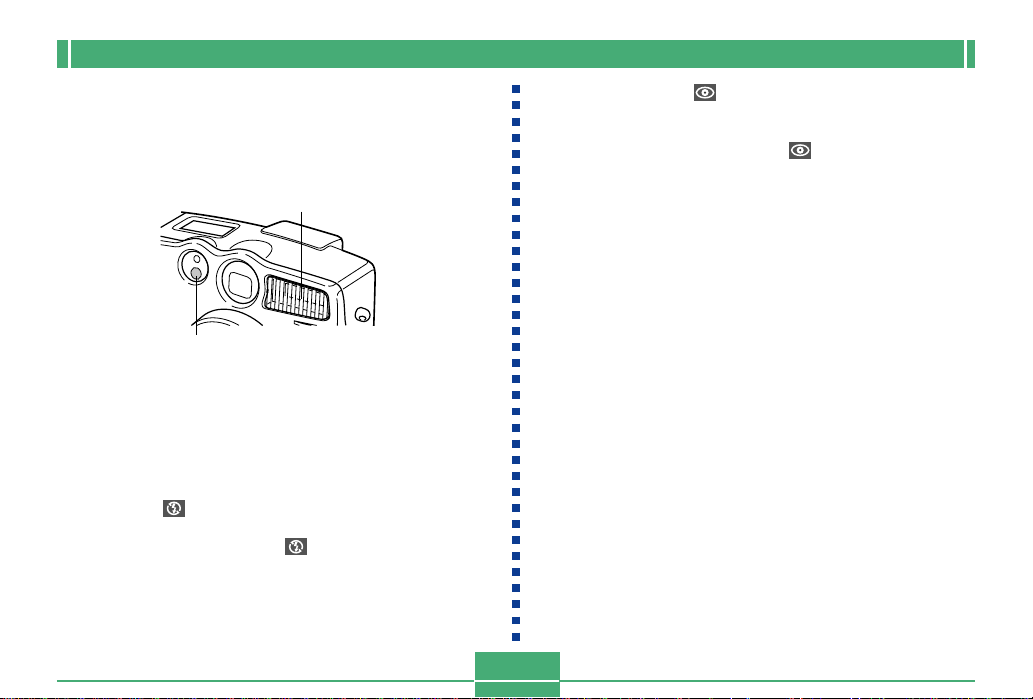
2.
Align the POWER/
Function Switch with
REC.
REC :Turns on power and
enters the REC mode.
PLAY :Turns on power and
enters the PLAY mode.
OFF :Turns off power.
REC
PLAY
OFF
E-48
3.
Compose the image on the monitor screen so
the point on which you want to focus is inside
the Focus frame.
Focus
frame
• If you are using the viewfinder to compose the image,
align the viewfinder’s auto focus frame with the subject you want to focus.
• If you are using the viewfinder to compose the subject,
press SET/DISP twice to turn off the monitor screen.
4.
Press the shutter
release button about
half way and hold it
there to perform auto
focus.
Shutter release button
Page 2

BASIC IMAGE RECORDING
• The monitor screen momentarily goes blank when
you press the shutter release button half way.
• The camera’s Auto Focus feature automatically
focuses the image.
• You can find out the
status of the Auto Focus
operation by checking the
color of the focus frame
MENU
and the status of the
operation lamp.
If you see this
Green focus frame and green
operation lamp
Red focus frame and green
operation lamp
The image is in focus.
The image is not in focus.
Operation lamp
It means this
• Take care that you do not
block the lens or the
sensors with your fingers
as you hold the camera.
• See “Using the Macro Mode” on page E-60 for information about shooting close-ups.
5.
After confirming that
the image is in focus,
press the shutter
release button all the
way down to record the
image.
• Recorded images are temporarily stored in a buffer
from which they are stored to the memory card. You
can continue to shoot consecutive images as long as
there is space available in the buffer.
• The number of images you can store in the camera
depends on the storage medium and the image quality
setting (page E-64) you are using.
• To avoid hand movement, press the shutter release
button gently.
• Use of a tripod is recommended for slow shutter
speeds and telephoto shots to avoid blurring of the
image due to camera movement.
■ Camera Shake Indicator
The (camera shake indicator) appears on the monitor
screen when the zoom slider is set to T (telephoto) or when a
slow shutter speed is being used.
• If the camera shake indicator appears, use a tripod to
avoid camera movement.
E-49
Page 3

BASIC IMAGE RECORDING
About the REC Mode Monitor Screen
• The image shown on the monitor screen in the REC mode
is a simplified image for composing purposes. The actual
image is recorded in accordance with the image quality
setting currently selected on your camera. The image recorded on the memory card has much better resolution and
detail than the REC mode monitor screen image.
• Certain levels of subject brightness can cause the response of the REC mode monitor screen to slow down,
which causes some static noise in the monitor screen image.
About Auto Focus
Auto Focus tends not to work well with the following types of
subjects. If you experience problems with obtaining good
results with Auto Focus, try using manual focus (page E-61).
• Solid color walls or objects with little contrast
• Strongly backlit objects
• Polished metal or other brightly reflective objects
• Venetian blinds or other horizontally repeating patterns
• Multiple images that are varying distances from the camera
• Subjects in poorly lit areas
• Auto Focus also may not work properly when the camera is
unsteady or shaking.
■ Fixed Focusing Distances
• The following are the fixed focusing distances when Auto
Focus is unable to focus properly.
Well-lit Location:1.5 meters minimum
With Flash :Approximately 2 meters
• Depending on actual conditions, a green operation indicator and focus frame do not necessarily guarantee that the
image is in focus.
Recording Precautions
• Never open the battery compartment cover, disconnect the
AC adaptor from the camera, or unplug the AC adaptor
from the wall socket while the operation lamp and the card
access lamp are flashing green. Doing so will not only
make storage of the current image impossible, it can also
corrupt other image data already stored on the camera’s
memory card.
• Never remove batteries, unplug the AC adapter, or remove
the memory card while the camera is saving images.
• Fluorescent lighting actually flickers at a frequency that
cannot be detected by the human eye. When using the
camera indoors under such lighting, you may experience
some brightness or color problems with recorded images.
E-50
Page 4
BASIC IMAGE RECORDING
Image Recording when the Battery is Low
To protect against unexpected loss of image data, each image is recorded directly to the memory card (without going
into the buffer) whenever battery level is indicated as or
lower. The message “Press to cancel save.” appears
on the monitor screen during the save operation under this
condition. As long as you do not press , the save operation continues and takes a few seconds to complete. Be
sure to replace all four batteries as soon as possible after
this message starts to appear.
Pressing while the “Press to cancel save.” is on
the monitor screen cancels the image save operation.
• If you have a microdrive loaded in the camera, the above
message appears whenever the battery level is indicated
as or lower.
• The message “Press to cancel save.” also appears
momentarily during save operations in the Panorama
Mode and Movie Mode. In this case, this message does not
indicate that battery power is low.
• The message described above does not appear while the
monitor screen is turned off.
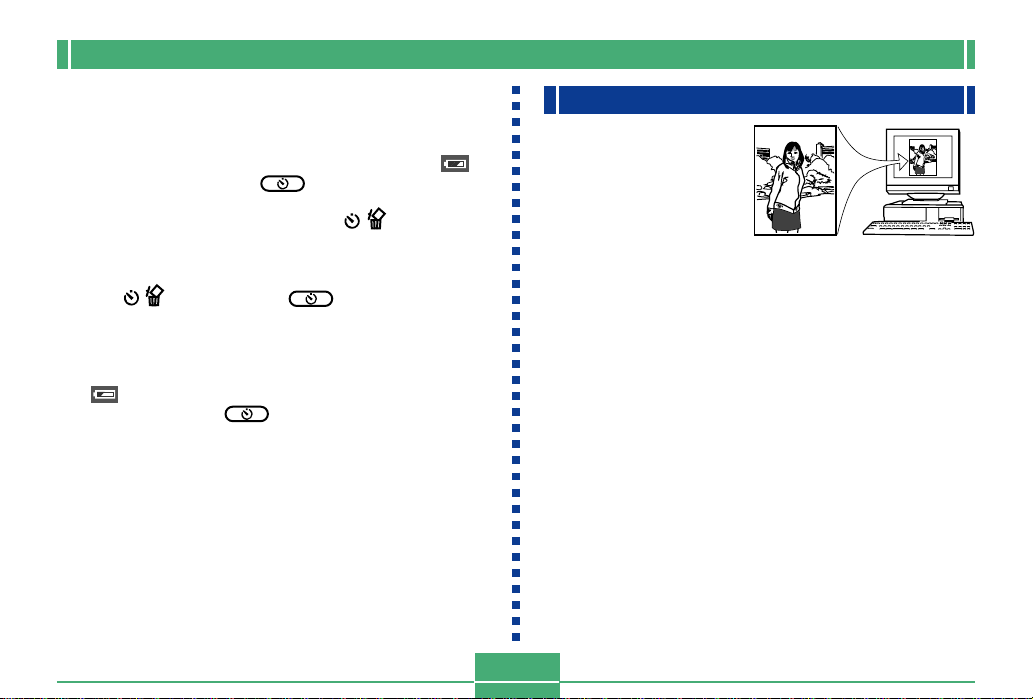
Camera Orientation Detection
The camera automatically
detects whether it is
oriented vertically or
horizontally when you
record an image, and
stores the orientation
along with the image data.
Then when you play back images using the bundled Photo
Loader application, they are all automatically oriented
correctly on the display.
IMPORTANT!
• Note the following precautions to ensure that the sensor
built into the camera can correctly detect the orientation of
the camera.
— Make sure you are holding the camera still when re-
cording images. Camera movement can cause sensor
errors.
E-51
Page 5
BASIC IMAGE RECORDING
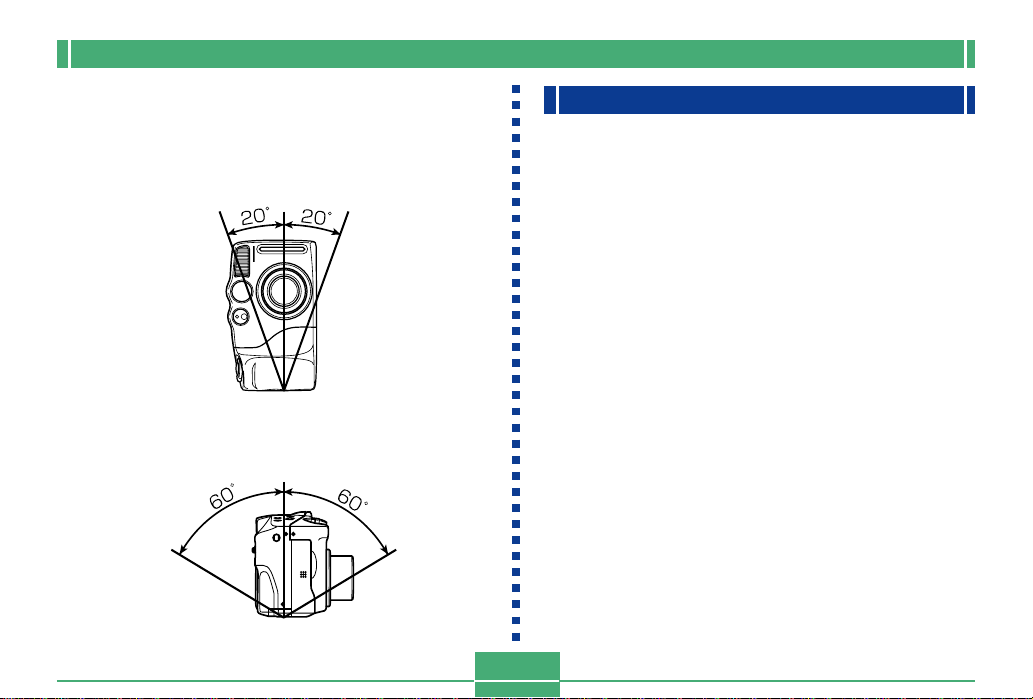
— When recording portrait orientation images, position
the camera to it is standing up as straight as possible,
as shown in the illustration below. Holding the camera
at an angle can cause sensor errors. As a general
rule, do not allow the camera to be more than about 20
degrees off of vertical.
— Tilting the camera too far upwards or downwards can
also cause sensor errors. As a general rule, do not
allow the camera to point more than about 60 degrees
up or down.
CARD
— The camera orientation sensor does not work with
movie images.
Previewing the Last Image Recorded
Use the following procedure to preview the last image recorded, without leaving the REC mode.
1.
Press the PREVIEW button to display the last
image recorded.
• You can use the PREVIEW button in the Movie Mode,
too.
• The PREVIEW button does not perform any operation
if you press it immediately after turning on camera
power or immediately after entering to the REC mode
from the PLAY mode.
E-52
Page 6
BASIC IMAGE RECORDING
Deleting the an Image in the REC Mode
You can use following procedure to delete the last image you
recorded without leaving the REC mode.
IMPORTANT!
• Note that the image delete operation cannot be undone. Make sure you really do not need an image before you delete it.
1.
In the REC mode, press the PREVIEW button to
display the last image you recorded.
2.
Press .
3.
In response to the confirmation message that
appears, select “Yes”.
• Select “No” to cancel the delete operation without deleting anything.
4.
Press SET/DISP.
• This deletes the image and returns to the REC mode.
Using the Viewfinder for Recording
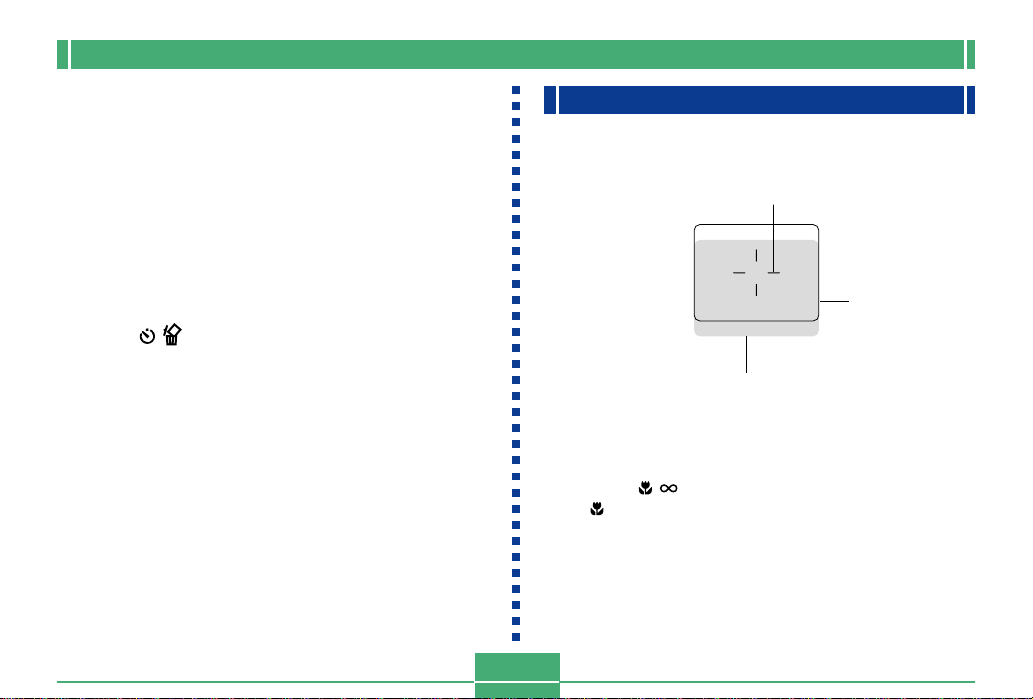
The illustrations below show what you see when you look
through the viewfinder to compose an image for recording.
Auto Focus Frame
Focus Range
Frame
Short distance to subject
Note that the focus range frame is valid for subjects that are
about three meters away. A different focus range is used for
subjects that are closer or farther away. Because of this, you
should use / /MF RESIZE to change to the Macro
Mode( ) or Manual Mode (MF) whenever the distance between the camera and the subject is 30cm or less.
• The monitor screen turns on automatically whenever the
camera is in the Macro Mode. Use the monitor screen to
compose images in the Macro Mode.
E-53
Page 7
BASIC IMAGE RECORDING
• You can use the Diopter Dial to adjust the image in
viewfinder screen to your eyesight.
• Rotate the diopter dial to adjust the image in the viewfinder
to match your eyesight.
*
Focusing of the viewfinder image is disabled while the camera is
turned off or in the PLAY mode.
Diopter Dial
Using Zoom
Your camera is equipped with both optical zoom and digital
zoom capabilities.
Using Optical Zoom
Optical zoom enlarges the image by changing the focal distance of the lens. You can zoom an image by a zoom factor
ranging from 1 (normal size) to 3 (three times normal size).
1.
Align the POWER/Function Switch with REC.
2.
Move the zoom slider towards T (telephoto) to zoom
in on the subject, or W (wideangle) to zoom out.
T (TELE): Telephoto
W (WIDE): Wide-angle
W (WIDE) T (TELE)
E-54
Zoom slider
T
W
Page 8

BASIC IMAGE RECORDING
NOTES
• Changing the optical zoom factor also affects the lens
aperture value.
• The lens aperture value indicated on the camera is the
aperture when optical zoom is 1X. Using a higher optical zoom setting results in a higher aperture value
(smaller aperture).
• Use of a tripod is recommended for telephoto shots to
avoid blurring of the image due to camera movement.
Using Digital Zoom
With digital zoom, you can enlarge the image on the monitor
screen by zoom factors of 2X or 4X before recording it.
1.
Align the POWER/Function Switch with REC.
2.
Press MENU.
3.
Select “FUNCTION” “Digital Zoom”, and
then press SET/DISP.
E-55
4.
Select the setting you want, and then press
SET/DISP to apply it.
To do this
Turn off digital zoom
Toggle between 2X and 4X digital zoom
whenever the zoom slider is slid to the
maximum T (telephoto) setting.
Always use 2X digital zoom
Always use 4X digital zoom
• A frame appears on the monitor screen whenever 4X
digital zoom is in use. Only the area of the image
within the frame is recorded, with the resulting image
measuring 1024 x 768 pixels.
• 4X digital zoom is not available in the Movie Mode and
Panorama Mode.
• 2X and 4X digital zoom are disabled while the composition outline is displayed in the Best Shot Mode.
Select this
Auto
Off
X2
X4
Page 9

BASIC IMAGE RECORDING
Using the Flash
The following describes various flash settings you can make
to suit the type of image you are trying to record.
1.
Align the POWER/Function Switch with REC.
2.
Press to cycle
through the available
flash modes until the
indicator for the one
you want is on the
monitor screen.
Flash
mode
RESIZE
BEST SHOT
MF//
E-56
• Each press of cycles through the available flash
modes described below.
To do this
Have the flash fire automatically
when required (Auto Flash)
Turn off the flash (Flash Off)
Always fire the flash (Flash On)
Fire a pre-flash followed by image
recording with flash, reducing the
chance of red-eye in the image (Redeye Reduction)
Select this setting
No display
Page 10

BASIC IMAGE RECORDING
Flash Status Indicators
You can check the current flash unit status by checking the
monitor screen indicator and flash lamp while the shutter release button is pressed about half way down.
Flash lamp
MENU
■ Flash lamp
When you press the shutter release button half way, the
flash icon appears on the monitor screen and the Flash lamp
light (amber) to indicate that the flash will fire when the shutter release button is pressed the rest of the way down.
■ Monitor screen
When you have Auto Flash or Red-Eye Reduction selected
as the flash mode, the indicator appears on the display
when you press the shutter release button about half way
down to indicate that available light is insufficient and the
flash will be fired.
Adjusting the Flash Intensity
Use the following procedure to adjust the intensity of the
flash when it fires.
1.
Align the POWER/Function Switch with REC.
2.
Press MENU.
3.
Select “FUNCTION” “Flash Intensity”, and
then press SET/DISP.
4.
Select the setting you want, and then press
SET/DISP to apply it.
To do this
Fire the flash with strong intensity
Fire the flash with normal intensity
Fire the flash with weak intensity
Select this setting
E-57
Strong
Normal
Weak
Page 11
BASIC IMAGE RECORDING
Precautions when Using Flash
• Make sure that you do not touch or block the flash or the
exposure sensor with your fingers. Doing so can soil these
components and interfere with correct flash operation.
Flash
Exposure sensor
• Flash is best be used for distances within the range of
about 0.5 meters to 4 meters (fully open aperture). Flash
does not work well outside this ranges.
• Depending on operating conditions (type of batteries being
used, temperature, etc. ), it may take up to 40 seconds for
the flash unit to charge.
• The flash is disabled during movie recording, which is indicated by the (Flash Off) icon on the monitor screen.
• The flash unit does not charge when battery power is too
low to charge the flash. The (Flash Off) indicator appears in order to warn you that the flash will not fire correctly, which may affect exposure of the image. Replace
batteries as soon as possible when this happens.
• Red-eye reduction may not work well when the camera
is not pointed directly at the subject or when the subject is
far from the camera.
• In the Red-eye Reduction Mode , the flash is fired automatically in accordance with exposure. Because of this,
the flash does not fire if the subject is well-lit.
• White balance is fixed while the flash is being used, so sunlight, fluorescent lighting, or other sources of illumination in
the immediate area may affect the coloring of the recorded
image.
E-58
Page 12

BASIC IMAGE RECORDING
Selecting the Focus Mode
You can use the following procedure to select from among
four different focus modes: Auto Focus, Macro, Infinity, and
Manual Focus.
1.
Align the POWER/Function Switch with REC.
2.
Press / /MF RESIZE
to cycle through the
available focus mode
RESIZE
settings.
/ /MF RESIZE
Focus
Mode
Each press of / /MF RESIZE cycles through the
focus modes in the following sequence.
Auto Focus (no indicator) Macro ( ) Infinity
( ) Manual Focus ( )
BEST SHOT
MF//
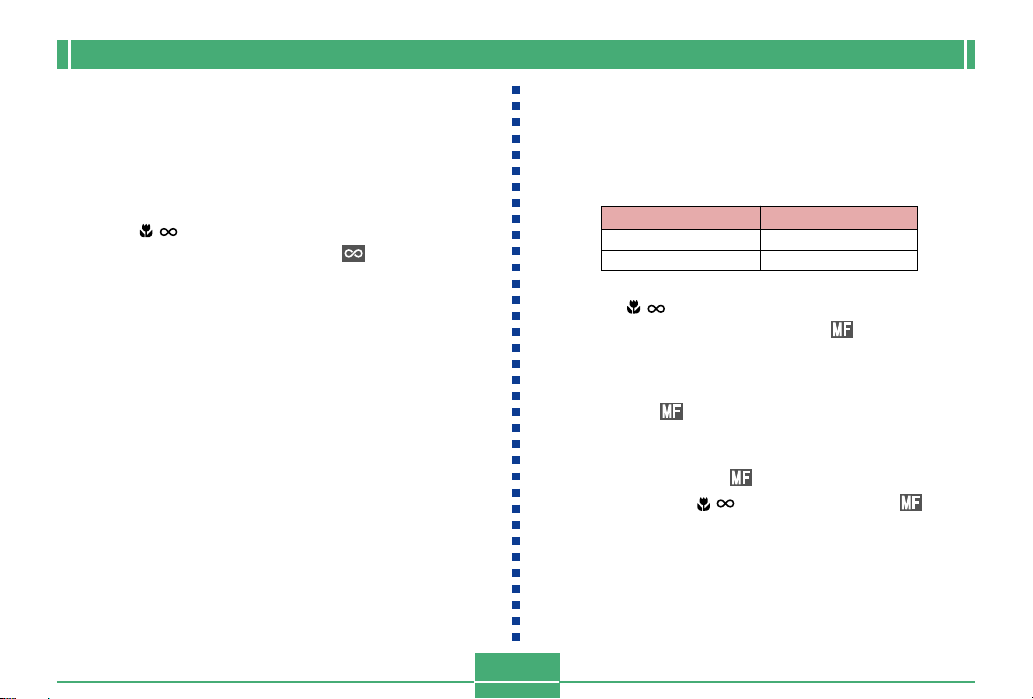
Using the Auto Focus Mode
As its name suggests, the Auto Focus Mode adjusts focus
automatically whenever you press the shutter release button
about half way down. The following shows the relationship
between the optical zoom factor and the focusing distance
for Auto Focus.
Optical Zoom Factor
1X
3X
1.
Press / /MF RESIZE to cycle through the fo-
Focusing Distance
30cm to ∞
32cm to ∞
cus mode settings until there is no focus mode
indicator on the display. This indicates the
Auto Focus Mode.
2.
Compose the image to the object you want
within the focus frame, and then press and
hold the shutter release button about half way
down.
E-59
Page 13

BASIC IMAGE RECORDING
Using the Macro Mode
The Macro Mode automatically sets the focus for close-up
shooting. Focus adjustment starts automatically whenever
Focus
frame
you press the shutter release button about half way down.
The following shows the relationship between the optical
zoom factor and the focusing distance for the Macro Mode.
• You can find out the status of the Auto Focus operation by checking the color of the focus frame and the
status of the operation lamp.
If you see this
Green focus frame and green
operation lamp
Red focus frame and green
operation lamp
3.
Press the shutter release button the rest of the
It means this
The image is in focus.
Auto Focus is not possible
for some reason.
way down to record the image.
E-60
Optical Zoom Factor
1X
2X
1.
Press / /MF RESIZE to cycle through the focus
Focusing Distance
6cm to 30cm
9cm to 30cm
mode settings until the indicator appears
on the display. This indicates the Macro Mode.
2.
Compose the image and record it.
• See “Using the Auto Focus Mode” on page E-59 for
information about how the camera focuses an image
automatically.
• You can check the current status by looking at the operation lamp and focus frame. See “Using the Auto
Focus Mode” on page E-59 for more information.
IMPORTANT!
• The focusing range is the distance from the lens surface to the subject.
• Note that you can use 1X and 2X zoom only with
Macro Mode recording.
Page 14
BASIC IMAGE RECORDING
Using the Infinity Mode
The Infinity Mode sets the focus near infinity. It is a good
choice for scenery and other far-off subjects. Focus adjustment starts automatically whenever you press the shutter
release button about half way down.
1.
Press / /MF RESIZE to cycle through the focus mode settings until the indicator appears on the display. This indicates the Infinity
Mode.
2.
Compose the image and record it.
• See “Using the Auto Focus Mode” on page E-59 for
information about how the camera focuses an image
automatically.
• You can check the current status by looking at the operation lamp and focus frame. See “Using the Auto
Focus Mode” on page E-59 for more information.
Using the Manual Focus Mode
With Manual Focus, you make the required focus settings by
hand. The following shows the relationship between the optical zoom factor and the focusing distance for the Manual
Focus Mode.
Optical Zoom Factor
1X
3X
1.
Press / /MF RESIZE to cycle through the fo-
Focusing Distance
6cm to ∞
18cm to ∞
cus mode settings until the indicator appears flashing on the display. This indicates
the Manual Focus Mode.
2.
While the indicator is flashing, use [왔] and
[왖] to focus the image.
• If you do not perform any focus operation for about
three seconds, the indicator stops flashing.
• You can press / /MF RESIZE while the indicator is on the monitor screen to change to another focus
mode, if you want.
E-61
Page 15

BASIC IMAGE RECORDING
3.
Press SET/DISP to stop the indicator flashing and fix the image focus at its current level.
• After stops flashing, you can use [왗] and [왘] to
adjust exposure compensation (EV).
• If stops flashing before you have a chance to focus, press / /MF RESIZE to make it flash again.
4.
Press the shutter release button to record the
image.
• The focus frame does not appear when you press the
shutter release button half way down while in the
Manual Focus Mode.
Using Focus Lock
Normally, Auto Focus automatically focuses on the object
that is inside the focus frame. Focus lock is a technique you
can use in the Auto Focus, Macro( ), and Infinity ( )
modes that lets you lock the focus on a subject and then
move the camera so the focus frame is pointed at another
subject when you record. This keeps the original subject in
focus, even though a different object is within the focus
frame.
NOTE
• Instead of using focus lock, you could also use the
procedure under “Specifying the Focus Frame Location” on page E-63 to move the focus frame to a different location.
E-62
1.
Align the POWER/Function Switch with REC.
2.
Align the focus frame with the subject you
want to lock on and press the shutter release
button half way down.
• The focus frame turns green when the image is in focus.
Focus frame
3.
While keeping the shutter release button depressed half way, move the camera and compose the image as you want.
Page 16
BASIC IMAGE RECORDING
4.
Press the shutter release button the rest of the
way down to record the image.
NOTE
• Locking the focus also locks the exposure setting.
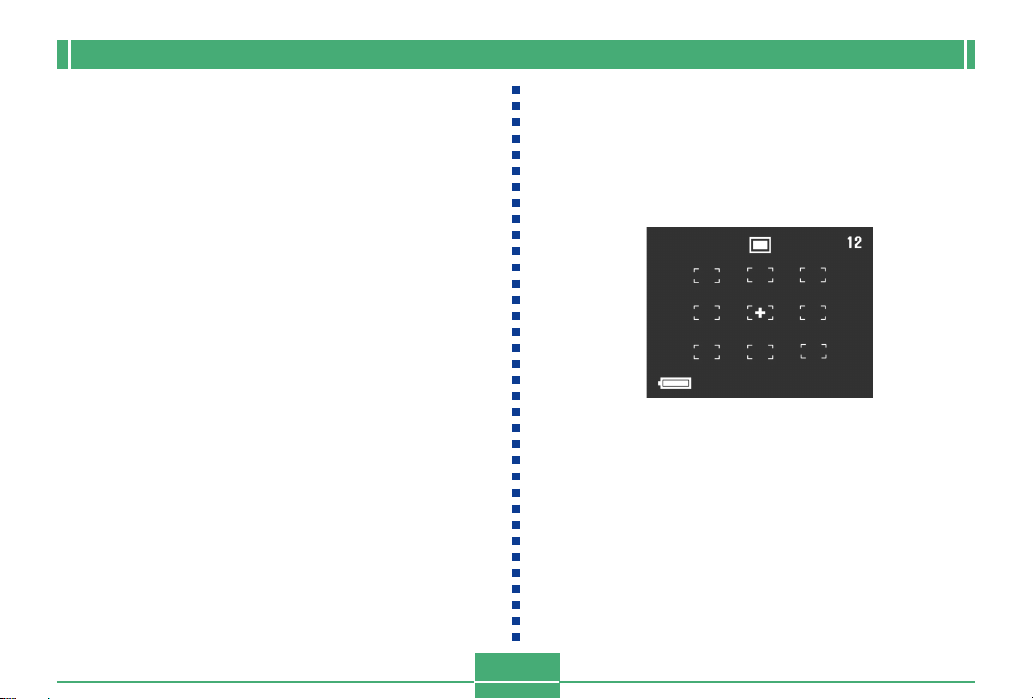
Specifying the Focus Frame Location
Normally, the Auto Focus frame is located in the center of
the screen. Use the following procedure when you need to
change the location of the focus frame.
NOTE
• Instead of moving the focus frame, you could also use
the procedure under “Using Focus Lock” on page E62 to lock the focus on one subject and then move the
camera so the focus frame is pointed at another subject.
1.
Align the POWER/Function Switch with REC.
2.
Compose the image you want to record.
3.
Holding down SHIFT to display all of the available Auto Focus frame positions, use [왘], [왗],
[왔], and [왖] to move the [+] mark to the focus
frame location you want to use.
• The currently selected Auto Focus frame is the one
where the [+] mark is located.
4.
After selecting the focus frame you want to
use, release SHIFT and then press the shutter
release button about half way to perform auto
focus.
• This causes the focus frame you selected to change
green when proper focus is achieved (or red if there is
a problem with the focus).
5.
Press the shutter release button the rest of the
way to record the image.
E-63
Page 17

BASIC IMAGE RECORDING
Specifying Image Size and Quality
You can specify the image size and image quality to suit the
type of image you are recording.
1.
Align the POWER/Function Switch with REC.
2.
Press MENU.
3.
Select “FUNCTION” “Size/Quality”, and then
press SET/DISP.
4.
Select the size and quality setting you want,
and then press SET/DISP.
■
Size/Quality Setting and Image Capacity (JPEG images only)
Image
size
(pixels)
2048
x
1536
1024
x
768
Quality
FINE
NORMAL
ECONOMY
FINE
NORMAL
ECONOMY
File size
1.4MB
1MB
600KB
350KB
250KB
150KB
8MB
memory card
5
6
11
19
27
43
Number of images
64MB
memory card
43
60
99
167
229
365
340MB
Microdrive
245
342
562
943
1292
2054
IMPORTANT!
• The values in the table are all approximate, and are
affected by the types of images you record and other
factors.
• Saving two versions of an image in JPEG and TIFF
formats creates a file that is very large, and greatly
reduces storage capacity (page E-93).
• To determine the number of images that can be stored
on a memory card of a different capacity, multiply the
capacities in the table, by the appropriate value.
• Note that the maximum number of images that can be
stored in a single folder is 250. Because of this, even
if you are using a card that allows storage of more
than 250 images, the camera’s monitor screen will
show its capacity for up to 250 images only.
• The number of images that can be recorded may differ
from the values shown above when you use Card
Browser (page E-134).
E-64
Page 18

BASIC IMAGE RECORDING
Using the Self-timer
You can set the self-timer to either one of two starting times.
1.
Align the POWER/Function Switch with REC.
2.
Press to select the self-timer time you
want.
BEST SHOT
MF//
RESIZE
Self timer
Time
E-65
Self-timer Time Settings:
Each press of cycles through the available selftimer settings described below.
To do this
Turn the self-timer off
Record 10 seconds after the
shutter release button is pressed
Record two seconds after the
shutter release button is pressed
3.
Press the shutter release button to start the
Select this setting
No display
10SEC
2SEC
self-timer countdown.
• The seconds are counted down on the monitor
screen.
• To stop a countdown part way through, press the shutter release button.
NOTES
• The hand-shake limiter is enabled when you use a
slow shutter speed and the two-second self-timer at
the same time.
• You cannot use the self-timer in combination with the
Continuous Shutter Mode.
Page 19

BASIC IMAGE RECORDING
Exposure Compensation
Whenever program AE, shutter speed priority AE, or aperture priority AE is selected as the exposure mode, you can
adjust the exposure compensation value (EV value) within
the range shown below in order to compensate for current
lighting conditions. This setting can be used to obtain better
results when shooting with backlighting, indirect indoor lighting, a dark background, etc.
EV Value Range: –2EV to +2EV
Steps: 1/3EV
1.
Select program AE, shutter speed priority AE,
or aperture priority AE as the exposure mode.
See page E-79.
2.
Use [왘] and [왗] to change the exposure compensation value (EV shift).
• The current EV value is shown on the monitor screen.
EV value
[왘]:Increases the EV value. A higher EV value is best
for light colored subjects and backlit subjects.
E-66
Page 20

BASIC IMAGE RECORDING
[왗]:Decreases the EV value. A lower EV value is best
for dark color subjects and for shooting outdoors
on a clear day.
3.
After the EV value is the way you want, press
the shutter release button to record the image.
IMPORTANT!
• When shooting under very dark or very bright conditions, you may not be able to obtain satisfactory results even after performing exposure compensation.
• An EV value setting you make remains in effect until
you change it. To reset the EV value to zero, use [왘]
and [왗] to return the display value to zero, which is
indicated when is not on the monitor screen. Note
that turning off the camera also resets the EV value to
zero.
• In the Panorama Mode, the exposure compensation
setting you make for the first image of the panorama is
fixed for all the other images.
E-67
Page 21

OTHER RECORDING FUNCTIONS
OTHER RECORDING FUNCTIONS
This section describes more advanced recording operations
that are also provided by this camera.
• Use the monitor screen to compose images for shooting in
the Best Shot Mode, Movie Mode, Panorama Mode, A
Mode (aperture priority AE), S Mode (shutter priority AE),
and M Mode (manual exposure).
Using the Continuous Shutter Mode
The Continuous Shutter Mode lets you record up to three
images at intervals of about 0.5 second.
• You can perform continuous shutter recording in the Portrait Mode, Landscape Mode, Night Scene Mode, Best
Shot Mode, P Mode (program AE), A Mode (aperture priority AE), and S Mode (shutter priority AE) only.
1.
Align the POWER/Function Switch with REC.
2.
Press MENU.
3.
Select “FUNCTION” “Continuous”, and then
press SET/DISP.
4
Select the setting you want, and then press
SET/DISP.
On: Continuous shutter enabled.
Off: Single-shot enabled
E-68
5.
Press the shutter release button to record the
image.
• The flash does not fire in the Continuous Shutter
Mode.
• You may be able to record only two images in the
Continuous Shutter Mode when using the Night Scene
Mode, a fixed shutter speed, or a slow shutter speed.
• You cannot use the self-timer in combination with the
Continuous Shutter Mode.
• The Continuous Shutter Mode is disabled while the
TIFF Mode is turned on (page E-93).
• Certain Best Shot Mode sample images also do not
support the Continuous Shutter Mode.
• Do not start a Continuous Shutter Mode operation
when the low battery indicator is on the monitor
screen.
• Storage of images recorded in the Continuous Shutter
Mode to a memory card can take about 14 seconds
(for three images).
• Never remove camera batteries, unplug the AC adaptor from the camera, or remove the memory card while
images are being saved.
Page 22

OTHER RECORDING FUNCTIONS
Shooting Portraits
The Portrait Mode blurs the background slightly, which
makes the foreground subject stand out better.
1.
Align the POWER/Function Switch with REC.
2.
Press MENU.
3.
Select “PORTRAIT” (Portrait Mode), and then
press SET/DISP.
4.
Press the shutter release button to record the
image.
NOTE
• You can blur the background even more by using the
zoom slider adjust to maximum telephoto.
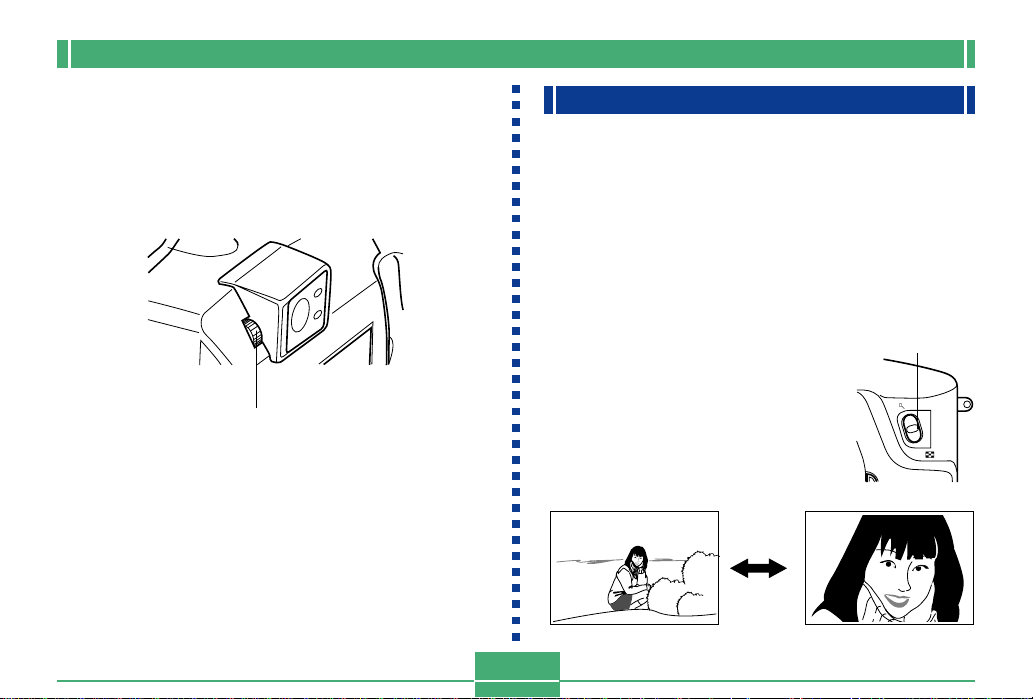
Shooting Landscapes
The Landscape Mode brings everything from distant scenery
to close foreground objects into focus.
1.
Align the POWER/Function Switch with REC.
2.
Press MENU.
3.
Select “LANDSCAPE” (Landscape Mode), and
then press SET/DISP.
4.
Press the shutter release button to record the
image.
E-69
Page 23

OTHER RECORDING FUNCTIONS
NOTES
• You can add more depth from the foreground to background, and also create a greater feeling of horizontal
expanse by using the zoom slider to adjust to maximum wide-angle.
• Using the Landscape Mode indoors, in a shaded location, or in any other areas where lighting is dim can
result in distant objects being out of focus.
Shooting Night Scenes
The Night Scene Mode uses longer exposure to produce
beautiful night scene images.
1.
Align the POWER/Function Switch with REC.
2.
Press MENU.
3.
Select “NIGHT SCENE” (Night Scene Mode),
and then press SET/DISP.
4.
Press the shutter release button to record the
image.
E-70
Page 24

OTHER RECORDING FUNCTIONS
NOTE
• You can use the Night Scene Mode in combination
with flash for slow sync shooting of people against a
twilight or night scene background.
IMPORTANT!
• The shutter speed is quite slow in the Night Scene
Mode, so be sure to use a tripod to hold the camera
steady.
• Auto Focus is difficult in the dark. If you experience
problems, use manual focusing (page E-61). There
may be some blurring of the image in cases where the
subject is moving quickly.
• Slow shutter speed also causes slow monitor screen
refresh. Because of this, the image recorded may be
slightly different from the image that was on the monitor screen when you pressed the shutter release button.
• The contrast of Night Scene Mode images is not affected by changes made in contrast settings (page E-
93).
Instant Setup Using the Best Shot Mode
The Best Shot Mode comes with a library of 28 different images. Simply select the image whose effects are the one you
want, and the settings of the camera automatically change to
the same setup that was used to record the selected image.
■ Instant Setup Using the Best Shot Mode
Sunset
See the "Best Shot scene List" that comes with the camera
for a list of scenes.
Night Scene
E-71
Page 25

OTHER RECORDING FUNCTIONS
■ Composition Outline
With certain Best Shot Mode
images, a composition outline
appears on the monitor screen
to aid you when composing
your image. The Auto Focus
Frame is also adjusted on the
monitor screen, so it is in the
appropriate location to suit the
composition outline.
1.
Align the POWER/Function Switch with REC.
2.
Press BEST SHOT.
• You can also display sample scenes by pressing
MENU, selecting “BEST SHOT”, and then pressing
SET/DISP.
Auto Focus
Frame
Example: Face and Chest
Composition
Outline
E-72
3.
Use [왘] and [왗] to display the sample scene
you want, and then press SET/DISP.
• You can also store your own setups. (page E-73)
4.
Press the shutter release button to record the
image.
NOTES
• Best Shot Mode images are not images recorded using this camera. They are intended for reference purposes only.
• The actual conditions that are present when you
record your image may make it impossible to correctly
obtain all of the effects of the Best Shot Mode image
you select.
• After selecting an image in the Best Shot Mode, you
can adjust camera settings manually as you normally
do.
• Press BEST SHOT to display the last sample scene
you selected.
Page 26

OTHER RECORDING FUNCTIONS
Specifying the Location of Best Shot Mode Scene Images
You can use the following procedure to specify the location
of the Best Shot Mode scene images.
1.
Align the POWER/Function Switch with REC.
2.
Press MENU.
3.
Select “FUNCTION” “Best Shot setting” and
then press SET/DISP.
4.
Select the setting you want, and then press
Registering Your Own Scene Setups
You can register the settings of any image recorded with a
CASIO QV-3500EX camera as a “user setup” for the Best
Shot Mode. After you register a user setup, you can recall it
just as you do with other scenes in the Best Shot Mode.
■ User Setup Parameters
Focus mode, aperture (A and M only), shutter speed (S
and M only), exposure compensation, sensitivity, filter setting, exposure mode, metering mode, white balance, enhancement, flash intensity, sharpness, saturation, contrast, flash mode
SET/DISP.
To have this appear when you scroll
through sample scenes
28 built-in sample scenes, followed by
sample scenes on the memory card
28 built-in sample scenes only
Sample scenes on the memory card only
NOTES
• If there are no Best Shot Mode sample images on the
memory card, you will be able to select from among
the 28 built-in sample images only, even when the
Built-in+CF or CF option is selected.
• See page E-74 for information about storing sample
images on a memory card.
Select this
Built-in+CF
Built-in
CF
■ Supported Camera Models
You can use only images recorded with the CASIO QV3500EX to register a user setup.
■ Number of User Setups
You can register up to 250 user setups (including images
imported form the bundled CD-ROM to the memory card).
E-73
Page 27

OTHER RECORDING FUNCTIONS
1.
Align the POWER/Function Switch with REC.
2.
Press BEST SHOT.
• You can also display sample scenes by pressing
MENU, selecting “BEST SHOT”, and then pressing
SET/DISP.
3.
Press .
4.
Use [왘] and [왗] to select the image you want to
import, and then press SET/DISP.
5.
The camera returns to the REC mode after registration is complete. Now you can use the procedure on page E-72 to select a scene and
record an image.
NOTES
• Press BEST SHOT to display the last sample scene
you selected.
• After you select a Best Shot Mode image, you can see
the camera setup by displaying the various menus you
normally use when setting up the camera manually.
• To delete a user setup, use your computer to navigate
to the memory card's “SCENE” folder, and then delete
the user setup file (page E-75, E-131).
Importing a Scene from the Best Shot Library on the CD-ROM
You can import sample scene images from the CD-ROM that
comes bundled with the camera to the camera's memory card,
and then use the imported scenes in the Best Shot Mode.
There is a total of 64 scenes.
• See the “Best Shot Scene List” that comes with the camera
for a list of scenes.
1.
Set up to access the memory card contents from
your computer.You can use either of the following
two methods to setup for memory card access.
(1) Connect the camera to the USB port of your com-
puter (page E-127)
(2) Read the images directly from the memory card
(page E-129)
E-74
Page 28

OTHER RECORDING FUNCTIONS
• Sample images are stored in memory card folder
named “SCENE”, so make sure that there is a folder
named “SCENE” on the memory card.
• To create a “SCENE” folder on a new memory card,
load the card into the camera, and then select REC or
PLAY with the POWER/Function Switch.
2.
Set the bundled CD-ROM into your computer's
CD-ROM drive.
3.
If you are running Windows, Click “My Computer” and then open the CD-ROM drive's window.
• This step is not required if you are using a Macintosh.
4.
Click “CASIO” “BestShot Library” “QV
3500EX” “English”, and then copy the
sample image files you want to import into the
“SCENE” folder of the memory card.
•
If your camera is set up for German-language screen text,
select “German” in place of “English” in the above step.
•
The sample image data is registered in file name sequence.
5.
Load the memory card into the camera.
6.
Specify either “Built-in + CF” or “CF” as the storage
location of Best Shot Mode scene images on page E-73.
E-75
7.
Use the same procedure as that on page E-72 to select an
imported sample image file and record the image you want.
IMPORTANT!
• Sample images are arranged in the following sequence on the memory card: camera sample images,
images imported from the CD-ROM, user images.
•
Formatting a memory card deletes all Best Shot Mode scene
sample images stored on it. After deleting the card, you have
to import the scenes you want to the memory card (page E-41).
NOTE
• To delete a sample scene imported to the memory
card from the CD-ROM, use your computer to navigate to the memory card's “SCENE” folder, and then
delete the sample scene file (page E-131).
Page 29

OTHER RECORDING FUNCTIONS
Recording a Movie
You can record movies that are approximately 30 seconds
long. There are two movie recording modes: past and normal. The past mode lets you capture images of events that
occurred before you pressed the shutter release button
while the normal mode records what happens after you
press the shutter release button.
■ File Format: AVI
AVI format is the Motion JPEG format standard advocated
by the Open DML Consortium.
■ Size: 320 x 240 pixels
■ Movie Memory Requirements
Approximately 300KB/second
■ Maximum Movie Length
30 seconds
To record a movie using the normal mode
1.
Align the POWER/Function Switch with REC.
2.
Press MENU.
3.
Select “MOVIE” (Movie Mode), and then press
SET/DISP.
4.
Point the camera at the subject, and then press
the shutter release button about half way
down.
• Auto Focus continues to adjust the focus as the subject moves.
5.
Press the shutter release button all the way
down to start recording.
• Recording continues for 30 seconds.
• To record a movie that is shorter than 30 seconds,
press the shutter release button again when you want
to stop recording.
E-76
Page 30

OTHER RECORDING FUNCTIONS
To record a movie using the past mode
1.
Align the POWER/Function Switch with REC.
2.
Press MENU.
3.
Select “MOVIE (PAST)” (Movie Past Mode),
and then press SET/DISP.
4.
When you are ready to record, press the shutter release button all the way down.
• Auto Focus continues to adjust the focus as the subject moves.
5.
Follow the subject with the camera, and press
the shutter release button all the way down
when you want to record.
• Pressing the shutter release button the second time
records everything that went on in front of the lens
during the 30-second period before you pressed the
shutter release button the first time in step 4.
• Pressing the shutter button before 30 seconds have
passed after you pressed the shutter release button
the first time in step 4 records everything that went on
in front of the lens during the period from when you
pressed the shutter release button the first time, up to
the point when you pressed it the second time.
IMPORTANT!
• Flash is disabled during movie recording.
• To view an AVI file on your computer, install
QuickTime from the CD-ROM that comes bundled
with the camera.
E-77
Page 31

OTHER RECORDING FUNCTIONS
Shooting Panoramas
The Panorama Mode lets you digitally stitch together multiple images to create a sweeping panorama.
4.
Press the shutter release button to record the
first image.
• The right edge of the first image remains on the left
side of the monitor screen to help you compose the
second image of the panorama.
1.
Align the POWER/Function Switch with REC.
2.
Press MENU.
3.
Select “PANORAMA” (Panorama Mode), and
then press SET/DISP.
E-78
Right edge
of previous
image
5.
Shoot the other images that will make up the
panorama, each time using the right edge of
the previous image to compose the next image
correctly.
6.
After recording the images you want, press
MENU.
• You can group up to 10 images into a panorama.
Page 32

OTHER RECORDING FUNCTIONS
NOTE
• The camera uses the same exposure and white balance settings in effect when the first image of the panorama is recorded for recording all of the other images
of the panorama.
Specifying the Exposure Mode
You can select from among the four exposure modes listed
below. You can change the shutter mode setting while in any
of the record modes.
P Mode : Program AE
A Mode : Aperture priority AE
S Mode : Shutter speed priority AE
M Mode: Manual
Program AE
In the P Mode (program AE), shutter speed and aperture
settings are made automatically in accordance with the
brightness of the subject.
1.
Align the POWER/Function Switch with REC.
2.
Press MENU.
3.
Select “FUNCTION” “Exposure Mode”, and
then press SET/DISP.
4.
Select “P” (Program), and then press SET/
DISP.
5.
Press the shutter release button to record the
image.
E-79
Page 33

OTHER RECORDING FUNCTIONS
Aperture Priority AE
The A Mode (aperture priority AE) is the opposite of the S
Mode. It lets you specify an aperture setting and automatically adjusts shutter speed accordingly. A larger aperture
decreases depth of field, which is the zone of sharp focus in
a scene. Conversely, a smaller aperture increases depth of
field.
Large Aperture Small Aperture
• Note that a smaller number indicates a larger aperture, and
a larger number indicates a smaller aperture.
■ Aperture Settings
1.
Align the POWER/Function Switch with REC.
2.
Press MENU.
3.
Select “FUNCTION” “Exposure Mode”, and
then press SET/DISP.
4.
Select “A” (aperture priority), and then press
SET/DISP.
5.
Use [왔] and [왖] to select the aperture value you
want.
Aperture
Aperture
Larger Smaller
F2 • F2.3 • F2.8 • F4 • F5.6 • F8
E-80
To do this
Decrease aperture
Increase aperture
Press this button
[왖]
[왔]
Page 34

OTHER RECORDING FUNCTIONS
6.
Press the shutter release button to record the
image.
IMPORTANT!
• It is often difficult to obtain proper brightness when
shooting a subject that is very dark or very light. In
such a case, try different aperture settings to find the
one that produces the best results.
Shutter Speed Priority AE
The S Mode (shutter speed priority AE) lets you specify a
shutter speed and automatically adjusts aperture accordingly.
Slow (1/30)
■ Shutter Speed Settings
Fast (1/1000)
E-81
Shutter
Speed
1.
Align the POWER/Function Switch with REC.
2.
Press MENU.
BULB, 60 seconds to 1/1000 second
Slow Fast
Page 35

OTHER RECORDING FUNCTIONS
3.
Select “FUNCTION” “Exposure Mode”, and
then press SET/DISP.
4.
Select “S” (shutter speed priority), and then
press SET/DISP.
5.
Use [왔] and [왖] to specify the shutter speed.
Shutter
speed
To do this
Increase shutter speed
Decrease shutter speed
6.
Press the shutter release button to record the
Press this button
[왖]
[왔]
image.
IMPORTANT!
• It is often difficult to obtain proper brightness when
shooting a subject that is very dark or very light. In
such a case, try different shutter speed settings to find
the one that produces the best results.
• When shutter speed is set to “BULB”, exposure continues as long as you depress the shutter button. Because of this, use of the wired remote controller (option) is recommended whenever using the “BULB” setting.
• The self-timer is disabled while shutter speed is set to
“BULB”.
• The slowest shutter speed when “BULB” is selected is
60 seconds.
• Note that using a slower shutter speed increases the
chance of static being present in your image, and the
amount of static visible in an image is inversely proportional to the shutter speed.
• At shutter speeds of one second or slower, the camera automatically performs internal data processing
intended to limit image static, so the image record operation takes longer at slow shutter speeds. At shutter
speeds of one second or greater, doubling the shutter
speed setting tells you about how long it takes for an
image to be recorded. For example, image recording
with a shutter speed of one second takes about two
seconds.
E-82
Page 36

OTHER RECORDING FUNCTIONS
• A shutter speed slower than 1/8 second can cause the
brightness of the image on the monitor screen to be
different from the brightness of the image that is recorded. Slower speeds can also cause exposure of
the image to be outside the AE range, making it impossible to achieve a proper aperture setting.
Manual Exposure
The M Mode (manual) lets you make the shutter speed and
aperture settings you want.
• The shutter speed settings you can make are the same as
those for shutter speed priority AE (page E-81).
• The aperture settings you can make are the same as those
for aperture priority AE (page E-80).
1.
Align the POWER/Function Switch with REC.
2.
Press MENU.
3.
Select “FUNCTION” “Exposure Mode”, and
then press SET/DISP.
E-83
4.
Select “M” (manual), and then press SET/DISP.
5.
Use [왗] and [왘] to specify the shutter speed,
and use [왔] and [왖] to select the aperture value
you want.
Aperture
Shutter
Speed
To do this
Increase shutter speed
Decrease shutter speed
Decrease aperture
Increase aperture
Press this button
[왘]
[왗]
[왖]
[왔]
Page 37

OTHER RECORDING FUNCTIONS
6.
Press the shutter release button to record the
image.
IMPORTANT!
• A shutter speed slower than 1/8 second can cause the
brightness of the image on the monitor screen to be
different from the brightness of the image that is recorded.
Quick Exposure Mode Selection
You can also use the following procedure to change the exposure mode, without going through the menu.
1.
Align the POWER/Function Switch with REC.
2.
While holding down SHIFT, press to cycle
through the exposure mode icons on the monitor screen in the sequence shown below.
• (program AE) (aperture priority AE)
(shutter speed priority AE) (manual)
E-84
Page 38

OTHER RECORDING FUNCTIONS
Selecting the Metering Mode
Use the following procedure to specify multi metering, spot
metering, or center-weighted metering as the metering
mode.
1.
Align the POWER/Function Switch with REC.
2.
Press MENU.
3.
Select “FUNCTION” “Metering”, and then
press SET/DISP.
4.
Select the metering mode you want and then
press the SET/DISP.
Multi:
This mode takes readings across the
entire image, and provides balanced
exposure settings.
Center:
This mode takes readings at the center
of the image.
Spot:
This mode takes readings of a very
small part of the focus area. It is not affected by light around the outer periphery of the image, which means that exposure can be set according to the illumination of a particular subject.
E-85
Page 39

OTHER RECORDING FUNCTIONS
Quick Metering Mode Selection
You can also use the following procedure to change the metering mode, without going through the menu.
1.
Align the POWER/Function Switch with REC.
2.
While holding down SHIFT, press / /MF
RESIZE to cycle through the metering mode
icons on the monitor screen in the sequence
shown below.
• (multi) (center) (spot)
Setting the Sensitivity Level
Use the following procedure to specify the sensitivity level.
1.
Align the POWER/Function Switch with REC.
2.
Press MENU.
3.
Select “FUNCTION” “Sensitivity”, and then
press SET/DISP.
4.
Select the setting you want, and then press
SET/DISP.
If you want to set sensitivity at this level
ISO 100 equivalent
ISO 180 equivalent
ISO 300 equivalent
ISO 500 equivalent
E-86
Select this
ISO 100
ISO 180
ISO 300
ISO 500
Page 40

OTHER RECORDING FUNCTIONS
IMPORTANT!
• Higher sensitivity can increase the chance of noise in
the image.
• Higher sensitivity can make it difficult to obtain proper
focus using Auto Focus. It does not change the minimum brightness required for Auto Focus.
• Regardless of the setting you make here, a sensitivity
setting of ISO 100 is used automatically whenever you
shoot with flash and whenever the S Mode (shutter
speed priority AE) is selected.
Using the Filter Function
The camera’s filter function lets you filter the image with one
of a selection of different colors.
1.
Align the POWER/Function Switch with REC.
2.
Press MENU.
3.
Select “FUNCTION” “Filter”, and then press
SET/DISP.
4.
Select the setting you want, and then press
SET/DISP.
• Available filter settings are: Off, B/W, Sepia, Red,
Green, Blue, Yellow, Pink, Purple
NOTES
• The filter function produces the same effect as if a
piece of colored cellophane paper were held in front of
the lens of the camera. Color enhancement (page E-
90), on the other hand, alters the characteristics of the
image to enhance specific color components.
• If color enhancement (page E-90) and the filter function are both turned on at the same time, the filter
function is given priority (color enhancement is not
performed).
E-87
Page 41

OTHER RECORDING FUNCTIONS
Selecting White Balance
Selecting the right type of white balance can help to make
the colors of a subject appear most natural under the type of
lighting that is available.
1.
Align the POWER/Function Switch with REC.
2.
Press MENU.
3.
Select “FUNCTION” “White Balance”, and
then press SET/DISP.
4.
Select the type of white balance you want, and
then press SET/DISP.
To do this
Let the camera adjust white balance
automatically
Shoot outdoors
Shoot in shady conditions
Shoot under incandescent (light bulb)
lighting
Shoot under fluorescent lighting
Adjust white balance normally for a
particular light source
Select this
Auto
Daylight
Shade
Tungsten
Fluorescent
Manual
NOTE
• Use “Daylight” for shooting in the Night Scene Mode.
You can also use manual white balance if the “Daylight” setting does not produce the desired results.
Adjusting White Balance Manually
Under some light sources, automatic white balance under
the “Auto” setting can take a long time to complete. Also, the
auto white balance range (color temperature range) is limited. Manual white balance helps to ensure that colors are
recorded correctly for a particular light source.
Note that you must perform manual white balance under the
same conditions you will be shooting under. You must also
have a white piece of paper or other similar object on hand in
order to perform manual white balance.
1.
Align the POWER/Function Switch with REC.
2.
Press MENU.
3.
Select “FUNCTION” “White Balance”, and
then press SET/DISP.
4.
Select “Manual”, and then press SET/DISP.
E-88
Page 42

OTHER RECORDING FUNCTIONS
5.
Point the camera at a piece of white paper or
other similar object so it completely fills the
monitor screen, and then press SET/DISP.
• This performs white balance adjustment and returns
to the REC mode screen.
• Pressing without pressing SET/DISP first re-
stores the setting obtained the last time you performed manual white balance.
• Dark lighting or pointing the camera at a dark object
can cause manual white balance to take a very long
time to complete. Avoid such conditions when performing manual white balance adjustment.
NOTE
• Even if you turn off the camera or change its white
balance back to “Auto” or another white balance setting, the last value obtained by manual white balance
is retained in memory and restored the next time you
select “Manual” for the white balance. The last value
obtained by manual white balance is retained, regardless of the mode memory setting (page E-94).
Quick White Balance Selection
You can also use the following procedure to change the
white balance, without going through the menu.
1.
Align the POWER/Function Switch with REC.
2.
While holding down SHIFT, press to cycle
through the white balance icons on the monitor screen in the sequence noted below.
• (Auto) (Daylight) (Shade)
(Tungsten) (Fluorescent) (Manual)
• For manual white balance, display the icon,
point the camera at a white piece of paper, hold down
SHIFT, and press the shutter release button.
E-89
Page 43

OTHER RECORDING FUNCTIONS
Enhancing Certain Colors
Use the following procedure when you want to enhance a
particular color in your recorded image.
1.
Align the POWER/Function Switch with REC.
2.
Press MENU.
3.
Select “FUNCTION” “Enhancement”, and
then press SET/DISP.
4.
Select the setting you want, and then press
SET/DISP.
To do this
Turn off color enhancement
Enhance reds
Enhance greens
Enhance blues
Enhance flesh tones
Select this
Off
Red
Green
Blue
Flesh Tones
NOTES
• The filter function (page E-87) produces the same effect as if a piece of colored cellophane paper were
held in front of the lens of the camera. Color enhancement, on the other hand, alters the characteristics of
the image to enhance specific color components.
• If color enhancement and the filter function (page E-
87) are both turned on at the same time, the filter function is given priority (color enhancement is not performed).
E-90
Page 44

OTHER RECORDING FUNCTIONS
Turning the On-screen Grid On and Off
You can display gridlines on the monitor screen to help you
compose your images before recording them.
1.
Align the POWER/Function Switch with REC.
2.
Press MENU.
3.
Select “FUNCTION” “Grid”, and then press
SET/DISP.
4.
Select the setting you want, and then press
SET/DISP.
To do this
Turn the grid off
Turn the grid on
Select this
Off
On
E-91
Page 45

OTHER RECORDING FUNCTIONS
Specifying Outline Sharpness
Use the following procedure to control the sharpness of image outlines.
1.
Align the POWER/Function Switch with REC.
2.
Press MENU.
3.
Select “FUNCTION” “Sharpness”, and then
press SET/DISP.
4.
Select the setting you want, and then press
SET/DISP.
To do this
Make outlines sharp
Leave outlines as they are
Make outlines soft
Select this
Hard
Normal
Soft
Specifying Color Saturation
Use the following procedure to control the saturation of image colors.
1.
Align the POWER/Function Switch with REC.
2.
Press MENU.
3.
Select “FUNCTION” “Saturation”, and then
press SET/DISP.
4.
Select the setting you want, and then press
SET/DISP.
To do this
Make colors more intense
Leave colors as they are
Make colors less intense
Select this
Normal
E-92
High
Low
Page 46

OTHER RECORDING FUNCTIONS
Specifying Contrast
Use the following procedure to control the difference between the light areas and dark areas of the image.
1.
Align the POWER/Function Switch with REC.
2.
Press MENU.
3.
Select “FUNCTION” “Contrast”, and then
press SET/DISP.
4.
Select the setting you want, and then press
SET/DISP.
To do this
Increase contrast
Leave contrast as it is
Decrease contrast
NOTE
• The contrast setting you make is not used in the Night
Scene Mode.
Select this
High
Normal
Low
Saving Uncompressed Images (TIFF Mode)
Normally, the camera stores images in JPEG format only.
The TIFF Mode stores two versions of the same image: a
JPEG (compressed) version and a TIFF (uncompressed)
version. Compressing an image causes a slight loss of image quality, while saving an image in TIFF format retains all
the quality of the image you record.
1.
Align the POWER/Function Switch with REC.
2.
Press MENU.
3.
Select "FUNCTION" "TIFF mode", and then
press SET/DISP.
4.
Select the setting you want, and then press
SET/DISP.
To do this
Store images in JPEG (compressed) format only
Save both JPEG (compressed)
and TIFF (uncompressed) versions of images
Select this
E-93
Off
On
Page 47

OTHER RECORDING FUNCTIONS
IMPORTANT!
• The TIFF format image save operation takes more
time than the JPEG format save operation.
• Turning on the TIFF Mode causes both JPEG and
TIFF versions of the image to be saved. This causes
image files to be very large, and greatly reduces storage capacity (page E-64).
● TIFF Format File Sizes
Format
TIFF
• Deleting the JPEG version of an image saved using
the TIFF Mode also causes the TIFF version to be deleted.
• You cannot delete the TIFF version of an image alone.
To delete the TIFF version, you must also delete the
JPEG version.
• TIFF images cannot be transferred to a computer using the Photo Loader application (page E-129) that
comes bundled with the camera.
• The Continuous Shutter Mode is disabled while the
TIFF Mode is turned on (page E-68).
Image size (pixels)
2048 x 1536
1024 x 768
File size
9MB
2.3MB
Specifying Power On Default Settings
Configuring the camera’s “mode memory” controls power on
default settings. Turning a mode memory item on specifies
that the setting of the item when the camera is turned off
should be restored when the camera is turned back on
again. Turning a mode memory item off specifies that its factory default setting should be used whenever the camera is
turned on.
1.
Align the POWER/Function Switch with REC.
2.
Press MENU.
3.
Select “FUNCTION” “Mode Memory”, and
then press SET/DISP.
4.
Select the item whose mode memory status
you want to change, and then press SET/DISP.
5.
Select the setting you want, and then press
SET/DISP.
E-94
Page 48

OTHER RECORDING FUNCTIONS
To do this when the camera is turned on
Restore the item’s last setting when
power was turned off
Restore the item’s factory default setting
■ Mode Memory Items and Settings
Memory Mode Status
On
Setting at power off.
Recording Mode
Continuous
TIFF Mode
Sensitivity
Exposure Mode
Metering
White Balance
Flash
Focus
Digital Zoom
Flash Intensity
6.
Press .
Item
Select this
On
Off (default)
Off
Normal
Normal
Normal
ISO 100
P (Program AE)
Multi
Auto
Auto
Auto
Auto
Normal
Resetting the Camera
Use the following procedure to reset all of the camera’s settings to their initial defaults as shown under “Camera Menus”
on page E-140.
1.
Align the POWER/Function Switch with REC or
PLAY.
2.
Press MENU.
3.
Select “Restore” using one of the following
two key operations, and then press SET/DISP.
If you are here
REC mode
PLAY mode
4.
In response to the confirmation message that
Select this on the menu screen
“FUNCTION” “SET UP” “Restore”
“SET UP” “Restore”
appears, use [왔] and [왖] to select “Yes” to reset or “No” to exit, and then press SET/DISP.
E-95
Page 49

OTHER RECORDING FUNCTIONS
Using the Camera’s Shortcut Features
The shortcut features of the
camera help to make it quicker
and easier to obtain the REC
mode setup you want. There
are three shortcut procedures
that you can use.
■ Changing specific REC mode FUNCTION menu set-
tings using the shortcut buttons
The shortcut buttons are the three buttons to the right of
the viewfinder. You can cycle through REC mode FUNCTION menu settings by holding down SHIFT and pressing
the shortcut buttons. See page E-97.
■ Direct access to the FUNCTION menu
This shortcut lets you display the FUNCTION menu with
the press of a button. See page E-99.
■ Cycling through settings on the FUNCTION menu
This shortcut lets you cycle through the settings of the currently selected FUNCTION menu item, without advancing
to the item’s setting screen.
RESIZE
Shortcut buttons
BEST SHOT
MF//
Changing REC mode FUNCTION Menu Settings Using the Shortcut Buttons
Changing REC mode FUNCTION Menu settings is normally
a multi-step process: Press MENU, use [왘], [왗], [왔] and [왖]
to select “FUNCTION”, press SET/DISP, use [왔] and [왖] to
select the item, and then use [왘] and [왗] to change the setting. The shortcut buttons let you change the settings of specific REC mode FUNCTION menu items without displaying
the FUNCTION menu.
To change settings using the shortcut buttons
1.
Align the POWER/Function Switch with REC.
2.
Hold down SHIFT.
• This causes icons that identify the FUNCTION menu
items assigned to the shortcut buttons to appear on
the monitor screen above each button.
E-96
Page 50

OTHER RECORDING FUNCTIONS
3.
While holding down SHIFT, press one of the
shortcut buttons to cycle through the settings
of the item assigned to the button. The current
setting of each button is indicated by an icon
above the button.
Button
/ /MF
RESIZE
REC mode
FUNCTION
Menu Item
Exposure
Mode
(page E-79)
Metering
(page E-85)
White
Balance
(page E-88)
Icon Setting
Program AE
Aperture Priority AE
Shutter Speed
Priority AE
Manual
Multi
Center
Spot
Auto
Daylight
Shade
Tungsten
Fluorescent
Manual
To assign REC mode FUNCTION menu items to shortcut buttons
1.
Align the POWER/Function Switch with REC.
2.
Press MENU.
3.
Use [왘], [왗 ], [왔] and [왖] to select “FUNCTION”, and then press SET/DISP.
4.
Use [왔] and [왖] to select the item you want to
assign to a shortcut button and then press
SET/DISP to display its setting screen.
E-97
Page 51

OTHER RECORDING FUNCTIONS
• The following example shows the filter setting screen.
• You can assign any of the items marked with “쑗” in
the table under “Camera Menus” on page E-140 to a
shortcut button.
5.
While holding down SHIFT, press the shortcut
button to which you want to assign the item
you selected in step 4.
• This assigns the item and returns to the REC mode
screen.
• You can assign only one menu item to each of the
three shortcut buttons.
E-98
• Assigning a menu item to a shortcut button changes
the icon that appears above the button when SHIFT is
pressed in the REC mode as shown below.
Button
/ /MF
RESIZE
Default Setting
Icon
Icon After
Assignment
SET 1
SET 2
SET 3
• Repeat the above procedure when you want to restore
the default shortcut button assignments. You need to
assign the following items to the shortcut buttons indicated to restore the default assignments.
Button
/ /MF
RESIZE
Assigned Item (Default)
Exposure Mode
Metering
White Balance
• Default shortcut button assignments are also restored
automatically by a Camera Reset (page E-95).
Page 52

OTHER RECORDING FUNCTIONS
3.
Directly Accessing the REC mode FUNCTION Menu
When in the REC mode, you can hold down SHIFT and
press MENU to display the FUNCTION menu.
Cycling through REC mode FUNCTION Menu
Use [왘] and [왗] to cycle through the settings of
the currently selected item.
4.
Repeat steps 2 and 3 for other items.
5.
When everything is the way you want, press
Settings
You can use this shortcut to cycle through the settings of
REC mode FUNCTION menu items without displaying the
setting screen for the item.
1.
Align the POWER/Function Switch with REC.
2.
Display the FUNCTION menu and then use [왖]
and [왔] to select the item whose setting you
want to change.
to exit the FUNCTION menu.
E-99
 Loading...