


Data Communications Chapter 9
Chapter
Data Communications
This chapter tells you everything you need to know to transfer programs between the fx-7400G PLUS and certain CASIO Graphic Scientific Calculator models connected with an optionally available SB62 cable. To transfer data between a unit and a personal computer,
you will need to purchase the separately available CASIO Interface
Unit.
This chapter also contains information on how to use the optional
SB-62 cable to connect to a CASIO Label Printer to transfer screen
data for printing.
1. Connecting Two Units
2. Connecting the Unit with a Personal Computer
3. Connecting the Unit with a CASIO Label Printer
4. Before Performing a Data Communication Operation
5. Performing a Data Transfer Operation
6. Screen Send Function
7. Data Communications Precautions
9
163
Chapter 9 Data Communications
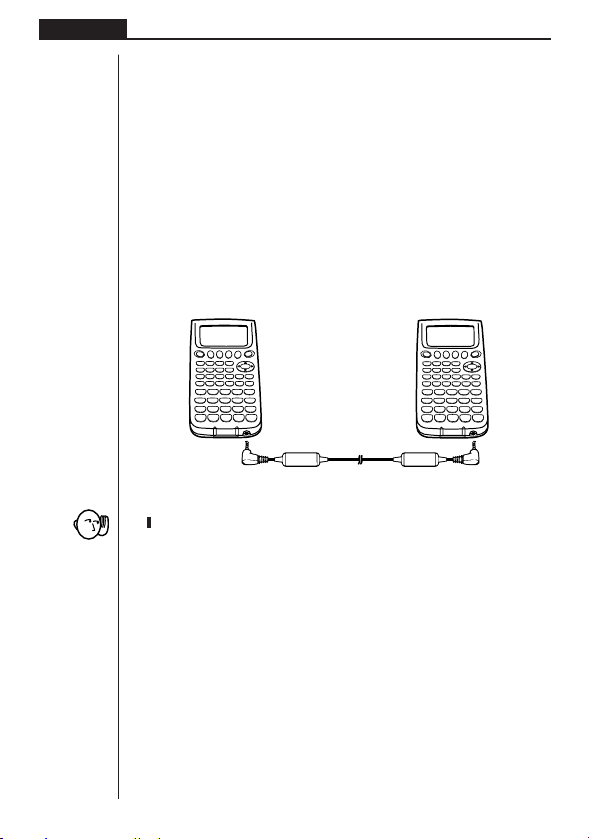
1. Connecting Two Units
The following procedure describes how to connect two units with an optional SB-62
connecting cable for transfer of programs between them.
uu
uTo connect two units
uu
1. Check to make sure that the power of both units is off.
2. Remove the covers from the connectors of the two units.
•Be sure you keep the connector covers in a safe place so you can replace them
after you finish your data communications.
3. Connect the two units using the SB-62 cable.
•Keep the connectors covered when you are not using them.
SB-62 cable
164
Data Communications Chapter 9
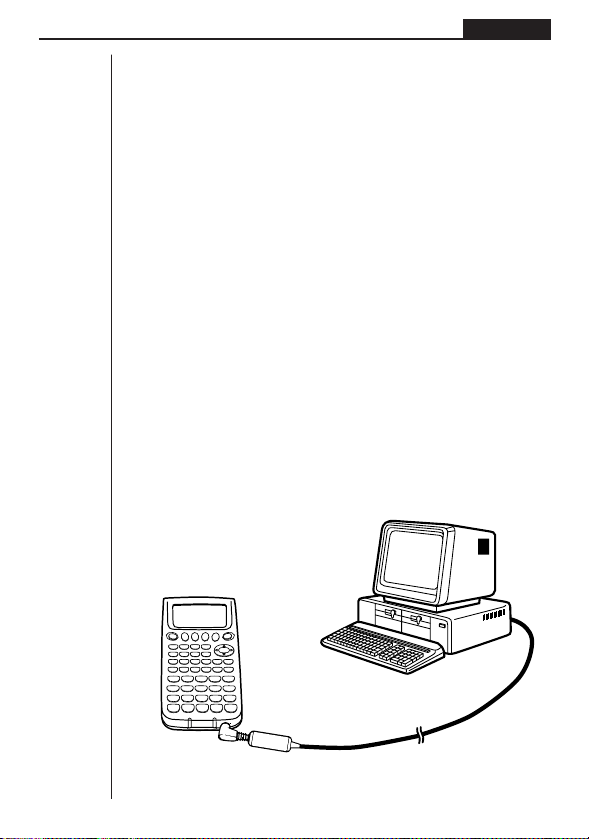
2. Connecting the Unit with a
Personal Computer
To transfer data between the unit and a personal computer, you must connect them
through a separately available CASIO Interface Unit.
For details on operation, the types of computer that can be connected, and hardware
limitations, see the user’s guide that comes with the Interface Unit.
Some types of data may not be able to be exchanged with a personal computer.
uu
uTo connect the unit with a personal computer
uu
1. Check to make sure that the power of the unit and the personal computer is off.
2. Connect the personal computer to the Interface Unit.
3. Remove the cover from the connector of the unit.
•Be sure you keep the connector cover in a safe place so you can replace it after
you finish your data communications.
4. Connect the unit to the Interface Unit.
5. Turn on the power of the unit, followed by the personal computer.
•After you finish data communications, turn off power in the sequence: the unit
first, and then the personal computer. Finally, disconnect the equipment.
165
Chapter 9 Data Communications
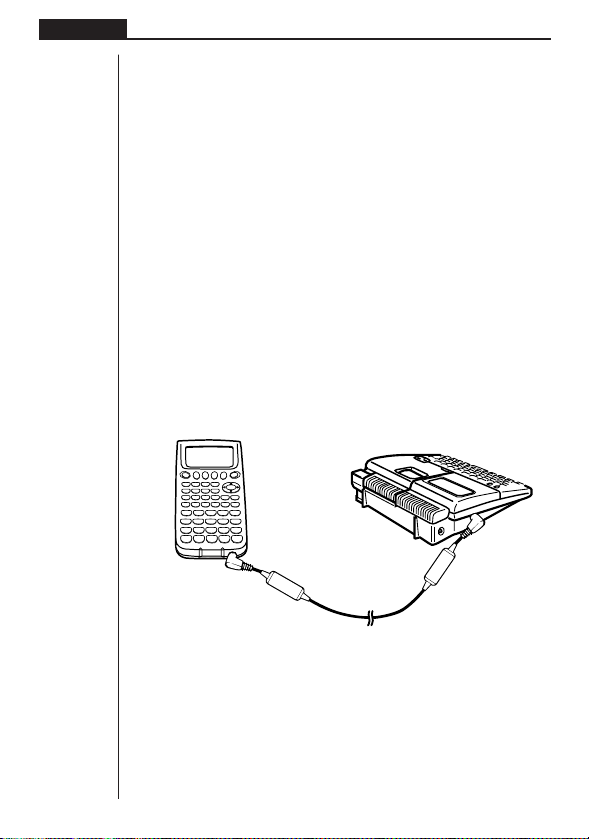
3. Connecting the Unit with a CASIO
Label Printer
After you connect the unit to a CASIO Label Printer with an optional SB-62 cable,
you can use the Label Printer to print screen shot data from the unit. See the user’s
guide that comes with your Label Printer for details on how to perform this operation.
• The operation described above can be performed using the following Label Printer
models: KL-2000, KL-2700, KL-8200, KL-8700 (as of February 2002).
uu
uTo connect the unit with a Label Printer
uu
1. Check to make sure that the power of the unit and the Label Printer is off.
2. Connect the optional SB-62 cable to the Label Printer.
3. Remove the cover from the connector of the unit.
•Be sure you keep the connector cover in a safe place so you can replace it after
you finish your data communications.
4. Connect the other end of the SB-62 cable to the unit.
5. Turn on the power of the unit, followed by the Label Printer.
Label Printer
166
SB-62 cable
•After you finish data communications, turn off power in the sequence: the unit
first, and then the Label Printer. Finally, disconnect the equipment.

P. 172
Data Communications Chapter 9
4. Before Performing a Data
Communication Operation
In the Main Menu, select the LINK icon and enter the LINK Mode. The following data
communication main menu appears on the display.
12 4
Image Set: ........... Indicates the status of the graphic image send features.
1 (TRAN) ..... Menu of send settings
2 (RECV) ..... Menu of receive settings
4 (IMGE) ...... Menu of graphic image transfer settings
Communication parameters are fixed at the following settings.
•Speed (BPS): 9600 bits per second
• Parity (PARITY): NONE
Off: Graphic images not sent.
On: Pressing M sends graphic images.
167

Chapter 9 Data Communications
5. Performing a Data Transfer Operation
Connect the two units and then perform the following procedures.
Receiving unit
To set up the calculator to receive data, press 2 (RECV) while the data communi-
cation main menu is displayed.
2(RECV)
The calculator enters a data receive standby mode and waits for data to arrive. Actual data receive starts as soon as data is sent from the sending unit.
Sending unit
To set up the calculator to send data, press 1 (TRAN) while the data communica-
tion main menu is displayed.
1 (TRAN)
Press the function key that corresponds to the type of data you want to send.
1 (SEL) ........ Selects data items and sends them
4 (BACK) ..... All memory contents, including mode settings
uu
uTo send selected data items
uu
Press 1 (SEL) to display a data item selection screen.
1(SEL)
1 2 4
168
Data items
1 2 4

Data Communications Chapter 9
1 (SEL) ........ Selects data item where cursor is located.
4 (TRAN) ..... Sends selected data items.
Use the f and c cursor keys to move the cursor to the data item you want to
select and press 1 (SEL) to select it. Currently selected data items are marked
with “'”. Pressing 4 (TRAN) sends all the selected data items.
•To deselect a data item, move the cursor to it and press 1 (SEL) again.
Only items that contain data appear on the data item selection screen. If there are
too many data items to fit on a single screen, the list scrolls when you move the
cursor to the bottom line of the items on the screen.
The following types of data items can be sent.
Data Item Contents
Program Program contents Yes Yes
List n List memory (1 to 6) contents Yes
Y=Data
V-WinView Window memory contents No
Variable Variable assignments No
1
No overwrite check: If the receiving unit already contains the same type of data, the existing
*
data is overwritten with the new data.
With overwrite check: If the receiving unit already contains the same type of data, a message appears to ask if the existing data should be overwritten with the new data.
Graph expressions, graph write/
non-write status, View Window No
contents, zoom factors
Overwrite Password
Check*1Check*
2
169

Chapter 9 Data Communications
1 (YES) ........ Replaces the receiving unit’s existing data with the new data.
4 (NO) ......... Skips to next data item.
2
With password check: If a file is password protected, a message appears asking
*
for input of the password.
Name of password protected file
Password input field
Data item name
1 2 4
170
4 (SYBL)...... Symbol input
After inputting the password, press w.
uu
uTo execute a send operation
uu
After selecting the data items to send, press 4 (TRAN). A message appears to
confirm that you want to execute the send operation.
4(TRAN)
1 (YES) ........ Sends data.
4 (NO) ......... Returns to data selection screen.
12 4
1 2 4

Data Communications Chapter 9
Press 1 (YES) to send the data.
1(YES)
•You can interrupt a data operation at any time by pressing A.
The following shows what the displays of the sending and receiving units look like
after the data communication operation is complete.
Sending Unit Receiving Unit
Press A to return to the data communication main menu.
uu
uTo send backup data
uu
This operation allows you to send all memory contents, including mode settings.
While the send data type selection menu is on the screen, press 4 (BACK), and
the back up send menu shown below appears.
4(BACK)
Press 4 (TRAN) to start the send operation.
4(TRAN)
The following shows what the displays of the sending and receiving units look like
after the data communication operation is complete.
12 4
171

Chapter 9 Data Communications
Sending Unit Receiving Unit
Press A to return to the data communication main menu.
•Data can become corrupted, necessitating a RESET of the receiving unit, should
the connecting cable become disconnected during data transfer. Make sure
that the cable is securely connected to both units before performing any data
communication operation.
6. Screen Send Function
The following procedure sends a bit mapped screen shot of the display to a connected computer.
uu
uTo send the screen
uu
P. 165
P. 167
1. Connect the unit to a personal computer or to a CASIO Label Printer.
2. In the data communication main menu, press 4 (IMGE), and the following dis-
play appears.
4(IMGE)
172
1(Off) ........... Graphic images not sent
2(On) ........... Bitmap
3. Display the screen you want to send.
4. Set up the personal computer or Label Printer to receive data. When the other
unit is ready to receive, press M to start the send operation.
12 4

Data Communications Chapter 9
You cannot send the following types of screens to a computer.
• The screen that appears while a data communication operation is in progress.
•A screen that appears while a calculation is in progress.
• The screen that appears following the reset operation.
• The low battery message.
• The flashing cursor is not included in the screen image that is sent from the
unit.
• If you send a screen shot of any of the screens that appear during the data
send operation, you will not be able to then use the sent screen to proceed with
the data send operation. You must exit the data send operation that produced
the screen you sent and restart the send operation before you can send additional data.
•You cannot use 6mm wide tape to print a screen shot of a graph.
7. Data Communications Precautions
Note the following precautions whenever you perform data communications.
•An error occurs whenever you try to send data to a receiving unit that is not yet
standing by to receive data. When this happens, press A to clear the error and
try again, after setting up the receiving unit to receive data.
•An error occurs whenever the receiving unit does not receive any data approxi-
mately six minutes after it is set up to receive data. When this happens, press A
to clear the error.
•An error occurs during data communications if the cable becomes disconnected,
the parameters of the two units do not match, or if any other communications
problem occurs. When this happens, press A to clear the error, then correct the
problem before trying data communications again. If data communications are
interrupted by the A key operation or an error, any data successfully received
up to the interruption will be in the memory of the receiving unit.
•An error occurs if the receiving unit memory becomes full during data communications. When this happens, press A to clear the error and delete unneeded
data from the receiving unit to make room for the new data, and then try again.
•To send picture (graph) memory data, the receiving unit need 1-kbytes of memory
for use as a work area in addition to the data being received.
173

Chapter 9 Data Communications
174
 Loading...