

Page 1
fx-7400G (ZX-930A)
(without price)
INDEX
MAR. 1996
fx-7400G
R
Page 2

CONTENTS
1. SCHEMATIC DIAGRAMS ..................................................................................1
2. SPECIFICATIONS............................................................................................. 3
3. REPLACING BATTERIES..................................................................................4
4. RESET OPERATION..........................................................................................6
5. ERROR MESSAGE ............................................................................................8
6. OPERATION CHECK .......................................................................................10
7. EXPLODED VIEW ............................................................................................12
8. PARTS LIST .....................................................................................................13
Page 3
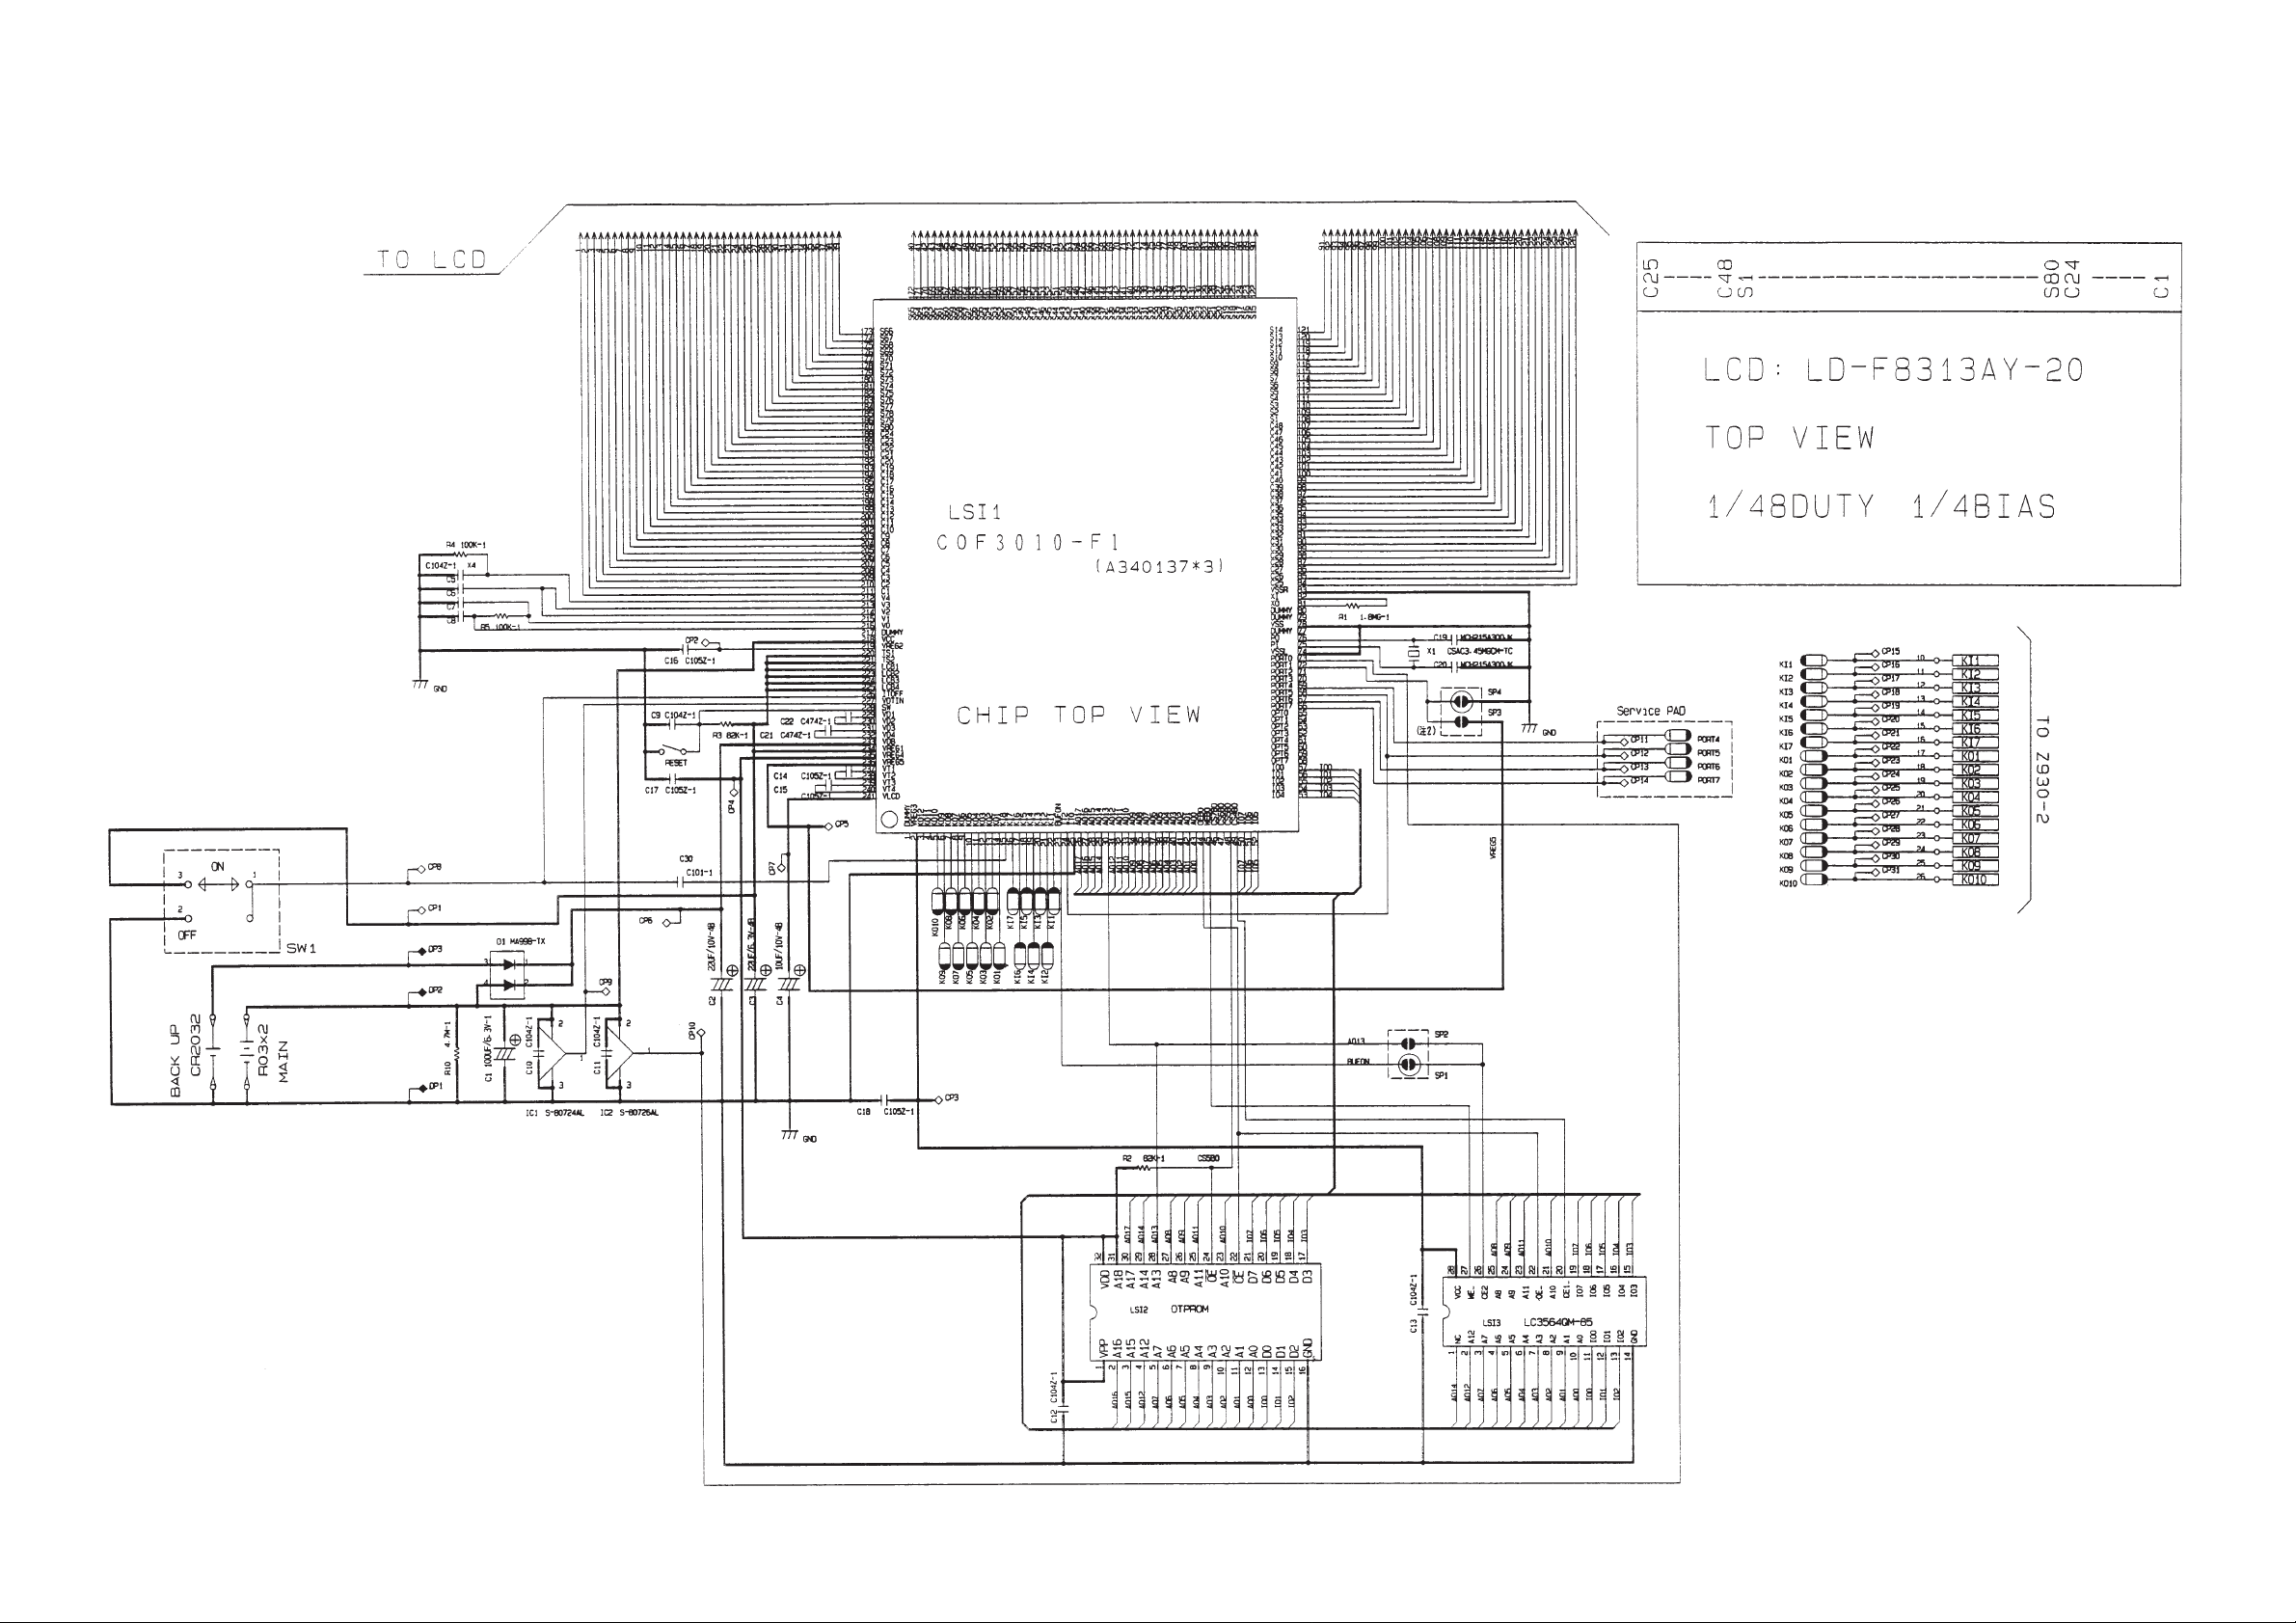
1. SCHEMATIC DIAGRAMS
— 1 —
Page 4
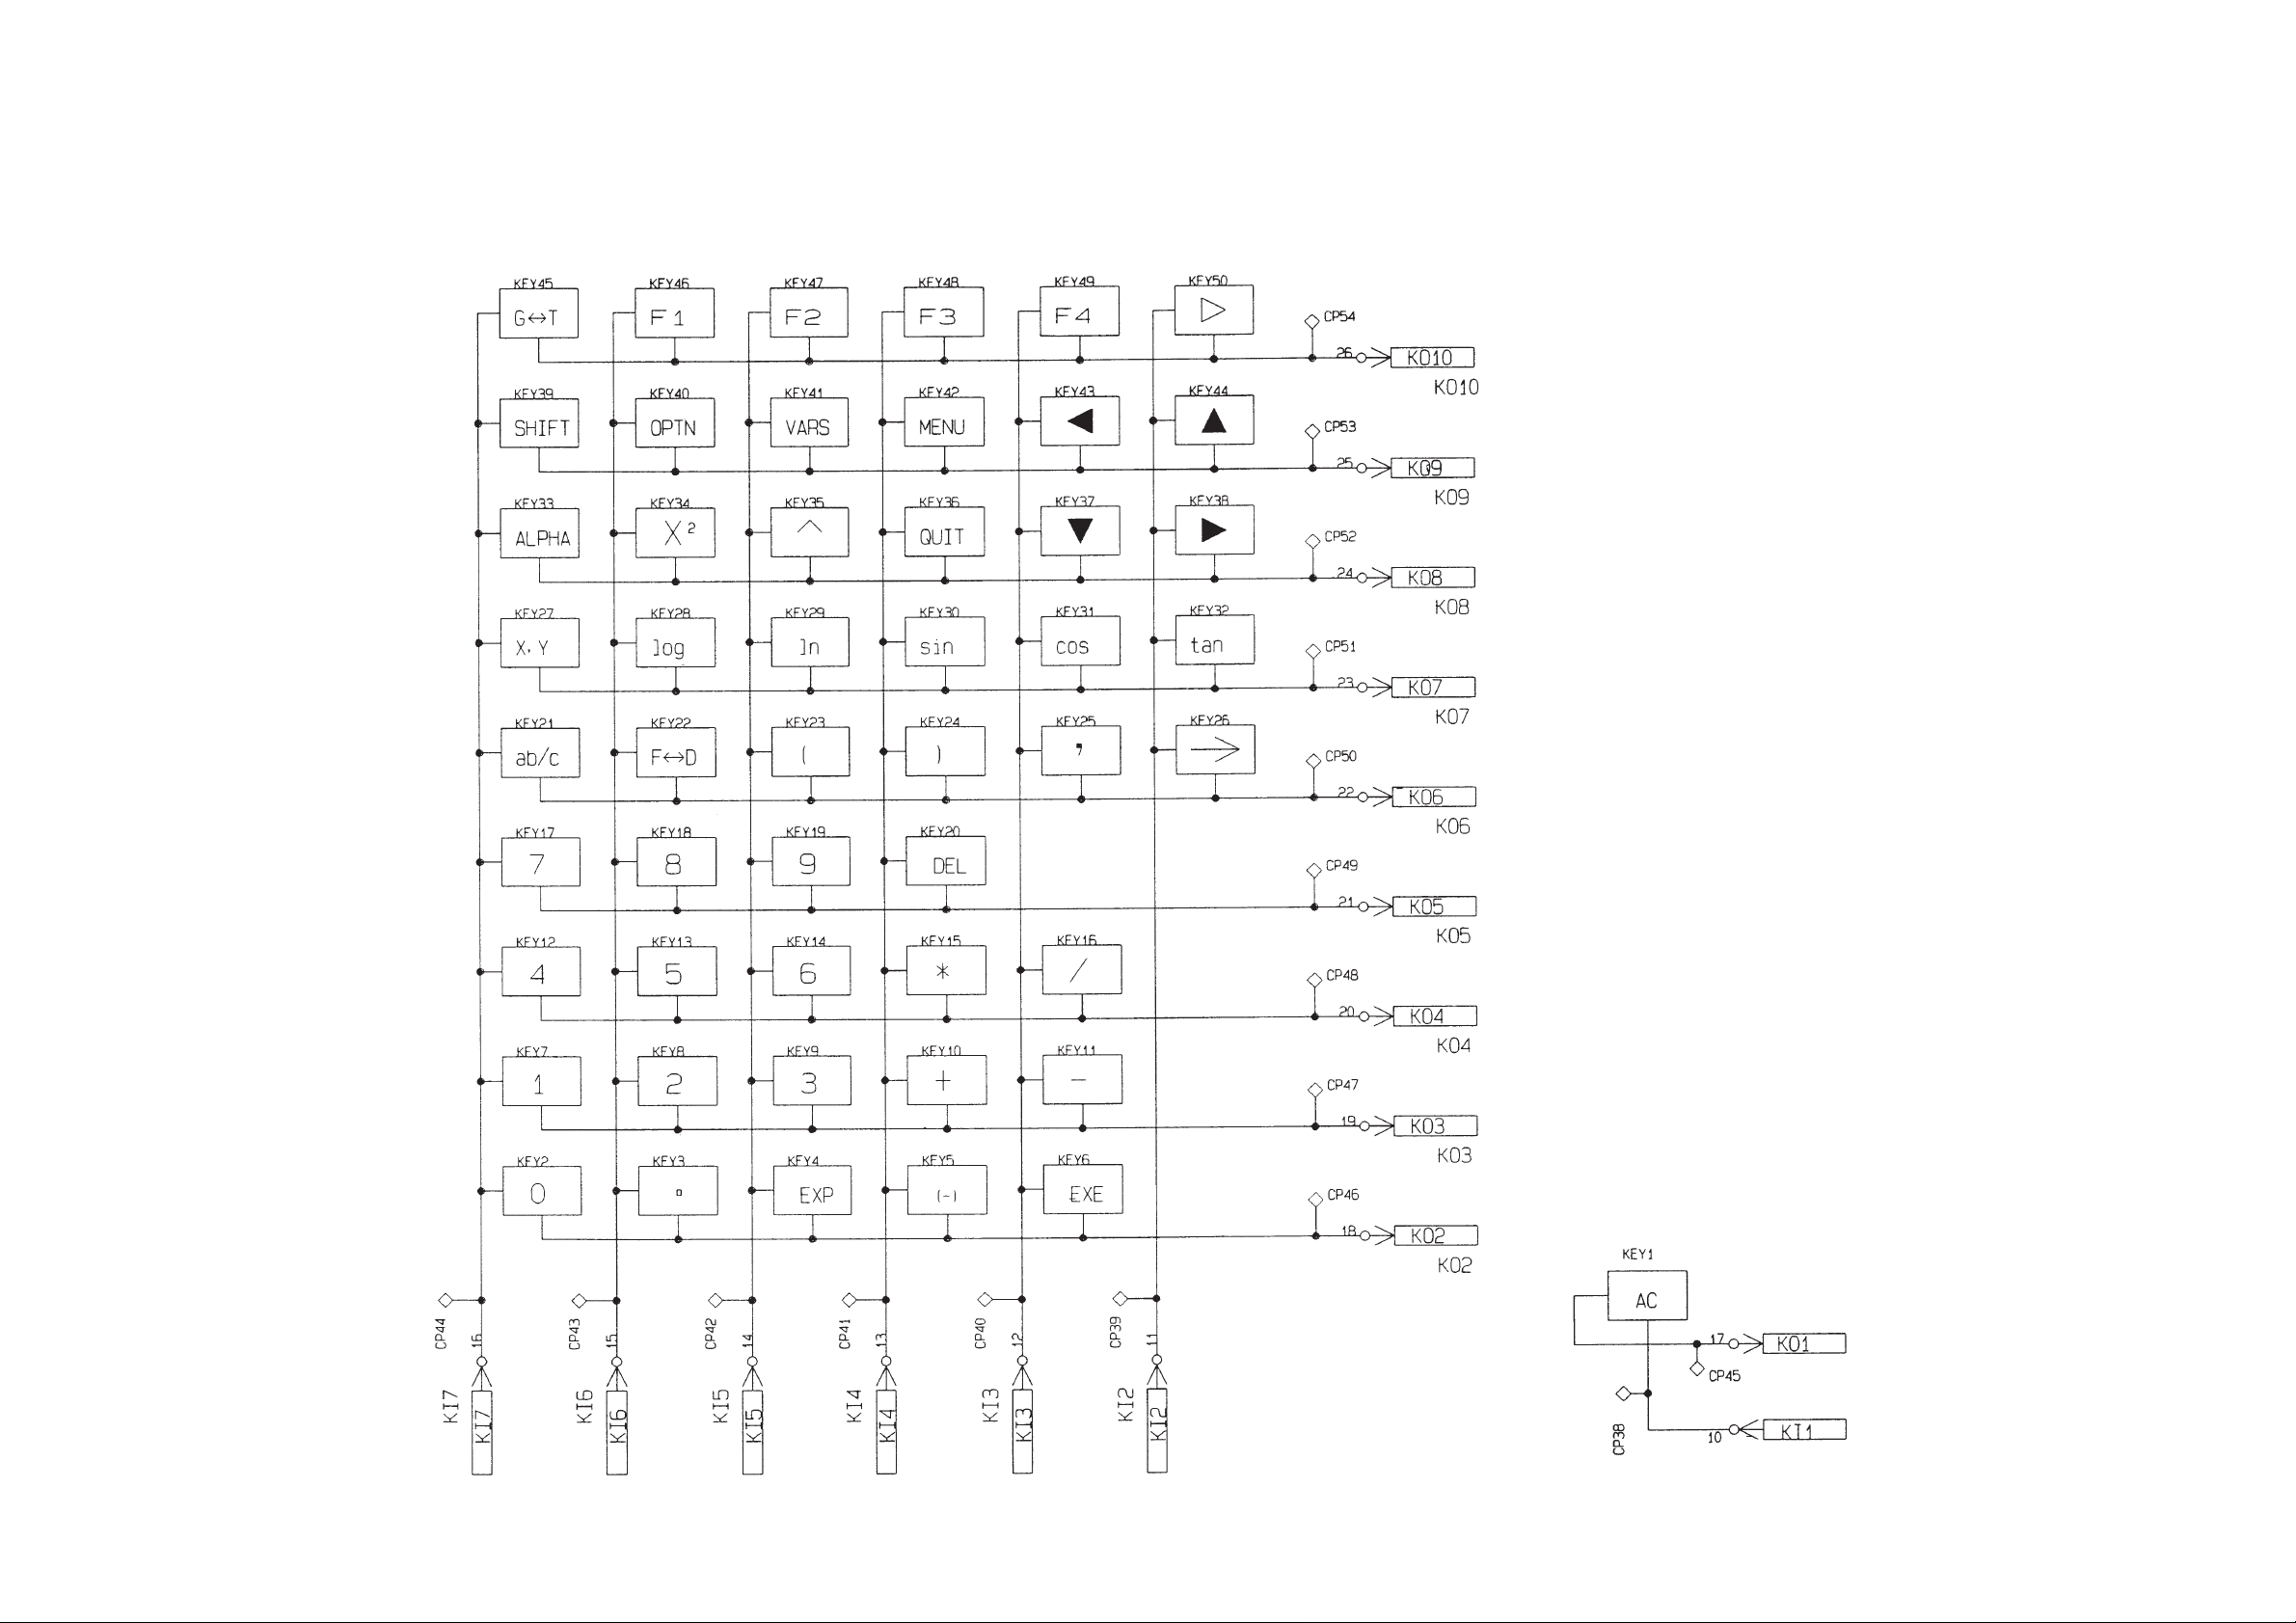
— 2 —
Page 5
2. SPECIFICATIONS
Display system: 13-character × 6-line display; 10-digit mantissa and 9-digit mantissa and 2-
digit exponent when using exponential format for calculations; displays
sexagesimal, fraction values
Power supply: Main: Two AAA-size batteries (LR03 (AM4) or R03 (UM-4))
Back-up: One CR2032 lithium battery
Power consumption: 0.05 W
Battery life*: LR03 (AM4): Approximately 2,000 hours (continuous display of main menu)
Approximately 2 years (power off)
R03 (UM-4): Approximately 1,000 hours (continuous display of main menu)
Approximately 2 years (poweroff)
Back-up: Approximately 2 years
* The batteries that have been installed in this unit when user purchased
it had been used in the factory test, so it will be impossible to fully satisfy
this specifications when these batteries are used.
Auto power off: Power is automatically turned off approximately six minutes after last
operation.
Ambient temperature range: 0°C ~ 40°C (32°F ~ 104°F)
Dimensions: 18.9 mm (H) × 77 mm (W) × 158 mm (D) (3/4" (H) × 3" (W) × 61/4" (D))
Weight: 130 g (4.6 oz) including batteries
Accessories: Hard case
Current Consumption:
TYP [µA] MAX [µA]
ON (MENU) 317.4 425.7
OFF 15.4
— 3 —
Page 6

3. REPLACING BATTERIES
AC/
ON
MENU
• To replace the main power supply batteries
SHIFT
1 Press
2 Push the battery compartment cover on the back of the calculator
in the direction noted in the illustration and remove it.
3 Remove the two old batteries.
4 Load a new set of two batteries, making sure that their positive +
and negative - ends are facing in the proper directions.
OFF
to turn the calculator off.
5 Replace the battery compartment cover and press
to turn
power on. The memory back-up battery provides power to the
memory while the main batteries are removed, so memory data
is not lost .
ON
• Power will not switch on if you press
AC/
while the main power
supply battery compartment cover is open.
• Do not leave the unit without main power supply batteries loaded
for long periods. Doing so can cause deletion of data stored in
memory.
• If the figures on the display appear too light and hard to see after
you turn on power, adjust the contrast using the following
procedure.
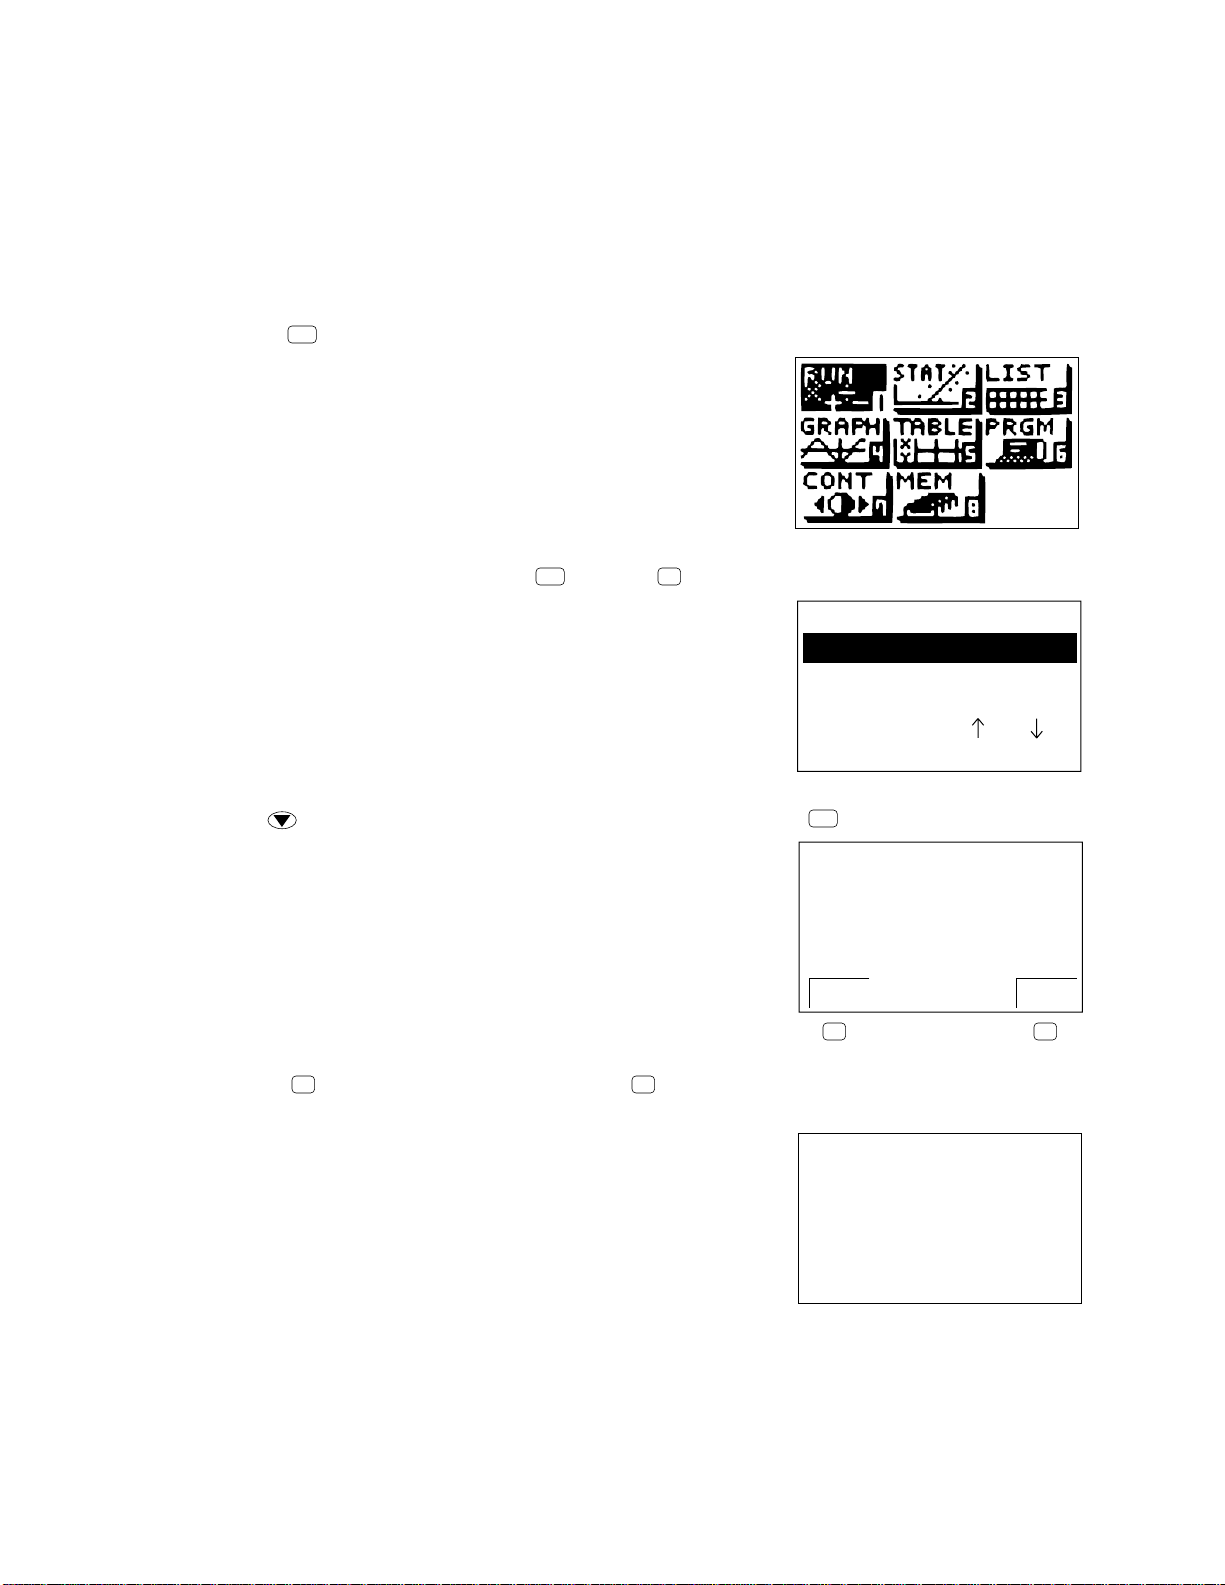
1. Press
2. Use the cursor keys ( , , , ) to select the CONT icon and press
MENU
.
EXE
or simply
press7to display the contrast adjustment screen.
3. Press to make the figure on the screen lighter or to make them darker.
4. After getting the contrast the way you want it, press
to return to the main menu.
REMARK
* Never remove the main power supply and the memory back up batteries from the unit at the same time.
* Be sure to switch the unit off before replacing batteries. Replacing batteries with power on will cause
data in memory to be deleted.
* Never replace the main power supply battery compartment cover or turn the calculator on while the
main power supply batteries are removed from the calculator or not loaded correctly. Doing so can
cause memory data to be deleted and malfunction of the calculator. If mishandling of batteries causes
such problems, correctly load batteries and then perform the RESET operation to resume normal
operation.
* Be sure to replace all two batteries with new ones.
— 4 —
Page 7

• To replace the memory back up battery
SHIFT
1 Press
2 Push the battery compartment cover on the
back of the calculator in the direction noted in
the illustration and remove it.
3 Remove screw D on the back of the calculator,
and remove the back up battery holder.
4 Remove the old battery.
5 Wipe off the surfaces of a new battery with a
soft, dry cloth. Load it into the calculator so that
its positive + side is facing up.
6 Pressing down on the battery with the battery
holder, replace the screw that secures the
holder in place.
OFF
to turn the calculator off.
D
7 Replace the battery compartment cover and
press
to turn power on. The main battery
ON
AC/
provides power to the memory while the backup batteries are removed, so memory data is
not lost.
REMARK
* Before replacing the memory back up battery, turn on the unit and check to see if the "Low battery!"
message appears on the display. If it does, replace the main power supply batteries before replacing
the back up power supply battery.
* Never remove the main power supply and the memory back up batteries from the unit at the same time.
* Be sure to switch the unit off before replacing batteries. Replacing batteries with power on will cause
data in memory to be deleted.
* Be sure to replace the back up power supply battery at least once 2 years, regardless of how much
you use the unit during that time. Failure to do so can cause data in memory to be deleted.
Important
Data stored in memory can be corrupted or lost if battery power drops below a certain level. When this
happens, you must perform the RESET operation to restore normal operarion. Note that the RESET
operation clears all data from memory. Because of this, you should be sure to keep written copies of
all important data to avoid losing it due to low battery power.
— 5 —
Page 8
4.RESET OPERATION
Warning!
The procedure described here clears all memory contents. Never perform this operation unless you
want to totally clear the memory of the calculator. If you need the data currently stored in memory, be
sure to write it down somewhere before performing the RESET operation.
•To reset the calculator
1Press
MENU
to display the Main menu.
2Highlight the MEM icon and press
EXE
, or press8.
3Use to move the highlighting down to "Reset" and then press
4Press
F1
(YES) to reset the calculator or
F4
(NO) to abort the operation without resetting
anything.
Memory
Memory Usage
Reset
Select
Set
EXE
.
::[ ] [ ]
[ EXE ]
✽ ✽ ✽ ✽ ✽ ✽ ✽ ✽ ✽ ✽ ✽ ✽ ✽
✽ ✽
R E S E T
✽ ✽ ✽ ✽ ✽ ✽ ✽ ✽ ✽ ✽ ✽ ✽ ✽
R E S E T
A L L M E M O R I E S ?
Y E S NO
RESET ALL
✽ ✽ ✽ ✽ ✽ ✽ ✽ ✽ ✽ ✽ ✽ ✽ ✽
R E S E T
F4F1
— 6 —
A L L M E M O R I E S !
✽ ✽ ✽ ✽ ✽ ✽ ✽ ✽ ✽ ✽ ✽ ✽ ✽
Page 9
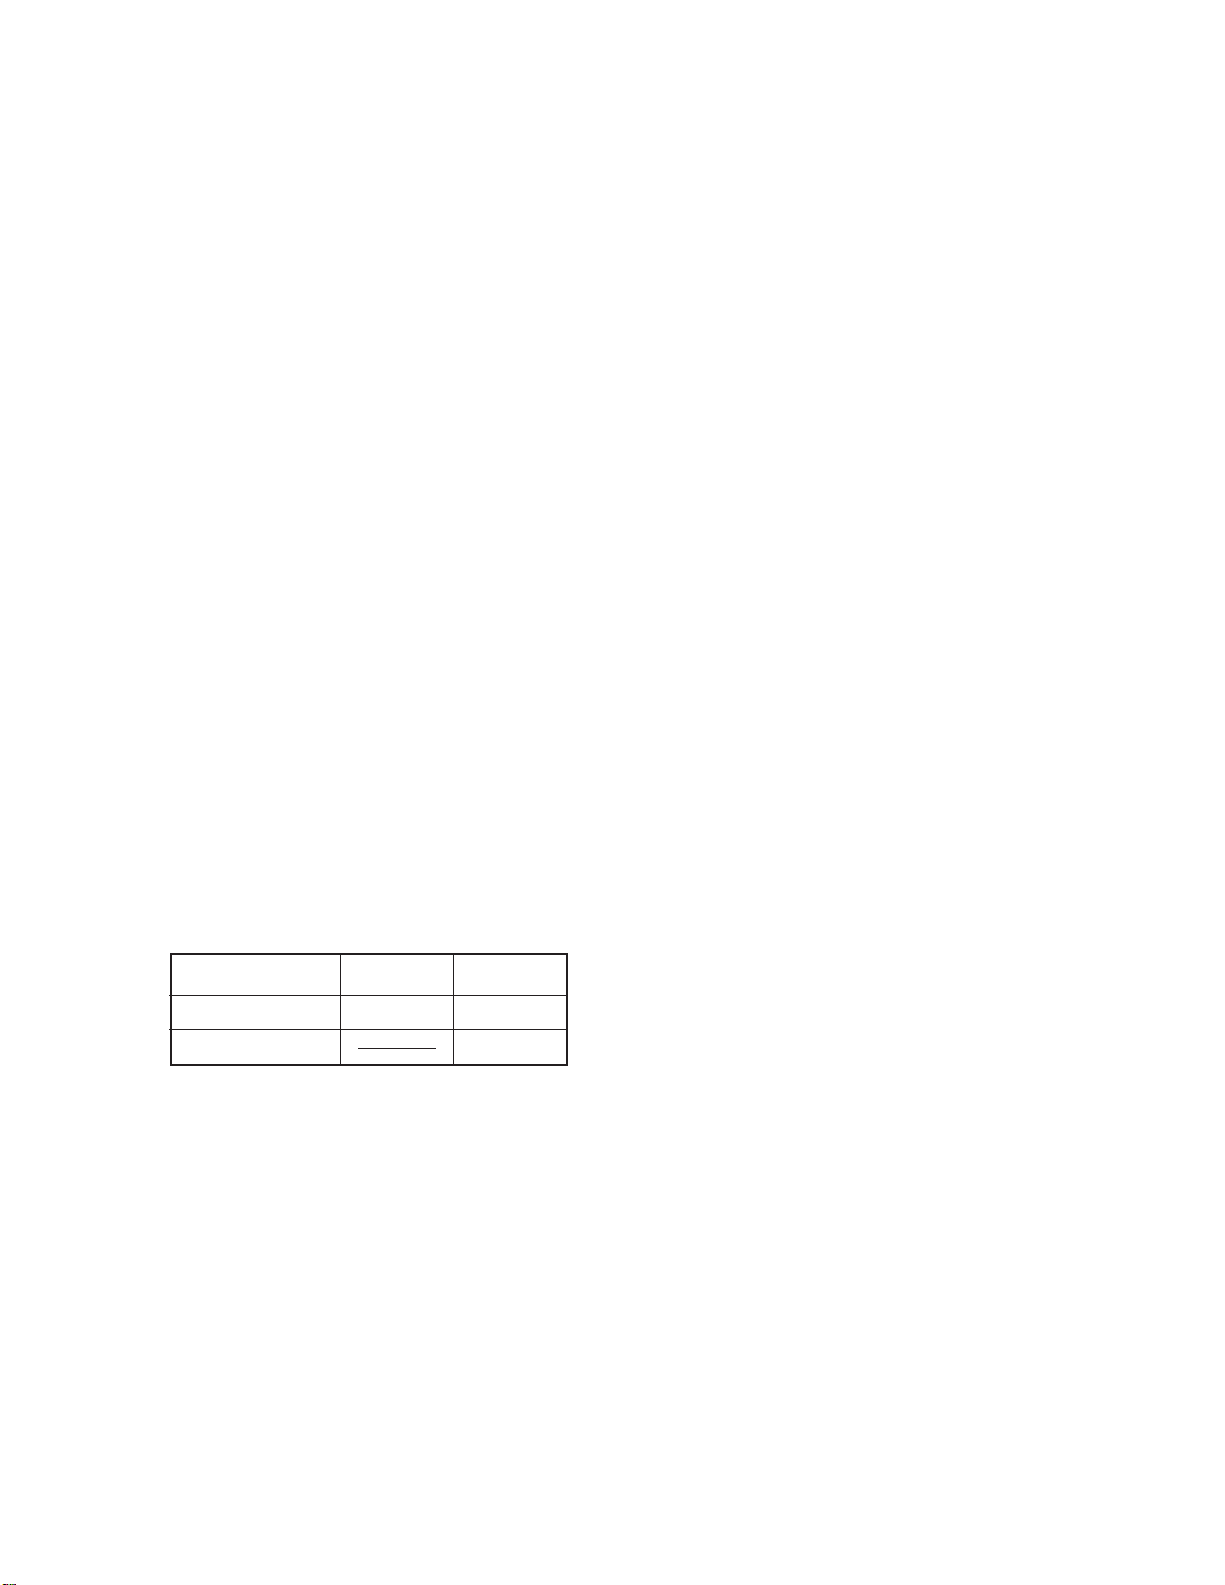
Resetting the calculator initializes it to the following settings.
Item
Icon
Angle Unit
Exponent Display Range
Fraction Reduction
Mixed Fraction
Graph Type
Statistical Graph
Variable Memory
Answer Memory (Ans)
Graphic Display/Text Display
View Window
View Window Memory
Graph Function
Enlargement/Reduction Factor
Initial Setting
RUN
Rad
Norm 1
Automatic
Display
Rectangular coordinate (Y=)
Automatic
Clear
Clear
Clear
Clear (initialized)
Clear
Clear
Clear (initialized)
Table & Graph Data
List Data
Statistical Calculation/Graph Memory
Program
Input Buffer/AC Replay
Clear
Clear
Clear
Clear
Clear
• Performing the RESET operation while an internal calculation is being performed (indicated by a blank
display) will cause all data in memory to be deleted. Make sure that no calculation be being performed
before starting a RESET operation.
• If the calculator stops operating correctly for some
reason, use a thin, pointed object to press the
RESET button on the back of the calculator. This
should make the RESET confirmation screen
appear on the display. Perform the procedure to
complete the RESET operation.
RESET button
— 7 —
Page 10
5. ERROR MESSAGE
Message
Syn ERROR
Ma ERROR
Go ERROR
Meaning
1 Calculation formula contains an error.
2 Formula in a program contains an
error.
1 Calculation result exceeds calcula-
tion range.
2 Calculation is outside the input range
of a function.
3 Illogical operation (division by zero,
etc.)
4 Poor precision in differential calcula-
tion results.
1 No corresponding Lbl n for Goto n.
2 No program stored in program area
Prog “file name”.
3 No corresponding “Next” for “For”, no
corresponding “LpWhile” for “Do”, or
no corresponding “whileEnd” for
“While”.
Countermeasure
1Use or to display the point
where the error was generated and
correct it.
2Use or to display the point
where the error was generated and
then correct the program.
123
Check the input numeric value and
correct it.
When using memories, check that the
numeric values stored in memories
are correct.
4Try using a smaller value for ∆ x
(x increment/decrement).
1Correctly input a Lbl n to correspond to
the Goto n, or delete the Goto n if not
required.
2Store a program in program area Prog
“file name”, or delete the Prog “file
name” if not required.
3Correctly match “Next” with “For”,
“LpWhile” with “Do”, or “whileEnd”
with “While”.
Ne ERROR
Stk ERROR
• Nesting of subroutines exceeds 10
levels.
• Execution of calculations that exceed
the capacity of the stack for numeric
values or stack for commands.
• Ensure that Prog “file name” is not
used to return from subroutines to
main routine. If used, delete any unnecessary Prog “file name”.
• Trace the subroutine jump destinations and ensure that no jumps are
made back to the original program
area. Ensure that returns are made
correctly.
• Simplify the formulas to keep stacks
within 10 levels for the numeric values
and 26 levels for the commands.
• Divide the formula into two or more
parts.
— 8 —
Page 11

Message
Meaning
Countermeasure
Mem ERROR
Arg ERROR
Dim ERROR
1 Not enough memory to hold function
input in the Graph Mode for graph
drawing.
2 Not enough memory to hold function
in the TABLE Mode.
3 Not enough memory to store data in
list function.
• Incorrect argument specification for a
command that requires an argument.
• Illegal dimension used during list calculations.
123
• Keep the number of variables you use
for the operation within the number of
variables currently available.
• Simplify the data you are trying to
store to keep it within the available
memory capacity.
• Delete no longer needed data to make
room for the new data.
Correct the argument.
• Fix n, Sci n : n = integer from 0 through
9.
• Lbl n, Goto n: n = integer from 0 through
9.
• Check list dimension.
— 9 —
Page 12
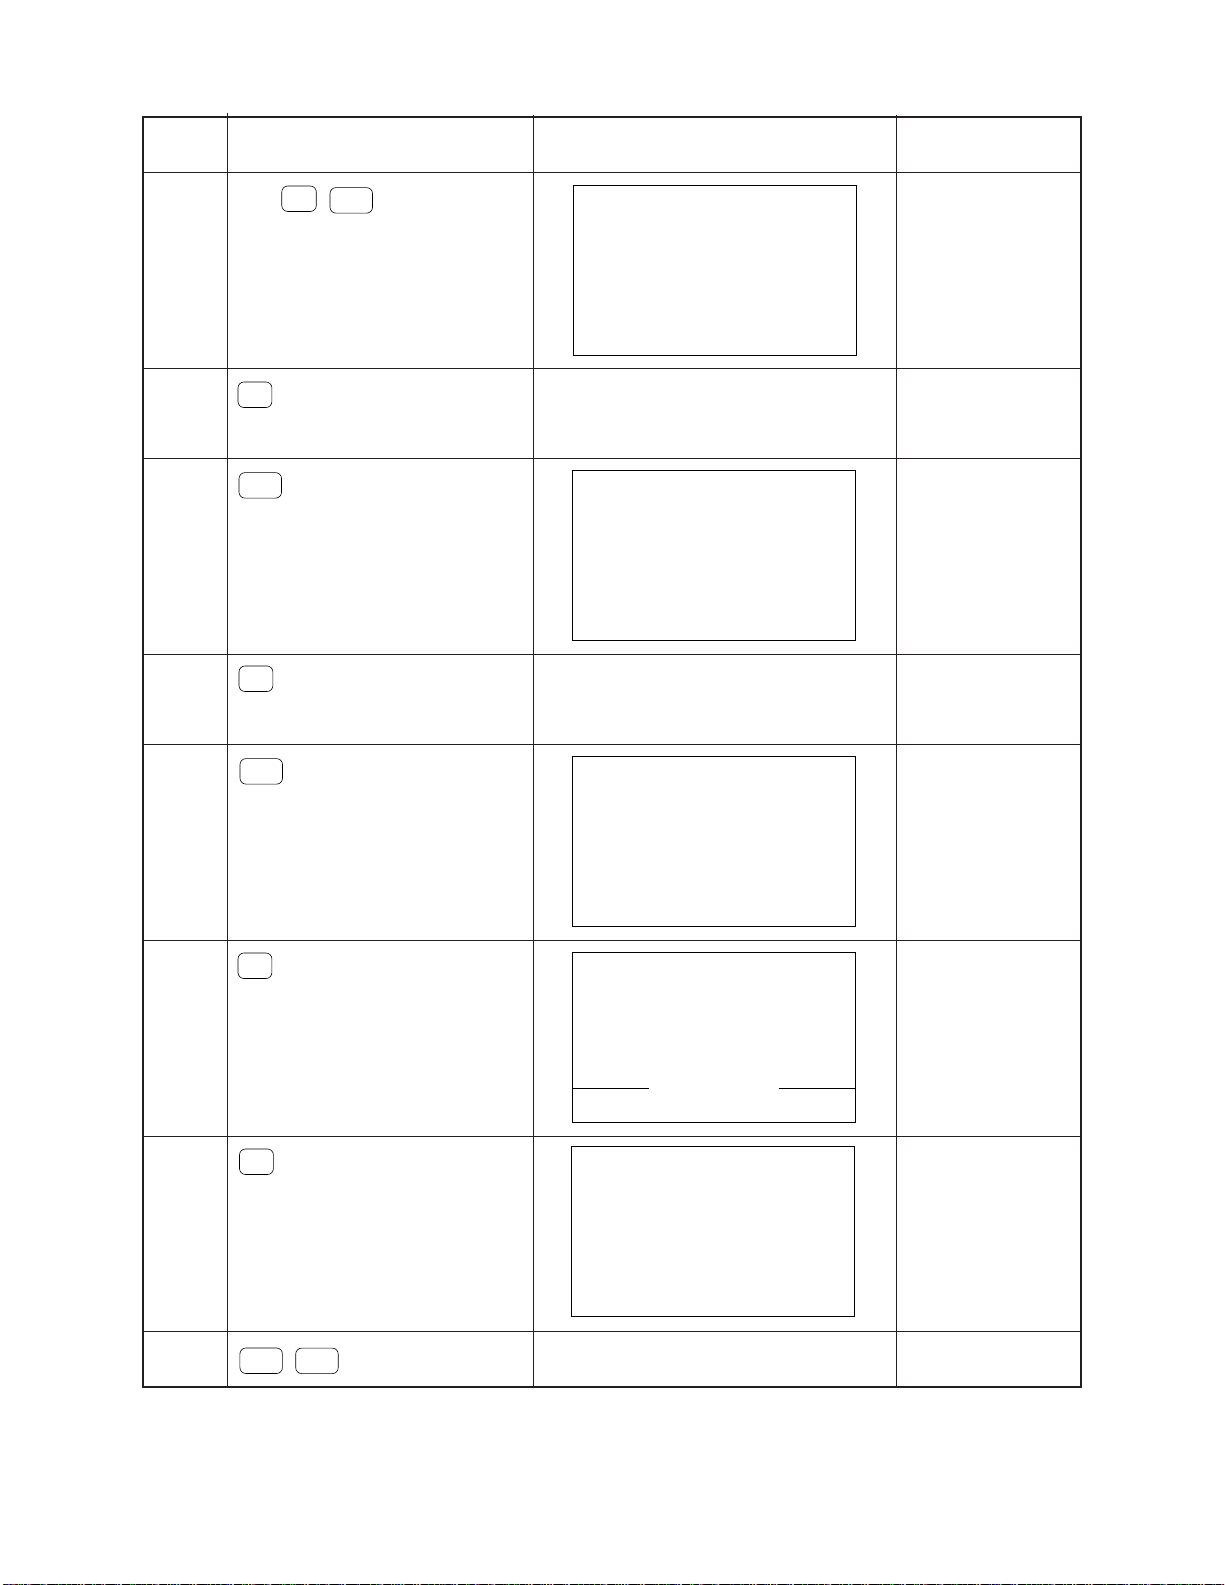
6.OPERATION CHECK
STEP OPERATION DISPLAY NOTE
Use a thin and pointed object to
1
press the RESET button on the
back of the unit.
✽ ✽ ✽ ✽ ✽ ✽ ✽ ✽ ✽ ✽ ✽ ✽ ✽
✽ ✽
R E S E T
✽ ✽ ✽ ✽ ✽ ✽ ✽ ✽ ✽ ✽ ✽ ✽ ✽
R E S E T
A L L M E M O R I E S ?
2
3
4
5
6
F1
ON
AC/
SHIFT
Press
∇
the same time.
1
EXE
ab/
Y E S NO
✽ ✽ ✽ ✽ ✽ ✽ ✽ ✽ ✽ ✽ ✽ ✽ ✽
RESET ALL
Reset
R E S E T
A L L M E M O R I E S !
✽ ✽ ✽ ✽ ✽ ✽ ✽ ✽ ✽ ✽ ✽ ✽ ✽
No Display
ON
c
AC/
keys at
Z X 9 3 0
1. L C D
2. K E Y
3. R O M
T E S T
5. T R S
6. R A M
0. R s t
OFF
TEST mode menu
4. D E T
All dots are displayed
No Display
Check for display
Check for display
7
8
9
10
11
12
EXE
EXE
EXE
EXE
2
G T
F1
F2
·····
Frame is displayed
Checkers are displayed
Reverse checkers are displayed
Z X 9 3 0
1. L C D
2. K E Y
3. R O M
T E S T
5. T R S
6. R A M
0. R s t
Check for display
Check for display
Check for display
TEST mode menu
4. D E T
Check for keysG < > T
F1, F2, F3 ····· Check for keys.
Push the key sequentially that is
being appeared in
the display.
— 10 —
Page 13
STEP OPERATION DISPLAY NOTE
13
·····
(–)
EXE
Z X 9 3 0 E
1. L C D
2. K E Y
3. R O M
T E S T
5. T R S
6. R A M
0. R s t
4. D E T
14 ROM Check
3
128 K byte
— OK —
15
EXE
Z X 9 3 0
1. L C D
2. K E Y
3. R O M
T E S T
5. T R S
6. R A M
0. R s t
4. D E T
16 RAM Check
6
8 K byte
— OK —
17
EXE
Z X 9 3 0
1. L C D
2. K E Y
3. R O M
T E S T
5. T R S
6. R A M
0. R s t
4. D E T
TEST mode menu
ROM check
TEST mode menu
RAM check
TEST mode menu
18
0
✽ ✽ ✽ ✽ ✽ ✽ ✽ ✽ ✽ ✽ ✽ ✽ ✽
✽ ✽
R E S E T
✽ ✽ ✽ ✽ ✽ ✽ ✽ ✽ ✽ ✽ ✽ ✽ ✽
R E S E T
A L L M E M O R I E S ?
Y E S NORESET ALL
19
F1
✽ ✽ ✽ ✽ ✽ ✽ ✽ ✽ ✽ ✽ ✽ ✽ ✽
R E S E T
A L L M E M O R I E S !
✽ ✽ ✽ ✽ ✽ ✽ ✽ ✽ ✽ ✽ ✽ ✽ ✽
20 EndNo Display
SHIFT
AC/
ON
— 11 —
Reset
Page 14

7. EXPLODED VIEW
13
S1
19
18
2
LSI1
11
15
17
23
16
9
8
10
DISASSEMBLY
1. Peel the display plate C from the upper case,
then loosen the two screws
6
5
2. Remove the battery cover J, then loosen the
screw D, then remove the battery holder K.
3. Remove the lithium battery
teries
B2
.
4. Loosen the six screws
case 7.
4
3
1
S1
.
B1
and the two bat-
S2
, then open the lower
12
22
7
S2
21
B1
S2
B2
14
20
— 12 —
Page 15

8. PARTS LIST
— 13 —
Page 16

8-11-10, Nishi-Shinjuku
Shinjuku-ku, Tokyo 160, Japan
Telephone: 03-3347-4926
 Loading...