

Page 1

FA-B30 Version 1.02
Basic Label Printing Software
E
For Windows
®
User’s Guide
This Label Printing Software can be used with a number of different Basic Label
Printer models.
• See page 11 of this manual for information about supported printer models.
• Some printer models may not support certain functions of this software.
Important!
Please keep this User’s Guide and all information handy for future reference.
Page 2

Important!
• All rights to this User’s Guide and the software that accompanies it shall revert to
CASIO COMPUTER CO., LTD.
•Microsoft® and Windows® are registered trademarks or trademarks of Microsoft
Corporation in the United States and/or other countries.
®
•Pentium
is a registered trademark of Intel Corporation.
•True Type® is a registered trademark of Apple Computer, Inc. in the United States
and other countries.
• Other product and company names used in this manual may be trademarks or
registered trademarks of others.
Copyright © 2004 CASIO COMPUTER CO., LTD. All rights reserved.
• Except as required for normal use of this software or for backup purposes, you are
not allowed to copy this manual or the software either in part or in their entirely
without written permission from CASIO COMPUTER CO., LTD.
2
Page 3

Be sure to read this manual carefully and familiarize yourself with proper operating
procedures before trying to use the software. Keep the manual in a safe place for
future reference when required.
User’s Guide Precautions
• Contact a nearby dealer whenever you require servicing.
• Note that the manufacturer shall not be held liable for any loss or claims by third
parties which may arise out of the use of this product.
• Note that the manufacturer shall not be held liable for any damages incurred as a
result of data loss caused by malfunctions, repairs, or interruption of power supply.
• It is up to the user to keep backup records of important data.
• The contents of this User’s Guide were prepared before the final version of the
FA-B30 Basic Label Printing Software was complete. Because of this, there may be
slight discrepancies between the features, functions, and operations described in
the User’s Guide and how the application actual works.
•FA-B30 Version 1.02 Basic Label Printing Software is designed to run under
Windows
• Certain computer system configurations can make it impossible for this software
to run properly.
XP, 2000 Professional, Me, 98SE and 98.
3
Page 4

Contents
About this manual... ............................................................................. 6
Getting Acquainted ..............................................................................8
FA-B30 Basic Label Printing Software Functions ................................................ 8
Supported Label Printer Models ........................................................................ 11
Shortcut Menu Operation .................................................................................. 12
Disabling Auto Startup of the FA-B30 Software................................................. 12
Starting Up and Quitting the FA-B30 Software................................ 13
Start Up ............................................................................................................. 13
Quitting .............................................................................................................. 14
User Interface ..................................................................................... 15
Input Panel ........................................................................................................ 15
Toolbar Button Name Display ............................................................................ 18
Preview Window ................................................................................................ 19
Preview Dialog Box............................................................................................ 20
Shortcut Menus ................................................................................................. 21
Inputting, Editing, and Printing Text ................................................. 24
Inserting Phrases, and the Current Date and Time ......................... 27
Time Stamp Formats ......................................................................................... 28
Saving Text in Phrase Memory .......................................................................... 28
Importing Screen Text into a Label ................................................... 30
Multiple Text Strings and Printing a Single Label .............................................. 32
Inserting an Image into a Label ........................................................ 35
Image Folder Contents ...................................................................................... 38
Capturing an Image from Your Computer Screen .............................................. 39
Recalling and Deleting Past Print Jobs ........................................... 40
Feeding and Cutting the Tape ........................................................... 42
Configuring Label Software Properties ........................................... 43
Configuring Printing Properties ......................................................................... 44
Editing Phrase Memory Text .............................................................................. 50
Configuring Shortcut Menu Settings ................................................................. 51
Configuring Display Settings ............................................................................. 51
Configuring Shortcut Menu Operation ............................................................... 52
Configuring Image Settings ............................................................................... 53
Configuring Add-in Settings ............................................................................... 55
Using Help .......................................................................................... 57
Visiting the CASIO Website ............................................................................... 59
4
Page 5

Appendix ............................................................................................. 60
Printing Problems .............................................................................................. 60
Error Messages ................................................................................................. 65
Label Creation Problems ................................................................................... 66
5
Page 6
About this manual...
Note the following important points when using this manual.
■ FA-B30 Basic Label Printing Software
• All mentions of “the FA-B30 Software” in this manual refer to the FA-B30 Basic Label
Printing Software.
• All mentions of “Label Printer” in this manual refer to a printer that is compatible with
this software.
■ Windows operations are not covered.
This manual describes operation of FA-B30 Version 1.02 Basic Label Printing Software
for Windows (XP, 2000 Professional, Me, 98SE, 98) only. The explanations in this
manual assume that you are already familiar with the following basic Windows
operations.
• Click, double-click, right-click, drag, drag and drop, and other mouse operations
• Menu operations using the mouse
•Text input using the keyboard
• Common Windows window operations
If you are unfamiliar with these or other Windows operations, see the documentation
that came with your computer or the version of Windows you are using.
The FA-B30 Software has a help function (page 57) you can use to access
operational information on your computer.
6
Page 7
■ Menus and Buttons
All explanations in this manual assume that on-screen menu and button operations
are performed using the mouse.
• The following shows an example of executing a menu command.
Click Input Panel .
• The following shows an example of clicking a dialog box button.
Click OK.
■ Key Operations
Computer keyboard operations are indicated in this manual as follows: Ctrl key, Shift
key, Alt key.
■ Screens
Note that the screen shots that appear in this manual may differ somewhat from the
screens that appear on your computer screen.
All of the sample screens in this manual show operation under the English version
of Windows XP. Screens appear differently when running the application under
another operating system.
7
Page 8
Getting Acquainted
The FA-B30 Software makes it possible for you to create and edit labels on your
computer.
FA-B30 Basic Label Printing Software Functions
■ Incorporate images into labels.
• 136 images included (page 37)
• Screen image capture (page 39)
• The tape types you can use depend on your Label Printer model. See page 11 for
more information.
■ Use fonts installed on your computer in labels
(pages 18, 48).
8
Page 9
■ Instantly print text you are inputting or editing with other
software on your computer screen (page 30).
Hold down
Ctrl and then
Right-click!
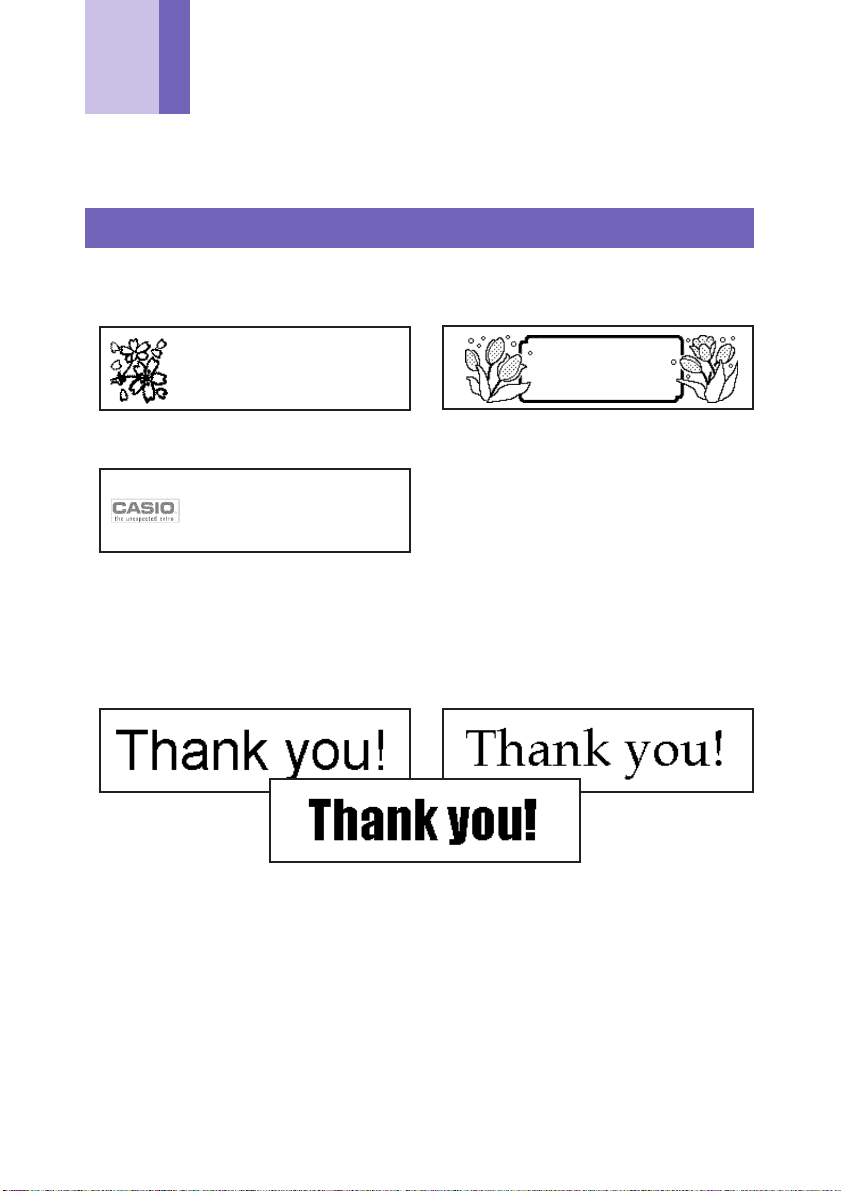
■ Character size is adjusted automatically, for quick and easy
printing.
Selecting three lines
➜
Selecting one line
➜
9
Page 10
■ Keep it running for instant label printing whenever you need
it. Does not interfere with other programs.
FA-B30 icon
•You can also shut down the FA-B30 Software when you want (page 14).
■ Register often-used terms and expressions for quick and
easy input (page 27).
■ USB port for easy connection to a computer
■ View the image of a label on your computer screen before
printing it.
•Executing a print operation from the shortcut menu displays a preview dialog box
that shows an image of what the printed label will look like.
•You can also display a preview window while inputting text into the Input Panel.
You can configure the FA-B30 Software so the preview image is not displayed, if
you want (“Preview Window,” page 19).
■ Store up to 100 past print jobs for later recall when you want
to print again (“Recalling and Deleting Past Print Jobs,” page
40).
Note
• Right-clicking your mouse while the FA-B30 Software is running normally displays
the FA-B30 shortcut menu. You can also set up the FA-B30 Software so the shortcut
menu of the application you are using for editing appears instead (“Configuring
Shortcut Menu Operation,” page 52).
10
Page 11

Supported Label Printer Models
This Label Software supports printing with the following CASIO Label Printer models
(as of October 2004).
•CW-L300 • KL-E20 • KL-P1000 • EL-5000W
• KP-C10 • KP-C50 • EL-700
■ Tape Types
There are two types of media that can be used for printing: EZ-LABEL PRINTER tape
and thermal roll paper (Memo Tape).
EZ-LABEL PRINTER Tape
This is a highly durable tape with strong adhesive. It can be used for videotape labels,
office labeling, and other general label applications. This type of tape is available in a
wide range of types and widths.
The tape width and type you can use depends on your CASIO Label Printer model.
See the user documentation that comes with your Label Printer for more information.
Thermal Roll Paper (Memo Tape)
This type of media can be used to create stick-on memos. Its adhesive makes it possible
to peel off and re-affix labels a number of times. The backing paper is divided into two
separate pieces, making it easy to affix them to a computer monitor, notebook, etc.
The following printer models support use of thermal roll paper.
• EL-5000W • KP-C10 • KP-C50
• Each label is approximately 6 cm long.
• The CW-L300, KL-E20, KL-P1000 and EL-700 printers do not support printing on
this type of tape.
11
Page 12
Shortcut Menu Operation
Normally after you install the FA-B30 Software, hold down Ctrl and then right-click in
the word processor, e-mail, or other application you are using to display the FA-B30
shortcut menu.
FA-B30 shortcut menu*
*A different menu
appears if you right-click
the FA-B30 icon in the
status area.
If you want to display the shortcut menu for the other application you are using, select
Context Menu on the FA-B30 shortcut menu.
• See “Configuring Shortcut Menu Operation” on page 52 for information about disabling
display of the FA-B30 shortcut menu, and configuring modifier keys to control which
shortcut menu appears.
Disabling Auto Startup of the FA-B30 Software
If you selected the auto startup option for the FA-B30 Software when you installed it
(see the “Read this first” sheet), you can use the following procedure to disable auto
startup.
Right-click the Windows Start button.
1
On the menu that appears, click Open.
2
• If you are running Windows 2000 Professional or Windows XP, click Open All
Users.
On the window that appears, double-click Programs.
3
Double-click the Startup folder.
4
Delete the Basic Label Printing Software FA-B30 icon.
5
12
Page 13
Starting Up and Quitting the FA-B30 Software
Start Up
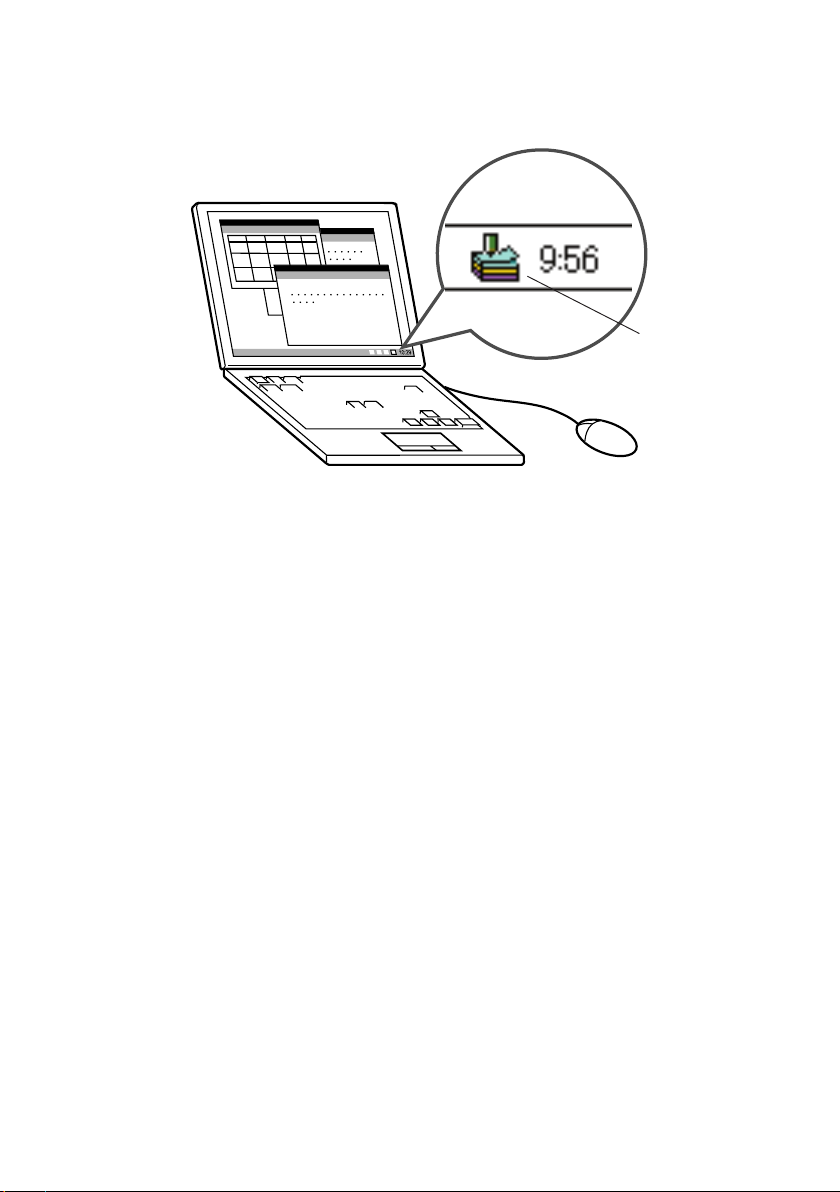
You do not need to perform this procedure if the FA-B30 icon is already in the status
area, which indicates the FA-B30 Software is already running.
Windows status area (normally located in the lower right corner of your screen)
FA-B30 icon (Indicates Label Software is running.)
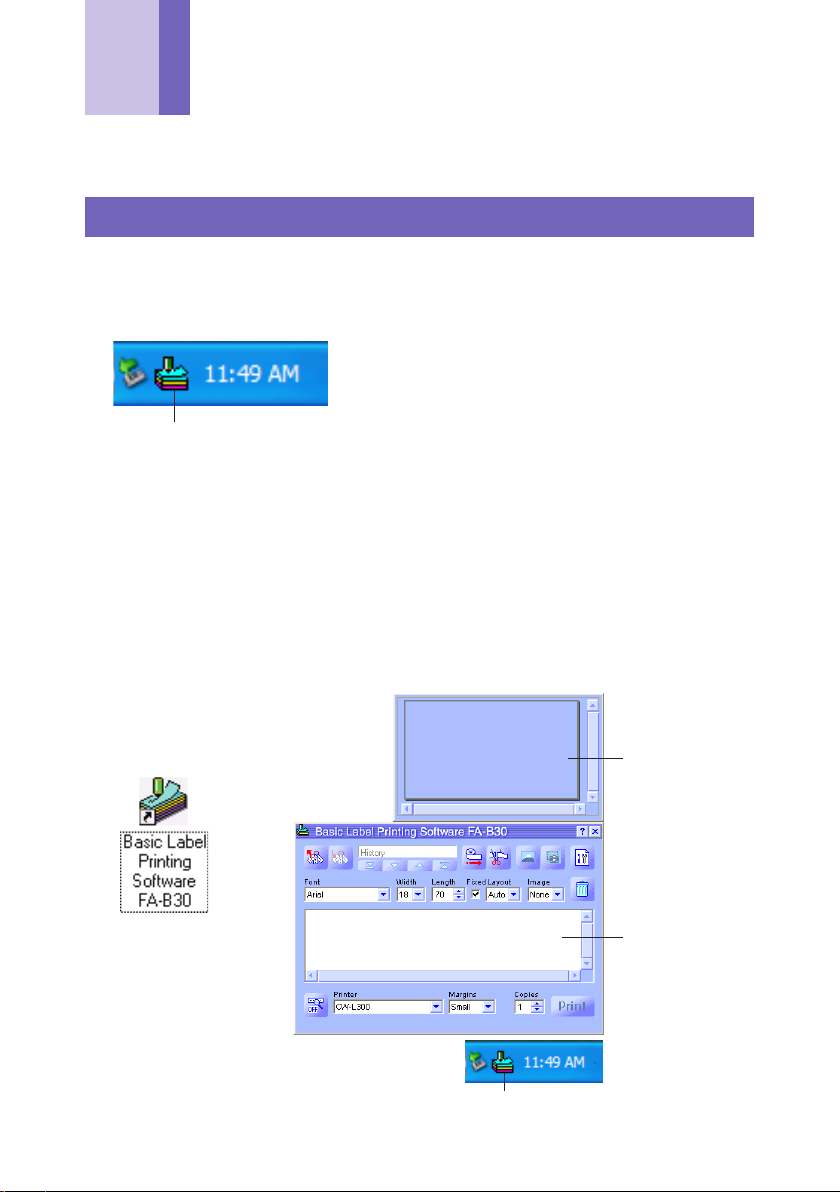
To start up the FA-B30 Software
On the Windows desktop, double-click the Basic Label Printing
1
Software FA-B30 icon.
This starts up the FA-B30 Software and displays the Input Panel and the preview
window. It also causes the FA-B30 icon to appear in the Windows status area.
•You can also start up by clicking the following: Start ➜ All programs ➜ CASIO ➜
Basic Label Printing Software FA-B30 ➜ Basic Label Printing Software
FA-B30. What you need to click may be different, depending on the folder where
you installed the FA-B30 Software.
Double-click
Preview window
➜
Input Panel
FA-B30 icon
13
Page 14
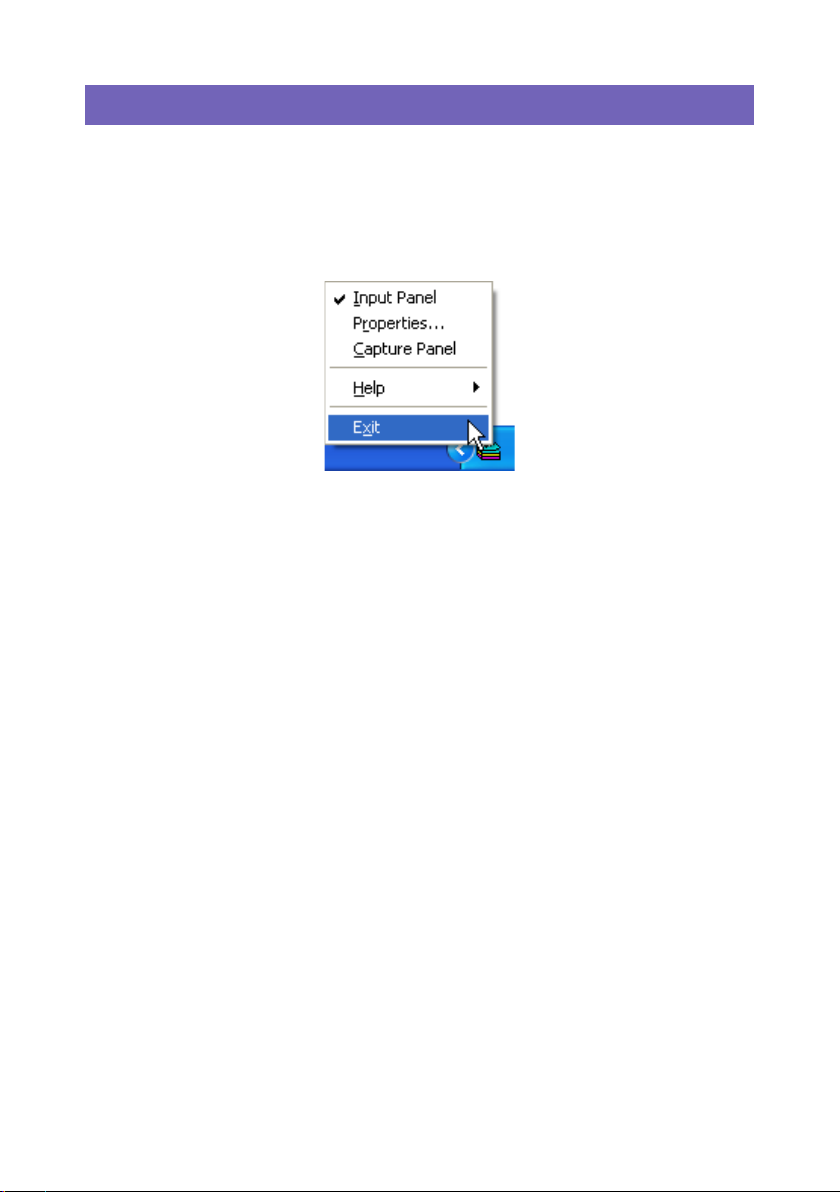
Quitting
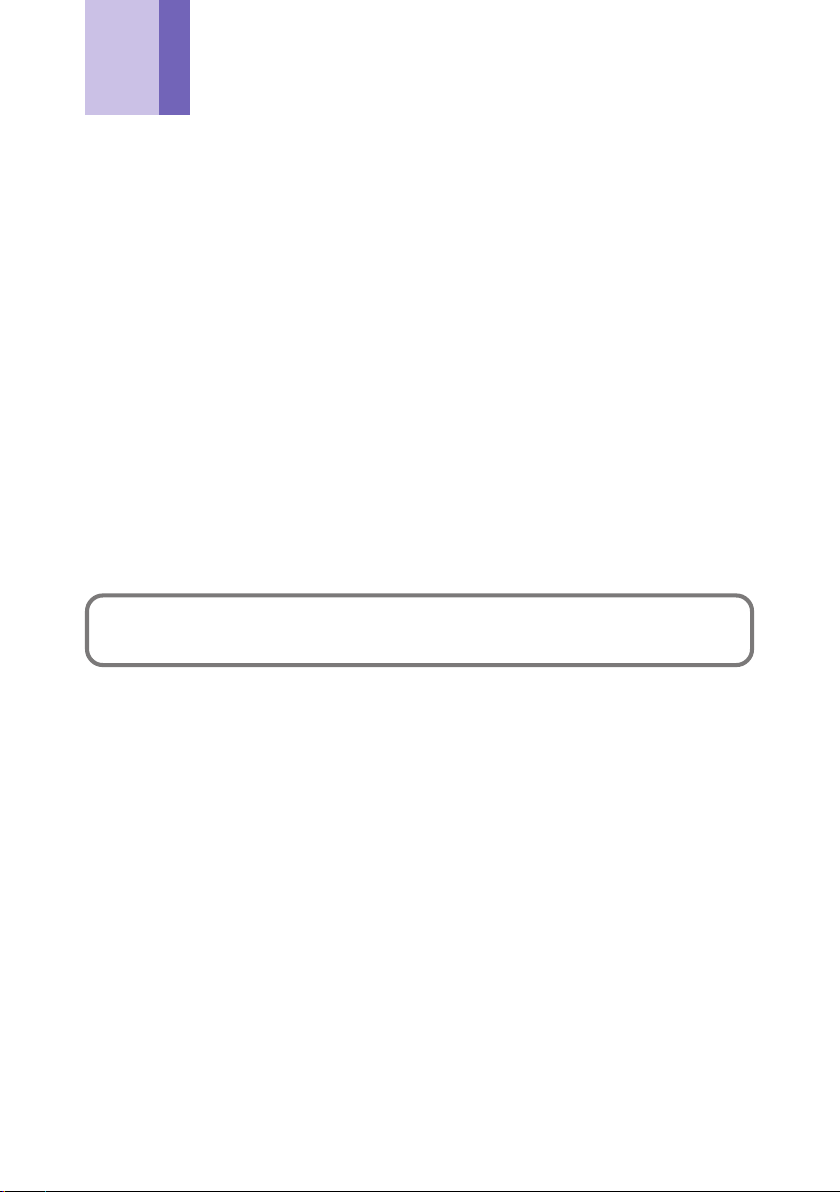
Right-click the FA-B30 icon in the Windows status area.
1
On the menu that appears, click Exit.
2
This quits the FA-B30 Software, which causes the FA-B30 icon to disappear from
the status area.
14
Page 15
User Interface
This section explains all of the screens and menus that appear on your computer
display while you are using the FA-B30 Software. For full details about operational
procedures, see the pages that are referenced in this section.
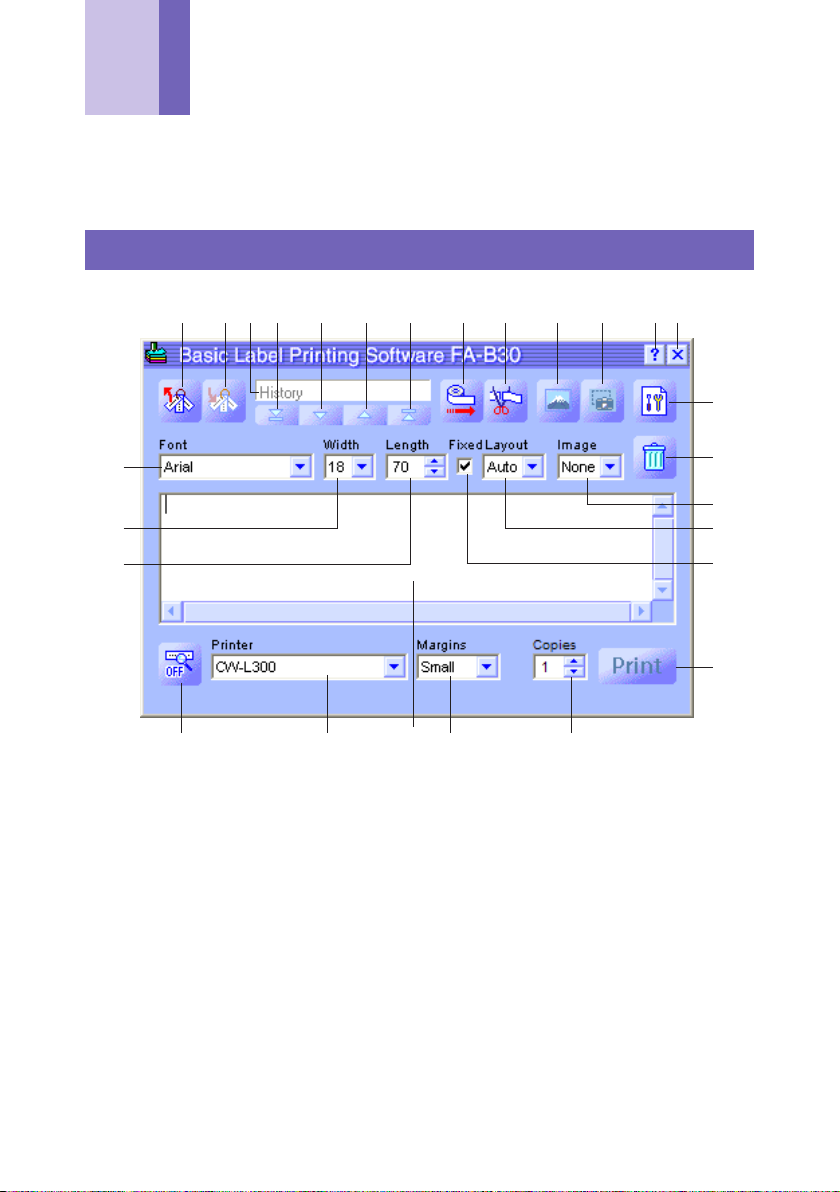
Input Panel
1234 5 6 7 89 0 q we
r
j
h
g
f
1 Recall Phrase Button
Recalls a previously saved term or expression for insertion into the Text Input Box.
• See “Inserting Phrases, and the Current Date and Time” on page 27.
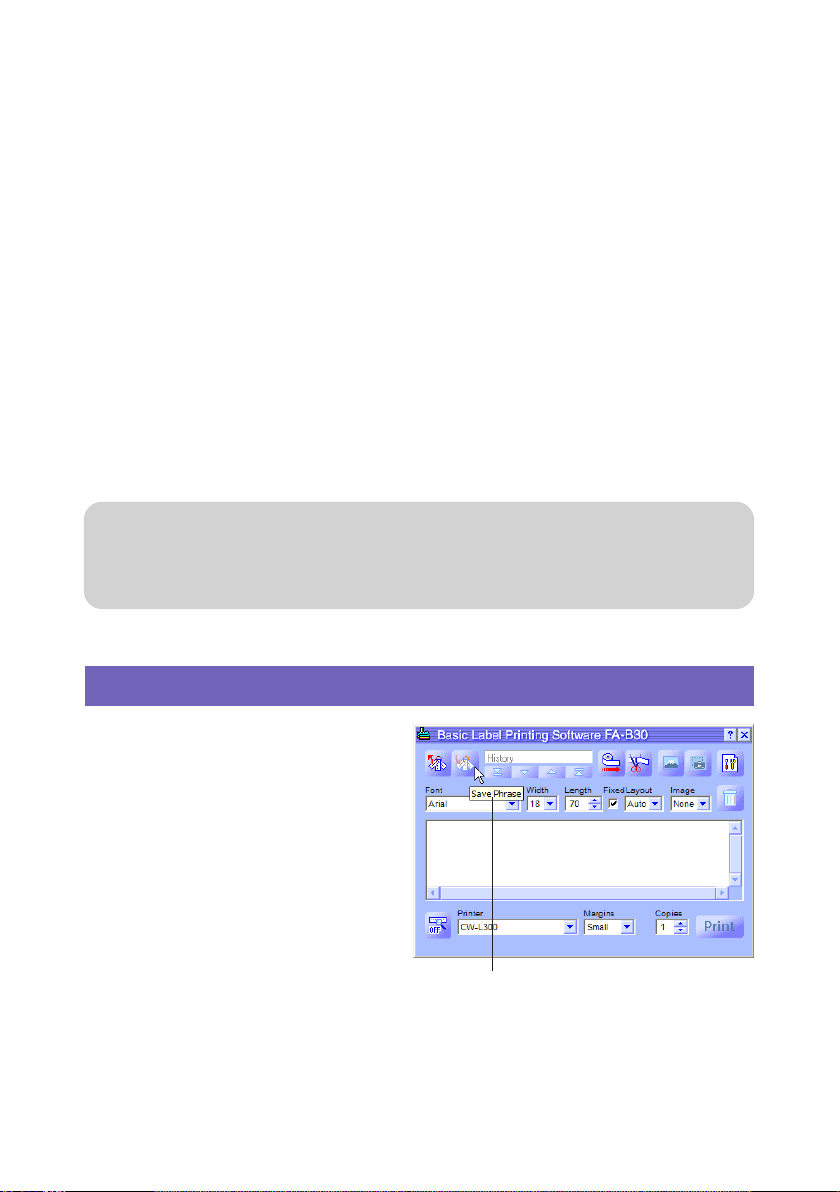
2 Save Phrase Button
Saves the text that is highlighted in the Text Input Box into phrase memory.
• See “Saving Text in Phrase Memory” on page 28.
3 History Box
Displays a history of past print jobs.
• See “To recall a past print job” on page 40.
dsa p
t
y
u
i
o
15
Page 16

4 Top Button
Displays the oldest entry in the history of past print jobs.
• See “To recall a past print job” on page 40.
5 Back Button
Displays the next older job in the history of past print jobs.
• See “To recall a past print job” on page 40.
6 Forward Button
Displays the next newer entry in the history of past print jobs.
• See “To recall a past print job” on page 40.
7 New Button
Displays the text you are currently editing.
• See “To recall a past print job” on page 40.
8 Tape Feed Button
Feeds the tape.
• See “To feed the tape” on page 42.
9 Tape Cut Button
Cuts the tape. This function is supported only for label printers that are equipped
with an auto cutter.
• See “To cut the tape” on page 42.
0 Insert Image Button
Displays a window for selecting an image.
• See “To insert an existing image into a label” on page 37.
q Capture Image Button
Captures an image from your computer screen for pasting into a label.
• See “To capture an image from your computer screen” on page 39.
w Help Button
Displays help.
• See “Using Help” on page 57.
e Close Button
Closes the Input Panel.
r Properties Button
Displays a Label Software properties dialog box.
• See “Configuring Label Software Properties” on page 43.
16
Page 17

t Trash Button
Deletes the contents of the Text Input Box. If the contents of the Text Input Box are
a past print job selected using the History Box, clicking this button deletes the past
job.
• See “Inputting, Editing, and Printing Text” on page 24, and “To delete a past print
job” on page 41.
y Image Box
Shows the Image paste size and location.
u Layout Box
Specifies the character size and number of lines. The contents of this box differ
according to the type of tape being used for printing.
• See “Inputting, Editing, and Printing Text” on page 24 and “Configuring Label
Software Properties” on page 43.
i Fixed Tape Length Check Box
Specifies whether the tape length should be fixed (checked) or variable (unchecked).
• See “Inputting, Editing, and Printing Text” on page 24 and “Configuring Label
Software Properties” on page 43.
o Print Button
Prints the text in the Text Input Box. This button becomes a Cancel Printing button
while printing is in progress.
• See “Inputting, Editing, and Printing Text” on page 24.
p Copies Box
Specifies the number of copies of the label to be printed.
• See “Inputting, Editing, and Printing Text” on page 24 and “Configuring Label
Software Properties” on page 43.
a Margins Box
Specifies the size of the left and right margins of the tape.
• See “Inputting, Editing, and Printing Text” on page 24 and “Configuring Label
Software Properties” on page 43.
s Text Input Box
Use this box to input and edit text for printing.
• See “Inputting, Editing, and Printing Text” on page 24.
d Printer Model Box
Indicates the model name of the printer that is currently selected. When using a
printer model that supports both EZ-LABEL PRINTER tape and thermal roll paper,
you can also use this box to select the tape type.
• See “Configuring Label Software Properties” on page 43.
17
Page 18
f Show/Hide Preview Button
Toggles display of the print image preview on and off.
•You can resize the Preview Window by dragging its boundaries.
• See “Preview Window” on page 19.
g Tape Length Box
Specifies the tape length.
• See “Inputting, Editing, and Printing Text” on page 24 and “Configuring Label
Software Properties” on page 43.
h Tape Width Box
Specifies the tape width.
• See “Inputting, Editing, and Printing Text” on page 24 and “Configuring Label
Software Properties” on page 43.
j Font Box
Specifies the text font.
• See “Inputting, Editing, and Printing Text” on page 24 and “Configuring Label
Software Properties” on page 43.
Important!
You can use the properties dialog box to configure the same settings that appear
on the Input Panel. See “Configuring Label Software Properties” on page 43 for
more information.
•You can change the size of the Input Panel by dragging its borders.
Toolbar Button Name Display
Moving the mouse pointer over a
toolbar button causes the name of the
button to appear on your screen.
•Moving the mouse pointer to the Tape
Length Box causes the allowable tape
length settings to appear.
Toolbar button name
18
Page 19
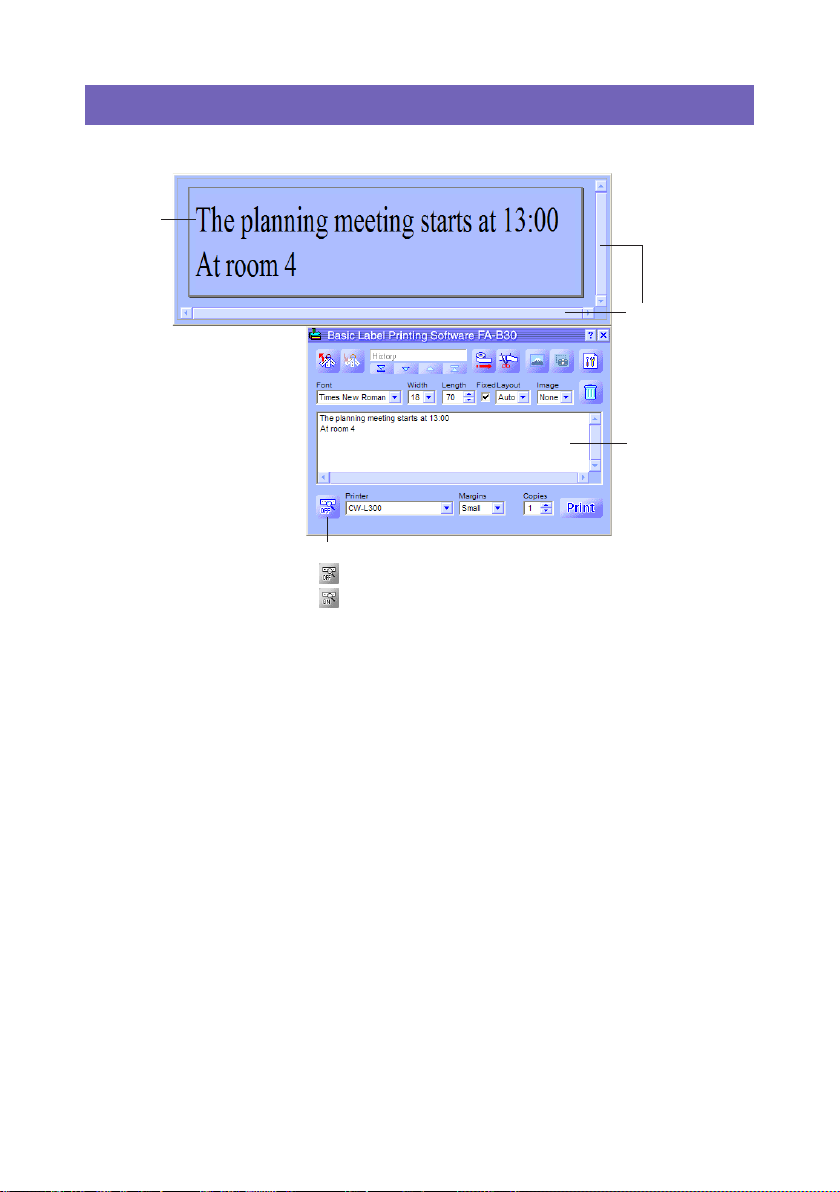
Preview Window
You can use the preview window to view the print image of a label before printing.
Preview
Scroll bars
Te xt Input Box
Show/Hide Preview Button
• when preview is displayed.
• when preview is not displayed
• The preview window shows what the text in the Text Input Box will look like when it is
printed.
•Font, tape width, tape length, and layout settings are all reflected in the preview
image.
• Clicking the Show/Hide Preview button toggles display of the preview window on
and off, except when there is no text in the Text Input Box.
• Some label contents can cause the preview window to be too small, which makes
the preview image appear ragged. If this happens, make the preview window larger
by dragging its borders.
•You can use the scroll bars to view the areas of the label that do not appear within
the preview window. If you are creating multiple labels, use the up/down scroll bar to
scroll between labels.
• With the EL-5000W, you can change the size of the preview window to half actual
size or double actual size. See “Configuring Display Settings” on page 51 for more
information.
• When laying out an image, you can also specify grayscale display of images in the
preview window instead of binary display. See “Configuring Display Settings” on
page 51 for more information.
19
Page 20
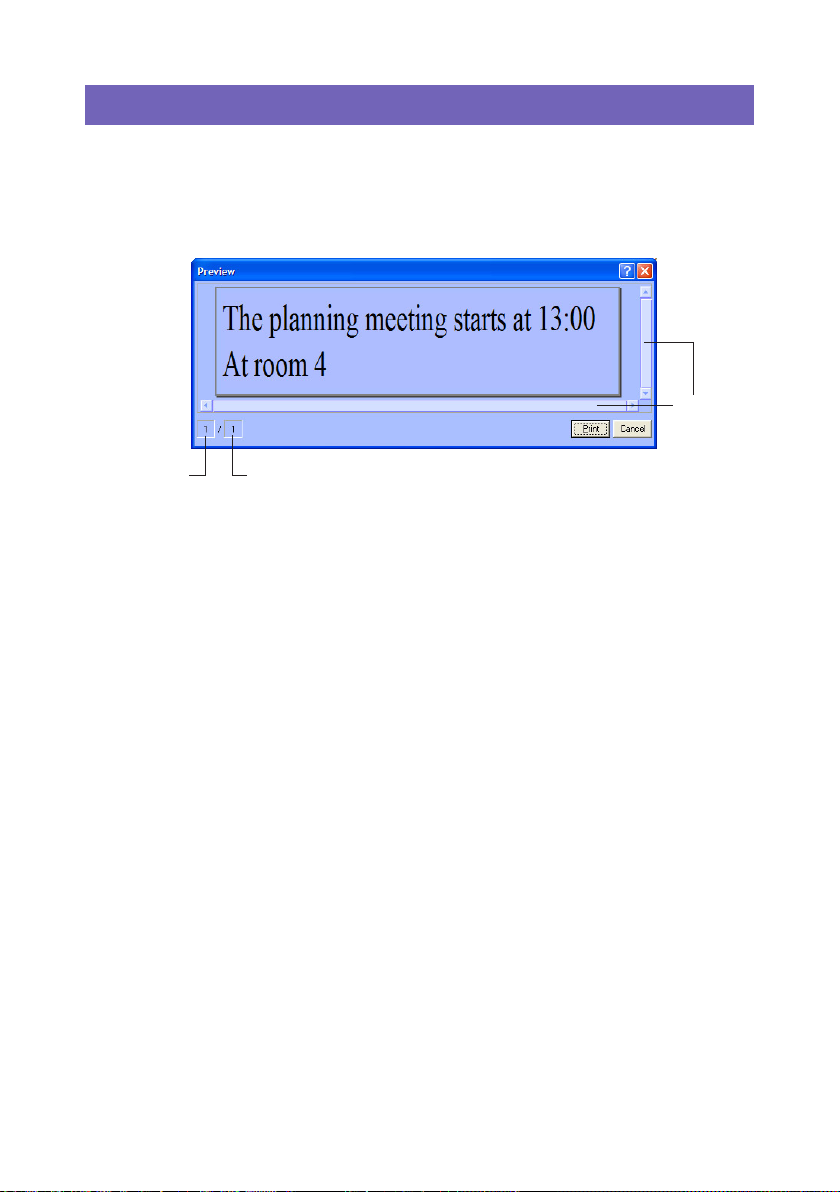
Preview Dialog Box
Whenever you have the Input Panel preview window hidden (display turned off), a
preview dialog box appears automatically when you execute the Print command. You
can use the preview dialog box to check the appearance of the printed label before
proceeding with the print operation.
Scroll bars
Current layout
• The preview dialog box shows what the text in the Text Input Box will look like when
it is printed.
• The total number of layouts value shows how many different layouts you are printing
with the current print operation. When this value is greater than 1, use the vertical
scroll bar to scroll between the different layouts.
• The current layout value indicates which layout is currently displayed. If you are
going to print three different layouts, for example, this value shows 1, 2, or 3, depending
on the layout that is displayed.
• The current layout value and total number of layouts value do not indicate the number
of labels that will be printed. You can determine the number of labels by multiplying
the total number of layouts value by the Copies value you specified on page 25.
• Some label contents can cause the preview dialog box to be too small, which makes
the preview image appear ragged. If this happens, make the preview dialog box
larger by dragging its borders.
•You can use the scroll bars to view the areas of the label that do not appear within
the preview dialog box.
• Clicking the Print button starts actual printing.
• Clicking the Cancel button cancels the print operation.
•You can configure the FA-B30 Software so the preview dialog box does not appear
before printing (“Configuring Display Settings”, page 51).
Total number of layouts
20
Page 21
Shortcut Menus
This section describes the contents of the two shortcut menus that appear when you
right-click your mouse while the FA-B30 Software is running.
• See “Configuring Shortcut Menu Operation” on page 52 for information about to
configure settings that control shortcut menu operations.
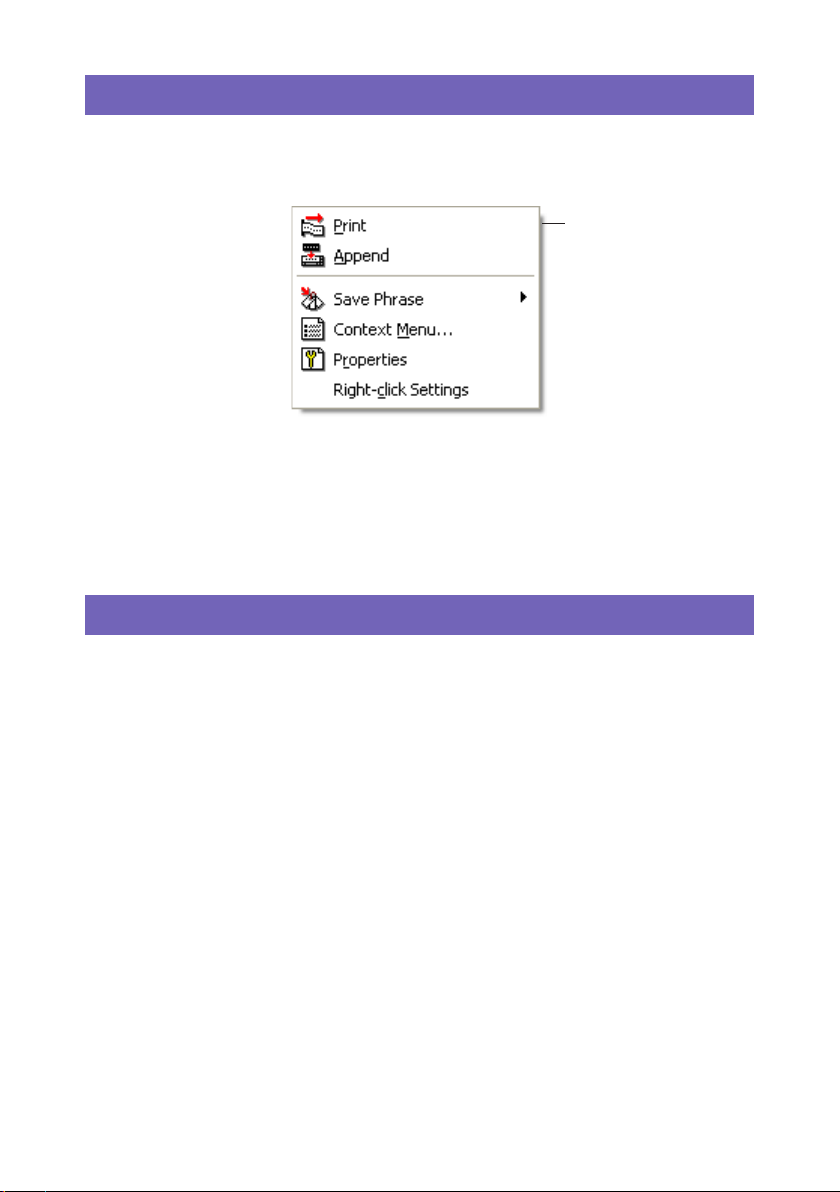
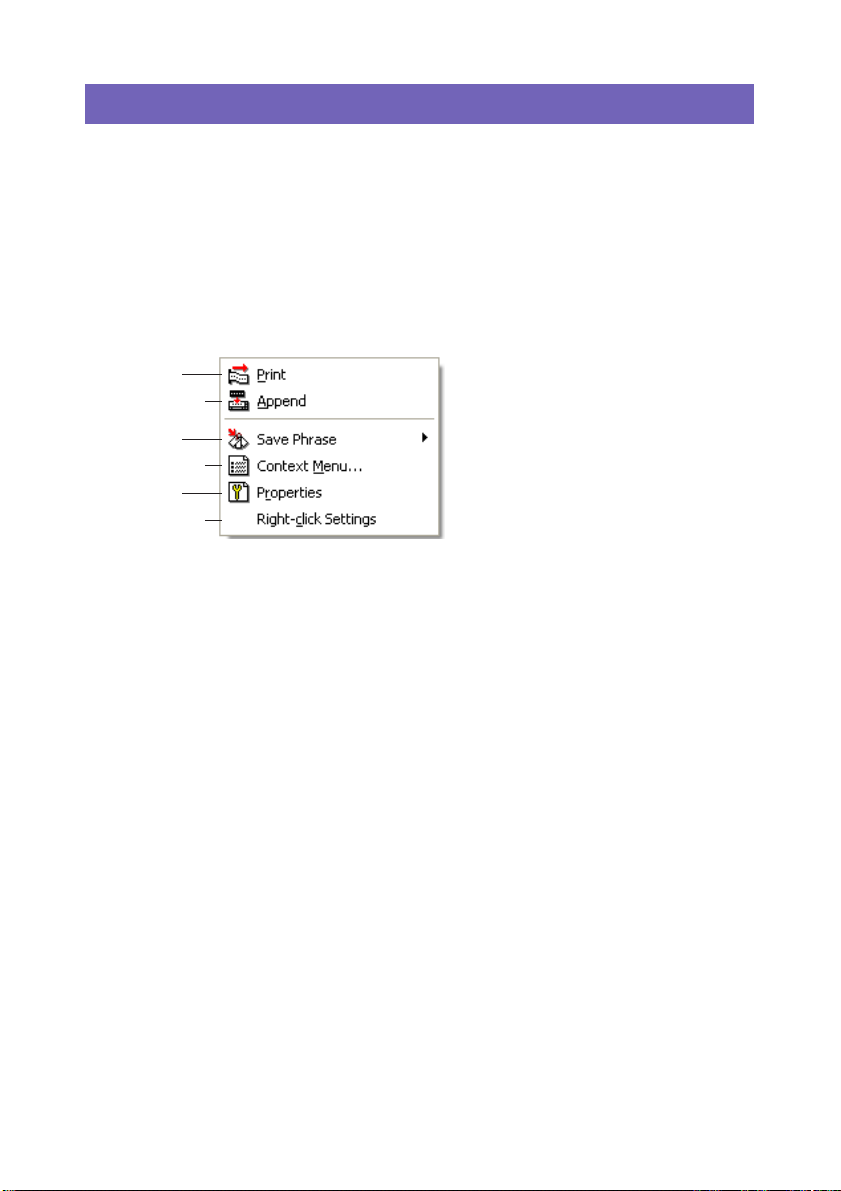
■ Shortcut menu that appears when you right-click the screen
The following is the shortcut menu that appears when you hold down Ctrl and then
right-click your word processor, mail, or browser software screen while the FA-B30
Software is running.
1
2
3
4
5
6
*You can also configure the FA-B30
Software so items 3 through 6 do
not appear on the shortcut menu
(“Configuring Shortcut Menu
Settings”, page 51).
1 Print
Prints text that is currently selected (highlighted) in the other application you are
using.
• See “To import and print a single string of text” on page 30.
2 Append
Copies text that is currently selected (highlighted) in the other application you are
using into the Input Panel. After collecting the text from various locations, you can
print it.
• See “Multiple Text Strings and Printing a Single Label” on page 32.
3 Save Phrase*
Saves text into phrase memory.
• See “Saving Text in Phrase Memory” on page 28.
4 Context Menu*
Displays the shortcut menu of the other application (word processor, mail, browser)
you are using.
5 Properties*
Displays a dialog box of Label Software properties.
• See “Configuring Label Software Properties” on page 43.
6 Right-click Settings*
Displays a dialog box for configuring settings that control what happens when you
hold down Ctrl and then right-click your mouse. This menu item appears when
display of the Properties menu item is enabled.
• See “Configuring Shortcut Menu Operation” on page 52.
21
Page 22

■ Shortcut menu that appears when you right-click the FA-B30
icon
The following is the shortcut menu that appears when you right-click the FA-B30 icon
in the Windows status area.
1
2
3
4
5
FA-B30 icon
1 Input Panel
Displays the Input Panel.
• See “Input Panel” on page 15.
2 Properties
Displays a dialog box of Label Software properties.
• See “Configuring Label Software Properties” on page 43.
3 Capture Panel
Displays the capture panel, which you can use to capture an image from your
computer screen without displaying the Input Panel.
• See “To capture an image from your computer screen” on page 39.
Capture Panel
22
Page 23

4 Help
Displays a help submenu.
• See “To access help from the status area icon” on page 58, “Visiting the CASIO
Website” on page 59, and “To view version information” on page 58.
Help submenu
5 Exit
Quits the FA-B30 Software.
• See “Quitting” on page 14.
23
Page 24

Inputting, Editing, and Printing Text
This section explains how to use the Input Panel to input and edit text, and then print
it.
To input, edit, and print text
If the FA-B30 Software is already running, click the FA-B30 icon in the
1
status area.
This displays the Input Panel. The preview window should also appear, unless it is
hidden (page 19).
• If the FA-B30 Software is not running, double click the FA-B30 icon on your
Windows desktop. After the Input Panel appears, proceed with step 2.
Use the Text Input Box to input and edit the text you want to print.
2
• The contents of the preview window will change as you input and edit the text.
• Clicking the Trash button deletes all of the text in the Text Input Box.
•You can input up to 255 characters per line. A carriage return will be inserted
automatically if your input exceeds this limit.
• The allowable number of characters per line is further limited when you are
using a fixed tape length. A carriage return is inserted automatically whenever
your input surpasses the maximum allowable line length.
• See “Input Panel” on page 15 for information about specifying font, tape width,
tape length, and other settings.
• See “Inserting an Image into a Label” on page 35 for information about inserting
an image into a label.
• See “Inserting Phrases, and the Current Date and Time” on page 27 for
information about inserting often-used phrases and the current date and time
into a label.
• See “Configuring Add-in Settings” on page 55 for information about printing mirror
images onto iron transfer tape.
24
Page 25

Configure Font, Width, Length, and Layout settings.
3
•Your settings will be reflected in the preview window, so you can see what your
printed label will look like.
• If you have Auto selected for Layout, the size of text will be adjusted automatically
so it fits within the specified tape length. If you have Title specified for Layout,
the first line will be middle size, while all remaining lines will be small size text.
• The tape length setting is ignored when you are printing to thermal roll paper.
•To specify a fixed-length tape, select the Fixed check box. The length of the
tape changes automatically in accordance with the text when this check box is
cleared.
• Note that some settings may not be available when using a label printer model
that does not support them.
Preview window
Width
Font
Te xt Input Box
Layout
Fixed
Length
Print Button
Printer
Check to make sure the Label Printer is connected correctly to your
4
Margins
Copies
computer.
You can connect the Label Printer to your computer any time before you click the
Print button in step 6.
Specify the number of copies and margin size.
5
Some Label Printer models do not support variable margin settings.
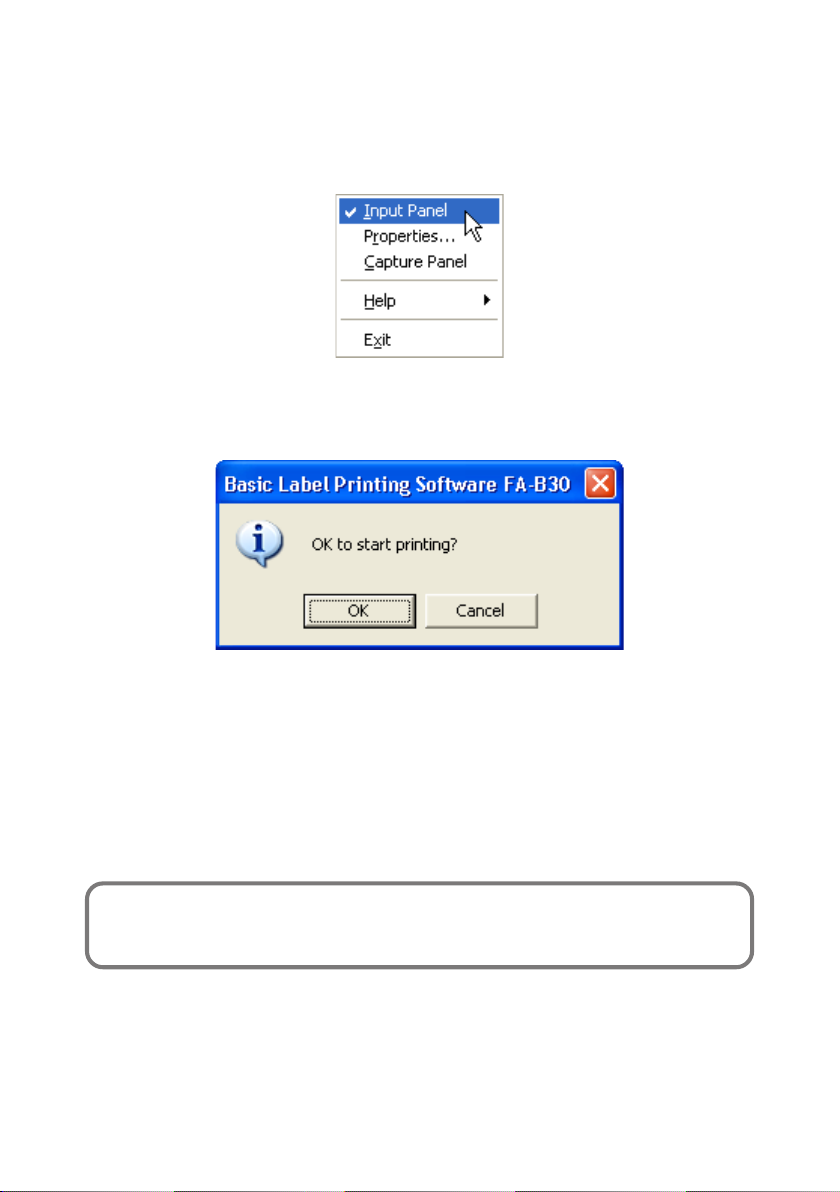
Click the Print button.
6
• This causes a confirmation message to appear.
• If you do not have the preview window displayed along with the Input Panel, the
preview dialog box will appear at this time.
25
Page 26

Click OK.
7
• This starts actual printing.
•You can also start printing by holding down Alt and pressing P.
•To cancel the print operation, click Cancel.
• Clicking the Stop button stops printing. You can also stop printing by holding
down Alt and pressing S.
• If the preview dialog box appeared in step 6, click Print to start printing.
Important!
•Never disconnect the cable between the Label Printer and computer while printing is
in progress.
•Never try printing on the CW-L300 printer from the FA-B30 Software and the DISC
TITLE PRINTER Application at the same time.
26
Page 27

Inserting Phrases, and the Current Date and Time
The FA-B30 Software comes pre-programmed with 103 different often-used expressions
and phrases that you can recall and input into a label. In addition, you can also store
your own phrases for instant recall when you need them.
To insert phrases, and the current date and time
On the Input Panel, click the Recall Phrase button.
1
This displays a menu of phrase categories.
Recall Phrase
Button
Align the mouse pointer with the category of the phrase you want to
2
input. On the submenu that appears, click the phrase you want to input.
•To input a date and time, select the Time Stamp category.
➜
27
Page 28

Time Stamp Formats
Clicking this menu item: Inputs this:*
mm/dd/yy 10/18/05
dd/mm/yyyy 18/10/2005
yyyy-mm-dd 2005-10-18
dd-mmm-yy 18-Oct-05
d mmmm yyyy 18 October 2005
h:mm 14:00
h:mm AM/PM 2:00 PM
* The input examples shown here are what would be input when the current date and
time setting of your computer is October 18, 2005, 2:00 pm.
Saving Text in Phrase Memory
Three categories named USER 1, USER 2, and USER 3 are provided for saving your
own original phrases and expressions in phrase memory. Each category can hold up
to 30 phrases.
To save a text in phrase memory
On the Input Panel, select (highlight) the text you want to save.
1
Click the Save Phrase button.
2
This displays a group selection menu.
Save Phrase Button
Te xt Input Box
•You can also save text that is selected on a part of the screen outside the
Te xt Input Box as well. Right-click the selected text and then click Save Phrase
on the shortcut menu that appears. Note that depending on how you have
the FA-B30 Software configured, the Save Phrase item may not appear.
• See “Configuring Shortcut Menu Settings” on page 51 for information about
displaying the Save Phrase item.
28
Page 29

Click the group where you want to save the text.
3
The highlighted text is saved into phrase memory.
■ Editing Phrase Memory Text
See “Editing Phrase Memory Text” on page 50 for information about deleting and
changing the order of phrase memory text.
29
Page 30

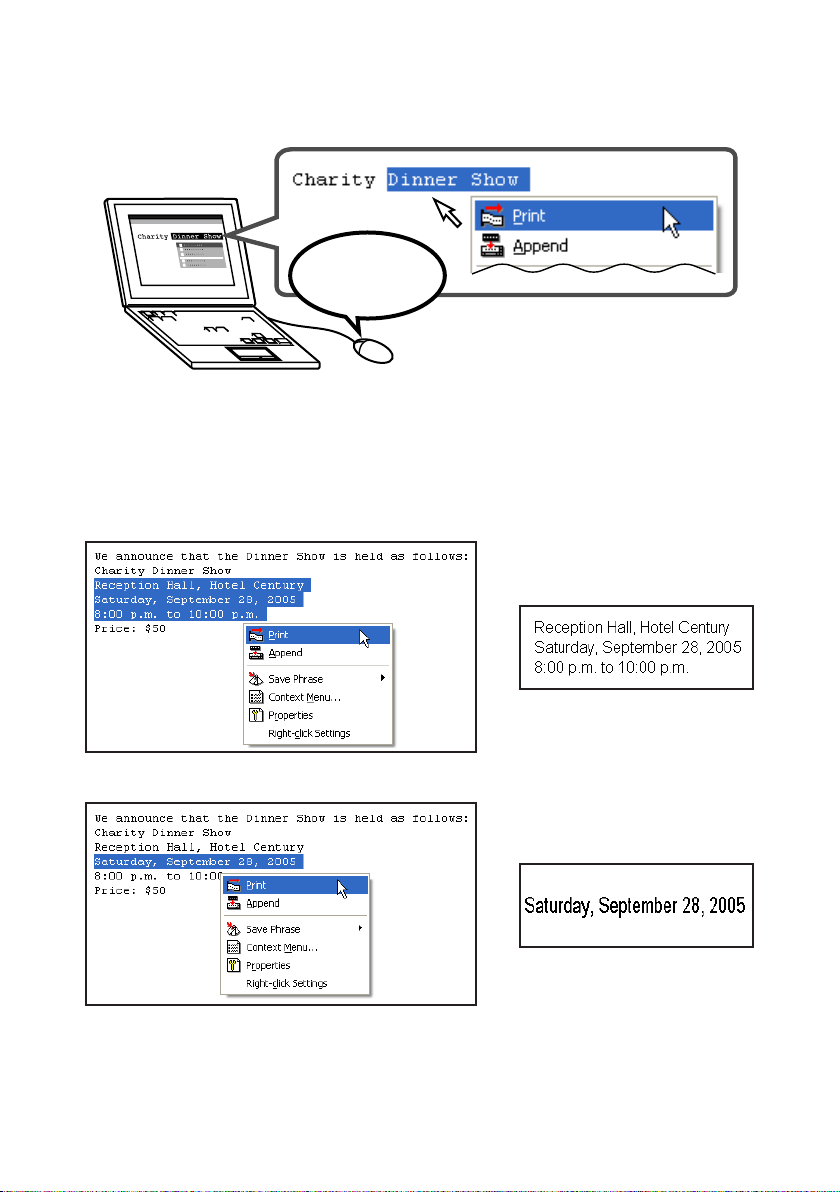
Importing Screen Text into a Label
This section explains how to import text that is selected on a word processor, browser,
or other application screen into a label for printing. You can import a single string of
text, or you can accumulate multiple strings from different locations.
As an example, the following procedure shows how to import and print text from
Microsoft
To import and print a single string of text
1
2
3
®
Internet Explorer.
Check to make sure the Label Printer is connected correctly to your
computer.
You can connect the Label Printer to your computer any time before you click the
Print button in step 6.
If the FA-B30 Software is already running, highlight the text you want
to print.
•You can input up to 255 characters per line. A carriage return will be inserted
automatically if your input exceeds this limit.
• The allowable number of characters per line is further limited when you are
using a fixed tape length. A carriage return is inserted automatically whenever
your input surpasses the maximum allowable line length.
Hold down Ctrl and then right-click with your mouse.
30
Page 31

On the shortcut menu that appears, click Print.
4
This causes the preview dialog box to appear.
• If you are using a Label Printer model that supports both EZ-LABEL PRINTER
tape and thermal roll paper, printing is performed on the type of tape selected
by the Printer setting of the Input Panel.
• The total number of layouts value shows how many different layouts you are
printing with the current print operation. When this value is greater than 1, use
the vertical scroll bar to scroll between the different layouts.
• The current layout value indicates which layout is currently displayed. If you are
going to print three different layouts, for example, this value shows 1, 2, or 3,
depending on the layout that is displayed.
•You can determine the number of labels by multiplying the total number of layouts
value by the Copies value you specify in the next step.
• Some label contents can cause the preview dialog box to be too small, which
makes the preview image appear ragged. If this happens, make the preview
dialog box larger by dragging its borders.
•You can use the scroll bars to view the areas of the label that do not appear
within the preview dialog box.
• See “Configuring Printing Properties” on page 44 for information about changing
the print image.
Scroll bars
Current layout
Total number of layouts
Specify the number of copies.
5
Click the Print button.
6
• This starts printing.
•You can also start printing by holding down Alt and pressing P.
•To cancel the print operation, click Cancel.
• Clicking the Stop button stops printing. You can also stop printing by holding
down Alt and pressing S.
Important!
•Never disconnect the cable between the Label Printer and computer while printing is
in progress.
•Never try printing on the CW-L300 printer from the FA-B30 Software and the DISC
TITLE PRINTER Application at the same time.
31
• Never disconnect the cable between the Label Printer
Page 32

Multiple Text Strings and Printing a Single Label
Perform the following steps when you want to accumulate a number of different text
strings for printing in a single label.
As an example, the following procedure shows how to import and print text from
Microsoft
To accumulate multiple text strings and print a single label
1
2
3
®
Internet Explorer.
Check to make sure the Label Printer is connected correctly to your
computer.
You can connect the Label Printer to your computer any time before you click the
Print button in step 9.
If the FA-B30 Software is already running, highlight the first string of
text you want to import.
Hold down Ctrl and then right-click the mouse.
Click Append.
4
This displays the Input Panel with the text you selected in step 2 in the Text Input Box.
• See “Input Panel” on page 15 for more information about the Input Panel.
Input Panel
32
Page 33

Highlight the next string of text you want to import, hold down Ctrl and
5
then right-click with your mouse, and then click Append.
• This appends the new text to the text that is already in the Text Input Box.
•You can input up to 255 characters per line. A carriage return will be inserted
automatically if your input exceeds this limit.
• The allowable number of characters per line is further limited when you are
using a fixed tape length. A carriage return is inserted automatically whenever
your input surpasses the maximum allowable line length.
•You can use the scroll bars to scroll the Text Input Box and view any text that
does not fit.
After appending all the text strings you want, edit the text in the Text
6
Input Box, if you want.
Configure Font, Width, Length, and Layout settings.
7
•Your settings will be reflected in the preview window, so you can see what your
printed label will look like.
• If you have Auto selected for Layout, the size of text will be adjusted automatically
so it fits within the specified tape length. If you have Title specified for Layout,
the first line will be middle size, while all remaining lines will be small size text.
• The tape length setting is ignored when you are printing to thermal roll paper.
•To specify a fixed-length tape, select the Fixed check box. The length of the
tape changes automatically in accordance with the text when this check box is
cleared.
• Note that some settings may not be available when using a label printer model
that does not support them.
33
Page 34

Preview window
Width
Font
CopiesMarginsPrinter
Specify the number of copies and margin size.
8
Click the Print button.
9
This causes a confirmation message to appear.
• If you do not have the preview window displayed along with the Input Panel, the
preview dialog box will appear at this time.
Click OK.
10
• This starts actual printing.
•You can also start printing by holding down Alt and pressing P.
•To cancel the print operation, click Cancel.
• Clicking the Stop button stops printing. You can also stop printing by holding
down Alt and pressing S.
• If the preview dialog box appeared in step 9, click Print to start printing.
Layout
Fixed
Length
Print Button
Important!
•Never disconnect the cable between the Label Printer and computer while printing is
in progress.
•Never try printing on the CW-L300 printer from the FA-B30 Software and the DISC
TITLE PRINTER Application at the same time.
34
Page 35

Inserting an Image into a Label
This Label Software comes with a collection of images that you can insert into your
labels. You can also capture an image from your PC screen into a label. Inserting an
image into a label consists of the following steps.
• Specify the location and size of the image.
• Specify an existing image or capture a new one.
Note that you can adjust the size and location of an image after you insert it into a
label.
•A captured image that has fine gray scaling may not look good when printed in a
label. When capturing an image to insert into a label, it is best to stick with those that
have clearly defined blacks and whites.
To specify the location of the image
Use the Image Box to specify the insert location and size of the image.
1
Image Box
35
Page 36

The following shows examples of what each of the available options does.
L-Sm
(Left Small)
R-Sm
(Right Small)
L-Lg
(Left Large)
R-Lg
(Right Large)
Full
(Full Tape)
None
(None)
•You can overlay text and images with the Full Tape option. If you select Full
Tape while the Fixed check box is cleared, a preview image does not appear in
the preview window until you input some text.
• Note that the image is not inserted when None is selected.
• Note that the text input range is smaller when any setting other than None is
selected in the Image Box.
After specifying the location and size of the image, perform the steps
2
under “To insert an existing image into a label” or “To capture an image
from your computer screen” on the following pages.
36
Page 37

To insert an existing image into a label
Click .
1
This displays an image selection window.
Insert Image Button
• Note that the Insert Image Button appears dimmed, which means it is unavailable,
when None is selected in the Image Box.
Click the folder that contains the image you want on the left panel of
2
the window, and then click the image you want on the right pane.
• See “Image Folder Contents” on the next page for information about the types of
images stored in each folder.
After selecting the image you want, click OK.
3
This inserts the image you selected into the label using the location and size
settings you specified on page 35.
37
Page 38

Image Folder Contents
The FA-B30 Version 1.02 Basic Label Printing Software comes with 136 sample images.
The images are contained in the folders named Illustrations and Frames, which are
located in FA-B30 – Samples. The following describes the types of sample images
that are available, and where you can find them.
■ Illustrations – Illustrations-Large
• 44 fun graphic images, measuring 256 × 256 pixels.
• The perfect size for EL-5000W 18mm tape.
■ Illustrations – Illustrations-Small
• 44 fun graphic images, measuring 128 × 128 pixels.
• The perfect size for CW-L300/EL-700 18mm tape.
■ Frame (For Full-Tape Image) – For EZ-LABEL Printer Tape
(Width-Large)
•A collection of 12 frames measuring 64 × 512 pixels.
• The aspect ratio (width:height) is 8:1. Best layout results are achieved using a tape
with a similar aspect ratio.*
■ Frame (For Full-Tape Image) – For EZ-LABEL Printer Tape
(Width-Medium)
•A collection of 12 frames measuring 64 × 384 pixels.
• The aspect ratio (width:height) is 6:1. Best layout results are achieved using a tape
with a similar aspect ratio.*
■ Frame (For Full-Tape Image) – For EZ-LABEL Printer Tape
(Width-Small)
•A collection of 12 frames measuring 64 × 256 pixels.
• The aspect ratio (width:height) is 4:1. Best layout results are achieved using a tape
with a similar aspect ratio.*
■ Frame (For Full-Tape Image) – For Memo Tape
•A collection of 12 frames measuring 64 × 400 pixels.
• The perfect size for thermal roll paper.*
* When you have Full Tape selected in the Layout box on the Image tab of the
properties dialog box (or Full Tape selected in the Image box of the Input Panel), be
sure to input enough space and adjust the position of text so it does not overlap with
image elements.
38
Page 39

Capturing an Image from Your Computer Screen
Perform the following steps when you want to capture an image from your computer
screen and incorporate it into a label.
To capture an image from your computer screen
Display the screen that contains the image you want to capture.
1
Click .
2
This closes the Input Panel.
• The Capture Image Button appears dimmed, which means it is unavailable,
when None is selected in the Image Box.
•You could also start the image capture operation by clicking the Capture Panel
instead of the Capture Image button. You can use the Capture Panel to capture
an image without displaying the Input Panel. See “Shortcut menu that appears
when you right-click the FA-B30 icon” on page 22 for more information.
•To cancel the capture operation, press the Esc key.
Capture Image
Button
Drag the mouse pointer on the screen so the area to be captured is
3
enclosed within the selection boundary.
• The area within the selection boundary is the image that will be captured.
➜
The image within the
boundary is inserted into
the label.
The area where you
drag is surrounded by a
selection boundary.
These guidelines indicate an area that
corresponds to the label layout size.
39
Page 40

Recalling and Deleting Past Print Jobs
The FA-B30 Software stores up to 100 of the last jobs you have printed. You can recall
print jobs for re-printing or editing, and delete jobs you no longer need.
To recall a past print job
On the Input Panel, use the Top, Back, Forward, and New buttons to
1
display the print job you want to recall.
Indicates the total number of print jobs and the currently
displayed print job number. This example indicates this is
the fourth print job out of a total of five jobs.
Top Button
Displays the oldest
entry in the history
of past print jobs.
Back Button
Displays the next
older job in the
history of past print
jobs.
Input new text, edit the existing text, or print the label.
2
• See “Inputting, Editing, and Printing Text” on page 24 for more information.
New Button
Displays the contents
of the label you are
currently editing.
Forward Button
Displays the next
newer entry in the
history of past print
jobs.
40
Page 41

To delete a past print job
Display the past print job you want to delete.
1
• See step 1 under “To recall a past print job” on page 40.
Click the Trash Button.
2
This deletes the displayed print job.
The print job count is reduced by 1.
Tr ash Button
41
Page 42

Feeding and Cutting the Tape
Perform the following steps when you want to feed or cut the tape on the printer
connected to your computer.
•Tape feed and tape cut operations are not supported by certain printer models.
To feed the tape
Click .
To cut the tape
Click .
42
Page 43

Configuring Label Software Properties
Label Printer properties let you control display of the Input Panel and various other
Label Software features and functions.
To configure Label Software properties
On the Input Panel, click .
1
This should display the Printer tab of the properties dialog box.
Printer tab
You can also display the properties dialog box by right-clicking the FA-B30 icon in
the status area and then clicking Properties on the shortcut menu that appears.
Use the procedures on the following pages to configure the settings
2
you want.
After you are finished, click OK to apply your settings and close the
3
properties dialog box.
•To close the properties dialog box without saving any settings, click Cancel.
•To apply your settings without closing the properties dialog box, click Apply.
•To return settings to their initial defaults, click Restore.
43
Page 44

Configuring Printing Properties
Use the Printer, Layout, and Format tabs to configure printing properties.
To configure printing properties
Click the Printer tab.
1
Configure the settings described below.
2
• Some Label Printer models do not support variable margin settings.
• The actual amount of tape that is fed with each margin setting depends on the
Label Printer model you are using, as shown in the table below.
Model
KL-E20/KL-P1000 Approx. 16 mm – Approx. 3 mm
EL-5000W
(EZ-LABEL Approx. 18.8 mm Approx. 10 mm Approx. 3 mm
PRINTER Tape)
EL-700 Approx. 19.3 mm Approx. 10 mm Approx. 3 mm
CW-L300 Approx. 21.5 mm Approx. 10 mm Approx. 3 mm
• All values in the above tables are approximate.
• Normally, you should leave the Print Density set to 3. Change this setting only
when printed characters are broken or too dark.
• With the KL-E20/KL-P1000 Label Printer, margins (small) are inserted only during
continuous printing, without tape cutting. If you want to have margins inserted,
configure the FA-B30 Software as described below.
Print without tape cutting.
•
On the Display tab, clear the Stop between prints for tape cut. check box.
•
Do not use a fixed tape length.
On the Layout tab, clear the Fix Tape Length check box.
Margins
Large Medium Small
44
Page 45

Click the Layout tab.
3
Layout tab
Configure the settings described below.
4
• The options that appear in the Font Size/Number of Lines list depend on the
tape width.
• When Automatic is selected under Font Size/Number of Lines, the Label
Printing software automatically selects the optimum text size to fit within the
specified tape length. Selecting Title causes medium size characters to be used
in the first line of text, and small size characters for subsequent lines.
• Clicking the Preset button displays a menu of commonly used preset labels
from which you can choose the one you want. Selecting a preset layout
automatically selects the Fix Tape Length check box.
• The value you can specify for Tape Length depends on the Label Printer model,
as shown in the table below.
KL-E20, EL-5000W (Memo Tape), KP-C10, KP-C50
Model
KL-E20/KL-P1000
EL-5000W
KP-C10/KP-C50
Tape Length Setting Range
37 to 300 mm
60 mm (fixed)
45
Page 46

CW-L300
Margins*
Small
Medium
Large
EL-700
Margins*
Small
Medium
Large
1
Auto Cut Style*
Half Cut/Full Cut
Full Cut only
No Cut
Half Cut/Full Cut
Full Cut only
No Cut
Half Cut/Full Cut
Full Cut only
No Cut
1
Auto Cut Style*
Half Cut/Full Cut
Full Cut only
No Cut
Half Cut/Full Cut
Full Cut only
No Cut
Half Cut/Full Cut
Full Cut only
No Cut
1
Tape Cut Length*
31 to 300 mm
25 to 300 mm
38 to 300 mm
32 to 300 mm
48 to 300 mm
48 to 300 mm
1
Tape Cut Length*
29 to 300 mm
23 to 300 mm
36 to 300 mm
30 to 300 mm
45 to 300 mm
45 to 300 mm
2
Tape Length
Setting Range
7 to 300 mm
–
21 to 300 mm
–
43 to 300 mm
–
2
Tape Length
Setting Range
7 to 300 mm
–
21 to 300 mm
–
39 to 300 mm
–
46
Page 47

EL-5000W (EZ-LABEL Printer Tape)
Margins*
1
Auto Cut Style*
Half Cut/Full Cut
Small
Full Cut only
No Cut
Half Cut/Full Cut
Medium
Full Cut only
No Cut
Half Cut/Full Cut
Large
Full Cut only
No Cut
*1You can change the Margins and Auto Cut Style settings on the Printer tab.
2
*
If the length of the tape being cut is outside the tape cut range when you perform
1
Tape Cut Length*
28 to 300 mm
22 to 300 mm
35 to 300 mm
29 to 300 mm
44 to 300 mm
44 to 300 mm
2
–
–
–
Tape Length
Setting Range
7 to 300 mm
21 to 300 mm
39 to 300 mm
a Half Cut/Full Cut or a Full Cut only, the tape length will be longer than the
specified tape length.
• The value you can specify for Tape Width depends on the Label Printer model,
as shown in the table below. The printing width also depends on the printer
model, and cannot be specified by you.
Model
KL-P1000
KL-E20
Tape Width
6mm / 9mm / 12mm / 18mm
6mm / 9mm / 12mm / 18mm
Maximum
Printing Width
7.5mm
12mm*
EL-5000W
(EZ-LABEL
PRINTER
6mm / 9mm / 12mm / 18mm / 24mm
16mm
Tape)
EL-5000W
(Memo Tape)
EL-700/CW-L300
KP-C50
KP-C10
13mm (Fixed)
6mm / 9mm / 12mm / 18mm / 24mm
13mm (Fixed)
13mm (Fixed)
8mm
16mm
8mm
8mm
* When printing text only on the KL-E20, the maximum printing width is
approximately 7.5mm.
47
Page 48

Click the Format tab.
5
Format tab
Configure the settings described below.
6
•Availability of the Label Direction setting depends on your computer’s OS and
the type of font being used for printing. Normally, this setting is Horizontal. The
Ver tical setting also becomes available if the OS you are using and the font that
is specified support vertical printing.
•For details about the Word Wrap and Justify settings, see “Word Wrap and
Justification” on page 49.
48
Page 49

■ Word Wrap and Justification
The following examples show how the Word Wrap and Justify settings affect label
text.
•
Word Wrap / Justify
Example
Carriage return inserted
inside of “into”.
• Word Wrap / Justify
Example
Carriage return inserted
in front of “into”.
•
Word Wrap / Justify
Example
Carriage return inserted
in front of “into”, and
right side of text is
•
Word Wrap / Justify
Example
aligned.
49
Right side of text is
aligned.
Page 50

Editing Phrase Memory Text
Use the Phrase tab to edit phrase memory text you previously registered. You can cut,
copy, paste, and delete text, and you can change the sequence of phrases.
To edit phrase memory text
On the properties dialog box, click the Phrase tab.
1
Phrase tab
Select the group that contains the phrase you want to edit.
2
This displays the phrases that are currently registered in the group.
Click the phrase you want to edit.
3
Edit the phrase.
4
• Use the Cut, Copy, Paste, Delete, Up, and Down buttons to edit phrase text.
•You can copy phrase text in one group and paste it into another group.
•You can select multiple phrases by holding down the Ctrl key as you click.
50
Page 51

Configuring Shortcut Menu Settings
Use the Menu tab to configure shortcut menu settings.
To configure shortcut menu settings
Click the Menu tab.
1
Menu tab
Select the check boxes of the items that you want to appear on the
2
shortcut menu.
Configuring Display Settings
Use the Display tab to configure display settings.
To configure display settings
Click the Display tab.
1
Display tab
51
Page 52

Select (check) and deselect (uncheck) the options you want.
2
• If you do not want the preview dialog box to appear each time you execute the
Print command, clear the Show preview before printing. check box.
•You can resize the preview window if you are using an EL-5000W printer. Clearing
the Display preview image in actual size. check box displays a preview window
that is one-half actual size.
• Select the Display preview image in monochrome. check box to enable
grayscale display of images.
Configuring Shortcut Menu Operation
Use the Operation tab to configure the type of shortcut menu that appears when you
right-click your mouse. You can also specify a modifier key that lets you select the
shortcut menu you want as you work.
To configure shortcut menu operation
Click the Operation tab.
1
Operation tab
Configure shortcut menu operation as described below.
2
When the check box
of this option is
cleared, the FA-B30
shortcut menu does
not appear when you
right-click your mouse.
When selected
(checked):
• Ctrl + right-click
displays the FA-B30
shortcut menu.
• Right-clicking only
displays the
shortcut menu of
the other application
you are using.
When selected
(checked):
• Alt + right-click
displays the FA-B30
shortcut menu.
• Right-clicking only
displays the
shortcut menu of
the other application
you are using.
When selected (checked):
• Shift + right-click displays the FA-B30 shortcut menu.
• Right-clicking only displays the shortcut menu of the
other application you are using.
52
Page 53

Configuring Image Settings
Use the Image tab to make image layout settings, specify the monochrome conversion
method, and to show or hide guidelines.
To configure image settings
Click the Image tab.
1
Image tab
Configure the image layout settings you want.
2
• Use the Layout box to specify the image location and size. The following shows
the available settings and what each one does.
Left Small
Right Small
Left Large
Right Large
Full Tape
None
53
Page 54

• Selecting the Resize to fit check box enlarges or reduces the image so it fits
within the area specified by Layout. When this option is deselected, the image
is inserted as-is at the location specified by Layout.
• Selecting the Maintain aspect ratio check box causes the width-to-height ratio
of the image to be maintained when it is resized. Note that this option appears
dimmed unless the Resize to fit check box is selected.
• The Full Tape layout can be selected for label printers other than the KL-P1000.
The Full Tape lets you use the all of the tape’s print area to layout an image.
Configure the monochrome conversion settings you want.
3
The explanation uses printing black text on white tape as an example.
• Use the Dithering setting to select the dithering method you want to use. The
following are the available options.
Nearest Color: With this option, light color areas are made white, while dark
color areas are made black. It is best when used for images that
contain line drawings and text only.
Pattern: This option makes light color areas whiter and dark color areas
blacker.
Error Diffusion: This option makes light color areas whiter and dark color areas
blacker, producing an appearance like you get when you
photocopy a color photograph. Printing with this option takes
longer than with Pattern, but results look better.
•Drag the Gamma slider left and right to adjust the relative darkness of an
image.
Specify the guideline setting you want.
4
Selecting the Show Guidelines check box displays guidelines indicating the
specified image size whenever you insert an image into a label.
54
Page 55

Configuring Add-in Settings
Use the Add-in tab to configure add-in settings.
To configure add-in settings
Click the Add-in tab.
1
Add-in tab
Configure add-in settings as described below.
2
• The Installed Add-ins lists add-ins you already have installed. Currently enabled
add-ins are those whose check boxes are selected.
•You can download the latest add-ins from the CASIO Website and add them as
needed. See “Visiting the CASIO Website” on page 59 for more information.
• The Add-in Setup button becomes undimmed whenever you select an add-in
name in the Installed Add-ins list by clicking it. Clicking the Add-in Setup button
displays a dialog box for configuring the setup of the selected add-in. The following
describes the settings you can configure for the preinstalled add-ins.
Sound Player Add-in
This add-in plays the contents of sound files whenever printing starts and ends.
Simply input the paths to the respective sound files into the Startup Sound File
and Shutdown Sound File boxes, and click OK. A Browse button can also be
used to select sound files. You can check the contents of the selected sound file
by clicking the Preview button.
Print Image Mirror and Rotate Add-in
This add-in makes it possible to create mirror images and to rotate the print image
180 degrees. Selecting the Mirror Print option reverses the print image for printing
to iron transfer tape. The Rotate 180° option rotates the print image 180 degrees.
Click the OK button after making the settings you want.
55
Page 56

Movie Player Add-in
This add-in can be used to play a video file while printing is in progress. Simply
input the path to the video file into the Video File box, and click OK. A Browse
button can also be used to select the video file. You can check the contents of the
selected video file by clicking the Preview button.
You can use Zoom to change the size of the playback screen, and Display
Location to change the location of the playback screen. Selecting the Mute option
mutes the audio portion of the video file.
56
Page 57

Using Help
You can access help from the Input Panel, the properties dialog box, and from the
FA-B30 icon in the status area. You can also display version information about the software.
To access help from the Input Panel or the properties
dialog box
Click the help button.
1
This causes a question mark to be added to the pointer.
Help Button
Pointer
Move the pointer to the item or area for which you need help and then
2
click.
Help text
After reading the help text, click with your mouse.
3
This closes the help box.
57
Page 58

To access help from the status area icon
Right-click the FA-B30 icon in the status area.
1
Click Help and then Search by Topic.
2
➜
FA-B30 icon
This displays a Windows help screen.
3
To view version information
Right-click the FA-B30 icon in the status area.
1
FA-B30 icon
Click Help and then About the Label Printer Application.
2
This displays version information.
After viewing the version information, click OK.
3
58
Page 59

Visiting the CASIO Website
Perform the following steps when you want to visit the CASIO Website on the Internet
for the latest information about CASIO Label Printers.
To visit the CASIO Website
Right-click the FA-B30 icon in the status area.
1
FA-B30 icon
Click Help and then CASIO Website.
2
This accesses the CASIO Website and displays a page with the latest information
about the CASIO Label Printer model you are using.
59
Page 60

Appendix
Printing Problems
Tape does not come out of the printer.
EZ-LABEL PRINTER tape printer Thermal roll paper printer
•
Is the tape compartment cover closed?
Securely close the tape compartment cover. See the Label Printer’s user’s
guide for details.
•
Are you out of tape?
Replace the tape cartridge or thermal roll paper with a new one. See the Label
Printer’s user’s guide for details.
•
Is tape jammed?
Disconnect the AC adaptor, remove the tape
cartridge, and then remove the jammed tape.
Use scissors to cut off the tape that was
jammed. Reload the tape cartridge and then
re-connect the AC adaptor.
Important!
Never do any of the following while printing is
in progress.
•Never allow the tape outlet to be blocked.
•Never touch the tape coming out of the
outlet.
•Never open the tape cartridge compartment.
•Never disconnect the AC adaptor.
•Never disconnect the USB cable.
See the Label Printer’s user’s guide for details.
Is tape jammed?
•
Remove the thermal roll
paper and reload it correctly.
Important!
Never do any of the following
while printing is in progress.
•Never allow the tape outlet to
be blocked.
•Never touch the tape coming
out of the outlet.
•Never open the tape
cartridge compartment.
•Never disconnect the AC
adaptor.
•Never disconnect the USB
cable.
See the Label Printer’s user’s
guide for details.
•
Computer USB port is not enabled.
Check to make sure that the USB cable is connected correctly. For the
CW-L300, check to make sure that the COMPUTER LINK button is depressed.
Also, perform the procedure below to check if the computer’s USB port is
enabled.
How to check if your computer’s USB port is enabled
Windows 98
1. Click Start - Settings - Control Panel.
2. Double-click the System icon.
3. Click the Device Manager tab.
4. Click the plus symbol next to Universal Serial Bus Controllers.
60
Page 61

Tape does not come out of the printer.
EZ-LABEL PRINTER tape printer Thermal roll paper printer
Windows Me
1. Click Start - Settings - Control Panel.
2. Double-click the System icon.
If the System icon does not appear, click If you don’t see an option you are
looking for, view all Control Panel options.
3. Click the Device Manager tab.
4. Click the plus symbol next to Universal Serial Bus Controllers.
Windows 2000 Professional/XP
1. Log in to Windows 2000 using an account that has Administrator privileges.
2. Click Start - Settings - Control Panel.
3. Double-click the System icon.
4. Click the Hardware tab and then click the Device Manager button.
5. Click the plus symbol next to Universal Serial Bus Controllers.
If both USB Host Controller and USB Root Hub appear under Universal Serial
Bus Controllers, it means your USB port is enabled. If you have multiple hubs in
your USB chain, try connecting the printer’s USB cable to a separate hub or to
another device. Make sure you connect the cable securely.
If USB Host Controller and USB Root Hub are not displayed under Universal
Serial Bus Controllers, see the documentation that came with your computer or
contact your computer’s manufacturer for information about USB setup and
procedures for enabling the USB port.
Tape comes out of the printer, but nothing is printed on it.
EZ-LABEL PRINTER tape printer Thermal roll paper printer
Did you input any text?
•
Input some text into the label.
Label contains non-printing character codes
•
Your FA-B30 software will not print or display a preview of a label that contains
blank spaces, carriage returns and tabs only.
61
Page 62

Print quality is poor.
EZ-LABEL PRINTER tape printer Thermal roll paper printer
•
Are you using a proper print density setting?
Change the print density setting. See “To configure Label Software properties”
on page 43.
•
Is the tape cartridge or thermal roll paper loaded correctly?
Correctly load the tape cartridge or thermal roll paper. See the Label Printer’s
user’s guide for details.
•
Is the printer head or rubber roller inside the printer dirty?
Clean the printer head and rubber roller. See the Label Printer’s user’s guide for
details.
Ink ribbon is coming out of the tape outlet together with the tape.
EZ-LABEL PRINTER tape printer Thermal roll paper printer
•
Was the ink ribbon slack when you loaded
the tape cartridge?
Remove the tape cartridge and make sure
the ink ribbon is not broken. Correctly load
the tape cartridge. See the Label Printer’s
user’s guide for details.
Important!
• Make sure you take up any slack in the ink
ribbon before loading the tape cartridge into
the Label Printer.
• If the ink ribbon ever breaks, replace the tape
cartridge with a new one.
—
Printing stops part way through.
EZ-LABEL PRINTER tape printer Thermal roll paper printer
•
Is the printer head overheated?
The printer head heats up during printing. If you print a large number of
consecutive labels or print labels that contain a large amount of black areas,
the printer head can overheat, which causes printing to stop automatically.
Simply leave the printer alone and the printing will resume when the print head
cools down.
62
Page 63

The tape does not cut.
EZ-LABEL PRINTER tape printer Thermal roll paper printer
•
Is label jammed?
Remove the tape cartridge or thermal roll paper, and then remove the jammed
label. See the Label Printer’s user’s guide for details.
•
Is tape cutter worn?
Contact your CASIO nearest dealer to have
the cutter replaced.
•
Is the No Cut option selected?
Select a different cutting option.
•
Are you using a short tape length (30mm or
less with small margins, 37mm or less with
medium margins, or 47mm or less with large
—
margins)?
After printing is complete, use the cutter
button to cut the tape.
Important!
•Available cutting options depend on the
Label Printer model. See the Label Printer’s
user’s guide for details.
Half cutting is not performed.
EZ-LABEL PRINTER tape printer Thermal roll paper printer
•
Is tape cutter worn?
Contact your nearest CASIO dealer to have
the cutter replaced.
•
Is the No Cut option selected as the Auto
Cut Style option?
Change the Auto Cut Style option setting to
Half Cut/Full Cut.
Important!
•Available cutting options depend on the
Label Printer model. See the Label Printer’s
user’s guide for details.
• Make sure you take up any slack in the ink
ribbon before loading the tape cartridge into
the Label Printer.
• Note that half cutting cannot be performed
when you are using reflective tape, magnetic
tape, or any other special tape.
—
63
Page 64

Tape does not adhere properly.
EZ-LABEL PRINTER tape printer Thermal roll paper printer
Did you peel off the backing paper?
•
Peel off the backing paper from the label. See the Label Printer’s user’s guide
for details.
•
Are you trying to affix the label to a compatible type of surface?
Make sure the surface or area where you are affixing the label is compatible.
See the Label Printer’s user’s guide for details.
64
Page 65

Error Messages
If this message appears: Do this:
No connected device
Tape size setting error
Cut setting error
Tape is jammed inside the printer
No tape is loaded in the printer or
tape is jammed inside the printer
The printer is busy.
Wait until printing from the other
application is complete and try again.
There are too many characters to fit
on the specified tape length.
OK to adjust the tape length
automatically?
Printer batteries are low.
Continue printing.
Check the connection between the printer
and computer. Check to make sure that
the printer model specified on the
Properties dialog box is the same as the
printer that is connected to your computer.
After correcting the problem, try printing
again.
Check if the tape loaded in the printer is
the right size. After correcting the
problem, try printing again.
The tape loaded in the printer is magnetic
tape. Magnetic tape cannot be half cut
using a printer’s cutter. When using
magnetic tape, change the Auto Cut
Style setting to No Cut.
If tape is jammed, see “Printing Problems”
on page 60 for more information.
Check to make sure that EZ-LABEL
PRINTER tape is loaded, tape is not
jammed, that the tape width is supported
by the label printer model you are using,
and that the tape cartridge is not out of
tape. If tape is jammed, see “Printing
Problems” on page 60 for more
information.
Wait until the other application is through
printing and then try again.
Click OK if there is no problem with
printing a long tape. To print a specific
length, click Cancel to return to the Input
Panel, change to a smaller character size,
or reduce the number of characters. After
you are finished, try printing again.
Clicking OK starts printing, but the printer
may turn off if battery power drops below
a certain level. If this happens, replace
batteries or use the AC adapter*.
*Some printer models do not support use
of an AC adaptor.
65
Page 66

Label Creation Problems
Using the FA-B30 Basic Label Printing Software
•
Cannot append selected text into the Text Input Box.
Tr y selecting the text you want and copying it to the Windows clipboard and then
performing the append operation. With most applications, you can perform the copy
operation by selecting the Copy command on the Edit menu.
Not enough memory to insert or print an image.
•
If the message “There is not enough memory to execute that command.” appears
when you try to insert an image into a label or print a label that contains an image, it
could mean either of the following.
• There is not enough memory to perform the operation. Quit other applications
you have running and try again.
• There is a problem with the Windows display driver. Contact the manufacturer of
your computer for more information.
Images become all black when printing
•
The image you are using may be too dark. Try either of the following to adjust image
brightness.
• Use Paint or some other graphic application to increase the brightness of the
image.
•
What to do when the Input Panel appears with your computer’s screen saver
With some screen savers, the FA-B30 Input Panel may remain on the display with
the screen saver if you have the Keep Input Panel in front. option selected on the
dialog box that appears when you select Properties - Display. If this happens, turn
off the Keep Input Panel in front option, or hide the FA-B30 input panel.
When expanding to the full-screen Acrobat Reader view
•
Close the FA-B30 screen before expanding the Acrobat Reader screen to its fullscreen view.
Creating a label on the KL-P1000 that includes graphics
•
When using a KL-P1000 Label Printer, you cannot select the Full Tape option when
printing a tape that includes graphics in its layout.
What to do when you can’t get to FA-B30 context menu to appear on the display
•
The FA-B30 context menu may not appear when this software is used in combination
with certain applications. If this happens, highlight the text in the application you
want to select, and then select Print, Append, etc. using the FA-B30 Input Panel.
Precautions when using mouse click modifier keys
•
Under initial default settings, right-clicking the mouse displays the FA-B30 context
menu.
You can use the FA-B30 Properties dialog box to change this so a modifier key (Ctrl,
Shift, Alt) is required while right clicking to display the FA-B30 context menu. If your
FA-B30 software is setup to require a modifier key to display its shortcut menu,
make sure you release the keys before using the mouse or up/down arrow keys to
select a command on the menu.
66
Page 67

•
Preview window precautions
You may experience slow response when typing large amounts of text into the text
box on the Input Panel while the FA-B30 preview window is on the display. If this
happens, try closing the preview window and then typing or editing text.
What to do when dots are missing from characters
•
The FA-B30 label printing software prints within the full area of the label tape width
you are using. If the preview window shows part of your text is being cut off, try
something like the following to correct the situation.
• Change to another font that prints without missing dots.
What to do when you have problems with the Windows desktop context menu
•
While typing or editing text on the Label Printer Application Input Panel, you may
experience problems performing operations on the context menu that appears when
you right-click on the Windows desktop. If this happens, click anywhere on the
Windows desktop and then right-click to display the Windows context menu.
Using Another Application
•
The shortcut menus of the other applications are different after installing this Label
Software.
While the FA-B30 Software is running in the background on your computer, holding
down Ctrl and then right-clicking your mouse displays an FA-B30 shortcut menu.
You can change how the right-click operation works by configuring the settings under
“Configuring Shortcut Menu Operation” on page 52.
67
Page 68

CASIO COMPUTER CO., LTD.
6-2, Hon-machi 1-chome
Shibuya-ku, Tokyo 151-8543, Japan
 Loading...