

Page 1
OPERATION MANUAL
MANUAL DE OPERACION
Page 2

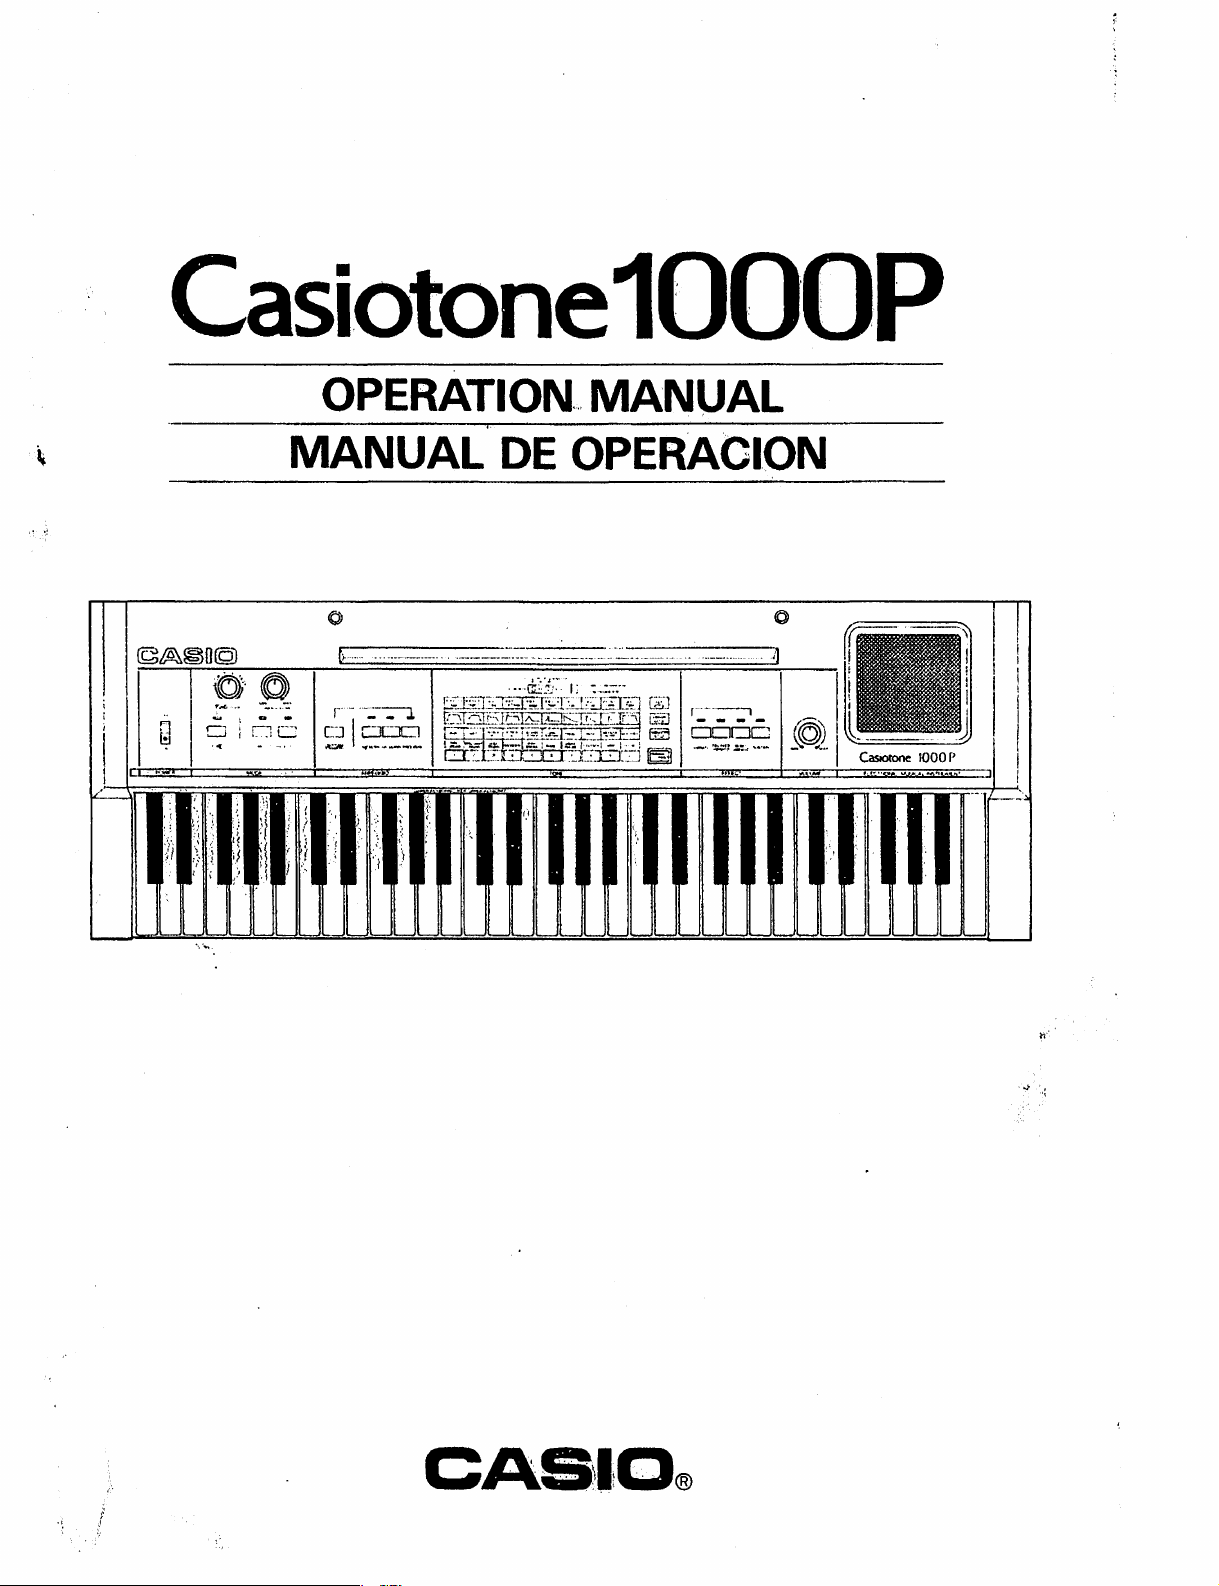
Thank you very much for purchasing the Casiotone
1 000P, we hope it gives you many years of enjoyment.
i iw:.
CasiotonelOOOP
ELECTRONIC MUSICAL INSTRUMENT
The Casiotone 1000P is a valuable and exciting intro
duction to the world of music, assembling myriad
sounds onto an electronic keyboard with under-arm
portability.
It is different from conventional synthesizers in that
it permits sounds to be created simply by combining
numbers using the sound programming function. There
is also an arpeggio programming function so you can
freely combine arpeggio patterns to support your
performance on the keyboard or accompany other
instruments in a group.
This booklet has been prepared to help you explore the
many
functions of the Casiotone 1000P and become
familiar with its varied abilities.
y:.;1;.';
CONTENTS
•
1
Unique features of the Casiotone 1
2
In and around the Casiotone 1000P
3
Power Supply
4
Casiotone 1000P — Starting to Play
5
Sound Programming Function
6
Arpeggio Programming Function
7
Preset Arpeggio Function
8
Tuning (Transposing)
9
Troubleshooting Chart
10
Care of Your Unit
11
Specifications
000P
]
2
5
6
9
15
2 e
21
23
24
25
Page 3

Sound programming allows the
simple creation of 1000 sounds
and storage in 10 memories.
With the selective use of FEET, ENVELOPE and
MODULATION and the combination of numbers
shown on the digital display, as many as 1000
different sounds can be created. The ones you like
best, up to 1 0, can be stored in the memory.
A programmable arpeggio
function freely combines
arpeggio patterns and can also
be used as a sequencer.
Arpeggio patterns can be freely programmed to
match the music.
Since up to 127 steps, 9 note pitches and rests
can be stored, it is possible to use this function
for high class arpeggio or as a sequencer.
A digital frequency display and With a clear digital display of the frequency,
wide range digital pitch control tuning can be perfected visually as well as by
provides transposing function. sou^- sJ,
r
to 662 Hz, with standard A=442 Hz, transposing
nce tbe variaJble/aAngLg°e1! from 221 Hz
is also possible between minus 1 octave and plus
0.5 octave.
S
10
preset sounds and a 16-Step
up/down preset arpeggio give
big musical scope.
°
r
10 beautiful preset sounds - the Piano, Jazz
Organ, Vibraphone, etc. can be selected with one
touch-
Also-
since a.16-st^P
up/down arpeggio
pattern is preset, music with a professional back
ground can be enjoyed.
A*
Various sound effects give full
play to musical expressions.
The Casiotone 1000P provides various sound ef
fects such as Sustain — which produces a beautiful
lingering effect, Vibrato and Delayed Vibrato —
indispensable for delicate, emotional expressions,
and Heavy Vibrato — which creates a modern
musical ambience.
The keyboard split function
allows you to play the melody
and chord separately with
different sounds.
Complete, yet compact
keyboard with 61 keys,
5 octaves and
8
-note polyphonic.
The 61
3-octave upper keyboard and a 2-octave lower
keyboard
-key, 5-octave keyboard can be split into
with one touch. Since different sounds
can be independently set for each section, you
can enjoy a wide variation of the performance
as if using a two-tiered organ keyboard.
The note range accomodates all kinds of music
from classics to pops. And, with 8-note poly
phonic, chord playing is truly realistic. All this,
in an instrument that is easily portable.
-
1
-
Page 4

® i ® | ' ®
© ©
©
©
(Rear panel)
©
(0 Power ON/OFF Switch
(?) TUNE Button
® TUNE/ARPEGGIO TEMPO Control
(4)
TONE SET Button
(I>
LOWER VOLUME Control Knob
(6) SPLIT Button
@ RECORD Button
(1) MEMORY Button
(9) UP/DOWN Button
© PROGRAM Button
(Q) Digital Display
©Sound Selection Buttons
©Sound Characteristic Data Chart
04)
PROGRAM/PRESET Button
© FEET Button
© ENVELOPE Button
© MODULATION Button
© VIBRATO Button
© DELAYED VIBRATO Button
© HEAVY VIBRATO Button
© SUSTAIN Button
© Main Volume Control Knob
© Built-in Speaker
(Rear panel)
© Headphone jack (PHONES)
© Output Jack (LINE OUT)
© FOOT VOLUME jack
© SUSTAIN jack
© AC Power Socket
Page 5

Each time a button is pressed, it t
lamp will light (except for the So
the PROGRAM Button indicators
currently established.
■.....■ ....
urns the function on
und Selection Butte
will blink in time
and off. When on, a red indicator
ns). The UP/DOWN Button and
vith the arpeggio tempo which is
® Power ON/OFF Switch
Turns the power on and off.
©TUNE Button
Press on when tuning or transposing.
©TUNE/ARPEGGIO TEMPO Control Knob
Adjusts arpeggio speed or note pitch. Turning the knob to the right increases the tempo
of the arpeggio or raises the pitch of the notes. Turning the knob to the left decreases the
tempo
of
the arpeggio or lowers the pitch of the notes. If you continue to turn the knob
in one direction, it will eventually return to the lowest or highest setting as it employs an
endless system control.
©TONE SET Button
Press on to set the sound for the lower keyboard (lower two octaves) when the keyboard
is
split.
©LOWER VOLUME Control Knob
Adjusts the volume of the lower keyboard (lower two octaves) when the keyboard is split.
As this is adjusted relative to the main volume, it will not function when the Main Volume
Control Knob is set to MIN.
©SPLIT Button
Press on to split the upper three octaves and the lower two octaves of the keyboard. In
this case, the lower two octaves will become one octave higher.
©RECORD Button
Press on the PROGRAM Button and this button at the same time when programming
arpeggio patterns.
©MEMORY Button
If this button is pressed on, while playing arpeggio, the sounds will continue to be produced
until the next
chord is pressed even if the fingers are removed from the keyboard.
©UP/DOWN Button
Press on when you want to play arpeggio using the preset arpeggio pattern (16-step, up/
down pattern).
CO>PROGRAM Button
When programming an arpeggio pattern, press on the RECORD Button and this button
at the same time. Also, press on when playing arpeggio using the programmed arpeggio
pattern.
©Digital Display
Displays the preset sound number, programmed sound memory number, sound character
istic numbers and note pitch (Hz).
©Sound Selection Buttons
Press to select preset sounds or programmed sounds. Also, these buttons are used when
programming sound characteristics or arpeggio patterns.
©Sound Characteristic Data Chart
Shows the various sound characteristics for sound programming. (10 elements each for
FEET, ENVELOPE and MODULATION).
Page 6

©PROGRAM/PRESET Button
Each time this is pressed, it
selects either the preset sounds or programmed sounds.
©FEET Button
Press on to designate the feet while programming a sound.
©ENVELOPE Button
Press on to designate the envelope while programming a sound.
©MODULATION Button
Press on to designate the modulation while programming a sound.
©VIBRATO Button
Press on to give warmth and strong expression to the sound. It allows full and effective
tonal reverberation.
©DELAYED VIBRATO Button
Press on to'get a delayed vibrato effect. It allows a certain delay of the vibrato after de
pression of a key.
©HEAVY VIBRATO Button
Press on to give a heavy vibration to the sound. It creates a modern musical ambience.
©SUSTAIN Button
Press on to get a sustain effect. The sound lingers on even after the fingers are removed
from the keyboard.
©Main Volume Control Knob
Adjusts the volume of the entire instrument. Turning the knob to the right increases the
volume.
©Built-in Speaker
Delivers ideal sound for home parties, personal listening or musical lessons.
(Rear panel)
©Headphone Jack (PHONES)
If a headphone (optional) is connected, the speaker sound will be automatically cut off
and playing can be enjoyed privately.
©Output jack (LINE OUT)
If the instrument is connected to audio equipment or a keyboard amplifier, etc. and ex
ternal speakers, playing can be enjoyed with a more powerful volume. The volume can be
adjusted by using the volume control on this instrument or a foot volume control pedal
(optional).
©
FOOT VOLUME Jack
By
connecting a foot volume control pedal (optional) to this jack, free volume change
can be made by foot during play.
©SUSTAIN Jack
If a sustain pedal (optional) is connected, a lingering sustain effect can be obtained while
stepping on the pedal, even after keyboard playing has finished.
©AC Power Socket
Connect the AC power cord (standard accessory).
-4-
Page 7

( Main Power Supply
The Casiotone 1
supply. Connect the provided AC power cord to the AC
power
an AC outlet.
( Memory Protection Power Supply )
Any programmed sound and arpeggio will be protected
even when the main power supply (Power ON/OFF
Switch) is turned OFF. Three AA size manganese dry
batteries
protection. Battery life is approximately one year, during
which
When batteries become weak, a distorted sound, different
from the one you programmed, may be produced or an
erroneous display appears. It is advisable to replace the
batteries once a year to avoid the above conditions.
The battery compartment is located on the back panel
of the instrument. Slide open the lid and replace the
socket on the Casiotone 1000P and plug it into
v-_ ---------——
(UM-3) are used as backup power for memory
time the memory contents will be retained.
[Battery Replacement]
batteries making sure the © and 0 terminals are facing
correctly.
-----------;—:--------------— ——
)
000P uses domestic AC for a power
A C ou 11 e t
r 1
H
a b
T
i
1
00
1
1tSI
AC power socket
T
fOPEN A
r~
’
lit!
s
1
i
m
3
i
i
;
j 1
----------
Note:
Since the lifespan of UM-3 or SUM-3 batteries is approximately one year, replace all three
batteries
should be made within approximately 8 to 10 months. Also, when the instrument is to be
left unused for a long time, remove the batteries to avoid damage caused by leakage.
once a year. The original batteries are installed at the factory, so the first replacement
Removing the batteries clears the memory contents. So, when the power is switched
ON just after battery replacement, the sound or display may be confused. Press a
Sound Selection Button to return to a normal condition. However, the programmed
sound and arpeggio need to be re-programmed.
....■ "
'
— —
Page 8

( Turn the power
ON.
)
OFF
When the Power ON/OFF Switch is turned ON, the digital
display
will illuminate to show the Casiotone I000P is operat
ing. At this time, a number between 0 and 9 will be displayed.
is
This
power
the number of the preset sound set prior to turning the
OFF.
* If the memory number of the programmed sound was last
set prior to turning the power OFF, that memory number
will be displayed as the number of the preset sound.
ON
POWER
Preset sound number
'
Switching the power OFF and then ON again turns off all of the buttons on the
Casiotone 1000P. This Operation Manual will explain the instrument from this initial
condition. Therefore, switch the power OFF and then ON again to prepare the instru
ment before starting to play.
* The sound and arpeggio which have been preset or programmed are protected by
a separate power supply.
Let's produce some sounds. )
With the Casiotone 1000P in this initial condition, the preset
sound whose number is shown on the digital display is set in
the entire 5-octave keyboard. Set the Main Volume Control
Knob as illustrated on the right and play the keys. Adjust
the volume while pressing the keys.
VOLUME
f
J
( Now, select
The Casiotone 1000P has 10 preset sounds such as
Jazz Organ, Piano, Vibraphone . . . and by pressing
the Sound Selection Buttons, any one can easily
be selected. The number of the selected preset
one of 10
preset
sounds.
)
JAZZ
ORGAN
3
BASSOON
4
Preset sound name
Preset sound number
sound will appear on the digital display.
* The CPU ME sound can be used as a sound
Sound Selection Buttons
effect as it contains various musical intervals.
(Preset sound display)
A single-digit number (0—9)
shows the preset sound number.
Each time the PROGRAM/PRESET Button is pressed, the two sets of information
shown below will change alternately on the display. When only one digit is displayed,
the preset sound can be selected by using the Sound Selection Buttons.
(Preset sound display)
3
-
3
(Sound programming display)
n
_
u
-6-
3
3
3
3
Page 9

( E
xperiment with s
ome effects.
)
There are four effect buttons as shown on the right. Each time
the buttons are pressed they turn on and off. When they are on,
the respective indicators will light up.
• VIBRATO
VIBRATO
viohmiu
DELAYED HEAVY SUSTAIN
V1BRATQ VIBRATO
This is a normal vibrato effect.
• DELAYED VIBRATO
This is a delayed vibrato effect.
• HEAVY VIBRATO
This gives a heavy vibration to the sound.
• Only one vibrato effect may be selected at one time.
• SUSTAIN
A lingering sound remains even after the fingers are removed from the keyboard.
( How to split the keyboard,
If the SPLIT Button is pressed, the 61
)
-key, 5-octave keyboard
will be split into a 3-octave upper keyboard and a 2-octave
lower keyboard, each one adopting 4-note polyphonic. At
this time, the lower keyboard note range will raise one octave
and become a note range suitable for accompaniment.
A
Lower keyboard (4-note polyphonic) Upper keyboard (4-note polyphonic)
B
C
D
E
* Since the note range of A and B is raised one octave, B
becomes in the same note range as C.
Lower Keyboard Volume Adjustment
The volume of the lower keyboard (lower two octaves) can be
independently adjusted. This is done by using the LOWER
VOLUME Control Knob. Turning the knob to the right in
creases the volume. However, if the Main Volume Control
Knob is set to MIN, even if the LOWER VOLUME Control
Knob is set to MAX, no sound will be produced.
TONE SET - SPLIT
LOWER
Lower Keyboard Sound Selection
Different sounds can be independently set for the lower and
upper keyboards.
(1)
Press both the SPLIT Button and the TONE SET Button
on.
• 7he
SPL
11' and TONE SET indicators will light.
7
TONE SET
- SPLIT
Page 10

wag;;
(2) Press the desired Sound Selection Button.
• The number of the selected preset sound will be displayed J
on the digital display.
^
JAZZ
ORGAN
3
BASSOON
4
(3) Press the TONE SET Button off.
• The TONE SET indicator will go off.
* With the above operation, the desired sound pressed in
Step 2, above, is now set in the lower keyboard.
When the Sound Selection Button is pressed in Step 3 (TONE
SET Button: off, SPLIT Button: on), that sound can be
set only in the upper keyboard.
• The sound set in the lower keyboard will be deleted and the sound set in the upper
L
•• ..till U o i . »■
/*. o «•■ /• •> I U « rot •
a U a I a 11 / a »• /n \
TONE SET - SPLIT
i
io tU a r a
rui'inft cnroc
WAH
BRASS
5
T:-
PI.
8
Page 11

With this instrument, 10 elements each for FEET, ENVELOPE and MODULATION can be
combined to create up to 1000 different sound characteristics and 10 of these can be stored
in the memory.
Sound Characteristic
Data Chart
Sound
Buttons
Selection
lS-8-5'/,-*-?
(OtiJin II
r~\
WAM
. PIPE
ORGAN
t
Digital Display —
l#-#*5V,-4-Z
(
Ogan 2 >
/"A
WAIT
BRILLIANT
ORGAN
21
16-8-5'/,.?
0 -4-2
<Tit>a1
(Full T.b.asl
L
a
ATTACK
ATTACK
sr
3
ORGAN | BASSOON
4
3
I EWVElC** f Mf«
n
u ~
16-85'/,
IB/asal
DELAYED
ATTACK
WAH
BRASS
5
~ i
n
16-8-5'/,-*
IReofli
A—.
LONG
SUSTAIN
PIANO
6
'<**
VIBRA
PHONE
TREBLE
2
8
\ Flute ►
7
AflKGGlO *f<iCnAM MOOt
TO** P«tOCAAM MOOt
8-4-2
<P'CCC*0>
K.
BASS
CELESTA
8
Programming Sequence
First, based on the Sound Characteristic Data Chart, select a
three-digit number which corresponds to the elements to be
combined
in
producing the desired overall sound characteristic.
The respective digits range from 0 to 9 with the first digit
indicating the FEET, the second digit the ENVELOPE and the
third digit indicating MODULATION.
The Data Chart indicates the FEET, ENVELOPE, MODULA
TION and preset sound in sequence from the top. Each of
these corresponds to a number on the Sound Selection Buttons.
When programming the sound characteristics, the preset sound
has no effect.
* See page 13 for the meaning of FEET, ENVELOPE and
MODULATION.
?»/>-! Vl'/l
' Chime*
»
< P'ano i
1 \
K
METALLIC
MOD FREE
SOUND
CHIME
FLUTE
9
PROGRAM/PRESET
ENVELOPE —
ENVELOPE
FEET
ENVELOPE
czo
MODULATION
err)
0
MODULATION
I 3 D
( L -l
FEET
FEET —
MODULATION
ENVELOPE
16-8-573-4-2'
7
Button -
Button
ButtonJ
Button —
(Organ 1)
16-8-5'
(Org;
/■
\
For example, the three-digit number '
indicate a sound characteristic with
‘
111”
would
elements as
follows.
FEET = 16’-8’-5
ENVELOPE = r~\
1/3’-4’-2’
Sound Selection Buttons—
MODULATION = WAH
After determining the three-digit number, use the PROGRAM/
PRESET Button, the FEET Button, the ENVELOPE Button,
the MODULATION Button and the Sound Selection Buttons
to perform programming.
-9-
MODULATION
—
H
—
• WAH
PIPE
ORGAN
-
WA
BRILL
ORG
1
r
C
Page 12

The basic operating sequence is as follows.
I—(T
f—(2
■—(3
—(4
Reparation)
Press the PROGRAM/PRESET Button to set the digital display to
a sound programming display.
Memory Number Designation)-
Press the Sound Selection Button to select the desired memory
number from 0 to 9.
FEET
If the FEET Button is pressed, the number in the feet position
(first digit) will blink. Press the Sound Selection Button which
corresponds to the desired feet.
ENVELOPE Designation)
If the ENVELOPE Button is pressed, the number in the envelope
position (second digit) will blink. Press the Sound Selection Button
which
corresponds to the desired envelope.
...........
Designation)---------------------
.....................................
^
...........
.................
u
n
_i
n
u
1
-It D
m
___
1 n
r
J L -I
Zi
1
(5 MODULATION Designation)-
♦
~--—
If the MODULATION Button is pressed, the number in the modula
tion position (third digit) will blink. Press the Sound Selection
Button which corresponds to the desired modulation.
.......
—(6 Prog
When the MODULATION Button is pressed, the digital display
will return to a sound programming display and programming is
complete.
The sequence of Step 3 through 5 above may be changed. In this case, at Step 6, press
the button (FEET, ENVELOPE or MODULATION) corresponding to the position
that is blinking.
EX.) When the number in the middle (envelope) is blinking, if the ENVELOPE
ramming Completion)-
Button is pressed, the digital display will return to the sound programming
display.
j oa
_(
n _ r
u
—3027
uzj
-I
)
Page 13

( Programming Demonstration
Example:
To set the FEET to “3” (8’-4’-2’), the ENVELOPE to “8” ( N ) and the MODULATION to
“5” (DELAYED ATTACK). This will produce a sound like raindrops which can be stored
into the memory number 1 (Sound Selection Button number 1).
)
* The following operation is based on starting the instrument from an inactive condition
(all buttons off). Press all the buttons off or switch the power OFF and then back ON
prior to starting.
Even during operation, as the keys will produce notes when pressed, programming can be
monitored and the notes confirmed.
(1) Preparation
Press the PROGRAM/PRESET Button and set the digital display
to a sound programming display.
• Each time the PROGRAM/PRESET Button is pressed, the digital
display is alternately changed to a sound programming display
or to a preset sound display.
(2)
Memory Number Designation
Press the Sound Selection Button number 1.
• The display is as shown on the right and it indicates that memory
number 1 has been called out.
(3) FEET Designation
Press the FEET Button and press the Sound Selection Button
number
• When the FEET Button is pressed, the sound characteristic
3.
number
and the first digit (FEET) will blink. If the Sound Selection
Button number 3 is pressed, the blinking first digit will become
"3”
previously stored will be displayed (a three-digit number)
(Sound programming display)
n _ 3
u
3
n _ i
u
Memory number
s'
3= n n
3s U I
FEET
<
(4)
ENVELOPE Designation
Press the ENVELOPE Button, the second digit will blink, then
press the Sound Selection Button number 8.
(5) MODULATION Designation
Press the MODULATION Button, the third digit will blink, then
press the Sound Selection Button number 5.
(6) Programming Completion
When the MODULATION Button is pressed again, the display will
return
to a
complete.
Thereafter, whenever the display is “0 - I ”,
which has sound characteristic number 385.
sound programming display and programming is
playing can be performed
-11
-
3
S13 n
3
: Us
-
T
ENVELOPE
3
D=
C=
3
U
-
MODULATION
;3
n
u
"
<
1
1
Page 14

( Storage and Callout of the Pro
gram
med Sound
As previously explained in Step 2 of “
Memory Number Designation”, by pressing one of the
Sound Selection Buttons from 0 to 9, up to 10 kinds of programmed sound can be stored
in the memory.
When the digital display is a sound programming display, the stored programmed sound can
be called out by pressing the Sound Selection Button of that memory number, and you can
play with that programmed sound.
Each time the PROGRAM/PRESET Button is pressed, the preset sound display and
sound programming display will alternately appear in the digital display. The pro
grammed sound can be called out by pressing the Sound Selection Button when the
digital display shows a sound programming display. Likewise^ the preset sound can be
called out when the digital display shows a preset sound display.
(Sound programming display)
(Preset
sound display)
iT
. Programmed sound
memory number
( Co
nfirmation of the Programmed Sound)
------------1—
Preset sound number
J
In order to confirm what kind of sound characteristic is stored, perform the following opera
tion.
Example:
To confirm the sound characteristic which is stored in memory number 8 (Sound Selection
Button number 8).
(1) Press the PROGRAM/PRESET Button and set the digital display
to a sound programming display.
(2) Press the Sound Selection Button number 8.
(3) Press either the FEET Button, ENVELOPE Button or MODULA
TION Button. The number displayed at this time will be the
number of the programmed sound stored in memory number 8.
When the FEET Button
is pressed, the first digit
(FEET) will blink.
(4) If the button which was pressed in Step 3 is pressed once more,
the digital display will return to a sound programming display
and the operation is complete.
* •
n _ o
u
u
• Even if the power is switched OFF, the programmed sound will be protected by
a separate power supply.
•
The programmed sound can also be set in the lower keyboard when the keyboard
has been split.
-12-
Page 15

Casiotone 1000P
Sound Creation System
)
The Casiotone I000P sound programming function allows the creation of 1000 different
sound characteristics by combining FEET, ENVELOPE and MODULATION, which are
important sound determining elements. The following is a simple explanation of these three
elements.
FEET
The lengths of pipes in a pipe organ are normally expressed in terms of feet and these are used
as units to express the harmonic numbers which determine sounds. Sounds are varied by
combining feet such as 8’, 4’, 5 I /3’, etc. The Casiotone 1000P has 10 combinations assembled
in advance (such as “8’-4’,
etc.), and the sound name is shown in parentheses. Since the rela
tionship between the harmonics and the sounds require a rather specialized theory, all that is
required to be understood here is that feet are elements which determine the sound. Further
more, among the 10 elements of FEET, since CHIME (2 2/3
'-I 3/5’-1 1/3’) does not include
whole number harmonics, it cannot be heard as the sound of a musical interval. So please
use it as a sound effect.
[
envelope]
Envelope is normally defined as the “
excess characteristic”. However, it might be more easily
defined as the variation in the sound intensity from the moment the sound is produced until
it is gone. The envelope differs according to the musical instrument. For example, with a
violin the envelope gradually becomes higher, whereas a guitar sound reches its peak the
moment
the string is plucked and then drops. When the envelope is different, even if the basic
sound is the same, a different effect will be heard. For example, if the envelope of strings
(
) is applied to the Flute sound, it will sound similar to that of a harp.
The Casiotone 1000P has 10 kinds of envelope already set and each has an envelope curve*
as shown on the Sound Characteristic Data Chart.
Envelope Curve:
The volume variation over a specific period of time is
graphically represented as shown in the figure and this
is called the “
envelope curve”. These graphic representa
tions are located on the Sound Characteristic Data Chart
on the Casiotone 1000P.
MODULATION
Modulation means a creative sound effect obtained by modulating the frequency or amplitude
the Wah or Treble effects. The Casiotone 1
like
000P has 1 0
kinds of
modulation already set as
shown on the Sound Characteristic Data Chart.
-13
Page 16

WAH
Adds a Wah effect to the sound at the moment it is produced.
WAIT
ATTACK 5 1/3
ATTACK 4'
DELAYED
Modulates the sound to “5 1 /3’ ”
Gives a “5 1 /3’ ” percussive effect on the sound.
’
Gives a “4’ ” percussive effect on the sound.
Modulates the sound to “5 1 /3’ ”, ”4’ ”
and then to “4’-2’ ”
and then to ‘‘2’ ”
.
.
ATTACK
LONG SUSTAIN
Gives a long sustain effect.
* Press the SUSTAIN Button on during play.
TREBLE
BASS
SOUND
LIC
Emphasizes the high note range.
Emphasizes the low note range.
Modulates the sound to a metallic tone.
* Useful for sound effect only.
MOD. FREE
- .
(
Sound Programming Examples
No modulation is applied.
|
The following are some sound programming examples. Please use these for reference when
creating
sounds.
Sound Name
Xylophone
Raindrops
Magic Violin
Chorus
Westminster
Bells
Honky-tonk
Piano
Space Sound
Electric Bass
Oboe
'
Horn
If
Violin
■-
Programming
FEET
7
3
7
6
9
3
9
6
6
5
8
m
9
8
5
4
7
9
2 6
0
1
1
1
MODU
LATION
7
5
7
2
6
0
8
1
0
7
Effect
' !
”v '
delayed
1
VIBRATO
HEAVY
vibrato
SUSv
TAIN
ATT :':vTv
'
Remarks
;TY
o
A sound like rain falling
o
o
o
~
o
o
A beautiful, high-pitched,
o
ethereal sound
Playing chords gives a
human choral effect
Most appropriate for sound
o
"
effects
o
O
An imposing, low-range bass
sound
i
o
O
An alpine meadow sound
-14
An impression of the violin,
O
o
especially in the higher
note range
Page 17

The Casiotone 1000P arpeggio programming function allows your favorite arpeggio patterns
to be programmed using the Sound Selection Buttons and il the lower keyboard (lower two
octaves) is played, the note pressed will emerge in accordance with the programmed pattern.
( Progra
mming B
asic and Playing Method)
Example:
Play three-finger chords (C, Am, etc.) using an arpeggio pattern
as shown on the right.
| Programming]
(1)
Number the notes (1 through 9) in sequence beginning with
the
lowest note.
• Assign number 1 to the lowest note and then use numbers
2, 3, etc. in sequence.
• Assign identical numbers to identical notes.
The numbering sequence for this example is "1, 2, 3, 2”
and
this becomes the program contents.
• These numbers will hereafter be referred to as “
program
number”.
(2) Press the RECORD Button and the PROGRAM Button
simultaneously.
• This should bring an “ ft ” to the digital display.
(3) Press the Sound Selection Buttons in the sequence deter
mined in Step 1.
* If
you press an incorrect button, re-start from Step 2.
[RECORD
PROGRAM
0
1 I
(4) Press the RECORD Button.
This completes programming.
Arpeggio Playing
(5) Press the PROGRAM Button on.
• The indicator will blink. (The rate of blinking depends
upon the current ARPEGGIO TEMPO setting.)
(6) If a chord (three-finger chords, C, Am, etc. for this ex
ample) is played using the lower keyboard (lower two
octaves), arpeggio will be played in accordance with the
programmed pattern.
• The tempo of the arpeggio is controlled using the TUNE/
ARPEGGIO TEMPO Control Knob. Adjustment can be
made within the range of
= 57 ~ 1064 (When an arpeggio
note is J ).
• When the MEMORY Button is pressed on, arpeggio will
continue until the next chord is played, even after your
fingers are removed from the keyboard. This is most con
venient for playing music which has few tempo adjustments
or chord variations.
-15-
RECORD
PROGRAM
■
---------- . AP»«l
iTUNEl
/
TEMPI")
MEMORY
Page 18

Tvv-'-rr: :
• When the SPLIT Button is pressed on, the note range of
arpeggio will be raised one octave. At this time, the arpeggio
sound and volume can be independently set and adjusted.
(See page 7 for the operating method.)
• During arpeggio playing, the PROGRAM Button indicator
will light up at each first beat of the arpeggio pattern.
PROGRAM
MOTS
When you want to stop arpeggio and perform normal playing,
press the PROGRAM
Button off. Even if the Power ON/OFF Switch is turned OFF, the program contents
will be protected by a separate power supply. Arpeggio can be performed at any
by
time
simply pressing the PROGRAM Button on. Flowever, in the following cases,
the program contents will be deleted.
• When a new arpeggio pattern is programmed. (When the RECORD Button and
PROGRAM Button are simultaneously pressed.)
• When the separate program protection power supply (see page 5) has been de-
pleted.'
• When the PROGRAM Button is pressed in the course of programming. j>N —^i.
When no arpeggio has been programmed, if the PRO
GRAM Button is pressed, the UP/DOWN Button indi
cator will blink and playing can be performed using the
Preset Arpeggio Function. (See page 20.)
SPLIT
/1 \
-
n
UP/DOWN
m
’/ I Y
//
V
(
Programmable
Note Pitches and Number of Steps^)
* *
|9 note pitches + rests
Sound Selection Button numbers 0 through 9 are used for programming. Since 0 is used for
rests, a pattern of up to 9 kinds
of
note pitch is programmable.
127 steps
A maximum of 127 steps can be programmed. No dividing is possible.
* While programming, one press of a Sound Selection Button is
counted as one step. The previous example is a four-step program.
When 127 steps have been programmed and another step is at
C _
J
!_ I I U
tempted," End ” will be shown on the digital display.
-16-
Page 19

Example 1
Arpeggio with noi
Arpeggio with notes other than those played on the keyboard can be performed.
• Arpeggio pattern
• Program contents
• Played keys
* Five kinds of note pitches, numbered I through 5, are used for the program contents and
only three keys are played. In this case, the program numbers correspond to the arpeggio
notes as shown below.
1 = C (Do), 2 = E (Mi), 3 = G (So), 4 = C (Do) (one octave higher), 5 = E (Mi) (one octave
higher)
(In the case of C)
1, 2, 3, 4, 5, 4, 3, 2, 3, 2, 3, 4
In other words, program numbers will be set, which climb and octave higher than the
number of played keys (in this example, 4 and 5).
Example 2
This applies to Example 1. This arpeggio pattern is the same as the one preset in the Casiotone
1000P. (See page 20.)
Arpeggio pattern
• Program contents
• Played keys
Up/Down Arpeggio
(In the case of C)
«
l
' *
1 23456789876
1, 2, 3, 4 5, 6, 7, 8, 9, 8, 7, 6, 5, 4, 3, 2
II
/
III
\
II
' #
5432
III
(In the case of C)
-17-
C
E
G
Page 20

* In this case, the program numbers correspond to arpeggio notes as shown below.
1 = C (Do), 2 = E (Mi), 3 = G (So), 4 = C (Do), 5 = E (Mi), 6 = G (So),
7 = C (Do), 8= E (Mi), 9 = G (So)
* “• ”
At this time, if the played keys are changed, the arpeggio pattern will become as shown
below.
(Example 2-1)
• Played keys
denotes one octave higher and ” denotes two octave higher.
i
TlWUtlW
In the case of C7)
(Example 2-2)
• Played keys
• Arpeggio pattern
* The maximum note range in arpeggio will be identical notes up to three octaves above
the note of the played key. In Example 2-2, since the note in parentheses is a C (Do),
which is four octaves higher, it is not played. Also, when the keyboard is split and the
upper
octave of the lower keyboard is played, the maximum note range in arpeggio will
be identical notes up to two octaves above the note of the played key. (See page 7.)
*
Lower keyboard
-18-
Page 21

Arpeggio
This is an arpeggio pattern which starts in a downward direction.
• Arpeggio pattern
• Even in this case, numbers are assigned beginning with the lowest note.
• Program contents
Played keys
Example 4
The Casiotone 1000P can be used as a sequencer within the range of 127 steps, with up to
9 note pitches. However, since the duration of each note is fixed, use the rests (Program
number
Operating as a Sequencer
0)
skillfully.
(in the case of C)
7, 6, 5, 4, 3, 2, 1, 3
II
(In the case of C)
III
V
3 2 13
II
III
• Programmed music
From
“FLir Elise” by
~t)
o
nr\
't
*)
Program contents
98 989576
600298
Played keys
* If the MEMORY Button is pressed on, automatic playing will be performed repeatedly
even if the keyboard is not touched. To interrupt this play, press the MEMORY Button
off.
r~trz
Beethoven
r—%
9
===========
989576
II
C
9
• u-
— n-m- m
400124
400124
ISI
E
G» A B C DE^E
- .... - --
------
m
---7-
500235
-a-
-j
i w
500265
IB
4000
III
m
----r
1
r . . J
r-n—
zru*
»
-----
Page 22

Since the Casiotone 1
000P has a preset arpeggio function (1
arpeggio playing can be simply enjoyed at any time.
6-step, up/down arpeggio pattern),
( How to
(1) Press the UP/DOWN Button on.
• The indicator will blink. (The rate of blinking depends upon the
Use
)
o1
//
current ARPEGGIO TEMPO setting.)
• The lower keyboard (lower two octaves) is only for playing
arpeggio.
UP/DOWN
(2) If a chord is played on the lower keyboard (lower two octaves), a 16-step, up/down
arpeggio pattern will emerge.
• The indicator will light on the first beat of the arpeggio pattern.
•
An operation using the MEMORY Button, SPLIT Button or TEMPO Control Knob while
the arpeggio performance is the same as in Arpeggio Programming Function (see page 15).
• See page 1 7 for further explanation concerning this preset arpeggio pattern.
• When you want to stop arpeggio playing and perform normal playing, press the UP/DOWN
Button once more.
UP/DOWN Button and PROGRAM Button:
.
■■ ■
'V
When using the arpeggio programming function, press the
PROGRAM
function, press the UP/DOWN Button on. However, when
either of the above button is on, use of the alter one overrides
the first button.
Button on and when using the preset arpeggio
. „ s
-
.......
■
•;S'
'Zyis,
PROGRAM Button is pressed, the preset arpeggio function
will be called out and the UP/DOWN Button indicator will
blink.
-
20
-
Page 23

Frequency is displayed on the digital display and tuning can be perfected visually as well as
by sound. Also, since the variable range is one and a half octaves, transposing is also possible.
By using this transposing function, you can play any tune in the C scale.
(
Oper
ating"Metho
d)
(1) Press the Sound Selection Button number 0 (Flute) in the
preset sound display.
• The flute sound is a sustaining sound, which will continue to
sound while a keyboard key is being pressed, and has almost a
sine wave sound characteristic. So it is suitable for tuning although
other sounds will do.
(2) Press the TUNE Button on.
• “
that the current setting is A=442 Hz
” will be displayed on the digital display which indicates
.
(3) The note will continue to sound if a keyboard key is pressed.
• The note will not continue to sound,
•
Volume can be adjusted using the Main Volume Control Knob.
except the sustaining sound.
(4) Set to the desired pitch by turning the TUNE/ARPEGGIO
TEMPO Control Knob.
• Turning the knob to the right raises the pitch. Turning the knob
to the left lowers the pitch, if the knob is turned continuously,
the setting will go from maximum to minimum (or vice versa).
This is called an “
endless system”. The variable range is A=221 Hz
to 662 Hz.
• The pitch of the standard sound A will be displayed on the digital
display.
n
u
i //
TUNE
[
tune|/tempo
(5) After setting, press the TUNE Button off and the operation is
complete.
m
If the power is switched OFF, the pitch which has been set will be deleted and
the pitch of A=442 Hz will be automatically set.
When the TUNE Button is on, the VIBRATO Button, SUSTAIN Button, SPLIT
Button and MEMORY Button etc. will not function.
Also, if the TUNE Button is pressed off and on again, all the buttons will revert
to off. Reset them after tuning.
In a few cases, there may be some discrepancy between the frequency shown on
the digital display and the real frequency. Please utilize the frequency on the digital
display as a standard reference.
-21
-
TUNE
Page 24

If the pitch is adjusted by referring to the table below, scale transposition can be accomplished
and you can play any tune in the C scale.
Example:
If “
393” is
set, the scale will be ET and a clarinet (B&
instrument) ensemble can be played
using a C scale.
SCALE
C
D
1,
D
E
b
E
PITCH
221
234
248
262
278
SCALE
F
G M
Till
A
PITCH
294
: 3 311| |||
350
: 371 '
SCALE
.BT >.
III
D
p
D
PITCH SCALE
p'!
•
■ ■ h
393
417
442
• l'-1- • r
: T' '
~
468
:: 496
_ 7
F#
G
PITCH
525
556
589
625
662
* The above table is reference to the standard pitch of each scale when A=442 Hz. It is
recommended that other instruments be used for practical tuning.
* When the scale is set to the extreme upper or lower limit, depending upon the sound, the
permissible note range of
this instrument may be exceeded.
-
22
-
Page 25

Symptom
No sound comes
out of the speaker
even when press-
ing the keyboard
keys.
♦
. The AC cord is not plugged in
correctly.
2. The Power Switch is OFF.
3. The Main Volume Control Knob
is at its minimum.
4. The Foot Volume Control Knob
is at its minimum.
5. Fleadphone is connected.
Possible Cause
ir
Remedy
1. Plug the AC cord properly.
2. Turn the Power SwitchON.
3. Adjust, the volume level
to the desired level.
4. Adjust the volume level
to the desired level.
5. Disconnect the headphone.
The note continues
to sound even
after fingers are
removed from the
keyboard keys.
The sound does
not come out or
is not in tune in
high note range.
The sound does not
change even when
the Sound Selec-
tion Button is
pressed.
Noise is present
1. The MEMORY Button is on.
2. The TUNE Button is on.
Since the permissible note range of
this instrument may be exceeded
when the pitch is set to the extreme
upper limit, there may be these
cases. This especially applies to the
preset sound of
programmed sounds which incor-
porate the FEET elements of
"CHIME”.
When the TONE SET Button is on,
only the sound of the lower two
octaves change.
Noise
from electric appliances such
as refrigerator or washing machine.
"CHIME” or
the
1. Press the MEMORY
Button off.
2. Press the TUNE Button
off.
Select other sounds or set the
pitch close to 442 Hz.
Press the TONE SET Button
off.
Use an AC outlet located as
far as possible from motor-
ized appliances.
No sound comes
out even an ex-
ternal amplifier
is connected.
1. The Main Volume Control on the
Casiotone is at its minimum.
2. The connection cord is bad.
-
23
-
1. Adjust the volume level to
the desired level.
2. Replace the connection
cord.
.. ... .
........
1
Page 26

1 Avoid heat, humidity or direct sunlight.
Do not overexpose the unit to direct sunlight, place
near an air conditioner, or in any ex-
tremely hot place.
2 Take care not to drop the unit and avoid strong shocks.
A strong shock may cause trouble. When carrying or transporting the unit, protect the key
board and switches with soft materials.
3 Keep the unit free of liquids, dust, particles etc
Do not allow bits and pieces to get between the keys, especially metallic objects such as hair
............
pins, sewing needles or coins. Also, do not wet the unit.
4 Never attempt to modify any parts of the unit.
The unit is built with precise electronic parts. Any modification of, or tampering with, inner
parts may cause trouble or accidents.
5 Do not use a lacquer thinner or
similar chemical.
Clean the unit with soft cloth dampened with a mild detergent. (Soak the cloth in a detergent
and squeeze until almost dry.)
6 Do not forget to turn off the power switch.
After using the unit, be sure to turn off the power switch. If the unit is left for many hours
with the power switch turned on, trouble or accidents may occur. Also when not using the
unit for a long period, plug out the AC cord.
7 In case of malfunction
............
When the unit does not work properly, check whether switches, connections, etc. are set
correctly as indicated in the Troubleshooting Chart on page 23. If
the unit still does not work,
please contact the original retailer or nearby dealer. Never attempt to repair it yourself. It
may result in serious damage of components.
-
24
-
Page 27

tvKSJSS
T
1
Specifications
Model
Number of keys
Chords
Preset sounds
Programmable sounds
Arpeggio
Sound
effects
Casiotone 1000P
61 keys (5 octaves)
* Variable from minus 1 to plus 0.5 octaves using the transposing
function.
8-note polyphonic (simultaneous sound: 8 notes at max.)
* During keyboard split: 4 notes (lower 2 octaves) plus 4 notes
(upper 3 octaves)
1 0 sounds;
Pipe Organ, Brilliant Organ, jazz Organ, Bassoon, Wah Brass, Piano,
Vibraphone, Celesta, Chime and Flute.
1000 sounds;
Programmable items:
Program memory:
Preset pattern:
FEET, ENVELOPE and MODULATION
10
1 (1
6-step, up/down)
Programmable patterns: Maximum of 127 steps with 9 note pitches.
Rests are also programmable.
Storage in memory is possible.
Arpeggio tempo:
Variable using TUNE/ARPEGGIO TEMPO
Control Knob
Sustain, Vibrato, Delayed Vibrato and Heavy Vibrato.
Pitch control
(incorporating trans
posing function)
Display
Built-in speaker
Output jack
(LINE OUT)
Power source
Memory protection
batteries
Power
consumption
Dimensions
Weight
Body finish
Standard accessories
Digital tuning system (frequency is displayed digitally)
Variable frequency range: A=221 Hz to 662 Hz (within ±1.6 Hz)
3-digit, LED display
10 cm (4”) dia. x 1 (Output = 1 0
W)
Output impedance = 5 kS2
Output voltage = 1.4 V max.
AC 100, 1 20, 220 or 240 V, 50/60 Hz.
Three AA size manganese dry batteries
* Battery life = Approx, one year
27 W
11 7 mmH x 916.5 mmW x 363.5 mmD
(4-5/8”H x 36”W x 14-3/8”D)
10.2 kgs (22.5 lbs)
Velvet black
AC power cord, score holder, dust cover and Three AA size manga
nese dry batteries (UM-3) (installed at the factory).
*
Design and specifications may be subject to change without notice.
-
25
-
Page 28

GUIDELINES LAID DOWN BY FCC RULES FOR USE OF THE UNIT IN
THE U.S.A. (not applicable to other areas).
This equipment generates and uses radio frequency energy and if not installed and used
properly, that is, in strict accordance with the manufacturer’s
interference
comply with the limits for a Class B computing device in accordance with the
specifications in Subpart J of Part 15 of FCC Rules, which arc designed to provide
reasonable protection against such interference in a residential installation. However,
there is no guarantee that interference will not occur in a particular installation. If this
equipment does cause interference to radio or television reception, which can be
determined
the interference by one or more of the following measures:
.....
reorient the receiving antenna
.....
relocate the computer with respect to the receiver
.....
move the computer away from the receiver
.....
plug the computer into a different outlet so that computer and receiver arc on
different branch circuits.
If necessary, the user should consult the dealer or an experienced radio/television
technician for additional suggestions. The user may find the following booklet prepared
by
the Federal Communications Commission helpful: "How to Identify and Resolve
Radio-1 V Interference Problems”. This booklet is available from the US Government
Printing Office, Washington, D.C., 20402, Stock No. 004-000-00345-4.
to
radio and television reception. It has been type tested and found to
by
turning the equipment off and on, the user is encouraged to try to correct
instructions, may cause
-26
1
J
Page 29

‘
fffWr-
i'
&
ji •
* t.
I
072C SA <§) (f§) Printed in Japan
 Loading...