

Page 1

Chapter
Computer Algebra
System and Tutorial
Modes (ALGEBRA FX 2.0 PLUS only)
7-1 Using the CAS (Computer Algebra System) Mode
7-2 Algebra Mode
7-3 Tutorial Mode
7-4 Algebra System Precautions
7
20010102
20010102
Page 2
Using the CAS (Computer Algebra System) Mode
7-1-1
7-1 Using the CAS (Computer Algebra System)
Mode
On the Main Menu, select the CAS icon to enter the CAS Mode.
The following table shows the keys that can be used in the CAS Mode.
COPY
i
kk
k Inputting and Displaying Data
kk
PASTE
H-COPY
REPLAY
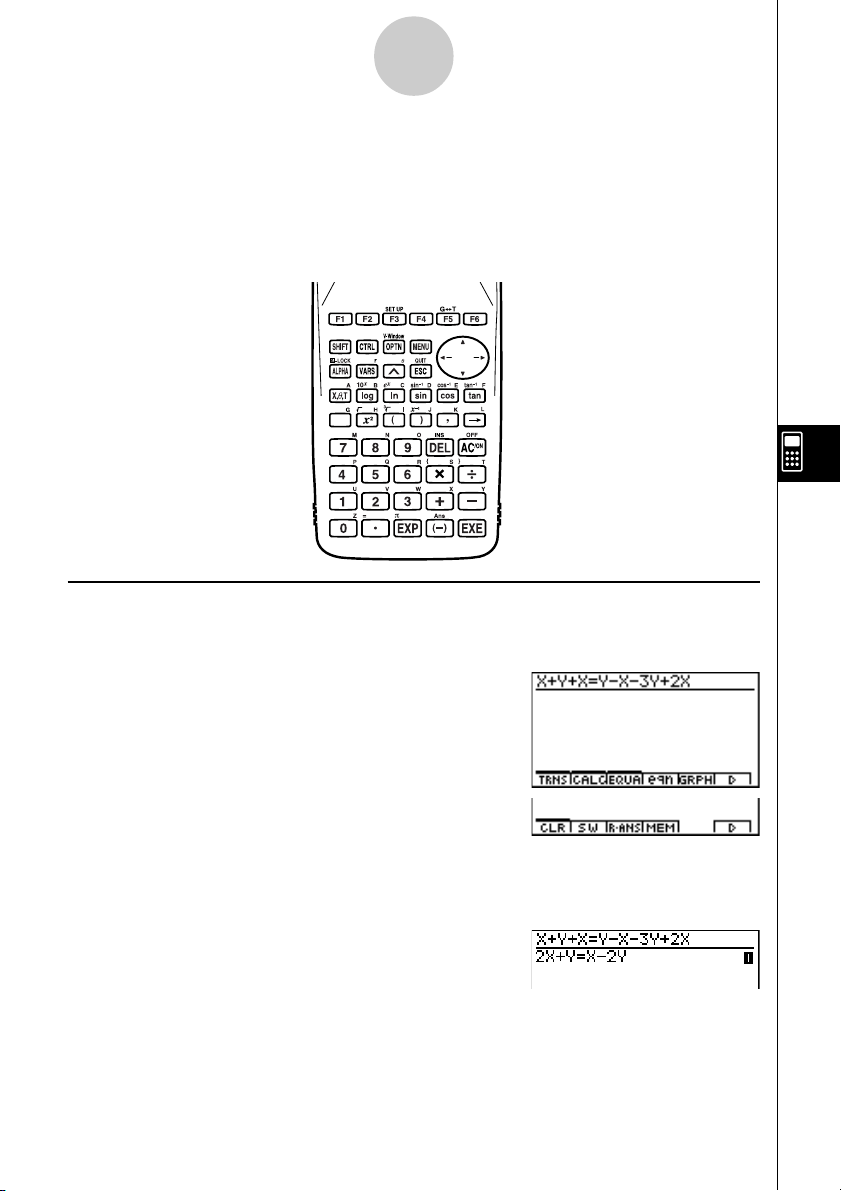
Input in the Algebra Mode is performed in the upper part of the display, which is called the
“input area.” You can input commands and expressions at the current cursor location.
Calculation results appear in the lower part of the display, which is called the “output area.”
When a calculation produces an equation or inequality, the lower part of the display is
divided between a “natural result display area” for the result, and a “formula number area” for
the formula number as shown below.
20010102
Page 3
Using the CAS (Computer Algebra System) Mode
7-1-2
If all the result does not fit on the display, use the cursor keys to scroll it.
k Inputting List Data
List: {element, element, ..., element}
•Elements should be separated by commas, and the entire set of elements should be
enclosed within {curly braces}.
•You can input numeric values and expressions, equations, and inequalities as list elements.
○○○○○
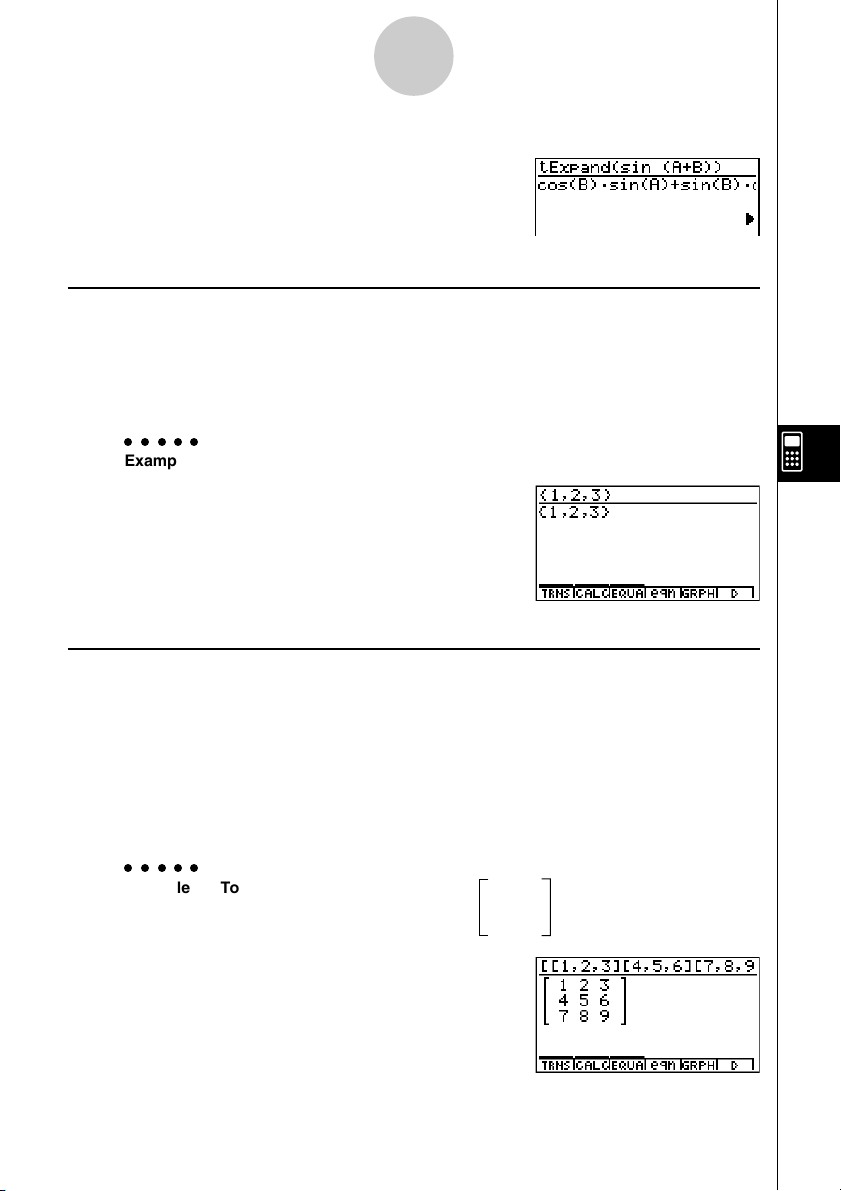
Example To input List {1, 2, 3}
!*( { )b,c,d
!/( } )w
k Inputting Matrix Data
Matrix (m × n): [[(1,1) entry, (1,2) entry, ..., (1,m) entry] [(2,1) entry, ......, (2,n) entry]...
[(m, n) entry, ..., (m, n) entry]]
• The above input is arranged to show the relative positions of entries in the matrix. Actual
input is an unbroken line, from left to right.
•Entries should be separated by commas, and the entire set of elements should be enclosed
within [square brackets]. And each line also should be enclosed within [square brackets].
•You can input numeric values and expressions as matrix entries.
○○○○○
Example To input the matrix shown below 1 2 3
4 5 6
7 8 9
!+( [ )!+( [ )b,c,d
!-( ] )!+( [ )e,f,g
!-( ] )!+( [ )h,i,j
!-( ] )!-( ] )w
20010102
20011101
Page 4
Using the CAS (Computer Algebra System) Mode
7-1-3
k Inputting Vector Data
Vector: [component, component, ..., component]
•Components should be separated by commas, and the entire set of components should be
enclosed within [square brackets].
•You can input numeric values and expressions as vector component entries.
○○○○○
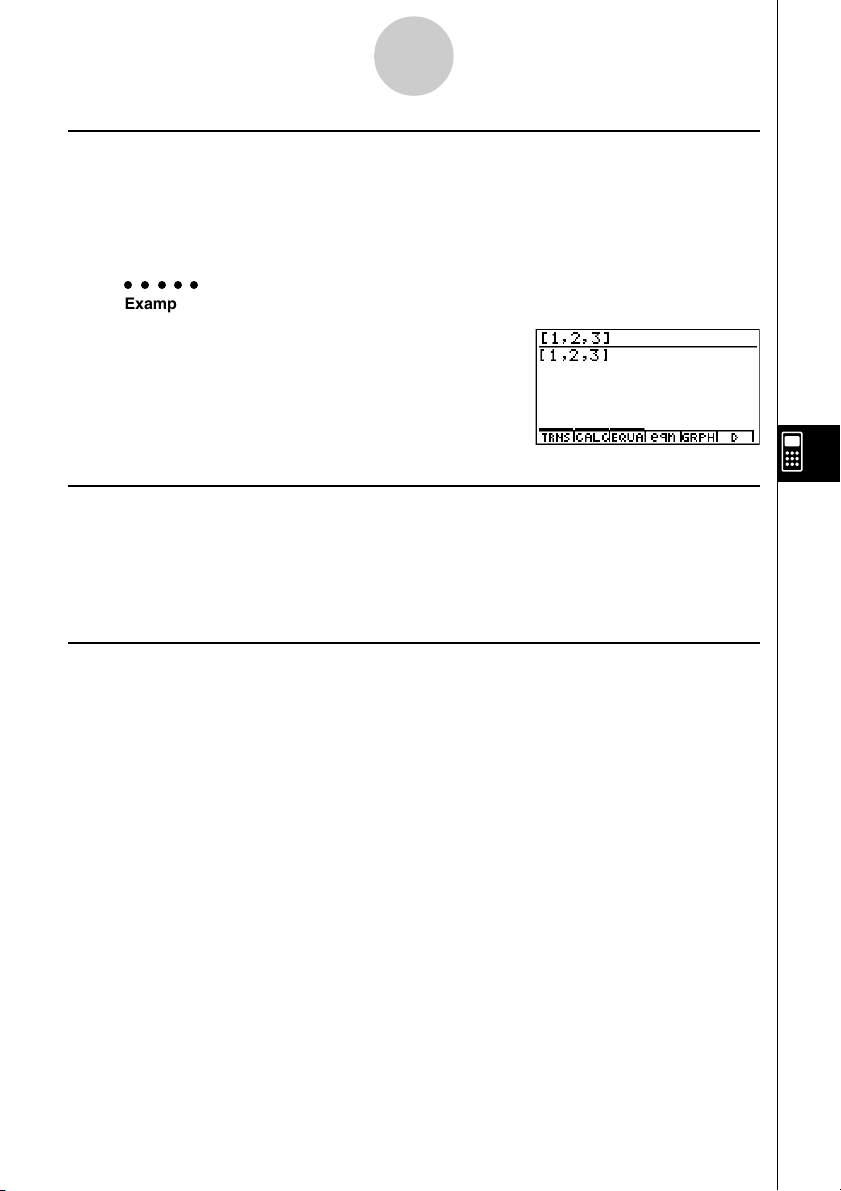
Example To input Vector (1 2 3)
!+( [ )b,c,d
!-( ] )w
kk
k Performing an Algebra Mode Operation
kk
There are two methods that you can use for input in the Algebra Mode.
• Function menu command input
•Manual formula and parameter input
kk
k Menu Command Input
kk
Press a function menu key to display the menu of functions for the type of operation you are
trying to perform.
• TRNS ... {formula transformation menu}
• CALC ... {formula calculation menu}
• EQUA ... {equation, inequality menu}
• eqn ... {calls up an equation stored in Equation Memory in accordance with a specified
input value}
• CLR ... {variable/formula delete menu}
Pressing the K key displays the menu shown below.
• LIST ... {list calculation menu}
• MAT ... {matrix calculation menu}
• VECT ... {vector calculation menu}
For details on commands and their formats, see the “Algebra Command Reference” on
page 7-1-11.
20010102
20011101
Page 5
Using the CAS (Computer Algebra System) Mode
7-1-4
kk
k Manual Formula and Parameter Input
kk
You can use the function menus, K key, and J key in combination to input formulas and
parameters as described below.
• 3(EQUA)b(INEQUA)
tt
•{>}/{<}/{
ss
t}/{
s} ... {inequality}
tt
ss
•Kkey
•{∞}/{Abs}/{x!}/{sign} ... {infinity}/{absolute value}/{factorial}/{signum function*1}
•{HYP} ... {hyperbolic}/{inverse hyperbolic} functions
• {sinh}/{cosh}/{tanh}/{sinh–1}/{cosh–1}/{tanh–1}
•Jkey
•{Yn}/{rn}/{Xtn}/{Ytn}/{Xn} ... input of graph memory {Yn}/{rn}/{Xtn}/{Ytn}/{Xn}
k Formula Memory
The CAS Mode has 28 formula variables. Variable names are the letters A through Z, plus r,
and θ. CAS Mode formula variables are independent of standard value variables.
○○○○○
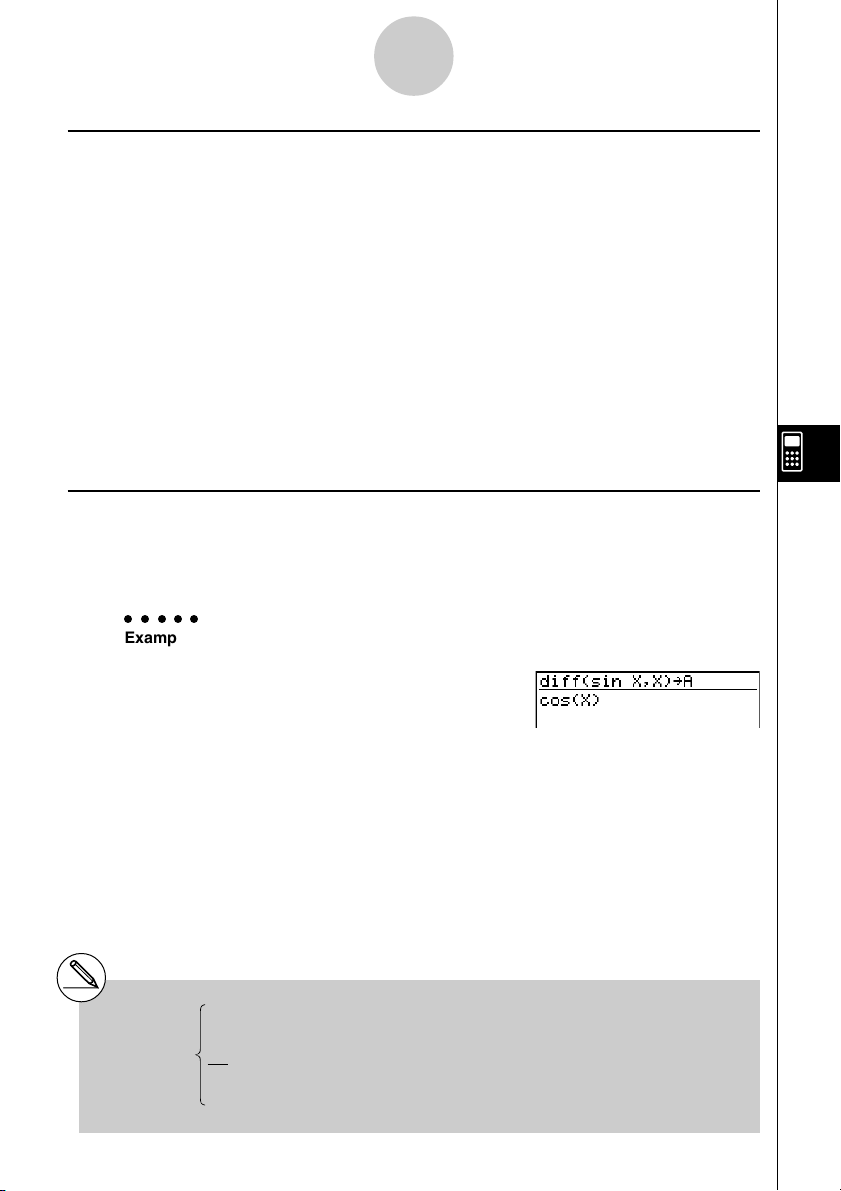
Example To assign a formula that differentiates sin(X) at X (cos(X)) to variable A
1
*
signum (A) A
2(CALC)b(diff)sv,
v)aav(A)w
1 (real number, A > 0)
–1 (real number, A < 0)
(A= imaginary number)
|A|
Undefined (A = 0)
20010102
20011101
Page 6
Using the CAS (Computer Algebra System) Mode
7-1-5
○○○○○
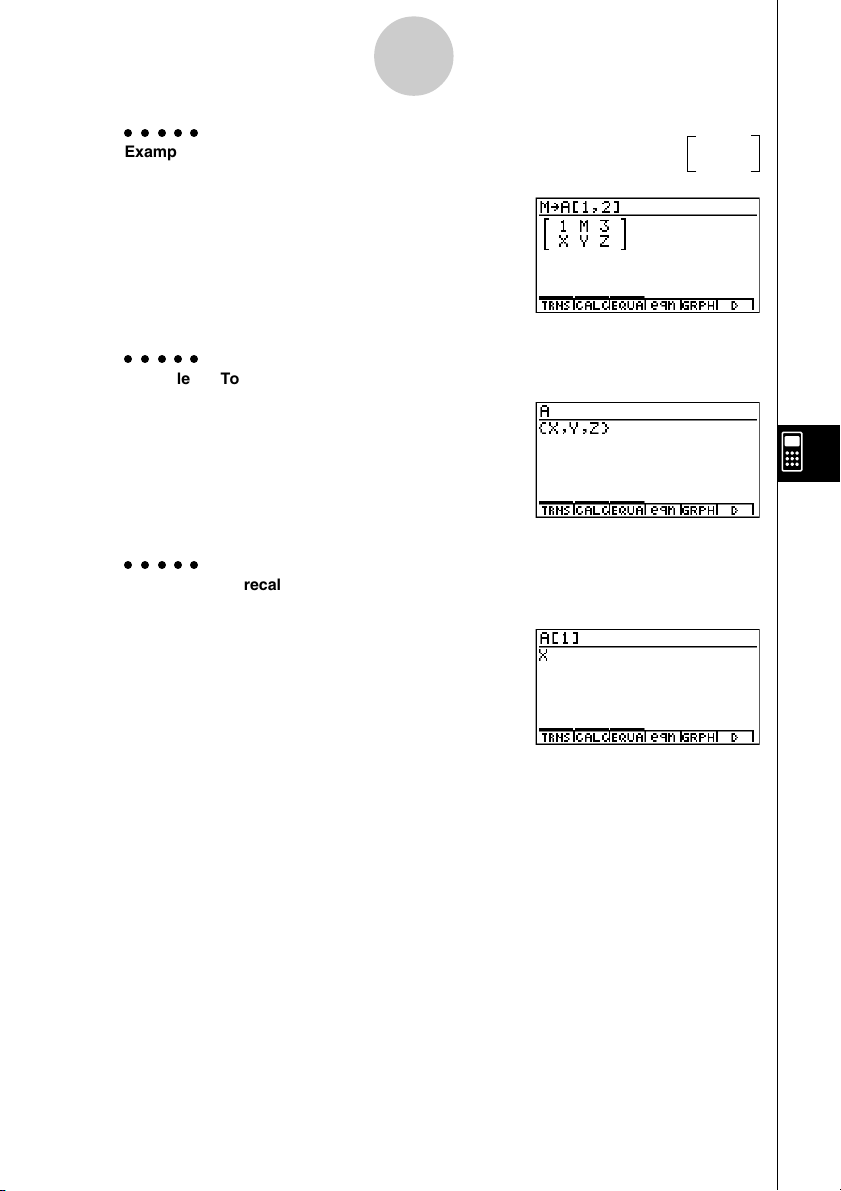
Example To assign M to row 1 column 2 of variable A when the matrix
is assigned to it
123
XYZ
ah(M)aav(A)
!+( [ )b,c!-( ] )w
○○○○○
Example To recall the value of variable A when the list {X, Y, Z} is assigned to it
av(A)w
○○○○○
Example To recall the first component (A [1]) of variable A when vector (X Y Z) is
assigned to it
av(A)!+( [ )b
!-( ] )w
20010102
Page 7

Using the CAS (Computer Algebra System) Mode
7-1-6
k Function Memory and Graph Memory
Function memory lets you store functions for later recall when you need them.
With graph memory, you can store graphs in memory. Press the J key and then input the
name of the graph.
○○○○○
Example To differentiate f1 = cos(X), which is assigned to function memory f1,
at X
2(CALC)b(diff)K6(g)4(FMEM)
d(fn)b,v)w
○○○○○
Example To differentiate Y1 = cos(X), which is assigned to graph memory Y1,
at X
2(CALC)b(diff)
J1(Yn) b,v)w
k Eqn Memory
When a calculation result is an equation or inequality, its formula number is displayed in the
formula number area, and the equation is stored in Eqn memory.*1 Stored equations can be
recalled with the eqn command, rclEqn command or rclAllEqn command.
*1Up to 99 formulas can be stored in Eqn
memory.
The error message “Memory ERROR” when
you try to store an equation when there are
already 99 equations in Eqn memory. When
this happens, execute the ALLEQU (Delete
All Equations) from the CLR menu.
20010102
20011101
Page 8
Using the CAS (Computer Algebra System) Mode
7-1-7
k Answer (Ans) Memory and Continuous Calculation
Answer (Ans) memory and continuous calculation can be used just as with standard
calculations. In the Algebra Mode, you can even store formulas in Ans memory.
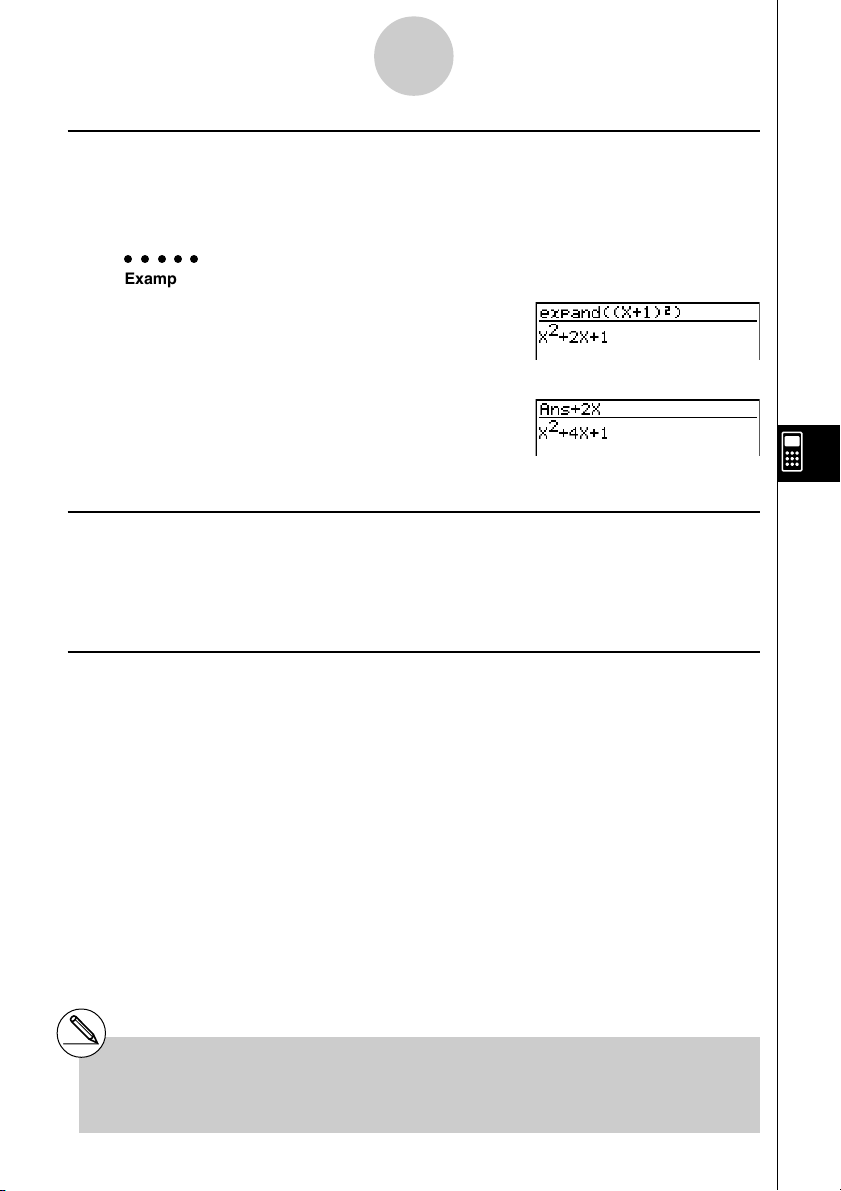
○○○○○
Example To expand (X+1)2 and add the result to 2X
1(TRNS)b(expand)
(v+b)x)w
Continuing:
+cvw
k Replay Contents
Replay memory can be used in the input area. After a calculation is complete, pressing d
or e in the input area recalls the formula of the last calculation performed. After a
calculation or after pressing A, you can press f or c to recall previous formulas.
k Moving the Cursor Between Display Areas
When ] ' ` $ indicates a calculation result that does not fit on the display, the cursor
keys perform output area scrolling. To use the Replay Function from this condition, press
6(g)2(SW). ] ' ` $ change to a dotted line display to indicate that cursor key
operations control the input area.
Pressing 2(SW) again moves the cursor back to the output area.
# Pressing 6(g)1(CLR)d(ALLEQU)
deletes Eqn memory, Ans memory, and
Replay memory contents.
#You can input up to 255 bytes of data into the
input area.
20010102
Page 9
Using the CAS (Computer Algebra System) Mode
7-1-8
SET UP Items
uu
uAngle ... Unit of angular measurement specification
uu
• {Deg}/{Rad} ... {degrees}/{radians}
uu
uAnswer Type ... Result range specification
uu
• {Real}/{Cplx} ... {real number}/{complex number}
uu
uDisplay ... Display format specification (for approx only)
uu
• {Fix}/{Sci}/{Norm} ... {number of decimal places}/{number of significant digits}/
{normal display format}
k Graph Function
Pressing 5(GRPH) displays the graph formula screen, which you can use to input a graph
formula. Press 4(G
•
VAR) if you want to input a graph memory.
You can also use the 1(SEL), 2(DEL), and 3(TYPE) functions while the graph formula
screen is on the display.
Press 6(DRAW) to draw a graph.
k RECALL ANS Function
Pressing 6(g)3(R
•
ANS) recalls Ans Memory contents.
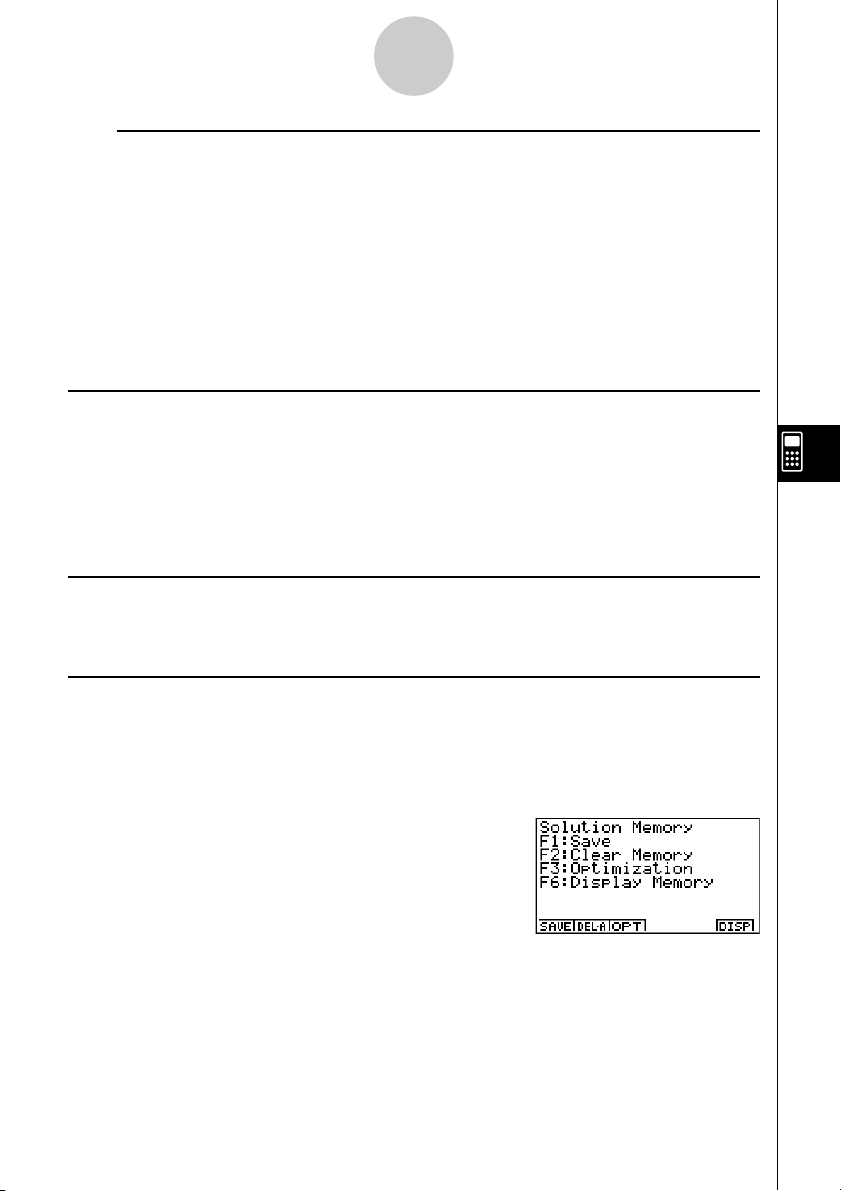
k Solution Memory
In the CAS Mode or ALGEBRA Mode, you can save the history of a calculation you perform
(replay memory contents) into solution memory. This section describes how you can access
and work with the contents of solution memory. Pressing 6(g)4(MEM) on the CAS Mode
or ALGEBRA Mode main menu display the initial solution memory screen shown below.
• {SAVE} ... {saves the calculation history to solution memory}
• {DEL
•
A}... {deletes solution memory contents}
• {OPT} ... {optimizes solution memory}
• {DISP} ... {displays solution memory contents}
20010102
Page 10
Using the CAS (Computer Algebra System) Mode
7-1-9
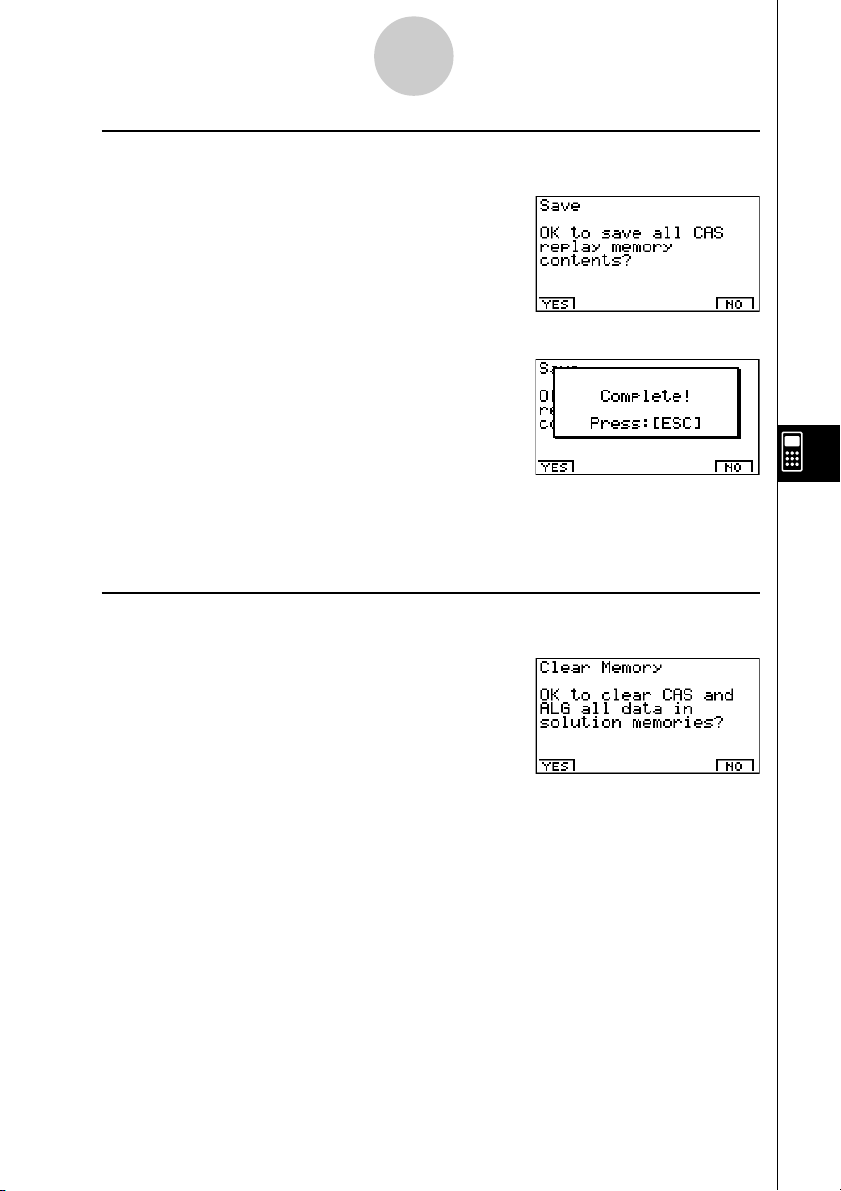
u To save a calculation history to solution memory (Save)
On the initial solution memory screen, press 1(SAVE).
Press 1(YES) to save the calculation history to solution memory.
Pressing i returns to the solution memory initial screen.
•Pressing 6(NO) in place of 1(YES) returns to the solution memory initial screen without
saving anything.
u To clear solution memory contents (Clear Memory)
On the initial solution memory screen, press 2(DEL
•
A).
Press 1(YES) to clear solution memory contents.
Pressing i returns to the solution memory initial screen.
•Pressing 6(NO) in place of 1(YES) returns to the solution memory initial screen without
clearing anything.
• This clears both CAS Mode and ALGEBRA Mode memory contents. You cannot select the
mode shows memory contents you want to delete.
20010102
Page 11
Using the CAS (Computer Algebra System) Mode
7-1-10
u To display solution memory contents (Display Memory)
On the initial solution memory screen, press 6(DISP).
This displays the oldest expression and result in solution memory. The bottom line shows the
record number.
• 6(DISP) is disabled when there is no data in Solution memory.
•To display the next record
Press 6(NEXT).
•To display the previous record
Press 1(BACK).
•Pressing 1(BACK) while the oldest record is on the display returns to the solution
memory initial screen.
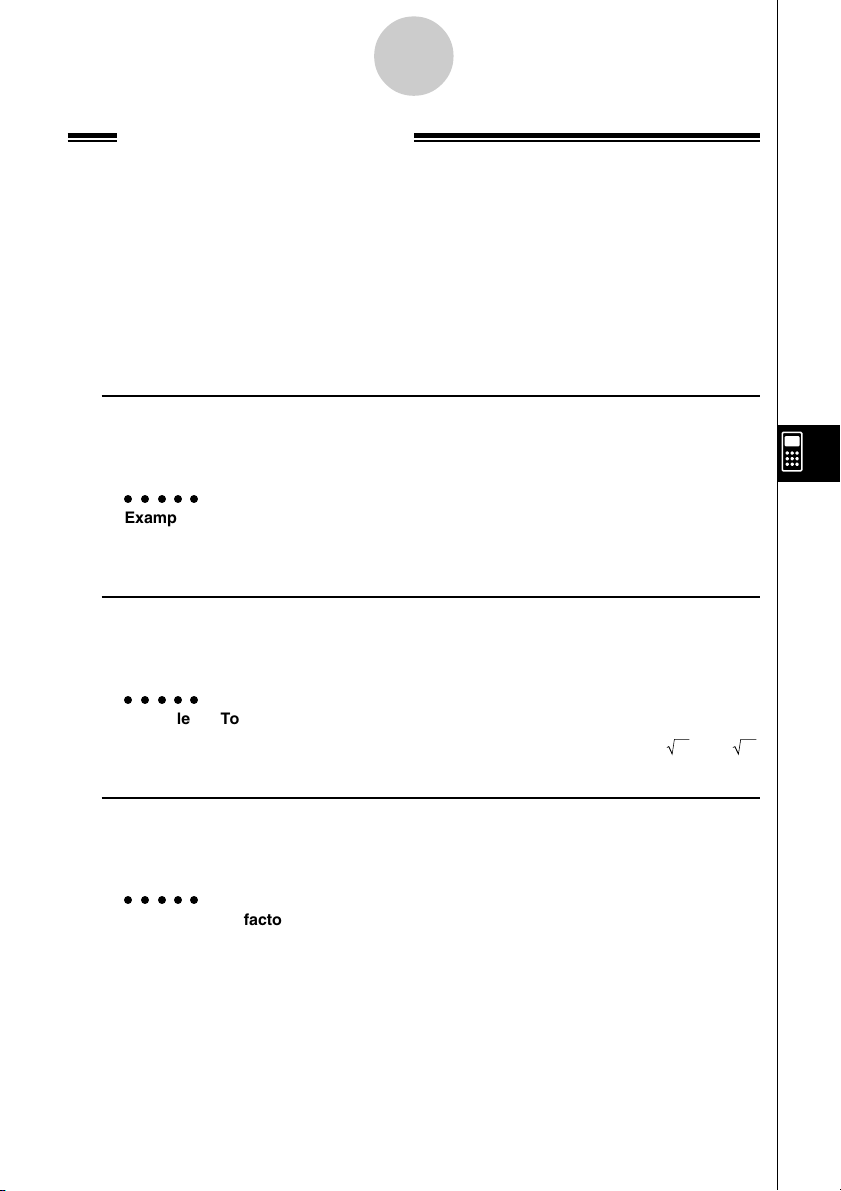
•To display a particular record
Press 5(SEL) and then input the number of the record you want to display.
Pressing w displays the record whose number you input.
•To delete a single solution memory record
Display the record you want to delete, and then press 2(DEL).
In response to the confirmation message that appears, press w(Yes) to delete the record
you displayed.
To clear the above screen without deleting anything, press i(No).
•To toggle record number display on and off
Press 4(NUM) to toggle display of the record number on and off.
u To o p timize solution memory (Optimization)
On the initial solution memory screen, press 3(OPT).
Pressing i returns to the solution memory initial screen.
Optimizing solution memory rearranges data and can free up more storage space. Perform
the above procedure when solution memory capacity starts running low.
20010102
Page 12
Using the CAS (Computer Algebra System) Mode
7-1-11
Algebra Command Reference
The following are the abbreviations used in this section.
• Exp ... Expression (value, formula, variable, etc.)
• Eq ... Equation
• Ineq ... Inequality
• List ... List
• Mat ... Matrix
• Vect ... Vector
Anything enclosed within square brackets can be omitted.
u expand
Function: Expands an expression.
Syntax: expand ( {Exp/Eq/Ineq/List/Mat/Vect} [ ) ]
○○○○○
Example To expand (X+2)
1(TRNS)b(expand)(v+c)xw X2 + 4X + 4
u rFactor (rFctor)
Function: Factors an expression up to its root.
Syntax: rFactor ( {Exp/Eq/Ineq/List/Mat/Vect} [ ) ]
○○○○○
Example To factor the X2– 3
1(TRNS)c(rFctor)vx-dw (X – 3) (X + 3)
2
u factor
Function: Factors an expression.
Syntax: factor ( {Exp/Eq/Ineq/List/Mat/Vect} [ ) ]
○○○○○
Example To factor X2– 4X + 4
1(TRNS)d(factor)vx-ev+ew (X – 2)
2
20010102
Page 13
Using the CAS (Computer Algebra System) Mode
7-1-12
u solve
Function: Solves an equation.
Syntax: solve( Eq [,variable] [ ) ]
solve( {Eq-1,..., Eq-n}, {variable-1,...,variable-n} [ ) ]
○○○○○
Example To solve AX + B = 0 for X
1(TRNS)e(solve)av(A)v+
al(B)!.(=)aw
○○○○○
Example To solve simultaneous linear equation 3X + 4Y = 5, 2X – 3Y = – 8
1(TRNS)e(solve)!*( { )
da+(X)+ea-(Y)!.(=)f,
ca+(X)-da-(Y)!.(=)-i
!/( } ),!*( { )a+(X), X = – 1
a-(Y)!/( } )w Y = 2
• X is the default when no variable is specified.
X =
– B
A
u tExpand (tExpnd)
Function: Employs the addition theorem to expand a trigonometric function.
Syntax: tExpand( {Exp/List/Mat/Vect} [ ) ]
○○○○○
Example To employ the addition theorem to expand sin(A+B)
1(TRNS)f(TRIG)b(tExpnd)
s(av(A)+al(B)w cos(B) • sin(A) + sin(B) • cos(A)
u tCollect (tCollc)
Function: Employs the addition theorem to transform the product of a trigonometric
function to a sum.
Syntax: tCollect( {Exp/List/Mat/Vect} [ ) ]
○○○○○
Example To employ the addition theorem to transform sin(A)cos(B) to
trigonometric sum
1(TRNS)f(TRIG)c(tCollc)
sav(A)cal(B)w
20010102
20011101
sin (A + B)
2
sin (A – B)
+
2
Page 14
Using the CAS (Computer Algebra System) Mode
7-1-13
u trigToExp (trigToE)
Function: Transforms a trigonometric or hyperbolic function to an exponential function.
Syntax: trigToExp( {Exp/List/Mat/Vect} [ ) ]
○○○○○
Example To convert cos(iX) to an exponential function
1(TRNS)f(TRIG)d(trigToE)c!a(i)vw
u expToTrig (expToT)
Function: Converts an exponential function to a trigonometric or hyperbolic function.
Syntax: expToTrig( {Exp/List/Mat/Vect} [ ) ]
○○○○○
Example To convert eix to a trigonometric function
1(TRNS)f(TRIG)e(expToT)
!I(ex)(!a(i)vw cos(X) + sin(X) • i
u simplify (smplfy)
Function: Simplifies an expression.
Syntax: simplify( {Exp/Eq/Ineq/List/Mat/Vect} [ ) ]
○○○○○
Example To simplify 2X + 3Y – X + 3 = Y + X – 3Y + 3 – X
1(TRNS)g(smplfy)ca+(X)+da-(Y)
-a+(X)+d!.(=)a-(Y)
+a+(X)-da-(Y)+d-
a+(X)w X + 3Y + 3 = –2Y + 3
—
x
x
e
+ e
2
20010102
Page 15
Using the CAS (Computer Algebra System) Mode
7-1-14
u combine (combin)
Function: Adds and reduces rational expressions.
Syntax: combine( {Exp/Eq/Ineq/List/Mat/Vect} [ ) ]
○○○○○
Example To reduce the fraction (X + 1) / (X + 2) + X (X + 3)
1(TRNS)h(combin)(v+b)/
(v+c)+v(v+dw
u collect (collct)
Function: Rearranges an expression, focusing on a particular variable.
Syntax: collect( {Exp/Eq/Ineq/List/Mat/Vect} [,{Exp/variable}] [ ) ]
○○○○○
Example To rearrange X2 + AX + BX, focusing on the variable X
1(TRNS)i(collct)vx+av(A)v+
al(B)vw X2 + (A + B)X
• X is the default when nothing is specified for [,{Exp/variable}].
X3 + 5X2 + 7X + 1
X + 2
u substitute (sbstit)
Function: Assigns an expression to a variable.
Syntax: substitute( {Exp/Eq/Ineq/List/Mat/Vect}, variable=expression
[,..., variable=expression] [ ) ]
○○○○○
Example To assign 5 to X in 2X – 1
1(TRNS)j(sbstit)cv-b,
v!.(=)fw 9
20010102
20011101
Page 16

Using the CAS (Computer Algebra System) Mode
7-1-15
u cExpand (cExpnd)
Function: Expands xth root of imaginary number.
Syntax: cExpand( {Exp/Eq/Ineq/List/Mat/Vect} [ ) ]
○○○○○
Example To expand 2 i
1(TRNS)v(cExpnd)!x( )c!a(i)w 1 + i
u approx
Function: Produces a numerical approximation for an expression.
Syntax: approx( {Exp/Eq/Ineq/List/Mat/Vect} [ ) ]
○○○○○
Example To obtain a numerical value for 2
1(TRNS)l(approx)!x( )cw 1.414213562
○○○○○
Example 9
20
Normal:jMcaw 12157665459056928801
approx: 1(TRNS)l(approx)jMcaw 1. 215766546E+19 (Display: Norm1)
# About approx
With normal calculations (when approx is not
used) in the CAS Mode, calculation results are
displayed in full, without using exponents.
When you use approx in the CAS Mode,
however, results are displayed using the
exponential format range specified by the Display
item of the SET UP screen.
This means approx displays results in the CAS
Mode the same way they are displayed in the
•
RUN
MAT Mode.
20010102
Page 17

Using the CAS (Computer Algebra System) Mode
7-1-16
u diff
Function: Differentiates an expression.
Syntax: diff( {Exp/List} [, variable, order, derivative] [ ) ]
diff( {Exp/List}, variable [, order, derivative] [ ) ]
diff( {Exp/List}, variable, order [, derivative] [ ) ]
○○○○○
Example To differentiate X6 with respect to X
2(CALC)b(diff)vMgw 6X
• X is the default when no variable is specified.
• 1 is the default when no order is specified.
u ∫
Function: Integrates an expression.
Syntax: ∫( {Exp/List} [, variable, integration constant] [ ) ]
∫( {Exp/List}, variable [, integration constant] [ ) ]
∫( {Exp/List}, variable, lower limit, upper limit [ ) ]
○○○○○
Example To integrate X2 with respect to X
2(CALC)c( ∫ )vxw
5
3
X
3
• X is the default when no variable is specified.
u lim
Function: Determines the limits of a function expression.
Syntax: lim( {Exp/List}, variable, point [, direction] [ ) ]
○○○○○
Example To determine the limits of sin(X)/X when X = 0
2(CALC)d(lim)sv/v,v,aw 1
• Direction can be positive (from right) or negative (from left).
20010102
Page 18

Using the CAS (Computer Algebra System) Mode
7-1-17
u Σ
Function: Calculates a sum.
Syntax: Σ( {Exp/List}, variable, start value, end value [ ) ]
○○○○○
Example To calculate the sum as the value of X in X2 changes from X = 1
through X = 10
2(CALC)e(Σ)vx,v,b,baw 385
u Π
Function: Calculates a product.
Syntax: Π( {Exp/List}, variable, start value, end value [ ) ]
○○○○○
Example To calculate the product as the value of X in X2 changes from X = 1
through X = 5
2(CALC)f(Π)vx,v,b,fw 14400
u taylor
Function: Finds a Taylor polynomial.
Syntax: taylor( {Exp/List}, variable, order [, center point] [ ) ]
○○○○○
Example To find a 5th order Taylor polynomial for sin(X) with respect to X = 0
5
2(CALC)g(taylor)sv,v,f,aw
X
120 6
3
X
+
–
X
• The default center point is zero.
u arcLen
Function: Returns the arc length.
Syntax: arcLen( {Exp/List}, variable, start value, end value [ ) ]
○○○○○
Example To determine the arc length for X2 from X = 0 to X = 1
2(CALC)h(arcLen)
vx,v,a,bw
20010102
In (4 5 + 8)–In(2) +5
422
Page 19

Using the CAS (Computer Algebra System) Mode
7-1-18
u tanLine (tanLin)
Function: Returns the expression for a tangent line.
Syntax: tanLine( {Exp/List}, variable, variable value at point of tangency [ ) ]
○○○○○
Example To determine the expression for a line tangent with X3 when X = 2
2(CALC)i(tanLin)vMd,v,cw 12X – 16
u denominator (den)
Function: Extracts the denominator of a fraction.
Syntax: denominator( {Exp/List} [ ) ]
○○○○○
Example To extract the denominator of the fraction (X + 2)/(Y – 1)
2(CALC)j(EXTRCT)b(den)
(a+(X)+c)/(a-(Y)-bw Y – 1
u numerator (num)
Function: Extracts the numerator of a fraction.
Syntax: numerator( {Exp/List} [ ) ]
○○○○○
Example To extract the numerator of the fraction (X + 2)/(Y – 1)
2(CALC)j(EXTRCT)c(num)
(a+(X)+c)/(a-(Y)-bw X + 2
u gcd
Function: Returns the greatest common divisor.
Syntax: gcd( {Exp/List}, {Exp/List} [ ) ]
○○○○○
Example To determine the greatest common divisor of X + 1 and X2 – 3X – 4
2(CALC)v(gcd)v+b,vx-
dv-ew X + 1
20010102
20011101
Page 20

Using the CAS (Computer Algebra System) Mode
7-1-19
u lcm
Function: Obtains the least common multiple of two expressions
Syntax: lcm( {Exp/List}, {Exp/List} [ ) ]
○○○○○
Example To obtain the least common multiple of X2 – 1 and X2 + 2X – 3
2(CALC)l(lcm)vx-b,
vx+cv-dw X3 + 3X2 – X – 3
u rclEqn
Function: Recalls multiple eqn memory contents.
Syntax: rclEqn( memory number [, ..., memory number] [ ) ]
○○○○○
Example To recall the contents of equation memory 2 and equation memory 3
3(EQUA)c(rclEqn)c,dw 3X – Y = 7
3X + 6Y = 63
• The memory numbers of equations produced as the result of a recall are not updated.
u rclAllEqn (rclAll)
Function: Recall all eqn memory contents.
Syntax: rclAllEqn
• The memory numbers of equations produced as the result of a recall are not updated.
u rewrite (rewrit)
Function: Moves the right side expression to the left side.
Syntax: rewrite( {Eq/Ineq/List} [ ) ]
○○○○○
Example To move the right side expression of X + 3 = 5X – X2 to the left side
3(EQUA)e(rewrit)v+d!.(=)
2
fv-vxw X
20010102
20011101
– 4X + 3 = 0
Page 21

Using the CAS (Computer Algebra System) Mode
7-1-20
u exchange (exchng)
Function: Exchanges the right-side and left-side expressions.
Syntax: exchange( {Eq/Ineq/List} [ ) ]
○○○○○
Example To exchange the left-side and right-side expressions of 3 > 5X – 2Y
3(EQUA)f(exchng)d3(EQUA)b(INEQUA)b(>)
fa+(X)-ca-(Y)w 5X – 2Y < 3
u eliminate (elim)
Function: Assigns an expression to a variable.
Syntax: eliminate( {Eq/Ineq/List} -1, variable, Eq-2 [ ) ]
○○○○○
Example To transform Y = 2X + 3 to X= and then substitute into 2X + 3Y = 5
3(EQUA)g(elim)ca+(X)+da-(Y)!.(=)
f,a+(X),a-(Y)!.(=)
ca+(X)+dw 4Y – 3 = 5
u getRight (getRgt)
Function: Gets the right-side element.
Syntax: getRight( {Eq/Ineq/List} [ ) ]
○○○○○
Example To extract the right side element of Y = 2X2 + 3X + 5
3(EQUA)h(getRgt)a-(Y)!.(=)
ca+(X)x+da+(X)+fw 2X
u invert
Function: Inverts two variables.
Syntax: invert( {Exp/Eq/Ineq/List} [,variable name 1, variable name 2] [ ) ]
If you omit the variable names, variables X and Y are inverted.
○○○○○
Example To invert X and Y in the expression 2X = Y
3(EQUA)i(invert)cv!.(=)a-(Y)w 2Y = X
20010102
20011101
2
+ 3X + 5
Page 22

Using the CAS (Computer Algebra System) Mode
7-1-21
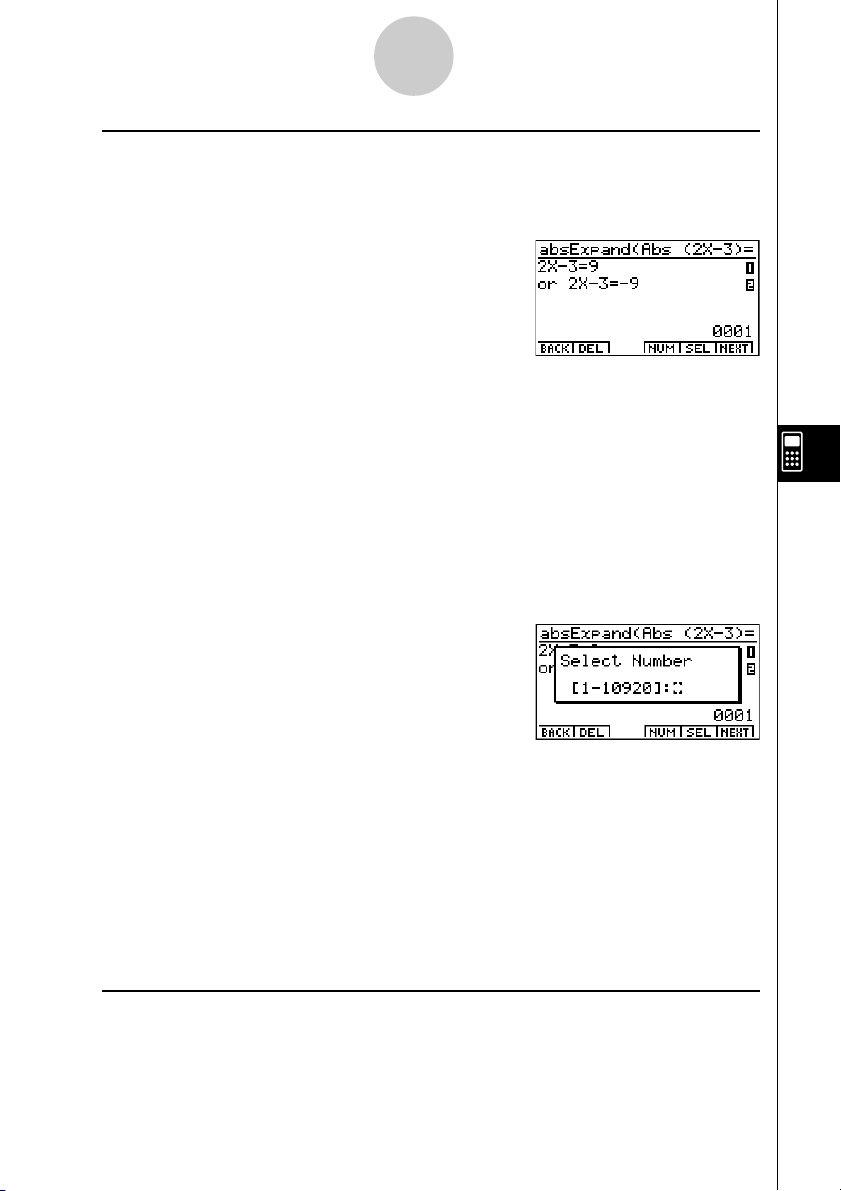
u absExpand (absExp)
Function: Divides an expression that contains an absolute value into two expressions.
Syntax: absExpand( {Eq/Ineq} [ ) ]
○○○○○
Example To strip the absolute value from | 2X – 3 | = 9
3(EQUA)j(absExp)K5(Abs)(
cv-d)!.(=)jw
2X – 3 = 9
or 2X – 3 = – 9 2
u andConnect (andCon)
Function: Connects two inequalities into a single expression.
Syntax: andConnect( Ineq-1, Ineq-2 [ ) ]
○○○○○
Example To combine X > – 1 and X < 3 into a single inequality
3(EQUA)v(andCon)v3(EQUA)b(INEQUA)b(>)
-b,v3(EQUA)b(INEQUA)c(<)dw –1 < X < 3
u eqn
Function: Recalls eqn memory contents.
Syntax: eqn( memory number [ ) ]
○○○○○
Example To add 15 to both sides of the equation 6X – 15 = X – 7, which is stored
in equation memory 3
4(eqn)d)+bfw 6X = X + 8
1
20010102
Page 23

Using the CAS (Computer Algebra System) Mode
7-1-22
u clear (clrVar)
Function: Clears the contents of specific equation (A to Z, r, θ ).*
Syntax: clear( variable [ ) ]
clear( {variable list} [ ) ]
○○○○○
Example To clear the contents of variable A
6(g)1(CLR)b(clrVar)av(A)w { }
○○○○○
Example To clear the contents of variables X, Y, and Z
6(g)1(CLR)b(clrVar)!*( { )a+(X),
a-(Y),aa(Z)!/( } )w { }
1
u clearVarAll (VarAll)
Function: Clears the contents of all 28 variables (A to Z, r, θ).
Syntax: clearVarAll { }
*1When you start out with memories A, B, C,
and D, for example, and delete memories A
and B, the display shows only C,D because
they are the only memories remaining.
20010102
Page 24

Using the CAS (Computer Algebra System) Mode
7-1-23
k List Calculation Commands [OPTN]-[LIST]
u Dim
Function: Returns the dimension of a list.
Syntax: Dim List
○○○○○
Example To determine the dimension of list {1, 2, 3}
K1(LIST)b(CALC)b(Dim)!*( { )b,c,d
!/( } )w 3
u Min
Function: Returns the minimum value of an expression or the elements in a list.
Syntax: Min( {List/Exp} [ ) ]
Min( {List/Exp}, {List/Exp} [ ) ]
○○○○○
Example To determine the minimum value of the elements in list {1, 2, 3}
K1(LIST)b(CALC)c(Min)!*( { )b,c,d
!/( } )w 1
○○○○○
Example To compare each element of list {1, 2, 3} with the value 2, and produce
a list whose elements are the minimum value resulting from each
comparison
K1(LIST)b(CALC)c(Min)!*( { )b,c,d
!/( } ),cw { 1, 2, 2
○○○○○
Example To compare the elements of list {1, 2, 3} and list {3, 1, 2}, and produce
a list whose elements are the minimum value resulting from each
comparison
K1(LIST)b(CALC)c(Min)!*( { )b,c,d
!/( } ),!*( { )d,b,c!/( } )w {1, 1, 2
20010102
}
}
Page 25

Using the CAS (Computer Algebra System) Mode
7-1-24
u Max
Function: Returns the maximum value of an expression or the elements of a list.
Syntax: Max( {List/Exp} [ ) ]
Max( {List/Exp}, {List/Exp} [ ) ]
○○○○○
Example To determine the maximum value of the elements in list {1, 2, 3}
K1(LIST)b(CALC)d(Max)!*( { )b,c,d
!/( } )w 3
○○○○○
Example To compare each element of list {1, 2, 3} with the value 2, and produce
a list whose elements are the maximum value resulting from each
comparison
K1(LIST)b(CALC)d(Max)!*( { )b,c,d
!/( } ),cw { 2, 2, 3 }
○○○○○
Example To compare the elements of list {1, 2, 3} and list {3, 1, 2}, and produce
a list whose elements are the maximum value resulting from each
comparison
K1(LIST)b(CALC)d(Max)!*( { )b,c,d
!/( } ),!*( { )d,b,c!/( } )w { 3, 2, 3 }
u Mean
Function: Returns the mean of the elements in a list.
Syntax: Mean( List [ ) ]
Mean( List, List [ ) ]
The list must contain values or mathematical expressions only. Equations and inequalities
are not allowed.
○○○○○
Example To determine the mean of the elements in list {1, 2, 3}
K1(LIST)b(CALC)e(Mean)!*( { )b,c,d
!/( } )w 2
20010102
Page 26

Using the CAS (Computer Algebra System) Mode
7-1-25
○○○○○
Example To determine the mean of the elements in list {1, 2, 3} when their
frequencies are {3, 2, 1}
K1(LIST)b(CALC)e(Mean)!*( { )b,c,d
!/( } ),!*( { )d,c,b!/( } )w
u Median
Function: Returns the median of the elements in a list.
Syntax: Median( List [ ) ]
Median( List, List [ ) ]
The list must contain values or mathematical expressions only. Equations and inequalities
are not allowed.
○○○○○
Example To determine the median of the elements in list {1, 2, 3}
K1(LIST)b(CALC)f(Median)!*( { )b,c,d
!/( } )w 2
○○○○○
Example To determine the median of the elements in list {1, 2, 3} when their
frequencies are {3, 2, 1}
K1(LIST)b(CALC)f(Median)!*( { )b,c,d
!/( } ),!*( { )d,c,b!/( } )w
5
3
3
2
u Sum
Function: Returns the sum of the elements in a list.
Syntax: Sum List
The list must contain values or mathematical expressions only. Equations and inequalities
are not allowed.
○○○○○
Example To determine the sum of the elements in list {1, 2, 3}
K1(LIST)b(CALC)g(Sum)!*( { )b,c,d
!/( } )w 6
20010102
Page 27

Using the CAS (Computer Algebra System) Mode
3503
100
50
,,
{
{
7-1-26
u Prod
Function: Returns the product of the elements in a list.
Syntax: Prod List
The list must contain values or mathematical expressions only. Equations and inequalities
are not allowed.
○○○○○
Example To determine the product of the elements in list {2, 3, 4}
K1(LIST)b(CALC)h(Prod)!*( { )c,d,e
!/( } )w 24
u Cuml
Function: Returns the cumulative frequency of the elements in a list.
Syntax: Cuml List
The list must contain values or mathematical expressions only. Equations and inequalities
are not allowed.
○○○○○
Example To determine the cumulative frequency of the elements in list {1, 2, 3}
K1(LIST)b(CALC)i(Cuml)!*( { )b,c,d
!/( } )w { 1, 3, 6 }
u Percent (%)
Function: Returns the percentage of each element in a list, the sum of which is assumed
to be 100.
Syntax: Percent List
The list must contain values or mathematical expressions only. Equations and inequalities
are not allowed.
○○○○○
Example To determine the percentage of each element in the list {1, 2, 3}
K1(LIST)b(CALC)j(%)!*( { )b,c,d
!/( } )w
20010102
Page 28

Using the CAS (Computer Algebra System) Mode
7-1-27
u A List
Function: Returns a list whose elements are the differences between the elements of
another list.
AA
Syntax:
A List List
AA
The list must contain values or mathematical expressions only. Equations and inequalities
are not allowed.
○○○○○
Example To generate a list whose elements are the differences between the
elements of list {1, 2, 4}
K1(LIST)b(CALC)v(AList)!*( { )b,c,e
!/( } )w { 1, 2 }
u StdDev
Function: Returns the sample standard deviation of the elements in a list.
Syntax: StdDev List
The list must contain values or mathematical expressions only. Equations and inequalities
are not allowed.
○○○○○
Example To determine the sample standard deviation of the elements in list
{1, 2, 4}
K1(LIST)b(CALC)l(StdDev)!*( { )b,c,e
!/( } )w
u Variance (Vari)
Function: Returns the variance of the elements in a list.
Syntax: Variance List
The list must contain values or mathematical expressions only. Equations and inequalities
are not allowed.
○○○○○
Example To determine the variance of the elements in list {1, 2, 4}
K1(LIST)b(CALC)I(Vari)!*( { )b,c,e
!/( } )w
20010102
20011101
21
3
7
3
Page 29

Using the CAS (Computer Algebra System) Mode
7-1-28
u Seq
Function: Generates a list in accordance with a numeric sequence expression.
Syntax: Seq( Exp, variable, start value, end value, [increment] [ ) ]
If you do not specify an increment, an increment of 1 is used.
○○○○○
Example To generate a list in accordance with the expression: value A, end
value 3A, increment A
K1(LIST)c(CREATE)b(Seq)v,v,av(A),d
av(A),av(A)w { A, 2A, 3A }
u Augment (Augmnt)
Function: Returns a new list that appends List 2 to List 1.
Syntax: Augment( List, List [ ) ]
○○○○○
Example To combine list {1, 2} and list {3, 4}
K1(LIST)c(CREATE)c(Augmnt)!*( { )b,c
!/( } ),!*( { )d,e!/( } )w { 1, 2, 3, 4 }
u Fill
Function: Replaces the elements of a list with a specified value or expression.
This command can also be used to create a new list whose elements all
contain the same value or expression.
Syntax: Fill( {Exp/Eq/Ineq}, List [ ) ]
Fill( Exp, numeric value [ ) ]
○○○○○
Example To replace the elements of list {3, 4} with X
K1(LIST)c(CREATE)d(Fill)v,!*( { )
d,e!/( } )w { X, X }
○○○○○
Example To create a list with eight elements, all of which are X
K1(LIST)c(CREATE)d(Fill)v,iw { X, X, X, X, X, X, X, X }
20010102
20011101
Page 30

Using the CAS (Computer Algebra System) Mode
7-1-29
u SortA
Function: Sorts the elements of a list into ascending order.
Syntax: SortA( List [ ) ]
The list must contain values or mathematical expressions only. Equations and inequalities
are not allowed.
○○○○○
Example To sort the elements of list {1, 5, 3} into ascending order
K1(LIST)c(CREATE)e(SortA)!*( { )b,f,d
!/( } )w { 1, 3, 5 }
u SortD
Function: Sorts the elements of a list into descending order.
Syntax: SortD( List [ ) ]
The list must contain values or mathematical expressions only. Equations and inequalities
are not allowed.
○○○○○
Example To sort the elements of list {1, 5, 3} into descending order
K1(LIST)c(CREATE)f(SortD)!*( { )b,f,d
!/( } )w { 5, 3, 1 }
u SubList (SubLst)
Function: Extracts a specific section of a list into a new list.
Syntax: SubList( List, start number [, end number] [ ) ]
○○○○○
Example To extract element 2 through element 3 from list {1, 2, 3, 4}
K1(LIST)c(CREATE)g(SubLst)!*( { )b,c,d
,e!/( } ),c,dw { 2, 3 }
• If you do not specify an end number, all the elements from the start number to the end of
the list are extracted.
20010102
Page 31

Using the CAS (Computer Algebra System) Mode
7-1-30
u List→Mat (L→Mat)
Function: Converts lists into a matrix.
Syntax: List→Mat( List [ , ... ,List ] [ ) ]
○○○○○
Example To convert list {3, 5} and list {2, 4} into a matrix
K1(LIST)d(LIST→)b(L→Mat)!*( { )d,f 32
!/( } ),!*( { )c,e!/( } )w 54
u List→Vect (L→Vect)
Function: Converts a list into a vector.
Syntax: List→Vect List
○○○○○
Example To convert list {3, 2} into a vector
K1(LIST)d(LIST→)c(L→Vect)!*( { )d,c
!/( } )w [ 3, 2 ]
20010102
Page 32

Using the CAS (Computer Algebra System) Mode
7-1-31
k Matrix Calculation Commands [OPTN]-[MAT]
u Dim
Function: Returns the dimensions of a matrix.
Syntax: Dim Mat
○○○○○
Example To determine the dimensions of the matrix below
123
456
K2(MAT)b(CALC)b(Dim)!+( [ )!+( [ )
b,c,d!-( ] )!+( [ )e,f,g
!-( ] )!-( ] )w { 2, 3 }
u Det
Function: Returns the determinant of a matrix.
Syntax: Det Mat
○○○○○
Example To determine the determinant of the matrix below
12
45
K2(MAT)b(CALC)c(Det)!+( [ )!+( [ )
b,c!-( ] )!+( [ )e,f
!-( ] )!-( ] )w – 3
u Norm
Function: Returns the norm of a matrix.
Syntax: Norm Mat
○○○○○
Example To determine the norm of the matrix below
12
45
K2(MAT)b(CALC)d(Norm)!+( [ )!+( [ )
b,c!-( ] )!+( [ )e,f
!-( ] )!-( ] )w 46
20010102
20011101
Page 33

Using the CAS (Computer Algebra System) Mode
7-1-32
u EigVc
Function: Returns the eigenvector of a matrix.
Syntax: EigVc Mat
○○○○○
Example To determine the eigenvector of the matrix below
34
13
K2(MAT)b(CALC)e(EigVc)
!+( [ )!+( [ )d,e
!-( ] )!+( [ ) [ 0.894427191 – 0.894427191 ]
b,d!-( ] )!-( ] )w [ 0.4472135955 0.4472135955 ]
Eigenvectors are stacked vertically on the display.
In this example, (0.894427191 0.4472135955) are the eigenvectors that correspond to 5,
while (–0.894427191 0.4472135955) are the eigenvectors that correspond to 1.
An eigenvector has an infinite number of solutions. The eigenvector displayed by this
command is the one with a size of 1.
u EigVl
Function: Returns the eigenvalue of a matrix.
Syntax: EigVl Mat
○○○○○
Example To determine the eigenvalue of the matrix below
34
13
K2(MAT)b(CALC)f(EigVl)!+( [ )!+( [ )
d,e!-( ] )!+( [ )b,d
!-( ] )!-( ] )w { 5, 1 }
20010102
20011101
Page 34

Using the CAS (Computer Algebra System) Mode
71
66
71
147
71
62
–
1 0 0
0 1 0
0 0 1
71
62
–
1 1 0
0 1
3
6
0 0 1
2
9
–
7-1-33
u Rref
Function: Returns the reduced row echelon form of a matrix.
Syntax: Rref Mat
○○○○○
Example To determine the reduced row echelon form of the matrix below
– 2– 20– 6
1– 19– 9
– 524– 4
K2(MAT)b(CALC)g(Rref)!+( [ )!+( [ )
-c,-c,a,-g!-( ] )!+( [ )
b,-b,j,-j!-( ] )
!+( [ )-f,c,e,-e
!-( ] )!-( ] )w
u Ref
Function: Returns the row echelon form of a matrix.
Syntax: Ref Mat
○○○○○
Example To determine the row echelon form of the matrix below
– 2– 20– 6
1– 19– 9
– 524– 4
K2(MAT)b(CALC)h(Ref)!+( [ )!+( [ )
-c,-c,a,-g!-( ] )!+( [ )
b,-b,j,-j!-( ] )
!+( [ )-f,c,e,-e
!-( ] )!-( ] )w
20010102
Page 35

Using the CAS (Computer Algebra System) Mode
100
01
1
6
5
212
1
7-1-34
u LU
Function: Returns the LU resolution of a matrix.
Syntax: LU( Mat, lower memory, upper memor y)
○○○○○
Example To determine the LU resolution of the matrix below
61218
51431
3818
The lower matrix is assigned to variable A, while the upper matrix is assigned to variable B.
K2(MAT)b(CALC)i(LU)!+( [ )!+( [ )
g,bc,bi!-( ] )!+( [ )
f,be,db!-( ] )!+( [ ) 61218
d,i,bi!-( ] )!-( ] ), 04 16
av(A),al(B)w 00 1
The upper matrix is displayed as the calculation result.
To display the lower matrix, recall the lower matrix variable (A in this example) specified
by the command.
av(A)w
To display the upper matrix, recall the upper matrix variable (B in this example) specified
by the command.
u Trn
Function: Transposes a matrix.
Syntax: Trn Mat
○○○○○
Example To transpose the matrix below
12
34
K2(MAT)c(CREATE)b(Trn)!+( [ )!+( [ )
b,c!-( ] )!+( [ )d,e 13
!-( ] )!-( ] )w 24
20010102
Page 36

Using the CAS (Computer Algebra System) Mode
7-1-35
u Augment (Augmnt)
Function: Combines two matrices.
Syntax: Augment( Mat, Mat [ ) ]
○○○○○
Example To combine the two matrices below
12 56
34 7 8
K2(MAT)c(CREATE)c(Augmnt)!+( [ )!+( [ )
b,c!-( ] )!+( [ )d,e
!-( ] )!-( ] ),!+( [ )!+( [ )
f,g!-( ] )!+( [ )h,i 1256
!-( ] )!-( ] )w 3478
u Identify (Ident)
Function: Creates an identity matrix
Syntax: Ident numeric value
○○○○○
Example To create a 2 × 2 identity matrix
K2(MAT)c(CREATE)d(Ident)cw 10
01
u Fill
Function: Replaces the elements of a matrix with a specified value or expression.
This command can also be used to create a new matrix whose elements all
contain the same value or expression.
Syntax: Fill( Exp, Mat [ ) ]
Fill( Exp, number of lines, number of rows [ ) ]
○○○○○
Example To replace the elements of the matrix below with X
34
12
K2(MAT)c(CREATE)e(Fill)v,!+( [ )
!+( [ )d,e!-( ] )!+( [ )
b,c!-( ] )!-( ] )w XX
20010102
XX
Page 37

Using the CAS (Computer Algebra System) Mode
7-1-36
○○○○○
Example To create a 2 × 3 matrix, all of whose entries are X
K2(MAT)c(CREATE)e(Fill)v,c,dw XXX
u SubMat
Function: Extracts a specific section of a matrix into a new matrix.
Syntax: SubMat( Mat [, start row] [, start column] [, end row] [, end column] [ ) ]
○○○○○
Example To extract the section from row 2, column 2 to row 3, column 3 from
the following matrix
123
456
789
K2(MAT)c(CREATE)f(SubMat)!+( [ )!+( [ )
b,c,d!-( ] )!+( [ )e,f,g
!-( ] )!+( [ )h,i,j!-( ] ) 56
!-( ] ),c,c,d,dw 89
XXX
• If you do not specify an end row and column, all the entries from the start row/column to the
end of the matrix are extracted.
20010102
Page 38

Using the CAS (Computer Algebra System) Mode
7-1-37
u Diag
Function: Extracts the diagonal elements of a matrix.
Syntax: Diag Mat
○○○○○
Example To extract the diagonal elements of the matrix below
12
34
K2(MAT)c(CREATE)g(Diag)!+( [ )!+( [ )
b,c!-( ] )!+( [ )d,e
!-( ] )!-( ] )w [ 1, 4 ]
u Mat→List (M→List)
Function: Converts a specific column of a matrix into a list.
Syntax: Mat→List( Mat, column number [ ) ]
○○○○○
Example To convert column 2 of the matrix below to a list
12
34
K2(MAT)d(MAT→)b(M→List)!+( [ )!+( [ )
b,c!-( ] )!+( [ )d,e
!-( ] )!-( ] ),cw { 2, 4 }
u Mat→Vect (M→Vect)
Function: Converts a specific column of a matrix into a vector.
Syntax: Mat→Vect( Mat, column number [ ) ]
○○○○○
Example To convert column 2 of the matrix below to a vector
12
34
K2(MAT)d(MAT→)c(M→Vect)!+( [ )!+( [ )
b,c!-( ] )!+( [ )d,e
!-( ] )!-( ] ),cw [ 2, 4 ]
20010102
20011101
Page 39

Using the CAS (Computer Algebra System) Mode
7-1-38
u Swap
Function: Swaps two rows of a matrix.
Syntax: Swap Mat, row number 1, row number 2
○○○○○
Example To swap row 1 with row 2 of the following matrix
12
34
K2(MAT)e(ROW)b(Swap)!+( [ )!+( [ )
b,c!-( ] )!+( [ )d,e 34
!-( ] )!-( ] ),b,cw 12
u `Row
Function: Returns the scalar product of a row of a matrix.
Syntax: `Row( Exp, Mat, row number [ ) ]
○○○○○
Example To multiply row 1 of the matrix below by X
12
34
K2(MAT)e(ROW)c(`Row)v,!+( [ )
!+( [ )b,c!-( ] )!+( [ ) X2X
d,e!-( ] )!-( ] ),bw 34
u `Row+
Function: Calculates the scalar product of one row of a matrix and adds the result to
another row.
Syntax: `Row+( Exp, Mat, line number 1, line number 2 [ ) ]
○○○○○
Example To multiply row 1 of the matrix below by X, and add the result to row 2
12
34
K2(MAT)e(ROW)d(`Row+)v,!+( [ )
!+( [ )b,c!-( ] )!+( [ ) 12
d,e!-( ] )!-( ] ),b,cw X + 3 2X + 4
20010102
Page 40

Using the CAS (Computer Algebra System) Mode
7-1-39
u Row+
Function: Adds one row of a matrix and to another row.
Syntax: Row+( Mat, row number 1, row number 2 [ ) ]
○○○○○
Example To add row 1 of the matrix below to row 2
12
34
K2(MAT)e(ROW)e(Row+)!+( [ )
!+( [ )b,c!-( ] )!+( [ ) 12
d,e!-( ] )!-( ] ),b,cw 46
20010102
Page 41

Using the CAS (Computer Algebra System) Mode
7-1-40
k Vector Calculation Commands [OPTN]-[VECT]
u Dim
Function: Returns the dimension of a vector.
Syntax: Dim Vect
○○○○○
Example To determine the dimension of the vector (1 2 3)
K3(VECT)b(CALC)b(Dim)!+( [ )b,c,d
!-( ] )w 3
u CrossP
Function: Returns the cross product of two vectors.
Syntax: CrossP( Vect, Vect [ ) ]
○○○○○
Example To determine the cross product of vector (1 2 3) and vector (4 5 6)
K3(VECT)b(CALC)c(CrossP)!+( [ )b,c,d
!-( ] ),!+( [ )e,f,g!-( ] )w [ – 3, 6, – 3 ]
u DotP
Function: Returns the dot product of two vectors.
Syntax: DotP( Vect, Vect [ ) ]
○○○○○
Example To determine the dot product of vector (1 2 3) and vector (4 5 6)
K3(VECT)b(CALC)d(DotP)!+( [ )b,c,d
!-( ] ),!+( [ )e,f,g!-( ] )w 32
u Norm
Function: Returns the norm of a vector.
Syntax: Norm Vect
○○○○○
Example To determine the norm of the vector (1 2 3)
K3(VECT)b(CALC)e(Norm)!+( [ )b,c,d
!-( ] )w 14
20010102
20011101
Page 42

Using the CAS (Computer Algebra System) Mode
,,
14
3 14
14
14
7
14
25
11 5
cos
–1
7-1-41
u UnitV
Function: Normalizes a vector.
Syntax: UnitV Vect
○○○○○
Example To normalize a vector (1 2 3)
K3(VECT)b(CALC)f(UnitV)
!+( [ )b,c,d
!-( ] )w
u Angle
Function: Returns the angle formed by two vectors.
Syntax: Angle( Vect, Vect [ ) ]
○○○○○
Example To determine the angle formed by vector (1 2) and vector (3 4)
(Unit Angle: Rad)
K3(VECT)b(CALC)g(Angle)!+( [ )b,c
!-( ] ),!+( [ )d,e!-( ] )w
u Augment (Augmnt)
Function: Combines two vectors.
Syntax: Angle( Vect, Vect [ ) ]
○○○○○
Example To combine vector (1 2) and vector (3 4)
K3(VECT)c(CREATE)b(Augmnt)!+( [ )b,c
!-( ] ),!+( [ )d,e!-( ] )w [ 1, 2, 3, 4 ]
u Fill
Function: Replaces the elements of a vector with a specified value or expression.
Syntax: Fill( Exp, Vect [ ) ]
○○○○○
Example To replace the components of the vector below with X
K3(VECT)c(CREATE)c(Fill)v,!+( [ )
d,e!-( ] )w [ X, X ]
20010102
20011101
Page 43

Using the CAS (Computer Algebra System) Mode
7-1-42
u Vect→List (V→List)
Function: Converts a vector into a list.
Syntax: Vect→List Vect
○○○○○
Example To convert vector (3 2) into a list
K3(VECT)d(VECT→)b(V→List)!+( [ )d,c
!-( ] )w { 3, 2 }
u Vect→Mat (V→Mat)
Function: Converts vectors into a matrix.
Syntax: Vect→Mat( Vect [, ... ,Vect ] ( ] )
○○○○○
Example To convert vector (3 5) and (2 4) into a matrix
K3(VECT)d(VECT→)c(V→Mat)!+( [ )d,f 32
!-( ] ),!+( [ )c,e!-( ] )w 54
20010102
Page 44

7-2-1
Algebra Mode
7-2 Algebra Mode
The CAS Mode automatically provides you with the final result only. The Algebra Mode, on
the other hand, lets you obtain intermediate results at a number of steps along the way.
On the Main Menu, select the ALGEBRA icon to enter the Algebra Mode. The screens in this
mode are the same as those in the CAS Mode.
Operations in the Algebra Mode are identical to those in the CAS Mode, except for a number
of limitations. Also, the following commands are available in the Algebra Mode only.
u arrange (arrang)
Function: Collects like terms and arranges them in order, starting with the term that
contains the smallest coefficient.
Syntax: arrange( {Exp/Eq/Ineq} [ ) ]
○○○○○
Example To arrange 2X + 3 – 5X + 8Y in sequence of its variables
1(TRNS)j(arrang)ca+(X)+d-
fa+(X)+ia-(Y)w – 5X + 2X + 8Y + 3
u replace (replac)
Function: Replaces a variable with the expression assigned to the corresponding
expression variable.
Syntax: replace( {Exp/Eq/Ineq} [ ) ]
○○○○○
Example To replace S in the expression 3X + 2S, when the expression 2X + 1 is
assigned to S
1(TRNS)v(replac)dv+ca*(S)w 3X + 2 (2X + 1)
19990401
20011101
Page 45

7-3-1
Tu to ri a l Mode
7-3 Tutorial Mode
On the Main Menu, select the TUTOR icon to enter the Tutorial Mode.
k Tu torial Mode Flow
1. Specify the expression type.
2. Define the expression.
3. Specify the solve mode.
k Specifying the Expression Type
Entering the Tutorial Mode displays a menu of the following expression types.
•Linear Equation
•Linear Inequality
•Quadratic Equation
•Simul (Simultaneous) Equation
Use the cursor keys to highlight the expression type you want to specify, and then press w.
This displays a list of formulas for the expression type you select. Move the cursor to the
formula you want to use.
In the case of Linear Inequality, press 4(TYPE) to select the inequality type.
19990401
Page 46

7-3-2
Tu to ri a l Mode
The following shows the formulas available for each type of expression.
Linear Equation — 6 Types
• AX = B • X + A = B
• AX + B = C • AX + B = CX + D
• A(BX + C) = D(EX + F) •AX + B = C
Linear Inequality — 6 × 4 Types
• AX { > < ><} B • X + A { > < ><} B
• AX + B { > < ><} C • AX + B { > < ><} CX + D
• A(BX + C) { > < ><} D(EX + F) •AX + B { > < ><} C
Quadratic Equation — 5 Types
• AX2 = B • (AX + B)2 = C
• AX2 + BX + C = 0 • AX2 + BX + C = D
• AX2 + BX + C = DX2 + EX + F
Simul Equation — 10 Types
• AX + BY = C • Y = AX + B
DX + EY = F Y = CX + D
• AX + BY + C = 0 • AX + BY + C = DX + EY + F
DX + EY + F = 0 GX + HY + I = JX + KY + L
• AX + BY = C • AX + BY = C
Y = DX + E DX + EY + F = 0
• AX + BY = C • AX + BY + C = 0
DX + EY + F = GX + HY + I Y = DX + E
• AX + BY + C = DX + EY + F • AX + BY + C = 0
Y = GX + H DX + EY + F = GX + HY + I
Pressing 6(EXCH) reverses the left side and right side elements of the expression.
19990401
Page 47

7-3-3
Tu to ri a l Mode
k Defining the Expression
In this step, you specify coefficients and define the expression. You can select any of the
three following methods for specifying coefficients.
•{RAND} ... {random generation of coefficients}
•{INPUT} ... {key input of coefficients}
•{SMPL} ... {selection of coefficients from samples}
•{SEED} ... {selection of a number from 1 to 99 (specification of the same number
displays the same expression)}
1(RAND) or w generates random coefficients and defines the expression.
2(INPUT) displays the coefficient input screen. Input coefficients, pressing w after each.
After you finish inputting all the coefficients, press 6(EXE) to define the coefficient.
3(SMPL) displays a number of preset sample expressions. Highlight the one you want to
use and then press w to define it.
Pressing4(SEED) displays a number selection screen. When you want to create the same
problem on another calculator, specify an appropriate matching number and press w.
No matter what method you use, the expression you define is displayed in the output area.
You can copy an expression to the Graph Mode as a graph function*1.
•{L•COP}/{R•COP} ... copy {left side element}/{right side element} as a graph function
(Simultaneous Equation Mode*2)
•{1•COP}/{2•COP} ... copy {first}/{second} expression as a graph function
*1In the case of an inequality, the inequality
symbols are also copied.
*2Simultaneous equations are transformed to the
format Y = AX + B when copied.
19990401
Page 48

7-3-4
Tu to ri a l Mode
k Specifying the Solve Mode
You can select one of the following three solve modes for the displayed expression.
•{VRFY} ... {Verify Mode}
In this mode, you input a solution for verification of whether or not it is correct. It provides
a good way to check solutions you arrive at manually.
•{MANU} ... {Manual Mode}
In this mode, you manually input algebra commands, transform the expression, and
calculate a result.
•{AUTO} ... {Auto Mode}
In this mode, the solution is produced automatically, one step at a time.
k Verify Mode
Press 4(VRFY) to enter the Verify Mode.
The expression is shown in the top line of the display. Input the solution underneath it, and
then press6(JUDG) to determine whether the solution is correct.
The verification result screen shows the left side and right side verification result (except for
a linear equation).
•However, in the case where a linear equation or quadratic equation has two solutions, the
left side and right side are obtained for the value where the pointer is located.
•In the case of simultaneous equations where the left side and right side of the second
equation are dissimilar even though the left side and right side of the first equation match,
the left side and right side of the second equation only are obtained. In other cases, the left
side and right side of the first equation are obtained.
The type of solution input screen that appears is selected according to the expression type.
To input a different type, press 1(TYPE) and then select the solution type you want to want
to use. Available solution types depend on the mode.
•{X = a} ... X has one solution (X = a) (linear equation default)
•{X = a, b} ... X has two solutions (X = a, X = b) (quadratic equation default)
•{X = a, Y=} ... X and Y have one solution each (X = a, Y = b) (simultaneous equation
default)
•{X > a} ... X { > < ><} a (linear inequality default)
•{X < a, b <} ... X < a, b < X or X < a, b < X
•{a < X < b} ... a < X< b, a < X < b or X = a
•{Identi} (Identity) ... identity of left side and right side
•{Many} (Many Solutions) ... many solutions
•{No sol} (No Solution) ... no solution
19990401
Page 49

7-3-5
Tu to ri a l Mode
You can press 4(MANU) to change to the Manual Mode or 5(AUTO) to change to the
Auto Mode.
○○○○○
Example To solve 4X = 8 in the Verify Mode
(Linear Equation)(AX = B)
2(INPUT)ewiw6(EXE)
4(VRFY)cw
6(JUDG)
19990401
Page 50

7-3-6
Tu to ri a l Mode
k Manual Mode
Press 5(MANU) to enter the Manual Mode.
As with the Algebra Mode, the screen is divided between an input area and a display area.
This means you can select Algebra Mode commands from the function menu, transform the
expression, and solve it.
Operation is the same as that in the Algebra Mode.
After you obtain a result, you can press 5(JUDG) to determine whether or not it is correct.
•{DISP} ... Determines whether the expression in the display area is a correct solution.
•{Identi} ... identity of left side and right side
•{Many} ... many solutions
•{No sol} ... no solution
You can press 6(AUTO) to change to the Auto Mode.
○○○○○
Example Solve 4X = 8 in the Manual Mode
(Linear Equation)(AX=B)
2(INPUT)ewiw6(EXE)
5(MANU)
4(eqn)b)/e
w
1(TRNS)b(smplfy)
4(eqn)c
w
5(JUDG)b(DISP)
19990401
20010102
Page 51

7-3-7
Tu to ri a l Mode
○○○○○
Example 4X2 = 16
True (X = 2, X = – 2)
Besides “TRUE” the messages shown below can also appear as the result of verification.
“CAN NOT JUDGE” appears in the Manual Mode, while the other messages appear in both
the Verify Mode and Manual Mode.
19990401
20010102
Page 52

7-3-8
Tu to ri a l Mode
k Auto Mode
Press 6(AUTO) to enter the Auto Mode.
In the Simultaneous Equation Mode, you must also select SBSTIT (Substitution Method) or
ADD-SU (Addition/Subtraction Method).
The Substitution Method first transforms the equation to the format Y = aX + b, and
substitutes aX + b for Y*1 in the other equation.
The Addition/Subtraction Method multiplies both sides of the expression by the same value
to isolate the coefficient X (or Y).
As with the Algebra Mode, the screen is divided between an input area and a display area.
Each press of 6(NEXT) advances to the next step. 6(NEXT) is not shown on the display
when the solution is obtained.
You can scroll back through the steps by pressing 1(BACK).
○○○○○
Example To solve 4X = 8 in the Auto Mode
(Linear Equation)(AX = B)
2(INPUT)ewiw6(EXE)
6(AUTO)
6(NEXT)
6(NEXT)
*1You can press 5(ADD SU) at any time to
switch from Substitution Method to Addition /
Subtraction Method.
#See 7-1-8 for information about graph functions.
1999040120011101
Page 53

Algebra System Precautions
7-4-1
7-4 Algebra System Precautions
• If an algebraic operation cannot be performed for some reason, the original expression
remains on the display.
• It may take considerable time to perform an algebraic operation. Failure of a result to
appear immediately does not indicate malfunction of the computer.
•Any expression can be displayed in various different formats. Because of this, you
should not assume that an expression is wrong just because it does not appear as you
expected.
• This calculator performs integration calculations under the assumption that integrals are
always positive, even when the integ rals switch between positive and negative.
f(x)
F(x): primitive function of f(x)
b
f(x)dx = F(b) – F(a)
∫
a
19990401
20011101
Page 54

20010102
 Loading...