

Page 1
This symbol is intended to
alert the user to the presence of uninsulated “dan-
product’s enclosure that may be of sufficient magnitude to constitute a risk of
electric shock to persons.
gerous voltage” within the
CAUTION
RISK OF ELECTRIC SHOCK
DO NOT OPEN
This symbol is
intended to alert the
user to the presence of
important operating
and maintenance (servicing) instructions in the literature accompanying
the appliance.
IMPORTANT! FOR YOUR PROTECTION, PLEASE READ THE FOLLOWING:
WATER AND MOISTURE: Appliance should not be used near water (near a bathtub, washbowl,
kitchen sink, laundry tub, in a wet basement, or near a swimming pool, etc). Care should be taken
so that objects do not fall and liquids are not spilled into the enclosure through openings.
POWER SOURCES: The product should be connected to a power supply only of the type described
in the operating instructions or as marked on the appliance.
GROUNDING OR POLARIZATION: Precautions should be taken so that the grounding or polarization is not defeated.
POWER CORD PROTECTION: Power supply cords should be routed so that they are not likely
to be walked on or pinched by items placed upon or against them, paying particular attention
to cords at plugs, convenience receptacles, and the point where they exit from the appliance.
SERVICING: The user should not attempt to service the appliance beyond that described in the
operating instructions. All other servicing should be referred to qualified service personnel.
FUSING: If your unit is equipped with a fuse receptacle, replace only with the same type fuse.
Refer to replacement text on the unit for correct fuse type.
SAFETY INSTRUCTIONS (EUROPEAN)
The conductors in the AC power cord are colored in accordance with the following code.
GREEN & YELLOW—Earth BLUE—Neutral BROWN—Live
U.K. MAIN PLUG WARNING: Amolded main plug that has been cut off from the cord is
unsafe. NEVER UNDER A N YC I R C U M S TANCES SHOULD YOU INSERTA D A M A G E D
OR CUTMAIN PLUG INTO APOWER SOCKET.
LIMITED WARRANTY
Your Carvin product is guaranteed against failure for 1 YEAR unless otherwise stated.
C a rvin will service and supply all parts at no charge to the customer providing the unit
is under warranty. Shipping costs are the responsibility of the customer. CARVIN DOES
NOT PAY FOR PA RTS OR SERVICING OTHER THAN OUR OWN. A COPY OF THE ORIGINAL INVOICE IS REQUIRED TO VERIFY YOUR WA R R A N T Y. Carvin assumes no responsibility for horn drivers or speakers damaged by this unit. This warranty does not cover,
and no liability is assumed, for damage due to: natural disasters, accidents, abuse, loss
of parts, lack of reasonable care, incorrect use, or failure to follow instructions. This warranty is in lieu of all other warranties, expressed or implied. No representative or person
is authorized to represent or assume for Carvin any liability in connection with the sale
or servicing of Carvin products.
CARVIN SHALL NOT BE LIABLE FOR INCIDENTAL OR CON-
SEQUENTIAL DAMAGES.
When RETURNING merchandise to the factory, you may call for a return authorization number. Describe in writing each problem. If your unit is out of warranty, you
will be charged the current FLAT RATE for parts and labor to bring your unit up to factory specifications.
MAINTAINING YOUR EQUIPMENT
Avoid spilling liquids or allowing any other foreign matter inside the unit. The panel of
your unit can be wiped from time to time with a dry or slightly damp cloth in order to
remove dust and bring back the new look.
As with all pro gear, avoid prolonged use in
caustic environments (salt air). When used in such an environment, be sure the amplifier is adequately protected by rack, covers, etc..
REPLACEMENT PARTS LIST FOR R600
80-40628 R600 Driver & Output
PCB REF DESCRIPTION PART #
A1 5532 Op Amp 60-55320
A2 5532 Op Amp 60-55320
A3 4558 Op Amp 60-45580
A5 4558 Op Amp 60-45580
A6 4558 Op Amp 60-45580
A7 4558 Op Amp 60-45580
A8 4558 Op Amp 60-45580
A9 4558 Op Amp 60-45580
A10 4558 Op Amp 60-45580
A11 4558 Op Amp 60-45580
A12 4558 Op Amp 60-45580
A13 5532 Op Amp 60-55320
A14 4558 Op Amp 60-45580
A15 4558 Op Amp 60-45580
A16 4558 Op Amp 60-45580
A200 5532 Op Amp 60-55320
A300 4558 Op Amp 60-45580
A301 4558 Op Amp 60-45580
A302 4558 Op Amp 60-45580
A400 5532 Op Amp 60-55320
BR1 Diode Bridge Rectifier 60-35041
C1 Capacitor, Mylar, 0.0068µF, 100V 46-68212
C2 Capacitor, Ceramic, 120pF, 500V 45-12152
C3 Capacitor, Ceramic, 120pF, 500V 45-12152
C4 Capacitor, Mylar, 0.1µF, 100V 46-10412
C5 Capacitor, Electrolytic, 10µF, 63V 47-10061
C6 Capacitor, Ceramic, 39pF, 500V 45-39052
C7 Capacitor, Mylar, 0.047µF, 100V 46-47312
C8 Capacitor, Ceramic, 560pF, 500V 45-56152
C9 Capacitor, Mylar, 0.1µF, 100V 46-10412
C10 Capacitor, Electrolytic, 10µF, 63V 47-10061
C11 Capacitor, Ceramic, 560pF, 500V 45-56152
C12 Capacitor, Electrolytic, 10µF, 63V 47-10061
C13 Capacitor, Mylar, 0.0022µF, 100V 46-22212
C14 Capacitor, Electrolytic, 10µF, 63V 47-10061
C15 Capacitor, Mylar, 0.047µF, 100V 46-47312
C16 Capacitor, Mylar, 0.0033µF, 100V 46-33212
C17 Capacitor, Mylar, 0.0033µF, 100V 46-33212
C18 Capacitor, Ceramic, 39pF, 500V 45-39052
C19 Capacitor, Ceramic, 120pF, 500V 45-12152
C23 Capacitor, Electrolytic, 10µF, 63V 47-10061
C27 Capacitor, Ceramic, 39pF, 500V 45-39052
C28 Capacitor, Mylar, 0.022µF, 100V 46-22312
C29 Capacitor, Mylar, 0.022µF, 100V 46-22312
C30 Capacitor, Electrolytic, 10µF, 63V 47-10061
C31 Capacitor, Mylar, 0.047µF, 100V 46-47312
C32 Capacitor, Ceramic, 120pF, 500V 45-12152
C33 Capacitor, Mylar, 0.01µF, 100V 46-10312
C34 Capacitor, Mylar, 0.01µF, 100V 46-10312
C35 Capacitor, Mylar, 0.001µF, 100V 46-10212
C37 Capacitor, Tant, 1µF, 35V 48-01031
C38 Capacitor, Mylar, 0.022µF, 100V 46-22312
C39 Capacitor, Tant, 1µF, 35V 48-01031
C40 Capacitor, Mylar, 0.01µF, 100V 46-10312
C41 Capacitor, Mylar, 0.22µF, 100V 41-22412
C42 Capacitor, Mylar, 0.01µF, 100V 46-10312
C43 Capacitor, Mylar, 0.1µF, 100V 46-10412
C44 Capacitor, Mylar, 0.0068µF, 100V 46-68212
C45 Capacitor, Mylar, 0.068µF, 100V 46-68312
C46 Capacitor, Mylar, 0.0033µF, 100V 46-33212
C47 Capacitor, Mylar, 0.033µF, 100V 46-33312
C48 Capacitor, Mylar, 0.0022µF, 100V 46-22212
C49 Capacitor, Mylar, 0.022µF, 100V 46-22312
C50 Capacitor, Mylar, 0.001µF, 100V 46-10212
C51 Capacitor, Mylar, 0.01µF, 100V 46-10312
C52 Capacitor, Ceramic, 680pF, 500V 45-68152
C53 Capacitor, Mylar, 0.0068µF, 100V 46-68212
C54 Capacitor, Ceramic, 560pF, 500V 45-56152
C55 Capacitor, Ceramic, 56pF, 500V 45-56052
C57 Capacitor, Mylar, 0.01µF, 100V 46-10312
C58 Capacitor, Mylar, 0.01µF, 100V 46-10312
C59 Capacitor, Electrolytic, 10µF, 63V 47-10061
C60 Capacitor, Mylar, 0.022µF, 100V 46-22312
C61 Capacitor, Mylar, 0.022µF, 100V 46-22312
C62 Capacitor, Ceramic, 120pF, 500V 45-12152
C64 Capacitor, Ceramic, 39pF, 500V 45-39052
C67 Capacitor, Mylar, 0.033µF, 100V 46-33312
C68 Capacitor, Mylar, 0.01µF, 100V 46-10312
C69 Capacitor, Mylar, 0.1µF, 100V 46-10412
C73 Capacitor, Electrolytic, 10µF, 63V 47-10061
C74 Capacitor, Electrolytic, 10µF, 63V 47-10061
C75 Capacitor, Electrolytic, 10µF, 63V 47-10061
C76 Capacitor, Electrolytic, 10µF, 63V 47-10061
C77 Capacitor, Electrolytic, 10µF, 63V 47-10061
C79 Capacitor, Electrolytic, 10µF, 63V 47-10061
C83 Capacitor, Mylar, 0.0022µF, 100V 46-22212
C84 Capacitor, Ceramic, 680pF, 500V 45-68152
C85 Capacitor, Electrolytic, 10µF, 63V 47-10061
C88 Capacitor, Electrolytic, 10µF, 63V 47-10061
C89 Capacitor, Electrolytic, 10µF, 63V 47-10061
C121 Capacitor, Mylar, 0.068µF, 100V 46-68312
C215 Capacitor, Ceramic, 27pF, 500V 45-27052
C216 Capacitor, Ceramic, 56pF, 500V 45-56052
C217 Capacitor, Ceramic, 250pF, 500V 45-25152
C218 Capacitor, Electrolytic, 10µF, 63V 47-10061
C219 Capacitor, Mylar, 0.01µF, 100V 46-10312
C220 Capacitor, Mylar, 0.001µF, 100V 46-10212
C221 Capacitor, Mylar, 0.068µF, 100V 46-68312
C310 Capacitor, Mylar, 0.047µF, 100V 46-47312
C312 Capacitor, Mylar, 0.047µF, 100V 46-47312
C313 Capacitor, Electrolytic, 10µF, 63V 47-10061
C315 Capacitor, Mylar, 0.047µF, 100V 46-47312
C316 Capacitor, Mylar, 0.047µF, 100V 46-47312
C317 Capacitor, Mylar, 0.047µF, 100V 46-47312
C318 Capacitor, Electrolytic, 470µF 25V 47-47125
C415 Capacitor, Ceramic, 27pF, 500V 45-27052
C416 Capacitor, Ceramic, 56pF, 500V 45-56052
C417 Capacitor, Mylar, 250pF, 500V 45-25152
C418 Capacitor, Electrolytic, 10µF, 63V 47-10061
C419 Capacitor, Mylar, 0.01µF, 100V 46-10312
C420 Capacitor, Mylar, 0.001µF, 100V 46-10212
C501 Capacitor, Electrolytic, 10,000µF, 63V 42-10363
C502 Capacitor, Electrolytic, 10,000µF, 63V 42-10363
C503 Capacitor, Electrolytic, 1000µF 35V 47-10235
C504 Capacitor, Electrolytic, 1000µF 35V 47-10235
C505 Capacitor, Mylar, 0.047µF, 100V 46-47312
C506 Capacitor, Mylar, 0.047µF, 100V 46-47312
C507 Capacitor, Electrolytic, 220µF, 50V 47-22151
C517 Capacitor, Electrolytic, 470F, 25V 47-47125
C520 Capacitor, Electrolytic, 220pF, 50V 47-22151
C572 Capacitor, Electrolytic , 47µF, 63V 47-47061
D1 LED, small Red 60-75320
D2 Diode, 1N914, HI Speed 61-19140
D3 LED, small Green 60-75330
D4 LED, small Red 60-75320
D5 LED, small Yellow 60-75340
D9 Diode, 1N914, HI Speed 61-19140
D10 LED, small Red 60-75320
D11 LED, small Red 60-75320
D12 Diode, 1N914, HI Speed 61-19140
D13 Diode, 1N914, HI Speed 61-19140
D14 Diode, 1N914, HI Speed 61-19140
D103 LED, small Red 60-75320
D106 Diode, 1N4003, 1A 200V 61-40030
D107 Diode, 1N4003, 1A 200V 61-40030
D108 Diode, 1N4003, 1A 200V 61-40030
D203 LED, small Red 60-75320
D204 LED, small Red 60-75320
D205 Diode, 1N4003, 1A 200V 61-40030
D206 Diode, 1N4003, 1A 200V 61-40030
D207 Diode, 1N4003, 1A 200V 61-40030
D208 Diode, 1N4003, 1A 200V 61-40030
D209 Diode, 1N4003, 1A 200V 61-40030
D214 Diode, 1N4003, 1A 200V 61-40030
D310 Diode, 1N4003, 1A 200V 61-40030
D311 Diode, 1N4003, 1A 200V 61-40030
D312 Diode, 1N4003, 1A 200V 61-40030
D404 LED, small Red 60-75320
D409 Diode, 1N4003, 1A 200V 61-40030
D414 Diode, 1N4003, 1A 200V 61-40030
D501 Diode, 1N4003, 1A 200V 61-40030
D502 Diode, 1N4003, 1A 200V 61-40030
D503 Diode, 1N4003, 1A 200V 61-40030
D504 Diode, 1N4003, 1A 200V 61-40030
D505 Diode, 1N4003, 1A 200V 61-40030
D506 Diode, 1N4003, 1A 200V 61-40030
D520 Diode, 1N4003, 1A 200V 61-40030
H1A Header, 4 Pin AMP 23-08604
H1B Header, 4 Pin AMP 23-08604
H2-A Header, 10 Pin SHS Vert 23-11010
H2-B Header, 10 Pin SHS Vert 23-11010
H2A Header, 4 Pin SHS Vert 23-11004
H2B Header, 4 Pin SHS Vert 23-11004
H3-B Header, 10 Pin SHS Vert 23-11010
H3A Header, 10 Pin SHS Vert 23-11010
H4-A Header, 8 Pin SHS Vert 23-11008
H4-B Header, 8 Pin SHS Vert 23-11008
H5 Header, 2 Pin Panduit Vert 23-10002
H5-A Header, 4 Pin SHS Vert 23-11004
H5-B Header, 4 Pin SHS Vert 23-11004
H6-A Header, 4 Pin SHS Vert 23-11004
H6-B Header, 4 Pin SHS Vert 23-11004
H6A Header, 4 Pin Vert 23-08604
H6B Header, 4 Pin Vert 23-08604
H7 Header, AMP 9 Pin 23-08609
H8 Header, 2 Pin Panduit Vert 23-10002
H9 Header, 2 Pin Panduit Vert 23-10002
H10 Not Used
J1 Mono Jack, 1/4”, 3 Pin Plastic, 24mm 21-06453
J2 Mono Jack, 1/4”, 3 Pin Plastic, 24mm 21-06453
J3 Stereo Jack, 1/4”, 7 Pin Plastic, 24mm 21-06457
J4 Mono Jack, 1/4”, 3Pin Rean, 24mm 21-50345
J5 Mono Jack, 1/4”, 3Pin Rean, 24mm 21-50345
J6 Mono Jack, 1/4”, 3Pin Rean, 24mm 21-50345
J7 Mono Jack, 1/4”, 3Pin Rean, 24mm 21-50345
J8 Mono Jack, 1/4”, 3Pin Rean, 24mm 21-50345
J9 Mono Jack, 1/4”, 3Pin Rean, 24mm 21-50345
J10 Jack XLR Male, Neutr 21-40001
J11 Mono Jack, 1/4”, 3Pin Rean, 24mm 21-50345
J12 Mono Jack, 1/4”, 3Pin Rean, 24mm 21-50345
J13 Stereo Jack, 1/4”, 5Pin Rean, 24mm 21-50545
J102 Mono Jack, 1/4”, 3Pin Rean, 24mm 21-50345
J202 Mono Jack, 1/4”, 3Pin Rean, 24mm 21-50345
K100 Relay 24V12A SPDT 70-05712
K200 Relay 24V12A SPDT 70-05712
L100 Inductor, 3.3µH, Air Core 15-00165
L200 Inductor, 3.3µH, Air Core 15-00165
OP1 Opto Isolator, VTL5C2 60-50253
P1 Pot, 16, B50K, D-shaft, Vert. 15mm 71-16501
P2 Pot, 16, B50K, D-shaft, Vert. 15mm 71-16501
P3 Pot, 16, B50K, D-shaft, Vert. 15mm 71-16501
P4 Pot, 16, B50K, D-shaft, Vert. 15mm 71-16501
P5 Pot, 16, B50K, D-shaft, Vert. 15mm 71-16501
P6 Pot, 16, B50K, D-shaft, Vert. 15mm 71-16501
P7 Pot, 16, B50K, D-shaft, Vert. 15mm 71-16501
P8 Pot, 16, B50K, D-shaft, Vert. 15mm 71-16501
P9 Pot, 16, 15C50Kx2, D-shaft, Vert. 15mm72-16503
P10 Pot, 16, B50K, D-shaft, Vert. 15mm 71-16501
P11 Pot, 16, B50K, D-shaft, Vert. 15mm 71-16501
P12 Pot, 16, B50K, D-shaft, Vert. 15mm 71-16501
P13 Fader B10K C30m15 71-10331
P14 Fader B10K C30m15 71-10331
P15 Fader B10K C30m15 71-10331
P16 Fader B10K C30m15 71-10331
P17 Fader B10K C30m15 71-10331
P18 Fader B10K C30m15 71-10331
P19 Fader B10K C30m15 71-10331
P20 Fader B10K C30m15 71-10331
P21 Fader B10K C30m15 71-10331
P23 Pot, 16, 15C50Kx2, D-shaft, Vert. 15mm72-16503
P101 Pot, Trimmer 500Ω, Vert 71-24500
P201 Pot, Trimmer 500Ω, Vert 71-24500
Q1 Transistor, Darlington NPN, MPSA14 60-00014
Q2 J175, TO-92, JFETP-Channel 60-17500
Q3 J175, TO-92, JFETP-Channel 60-17500
Q4 J175, TO-92, JFETP-Channel 60-17500
Q5 J175, TO-92, JFETP-Channel 60-17500
Q7 Transistor, Darlington NPN, MPSA14 60-00014
Q8 Transistor, Darlington NPN, MPSA14 60-00014
Q101 Transistor, TIP31C NPN, 3A 100V 60-31000
Q102 Transistor, MPSW42 NPN, HV 1.0W 60-00042
Q103 Transistor, CENW92, HV PNP, 1.0W 60-00092
Q104 Transistor, MJE15033 PNP, 3A 100V 60-15033
Q105 Transistor, MJE15032 NPN, 3A 100V 60-15032
Q106 Transistor, TIP31C NPN, 3A 100V 60-31000
Q107 Transistor, MJL21194 NPN, 200W 60-21194
Q108 Transistor, MJL21194 NPN, 200W 60-21194
Q109 N/U
Q110 Transistor, MJL21193 PNP, 200W 60-21193
Q111 Transistor, MJL21193 PNP, 200W 60-21193
Q112 N/U
Q114 Transistor, 2N5400 PNP 60-54000
Q202 Transistor, MPSW42 NPN, HV 1.0W 60-00042
Q203 Transistor, CENW92, HV PNP, 1.0W 60-00092
Q204 Transistor, MJE15033 PNP, 3A 100V 60-15033
Q205 Transistor, MJE15032 NPN, 3A 100V 60-15032
Q206 Transistor, TIP31C NPN, 3A 100V 60-31000
Q207 Transistor, MJL21194 NPN, 200W 60-21194
Q208 Transistor, MJL21194 NPN, 200W 60-21194
Q209 N/U
Q210 Transistor, MJL21193 PNP, 200W 60-21193
Q211 Transistor, MJL21193 PNP, 200W 60-21193
Q212 N/U
Q214 Transistor, 2N5400 PNP 60-54000
Q301 Transistor, Darlington NPN, MPSA14 60-00014
Q302 Transistor, 2N5400 PNP 60-54000
Q303 Transistor, 2N5400 PNP 60-54000
R1 Resistor 1/4W, ±5%, 470K 50-47055
R2 Resistor 1/4W, ±5%, 6.8K 50-68035
R3 Resistor 1/4W, ±5%, 150K 50-15055
R4 Resistor 1/4W, ±5%, 33K 50-33045
R5 Resistor 1/4W, ±5%, 6.8K 50-68035
R6 Resistor 1/4W, ±5%, 1K 50-10035
R7 Resistor 1/4W, ±5%, 180K 50-18055
R8 Resistor 1/4W, ±5%, 100K 50-10055
R9 Resistor 1/4W, ±5%, 22K 50-22045
R10 Resistor 1/4W, ±5%, 470Ω 50-47025
R11 Resistor 1/4W, ±5%, 470Ω 50-47025
R12 Resistor 1/4W, ±5%, 2.2K 50-22035
R13 Resistor 1/4W, ±5%, 4.7K 50-47035
R14 Resistor 1/4W, ±5%, 4.7K 50-47035
R15 Resistor 1/4W, ±5%, 4.7K 50-47035
R16 Resistor 1/4W, ±5%, 4.7K 50-47035
R17 Resistor 1/4W, ±5%, 1K 50-10035
R18 Resistor 1/4W, ±5%, 15K 50-15045
R19 Resistor 1/4W, ±5%, 1M 50-10065
R20 Resistor 1/4W, ±5%, 1K 50-10035
R21 Resistor 1/4W, ±5%, 150K 50-15055
R22 Resistor 1/4W, ±5%, 47K 50-47045
R23 Resistor 1/4W, ±5%, 47K 50-47045
R24 Resistor 1/4W, ±5%, 47K 50-47045
R25 Resistor 1/4W, ±5%, 150K 50-15055
R26 Resistor 1/4W, ±5%, 47K 50-47045
R27 Resistor 1/4W, ±5%, 47K 50-47045
R28 Resistor 1/4W, ±5%, 47M 50-47065
R29 Resistor 1/4W, ±5%, 22K 50-22045
R30 Resistor 1/4W, ±5%, 10K 50-10045
R31 Resistor 1/4W, ±5%, 10K 50-10045
R32 Resistor 1/4W, ±5%, 22K 50-22045
R33 Resistor 1/4W, ±5%, 47K 50-47045
R34 Resistor 1/4W, ±5%, 100Ω 50-10025
R35 Resistor 1/4W, ±5%, 100Ω 50-10025
R36 Resistor 1/4W, ±5%, 10K 50-10045
R37 Resistor 1/4W, ±5%, 10K 50-10045
R38 Resistor 1/4W, ±5%, 10K 50-10045
R39 Resistor 1/4W, ±5%, 10K 50-10045
R40 Resistor 1/4W, ±5%, 300K 50-30055
R41 Resistor 1/4W, ±5%, 470Ω 50-47025
R42 Resistor 1/4W, ±5%, 470Ω 50-47025
R43 Resistor 1/4W, ±5%, 470Ω 50-47025
R44 Resistor 1/4W, ±5%, 470Ω 50-47025
CAUTION
RISK OF ELECTRIC SHOCK
R45 Resistor 1/4W, ±5%, 1M 50-10065
R46 Resistor 1/4W, ±5%, 100K 50-10055
R47 Resistor 1/4W, ±5%, 100K 50-10055
R48 Resistor 1/4W, ±5%, 100K 50-10055
R49 Resistor 1/4W, ±5%, 100Ω 50-10025
R50 Resistor 1/4W, ±5%, 100Ω 50-10025
R51 Resistor 1/4W, ±5%, 1M 50-10065
R53 Resistor 1/4W, ±5%, 10K 50-10045
R54 Resistor 1/4W, ±5%, 10K 50-10045
R55 Resistor 1/4W, ±5%, 10K 50-10045
R56 Resistor 1/4W, ±5%, 10K 50-10045
R57 Resistor 1/4W, ±5%, 2.2K 50-22035
R58 Resistor 1/4W, ±5%, 2.2K 50-22035
R59 Resistor 1/4W, ±5%, 100Ω 50-10025
R60 Resistor 1/4W, ±5%, 10K 50-10045
R61 Resistor 1/4W, ±5%, 33K 50-33045
R62 Resistor 1/4W, ±5%, 10K 50-10045
R63 Resistor 1/4W, ±5%, 33K 50-33045
R64 Resistor 1/4W, ±5%, 1M 50-10065
R65 Resistor 1/4W, ±5%, 1M 50-10065
R66 Resistor 1/4W, ±5%, 10K 50-10045
R67 Resistor 1/4W, ±5%, 10K 50-10045
R68 Resistor 1/4W, ±5%, 10K 50-10045
R69 Resistor 1/4W, ±5%, 2.4K 50-24035
R70 Resistor 1/4W, ±5%, 220K 50-22055
R71 Resistor 1/4W, ±5%, 1.8K 50-18035
R72 Resistor 1/4W, ±5%, 220K 50-22055
R73 Resistor 1/4W, ±5%, 1.8K 50-18035
R74 Resistor 1/4W, ±5%, 300K 50-30055
R75 Resistor 1/4W, ±5%, 2K 50-20035
R76 Resistor 1/4W, ±5%, 300K 50-30055
R77 Resistor 1/4W, ±5%, 2.4K 50-24035
R78 Resistor 1/4W, ±5%, 300K 50-30055
R79 Resistor 1/4W, ±5%, 2K 50-20035
R80 Resistor 1/4W, ±5%, 360K 50-36055
R81 Resistor 1/4W, ±5%, 2.2K 50-22035
R82 Resistor 1/4W, ±5%, 360K 50-36055
R83 Resistor 1/4W, ±5%, 2.2K 50-22035
R84 Resistor 1/4W, ±5%, 300K 50-30055
R85 Resistor 1/4W, ±5%, 2.2K 50-22035
R86 Resistor 1/4W, ±5%, 150K 50-15055
R87 Resistor 1/4W, ±5%, 10K 50-10045
R88 Resistor 1/4W, ±5%, 10K 50-10045
R89 Resistor 1/4W, ±5%, 33K 50-33045
R90 Resistor 1/4W, ±5%, 1M 50-10065
R91 Resistor 1/4W, ±5%, 1M 50-10065
R92 Resistor 1/4W, ±5%, 33K 50-33045
R93 Resistor 1/4W, ±5%, 10K 50-10045
R94 Resistor 1/4W, ±5%, 10K 50-10045
R95 Resistor 1/4W, ±5%, 47K 50-47045
R96 Resistor 1/4W, ±5%, 47K 50-47045
R97 Resistor 1/4W, ±5%, 47K 50-47045
R98 Resistor 1/4W, ±5%, 100K 50-10055
R99 Resistor 1/4W, ±5%, 4.7K 50-47035
R100 Resistor 1/4W, ±5%, 4.7K 50-47035
R101 Resistor 1/4W, ±5%, 47K 50-47045
R102 Resistor 1/4W, ±5%, 100K 50-10055
R104 Resistor 1/4W, ±5%, 33K 50-33045
R105 Resistor 1/4W, ±5%, 150K 50-15055
R106 Resistor 1/4W, ±5%, 22K 50-22045
R107 Resistor 1/4W, ±5%, 22K 50-22045
R108 Resistor 1/4W, ±5%, 22K 50-22045
R109 Resistor 1/4W, ±5%, 22K 50-22045
R110 Resistor 1/4W, ±5%, 1K 50-10035
R111 Resistor 1/4W, ±5%, 1K 50-10035
R112 Resistor 1/4W, ±5%, 100K 50-10055
R113 Resistor 1/4W, ±5%, 10K 50-10045
R120 Resistor 1/4W, ±5%, 1M 50-10065
R121 Resistor 1/4W, ±5%, 47K 50-47045
R122 Resistor 1/4W, ±5%, 2.2K 50-22035
R123 Resistor 1/4W, ±5%, 100Ω 50-10025
R124 Resistor 1/4W, ±5%, 33K 50-33045
R125 Resistor 1/4W, ±5%, 1M 50-10065
R126 Resistor 1/4W, ±5%, 47K 50-47045
R128 Resistor 1/4W, ±5%, 5.6K 50-56035
R129 Resistor 1/4W, ±5%, 100K 50-10055
R135 Resistor 1/4W, ±5%, 10Ω 50-10015
R137 Resistor 1/4W, ±5%, 10Ω 50-10015
R138 Resistor 1/4W, ±5%, 10K 50-10045
R141 Resistor 1/4W, ±5%, 220K 50-22055
R142 Resistor 1/4W, ±5%, 33K 50-33045
R143 Resistor 1/4W, ±5%, 1K 50-10035
R144 Resistor 5W, ±5%, 5Ω 55-05025
R145 Resistor 1/4W, ±5%, 300K 50-30055
R147 Resistor 1/4W, ±5%, 47K 50-47045
R148 Resistor 1/4W, ±5%, 10K 50-10045
R150 Resistor 1/4W, ±5%, 68K 50-68045
R153 Resistor 1/4W, ±5%, 2.2K 50-22035
R158 Resistor 1/4W, ±5%, 33K 50-33045
R159 Resistor 1/4W, ±5%, 68K 50-68045
R160 Resistor 1/4W, ±5%, 68K 50-68045
R211 Resistor 1/4W, ±5%, 150Ω 50-15025
R215 Resistor 1/4W, ±5%, 22K 50-22045
R216 Resistor 1/4W, ±5%, 15K 50-15045
R217 Resistor 1/4W, ±5%, 4.7K 50-47035
R218 Resistor 1/4W, ±5%, 47K 50-47045
R219 Resistor 1/4W, ±5%, 4.7K 50-47035
R220 Resistor 1/4W, ±5%, 100Ω 50-10025
R221 Resistor 1/4W, ±5%, 100Ω 50-10025
R222 Resistor 1/4W, ±5%, 4.7K 50-47035
R223 Resistor 1/4W, ±5%, 680Ω 50-68025
REFER SERVICING TO QUALIFIED SERVICE
PERSONNEL! THIS UNIT CONTAINS HIGH
VOLTAGE INSIDE!
R224 Resistor 1/4W, ±5%, 4.7K 50-47035
R225 Resistor 1/4W, ±5%, 2.2K 50-22035
R226 Resistor 1/4W, ±5%, 1K 50-10035
R227 Resistor 1/4W, ±5%, 680Ω 50-68025
R228 Resistor 1/4W, ±5%, 2.2K 50-22035
R229 Resistor 1/2W, ±5%, 4.7Ω 52-47005
R230 Resistor 1/4W, ±5%, 150Ω 50-15025
R231 Resistor 1/2W, ±5%, 4.7Ω 52-47005
R232 Resistor 5W, ±5%, 0.22Ω 55-02205
R233 Resistor 5W, ±5%, 0.22Ω 55-02205
R234 Resistor 5W, ±5%, 0.22Ω 55-02205
R235 Resistor 5W, ±5%, 0.22Ω 55-02205
R236 Resistor 1/4W, ±5%, 15K 50-15045
R237 Resistor 1/4W, ±5%, 10K 50-10045
R238 Resistor 1/4W, ±5%, 100K 50-10055
R239 Resistor 1/4W, ±5%, 100K 50-10055
R240 Resistor 1/4W, ±5%, 33K 50-33045
R241 N/U
R242 N/U
R244 Resistor 5W, ±5%, 5Ω 55-05025
R250 Resistor 2W, ±5%, 10Ω 54-10015
R305 Resistor 1/4W, ±5%, 39K 50-39045
R306 Resistor 1/4W, ±5%, 39K 50-39045
R307 Resistor 1/4W, ±5%, 470K 50-47055
R308 Resistor 1/4W, ±5%, 470K 50-47055
R309 Resistor 1/4W, ±5%, 22K 50-22045
R310 Resistor 1/4W, ±5%, 22K 50-22045
R311 Resistor 1/4W, ±5%, 20K 50-20045
R312 Resistor 1/4W, ±5%, 6.8K 50-68035
R313 Resistor 1/4W, ±5%, 2.2M 50-22065
R314 Resistor 1/4W, ±5%, 20K 50-20045
R315 Resistor 1/4W, ±5%, 10K 50-10045
R316 N/U
R317 Resistor 1/4W, ±5%, 22K 50-22045
R318 Resistor 1/4W, ±5%, 1K 50-10035
R319 Resistor 1/4W, ±5%, 10K 50-10045
R320 Resistor 1/4W, ±5%, 10K 50-10045
R321 Resistor 1/4W, ±5%, 27K 50-27045
R322 Resistor 1/4W, ±5%, 5.6K 50-56035
R323 Resistor 1/4W, ±5%, 470K 50-47055
R324 Resistor 1/4W, ±5%, 10K 50-10045
R325 Resistor 1/4W, ±5%, 1K 50-10035
R326 Resistor 1/4W, ±5%, 4.7K 50-47035
R327 Resistor 1/4W, ±5%, 22K 50-22045
R328 Resistor 1/4W, ±5%, 220Ω 50-22025
R329 Resistor 1/4W, ±5%, 10K 50-10045
R331 Resistor 1/4W, ±5%, 100K 50-10055
R411 Resistor 1/4W, ±5%, 150Ω 50-15025
R415 Resistor 1/4W, ±5%, 22K 50-22045
R416 Resistor 1/4W, ±5%, 15K 50-15045
R417 Resistor 1/4W, ±5%, 4.7K 50-47035
R418 Resistor 1/4W, ±5%, 47K 50-47045
R419 Resistor 1/4W, ±5%, 4.7K 50-47035
R420 Resistor 1/4W, ±5%, 100Ω 50-10025
R421 Resistor 1/4W, ±5%, 100Ω 50-10025
R422 Resistor 1/4W, ±5%, 4.7K 50-47035
R423 Resistor 1/4W, ±5%, 680Ω 50-68025
R424 Resistor 1/4W, ±5%, 4.7K 50-47035
R425 Resistor 1/4W, ±5%, 2.2K 50-22035
R426 Resistor 1/4W, ±5%, 1K 50-10035
R427 Resistor 1/4W, ±5%, 680Ω 50-68025
R428 Resistor 1/4W, ±5%, 2.2K 50-22035
R429 Resistor 1/2W, ±5%, 4.7Ω 52-47005
R430 Resistor 1/4W, ±5%, 150Ω 50-15025
R431 Resistor 1/2W, ±5%, 4.7Ω 52-47005
R432 Resistor 5W, ±5%, 0.22Ω 55-02205
R433 Resistor 5W, ±5%, 0.22Ω 55-02205
R434 Resistor 5W, ±5%, 0.22Ω 55-02205
R435 Resistor 5W, ±5%, 0.22Ω 55-02205
R436 Resistor 1/4W, ±5%, 15K 50-15045
R437 Resistor 1/4W, ±5%, 10K 50-10045
R438 Resistor 1/4W, ±5%, 100K 50-10055
R439 Resistor 1/4W, ±5%, 100K 50-10055
R440 Resistor 1/4W, ±5%, 33K 50-33045
R441 N/U
R442 N/U
R450 Resistor 2W, ±5%, 10Ω 54-10015
R519 Resistor 5W, ±5%, 100Ω 55-10020
R528 Resistor 1/4W, ±5%, 10K 50-10045
S1 Switch, DPDT Vert 25-02201
S2 Switch, DPDT Vert 25-02201
S3 Switch, DPDT Vert 25-02201
S4 Switch, DPDT Vert 25-02201
S5 Switch, DPDT Vert 25-02201
S6 Switch, DPDT Vert 25-02201
S7 Switch, DPDT Vert 25-02201
S9 Switch, DPDT Vert 25-02201
U2 DIP IC, MC14049UBCP Hex Inverter 60-40490
V1 Tube Socket, 9 Pin, 12AX7A 23-91632
12AX7A, Twin Triode 65-00127
VR1 Voltage Regulator, 7815 +15V 60-78150
Heatsink T0-220, Vert 12-57462
VR2 Voltage Regulator, 7915 -15V 60-79150
Heatsink T0-220, Vert 12-57462
VR3 Voltage Regulator, 7912 -12V 60-79120
Z1 Zener Diode, 5.1V, 1N4733A, 1W 61-04733
FAN DC24V 80x80x25mm 42cfm 70-02408
Page 2
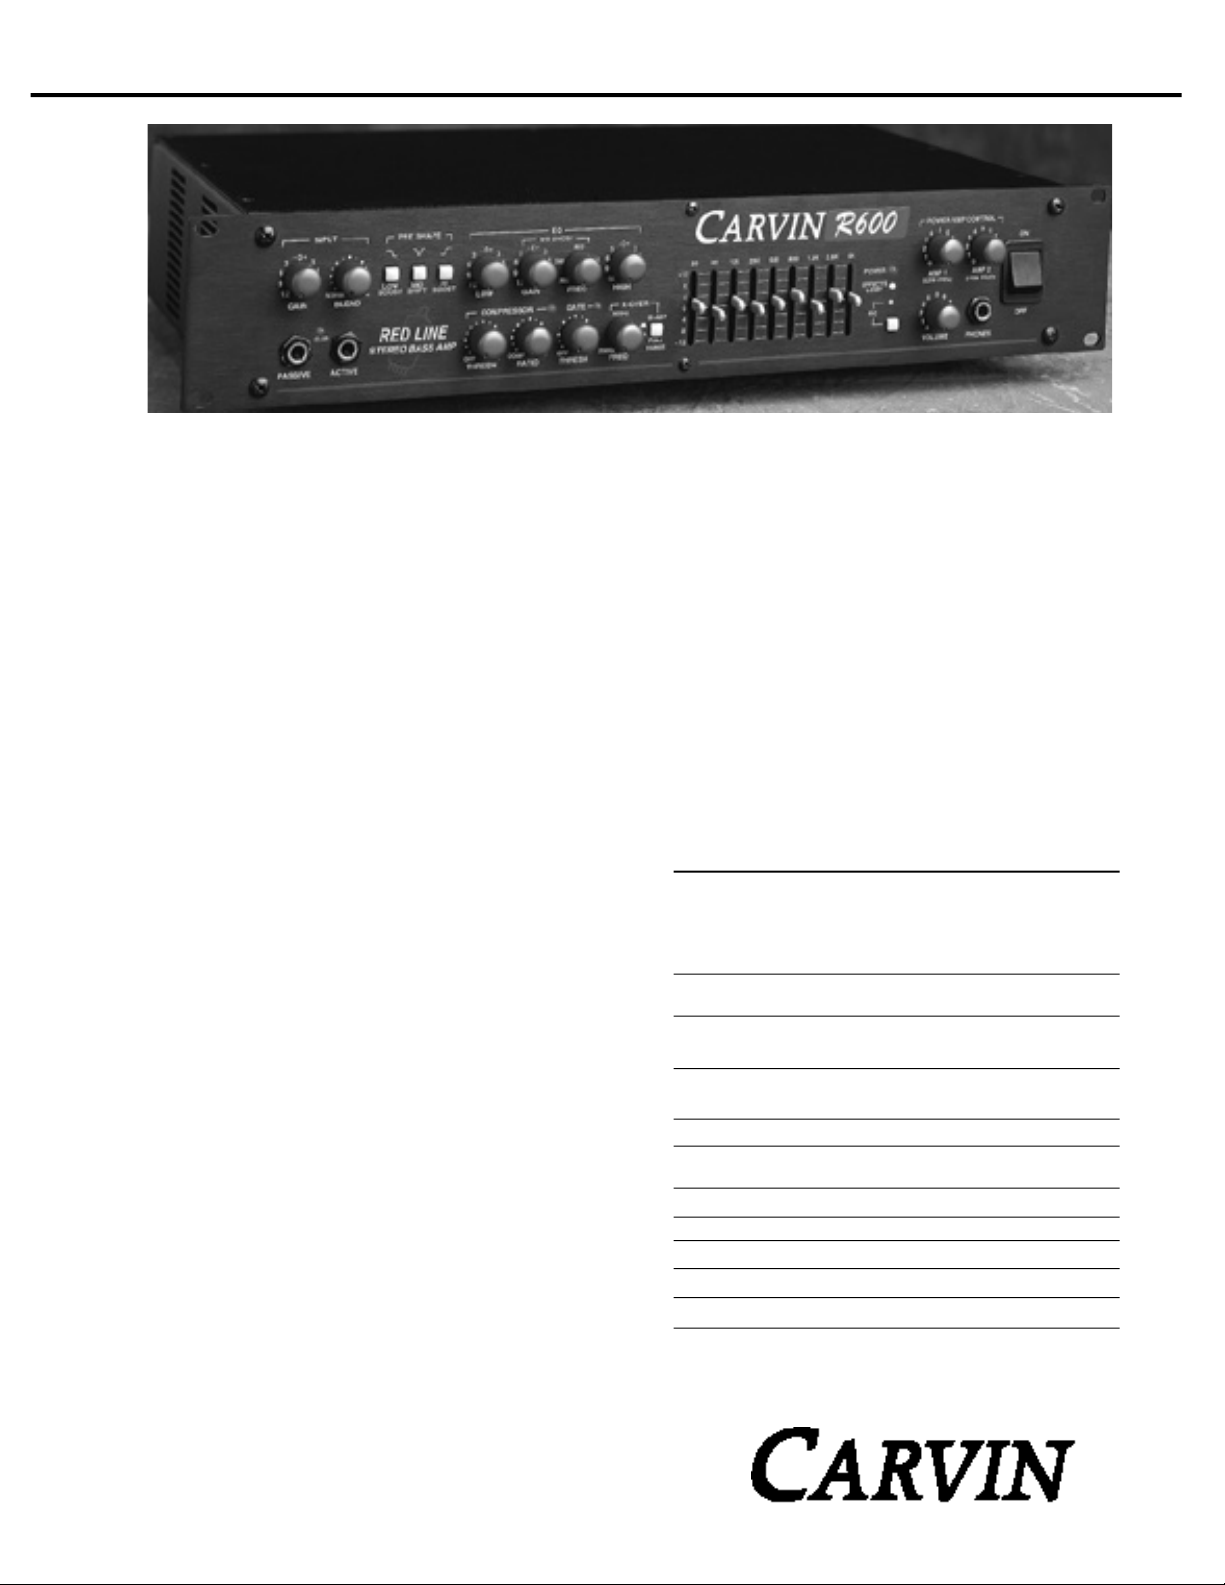
CARVIN ENGINEERING DA TA OPERATING MANUAL
R600/R1000 HEAD/RL6815 CYCLOPS /RC210 RED EYE
Congratulations on your decision to purchase the new Red Line Series bass
amp. The Red line Series of products represent Carv i n ’s commitment to producing the state of the art in professional bass technology. All Red Line amplifiers offer a hybrid 12AX7 tube pre-amp which gives the player a choice of
a clean or vintage sound at the turn of a knob. The light-weight and compact design is complemented by heavy duty construction perfectly suited
for the rigors of road use. This manual covers the R600 and R1000 head,
“Cyclops” and “Red Eye” (combo) amplifiers.
GETTING STARTED QUICKLY
If you are like most players, you probably want to plug in your new amp and get started
playing right away. However, with a sophisticated amp like the R600/R1000, the setup must
be right or you will experience unsatisfactory results. Before you start, be sure your amp
is plugged into the correct AC voltage.
1. Plug your bass guitar into the ACTIVE (bass with preamp) or PASSIVE (bass with no battery) input jack. With your bass full on and playing hard, be sure the CLIP led next to the
input jacks is not flashing (very dim flashing is OK) or preamp distortion will result. Use
the ACTIVE input if your instrument continues to cause clipping.
2. The INPUT GAIN control should be set at its center “0” position. The master AMP 1 & 2
and VOLUME levels should be set at their center “5” position. If these setting are too loud,
then bring all three down proportionally. However, the GAIN control should be kept at “0” for
the best signal to noise performance. Note, the GAIN control does not turn the guitar off.
3. Set the COMPRESSOR & GATE to their off position. Read about their function later.
4. Set the LOW, MID SWEEP and HIGH tone controls to their off center “0” position. Adjust
later after you are more familiar with the amp.
5. Set the 9 EQ bands to their “0” center positions and adjust later if needed. The EQ switch
can also be used to defeat the EQ.
6. Set the guitar’s level about 1/2 and turn the master VOLUME OFF. Now, turn the amp ON
and gradually raise the master VOLUME (set the input GAIN at “0” & the AMP 1 & 2 at “5”).
Re-adjust the guitar and these masters according to the desired volume. If you require full
output, then raise these master controls to 10. Never try to get full power by pushing the input
GAIN control to its maximum and keeping the master AMP 1 & 2 and VOLUME below 5.
7. Your tone shaping should start with the PRE-SHAPE filters. You can use the tone controls and the 9-band graphic EQ as more tone variation is required. It is not recommended
to add a lot of bass if the pre-shape bass filter is used especially at high levels because early
clipping can occur. Use moderation when dialing in tone.
8. Use the built-in COMPRESSOR to limit peaks. This will help you to get more power from
your amp.
9. Biamping the CYCLOPS combo or any large bass stacks requires careful balancing of
the AMP 1 & 2 controls. These amp controls power the woofer and midrange/tweeter independently. Double check to see that the speaker’s components are plugged into the correct amp jacks. If the cables are reversed (feeding the wrong speakers), or the BRIDGE
switch is inadvertently pushed in, or the front BIAMP switch or X-OVER frequency is incorrectly set, your amp will not perform correctly. Carefully checking these items will help prevent service calls.
10. Need more power? Even though the R600/R1000 is a powerful amp, adding more speakers is the only way for substantially more output. Every time you double your speakers, your
acoustic output goes up by a factor of four. This is far more efficient than trying to add 4
times the power especially when speakers become less efficient when driving them harder.
Bridging your amp into a 4 ohm system will give you more output. However, use caution
because speakers can be be damaged from its high output.
H o p e f u l l y, this will help you get started. Have fun exploring the many new features and sounds
of the R600/R1000. Take your time because you’re new amp has a lot of potential if properly setup!
76-4000 0798
RECEIVING INSPECTION—read before getting start e d
INSPECT YOUR UNIT FOR ANY DAMAGE which may have occurred during shipping. If any
damage is found, please notify the shipping company and CARVIN immediately.
S AVE THE CARTON & ALL PACKING MATERIALS. In the event you have to re-ship your unit,
always use the original carton and packing material. This will provide the best possible protection during shipment. CARVIN and the shipping company are not liable for any damage caused
by improper packing.
S AVE YOUR INVOICE. It will be required for warranty service if needed in the future.
SHIPMENT SHORTAGE. If you find items missing, they may have been shipped separately.
Please allow several days for the rest of your order to arrive before inquiring.
RECORD THE SERIAL NUMBER on the enclosed warranty card or below on this manual
for your records. Keep your portion of the card and return the portion with your name and
comments to us.
DESIGNED FOR TOURING
Every R600 is made from heavy-duty 16 gauge steel that is galvanized before being painted
to prevent rust. All internal cabling is neatly tied and harnessed. Every circuit card is MIL
SPEC, double-sided, through-hole plated, fire retardant FR-4 glass epoxy. This insures that
the solder flows on the top, bottom and through each hole of every component, preventing
components from shaking loose. Toroid transformers are used as they are the engineer’s
choice for greater power supply current while reducing weight and magnetic “hum” fields.
R600/R1000 RED LINE SPECIFICATIONS:
Output Power R 6 0 0 R 1 0 0 0
8 Ω THD < 1% 1 7 5 / 1 7 5 w 2 2 5 / 2 2 5 w
4 Ω THD < 1% 2 5 0 / 2 5 0 w 3 5 0 / 3 5 0 w
2 Ω THD < 1% 3 0 0 / 3 0 0 w 5 0 0 / 5 0 0 w
8Ω Bridged THD < 1% 5 0 0 w 7 0 0 w
4Ω Bridged THD <1% 6 0 0 w 1 0 0 0 w
Input Impedance (passive input) 1 M Ω
Pre-Shape EQ. Low Boost: +8dB @ 80Hz
Main EQ. Low ±12dB @ 100Hz
(active input) 200k Ω
Mid Shift: 250 Hz or 475 Hz @-12dB
Hi Boost: +7dB @ 6kHz
Mid Sweep ±12dB @ 200Hz-2kHz
High ±12dB @ 8kHz
Graphic EQ Freq. 50, 80, 125, 250, 500, 800, 1.3k, 2.6k, 5k
C o m p r e s s o r Variable Threshold Range (-10dB to -35dB)
Variable Ratio Range (1.3 to 1) to (5 to 1)
Noise Gate Variable Threshold Range off to -30dB
C r o s s o v e r 12dB per Octave Sweepable 200Hz to 2kHz
D i m e n s i o n s 3 1/2” High x 19” Wide x 10” Deep
Shipping Weight with SV2 Duratuff II™ cabinet R600: 30 lbs. R1000:36 lbs
Wa r r a n t y One year parts and labor unless otherwise state
For your records, you may wish to record the following information.
Serial No._____________________ Invoice Date_______________
12340 World Trade Drive, San Diego, CA 92128
(619) 487-1600 (800) 854-2235
www.carvin.com
Page 3

FRONT PANEL CONTROLS
SPEAKER CONNECTIONS
SPK 1
FS-22
PREAMP
SEND
RETURN
GRAPHIC EQ
EFFECTS LOOP
DIRECT
LINE
GND
LIFT
AMP 1 RETURN
PREAMP 1 OUT
(LOW FREQ)
FOOTSWITCH
1. INPUT GROUP
Two 1/4” phone jacks are provided to accommodate both passive and active instruments. The
PA S S I V Einput is to be used with bass guitars with standard high impedance pickups. The high
impedance input offers 8db more gain than the A C T I V Einput jack. The A C T I V Einput is to be
used with instruments that contain active electronics. The INPUT GAINknob is used to set the
input level, and the B L E N Dknob controls how much signal is mixed through the 1 2 A X 7 v a c u u m
tube. With your bass full on and the blend control set to the T U B Epostition, you are able to get
mild vintage tube distortion. The red C L I PLED indicates when the input is close to clipping. To
avoid clipping, reduce the bass level, G A I Nknob or use the A C T I V E input jack.
2. PRE-SHAPE EQ
The PRE-SHAPE EQ is useful for dialing up a certain sound quickly and easily. The LOW BOOST
switch provides a 8dB boost at just under 80Hz. This is useful for adding some depth to the
bottom end without bringing up the lower midrange. The MID SHIFT switch offers two differ-
ent scooped mid selections. In the IN position the amp has a 12dB cut at 250Hz. Depressing
this button raises the cut frequency to 475Hz. TheHI BOOSTswitch offers a 6dB boost at 6kHz.
This can provide good high frequency compensation when using only 15” or 18” speakers.
3. MAIN EQ TONE CONTROLS
The main EQ tone controls consists of a low shelving control, a sweep midrange control and
a high shelving control. The LOW control provides the overall shaping of the low frequencies.
The action of this control has been carefully matched to the response of the bass guitar. The
MID SWEEPcontrols perform as a semiparametric EQ over the mid frequency range. The M I D
G A I Nknob provides a boosting or cutting action at a relatively narrow band of frequencies. When
the EQ GAIN knob of the MID SWEEP controls is set to “0” the mid sweep will have no effect.
To boost or cut a specific frequency rotate the M I DG A I Nknob clockwise (right) or counter clock-
wise (left) respectively. The F R E Q control knob is used to select the center frequency where
the boosting or cutting will occur. The best way to become familiar with the MID SWEEPc o n-
trol is to set the M I D G A I N knob at either full cut or full boost and rotate the FREQ knob over
its range of frequencies. Listen to the results and experiment with different levels. The M I D
S W E E P E Q is a powerful sound shaping tool which usually requires some practice to get the
best results. The HIGH control knob is designed to cut or boost the high frequencies of the
bass guitar. Boosting with this control is useful for bringing up the very highest harmonics of
the bass, which is especially useful when slapping or popping. Note: boosting the high frequencies
can result in increased hiss, especially when using tweeters. This is normal.
4. COMPRESSOR
The C O M P R E S S O Rof the Red Line Series amps is designed to limit the peaks so the volume
level is more constant. This allows greater power to your speakers preventing the power amps
from clipping. The R600/R1000 two knob compressor with T H R E S H O L Dand R AT I Oc o n t r o l s
is more flexible and precise than a single control unit. The user can dial up the exact amount
of compression desired and at what level they want the compression to begin. The T H R E S H-
O L D control knob sets the point where the compressor kicks in. In the O F F position the com-
pressor has no effect on the sound. Rotating this control in the clockwise direction lowers the
level where the compressor turns on. The compressor indicator LED shows when this thresh-
old is obtained, thus showing when the compressor is on. The R AT I Oknob is used to set the
amount of compression once the threshold has been reached. When this knob is swept all the
way counter clockwise (left) the unit is set for a mild compression. As the knob is rotated clockwise (right) the compression ratio increases. The range of available compression ratios is 1.3
to 1 in the full counter clockwise position and 5 to 1 in the full clockwise position. The compressor is interactive with the input gain knob and the volume knobs on the bass guitar itself. Lowering
the volume feeding the compressor will reduce the amount of compression and raising it will result
in more compression. To get a tight limiting sound which is often nice for slap style playing, set
the R ATIO control to the full clockwise position and bring up the THRESHOLD knob until the desired
reduction is realized.
5. NOISE GATE
The noise G AT E reduces the noise caused by the bass pickups. To use the G AT E , mute the
strings with your hand and raise the T H R E S H O L D control knob until the amp’s noise is turned
off and the red LED illuminates. The G AT E will turn the amp on as the bass is played. The
noise gate senses the guitar. This alllows the INPUT GAIN and MASTER VOLUMESto be adjusted
independently of the gate setting. Only your guitar affects the setting.
6. ELECTRONIC X-OVER
The electronic X - O V E Ris used to set the amp for a bi-amped configuration. When the B I - A M P
/ FULL RANGE selector switch is in the OUT position, the amp is in the bi-amp mode. To select
the crossover frequency, rotate the F R E Q control knob until the desired frequency is obtained
(800 Hz is recomended). A bi-amped system allows the user greater control over the high and
low frequencies of their stage rig. This allows speakers designed for specific frequencies to
be utilized to their fullest potential.
7. GRAPHIC EQ/EFFECTS LOOP
The nine band graphic EQ has been designed with the center frequencies most requested by
professional bass players. This E Qcan be used to fine tune the tonal content of the amps output.
Since the graphic EQ is controllable with either the optional F S 2 2 footswitch or the E Qs w i t c h
on the front panel, it can be used to develop a second sound from the amp. Musicians that
play more than one bass on stage will find this useful to get the sounds they desire out of each
of their instruments. The footswitch selectable graphic EQ can also be useful during passages
of a song when the bass needs to punch through the mix. A green LED indicator located along
side of the EQ signifies when the graphic EQ is working in the amp.
The yellow effect loop LED labeled EFF LOOP indicates when the effects loop is turned on.
Note: the E Q switch on the front panel overrides the S E L E C T switch on the footswitch. So
when the graphic EQ is off on the front panel it cannot be turned on with the footswitch.
8. OUTPUT GROUP (AMP CONTROLS, BIAMPING & JACKS)
The output group determines how the Red Line amplifier interfaces with other gear and speakers. The master VOLUME control sets the overall volume level of the amp. The P O W E R A M P
CONTROL 1 & 2 knobs control the final volume to the individual amps. These are used to balance the low and high cabinets when bi-amping or stereo signals. To set the balance in a biamped rig, bring up the AMP 1 (LOW FREQ) knob until the desired volume level is reached.
Now bring up the AMP 2 (HIGH FREQ) knob until the desired balance between the lows and
highs is met. If the V O L U M E control is at its maximum position and more volume is needed,
2
1
R600/R1000 BI-AMP HOOK UP
The R600/R1000 bass amp contains two separate
(stereo) power amplifiers. This makes it possible to
run a full Bi-amped rig directly off of your R600/R1000.
The AMP 1 (LOW FREQ) 1/4” output jack should be
connected to a low frequency speaker cabinet, usu-
ally a 15” or 18” speaker. The AMP 2 (HIGH FREQ)
1/4” output jack should be connected to a set of
mid/high frequency drivers, often a 4x10 box with a
t w e e t e r. The crossover selector switch must be set
to the B I - A M P (out) position in order to engage the
internal electronic crossover. The crossover frequency is set by rotating the X - O V E Rknob on the front
panel, 800 Hz is recommended. The mix of the low
and high frequency volume levels are set with the A M P
1 and AMP 2 P O W E R A M P C O N T R O L k n o b s .
3 4
Low Frequency-W O O F E R
6
5
7
FULL RANGE MODE:
SPK 2SPK 1
LOW FREQ
HI FREQ
www.carvin.com
R600
PROFESSIONAL REDLINE
STEREO BASS AMPLIFIER
8 OHMS/CH
175W
4 OHMS/CH
250W
2 OHMS/CH
300W
8Ω BRIDGED
500W
4Ω BRIDGED
600W
SERIAL NUMBER
1212121
MADE
BRIDGE
BIAMP
BIAMP
ONLY
FS-22
FOOTSWITCH800-854-2235
GRAPHIC EQ
EFFECTS LOOP
FULL RANGE
EFF LOOP
SEND
INTHE
RETURN
AUS
4 Ω MIN2 Ω MIN 2 Ω MIN
PREAMP
BRIDGE
ON
OFF
DIRECT
GND
LINE
LIFT
AMP 2 RETURNAMP 1 RETURN
PREAMP 2 OUT
PREAMP 1 OUT
(LOW FREQ)
10
120VAC 60Hz
700VA
(HI FREQ)
If only one speaker is being used
(or multiple full range speakers),
connect it to the AMP 1or the A M P
2 output jacks. The internal
crossover switch should be set to
8
9
LOW FREQ
800-854-2235
www.carvin.com
R600
PROFESSIONAL REDLINE
STEREO BASS AMPLIFIER
8 OHMS/CH
175W
4 OHMS/CH
250W
2 OHMS/CH
300W
8Ω BRIDGED
500W
4Ω BRIDGED
600W
SERIAL NUMBER
1212121
MADE
INTHE
AUS
BIAMP
2 Ω MIN
EFF LOOP
BRIDGE
ON
OFF
the FULL RANGEmode (IN), since
it will not be used in this applicat i o n .
High Frequency -MID/TWEETER
Page 4

increase both P O W E R A M P CONTROL 1 & 2 knobs by the same amount, so that the mix is
BRIDGED MODE
Bridge the two power amps by
pushing in the B R I D G E s w i t c h .
Use the BRIDGE ONLY o u t p u t
jacks to connect your speakers.
Caution must be used or damage
could result to your speakers
because of excess power. The
minimum impedance from these
two jacks are 8Ω from each jack
or 4Ω from one jack. Lower
impedance will cause the amp to
go into protect mode. Reset by
turning amp off for 1 minute and
on again.
120VAC 60Hz
700VA
SPK 2
AMP 2 RETURN
PREAMP 2 OUT
(HI FREQ)
4 Ω MIN
2 Ω MIN
HI FREQ
BIAMP
unchanged. These knobs can also be used to set the level of two full range speakers. So one
speaker can be used as a monitor for the guitar player or drummer and the other speaker as
the main bass cabinet. A front panel mounted P H O N E Sjack is provided for practicing or as a
place to hook up a tuner. Use high quality headphones with an impedance greater than 100Ω
when connecting to this jack. The phones jack does not interrupt the amplifiers output so a
tuner can be left plugged into this jack while playing. When using a Tip / Sleeve (mono) cable
to attach gear such as a tuner to the phones jack, insert the cable to the first click of the jack.
9. POWER / PROTECT RESET
O N / O F F switch and power indicator LED. Push the upper portion of the power switch to turn
the amplifier on. If the power indicator LEDis on but no sound is coming out of the speakers,
the amp may have gone into one of its protection modes. To reset the amp, turn the power
off for one minute and then turn the amp back on. If the problem persists check for a bad
speaker cable, damaged speaker or blocked rear fan intake.
REAR PANEL CONTROLS
10. COOLING VENTS
These vents are for cooling the internal power amplifiers. Provide a minimum of 3” of clearance for adequate ventilation. Blocking the air flow through these vents will cause the amp to
thermally protect and turn the speaker relays off. If this happens clear the obstruction first,
keep the power on and turn the guitar volume down allowing the amp to cool. The amp will
engage the speaker relays when cooling conditions return to normal.
11. EFFECTS LOOP
T h e EFF LOOP send and return jacks are used to connect external effects into the Red Line’s
signal chain. The loop is located after the main EQ, compressor and noise gate and before the
graphic EQ. To use the effects loop, connect the “ S N D ” jack to the input of the effects unit
and connect the “ RT N ” jack to the output of the effects unit. The effects loop can be turned
on and off by using the F S 2 2footswitch. When the footswitch is not connected, the loop will
default to the O N position. The status of the effects loop is indicated on the front panel by a
yellow LED marked “EFF LOOP” .
12. PREAMP / DIRECT OUT XLR
The P R E A M PXLR is a balanced output that can be configured in a number of different ways.
The LINE / DIR switch is used to select a pre or post pre amp feed. In the “ L I N E ” p o s i t i o n ,
the feed is post the preamp section of the Red Line amp and contains all of the signal processing and effects that are being used. The “ D I R ” position is a direct feed off of the bass
guitar and is similar to using a D.I. box at the input jack. A ground lift switch is also available
on the preamp out XLR jack. Set this switch for the lowest noise when using this output. When
the GND / LIFT switch is depressed, the signal ground is lifted from this jack thus eliminating
any ground loops between the Red Line preamp out and the gear it is feeding.
13. PREAMP OUT JACKS (HI FREQ & LOW FREQ)
The PREAMP 1 & 2 OUT jacks add a lot of interconnection flexibility to the Red Line bass amp.
These jacks can be used to drive additional power amplifiers or to drive stereo or frequency
selective effects. When the amp is operating in Bi-amp mode, the LOW FREQ jack contains
only the low frequency material and the HI FREQ jack contains only the high frequency mate-
rial, as determined by the X-OVER FREQ selector knob on the front panel. When the amp is
operating in full range mode, both output jacks contain the same full range signal. Use the
front AMP 1 & 2controls for level adjustments.
14. STEREO RETURN JACKS
The STEREO RETURNjacks are to be used as stereo effects returns or as an AMP PAT C Hj a c k .
These jacks can be used to patch external gear to the internal power amps of the Red Line
amps. These jacks can also be utilized in conjunction with the pre-amp out jacks as a full stereo
effects loop.
15. FOOTSWITCH
Connect the optional F S 2 2 footswitch to remotely control the nine band graphic EQ and the
effects loop. The first button on the F S 2 2 marked S E L E C T turns the graphic EQ on and off,
and the second button marked REVERB / EFFECTS turns the effects loop on and off. Any stan-
dard footswitch with a stereo plug will work.
16. SPEAKER OUTPUTS
The R600/R1000 amp contains two 1/4” speaker output connectors, one for each amp. The
AMP 1 (LOW FREQ) jack corresponds to the AMP 1 (LOW FREQ) knob on the front panel.
The AMP 2 (HIGH FREQ) jack corresponds to the AMP 2 (HIGH FREQ)knob on the front panel.
Multiple speakers can be attached to each of the speaker output jacks so long as the total impedance is not below 2Ω per jack.
17. BRIDGE SPEAKER OUTPUTS
The R600 produces 600 watts (bridged mono) into a 4Ω load or 500 watts into an 8Ω load.
The R1000 produces 1000 watts (bridged mono) into a 4Ω load or 700 watts into an 8Ω load.
To activate, push the B R I D G Eswitch in and plug the speakers into the BRIDGE ONLY j a c k s .
18. AC CIRCUIT BREAKER
A circuit breaker is provided so that you will never have to replace the fuse. Occasionally
the circuit breaker on your amp may have to be reset if high AC voltage surges are present
or if the amp is used with excessive loads. Simply push the button to reset.
19. AC LINE CORD
All Red Line Series bass amplifiers are supplied with detachable three conductor line cords.
Make sure the cord is securely inserted into the back of the unit. Never defeat the grounding pin of the AC line cord as it is there for your own protection. If you must plug into a two
prong outlet use a quality 3 to 2 prong grounded adapter.
20. SPEAKER SYSTEM / TWEETERS
Speaker systems such as the RL410T or RL210T that have tweeters with L-Pad controls should
be adjusted correctly. Be conservative or excess noise will result.
1 6
1 8
1 7
1 9
1 0
111 5
1 2
1 4
1 3
HELPFUL HINTS
10
FOOTSWITCH800-854-2235
www.carvin.com
GRAPHIC EQ
EFFECTS LOOP
R600
EFF LOOP
PROFESSIONAL REDLINE
STEREO BASS AMPLIFIER
PREAMP
8 OHMS/CH
175W
4 OHMS/CH
250W
2 OHMS/CH
300W
DIRECT
8Ω BRIDGED
500W
LINE
4Ω BRIDGED
600W
SEND
SERIAL NUMBER
1212121
MADE
INTHE
RETURN
AUS
SET SWITCH TO BRIDGE MODE
FS-22
GND
LIFT
LOW FREQ
BRIDGE
BIAMP
ONLY
FULL RANGE
2 Ω MIN 2 Ω MIN
4 Ω MIN
BRIDGE
ON
OFF
PREAMP 1 OUT
(LOW FREQ)
AMP 2 RETURNAMP 1 RETURN
PREAMP 2 OUT
(HI FREQ)
SPK 2SPK 1
HI FREQ
BIAMP
10
120VAC 60Hz
700VA
8 Ω min
(4 Ω from one jack only)
8 Ω min
1) POOR BIAMP SOUND: The speaker cables from AMP 1
(woofers) and AMP2 (tweeters) have been reversed or AMP
1 and 2 level controls are not balanced or the X-OVER has
been set at an incorrect frequency (set at 800 Hz).
2 ) NO SOUND FROM AMPS 1 & 2: The rear BRIDGE switch has
been inadvertently pushed in or speakers plugged into wrong jacks.
3) NO HIGH FREQUENCIES: Tweeters or midrange drivers have
been damaged or blown from overpowering.
4 ) WEAK BASS: The speaker systems could be wired out of phase
to each other. To correct, reverse the wires on one speaker
connector only and your bass response will improve.
5 ) DIR XLR HUM: Try switching the GND LIFT switch IN or OUT
(depending on your use). If hum is not eliminated, then use a
600Ω line input transformer cutting the input ground on the
connectors (Pin 3). This isolates the input ground from the AC
power ground eliminating a system ground loop.
6 ) REAR CIRCUIT BREAKER TRIPS: High AC voltage surges may
be present. Reset the breaker by pushing the protruding button.
 Loading...