

Page 1

Page 2

S M A R T + C O O L
P L U G
M O B I L E
A P P
A I R
C O N D I T I O N E R
F R E Q U E N T L Y
A S K E D
Q U E S T I O N S
Page 3

C A R R I E R
S M A R T + C O O L
P L U G
TABLE OF CONTENTS
• Technical Specifications
• Plug Components
• How to Install
• Led Indicator
• Items included in the box
• Care and maintenance
• SMART+COOL PLUG Warranty
>>Back to Main Table of Contents<<
Page 4

TECHNICAL SPECIFICATIONS
>>Back to Main Table of Contents<< >>Back to Carrier Smart+Cool Plug Table of Contents<<
TECHNICAL SPECS
- Window type air conditioner up to 2.5hp with autorestart feature*
- Smartphone with Bluetooth LE, iOS 11 or higher, or
Android
- Home Wi-Fi 2.4 GHz 802.11 b/g/n (not compatible with
5Ghz routers)
SYSTEM REQUIREMENTS
INPUT
220 VA C, 15A , 50/60Hz, Resistive
OUTPUT
240 VA C, 15A , 50/60Hz, Inductive
PLUG TYPE
NEMA 6
-15P/R
OPERATING TEMPERATURE
0
C to 50 C
PRODUCT WARRANTY
1 Year
USAGE
Indoor Only
QUANTITY
1 Smart Pl ug
• Required for remote control units only – allows the air conditioner
to automatically resume operation after a power outage.
• Check with your air conditioner manufacturer for this feature.
Page 5

SMART PLUG COMPONENTS
>>Back to Main Table of Contents<< >>Back to Carrier Smart+Cool Plug Table of Contents<<
LED BULB
AIR CON
POWER SOCKET
SMART PLUG
PRONGS
Page 6

H O W T O I N S T A L L
>>Back to Main Table of Contents<< >>Back to Carrier Smart+Cool Plug Table of Contents<<
Page 7

L E D I N D I C A T O R
>>Back to Main Table of Contents<< >>Back to Carrier Smart+Cool Plug Table of Contents<<
LED BULB COLOR LED BULB ACTIVITY INDICATOR
No light
Smart+Cool
Plug not working; no power source
Steady on
Your Smart+Cool
Plug is connected to the WIFI network
Blinking every 1
second
Your Smart+Cool
Plug cannot connect to the WIFI network
Rapid
blinking every few seconds
Your Smart+Cool
Plug is sending data to the internet
Steady On
The power state for
the A/C i s OFF as controlled by the app
Blinking every 1
second
Possible internet
connectivity issue
Slow Blinking
every 1 second
The Smart+ Cool plug is restarting
Rapid
Blinking (twice for each LED)
A factory reset or software update is in progress
NO LIGHT GREEN RED GREEN & RED
(Alternate Blinking)
Page 8

I T E M S I N S I D E T H E B O X
>>Back to Main Table of Contents<<
SMART+COOL
PLUG
WELCOME
KIT
SMART+COOL PLUG
WARRANTY CERTIFICATE
>>Back to Carrier Smart+Cool Plug Table of Contents<<
Page 9

C A R E A N D M A I N T E N A N C E
>>Back to Main Table of Contents<<
The plug can be only used
indoors where the plug is not
exposed to the environment
or moisture
Inspect that your socket is
meant for the AC has no
damage or obstruction that
may cause the Smart+Cool
plug to be loose or placed in
a way that may cause
damage to the device.
Lastly make sure the your
socket has the right voltage
required for the Smart+Cool
plug. The Smart+Cool plug is
rated at 220V 15A input and
240V 15A.
The plug should be properly
plugged directly in to the
socket. Avoid plugging into
an extension cord or surge
protector.
>>Back to Carrier Smart+Cool Plug Table of Contents<<
Page 10

WARRANTY
>>Back to Main Table of Contents<< >>Back to Carrier Smart+Cool Plug Table of Contents<<
Page 11

C A R R I E R
S M A R T + C O O L
A P P
TABLE OF CONTENTS
• Compatibility & Where to Download
• Registration
• Pairing
• Log In
• Forgot Password
• Adding a new plug
• App Features
• Firmware update
>>Back to Main Table of Contents<<
Page 12

COMPATIBILITY &WHERE TO DOWNLOAD
>>Back to Main Table of Contents<< >>Back to Carrier Smart+Cool APP Table of Contents<<
- Smartphone with
Bluetooth LE, iOS 11 or
higher, or Android
- Smart+Cool is not
compatible with Android
OS (Lollipop)
SYSTEM REQUIREMENTS
Page 13

REGISTRATION
>>Back to Main Table of Contents<<
To access the registration
module in the main screen click
on:
>>Back to Carrier Smart+Cool APP Table of Contents<<
REGISTRATION
Registration
Options
Register via Email
Register via Facebook
Both located on the middle part
of the screen.
Page 14

E M A I L R E G I S T R A T I O N
>>Back to Main Table of Contents<<
Fill up the Registration Form.
Make sure you register a new
unregistered email address.
Make sure the passwords are
correct.
1 / 6
BACK TO REGISTRATION
>>Back to Carrier Smart+Cool APP Table of Contents<<
NEXT PAGE
REGISTRATION > VIA EMAIL > INPUT INFORMATION
juandelacruz@yahoo.com
Juan
De la Cruz
Page 15

E M A I L R E G I S T R A T I O N
>>Back to Main Table of Contents<<
You are now in the email
verification process.
Check your inbox in the email
address you registered.
2 / 6
PREVIOUS PAGE
>>Back to Carrier Smart+Cool APP Table of Contents<<
NEXT PAGE
REGISTRATION > VIA EMAIL > INPUT INFORMATION > EMAIL VERIFICATION
Page 16

E M A I L R E G I S T R A T I O N
>>Back to Main Table of Contents<<
You should receive an email
verification like this. Click on the
verification link.
3 / 6
PREVIOUS PAGE
>>Back to Carrier Smart+Cool APP Table of Contents<<
NEXT PAGE
REGISTRATION > VIA EMAIL > INPUT INFORMATION > EMAIL VERIFICATION
Juan,
Page 17

E M A I L R E G I S T R A T I O N
>>Back to Main Table of Contents<<
When you click the verification
link you should see something
like this.
Your email address is now
verified.
4 / 6
PREVIOUS PAGE
>>Back to Carrier Smart+Cool APP Table of Contents<<
NEXT PAGE
REGISTRATION > VIA EMAIL > INPUT INFORMATION > EMAIL VERIFICATION
Page 18
E M A I L R E G I S T R A T I O N
>>Back to Main Table of Contents<<
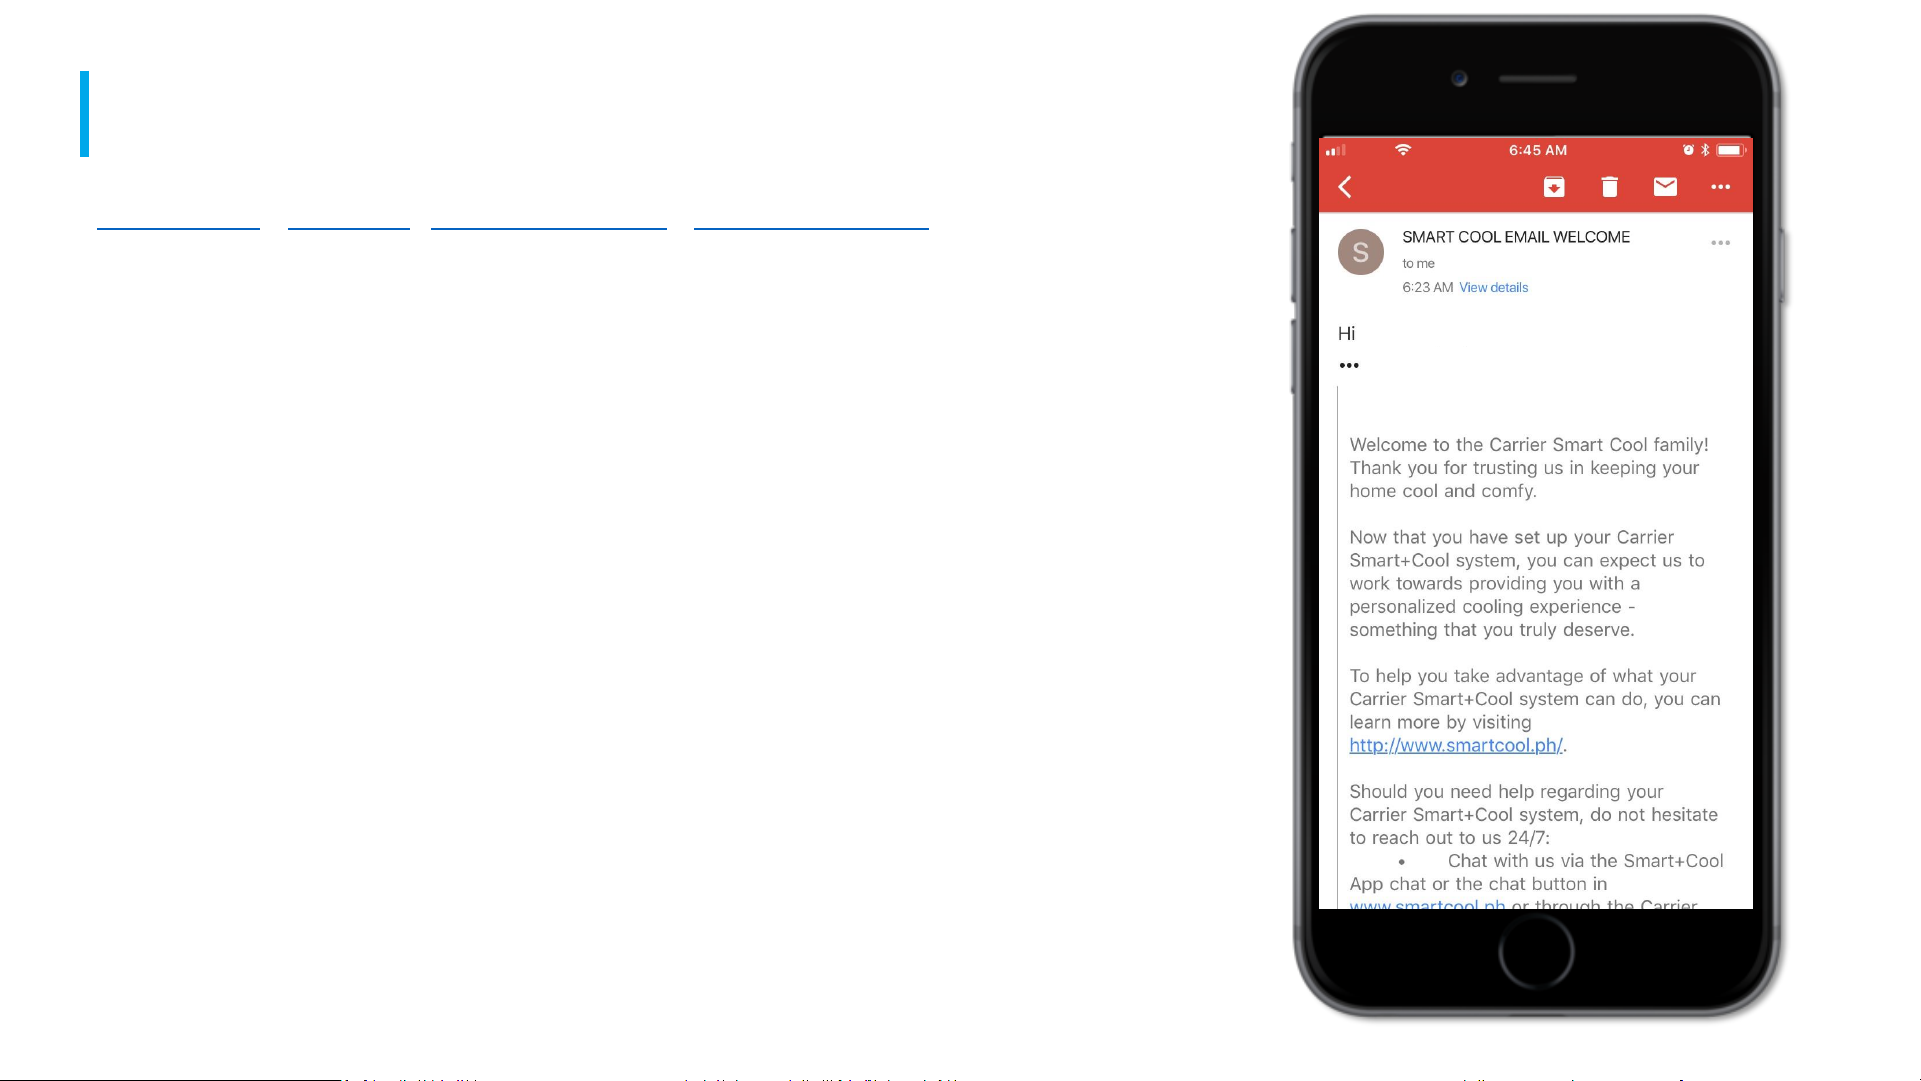
You should receive a welcome
email like this. You are now
successfully registered. You can
now go back to the Smart Cool
App.
5 / 6
PREVIOUS PAGE
>>Back to Carrier Smart+Cool APP Table of Contents<<
NEXT PAGE
REGISTRATION > VIA EMAIL > INPUT INFORMATION > EMAIL VERIFICATION
Juan,
Page 19

E M A I L R E G I S T R A T I O N
>>Back to Main Table of Contents<<
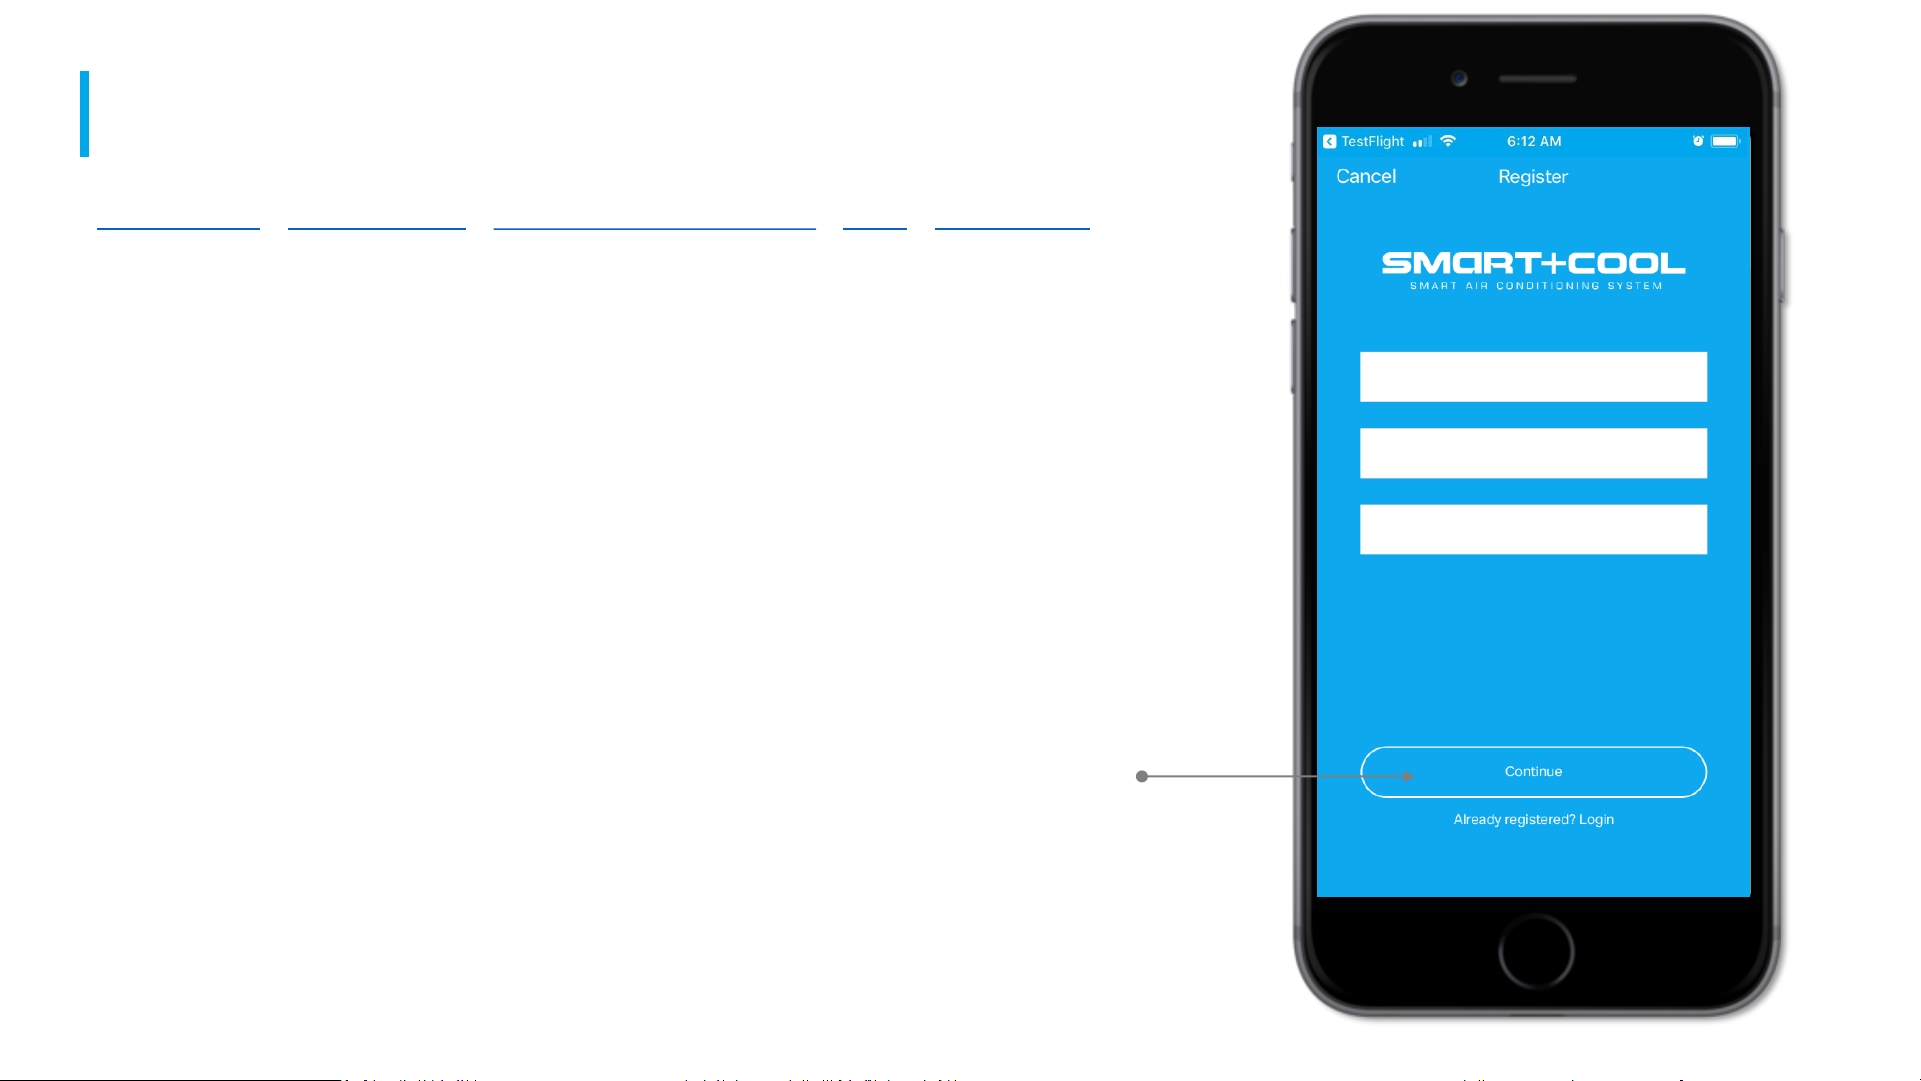
After a successful email
verification when you return to
your Smart Cool App you should
see something like this.
Click on Continue
6 / 6
PREVIOUS PAGE
>>Back to Carrier Smart+Cool APP Table of Contents<<
PAIRING OF SMART+COOL PLUG
BACK TO REGISTRATION
REGISTRATION > VIA EMAIL > INPUT INFORMATION > EMAIL VERIFICATION
Page 20

FACEBOOK REGISTRATION
>>Back to Main Table of Contents<<
At the registration page, you
may choose to register using
Facebook account
Register using
Facebook
account
>>Back to Carrier Smart+Cool APP Table of Contents<<
1 / 5
NEXT PAGE
REGISTRATION > VIA FACEBOOK
BACK TO REGISTRATION
Page 21

FACEBOOK REGISTRATION
>>Back to Main Table of Contents<<
You will be led to the Facebook
confirmation section and you
may choose to login with either
your Facebook app or log in
with phone or email
>>Back to Carrier Smart+Cool APP Table of Contents<<
2 / 5
PREVIOUS PAGE NEXT PAGE
REGISTRATION > VIA FACEBOOK > FACEBOOK CONFIRMATION
Page 22

FACEBOOK REGISTRATION
>>Back to Main Table of Contents<<
It will then lead you to
notification page where you are
requested to allow Smart+Cool
app to sync with Facebook your
public profile and email address
Click on Continue
>>Back to Carrier Smart+Cool APP Table of Contents<<
3 / 5
PREVIOUS PAGE NEXT PAGE
REGISTRATION > VIA FACEBOOK > FACEBOOK CONFIRMATION
Continue as Juan de la Cruz
Click on continue
Page 23

FACEBOOK REGISTRATION
>>Back to Main Table of Contents<< >>Back to Carrier Smart+Cool APP Table of Contents<<
Facebook and the Smart+Cool
app will now sync
Click on Open
Click on Open
4 / 5
PREVIOUS PAGE NEXT PAGE
REGISTRATION > VIA FACEBOOK > FACEBOOK CONFIRMATION > SYNC
Page 24
FACEBOOK REGISTRATION
>>Back to Main Table of Contents<< >>Back to Carrier Smart+Cool APP Table of Contents<<
It will then bring you back to the
Smart+Cool App registration
page with your basic
information already filled up
Click on Continue
5 / 5
PREVIOUS PAGE
BACK TO REGISTRATION
REGISTRATION > VIA FACEBOOK > FACEBOOK CONFIRMATION > SYNC > COMPLETION
PAIRING OF SMART+COOL PLUG
Click on continue
juandelacruz@yahoo.com
Juan
De la Cruz
Page 25

PAIRING
>>Back to Main Table of Contents<< >>Back to Carrier Smart+Cool APP Table of Contents<<
*Important: The user should first turn ON the phone’s
Bluetooth as well as connect the phone to the
preferred Wi-Fi connection as the app will auto
populate the network name (SSID name) during Wi-Fi
set-up with the Smart+Cool plug. The user simply has
to provide the Wi-Fi password to complete
configuration.
1 / 13
NEXT PAGE
WI-FI
BLUETOOTH
Juan de la Cruz
Page 26

PAIRING
>>Back to Main Table of Contents<< >>Back to Carrier Smart+Cool APP Table of Contents<<
Since this is a new account the
Smart Cool App will ask you to
add your first plug. Swipe on the
Bluetooth toggle in the upper
right side of the screen.
2 / 13
NEXT PAGEPREVIOUS PAGE
PAIRING VIA BLUETOOTH
Page 27

PAIRING
>>Back to Main Table of Contents<< >>Back to Carrier Smart+Cool APP Table of Contents<<
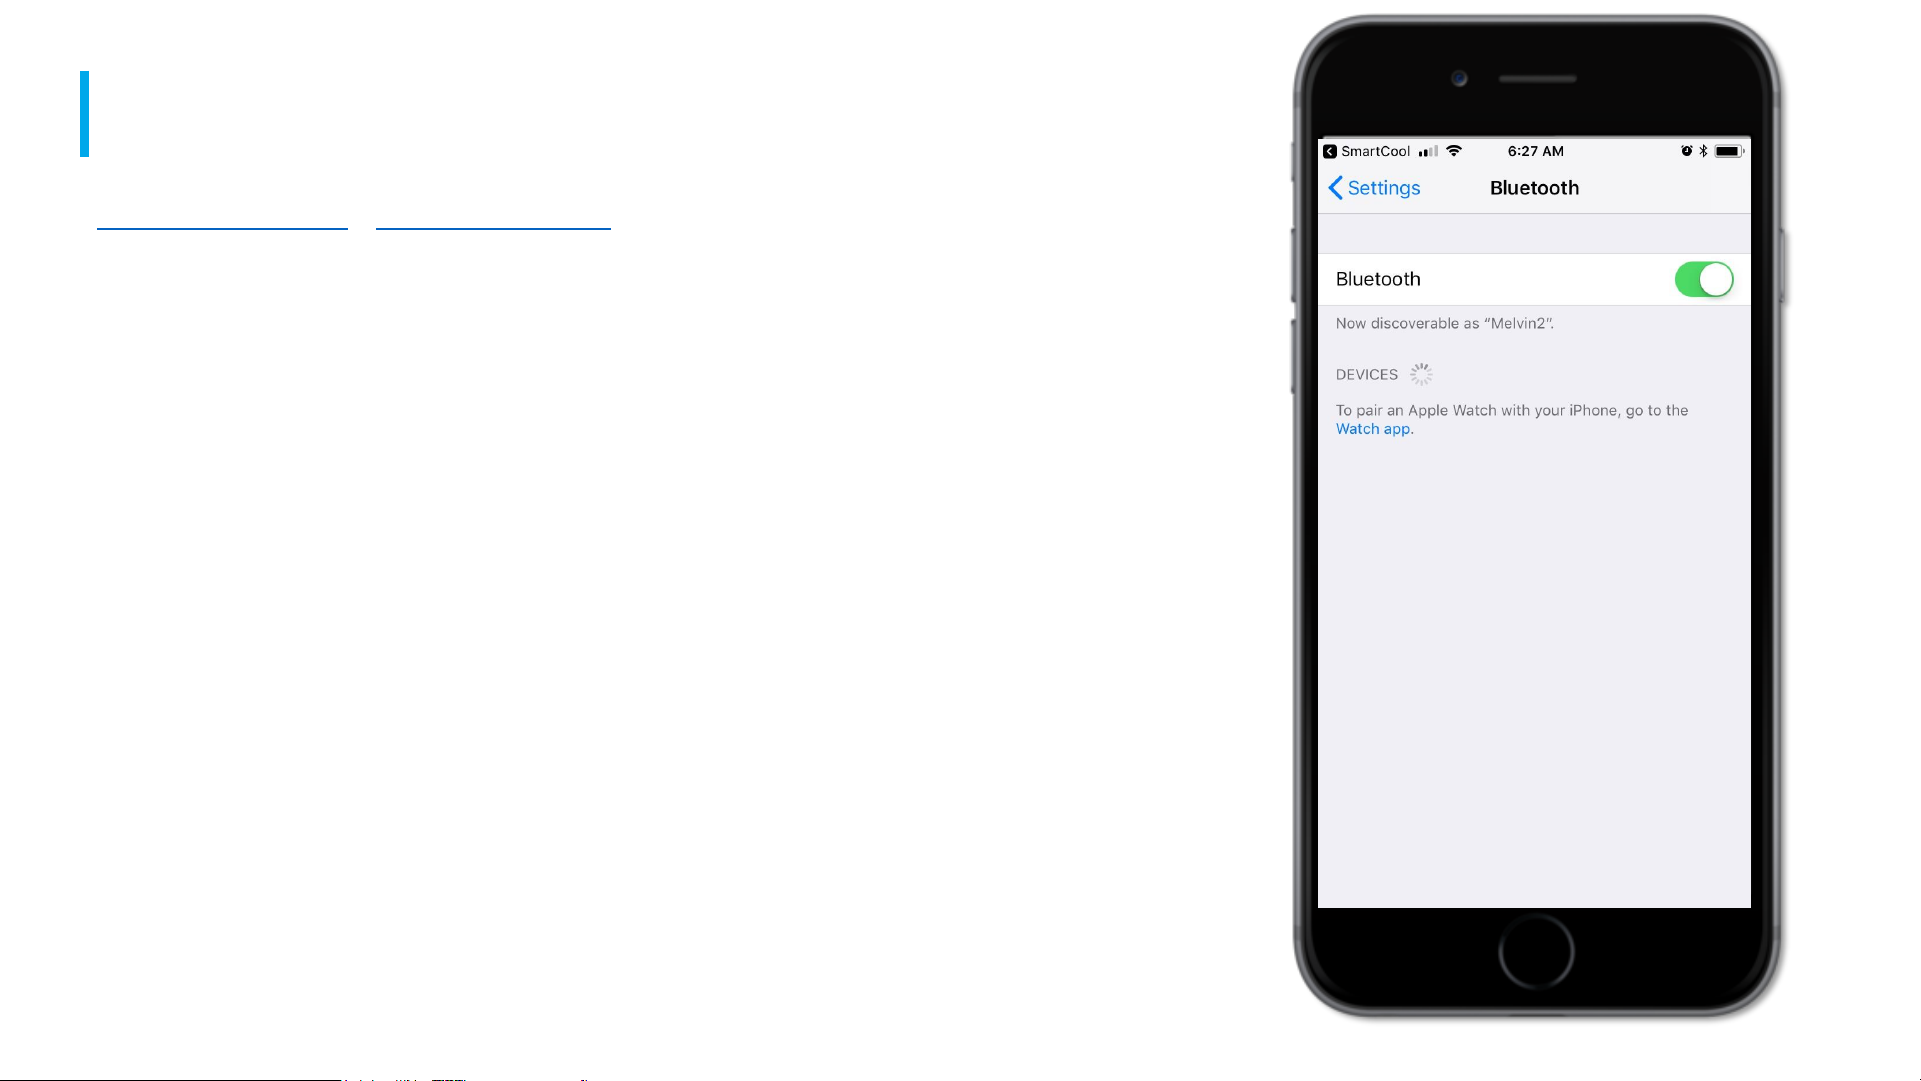
This will bring you to the iOS
settings. Click on Bluetooth
Button to turn it on.
3 / 13
NEXT PAGEPREVIOUS PAGE
PAIRING VIA BLUETOOTH
Juan de la Cruz
Page 28

PAIRING
>>Back to Main Table of Contents<< >>Back to Carrier Smart+Cool APP Table of Contents<<
Turn on the Bluetooth toggle.
And Click on the Smart Cool
Back Button in the upper left
hand side of the screen.
4 / 13
NEXT PAGEPREVIOUS PAGE
PAIRING VIA BLUETOOTH
Page 29

PAIRING
>>Back to Main Table of Contents<< >>Back to Carrier Smart+Cool APP Table of Contents<<
Your Smart Cool Plug should
now be visible in this screen.
Depending no your Plug it will
have “SmartCool” or “Buddee”
as the prefix of the Device
Name.
Click on it.
5 / 13
NEXT PAGEPREVIOUS PAGE
PAIRING VIA BLUETOOTH
Page 30

PAIRING
>>Back to Main Table of Contents<< >>Back to Carrier Smart+Cool APP Table of Contents<<
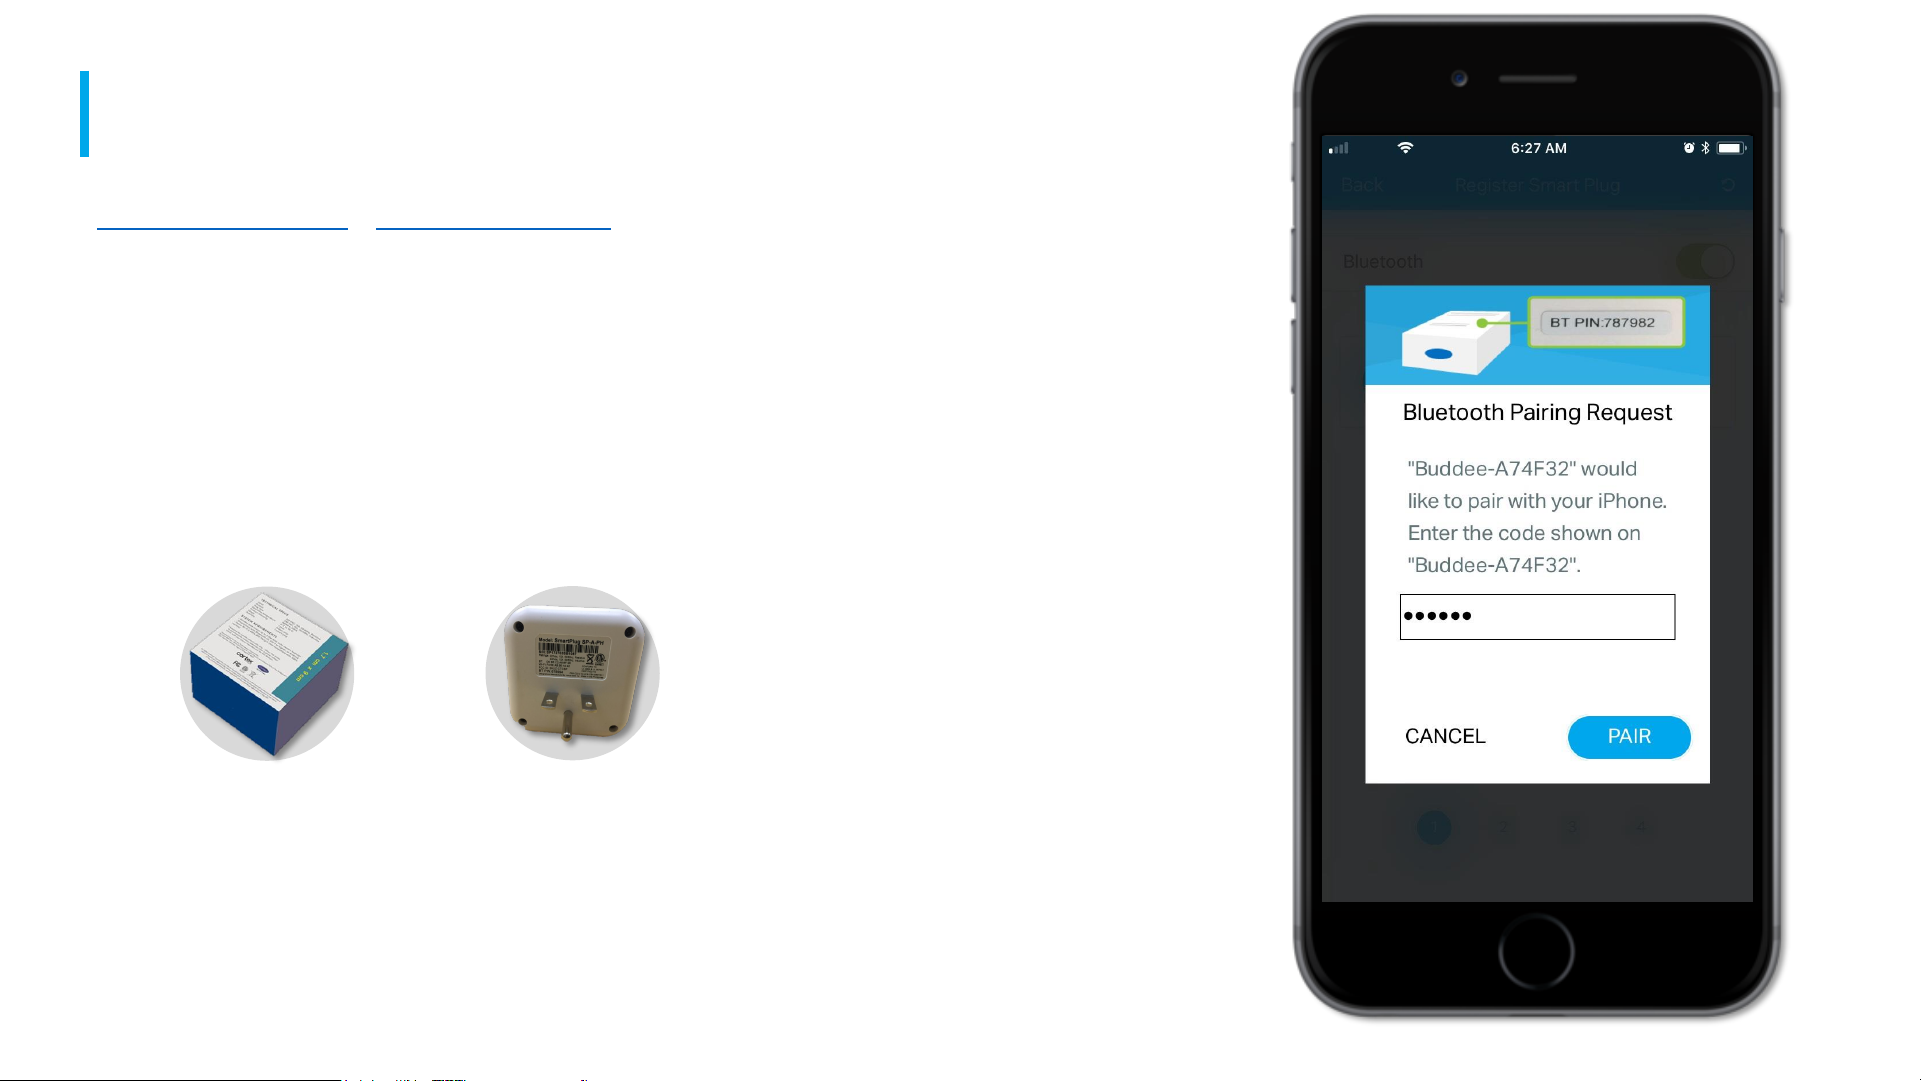
You need to pair now with your
Smart Cool Plug.
Check the bottom part of the
Box of the Smart Cool Plug or
bottom of the plug for the pin.
Enter the pin in the textbox and
click pair.
6 / 13
NEXT PAGEPREVIOUS PAGE
Bottom of the packaging
At the back of the plug
PAIRING VIA BLUETOOTH > BLUETOOTH PIN
Page 31

PAIRING
>>Back to Main Table of Contents<< >>Back to Carrier Smart+Cool APP Table of Contents<<
Now we need to add a
location. Click on Add Location.
7/ 13
NEXT PAGEPREVIOUS PAGE
PAIRING VIA BLUETOOTH > BLUETOOTH PIN > ADD LOCATION
Page 32
PAIRING
>>Back to Main Table of Contents<< >>Back to Carrier Smart+Cool APP Table of Contents<<
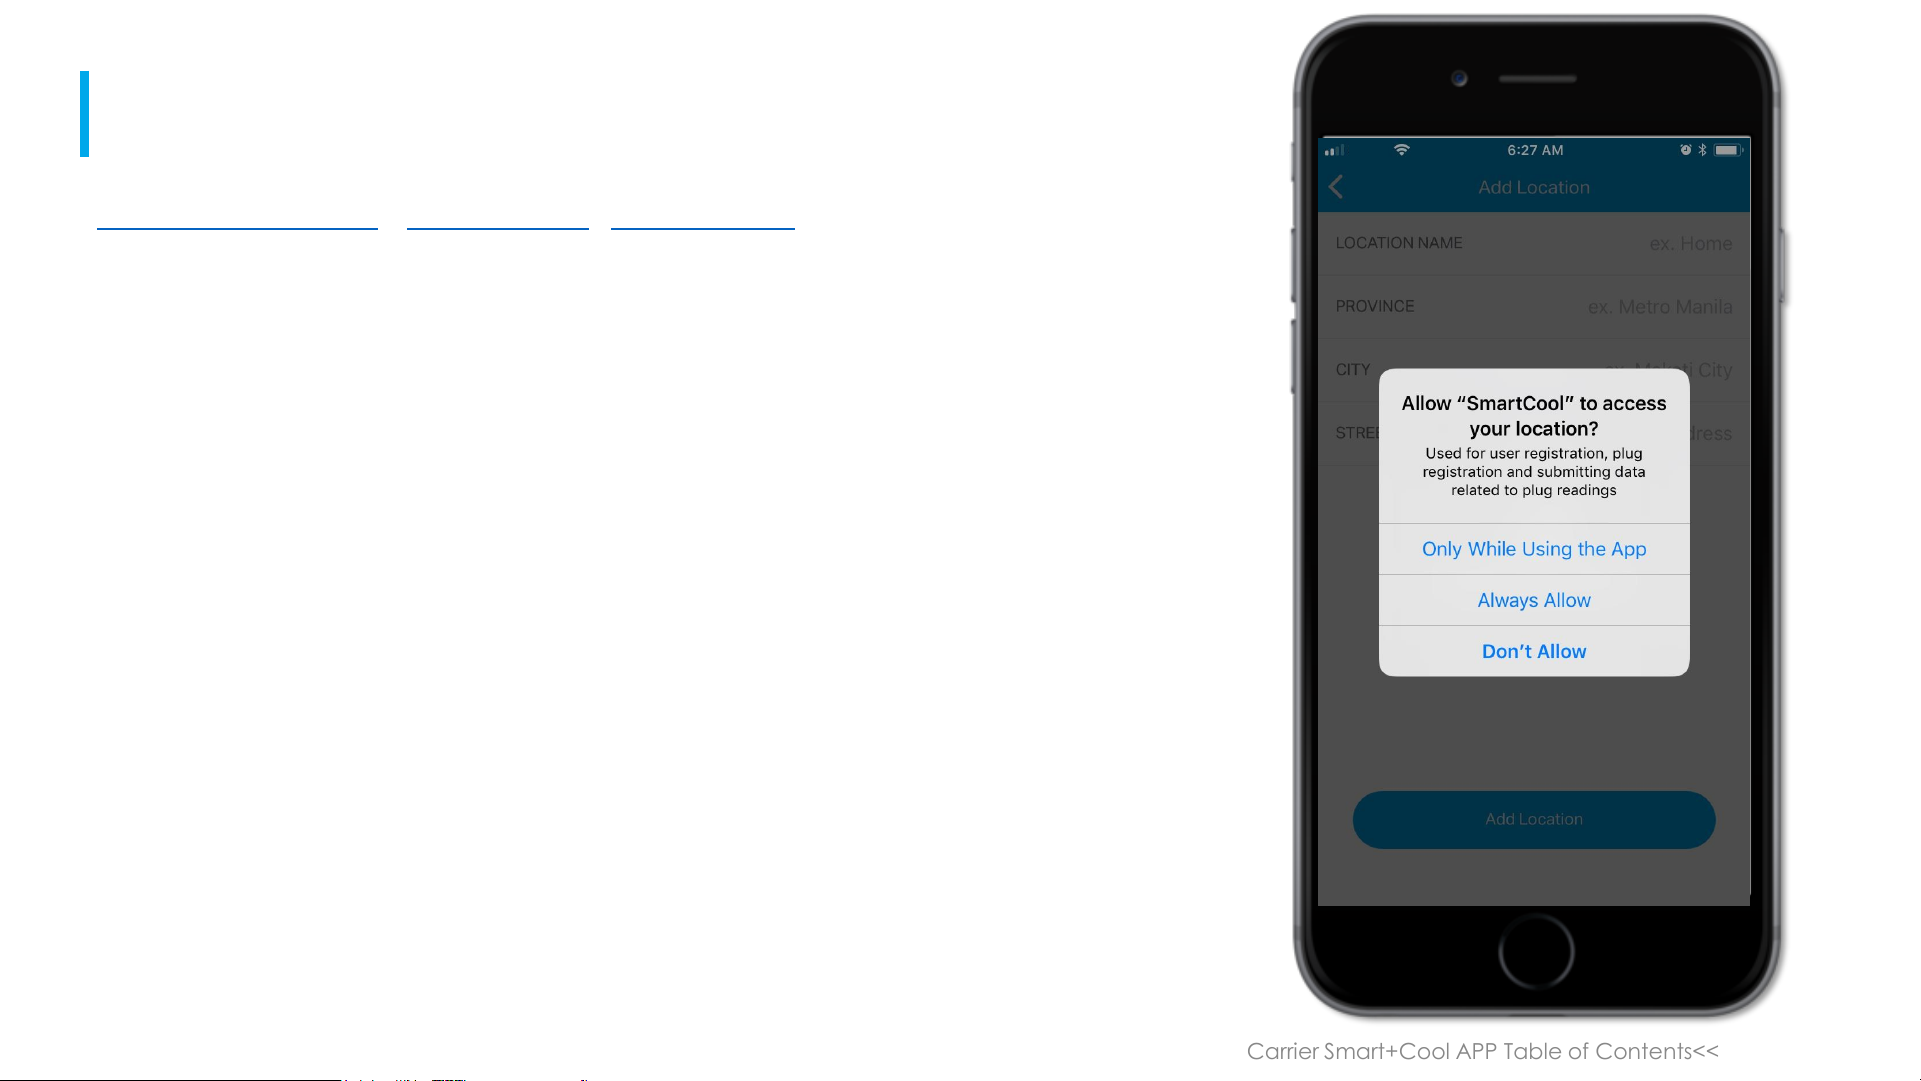
You will be prompted with this
menu which will turn on GPS.
Click Always Allow.
8 / 13
NEXT PAGEPREVIOUS PAGE
PAIRING VIA BLUETOOTH > BLUETOOTH PIN > ADD LOCATION
Page 33
PAIRING
>>Back to Main Table of Contents<< >>Back to Carrier Smart+Cool APP Table of Contents<<
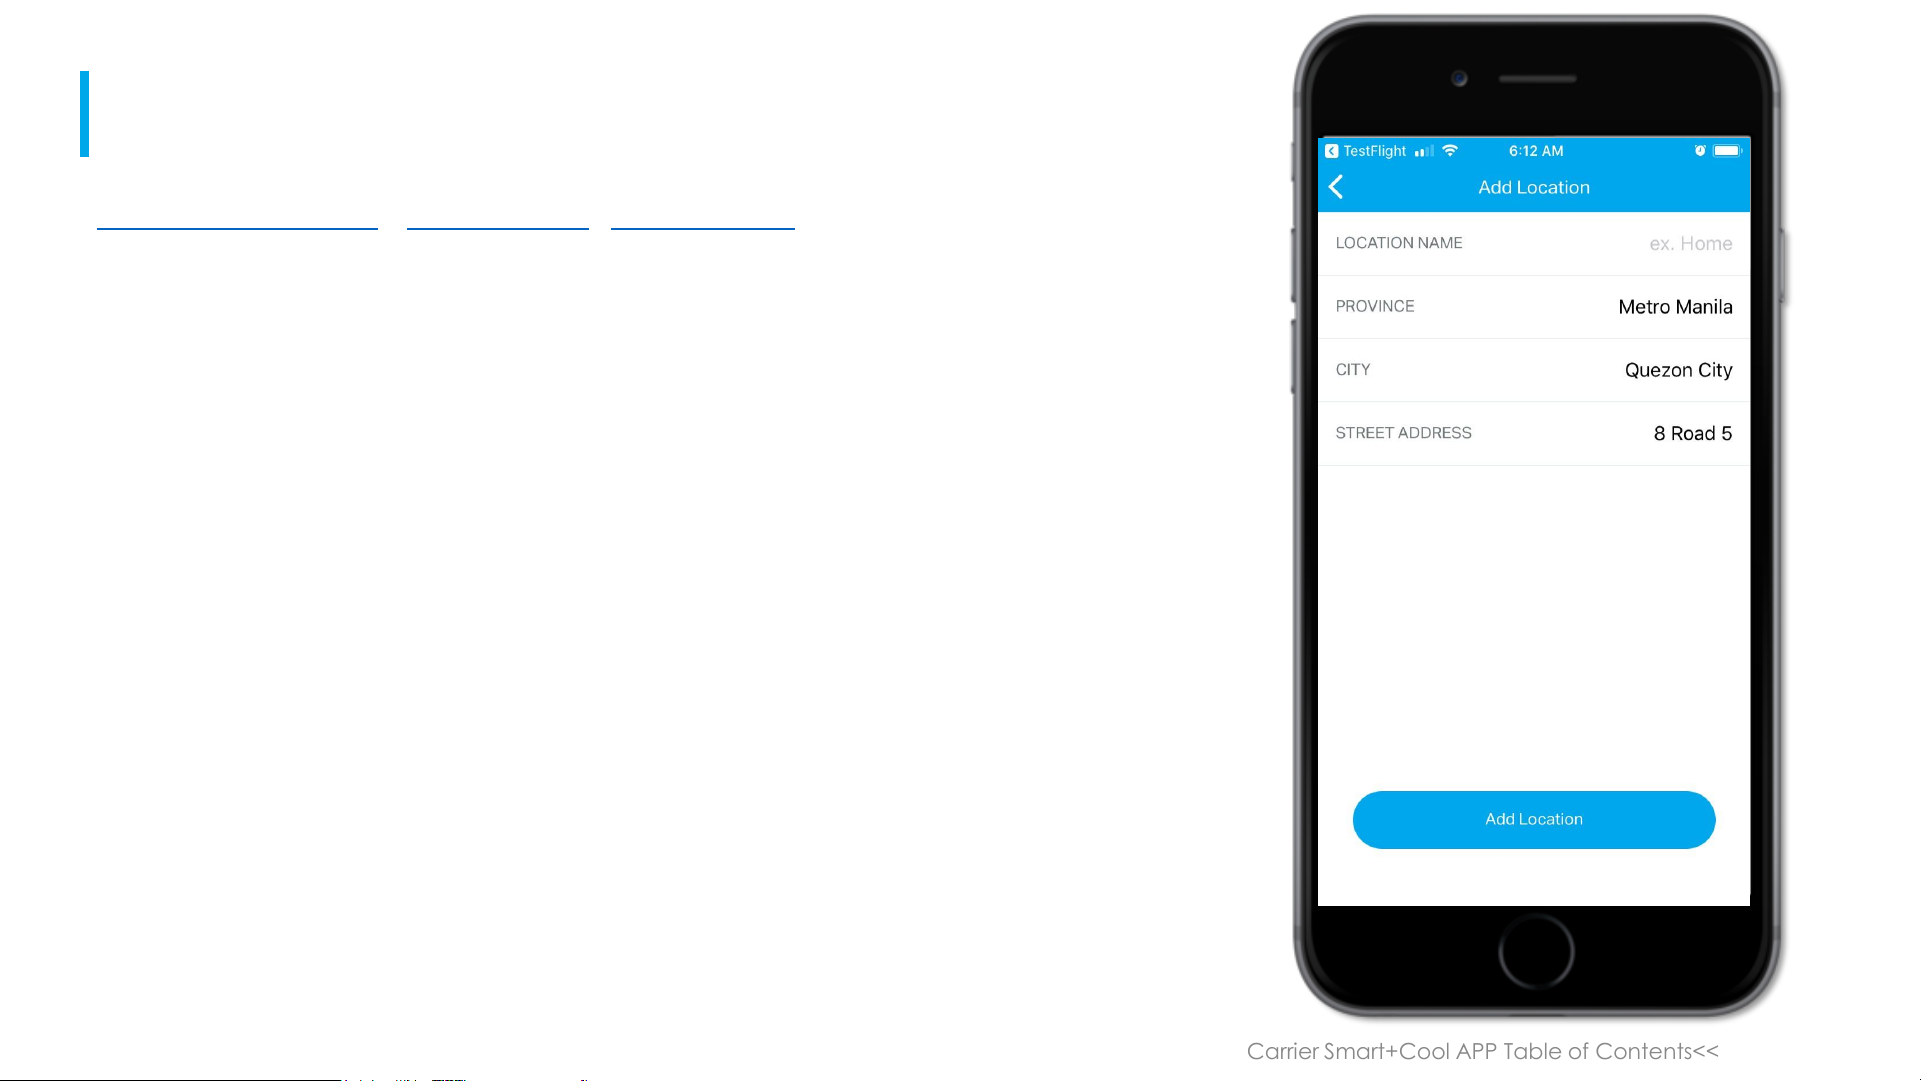
The app will now try to
prepopulate the Address for this
location. You can edit it as you
see fit. Enter the name of the
Location and Click on Add
Location.
9 / 13
NEXT PAGEPREVIOUS PAGE
PAIRING VIA BLUETOOTH > BLUETOOTH PIN > ADD LOCATION
Page 34

PAIRING
>>Back to Main Table of Contents<< >>Back to Carrier Smart+Cool APP Table of Contents<<
Click on the location you just
added to proceed to the next
step.
10 / 13
NEXT PAGEPREVIOUS PAGE
PAIRING VIA BLUETOOTH > BLUETOOTH PIN > ADD LOCATION
Page 35
PAIRING
>>Back to Main Table of Contents<< >>Back to Carrier Smart+Cool APP Table of Contents<<
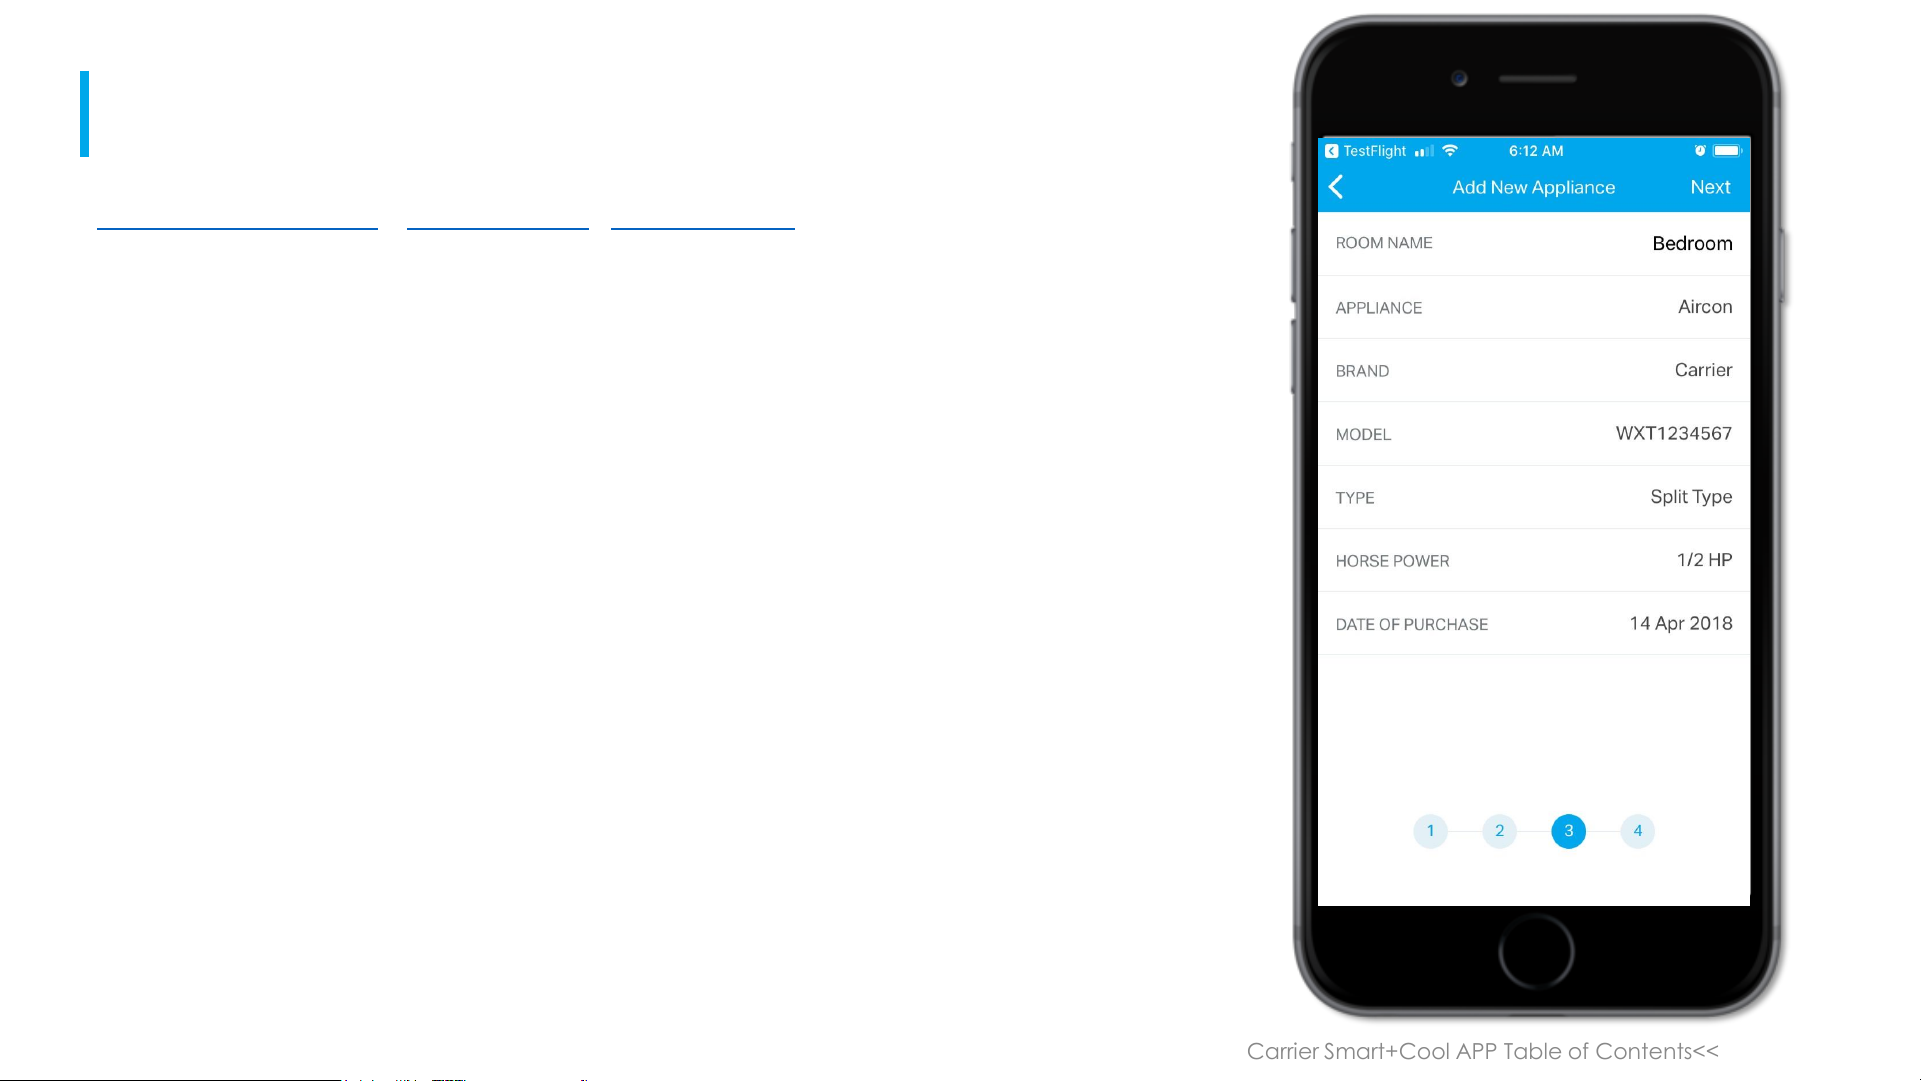
Enter the Name of the Room.
And Click on Next.
11 / 13
NEXT PAGEPREVIOUS PAGE
PAIRING VIA BLUETOOTH > BLUETOOTH PIN > ADD LOCATION
Page 36

PAIRING
>>Back to Main Table of Contents<< >>Back to Carrier Smart+Cool APP Table of Contents<<
Enter the SSID of your wifi
network and Enter the WiFi
Password.
Click on done afterwards.
12 / 13
NEXT PAGEPREVIOUS PAGE
- Home Wi-Fi 2.4 GHz
802.11 b/g/n (not
compatible with 5Ghz
routers)
SYSTEM REQUIREMENTS
PAIRING VIA BLUETOOTH > BLUETOOTH PIN > ADD LOCATION > CONNECTING TO WIFI
Page 37
PAIRING
>>Back to Main Table of Contents<< >>Back to Carrier Smart+Cool APP Table of Contents<<
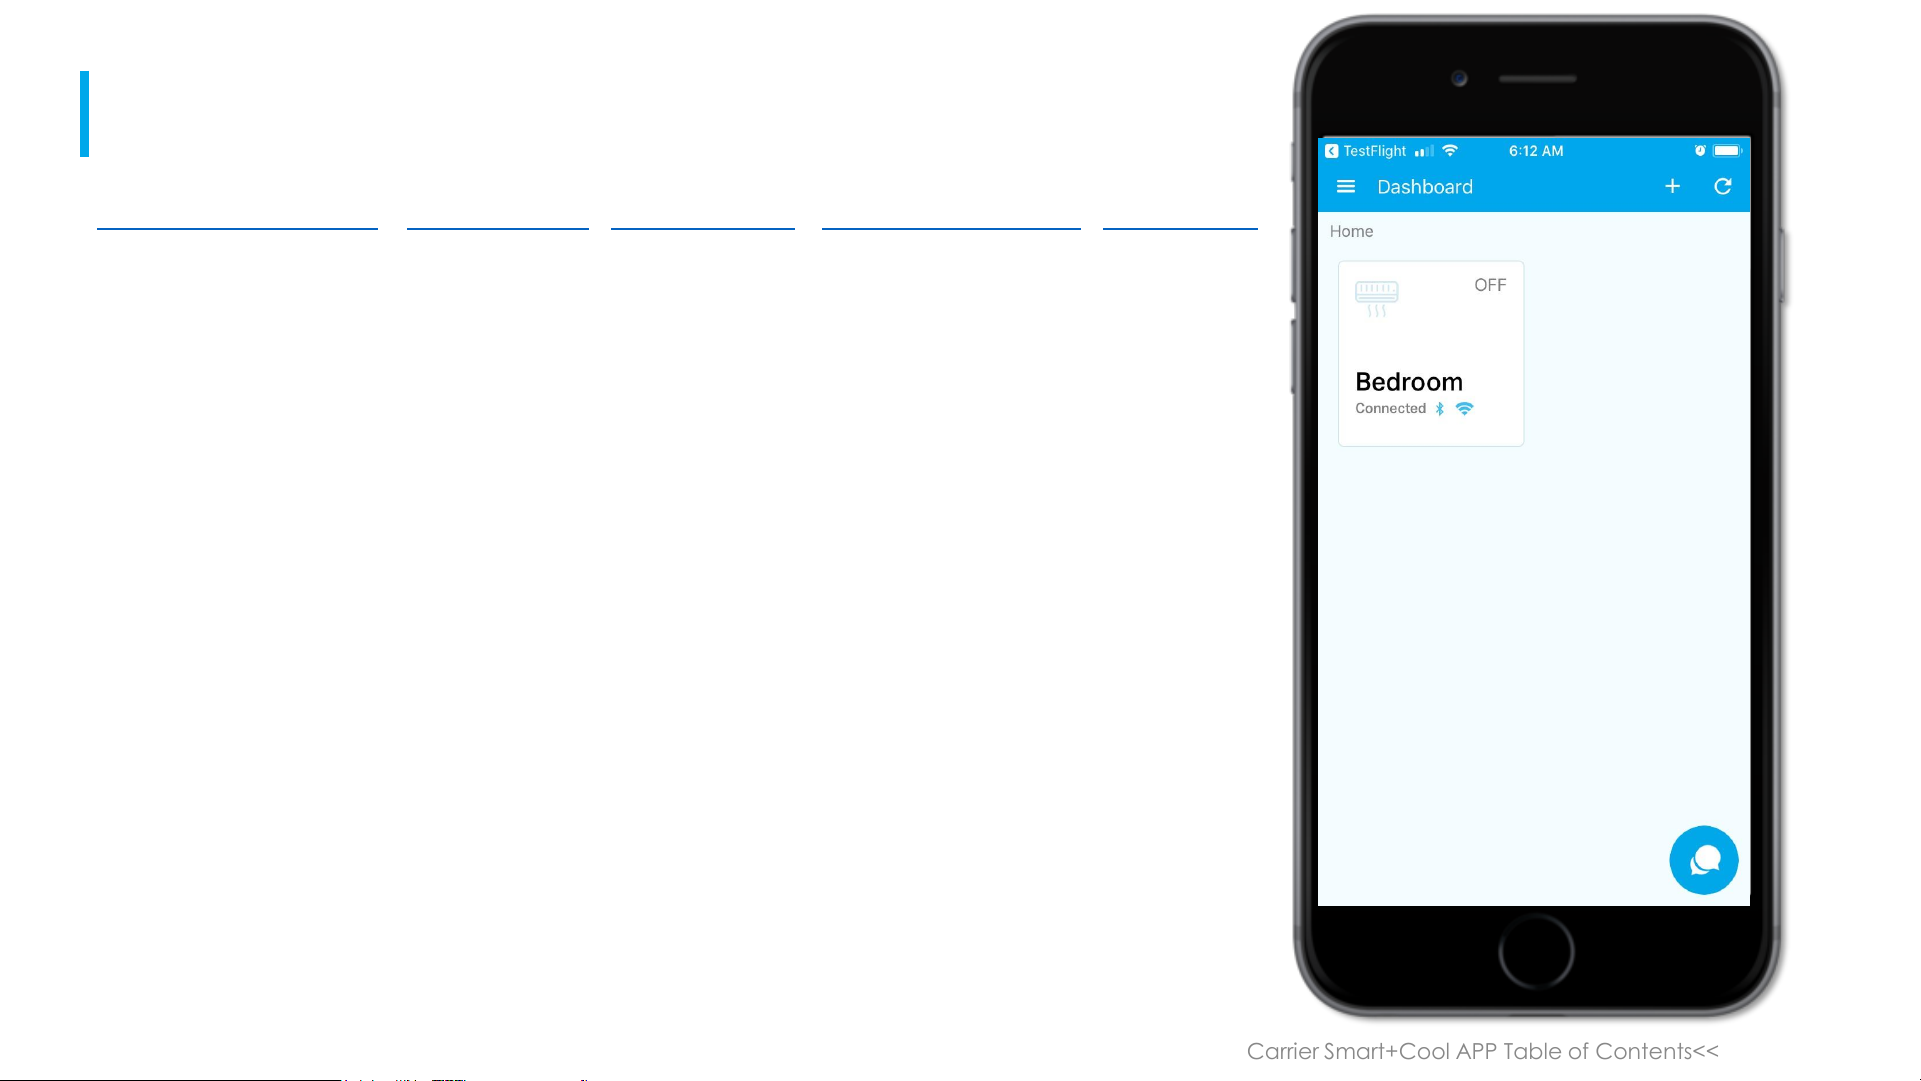
When you have completed the
registration and pairing process
you should see something like
this.
You can now turn on and turn
off your plug.
13 / 13
BACK TO CARRIER SMART+COOL APP CONTENTS PREVIOUS PAGE
PAIRING VIA BLUETOOTH > BLUETOOTH PIN > ADD LOCATION > CONNECTING TO WIFI > COMPLETION
Page 38

L O G I N
>>Back to Main Table of Contents<< >>Back to Carrier Smart+Cool APP Table of Contents<<
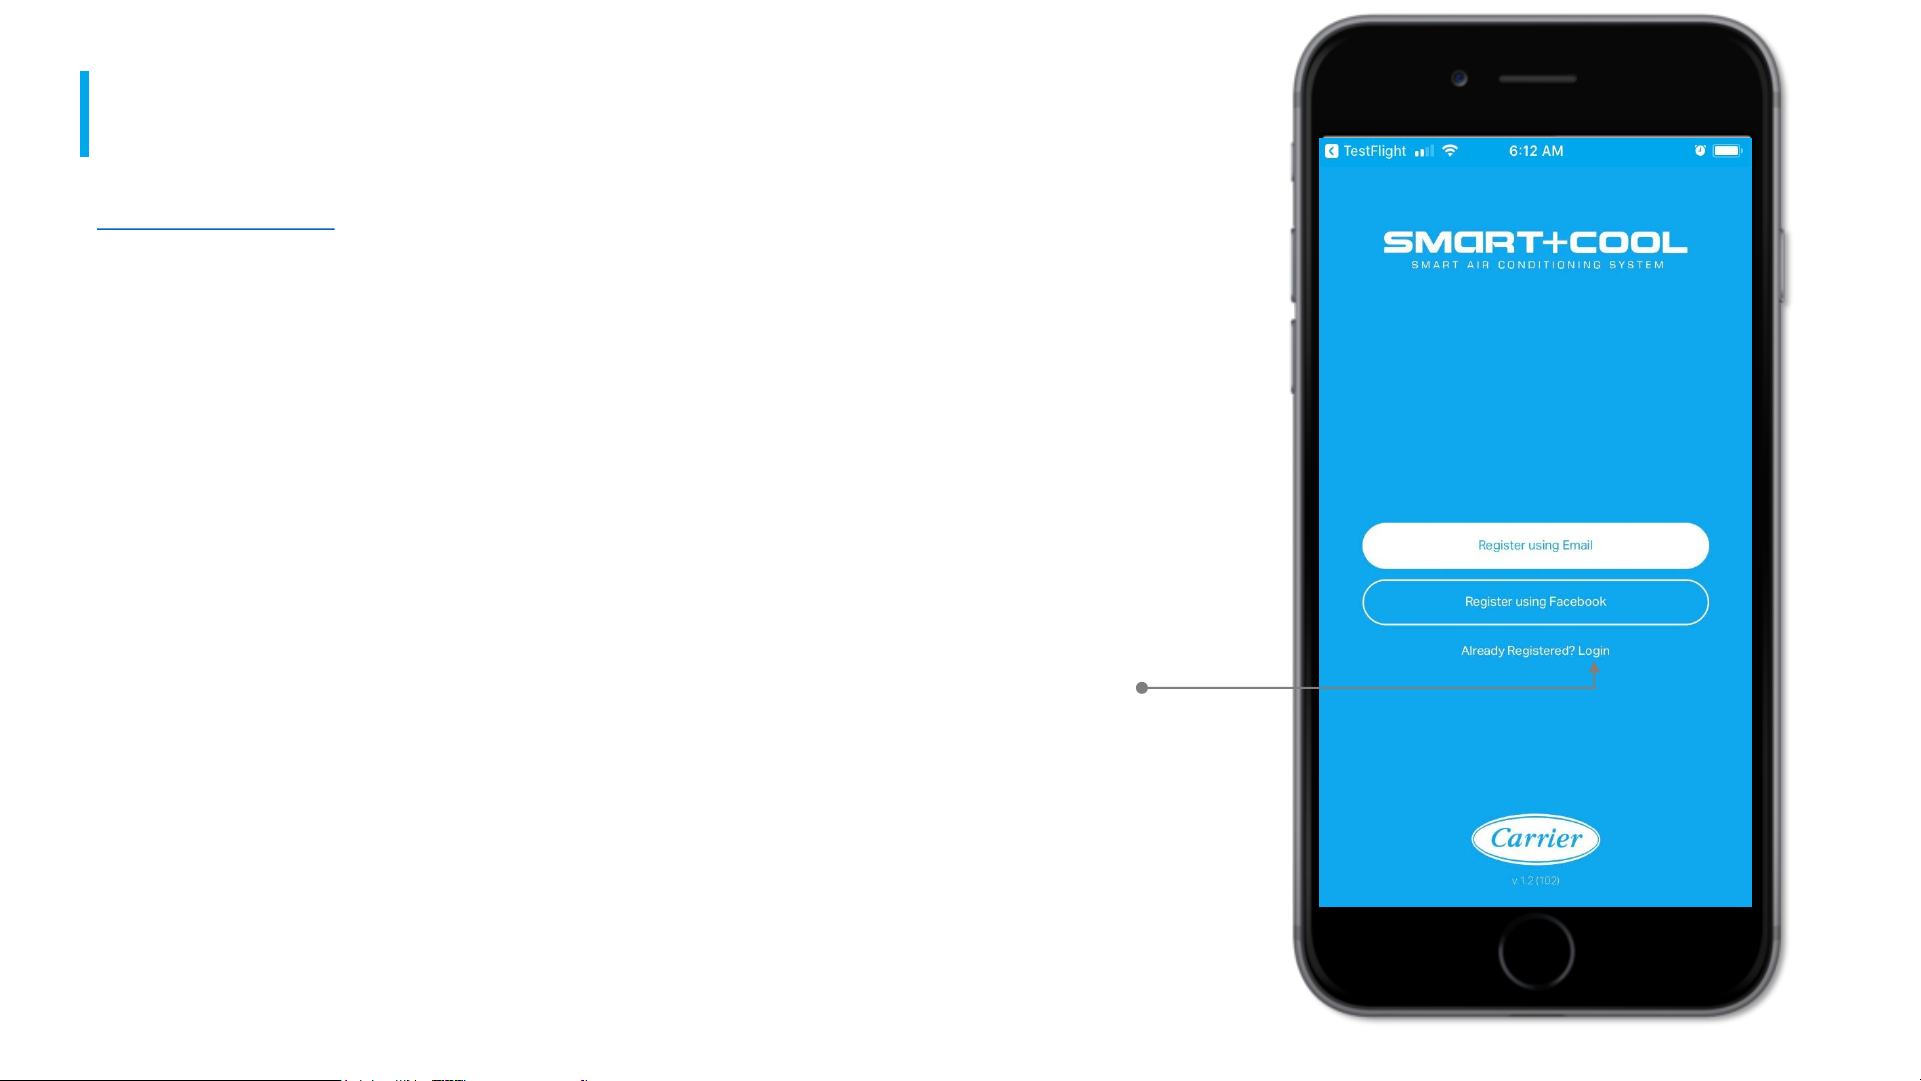
Login button
Login here if you already have a
smart cool account
BACK TO CARRIER SMART+COOL APP CONTENTS
Page 39
FORGOT PASSWORD
>>Back to Main Table of Contents<<
Login button
To access the forgot password
click on “Login” in the lower part
of the screen
1 / 9
NEXT PAGE
>>Back to Carrier Smart+Cool APP Table of Contents<<
FORGOT PASSWORD
Page 40
FORGOT PASSWORD
>>Back to Main Table of Contents<<
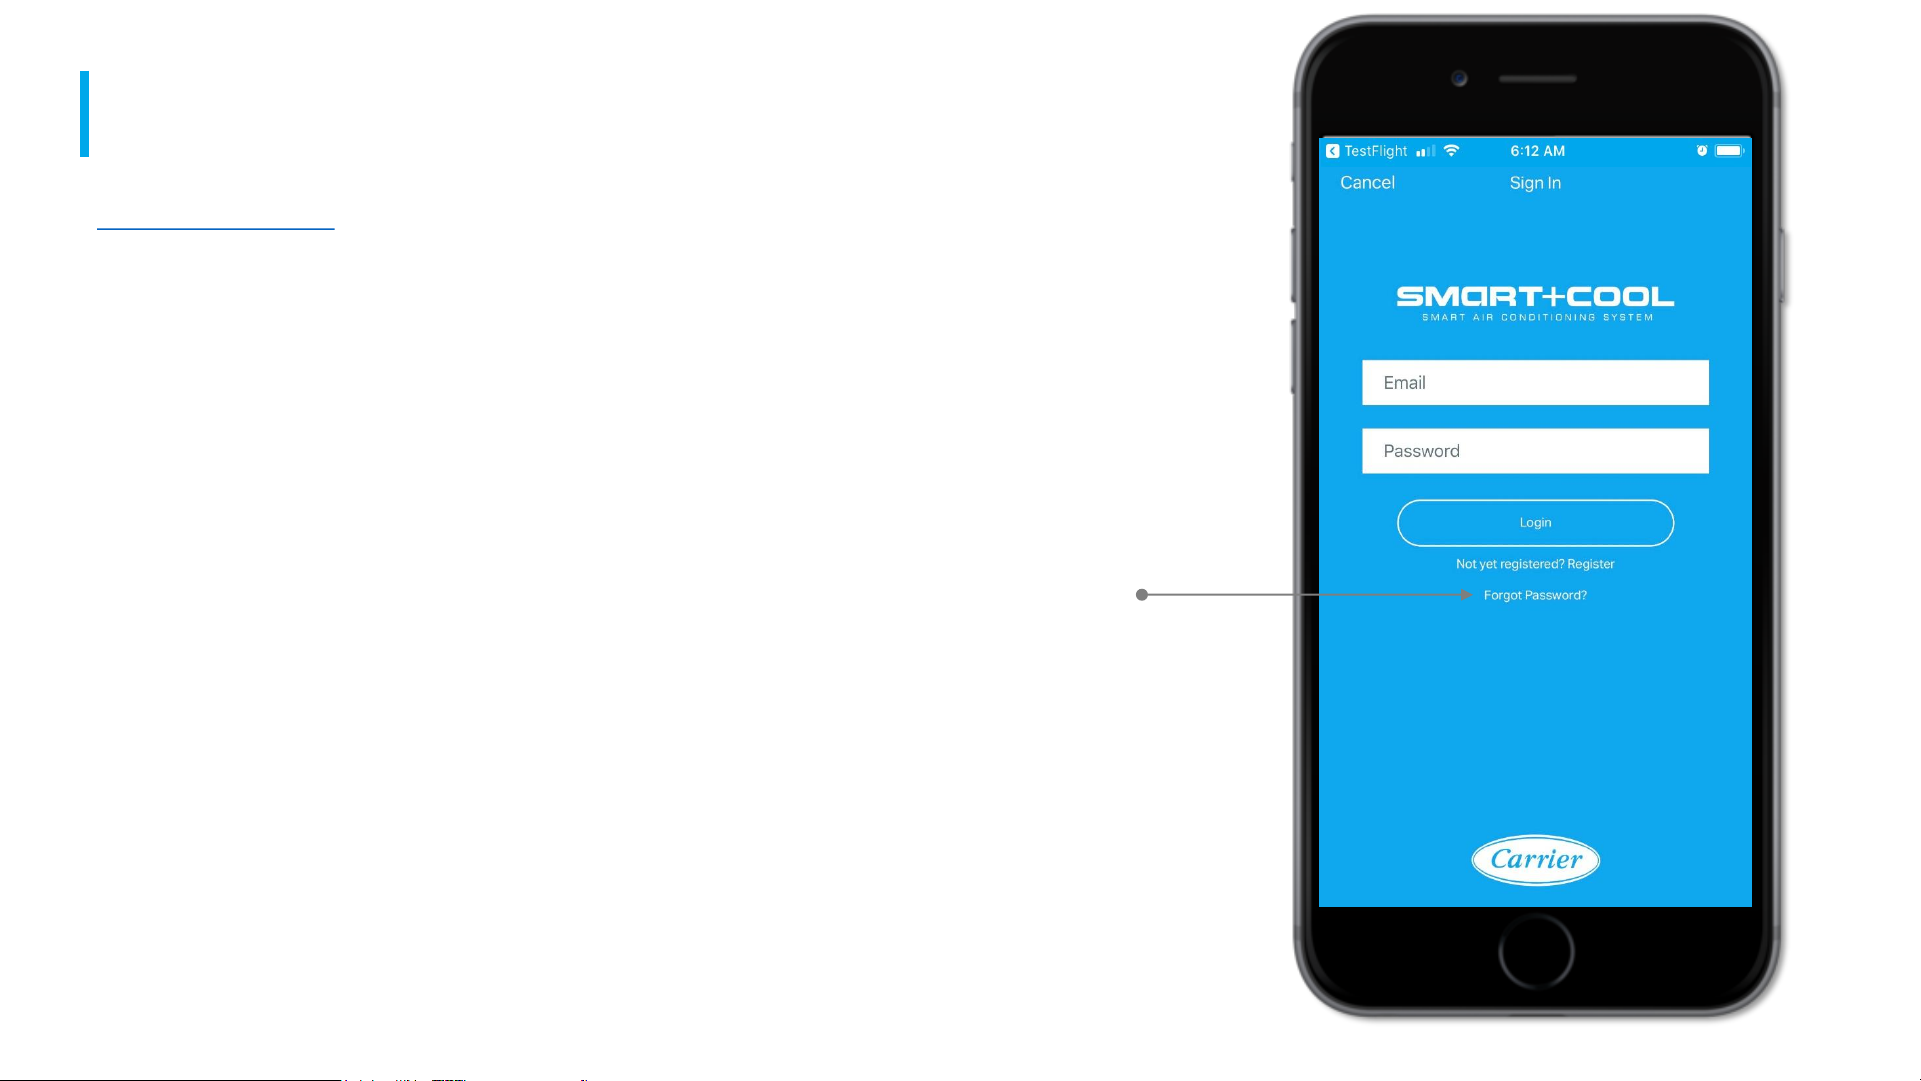
Then click on the “Forgot Login”
link in the lower part of the
screen.
FORGOT PASSWORD
2 / 9
NEXT PAGEPREVIOUS PAGE
>>Back to Carrier Smart+Cool APP Table of Contents<<
Forget Password
Page 41

FORGOT PASSWORD
>>Back to Main Table of Contents<<
This will open a web browser
that looks like this.
Enter your email address and
Click on the Captcha.
Captcha
verification
3 / 9
NEXT PAGEPREVIOUS PAGE
>>Back to Carrier Smart+Cool APP Table of Contents<<
FORGOT PASSWORD > ACCOUNT VERIFICATION
juandelacruz@yahoo.com
Page 42

FORGOT PASSWORD
>>Back to Main Table of Contents<<
Depending on how many times
you have done this, the
captcha may just ask you to
click on the button, or select
several images.
It’s supposed to be a security
measure to prevent bots from
spamming your email.
4 / 9
NEXT PAGEPREVIOUS PAGE
>>Back to Carrier Smart+Cool APP Table of Contents<<
FORGOT PASSWORD > ACCOUNT VERIFICATION
juandelacruz@yahoo.com
Page 43

FORGOT PASSWORD
>>Back to Main Table of Contents<<
If you entered the correct email
address and was able to
interact with the captcha
properly you should see this
screen.
5 / 9
NEXT PAGEPREVIOUS PAGE
>>Back to Carrier Smart+Cool APP Table of Contents<<
FORGOT PASSWORD > ACCOUNT VERIFICATION
Page 44

FORGOT PASSWORD
>>Back to Main Table of Contents<<
Check your registered Email for
a password recovery email like
this.
6 / 9
NEXT PAGEPREVIOUS PAGE
>>Back to Carrier Smart+Cool APP Table of Contents<<
FORGOT PASSWORD > ACCOUNT VERIFICATION
juandelacruz@yahoo.com
Page 45

FORGOT PASSWORD
>>Back to Main Table of Contents<<
Click on the embedded
recovery link.
This process is validating that
you do own the email address
and you are resetting the
password to.
Password
Recovery
Link
7 / 9
NEXT PAGEPREVIOUS PAGE
>>Back to Carrier Smart+Cool APP Table of Contents<<
FORGOT PASSWORD > ACCOUNT VERIFICATION
juandelacruz@yahoo.com
Page 46

FORGOT PASSWORD
>>Back to Main Table of Contents<<
At this point we have validated
that you do own the email
address.
You can now set up your new
password. Make sure the
password and confirmation
password is the same.
New
Password
Confirm
New
Password
8 / 9
NEXT PAGEPREVIOUS PAGE
>>Back to Carrier Smart+Cool APP Table of Contents<<
FORGOT PASSWORD > ACCOUNT VERIFICATION > SET UP NEW PASSWORD
Page 47

FORGOT PASSWORD
>>Back to Main Table of Contents<<
After that you should see
something like this.
You can now go back to the
Smart Cool App and login using
your new password.
9 / 9
PREVIOUS PAGE
>>Back to Carrier Smart+Cool APP Table of Contents<<
BACK TO CARRIER SMART+COOL APP CONTENTS
FORGOT PASSWORD > ACCOUNT VERIFICATION > SET UP NEW PASSWORD
Page 48

A D D I N G A N E W P L U G
>>Back to Main Table of Contents<<
To Add a new plug Click on the
“+” button on the upper right
hand side of the screen.
1 / 12
>>Back to Carrier Smart+Cool APP Table of Contents<<
ADDING A NEW PLUG
NEXT PAGE
Add a
new plug
Page 49

A D D I N G A N E W P L U G
>>Back to Main Table of Contents<<
Click on the Bluetooth Button
2 / 12
PREVIOUS PAGE
>>Back to Carrier Smart+Cool APP Table of Contents<<
ADDING A NEW PLUG > BLUETOOTH PAIRING
NEXT PAGE
Page 50
A D D I N G A N E W P L U G
>>Back to Main Table of Contents<<
Click on the Bluetooth Button
Turn On the Bluetooth
3 / 12
PREVIOUS PAGE
>>Back to Carrier Smart+Cool APP Table of Contents<<
NEXT PAGE
ADDING A NEW PLUG > BLUETOOTH PAIRING
Page 51

A D D I N G A N E W P L U G
>>Back to Main Table of Contents<<
You should see something like
this.
Click on the Plug you want to
add.
4 / 12
PREVIOUS PAGE
>>Back to Carrier Smart+Cool APP Table of Contents<<
NEXT PAGE
ADDING A NEW PLUG > BLUETOOTH PAIRING
Page 52
A D D I N G A N E W P L U G
>>Back to Main Table of Contents<<
You need to pair now with your
Smart Cool Plug.
Check the bottom part of the
Box of the Smart Cool Plug for
the pin. Enter the pin the
textbox and click pair.
5 / 12
PREVIOUS PAGE
>>Back to Carrier Smart+Cool APP Table of Contents<<
NEXT PAGE
ADDING A NEW PLUG > BLUETOOTH PAIRING
Bottom of the packaging
At the back of the plug
Page 53

A D D I N G A N E W P L U G
>>Back to Main Table of Contents<<
Now we need to add a
location. Click on Add Location.
6 / 12
PREVIOUS PAGE
>>Back to Carrier Smart+Cool APP Table of Contents<<
NEXT PAGE
ADDING A NEW PLUG > BLUETOOTH PAIRING > ADD LOCATION
Page 54

A D D I N G A N E W P L U G
>>Back to Main Table of Contents<<
You will be prompted with this
menu which will turn on GPS.
Click Always Allow.
7 / 12
PREVIOUS PAGE
>>Back to Carrier Smart+Cool APP Table of Contents<<
NEXT PAGE
ADDING A NEW PLUG > BLUETOOTH PAIRING > ADD LOCATION
Page 55

A D D I N G A N E W P L U G
>>Back to Main Table of Contents<<
The app will now try to
prepopulate the Address for this
location.
You can edit it as you see fit.
Enter the name of the Location
and Click on Add Location.
8 / 12
PREVIOUS PAGE
>>Back to Carrier Smart+Cool APP Table of Contents<<
NEXT PAGE
ADDING A NEW PLUG > BLUETOOTH PAIRING > ADD LOCATION
Page 56

A D D I N G A N E W P L U G
>>Back to Main Table of Contents<<
Click on the location you just
added to proceed to the next
step.
9 / 12
PREVIOUS PAGE
>>Back to Carrier Smart+Cool APP Table of Contents<<
NEXT PAGE
ADDING A NEW PLUG > BLUETOOTH PAIRING > ADD LOCATION
Page 57

A D D I N G A N E W P L U G
>>Back to Main Table of Contents<<
Enter the Name of the Room.
And Click on Next.
10 / 12
PREVIOUS PAGE
>>Back to Carrier Smart+Cool APP Table of Contents<<
NEXT PAGE
ADDING A NEW PLUG > BLUETOOTH PAIRING > ADD LOCATION
Page 58

A D D I N G A N E W P L U G
>>Back to Main Table of Contents<<
Enter the SSID of your wifi
network and Enter the WiFi
Password. Click on done
afterwards.
11 / 12
PREVIOUS PAGE
>>Back to Carrier Smart+Cool APP Table of Contents<<
NEXT PAGE
ADDING A NEW PLUG > BLUETOOTH PAIRING > ADD LOCATION > WIFI PAIRING
Page 59

A D D I N G A N E W P L U G
>>Back to Main Table of Contents<<
When you have completed the
registration and pairing process
you should see something like
this.
You can now turn on and turn
off your plug.
12 / 12
PREVIOUS PAGE
>>Back to Carrier Smart+Cool APP Table of Contents<<
BACK TO CARRIER SMART+COOL APP CONTENTS
ADDING A NEW PLUG > BLUETOOTH PAIRING > ADD LOCATION > WIFI PAIRING > COMPLETE
Page 60

APP FEATURES
>>Back to Main Table of Contents<< >>Back to Carrier Smart+Cool APP Table of Contents<<
TABLE OF CONTENTS
• Turn the unit On / Off
• Consumption Monitoring
• Consumption Alert
• Scheduler
• Maintenance Reminder
• Service Request
• Chat
BACK TO CARRIER SMART+COOL APP CONTENTS
Page 61

APP FEATURES
>>Back to Main Table of Contents<< >>Back to Carrier Smart+Cool APP Table of Contents<<
While connected to the plug via
Bluetooth. Do a long press on
the Plug icon to turn your plug
ON
APP FEATURES > TURN THE UNIT ON / OFF
1 / 2
NEXT PAGE
Page 62

APP FEATURES
>>Back to Main Table of Contents<< >>Back to Carrier Smart+Cool APP Table of Contents<<
While connected to the plug via
Bluetooth. Do a long press on
the Plug icon to turn your plug
OFF
APP FEATURES > TURN THE UNIT ON / OFF
BACK TO APP FEATURES
2 / 2
PREVIOUS PAGE
Page 63

APP FEATURES
>>Back to Main Table of Contents<< >>Back to Carrier Smart+Cool APP Table of Contents<<
Login to your Account, and
from the Main Menu Click on
your plug.
Registered
plug
1 / 3
NEXT PAGE
APP FEATURES > CONSUMPTION MONITORING
Page 64
APP FEATURES
>>Back to Main Table of Contents<< >>Back to Carrier Smart+Cool APP Table of Contents<<
This will lead you to the Plug
Menu. And it should look
something like this.
Click on the Consumption
2 / 3
PREVIOUS PAGE NEXT PAGE
Consumption
Monitoring
APP FEATURES > CONSUMPTION MONITORING > SET UP
Page 65

APP FEATURES
>>Back to Main Table of Contents<< >>Back to Carrier Smart+Cool APP Table of Contents<<
It will load the consumption
screen where you can view
your real time AC
consumption.
You can also change filters
depending on how you want
to monitor your consumption
3 / 3
PREVIOUS PAGE BACK TO APP FEATURES
Filter
APP FEATURES > CONSUMPTION MONITORING > SET UP
Page 66

APP FEATURES
>>Back to Main Table of Contents<< >>Back to Carrier Smart+Cool APP Table of Contents<<
Login to your Account, and
from the Main Menu Click on
your plug.
Registered
plug
1 / 8
NEXT PAGE
APP FEATURES > CONSUMPTION ALERT
Page 67

APP FEATURES
>>Back to Main Table of Contents<< >>Back to Carrier Smart+Cool APP Table of Contents<<
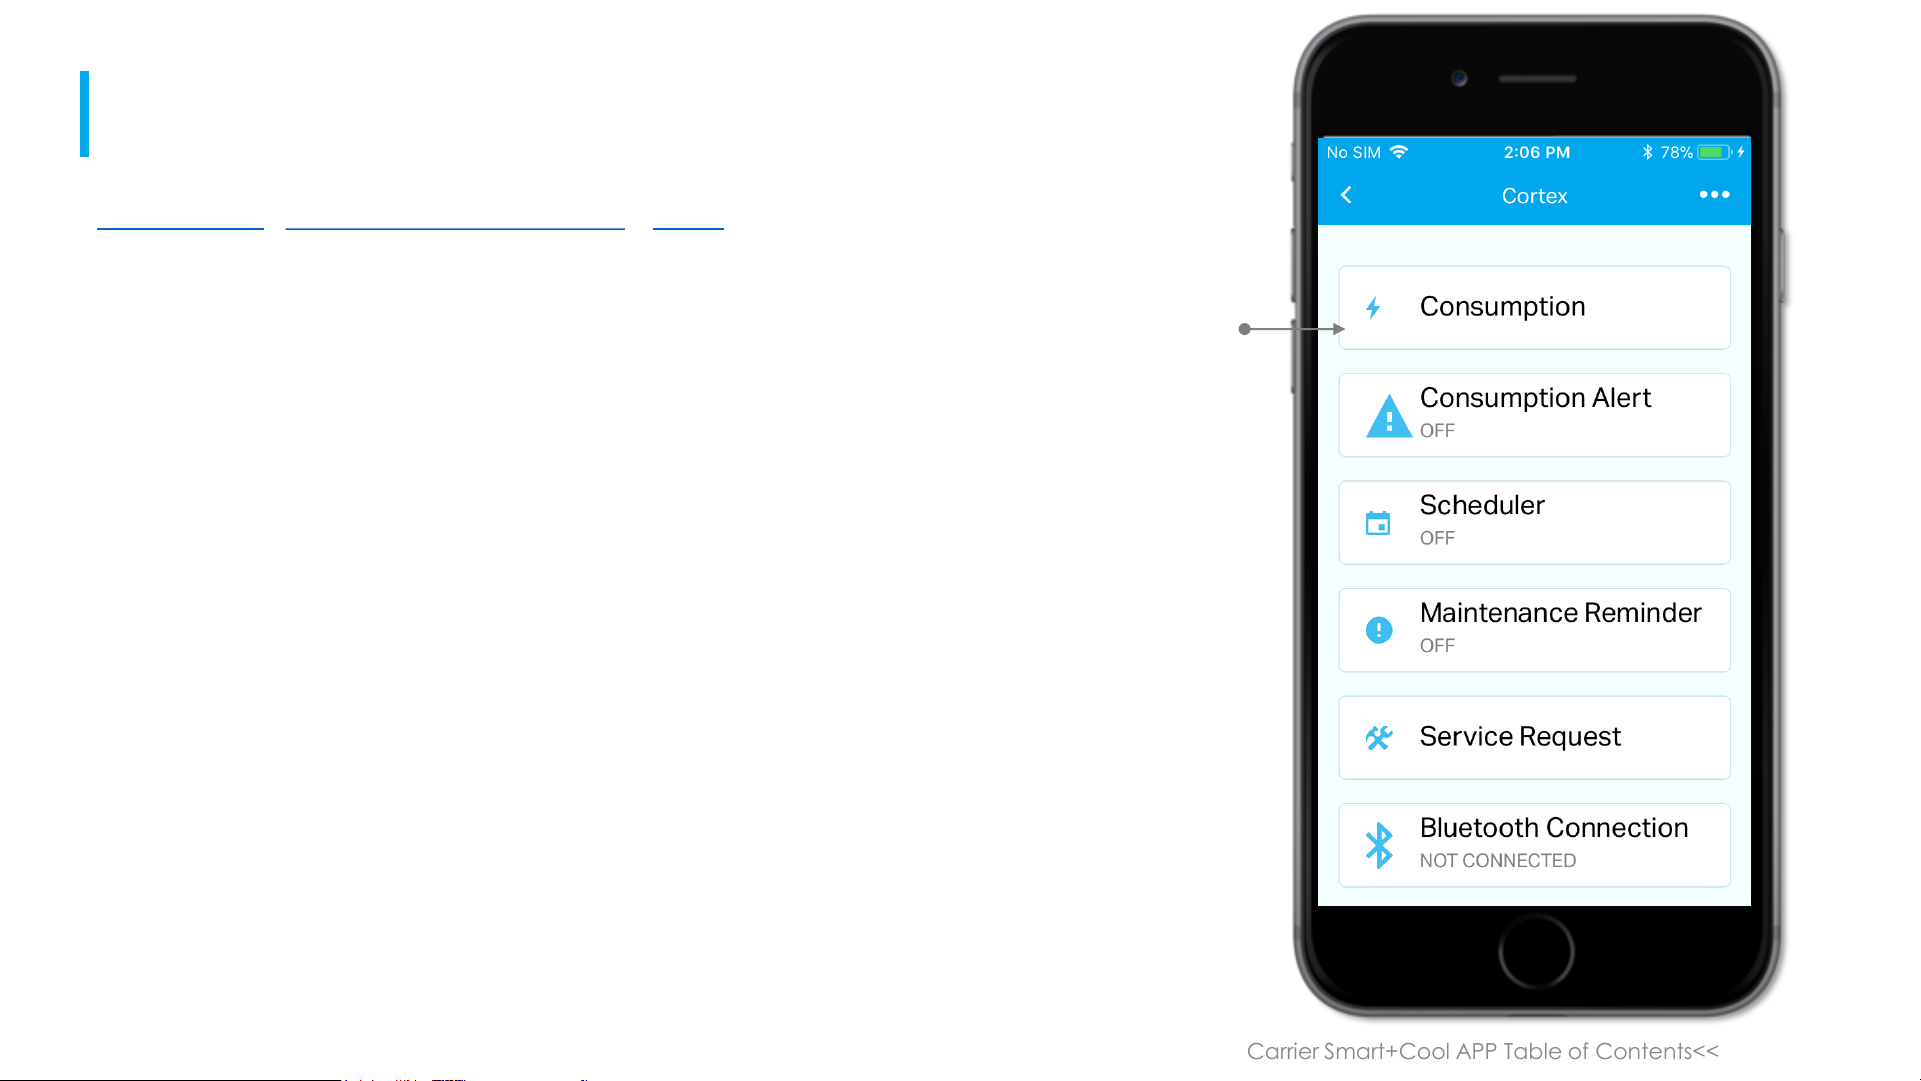
This will lead you to the Plug
Menu. And it should look
something like this.
Click on the Consumption Alert
Menu.
Consumption
Alert
2 / 8
PREVIOUS PAGE NEXT PAGE
APP FEATURES > CONSUMPTION ALERT > SET UP
Page 68

APP FEATURES
>>Back to Main Table of Contents<< >>Back to Carrier Smart+Cool APP Table of Contents<<
You can choose from PHP or
KWH in the Unit Module of the
Consumption Alert.
And also set an amount. The
default Value is PHP and 100.00.
Click on Save.
PHP / KWH
Set a value
Click save
after set
up
3 / 8
PREVIOUS PAGE NEXT PAGE
APP FEATURES > CONSUMPTION ALERT > SET UP
Page 69
APP FEATURES
>>Back to Main Table of Contents<< >>Back to Carrier Smart+Cool APP Table of Contents<<
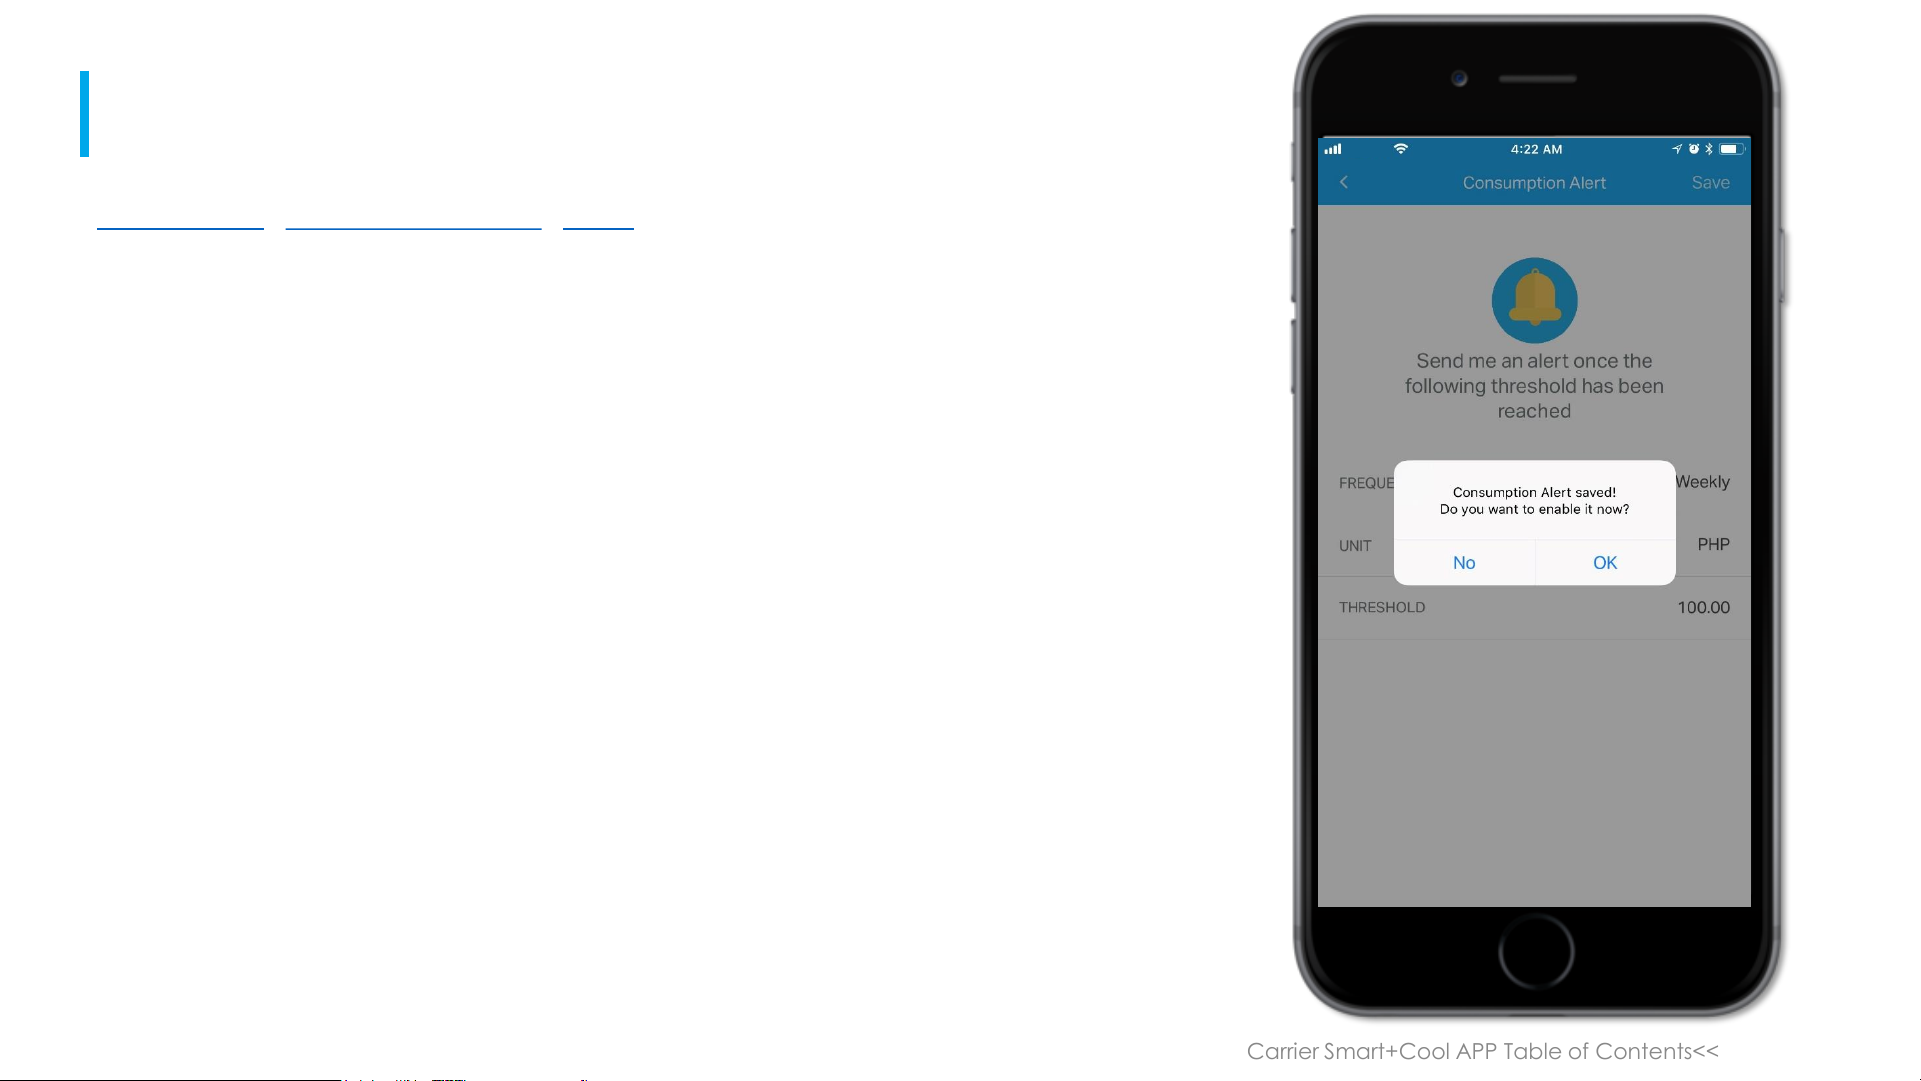
You should see this screen
asking you to save the
Consumption Alert setting.
Click on Ok.
4 / 8
PREVIOUS PAGE NEXT PAGE
APP FEATURES > CONSUMPTION ALERT > SET UP
Page 70

APP FEATURES
>>Back to Main Table of Contents<< >>Back to Carrier Smart+Cool APP Table of Contents<<
You should now see the
Consumption Alert Setting
Saved in the Plugs Menu.
Consumption
Alert saved
5 / 8
PREVIOUS PAGE NEXT PAGE
APP FEATURES > CONSUMPTION ALERT > SET UP
Page 71

APP FEATURES
>>Back to Main Table of Contents<< >>Back to Carrier Smart+Cool APP Table of Contents<<
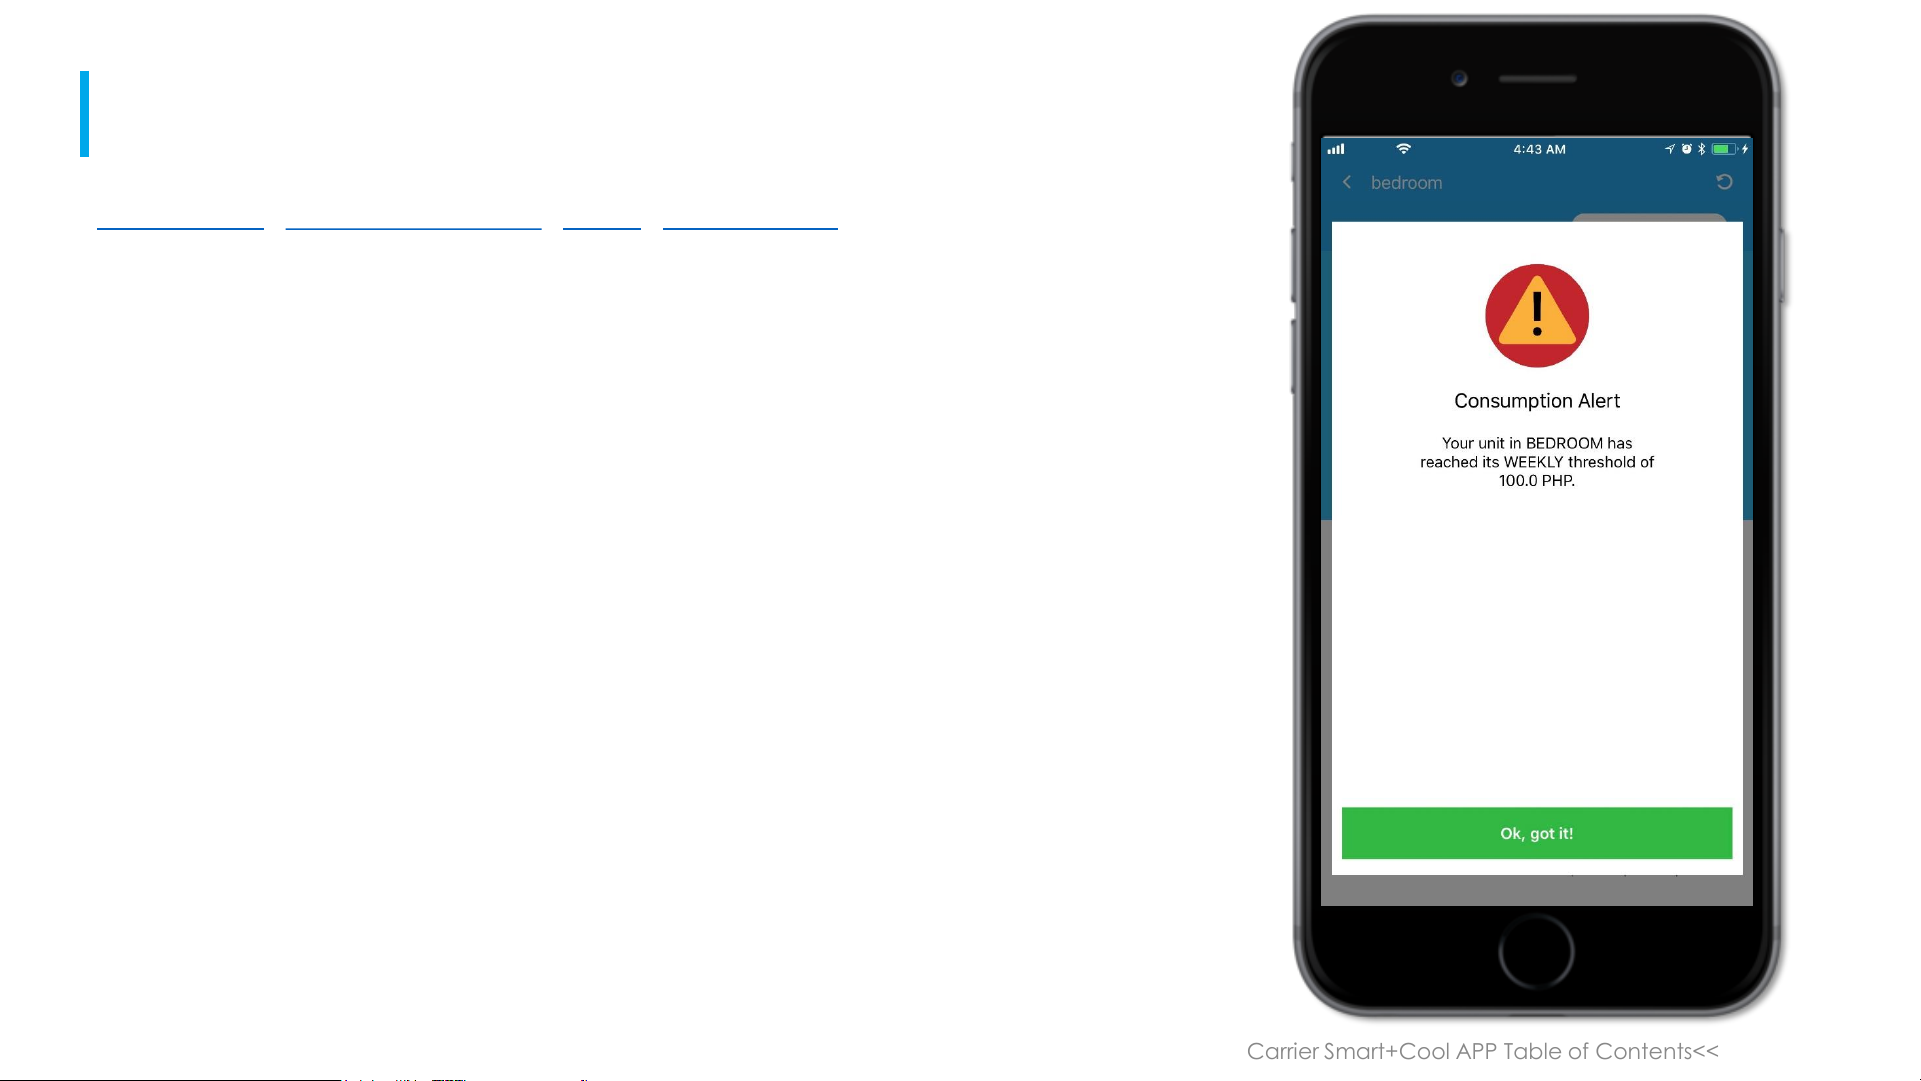
When your weekly threshold has
reached or exceeded the
weekly power / peso
consumption of your plug it will
send you a Push Notification like
this.
Consumption
notification
6 / 8
PREVIOUS PAGE NEXT PAGE
APP FEATURES > CONSUMPTION ALERT > SET UP > NOTIFICATIONS
SMARTCOOL
Oops! It seems that the aircon in your Bedroom has
reached its set threshold of 100 PHP
1m ago
Page 72
APP FEATURES
>>Back to Main Table of Contents<< >>Back to Carrier Smart+Cool APP Table of Contents<<
It will load this screen. Click on
Continue.
7 / 8
PREVIOUS PAGE NEXT PAGE
APP FEATURES > CONSUMPTION ALERT > SET UP > NOTIFICATIONS
Page 73

APP FEATURES
>>Back to Main Table of Contents<< >>Back to Carrier Smart+Cool APP Table of Contents<<
It should load the weekly
consumption module where you
can verify if the power/peso
reading has indeed exceeded
or reached the setting you have
saved.
8 / 8
PREVIOUS PAGE BACK TO APP FEATURES
APP FEATURES > CONSUMPTION ALERT > SET UP > NOTIFICATIONS
Page 74

APP FEATURES
>>Back to Main Table of Contents<< >>Back to Carrier Smart+Cool APP Table of Contents<<
To go to the Scheduler Feature
Click on the Plug Icon
1 / 8
NEXT PAGE
Registered
plug
APP FEATURES > SCHEDULER
Page 75

APP FEATURES
>>Back to Main Table of Contents<< >>Back to Carrier Smart+Cool APP Table of Contents<<
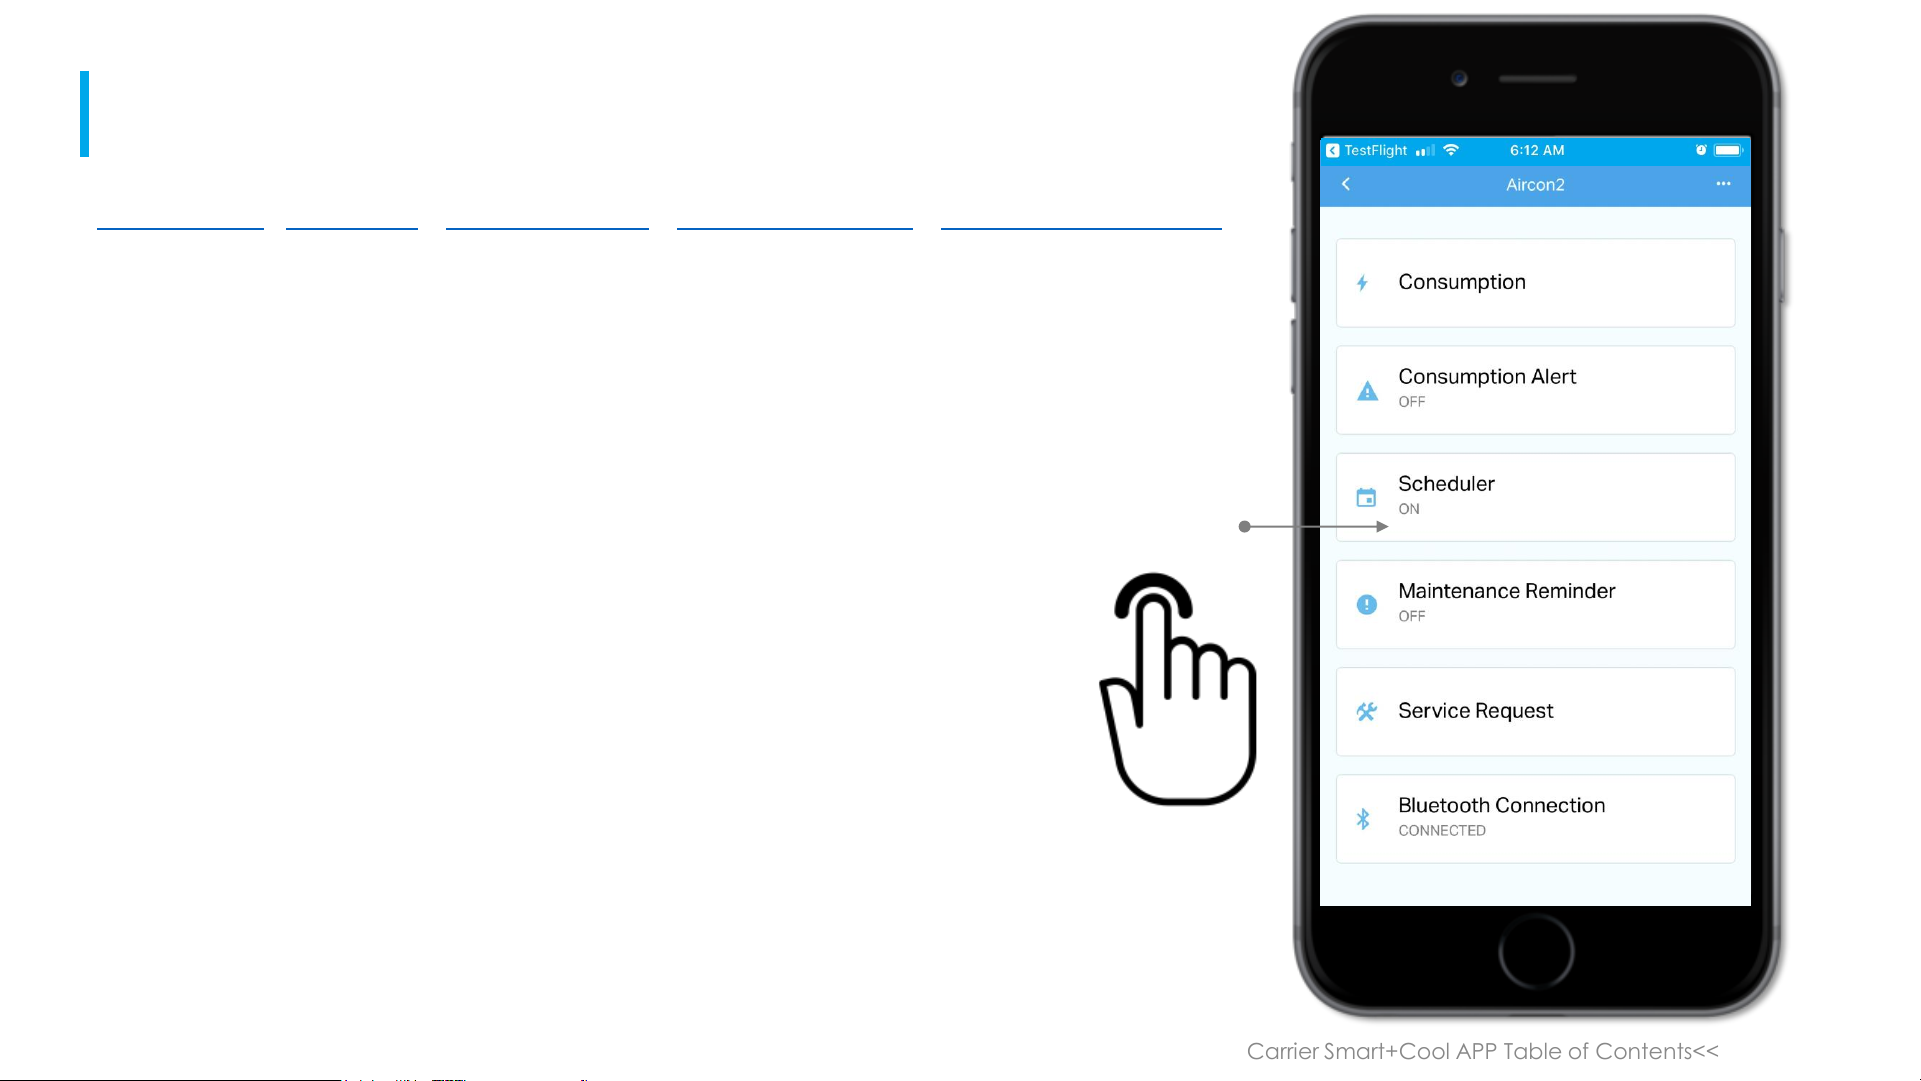
This will bring you to the Plug
Menu. Click on the Scheduler
Button
2 / 8
PREVIOUS PAGE
APP FEATURES > SCHEDULER
NEXT PAGE
Scheduler
Section
Page 76

APP FEATURES
>>Back to Main Table of Contents<< >>Back to Carrier Smart+Cool APP Table of Contents<<
This will bring you to the
Schedule Screen.
To add a schedule. Click on the
“+” Sign in the upper right hand
side of the screen.
3 / 8
PREVIOUS PAGE
APP FEATURES > SCHEDULER > ADD A SCHEDULE
NEXT PAGE
Add a
schedule
Page 77

APP FEATURES
>>Back to Main Table of Contents<< >>Back to Carrier Smart+Cool APP Table of Contents<<
Now you can Set a schedule.
Schedules are in 15 minute
blocks.
When you set a schedule the
plug will be on during that
period.
4 / 8
PREVIOUS PAGE NEXT PAGE
APP FEATURES > SCHEDULER > ADD A SCHEDULE
Page 78

APP FEATURES
>>Back to Main Table of Contents<< >>Back to Carrier Smart+Cool APP Table of Contents<<
Select a 15 minute block when
you want the plug to be on.
Click on Save in the upper right
hand side of the screen.
You will be prompted with this
dialog box. Click on OK to
continue
5 / 8
PREVIOUS PAGE NEXT PAGE
Click on save
Confirm and
enable the
schedule
APP FEATURES > SCHEDULER > ADD A SCHEDULE > CONFIRM SCHEDULE
Page 79

APP FEATURES
>>Back to Main Table of Contents<< >>Back to Carrier Smart+Cool APP Table of Contents<<
You will be redirected to this
screen.
The Scheduler screen will now
show the Scheduler is ON.
Click on the Scheduler Button to
view the new Schedule.
6 / 8
PREVIOUS PAGE NEXT PAGE
Scheduler now
activated
APP FEATURES > SCHEDULER > ADD A SCHEDULE > CONFIRM SCHEDULE
Page 80

APP FEATURES
>>Back to Main Table of Contents<< >>Back to Carrier Smart+Cool APP Table of Contents<<
Verify that the 15 minute block
you selected is rendered like this
in the Schedule Screen.
During the scheduled block the
Plug will be on. After the 15
minute block the plug will
automatically turn off.
You can try turning off the plug
during the 15 minute block and
it should automatically turn on
every minute. Until the Schedule
is over.
7 / 8
PREVIOUS PAGE NEXT PAGE
APP FEATURES > SCHEDULER > ADD A SCHEDULE > CONFIRM SCHEDULE
Active
Schedule
saved on the
app
Page 81
APP FEATURES
>>Back to Main Table of Contents<< >>Back to Carrier Smart+Cool APP Table of Contents<<
To turn off the Schedule do a
long press on the Scheduler
Button. It should say OFF.
8 / 8
PREVIOUS PAGE
APP FEATURES > SCHEDULER > ADD A SCHEDULE > CONFIRM SCHEDULE > DEACTIVATE SCHEDULER
Deactivate the
scheduler
BACK TO APP FEATURES
Page 82

APP FEATURES
>>Back to Main Table of Contents<< >>Back to Carrier Smart+Cool APP Table of Contents<<
To Access the Maintenance
Alert Module click on a plug
Icon in the Plug Dashboard
Screen
Registered
plug
1 / 9
NEXT PAGE
APP FEATURES > MAINTENANCE REMINDER
Page 83

APP FEATURES
>>Back to Main Table of Contents<< >>Back to Carrier Smart+Cool APP Table of Contents<<
This will lead you to the Plug
Menu.
Click on Maintenance Reminder
Menu
2 / 9
PREVIOUS PAGE NEXT PAGE
Maintenance
Reminder
APP FEATURES > MAINTENANCE REMINDER > SET UP
Page 84

APP FEATURES
>>Back to Main Table of Contents<< >>Back to Carrier Smart+Cool APP Table of Contents<<
Select the frequency
3 Months
6 Months
Annually
Select the Starting Date
Once done, click on Save
Reminder Button on the Lower
Part of the Screen.
3 / 9
PREVIOUS PAGE NEXT PAGE
Frequency
Start Date
Save
Reminder
APP FEATURES > MAINTENANCE REMINDER > SET UP
Page 85

APP FEATURES
>>Back to Main Table of Contents<< >>Back to Carrier Smart+Cool APP Table of Contents<<
It will Prompt you to Enable it
now.
Click on OK
4 / 9
PREVIOUS PAGE NEXT PAGE
APP FEATURES > MAINTENANCE REMINDER > SET UP
Page 86

APP FEATURES
>>Back to Main Table of Contents<< >>Back to Carrier Smart+Cool APP Table of Contents<<
When you go back to the Plug
Menu notice the Maintenance
Reminder is now activated and
has the following settings.
5 / 9
PREVIOUS PAGE NEXT PAGE
Maintenance
Reminder
APP FEATURES > MAINTENANCE REMINDER > SET UP
Page 87

APP FEATURES
>>Back to Main Table of Contents<< >>Back to Carrier Smart+Cool APP Table of Contents<<
Depending on the frequency
you configured you should get
a Push Notification Similar to this.
Notifications should include:
Your Name
The room where the Plug was
configured
6 / 9
PREVIOUS PAGE NEXT PAGE
Push
Notification
APP FEATURES > MAINTENANCE REMINDER > SET UP > NOTIFICATIONS
SMARTCOOL
Hi Juan! It’s time to get your Bedroom aircon cleaned.
Click this message to request for service.
now
Page 88

APP FEATURES
>>Back to Main Table of Contents<< >>Back to Carrier Smart+Cool APP Table of Contents<<
You should also be able to see
the Push Notification Message in
the Notification Tab of your
phone
Click on this Push Notification
Message
7 / 9
PREVIOUS PAGE NEXT PAGE
Push
Notification
APP FEATURES > MAINTENANCE REMINDER > SET UP > NOTIFICATIONS
SMARTCOOL
Hi Juan! It’s time to get your Bedroom aircon cleaned.
Click this message to request for service.
1m ago
Page 89
APP FEATURES
>>Back to Main Table of Contents<< >>Back to Carrier Smart+Cool APP Table of Contents<<
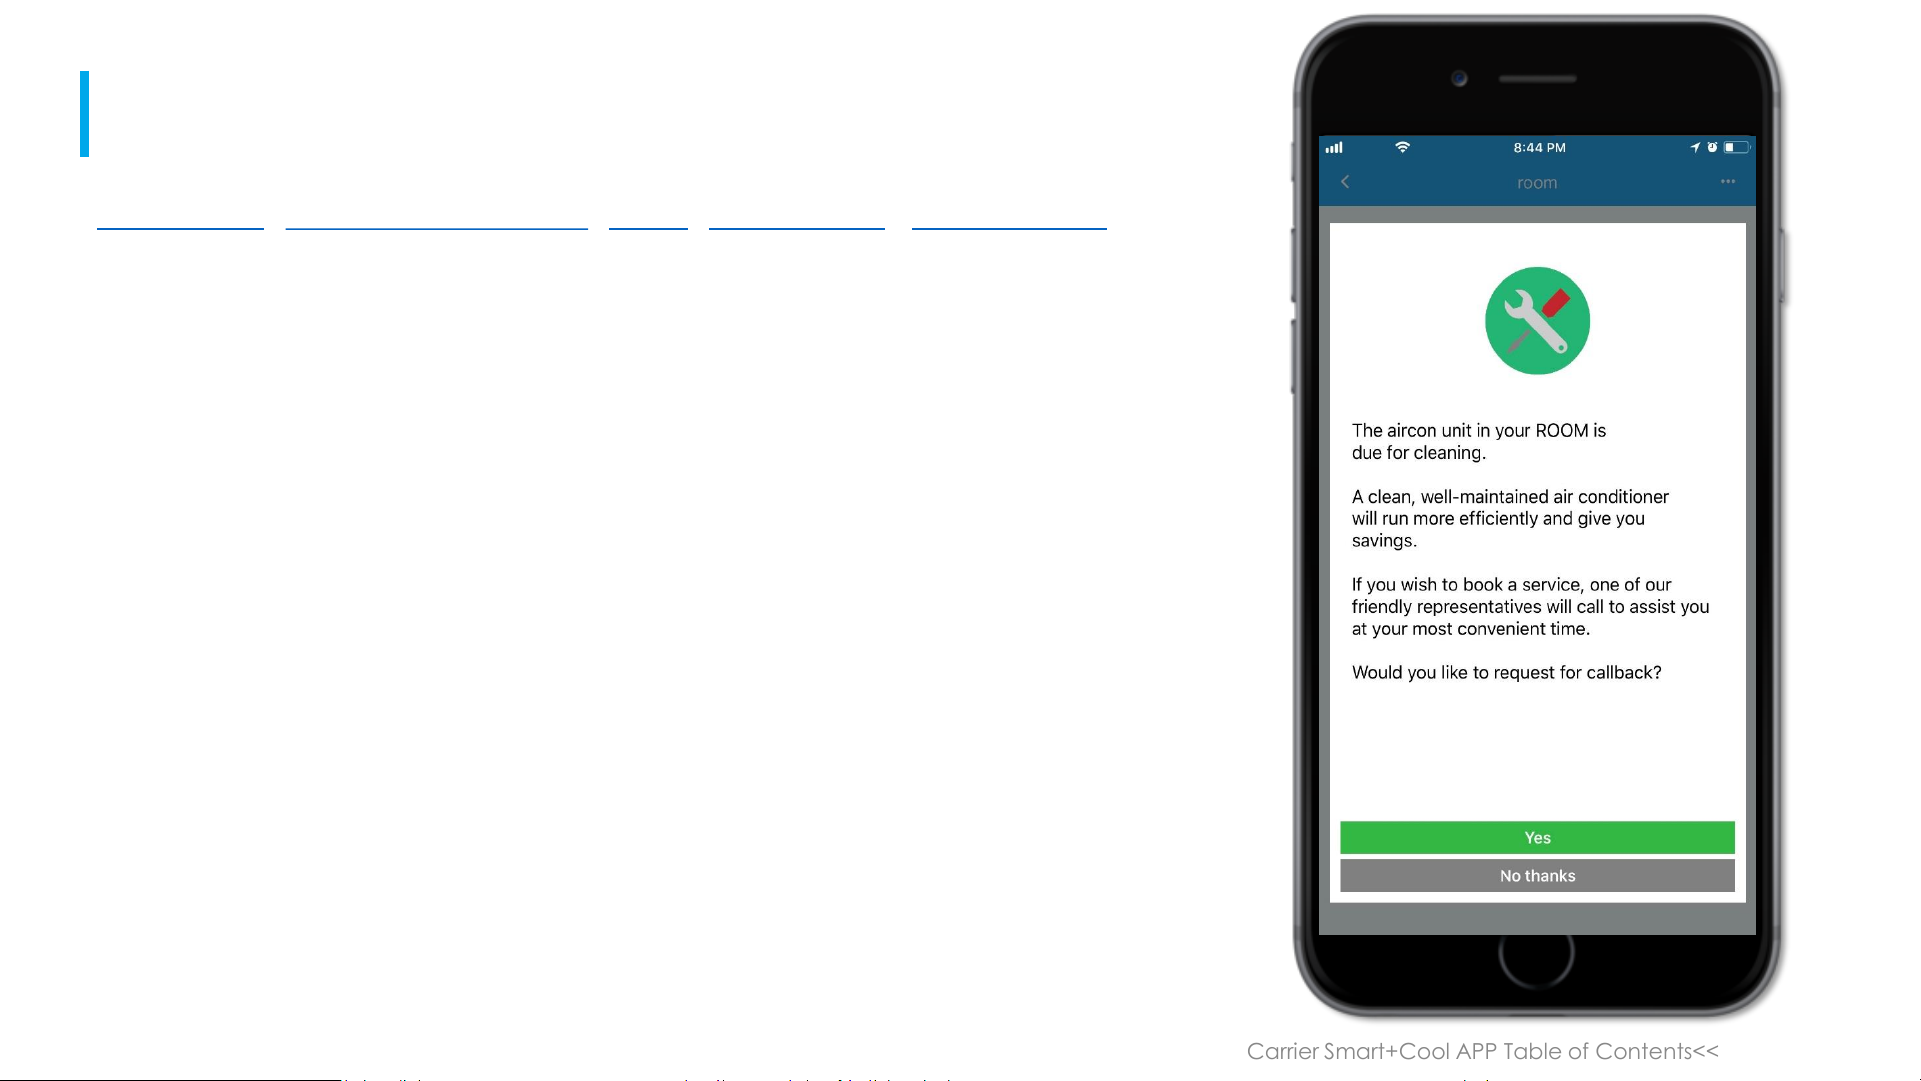
Clicking on the Alert Reminder
will Load this Screen.
You can Click on Yes and it Will
Open the Service Request
Module
8 / 9
PREVIOUS PAGE NEXT PAGE
APP FEATURES > MAINTENANCE REMINDER > SET UP > NOTIFICATIONS > BOOK A SERVICE
Page 90

APP FEATURES
>>Back to Main Table of Contents<< >>Back to Carrier Smart+Cool APP Table of Contents<<
Clicking on Yes in the Previous
Screen will lead you to the
Service Request Module
9 / 9
PREVIOUS PAGE BACK TO APP FEATURES
APP FEATURES > MAINTENANCE REMINDER > SET UP > NOTIFICATIONS > BOOK A SERVICE
Page 91

APP FEATURES
>>Back to Main Table of Contents<< >>Back to Carrier Smart+Cool APP Table of Contents<<
To access the Service Request
Module click on a plug Icon in
the Plug Dashboard Screen
1 / 6
NEXT PAGE
APP FEATURES > BOOK A SERVICE
Registered
plug
Page 92

APP FEATURES
>>Back to Main Table of Contents<< >>Back to Carrier Smart+Cool APP Table of Contents<<
This will bring you to the Plug
Menu. Click on Service Request
Module
2 / 6
PREVIOUS PAGE NEXT PAGE
Service
Request
APP FEATURES > BOOK A SERVICE
Page 93

APP FEATURES
>>Back to Main Table of Contents<< >>Back to Carrier Smart+Cool APP Table of Contents<<
Click on Cleaning
Then Click on proceed Button at
the bottom part of the screen
3 / 6
PREVIOUS PAGE NEXT PAGE
Cleaning
APP FEATURES > BOOK A SERVICE
Page 94
APP FEATURES
>>Back to Main Table of Contents<< >>Back to Carrier Smart+Cool APP Table of Contents<<
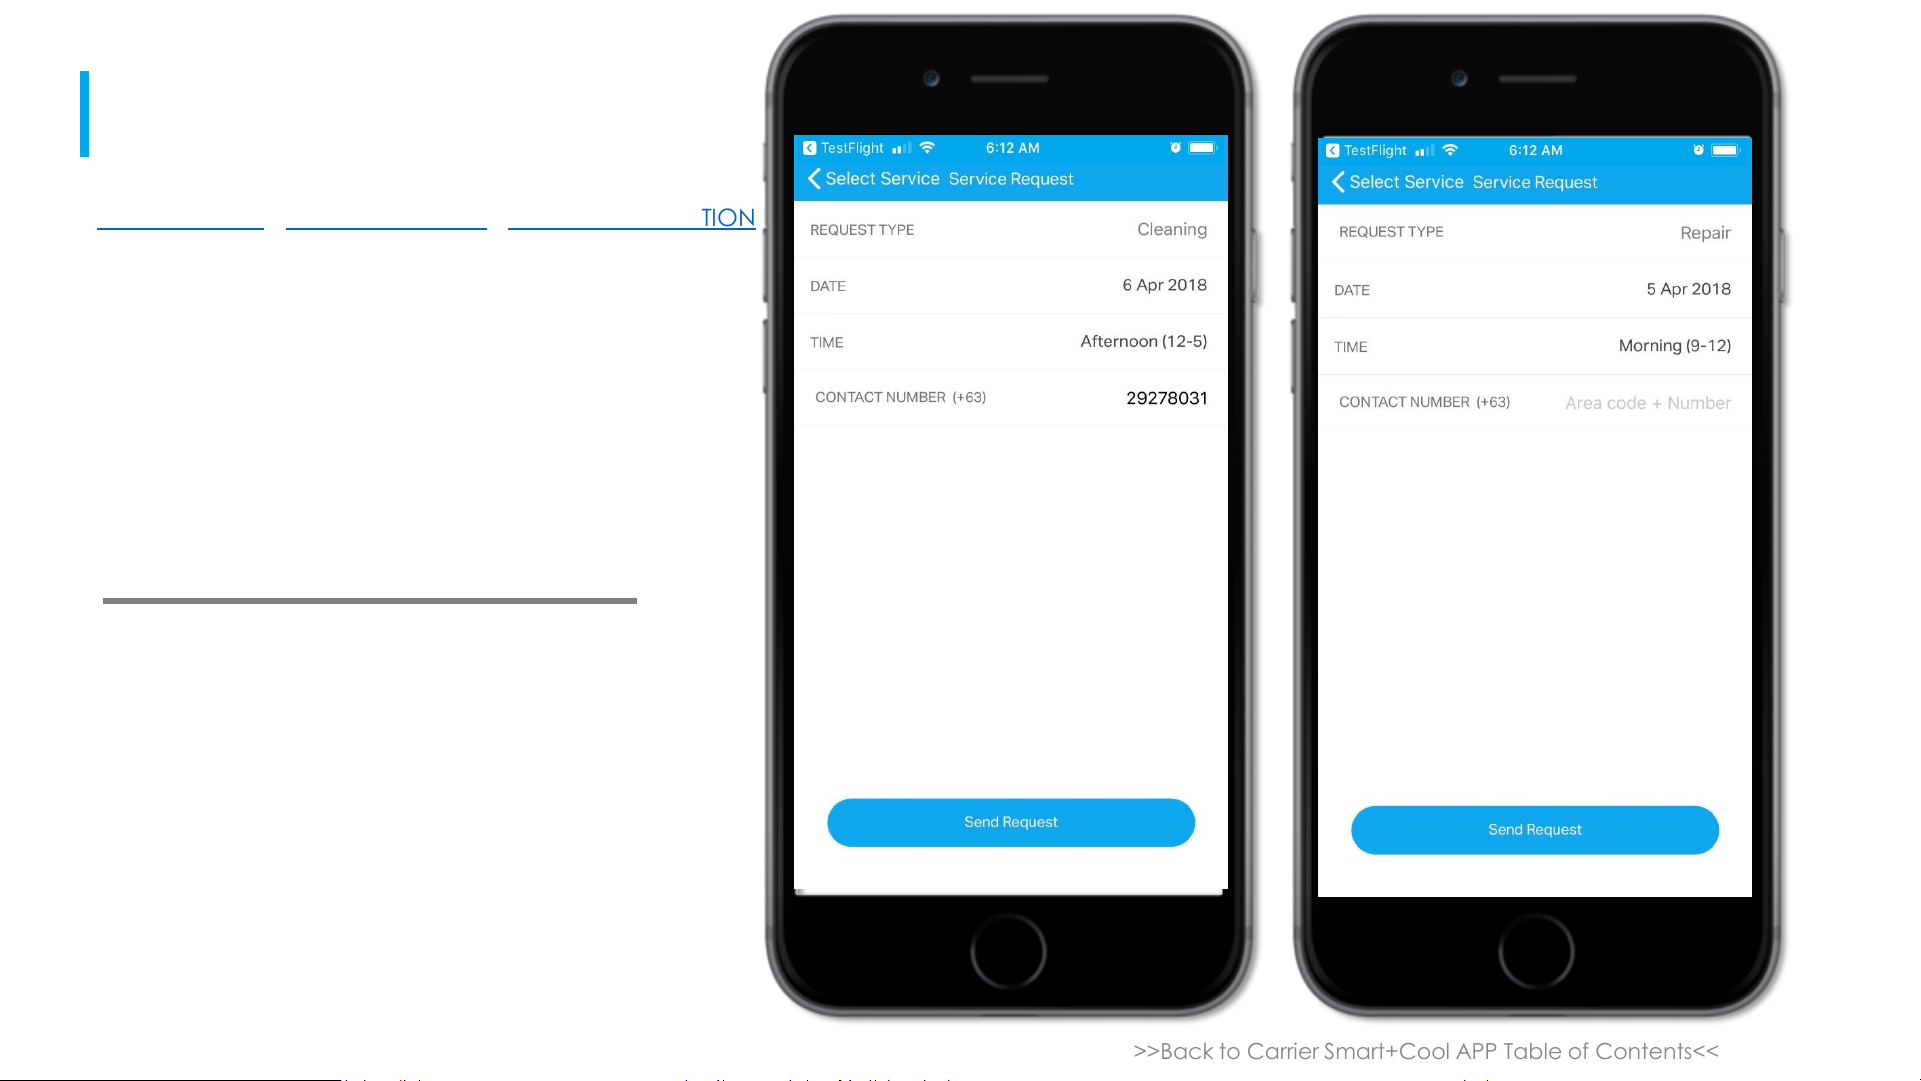
Input the information required:
• Select Date for Cleaning
• Select Time for Request
• Enter your Contact Number
• Click on Send Request
4 / 6
PREVIOUS PAGE NEXT PAGE
*Note: Same information will be
requested if you click on Repair
APP FEATURES > BOOK A SERVICE > FILL UP INFORMATION
Page 95

APP FEATURES
>>Back to Main Table of Contents<< >>Back to Carrier Smart+Cool APP Table of Contents<<
You will Be prompted to
proceed with the request.
Click on Proceed
5 / 6
PREVIOUS PAGE NEXT PAGE
APP FEATURES > BOOK A SERVICE > FILL UP INFORMATION > CONFIRM REQUEST
Page 96

APP FEATURES
>>Back to Main Table of Contents<< >>Back to Carrier Smart+Cool APP Table of Contents<<
You should get a screen similar
to this
6 / 6
PREVIOUS PAGE BACK TO APP FEATURES
APP FEATURES > BOOK A SERVICE > FILL UP INFORMATION > CONFIRM REQUEST
Page 97

APP FEATURES
>>Back to Main Table of Contents<< >>Back to Carrier Smart+Cool APP Table of Contents<<
To Access the Chat function
within the App go to the Plug
Dashboard Screen.
Then click on the Chat icon on
the lower right part of the
screen.
1 / 2
NEXT PAGE
Chat Icon
APP FEATURES > CHAT FUNCTION
Page 98

APP FEATURES
>>Back to Main Table of Contents<< >>Back to Carrier Smart+Cool APP Table of Contents<<
It should open this screen with
an envelope icon at the
bottom. Click on it.
Leave a message and a
Customer Service Agent will
attend to you.
2 / 2
PREVIOUS PAGE BACK TO APP FEATURES
APP FEATURES > CHAT FUNCTION
Page 99

FIRMWARE UPDATE
>>Back to Main Table of Contents<< >>Back to Carrier Smart+Cool APP Table of Contents<<
To do Firmware Upgrade Click
on the Plug Icon
1 / 5
FIRMWARE UPDATE
NEXT PAGE
Page 100

FIRMWARE UPDATE
>>Back to Main Table of Contents<< >>Back to Carrier Smart+Cool APP Table of Contents<<
Click on the Menu with 3 dots
on the upper right hand side of
the screen.
2 / 5
PREVIOUS PAGE NEXT PAGE
FIRMWARE UPDATE
 Loading...