

Page 1
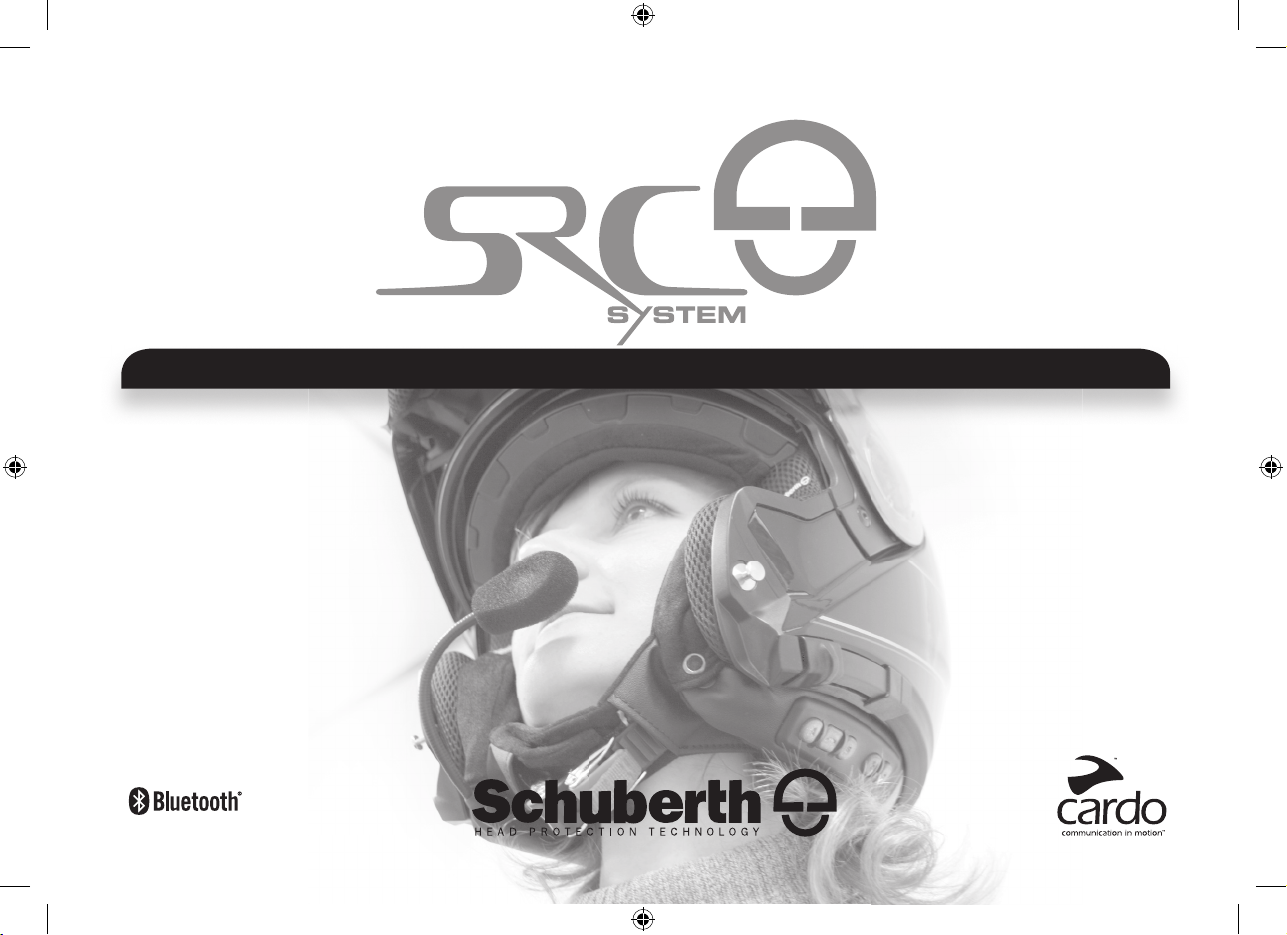
U S E R M A N U A L
P O W E R E D B Y
QG SRC 207 - MAN00015.indd 21 2/1/11 11:38 AM
Page 2

TABLE OF CONTENTS
1. INTRODUCTION . . . . . . . . . . . . . . . . . . . . . . . . . . . . . . . . . . . . . . . . . . . . . . . . . . . . . . . . . 23
2. CONTENTS OF THE RETAIL BOX . . . . . . . . . . . . . . . . . . . . . . . . . . . . . . . . . . . . . . . . . 24
3. CHARGING THE HEADSET . . . . . . . . . . . . . . . . . . . . . . . . . . . . . . . . . . . . . . . . . . . . . . . 24
4. BASIC SETUP AND CONFIGURATION . . . . . . . . . . . . . . . . . . . . . . . . . . . . . . . . . . . . . 25
4.1 GENERAL FUNCTIONS . . . . . . . . . . . . . . . . . . . . . . . . . . . . . . . . . . . . . . . . . . . . . 25
4.2 SPOKEN STATUS ANNOUNCEMENTS . . . . . . . . . . . . . . . . . . . . . . . . . . . . . . 25
4.3 AUDIO SOURCES AND PRIORITIES . . . . . . . . . . . . . . . . . . . . . . . . . . . . . . . . . 25
4.4 SOFTWARE UPGRADE OPTION . . . . . . . . . . . . . . . . . . . . . . . . . . . . . . . . . . . . 25
4.5 RESETTING YOUR HEADSET . . . . . . . . . . . . . . . . . . . . . . . . . . . . . . . . . . . . . . . 26
5. GETTING STARTED . . . . . . . . . . . . . . . . . . . . . . . . . . . . . . . . . . . . . . . . . . . . . . . . . . . . . . . 26
5.1 REPLACING THE EXISTING ACOUSTIC COLLAR WITH THE
SRC-SYSTEM . . . . . . . . . . . . . . . . . . . . . . . . . . . . . . . . . . . . . . . . . . . . . . . . . . . . . . 26
5.2 POSITIONING THE SPEAKERS . . . . . . . . . . . . . . . . . . . . . . . . . . . . . . . . . . . . . . 26
5.3 POSITIONING THE MICROPHONE . . . . . . . . . . . . . . . . . . . . . . . . . . . . . . . . . . 27
5.4 REMOVING THE SRC-SYSTEM FROM YOUR HELMET . . . . . . . . . . . . . . . . 27
5.5 WEARING AND REMOVING THE HELMET . . . . . . . . . . . . . . . . . . . . . . . . . . 27
5.6 CLEANING THE ACOUSTIC COLL AR . . . . . . . . . . . . . . . . . . . . . . . . . . . . . . . 27
6. CONNECTING BLUETOOTH® ENABLED MOBILE PHONES, GPS OR
MP3 (A2DP) DEVICES . . . . . . . . . . . . . . . . . . . . . . . . . . . . . . . . . . . . . . . . . . . . . . . . . . . . 28
6.1 MOBILE PHONE . . . . . . . . . . . . . . . . . . . . . . . . . . . . . . . . . . . . . . . . . . . . . . . . . . 28
6.2 GPS DEVICE . . . . . . . . . . . . . . . . . . . . . . . . . . . . . . . . . . . . . . . . . . . . . . . . . . . . . . 29
6.3 MP3 MUSIC WIRELESS OPTION A2DP . . . . . . . . . . . . . . . . . . . . . . . . 29
7. BUILTIN FM RADIO AND EXTERNAL MP3 PLAYER CABLE OPTION . . . . . 30
7.1 FM RADIO . . . . . . . . . . . . . . . . . . . . . . . . . . . . . . . . . . . . . . . . . . . . . . . . . . . . . . . . . 30
7.2 CABLE CONNECTING YOUR MP3 PLAYER OR OTHER
EXTERNAL AUDIO SOURCES . . . . . . . . . . . . . . . . . . . . . . . . . . . . . . . . . . . . . . 31
8. USING THE MOBILE PHONE . . . . . . . . . . . . . . . . . . . . . . . . . . . . . . . . . . . . . . . . . . . . . . 32
9. USING THE INTERCOM . . . . . . . . . . . . . . . . . . . . . . . . . . . . . . . . . . . . . . . . . . . . . . . . . . . 32
9.1 INTRODUC TION . . . . . . . . . . . . . . . . . . . . . . . . . . . . . . . . . . . . . . . . . . . . . . . . . . 32
9.2 INTERCOM COMPATIBILITY . . . . . . . . . . . . . . . . . . . . . . . . . . . . . . . . . . . . . . . 32
9.3 BEFORE STARTING THE INTERCOM . . . . . . . . . . . . . . . . . . . . . . . . . . . . . . . 33
9.4 USING YOUR SRCSYSTEM FOR INTERCOM WITH OTHER
SRCSYSTEM HEADSETS . . . . . . . . . . . . . . . . . . . . . . . . . . . . . . . . . . . . . . . . . 33
9.4a. TWOWAY INTERCOM . . . . . . . . . . . . . . . . . . . . . . . . . . . . . . . . . . . . . . 33
9.4b. THREEWAY INTERCOM . . . . . . . . . . . . . . . . . . . . . . . . . . . . . . . . . . . . 33
9.5 RECEIVING INTERCOM CALLS. . . . . . . . . . . . . . . . . . . . . . . . . . . . . . . . . . . . . 34
9.6 INITIATE INTERCOM CALLS . . . . . . . . . . . . . . . . . . . . . . . . . . . . . . . . . . . . . . . 34
9.7 VOICE CONNECT FEATURE VOX . . . . . . . . . . . . . . . . . . . . . . . . . . . . . . . . . 35
9.8 RESET PAIRING RESTORING THE ORIGINAL DEFAULT
CONFIGURATION . . . . . . . . . . . . . . . . . . . . . . . . . . . . . . . . . . . . . . . . . . . . . . . 35
9.9 NOTEWORTHY ISSUES . . . . . . . . . . . . . . . . . . . . . . . . . . . . . . . . . . . . . . . . . . . 35
9.10 TROUBLESHOOTING THE INTERCOM . . . . . . . . . . . . . . . . . . . . . . . . . . . . 35
10. CLICKTOL INK . . . . . . . . . . . . . . . . . . . . . . . . . . . . . . . . . . . . . . . . . . . . . . . . . . . . . . . . . . . 36
11. SUPPORT . . . . . . . . . . . . . . . . . . . . . . . . . . . . . . . . . . . . . . . . . . . . . . . . . . . . . . . . . . . . . . . 37
12. NOTICES . . . . . . . . . . . . . . . . . . . . . . . . . . . . . . . . . . . . . . . . . . . . . . . . . . . . . . . . . . . . . . . . 37
IMPORTANT: This is version 2.0 of the User Manual. Please note, that our
manual is updated periodically on our website in order to include the
very latest features as well the new options and functions of your new
SRC‑System. Please visit www.schuberth.com/leadmin/downloads/
SRC/SRC‑System_Manual‑1.pdf to check now if the manual you are
holding is the most updated version and download the website manual
version in your preferred language.
22
QG SRC 207 - MAN00015.indd 22 2/1/11 11:38 AM
Page 3

1. INTRODUCTION
Congratulations and thank you for choosing the Schuberth Rider
Communication-System™ (SRC-System™) Headset for motorcycle
helmets.
This manual will help you operate the headset, but you should rst
familiarize yourself with the Bluetooth® functionality of your mobile
phone and/or GPS device before using the SRC-System™.
The SRC-System™ retail box contains one headset unit. When paired
with another SRC-System™, the headsets can be used as an Intercom at a range of up to 300 m/ 1,000 ft (subject to terrain).
YOUR SRCSYSTEM OFFERS THE FOLLOWING CONNECTIVITY
OPTIONS:
1. Mobile phone communication (supporting Bluetooth® Handsfree*
and A2DP and AVRCP proles at a 10 m / 33 ft. range)
2. Wireless music-streaming (supporting the Bluetooth® Stereo A2DP
prole and compatible with a variety of MP3 Players, adapters and
other audio devices)
3. 2-way or 3-Way Bike-to-Bike Intercom for conference calls with
other SRC-System™ headsets (up to 300 m / 1,000 ft) in Full
Duplex** mode.
4. Driver-to-Passenger Intercom
5. Click-to-Link for spontaneous intercom communication with any
nearby SRC-System™
6. GPS Navigation instructions and Streaming Audio from compatible
Bluetooth® devices
7. Built-in FM Radio
8. as a stereo headset for listening to cable-connected audio devices,
(such as non-Bluetooth® MP3 Players and iPods®)
ADDITIONAL SPECIAL FEATURES:
➤AGC technology (Automatic Gain Control), allowing your
SRC-System™ to automatically increase or reduce its volume
according to ambient noise and driving speed. You can also
control the volume level manually.
➤VOX technology for safe and handsfree operation of some key func-
tions (Voice Dial, answer call, reject call).
➤PLC software (Packet Loss Concealment) for real-time compensa-
tion of audio losses in challenging environments.
➤Advanced software which you should update while in standby
mode, via any PC running Windows® XP™, Vista™ or Windows 7™.
➤Spoken status instructions, so that you always know to whom or what
device you are connected to at any given time.
We wish you a great riding experience and remain available for any inquiries you may have. Just write us at Kundenservice@schuberth.com
F-J. Görges Erwin Van Hoof
Director of Sales Vice President
SCHUBERTH GmbH Int. Sales Manager
Visit www.schuberth.com/src-tutorial/en to experience an interactive
demonstration of the SRC-System functions.
_______________________
* Mobile phones that do not support the B luetooth® Handsfree prole may prevent
you from using certain advanced features
** “Full Duplex” lets you to speak and hear the other par ty simultaneously, similar to
mobile or landline phone conversations and unlike walkie-talkie communications
Englis h
23
QG SRC 207 - MAN00015.indd 23 2/1/11 11:38 AM
Page 4
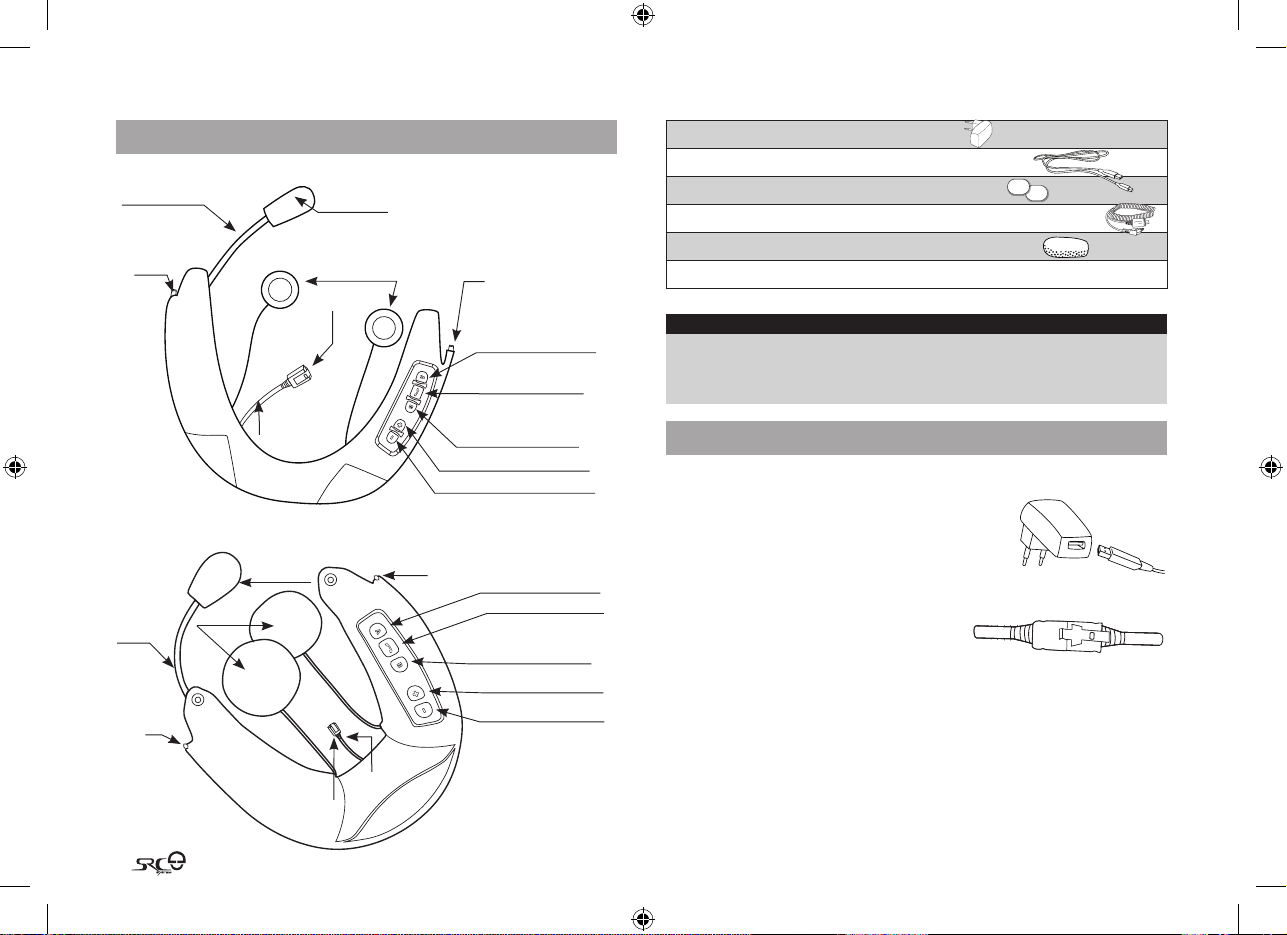
2. CONTENTS OF THE RETAIL BOX
SRC-System™ for C3 helmets*
Flexible Boom
Pin
Microphone
2 Speakers
Wall charger plug
USB adapter cable
Velcro® pads
MP3 cable
Microphone sponges
Pin
User Manual, stickers
USB
Connector
Cover
USB Connector
SRC-System™ for C2 / Concept helmets
Microphone
Flexible
Boom
2 Speakers
Pin
USB Connector
Cover
Pin
USB
Connector
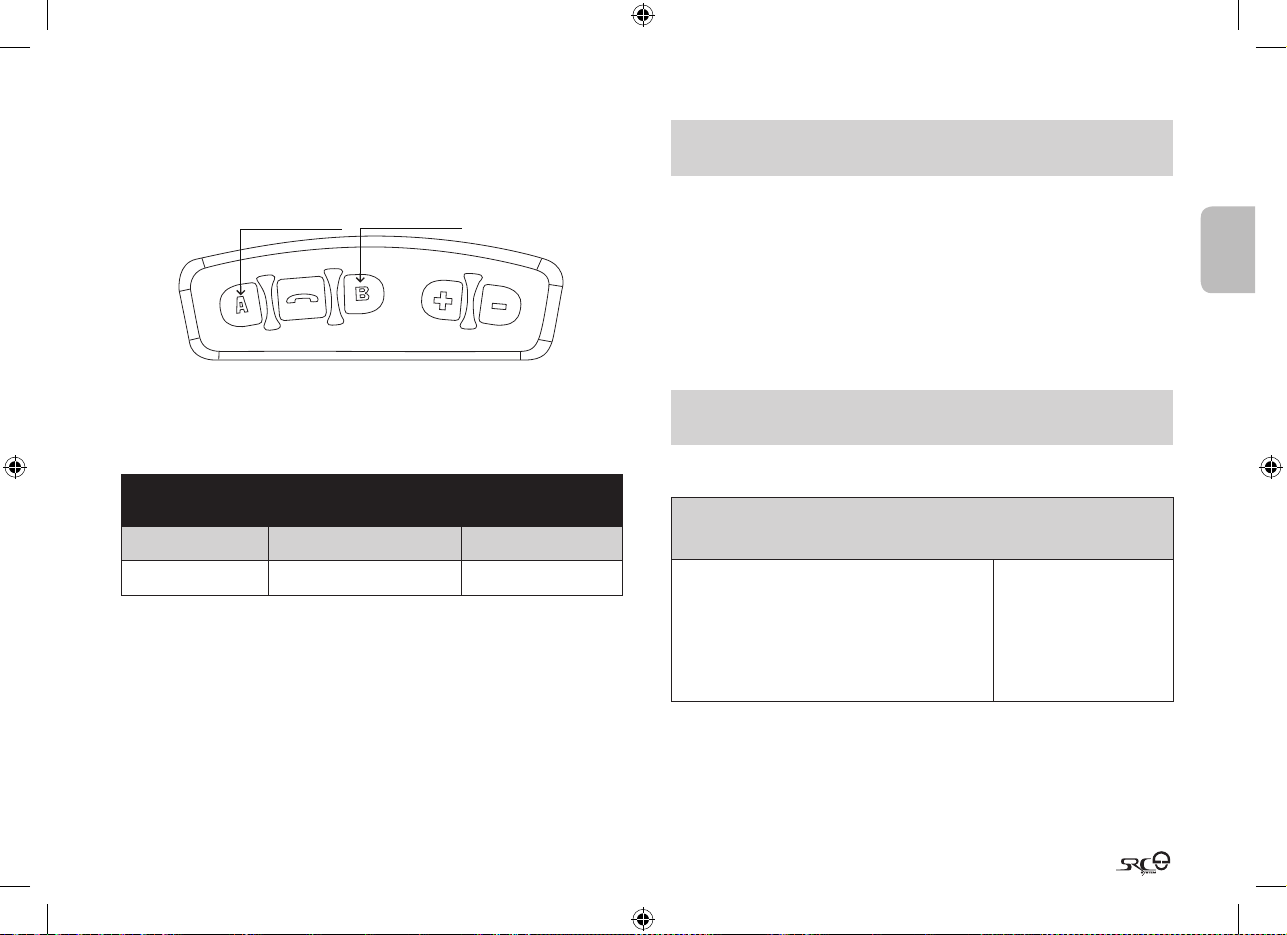
Volume Down / Rewind Button
Channel A Button
• Connect to Rider A
• Mp3 Button
Mobile Phone
Button
Channel B Button
• Connect to Rider B
• FM Radio Button
Volume Up / Forward Button
Channel A Button
• Connect to Rider A
• MP3 Button
Mobile Phone Button
Channel B Button
• Connect to Rider B
• FM Radio Button
Volume Up / Forward
Button
Volume Down / Rewind
Button
*The product is
oered in
IMPORTANT:
The cover lid protecting the micro USB Connector should be kept tightly
closed at all times to prevent moisture from entering the device.
3. CHARGING THE HEADSET
Make sure that your headset is fully charged for at least four
hours before initial use.
Insert the USB cable to the wall charger and
insert the other end of the cable to the
headset’s micro USB Connector. While charging,
the Red Light turns on. When charging is
complete, the Red Light will turn o.
Your wall charger and USB adaptor cable
serve two purposes:
1. Charging your headset from
any A/C wall socket or from a USB port on your computer
(charging time from computer takes longer)
2. Downloading software upgrades from any PC running
Windows® XP™, Vista™ or Windows 7™. (see section 4.4 for
details).
dierent sizes
24
QG SRC 207 - MAN00015.indd 24 2/1/11 11:38 AM
Page 5
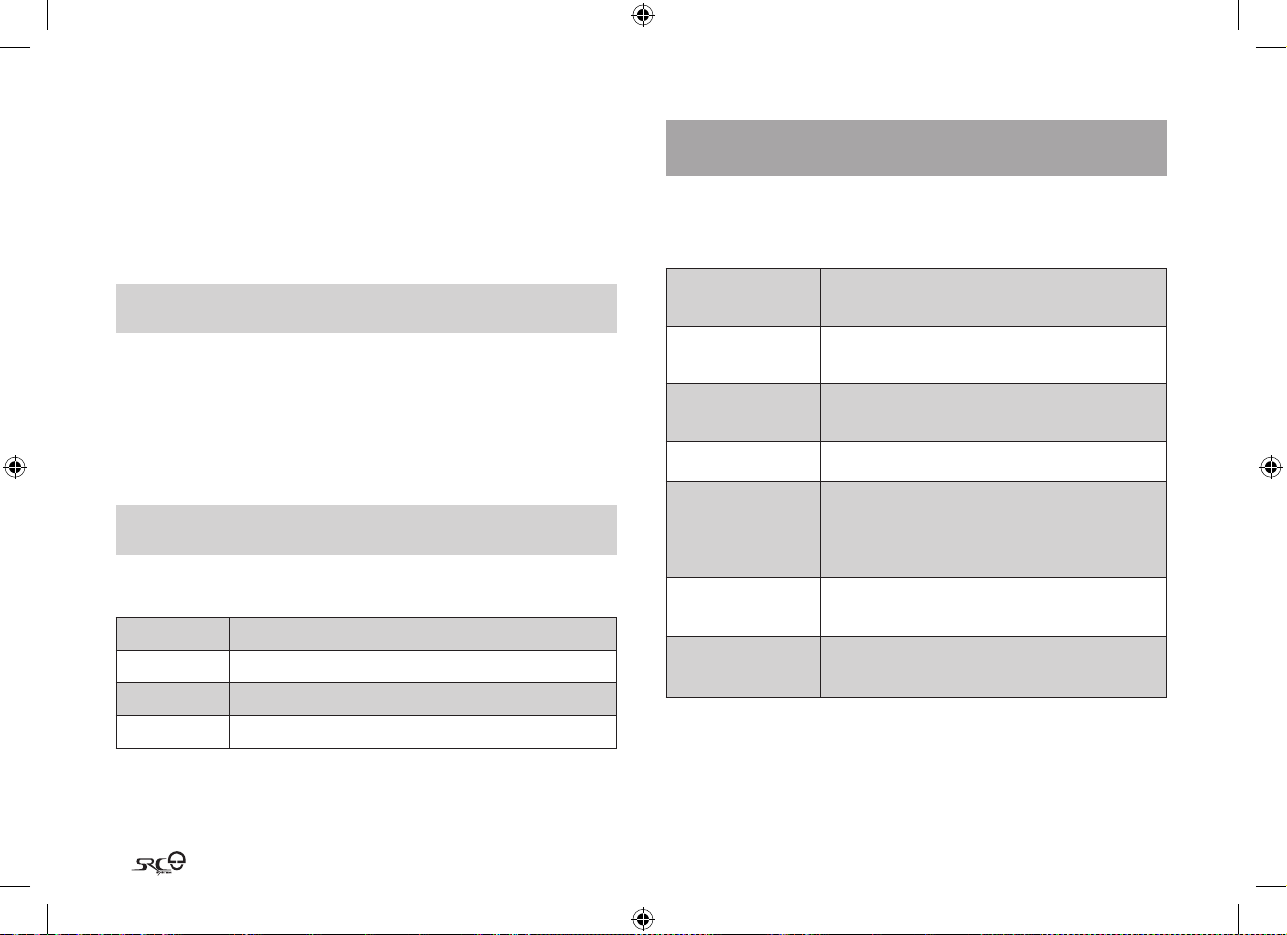
4. BASIC SETUP AND CONFIGURATION
4.1 GENERAL FUNCTIONS
DESIRED RESULT REQUIRED ACTION
Turn on the headset
Turn o the headset
Increase the volume of
the current audio source
Decrease the volume of
the current audio source
Mute Simultaneously tap Volume Up and Volume
Batter y Level Indicator While on standby, press and hold the Volume
4.2 SPOKEN STATUS ANNOUNCEMENTS
Your SRC-System™ headset oers various audio status messages
sent through your speakers. Among others, it will announce your
connection state, e.g. whether you are in mobile phone or on
intercom mode, it will conrm changes of such modes and more. By
default the feature is ON, and can be disabled as outlined below.
The Voice menu can be set at any one of the available language
options.
Entering the Voice Menu: Press and hold the CHANNEL “A” button
and CHANNEL “B” button simultaneously for 3 seconds while the
Press and hold the Mobile Button
four seconds
LED indication: Three blue ashes.
Audio feedback: Ascending tone (low-high).
Press and hold the Mobile Button
three seconds
LED indication: Three red ashes.
Audio feedback: Descending tone (high-low).
Tap the Volume Up Button (sets and saves the
volume per source)
Tap the Volume Down Button (sets and saves
the volume per source)
Down while any audio is on
Up Button for 3 seconds
Blue light = Battery is fully charged
Red/blue light = Batter y is half full
Red light = Battery is almost empty
for at least
for at least
headset is on standby. Now, follow the voice instructions in English
or choose your preferred language.
Disable/Enable status announcements: While on standby, press
and hold the Volume Down Button for 6 seconds.
LED ON: indication: Solid blue + Audio feedback: One short beep
LED OFF: indication: Solid red + Audio feedback: Two short beeps
4.3 AUDIO SOURCES AND PRIORITIES
The dierent audio sources connected to the SRC-System™ are
prioritized as shown below, i.e. the higher priority source will always
override and interrupt the lower one.
For example, incoming mobile phone calls will interrupt ongoing
Intercom calls, while incoming intercom calls will interrupt the audio
from the built-in FM Radio etc.
Higher Priority
Lower Priority
1. Mobile phone audio or GPS instructions
(device specic)
2. Intercom / Click-to-Link
3. A2DP audio source
4. FM Radio (built-in)
5. Auxiliary Line-In Port (for corded connection
e.g. MP3 players).
4.4 SOFTWARE UPGRADE OPTION
In the future you will be able to install Software upgrades and program
patches to keep the software of your SRC-System™ up-to-date. Among
others, future Software upgrades will include
additional status announcements and other valuable functions. To ensure that you don’t miss out on the latest versions,
please register online at www.schuberth.com/src-register/en and
have your serial number ready. To download upgrades, please use the
USB cable included in the SRC-System™’s retail package.
Upgrades are only available for Windows® based computers with
XP™, Vista™ or Windows 7™ operating systems.
Englis h
25
QG SRC 207 - MAN00015.indd 25 2/1/11 11:38 AM
Page 6
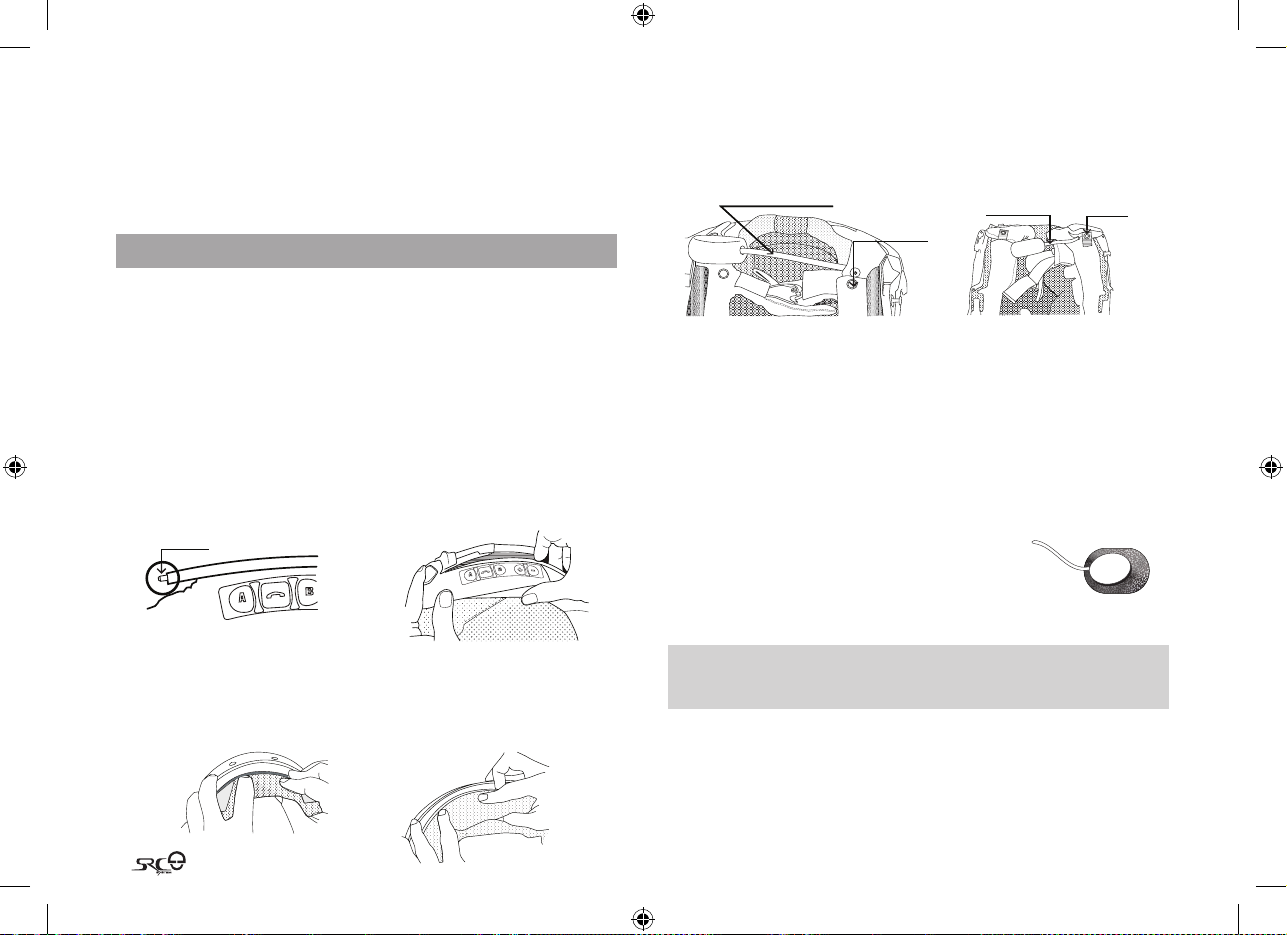
Microphone Boom
Snap
Button
Snap
Button
Microphone
Boom
26
4.5 RESETTING YOUR HEADSET
If your SRC-System™ fails to respond despite repeated attempts,
you can reset your headset by charging it. After approximately 10
seconds, remove the headset from the charger and turn it on again. It
should now respond as expected.
5. GETTING STARTED
5.1 REPLACING THE EXISTING ACOUSTIC COLLAR WITH THE
SRCSYSTEM
First, remove the existing Acoustic Collar from your helmet as follows:
1. Open both snap buttons.
2. Pull out the Acoustic Collar from the rear at its bended center.
3. Release the collar’s pins from their corresponding indentations
inside the helmets rim.
4. Now proceed and replace the existing collar with the new
SRC-System™ Acoustic Collar. As you secure the SRC-System™
into place, be sure to have the speaker cords inside the helmet.
5. Slide and insert the pin located at the edge of the control panel into it’s
corresponding indentation on the helmet and close the snap button.
Pin
6. Insert the other pin on the opposite side of the Acoustic Collar into
place and close the second snap button.
7. Push and insert the Acoustic Collar starting from the center area to
the back of the helmet area. Do the same for the remaining parts
to secure the Acoustic Collar into place.
8. Make sure that both snap buttons remain fastened, and that the
microphone boom is located on the inner side of your helmet
(between the SRC-System™ and the inner padding of the helmet).
C3 helmet C2/Concept helm et
9. Make sure to close the cover of the USB connector, and then tuck
it away into the folds of the Acoustic Collar (into the back of the
Acoustic Collar on the control panel side).
5.2 POSITIONING THE SPEAKERS
For best audio results, make sure that both of your speakers are placed
as closely as possible just opposite your ears.
C2 & Concept helmets:
If you have purchased an SRC-System™ version
that ts C2 and Concept helmets, simply attach
the speakers opposite your ears onto the internal
lining by using the supplied Velcro pads.
C3 helmet:
Note: While you can attach the speakers in the same manner as explained
above (for C2 and concept helmets), we recommend that you use the
following procedure.
The following applies to both sides of the C3 Acoustic Collar:
1. Release the snap buttons on both sides of the Acoustic Collar (the
same buttons that you just fastened earlier).
QG SRC 207 - MAN00015.indd 26 2/1/11 11:38 AM
Page 7

2. Open the two red buttons located at the bottom part of the
interior lining that cover the cheek pads (the
button on the back is held by a black ring).
Lift the lining slightly.
3. Attach the corresponding Velcro pad to the
identically shaped depression on the EPS (expanded polystyrene) and position the speaker
on the Velcro pad.
4. Close the two red buttons. Make sure the red button is still inside
its black holding ring.
5. Now, close the snap buttons of the Acoustic Collar on both sides
and make sure they are securely fastened.
5.3 POSITIONING THE MICROPHONE
To assure smooth closing (ip-down) of the helmet’s chin section, please
remove rst its triangular Anti-Noise Pad and proceed as follows:
1. Bend the exible microphone boom as shown in the image.
2. Press the microphone towards the center of your mouth with its
large surface facing you (not the narrow one).
3. Flip-down and close the chin section of your helmet. You may
need to use both of your hands to close the chin section properly.
4. While the chin section is closed and the visor is open, insert your hand
into the opening of the visor and push the microphone away, towards
the center of the chin section directly opposite of your mouth.
Chin
Section
Visor
5.4 REMOVING THE SRCSYSTEM™ FROM YOUR HELMET
1. Open both snap buttons.
2. Lift and push the Acoustic Collar’s arch from the center.
3. Release the Acoustic Collar’s pins from their corresponding indentations inside the helmet’s rim.
5.5 WEARING AND REMOVING THE HELMET
The electronic components of SRC-System™ are safely embedded
inside the Acoustic Collar. To avoid discomfort while you put on your hel-
met or while removing it, we recommend that you proceed as follows:
1. Expand the helmet opening by rmly holding the chin straps and
pulling them forcefully apart.
2. While pulling the straps apart, slide the
helmet over your head, beginning from
the neck forward.
3. To remove the helmet, proceed along the
same lines by rst pulling the straps apart
and then pushing the entire helmet upwards.
NOTE: Your SRC‑System™ Acoustic Collar is designed for maximum
comfort. However, since it contains an entire electronic kit within, it will
somewhat bulge a bit. Therefore, putting your SRC equipped helmet on or
taking it o may feel dierent than what you are used to with a standard
Acoustic Collar. Remember: The more you pull the helmet straps apart
when putting on your helmet or taking it o, the smoother the process will
be, allowing the stiness of the Acoustic Collar to decrease.
5.6 CLEANING THE ACOUSTIC COLLAR
To clean the Acoustic Collar, rst close tightly the micro USB connec-
tor of the SRC-System™. Use only a slightly damp and lukewarm cloth.
Avoid soaking the Acoustic Collar with water or any other uid. Never
submerge it and refrain from letting water come in contact with the
speakers or the microphone. Allow the unit to dry at room temperature.
Englis h
27
QG SRC 207 - MAN00015.indd 27 2/1/11 11:38 AM
Page 8

6. CONNECTING BLUETOOTH ENABLED MOBILE
Up to 300 m / 1,000 ft.
Bike-to-B ike
Intercom Range*
Mobile pho ne
& A2DP connec tivity
Built-in
FM radio
GPS
MP3
player
PHONES, GPS OR MP3 (A2DP) DEVICES
Multiple Device Connectivity (“MDC”) with Bluetooth®
compatible Devices
Thanks to MDC technology the SRC-System™ oers parallel connec-
tivity as follows*:
➤ Intercom with up to two other SRC-System™ headsets
➤ Bluetooth enabled Mobile Phone / GPS device
➤ A2DP enabled MP3 Player or A2DP Adapter
GPS
Built-in
FM radio
MP3
player
Up to 300 m / 1,000 ft.
Bike-to-B ike
Intercom Range*
NOTE: If you plan to use your mobile phone while using a Bluetooth® GPS
device, then you should pair your mobile phone to the GPS and not to the
SRC‑System™ headset.
* see restrictions under 9.4 b
Mobile pho ne
& A2DP connec tivity
6.1 MOBILE PHONE
To use your Bluetooth® mobile phone with the SRC-System™, you
must rst pair the two devices.
NOTE: If you plan to use a GPS device in parallel with your mobile phone, then you
should pair your mobile phone to the GPS device and not to the SRC‑System™. In
such case, skip this section and proceed directly with section 6.2.
Pairing is a one time process. Once the headset is paired to a
specic mobile phone, they will remain paired and automatically
recognize each other whenever they are within range.
If the connection between the phone and headset is lost, tap the
Mobile Button on your headset to reconnect the devices.
PAIRING THE HEADSET TO A BLUETOOTH MOBILE PHONE:
1. Turn on your phone and make sure its Bluetooth® function is activated.
Turn on your headset by pressing the Mobile Phone Button for at least
three seconds resulting in three blue ashes.
2. With the SRC-System™ turned ON, press and hold the Mobile
Button for at least six seconds until the Red and Blue Lights begin
rapidly alternating.
3. Search for Bluetooth® devices on your phone by following the phone’s
instructions. Consult your phone’s User Manual for more information.
4. After a few seconds the phone will list “SRCS” (incl. its software
version) as a discovered device. Select it and follow your phone’s
instructions to accept the pairing.
5. When prompted, enter 0000 (four zeros) as your PIN or passkey.
6. Your phone will conrm that pairing has succeeded and the headset
will begin ashing slowly in Blue.
NOTE: Not all Bluetooth® mobile phones can broadcast Bluetooth®
Stereo music (A2DP), even if the phone has an MP3 player application.
Consult your mobile phone’s User Manual for more information.
With some mobile phones, you may need to tap the Mobile Button to connect the headset to the phone after pairing is complete. The SRC‑System™
will automatically connect to the last phone connected to the headset.
QG SRC 207 - MAN00015.indd 28 2/1/11 11:38 AM
28
Page 9

NOTE: If the pairing process is not completed within two minutes the
headset will return to Standby mode.
6.2 GPS DEVICE
To use a Bluetooth® enabled GPS device with the SRC-System™, you
must rst pair the two devices. This will allow your GPS to transmit
navigation instructions and audio to the speakers of your headset.
NOTE: Not all Bluetooth® enabled GPS devices allow connections to
Bluetooth® headsets. Among others, any such GPS unit must be compatible
with the Bluetooth® “Handsfree” gateway protocol. Please consult your GPS
device’s User Manual for more information.
PAIRING THE HEADSET TO A GPS DEVICE:
1. Turn on your GPS and turn on your headset.
2. With the SRC-System™ turned ON, press and hold the Volume Up
Button for at least six seconds until the Red and Blue Lights begin
ashing simultaneously.
3. Search for Bluetooth® headsets on your GPS device by following the
device’s instructions. Consult your GPS device’s User Manual for
more information.
After a few seconds the GPS will list “SRCS” (incl. its software version)
as a discovered device. Select it and follow your GPS’s instructions to
accept the pairing.
4. If your GPS device prompts for a PIN or Passkey enter 0000 (four
zeros).
5. Your GPS device will conrm that pairing has succeeded. Your
SRC-System™ will begin ashing slowly in Blue.
6. If you wish to use a Bluetooth® mobile phone to make and receive calls
through the headset, you should pair your mobile phone to your GPS
device by following the instructions in your GPS manual.
NOTE: If the pairing process is not completed within two minutes the
headset will return to Standby mode.
NOTE: The priority schedule of your SRC‑System™ has been set in a way to
avoid incoming intercom calls to interrupt GPS instructions in progress. In such
case the intercom caller will hear a busy signal and you will hear two beeps, indicating that an intercom caller is trying to page you. (see section 4.3 for details
on audio priorities of paired devices).
6.3 MP3 MUSIC WIRELESS OPTION A2DP
Your headset is designed to receive wireless stereo music from A2DP
sources and mobile phones that support the Bluetooth® A2DP and
AVRCP proles (mostly 3rd generation devices).
Using a Bluetooth® device that supports the AVRCP prole will allow you
to operate all major A2DP source functions directly from your headset.
NOTE: The SRC‑System™ can also receive audio via the enclosed cable
from non-Bluetooth® MP3 Players or audio sources as described in
section 7.2
While listening to music from an A2DP source, you will not miss any
mobile or intercom calls, as the headset will automatically stop the
music giving preference to the incoming call. However, after you terminate your call, some MP3 sources may not automatically continue
but require manual re-activation.
SETTING UP YOUR MP3 PLAYER FOR BLUETOOTH STEREO A2DP
TRANSMISSION
To use a Bluetooth® Stereo (A2DP) enabled MP3 Player or Adapter to
listen to stereo music, you must rst pair the device to your headset.
NOTE: When pairing two Bluetooth® audio devices to the SRC-System™,
please follow instructions below. Bluetooth® Stereo device pairing will
vary depending on the combination of Bluetooth® devices you are using.
PAIRING THE HEADSET TO AN MP3 PLAYER OR ADAPTER
NOTE: If your A2D P source is integrated inside your M obile Phone, then
you should pair it with your headset as described in section 6.1 above
Englis h
29
QG SRC 207 - MAN00015.indd 29 2/1/11 11:38 AM
Page 10
1. Turn on your MP3 Player or Adapter, and make sure that its Bluetooth®
function is activated.
2. With the SRC-System™ headset turned ON, press and hold the
Mobile Button for at least six seconds until the Red and Blue Lights
begin alternating rapidly:
3. Search for Bluetooth® headsets on your MP3 Player by following the
device’s instructions.
NOTE: For use of a Bluetooth® adapter, follow the device’s instructions.
4. After a few seconds the MP3 Player will list “SRCS” (incl. its software
version) as a discovered device. Select it and follow your MP3
Player’s instructions to accept the pairing.
5. If your MP3 player prompts for a PIN or Passkey enter 0000 (four zeros).
6. Once pairing is complete, your MP3 Player or Adapter may conrm
that pairing has succeeded, and the headset will begin ashing
slowly in Blue.
NOTE: If the Pairing process is not completed within two minutes the
headset will return to Standby mode.
7. BUILT-IN FM RADIO AND EXTERNAL MP3
PLAYER (CABLE OPTION)
7.1 FM RADIO
The SRC-System™ is equipped with an FM stereo radio receiver and
RDS (Radio Data System) technology.
Turn on the radio While in Standby mode, press and hold the CHAN-
Turn o the radio While listening to the Radio, press and hold the
Switch to next
preset station
Start Intercom call While listening to the Radio, start talking loudly
Initiate Voice Dial
from your Mobile
Phone
NEL “B” button for 3 seconds
CHANNEL “B” button for 3 seconds
While listening to the Radio, tap the CHANNEL “B”
button to cycle through the 6 Preset FM Stations
While listening to the Radio, tap the Mobile Button
and pronounce loudly the name of the person you
wish to call. This feature is supported only by mobile
phones that include the Voice Dial feature
Operating your A2DP source from your headset
Play press and hold the MP3 Button for 3 seconds
Pause / Stop* press and hold the MP3 Button for 3 seconds
Forward press and hold the Volume Up Button for 3 seconds
Rewind** press and hold the Volume Down Button for 3 seconds
* Varies depending on your mobile phone
** With some phones you may need to repeat this action once more
30
QG SRC 207 - MAN00015.indd 30 2/1/11 11:38 AM
Initiate Redial from
your Mobile Phone
RDS ON/OFF
(Default: OFF)
While listening to the Radio, tap the Mobile Button
twice
While the Radio is on, press and hold Volume Up and
Volume Down Buttons simultaneously for 3 seconds
Thanks to the RDS feature, your headset will automatically select the
strongest signal available for the FM station you wish to listen to, no
matter where you are riding. This allows you to leave your hands on
the handlebars at all times with no need to adjust the radio station
frequency while you are in motion.
Page 11

RDS ON/OFF (press simultaneously 3 seconds while Radio is on)
• FM Radio ON / OFF (press 3 sec.)
• Switch among pre-saved stations (tap briey)
Searching for and setting new stations
1. While the Radio is on, press and hold the Volume Up or Volume
Down Button for three seconds or until you hear the next station
on your headset.
• Pressing Volume Up will search upwards (higher frequency).
• Pressing Volume Down will search downwards (lower
frequency).
2. Once a station is found, searching stops and you can hear the station.
3. To continue searching, press the Volume Up or Volume Down Button again for three seconds.
4. To save this station, refer to the following section. You may still
continue to listen to the current unsaved station.
Saving a selected station
1. Select the station number from one to six that you wish to set by
tapping the CHANNEL “B” button until the desired station is found.
2. Search for a new station as described in the section above.
3. Tap the CHANNEL “B” button within 20 seconds of nding the station to save the current station.
4. To save another station, tap the CHANNEL “B” button again to
reach next station number.
5. If you don’t save the station, the Radio will exit search mode without saving the current station. You can still continue to listen to the
current unsaved station. Tapping the CHANNEL “B” Button in this
case will move to the next saved station.
You can store up to six stations.
7.2 CABLE CONNECTING YOUR MP3 PLAYER OR OTHER
EXTERNAL AUDIO SOURCES
Using the auxiliary line-in port for cable connectivity
Your headset allows you to connect non-Bluetooth® audio sources,
such as MP3 players to the headset by using the enclosed cable.
1. Make sure the headset is on Standby mode, ashing slowly in Blue.
2. Connect the MP3 cable to your MP3 player/audio source’s
headset jack and insert the other
end of the cable into the micro USB
Connector.
3. Operate the MP3 Player device by using its own buttons as usual
(FF / REW / PLAY / PAUSE).
Volume can be adjusted through the MP3 Player or the Volume
Buttons of the headset.
Any other audio connection will automatically mute the MP3 Player. The
audio signal will return only when headset is once again in Standby
mode.
NOTE: While listening to your MP3 player, the VOX feature is disabled
Englis h
31
QG SRC 207 - MAN00015.indd 31 2/1/11 11:38 AM
Page 12
8. USING THE MOBILE PHONE
INITIATING AND RECEIVING MOBILE PHONE CALLS
BASIC FUNCTIONS
Answer a call Tap the Mobile Button or speak loudly any word of
Reject a call Remain silent for 15 seconds, or press and hold the
Terminate a call Tap the Mobile Button during a call, or let the other
Voice Dial During Standby, tap the Mobile Button and pro-
Redial During Standby, tap the Mobile Button twice
ADVANCED FUNCTIONS FOR 3WAY COMMUNICATION:
Add/Remove
CHANNEL “A”
headset to/from
phone call
Add/Remove
CHANNEL “B”
headset to/from
phone call
When the headset is on an active phone call, any Intercom call
request will be automatically rejected.
Once the phone call is terminated, you can initiate and accept Intercom calls.
your choice
Mobile Button for 3 seconds during an incoming call
party terminate the call
nounce loudly the name of the person you wish to
call. This feature is supported only by mobile phones
that include the Voice Dial feature
Tap the CHANNEL “A” button while on a phone call
Tap the CHANNEL “B” button while on a phone
call
STATUS LIGHTS
LED Indication Status
None Headset is o
1 blue ash every 3 seconds Standby – No call is in progress
2 blue ashes every 3 seconds Audio active
1 red ash every 3 seconds Standby - Battery is low
2 red ashes every 3 seconds Low battery while audio active
Solid red Charging
9. USING THE INTERCOM
9.1 INTRODUCTION
Your SRC-System™ allows you to connect to other bikers using
SRC headsets within a range of up to 300 meters / 1,000 ft. (subject
to terrain and other conditions). To set up one or two Intercom
Bluetooth® connections, you must rst pair your SRC-System™
headset with the other headsets.
Pairing is a one time process. Once completed, the headsets will
remain paired and automatically recognize each other whenever
they are within range.
Your headset has two Intercom channels available for headset-to-head-
set connections. Therefore, your SRC-System™ can communicate simul-
taneously in conference mode with up to two other SRC headsets.
9.2 INTERCOM COMPATIBILITY
You can use your SRC-System™ headset to conduct Intercom
communications with any other SRC-System™ headset and with
the Cardo scala rider headsets. For further details please visit
www.cardosystems.com/SRC.
32
QG SRC 207 - MAN00015.indd 32 2/1/11 11:38 AM
Page 13
9.3 BEFORE STARTING THE INTERCOM
Your SRC-System™ headset has two buttons designated for quick con-
nection to two other headsets. These other headsets are referred to as
CHANNEL “A” and CHANNEL “B”.
Channel “A“ Button
Channel “B“ Button
Before you can begin using the intercom for Bike-to-Bike communication with one or two other headsets, all units must rst be paired.
9.4 USING THE SRC-SYSTEM™ FOR INTERCOM WITH OTHER
SRC-SYSTEM™ HEADSETS
INTERCOM
CHANNEL
CHANNEL “A” CHANNEL “A” BUTTON Rapid RED ashing
CHANNEL “B” CHANNEL “B” BUTTON Rapid BLUE ashing
PAIRING / CONNECTION
BUTTON
PAIRING MODE LED
INDICATORS
9.4a. TWO-WAY INTERCOM PAIRING OPTIONS BETWEEN TWO
PARTICIPANTS
Using two SRC-System™ headsets
1.While both headsets are turned OFF, turn them ON by pressing and
holding the Mobile Buttons until the Blue Lights ash three times.
2. Make sure that both headsets are now ashing slowly in Blue.
3. Choose an available CHANNEL you wish to use to pair the headset
(CHANNEL “A” or CHANNEL “B”).
NOTE: Selecting a CHANNEL that is already in use will override the paired
headset on that CHANNEL with the newly paired headset.
4. On the SRC-System™ headset, press and hold the assigned
CHANNEL BUTTON (“A” or “B”) for at least six seconds until the
headset’s BLUE or RED Light begins ashing rapidly, indicating it is
in Intercom Pairing mode. (See Intercom Channel Table for Pairing
LED indication for each CHANNEL).
5. Repeat Step 3-4 for the second SRC-System™.
6. Within a few seconds, both headsets will show a solid light for two
seconds, indicating that the two headsets are now paired, connected and ready for use.
NOTE: If the Pairing process is not completed within two minutes the
headset will return to Standby mode.
Initiate Intercom calls
There are two ways to start an Intercom call with your paired headset
while the headset is in Standby mode:
VOICE CONNECT:
Start talking loudly
Once you start talking loudly, an Intercom call will
be established with the other paired headset.
The Intercom call will stay on until all participants
remain silent for 30 seconds.
CHANNEL BUTTON
CONNECT:
Tap the chosen
CHANNEL Button once
to add or remove the
other headset from an
Intercom call.
9.4b. THREE-WAY INTERCOM
The SRC-System™ oers three-way intercom conference connectiv-
ity as follows:
Englis h
33
QG SRC 207 - MAN00015.indd 33 2/1/11 11:38 AM
Page 14

Use Channel “B ”Use Channel “A”
First SRC-System™
Rider “A”
Second SRC-System™
Rider “B”
Third SRC-System™
Rider “C”
In this conguration Rider “B” is paired to Rider “A” and to Rider “C”.
IMPORTANT: Since Rider “B” uses two Bluetooth® connections during the
conference mode, Rider “B” will be disconnected from the mobile phone or GPS
device until the conference mode is terminated. Upon termination, Rider “B” will
automatically re-connect to his mobile phone or GPS. Rider “A” and “C” remain
connected to their mobile phones or GPS devices during the 3-way intercom call.
Set-up and conguration of three-way intercom connectivity
INTERCOM
CHANNEL
CHANNEL “A” CHANNEL “A” BUTTON Rapid RED ashing
CHANNEL “B” CHANNEL “B” BUTTON Rapid BLUE ashing
PAIRING / CONNEC-
TION BUTTON
PAIRING MODE LED
INDICATORS
PAIRING OPTIONS BETWEEN THREE PARTICIPANTS
Pairing three SRC-System™ headsets is achieved by simply repeating
the procedure in the above section 9.4a with a third SRC-System™
headset (in a dierent CHANNEL).
1. Pair your SRC-System™ with the second SRC-System™ as
described in section 9.4a (Using CHANNEL “A”).
2. Pair your SRC-System™ with the third SRC-System™ as
described in section 9.4a (Using CHANNEL “B”)
Initiate Intercom calls
There are two ways to start an Intercom call with your paired headsets
while the headset is in Standby mode:
VOICE CONNECT:
Start talking loudly
Once you start talking loudly, an
Intercom call will be established
with both paired headsets,
CHANNEL “A” and CHANNEL “B”
(if both are available).
CHANNEL BUTTON CONNECT:
Single tap the CHANNEL “A” Button
to add or remove the CHANNEL “A”
headset from an Intercom call.
Single tap the CHANNEL “B” Button
to add or remove the CHANNEL “B”
headset from an intercom call.
9.5 RECEIVING INTERCOM CALLS
Once another paired headset tries calling you via intercom, the call
will begin almost instantly.
NOTE: The headsets preset priority modes have been set in a way to avoid incoming intercom calls from interrupting mobile phone calls and GPS instructions in progress. In such case the intercom caller will hear a busy signal and
you will hear two beeps, indicating that an intercom caller is trying to page
you. (see section 4.3 for details on audio priorities of paired devices).
9.6 INITIATE INTERCOM CALLS
There are two ways to start an Intercom call with headsets that are paired to
your SRC-System™ (make sure you are in Standby mode):
VOICE CONNECT:
Preferred for relatively brief conversations
as it takes the channel into standby mode
after 30 seconds of silence
Start talking loudly
Once you start talking loudly, an
Intercom call will be established with
both paired headsets, CHANNEL “A” and
CHANNEL “B” (if both are available).
The Intercom call will stay on until all
participants remain silent for 30 seconds.
(Applicable for 2-way communication)
CHANNEL BUTTON
CONNECT:
Preferred for extended conversations as it leaves the channel
open and active
Single tap the CHANNEL “A”
Button to add or remove the
CHANNEL “A” headset from an
Intercom call.
Single tap the CHANNEL “B”
Button to add or remove the
CHANNEL “B” headset from an
intercom call.
34
QG SRC 207 - MAN00015.indd 34 2/1/11 11:38 AM
Page 15

NOTE: While the Intercom is on, the Redial and Voice Dial functions will be
disabled.
9.7 VOICE CONNECT FEATURE VOX
The SRC-System™ also oers VOX technology for safe and hands-
free operation of some key functions.
For incoming calls, just pronounce loudly any word (e.g. “hello”).
To reject an incoming call, you need only to remain silent for about
15 seconds.
To reject an intercom call remain silent for 30 seconds.
ENABLE/DISABLE VOX: While on standby press and hold the Vol-
ume Up and Volume Down Buttons simultaneously for three seconds
until you hear a beep. The default status is Voice Connect enabled.
NOTE: The Enable/Disable Voice Connect feature aects only the Intercom
functionalit y.
9.8 RESET PAIRING RESTORING THE ORIGINAL DEFAULT
CONFIGURATION
This section is only relevant once you have completed a pairing process
You can delete all of your paired devices at any time as follows:
1. With the SRC-System™ headset turned ON, press and hold the
Mobile Button for at least six seconds until the Red and Blue Lights
begin rapidly alternating.
2. Press and hold the Volume Up Button for three seconds.
3. The Red and Blue Lights will ash ve times simultaneously and
then the headset will turn o, conrming that Reset was successfully completed.
9.9 NOTEWORTHY ISSUES
a. Busy Status (When using a SRC-System™ headset)
When attempting an Intercom call with a headset that is already on
a Phone/ GPS/ Intercom call, you will hear two beeps indicating the
other headset is busy.
b. Automatic Reconnection of the Intercom
If the SRC-System™ and another paired headset go out of range and
disconnect from each other, the SRC-System™ will immediately try
to reconnect to the other headset.
You can manually reconnect the intercom call while the headset is
in Standby mode by pressing the CHANNEL “A” or the CHANNEL “B”
Button to connect to the respective lost connection.
c. Conference Mode Limitations
Whenever you enter the Intercom Conference mode among three
participants (including yourself), the participants who maintain
simultaneously two active connections will not be able to receive
mobile phone calls or GPS messages as long as the conference call is
in progress (see details in sections 9.4 b).
9.10 TROUBLESHOOTING THE INTERCOM
First, make sure your microphone is located properly in front of the
center of your mouth.
The SRC-System™ is designed for use in loud environments.
Therefore, you should test the Intercom functionality only in a noisy
environment, such as next to an idling motorcycle and not indoors.
Please also verify that the headsets were paired together properly by
following the instructions in the relevant Setup sections.
Englis h
35
QG SRC 207 - MAN00015.indd 35 2/1/11 11:38 AM
Page 16

10. CLICK-TO-LINK
Click-to-Link is the spontaneous “social” nature of your SRC-System™.
This unique feature will enable you to instantly initiate one-to-one
intercom calls with other SRC-System™ users in the near vicinity without
going through a pairing process in advance. Think of it as a private biketo-bike channel that you can set up on-the-y with other SRC-System™
users that you spot next to a trac light or along the road.
The Click-to-Link feature can of course be disabled at any time, blocking
any attempt by other users to establish a spontaneous link.
USING CLICKTOLINK
Disable/Enable Click-to-Link: The feature can be turned on or o
via the Settings Customization Menu (see Section 4.2). By default,
this feature is DISABLED.
AUDIO SOURCES AND PRIORITIES
The dierent audio sources connected to the SRC-System™ are
prioritized as shown below, i.e. the higher priority source will always
override and interrupt the lower one.
For example, incoming mobile phone calls and GPS navigation instructions will interrupt ongoing Click-to-Link calls, while incoming Click-to-Link
calls will interrupt the audio from the built-in FM Radio etc.
Click-to-Link established calls and Intercom calls have the same priority:
If one is in use, the other is unable to interrupt. Therefore, a Click-to-Link
request cannot interrupt an Intercom call in progress, and vice-versa.
Higher Priority
Lower Priority
1. Mobile Phone audio or GPS instructions (device
specic)
2. Intercom / Click-to-Link (same priority level)
3. A2DP audio source
4. FM Radio (built-in)
5. Auxiliary Line-In Port (for corded connection
e.g. MP3 players).
IC (Intercom) Request Tone: If you are on a Click-to-Link call and
Rider A or Rider B try to connect to you for an IC Call, you will hear an
IC Request Tone while the other party will hear a rejection beep.
If your Click-to-Link connection is dropped for any reason and other
Click-to-Link-enabled units are nearby, new Click-to-Link connections
may link up with users other than your initial connection.
General Functions
Categor y Desired result Required Action
Making
Click-to-Link
calls
Receiving
Click-to-Link
calls
During
Click-to-Link
calls
* The SRC‑System™ searches for another Click-to-Link enabled unit for up to
10 seconds, while beeping and ashing red.
NOTE: Click-to-Link connections will not replace or change your current Rider
A and Rider B intercom pairings. Click-to-Link uses a separate temporary
channel to connect to a Click-to-Link conversation partner.
Start a Click-to-Link call
request*
Cancel a Click-to -Link call Tap Channel “A” Button
Accept a Click-to-Link call When you hear the ringtone,
Reject a Click-to-Link call When hearing the ring tone,
End a Click-to-Link call Tap Channel “A” Button
Double tap Channel “A” Button
tap Channel “A” Button or speak
loudly to answer by VOX
remain silent for 10 seconds or
until the ring tone subsides
36
QG SRC 207 - MAN00015.indd 36 2/1/11 11:38 AM
Page 17

11. SUPPORT
12. NOTICES
For additional information please visit our website at
www.schuberth.com
For technical support please contact us at:
Kundenservice@schuberth.com
Phone: +49-391-8106-555
For the latest information on Software upgrades please visit our
website at www.schuberth.com/en/products/service/
src-systemtm.html and register on-line.
IMPORTANT:
OPENING ACOUSTIC COLLAR ZIPPER VOIDS WARRANTY!
The electronic components inside the Acoustic Collar of the
SRC-System™ are closed by a sealed zipper. Please do not tamper
with or open the zipper as this will void your warranty.
Federal Communications Commission (FCC) / Industry Canada (IC)
Statement
15.21
You are cautioned that changes or modications not expressly approved by
the part responsible for compliance could void the user’s authority to operate the equipment.
15.105(b)
This equipment has been tested and found to comply with the limits for a
Class B digital device, pursuant to part 15 of the FCC / IC rules. These limits
are designed to provide reasonable protection against harmful interference
in a residential installation. This equipment generates, uses and can radiate
radio frequency energy and, if not installed and used in accordance with
the instructions, may cause harmful interference to radio communications.
However, there is no guarantee that interference will not occur in a particular
installation. If this equipment does cause harmful interference to radio or
television reception, which can be determined by turning the equipment o
and on, the user is encouraged to try to correct the interference by one or
more of the following measures:
• Reorient or relocate the receiving antenna.
• Increase the separation between the equipment and receiver.
• Connect the equipment into an outlet on a circuit dierent from that to
which the receiver is connected.
• Consult the dealer or an experienced radio/TV technician for help.
Operation is subject to the following two conditions:
1) this device may not cause interference and
2) this device must accept any interference, including interference that may
cause undesired operation of the device.
Englis h
37
QG SRC 207 - MAN00015.indd 37 2/1/11 11:38 AM
Page 18

FCC/IC RF Radiation Exposure Statement:
This equipment complies with FCC/IC radiation exposure limits set forth for an
uncontrolled environment. End users must follow the specic operating instructions for satisfying RF exposure compliance. The antenna used for this transmitter
must not transmit simultaneously with any other antenna or transmitter, except
in accordance with FCC/IC multi-transmitter product procedures.
European CE Notice
The SRC-System™ headset (the “Product”) is in conformity with the following
essential requirements of Council Directive 1999/5/EC (referred to as R&TTE
Directive): Articles 3.1a, 3.1.b and 3.2. The Product is manufactured in accordance with Annex II of the above directive.
Declaration of Conformity (DOC)
The SRC-System™ headset is compliant with and adopts the Bluetooth® Speci-
cation 2.1 and has successfully passed all interoperability tests that are specied in the Bluetooth® specication. However, interoperability between the
device and other Bluetooth®-enabled products is not guaranteed.
WAIVE R AND GEN ERAL RELEASE
(not f or countr ies of the European U nion)
By using the SRC-System™ you will waive substantial legal right s including the
right to sue.
Please read the following carefully before using the device. If you do not accept
all terms of this agreement, you should immediately return the product for a
full refund. By using the headset you agree to be bound to this agreement and
forfeit the right to sue.
Using a communication device while riding a motorcycle, scooter, moped, ATV, quadbike or any other vehicle or equipment, whether on land, water or air (jointly referred
to as “Vehicle”) requires your complete and undivided attention. Schuberth GmbH.
and Cardo Systems, Inc., including their respective Ocers, Directors, Aliates, Parent
Company, Representatives, Agents, Contractors, Sponsors, Employees, Suppliers and
Resellers (jointly referred to as the “Company”) strongly advises you to take all necessary
precautions and remain alert to the trac, weather and road conditions if you choose
to use the SRC System (the “Device”) , including all derivative models irrespective of its
38
commercial name or branding, and stop your Vehicle on the roadside prior to initiating
or receiving calls. Any publications, advertisements, announcements or similar notes
that refer to using the Device while riding a Vehicle are solely intended to address its
technical capabilities and should not be misconstrued as if encouraging users to operate the Device while actively involved in trac.
By way of purchasing this Device and not returning it for a full refund (see below),
you are irrevocably releasing, indemnifying from any liability, loss, claim and expense
(including attorneys fees) and holding the Company harmless for any bodily injuries,
harm or death as well as losses or damages in goods, to any Vehicles including your
own, or to any property or asset that belong to you or to third parties, any of which may
result from using the Device under any circumstances or conditions and irrespective of
jurisdiction. the Company will not be responsible for any physical damages, irrespective
of reasons, conditions or circumstances, including malfunctioning of the Device, and
all risks associated with operating it rest solely and entirely with the user of this Device,
irrespective of whether the Device is used by the original purchaser or any third party.
The Company hereby noties you that using this Device may also be in contravention
to local, federal, state or national laws or regulations, and that any use of the Device is
entirely at your sole risk and responsibility.
1. You, your heirs, legal representatives, successors or assigns, hereby voluntarily and
forever release, discharge, indemnif y and hold harmless the Company from any and
all litigation, claims, debts, demands, actions and liability which may arise, directly
or indirectly, from using the Device for any distress, pain, suering, discomfort, loss,
injury, death, damages to or in respect to any person or property however caused,
WHETHER ARISING FROM THE NEGLIGENCE OR OTHERWISE, and which may hereafter
accrue to you on some future date as a result of said use, to the fullest extent permit-
ted by law.
2. You fully understand and assume the risks in using the Device, including risk of negligent acts or omissions by others.
3. You conrm that you are physically capable to use the Device and that you have no
medical conditions or needs that may infringe upon your abilities to do so in a safe
manner. You conrm that you are at least eighteen (18) years of age and that you
have been advised of the risks associated with the use of the Device. You further
conrm that you will not consume any alcohol that may aect your alertness or any
mind-altering substance, and will not carry, use or consume these substances before
or during the use of the Device.
4. You fully acknowledge our warnings and understand that: (a) risks and dangers exist in using the Device while in trac, including but not limited to injury or illness,
strains, fractures, partial and/or total paralysis, death or other ailments that could
QG SRC 207 - MAN00015.indd 38 2/1/11 11:38 AM
Page 19

cause serious disability; (b) these risks and dangers may be caused by the negligence
of the manufacturers or its agents or any third party involved in designing or manu-
facturing the Device; (c) these risks and dangers may arise from foreseeable or un-
foreseeable causes. You hereby assume all risks and dangers and all responsibility for
any losses and/ or damages, whether caused in whole or in part by the negligence or
other conduct of others, including the Company.
5. You conrm that you have read this release of liability and fully understand its terms
and that you have given up substantial rights by not returning the Device for a full
refund (see refund option below).
Disclaimer of Warranty
THE COMPANY DISCLAIMS ALL EXPRESS AND IMPLIED WARRANTIES WITH REGARD TO
THE ENCLOSED DEVICE, INCLUDING WITHOUT LIMITATION ANY IMPLIED WARRANTIES OF
MERCHANTABILITY, FITNESS FOR A PARTICULAR PURPOSE, AND NON-INFRINGEMENT. THE
DEVICE AND ITS ACCESSORIES ARE PROVIDED “AS IS” AND “AS AVAILABLE” WITHOUT WARRANTY OF ANY KIND BEYOND THOSE ASSUMED IN THE ENCLOSED MANUAL.
Limitation of Liability
IN NO EVENT SHALL THE COMPANY BE LIABLE FOR ANY SPECIAL, INDIRECT, PUNITIVE,
INCIDENTAL, EXEMPLARY OR CONSEQUENTIAL DAMAGES, OR ANY DAMAGES WHATSOEVER RESULTING FROM THE USE OF THE DEVICE, WHETHER BASED ON BREACH OF
CONTRACT, TORT (INCLUDING NEGLIGENCE), PRODUCT LIABILITY OR OTHERWISE, EVEN
IF ADVISED OF THE POSSIBILITY OF SUCH DAMAGES.
YOU ACKNOWLEDGE AND AGREE THAT THE LIMITATIONS SET FORTH ABOVE ARE
FUNDAMENTAL ELEMENTS OF THIS AGREEMENT AND THE DEVICE WOULD NOT BE
PROVIDED TO YOU ABSENT SUCH LIMITATIONS. SOME STATE STATUTES MIGHT APPLY
REGARDING LIMITATION OF LIABILIT Y.
RETURN FOR FULL REFUND
IF YOU ARE UNWILLING TO ACCEPT AND AGREE TO THE ABOVE CONDITIONS,
YOU MAY RETURN THIS DEVICE TO TH E RESELLER OR TO THE COMPANY FOR A
FULL REFUND, PROVIDED THAT YOU DO SO NO LATER THAN 7 BUSINESS DAYS
FOLLOWING THE PURCHASE OF THE DEVICE (proof of purchase required) AND
SUBJECT TO THE WRAPPING BEING INTACT. WHEN D OING SO, PLEASE REFER
TO THIS SECTION. BY NOT RETURNING THE DEVICE FOR REFUND WITHIN THE
PERIOD PROVIDED, YOU ARE EXPLICITLY IN AGREEMENT WITH THE ABOV E, AND
RENOUN CE ALL RIGHTS TO FUTURE CLAIMS AND DEMANDS AGAINST THE COMPANY AS DEFINED ABOVE.
www.schuberth.com
Englis h
39
QG SRC 207 - MAN00015.indd 39 2/1/11 11:38 AM
 Loading...