


SCALA RIDER G4
Table of contents
 Loading...
G4
™
PowerSet
User Guide

TABLE OF CONTENTS
1. INTRODUCTION . . . . . . . . . . . . . . . . . . . . . . . . . . . . . . . . . . . . . . . . . . . . . . . . . . . . . . . . . 3
2. CONTENTS OF THE RETAIL BOX . . . . . . . . . . . . . . . . . . . . . . . . . . . . . . . . . . . . . . . . . 4
3. CHARGING THE HEADSET . . . . . . . . . . . . . . . . . . . . . . . . . . . . . . . . . . . . . . . . . . . . . . . 4
4. BASIC SETUP AND CONFIGURATION . . . . . . . . . . . . . . . . . . . . . . . . . . . . . . . . . . . . 5
4.1 GENERAL FUNCTIONS . . . . . . . . . . . . . . . . . . . . . . . . . . . . . . . . . . . . . . . . . . . . . 5
4.2 SPOKEN STATUS ANNOUNCEMENTS . . . . . . . . . . . . . . . . . . . . . . . . . . . . . . 5
4.3 AUDIO SOURCES AND PRIORITIES . . . . . . . . . . . . . . . . . . . . . . . . . . . . . . . . . 5
4.4 FIRMWARE UPGRADE OPTION . . . . . . . . . . . . . . . . . . . . . . . . . . . . . . . . . . . . 6
4.5 RESETTING YOUR HEADSET . . . . . . . . . . . . . . . . . . . . . . . . . . . . . . . . . . . . . . . 6
5. GET TING STARTED . . . . . . . . . . . . . . . . . . . . . . . . . . . . . . . . . . . . . . . . . . . . . . . . . . . . . . . 6
5.1 MOUNTING THE HEADSET ON THE HELMET . . . . . . . . . . . . . . . . . . . . . . 6
5.2 ATTACHING THE CORDED MICROPHONE CLAMP ON A
FULL-FACED HELMET . . . . . . . . . . . . . . . . . . . . . . . . . . . . . . . . . . . . . . . . . . . . . 7
5.3 POSITIONING THE MICROPHONE AND SPEAKERS . . . . . . . . . . . . . . . . . 7
5.4 ATTACHING AND REMOVING THE HEADSET FROM THE
HELMET CLAMP . . . . . . . . . . . . . . . . . . . . . . . . . . . . . . . . . . . . . . . . . . . . . . . . . . 8
5.5 USING THE FLIP-UP ANTENNA . . . . . . . . . . . . . . . . . . . . . . . . . . . . . . . . . . . . 8
6. CONNECTING BLUETOOTH ENABLED MOBILE PHONES, GPS OR
MP3 (A2DP) DEVICES . . . . . . . . . . . . . . . . . . . . . . . . . . . . . . . . . . . . . . . . . . . . . . . . . . . . 8
6.1 MOBILE PHONE . . . . . . . . . . . . . . . . . . . . . . . . . . . . . . . . . . . . . . . . . . . . . . . . . 9
6.2 GPS DEVICE . . . . . . . . . . . . . . . . . . . . . . . . . . . . . . . . . . . . . . . . . . . . . . . . . . . . . 9
6.3 MP3 MUSIC (wireless option – A2DP) . . . . . . . . . . . . . . . . . . . . . . . . . . . . 10
7. THE SOUND OF MUSIC: Built-In FM Radio and external MP3 Player
(cable option) . . . . . . . . . . . . . . . . . . . . . . . . . . . . . . . . . . . . . . . . . . . . . . . . . . . . . . . . . . . 11
7.1 FM RADIO . . . . . . . . . . . . . . . . . . . . . . . . . . . . . . . . . . . . . . . . . . . . . . . . . . . . . . . . . 11
7.2 CABLE CONNECTING YOUR MP3 PLAYER OR OTHER
EXTERNAL AUDIO SOURCES . . . . . . . . . . . . . . . . . . . . . . . . . . . . . . . . . . . . . 12
8. USING THE MOBILE PHONE . . . . . . . . . . . . . . . . . . . . . . . . . . . . . . . . . . . . . . . . . . . . . . 12
9. USING THE INTERCOM . . . . . . . . . . . . . . . . . . . . . . . . . . . . . . . . . . . . . . . . . . . . . . . . . . . 13
9.1 INTRODUCTION . . . . . . . . . . . . . . . . . . . . . . . . . . . . . . . . . . . . . . . . . . . . . . . . . . 13
9.2 BACKWARDS COMPATIBILITY . . . . . . . . . . . . . . . . . . . . . . . . . . . . . . . . . . . . . . 13
9.3 BEFORE STARTING THE INTERCOM . . . . . . . . . . . . . . . . . . . . . . . . . . . . . . . . 13
9.4 INITIATE INTERCOM CALLS . . . . . . . . . . . . . . . . . . . . . . . . . . . . . . . . . . . . . . . . 14
9.5 RECEIVING INTERCOM CALLS . . . . . . . . . . . . . . . . . . . . . . . . . . . . . . . . . . . . . 14
9.6 ENABLE/DISABLE VOICE CONNECT FEATURE VOX . . . . . . . . . . . . . . . . 15
9.7 RESET PAIRING RESTORING THE ORIGINAL
DEFAULT CONFIGURATION . . . . . . . . . . . . . . . . . . . . . . . . . . . . . . . . . . . . . . 15
9.8 NOTEWORTHY ISSUES . . . . . . . . . . . . . . . . . . . . . . . . . . . . . . . . . . . . . . . . . . . . 15
9.9 TROUBLESHOOTING THE INTERCOM . . . . . . . . . . . . . . . . . . . . . . . . . . . . . . 15
9.10 USING THE G4 FOR INTERCOM WITH OTHER
G4 HEADSETS . . . . . . . . . . . . . . . . . . . . . . . . . . . . . . . . . . . . . . . . . . . . . . . . . . . . 15
9.10a. TWOWAY INTERCOM . . . . . . . . . . . . . . . . . . . . . . . . . . . . . . . . . . . . . . 15
9.10b. THREEWAY INTERCOM . . . . . . . . . . . . . . . . . . . . . . . . . . . . . . . . . . . . 16
9.10c. FOURWAY INTERCOM . . . . . . . . . . . . . . . . . . . . . . . . . . . . . . . . . . . . . 17
9.11 USING THE G4 FOR INTERCOM WITH OTHER SCALA RIDER
HEADSETS . . . . . . . . . . . . . . . . . . . . . . . . . . . . . . .. . . . .. . . . . . . . . . . . . . . . . . . . . .18
9.11a. TWOWAY INTERCOM WITH SCALA RIDER Q2 . . . . . . . . . . . . . 19
9.11b. TWOWAY INTERCOM WITH EARLIER SCALA RIDER
MODELS . . . . . . . . . . . . . . . . . . . . . . . . . . . . . . . . . . . . . . . . . . . . . . . . . 19
9.11c. THREE WAY INTERCOM
WITH OTHER SCALA RIDER
HEADSETS . . .. .. .. .. .. . . . .. .. .. .. .. . . . .. .. .. .. .. . . . .. .. .. .. .. . . . .. .. . 20
10. SUPPORT . . . . . . . . . . . . . . . . . . . . . . . . . . . . . . . . . . . . . . . . . . . . . . . . . . . . . . . . . . . . . . 21
11. NOTICES . . . . . . . . . . . . . . . . . . . . . . . . . . . . . . . . . . . . . . . . . . . . . . . . . . . . . . . . . . . . . . . 21
IMPORTANT: This is version 1.1 of the User Manual. Our manuals are updated
periodically in order to include the ver y latest features as well the new options
and functions of your new scala rider G 4 PowerSet headsets. Please visit w ww.
cardosystems.com/download/manuals to check if the manual you are now
holding is the most updated version, and download the most updated version in
your preferred language.
2
scala ride r® G4™ PowerSet

1. INTRODUCTION
8. as a stereo headset for listening to cable-connected audio devices,
(such as non-Bluetooth MP3 Players, iPods® and iPhones™)
Englis h
Congratulations and thank you for choosing the scala rider G4
PowerSet Bluetooth® Headset package for motorcycle helmets.
This manual will help you operate the headsets, but you should rst
familiarize yourself with the Bluetooth functionality of your mobile
phone and/or GPS device before using the scala rider G4.
The PowerSet retail box contains two scala rider G4 headset units
that are already factory paired. Amongst others, the headsets can be
used as an Intercom at a range of up to one mile or 1.6 km (subject to
terrain).
Your scala rider G4 PowerSet is a versatile communication and entertainment system with a wide range of connectivity options. Each
headset may be used as follows:
1. as a Bluetooth headset for mobile phone communication (supporting Bluetooth Headset and Handsfree* proles at a range of
10 m / 33 ft.)
2. as a Bluetooth stereo headset for wireless music streaming (supporting the Bluetooth A2DP and AVRCP proles, compatible with a
variety of MP3 Players, adapters and other audio devices)
3. as a 3-Way Bike-to-Bike Intercom for conference calls with up to
two other scala rider G4 or Q2 headsets (up to 1 mile / 1.6 km.
range between two G4 headsets and in Full Duplex** mode)
4. as a 4-Way Intercom for conference calls between up to four G4
headsets on two motorcycles (i.e. between two drivers and their
passengers up to 1 mile / 1.6 km. range and in Full Duplex** mode)
5. as a Driver-to-Passenger Intercom (backwards compatible with
earlier scala rider headsets)
6. as a Bluetooth headset for receiving GPS Navigation instructions
and Streaming Audio from compatible Bluetooth devices
7. as a stereo headset for listening to the built-in FM Radio
ADDITIONAL SPECIAL FEATURES:
➤Your headsets are equipped with AGC technology (Automatic
Gain Control), allowing automatic increase or reduction of volume
according to ambient noise and driving speed. You can also control
the volume level manually.
➤VOX technology for safe and hands-free operation of key functions
(Voice Dial, Answer Call, Reject Call).
➤Your headsets contain advanced software which you may update
through your Windows® XP™ or Vista™ based PC.
➤Your headsets oer spoken status instructions, so that you always
know to whom or what device you are connected to at any given
time.
We wish you a great scala rider experience and remain available for any
inquiries you may have. Just write us at support@cardosystems.com
Visit www.cardosystems.com/download/manuals to download
this manual also in other languages
__________ _______________
* Mobile phones that do not support the B luetooth Handsfree prole may prevent
you from using certain advanced features
** “Full Duplex” lets you to speak and hear the other par ty simultaneously, similar to
mobile or landline phone conversations and unlike walkie-talkie communications
scala ride r® G4™ PowerSet
3

2. CONTENTS OF THE RETAIL BOX
2 Helmet clamps (subject to the version purchased: Boom-Mounted or
Cord-Mounted Microphone)
Two speakers
MP3 Jack
Volume
Down /
Rewind
(back of clamp)
antenna
Flip-up
Noise
canceling
microphone
Sliding Panel
Flexible Boom
2 scala rider G4 headsets
Volume Up /
Forward
Button
Mobile
Phone
Button
Button
2 Wall charger plugs
2 USB adapter cables
2 Allen wrenches
4 Velcro pads
2 MP3 cables
2 Glue plates
2 Pre-moistened towlettes
2 Carry pouches
4 Microphone sponges
Flat sponges for full-face helmets and round sponges for other helmet types
User Guide, stickers, Warranty and Registration form
The scala rider G4 is also available in a cord-mounted microphone
version to better t certain full-faced helmets with tight chin sections
IMPORTANT:
Your headsets are water-resistant, designed for use under moderate rain or
snow conditions. The cover lid protecting the Charging Jack should be kept
tightly closed at all times to prevent moisture from entering the device.
NOTE: WHILE MOST INSTRUCTIONS ON THIS MANUAL REFER TO THE HEADSET
IN SINGULAR, THEY APPLY TO BOTH UNITS UNLESS INDICATED OTHERWISE
3. CHARGING THE HEADSET
Channel A
Button
• Connect to
Rider A
• MP3 Button
4
scala ride r® G4™ PowerSet
LED
Channel B B utton
• Connect to Rider B
• FM Radio Button
Silicone cover
Charging Jack
& Firmware
download por t
Make sure that your headset is fully charged for at least four hours
before initial use. Open the silicone cover protecting the Charging
jack and Firmware download port.
Insert the USB cable to the wall charger and insert
the other end of the cable to the headset’s
Charging Jack. While charging, the Red Light turns
on. When charging is complete, the Red Light will
turn o.
Your wall charger and USB adaptor cable serve
two purposes:
1. Charging your headset from any A/C
wall socket or from a USB port on your
computer (charging time from computer takes longer)
2. Downloading software upgrades from Windows™ XP or Vista™
based computers (see section 4.4 for details).
4. BASIC SETUP AND CONFIGURATION
4.1 GENERAL FUNCTIONS
DESIRED RESULT REQUIRED ACTION
Turn on the headset
Turn o the headset
Increase the volume Tap the Volume Up Button
Decrease the volume Tap the Volume Down Button
Mute Tap simultaneously Volume Up and Volume Down
Batter y Level
Indicator
Press the Mobile Button steadily for at least four
seconds
Led indication: Three blue ashes.
Audio feedback: Ascending tone (low-high).
Press the Mobile Button steadily for at least three
seconds
Led indication: Three red ashes.
Audio feedback: Descending tone (high-low).
while any audio is on
Press and hold the Volume Up Button for three
seconds
Blue light = Battery is fully charged
Red/blue light = Batter y is half full
Red light = Battery is almost empty
4.2 SPOKEN STATUS ANNOUNCEMENTS
Your scala rider G4 headset oers various audio status messages
sent through your speakers. Among others, it will announce your connection state, e.g. whether you are in mobile phone or on intercom
mode, it will conrm changes of such modes and more. By default
the feature is ON, and can be disabled as outlined below.
The Voice menu can be set at any one of the available language op-
tions. In the future, more languages will be available for downloading
from our website (see section 4.4 for Firmware Upgrade).
Entering the Voice Menu: Press and hold the CHANNEL “A” button
and CHANNEL “B” button simultaneously for 3 seconds while the
headset is on standby. Once entering the system, follow the voice
instructions in English or choose your preferred language.
Disable/Enable status announcements: Press and hold the
Volume Down Button for 6 seconds.
ON: Led indication: Solid blue + Audio feedback: One short beep
OFF: Led indication: Solid red + Audio feedback: Two short beeps
4.3 AUDIO SOURCES AND PRIORITIES
The dierent audio sources connected to the G4 are prioritized as
shown below, i.e. the higher priority source will always override and
interrupt the lower one.
For example, incoming mobile phone calls will interrupt ongoing
Intercom calls, while incoming intercom calls will interrupt the audio
from the built-in FM Radio etc.
Higher Priority
Lower Priority
1. Mobile phone audio or GPS instructions
(device specic)
2. Intercom
3. A2DP audio source
4. FM Radio (built-in)
5. Auxiliary Line-In Port (for corded connection
e.g. MP3 players).
Englis h
scala ride r® G4™ PowerSet
5
4.4 FIRMWARE UPGRADE OPTION
In the future you will be able to install rmware
upgrades and program patches to keep the
software of your G4 up-to-date. Among others,
future rmware upgrades will include additional
status announcements and other valuable functions. To ensure that
you don’t miss out on the latest versions, please register online at
www. cardosystems.com/download/softwareupgrade and have
your serial number ready. For downloading upgrades, please use the
USB cable included in the retail package of your scala rider G4.
Please note that until further notice, upgrades will only be available for
Windows™ based computers with XP™ or Vista™ operating systems.
4.5 RESETTING YOUR HEADSET
If your headset fails to respond despite repeated attempts, you can
reset your headset by charging it. After approximately 10 seconds,
remove the headset from the charger and turn it on again. Your headset should now respond as expected.
5. GETTING STARTED
Standard Method: Fastening the Clamp to the
Helmet
1. Use the enclosed Allen Wrench to loosen
the two screws on the Back Plate.
2. Slide the Back Plate between the internal
padding and the external shell of the helmet.
3. Adjust the clamp’s location so that the
microphone is located in front of the center
of your mouth, and then tighten the screws.
You may need to reposition the Clamp
repeatedly until you identify the best spot.
If you have purchased a helmet clamp version with
the corded microphone, please refer to section 5.2.
Glue Plate Method: Attaching the Clamp by way of glue
You have the option to glue the Helmet Clamp onto your helmet,
when the above standard method cannot be used, or in case you
prefer to secure the Helmet Clamp with adhesive glue.
Caution: This process can be done only once!
5.1 MOUNTING THE HEADSET ON THE HELMET
The Helmet clamp that includes your microphone and speakers must
rst be mounted on the helmet. Once mounted, the headset unit can
be attached or detached from the clamp at any time (sec. 5.4).
There are two methods that can be used to attach the clamp to the
helmet:
Standard Method: Recommended for most helmet types.
Glue Plate Method: Recommended for helmets
to which the standard method cannot be applied,
using the Glue Plate included in the box.
6
scala ride r® G4™ PowerSet
Glue Plate
NOTE: While we have no reason to believe that the gluing option might nega-
tively aect any helmet, Cardo does not assume any responsibility
to that eect, irrespective of its nature and circumstances. The Glue
Plate is oered as a free option that you may choose to use at your
own risk and subject to renouncement of any future claims.
1. Use the enclosed Allen Wrench to remove
both Allen screws and release the Helmet
Clamp’s back plate.
2. Determine the location on the helmet where the Helmet
Clamp must be attached.
3. Adjust the Helmet Clamp’s location on the Helmet so that the
microphone is located opposite the center of
your mouth. You may need to reposition the
Clamp repeatedly until you identify the best
spot. (Be sure to clean the selected area prior
to the gluing process).
4. Use the pre-moistened Towlette to clean the helmet area where
you want to install the Glue Plate. Allow to dry thoroughly.
5. Peel the foil cover from the Glue Plates’ adhesive pad.
6. Place the Glue Plate into position according to #3. Press rmly
15 seconds on all 3 parts of the Glue Plate.
7. The adhesive pad bonds to full strength over the next 24
hours. Therefore it is recommended to not use the headset
during this 24 hour period.
8. Fasten the Clamp to the Glue Plate using the Allen screws that
were previously removed.
If you have purchased a helmet clamp version with the corded
microphone, please proceed as follows:
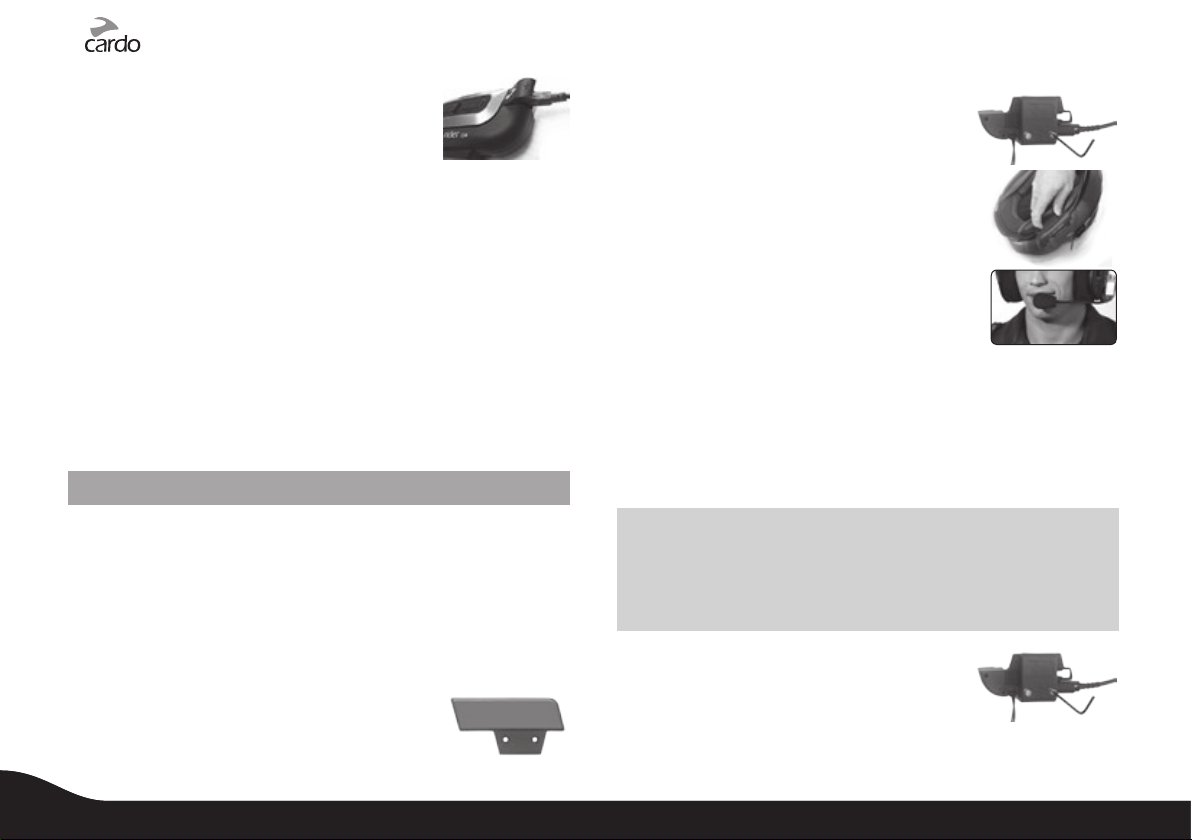
5.2 ATTACHING THE CORDED MICROPHONE CLAMP ON A
FULLFACED HELMET
If you are using the corded microphone version, you must rst make
sure your helmet clamp is attached to your
helmet as described in previous section (5.1).
Clean the exact spot on the internal padding of
the helmet, opposite your mouth, where the
microphone will be placed.
a. Peel the foil cover from the adhesive Velcro
pad and place the Velcro pad on the chosen
location opposite your mouth.
b. Attach the microphone to the Velcro, as shown in photo.
c. When done, tighten the screws of the clamp
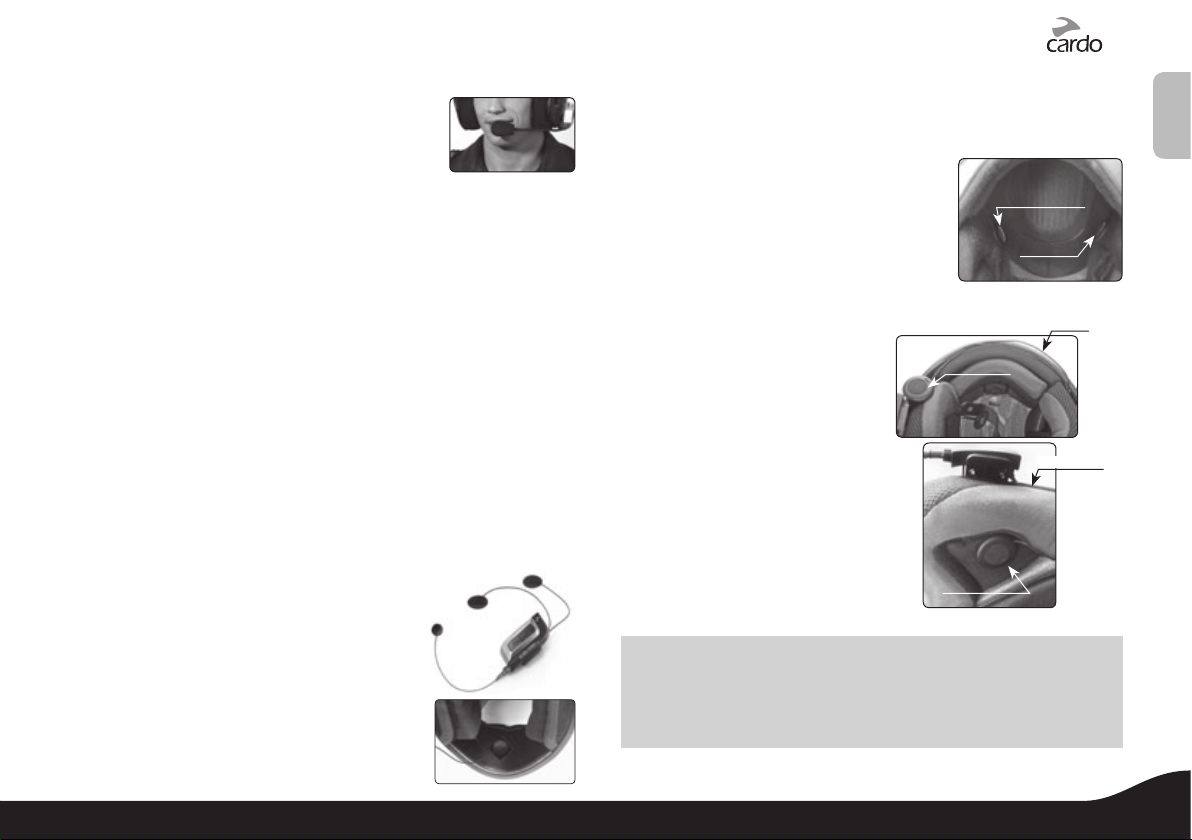
5.3 POSITIONING THE MICROPHONE AND SPEAKERS
The microphone must be positioned in
front of the center of your mouth as
detailed above.
Speaker A
Attach the speakers to the Velcro inside
your helmet, opposite your ears (short
speaker cord for left ear & long speaker
Speaker B
cord for right ear). Use the supplied
Velcro pads if needed.
Using two speakers inside the
helmet may be prohibited in
Speaker B
certain jurisdictions. If this is the
case, you should tuck away the
long corded speaker underneath
the helmet padding as follows:
Lead the speaker cord [B]
alongside the rim of the
padding to the right side and
then back to the left side, near
speaker [A]. Then place the
speaker [B] underneath the
padding.
NOTE: For best audio results, make sure that both of your speakers
actually touch your ears.
Please visit us at www.cardosyst ems.com /faq and look for
some ve ry useful tips under the Audiokit category.
Speaker A
Englis h
Cable
Speaker B
scala ride r® G4™ PowerSet
7
Loading...