

Page 1

Page 2

amen
scomtffi
INSTRUCTIONS . (
■‘гй‘
English Edition t
L
Page 3

Technical Data
Film : Uses 16mm single or double perforated
film on standard 100-foot (30.5-meter) spool.
Lens: Canon zoom lens C-16E F 1.5 with zoom
ing range of 13-76mm. 13-component, 18element construction. Zoom ratio, 1 : 5.85.
Zooming by rotation of lens barrel. Shooting
distance, 1.5m (5 ft.) to infinity. Inner dia
meter, 72mm, Outer diameter, 75mm.
Viewfinder: Single-lens reflex type with prism
screen rangefinder and eyepiece adjustment
ring. Contains f/stops scaie, over/under ex
posure warning marks and manual aperture
control mark. Eyecup is revolvable.
Electric Eye Mechanism : Automatic aperture
mechanism fully coupled to highly sensitive
built-in CdS cell.
Light Measuring Range: Film speed ASA 10-
320 (DIN 11-26). Coupled to entire range of
f/1.6-f/22 and 16-48fps.
Film Speed Indexes:
ASA 10 (12) (16) 20 (25) (32) 40 (50) (64)
80 (100)(125) 160 (200)(250) 3 20
DIN 11 (12) (13) 14 (15) (16) 17 (18) (19)
20 (21) (22) 23 (24) (25) 26
Page 4

Filming Speeds per Second ; 16 fps (1/43 sec.),
24fps (1/54 sec.), 32fps (1/85 sec.), 48fps (1/
128sec.). Shutter opening angle, 135 degrees.
Manually Operated Aperture ; Ordinary photog
raphy possible at any f/stop.
Power System : Electric motor system. Built-
in micromotor is powered by a 12 v nickel
cadmium battery.
Film Loading: Semiautomatic film loading sys
tem. Just insert the tip of the film into the
film feeding guide.
Footage Counter: Counts up to 100 feet.
Needle automatically returns to “S" mark
when side cover is opened.
Power Source: 12 v nickel cadmium battery.
Rechargeable. 12vx2 parallel circuit for out
side power source.
Accessories : Lens hood, battery charger, external
battery box, close-up lenses, compensating filter
for the CdS window and various types of filters
available.
Size: 280 X 147 x222mm (11" x 5-3/4» x 8-3/4")
Weight: 3.1kg (6 1b. 13-3/8 oz.)
Subject to alterations.
Page 5
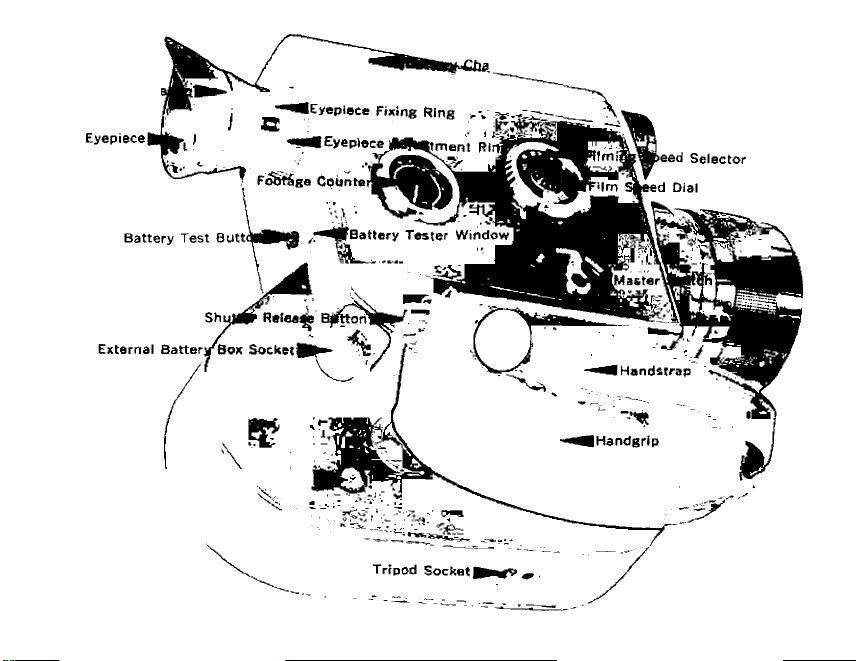
Revoluable Eyi
Tape Reccl^lr StartH^ SocKel
mber
Page 6
We are highly gratified that you have
Selected the Canon Scoopic 16 — a
wise choice that promises you many
delightful years of photographic ex
periences.
Canon is recognized the world over
as the foremost pioneer in the devel
opment of photographic equipment of the high
est quality and performance.
Whether it is for news reportage, laboratory or
traveling, make the most of your opportunities!
Before Using ...
It is important for you to thoroughly know
and to get accustomed to handling the Canon
Scoopic 16. Please read this instruction booklet
carefully, and master the manipulations of the
various parts completely before inserting the film
into the camera. If you are thoroughly versed in
the correct handling of this movie camera, you
can get the maximum performance out of the
Canon Scoopic 16 to your greatest satisfaction.
Canon Scoopic 16 Set
Main Body of Scoopic 16
12 V Nickel Cadmium Battery
Lens Cap
Lens Hood
Scoopic Battery Charger-S
Carrying Case
Spool
1 unit
1 pc
1 pc
1 pc
lunit
1 pc
1 pc
Page 7
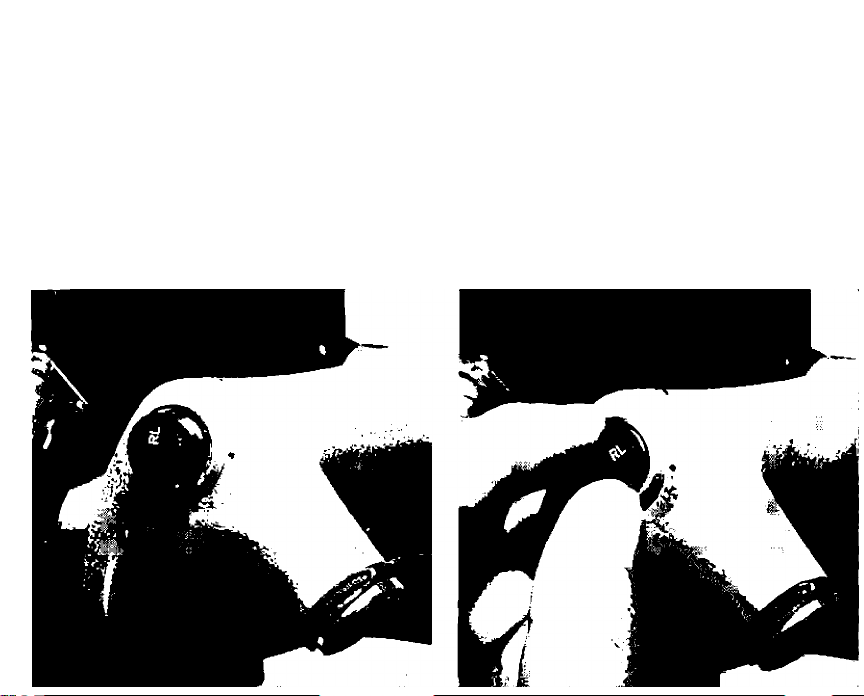
RUNNING LOCK
While depressing the shutter button all the way
down, turn it clockwise and set "RL” at the index
mark. You can now release your finger from the
button and the camera will continue to run until
the button is returned to its original position.
Page 8

Main Features of Canon Scoopic 16
First 16mm Movie Camera to Incorporate
1
Zoom Lens: Canon Scoopic 16 is the world’s
first 16mm movie camera to incorporate a builtin zoom lens. The zoom lens on this revolution
ary movie camera has a zoom ratio of 1 : 5.85,
or a focal length of 13mm wide-angle to 76mm
telephoto which covers the focal lengths used
most often. The lens speed is a pre-eminent
F 1.6.
First 16mm Movie Camera to Incorporate
2
Electric Eye with Manual Override: Shoot
ing with accurate exposure is always possible
with the automatic aperture mechanism which
is coupled to the built-in CdS cell. It couples to
the entire range of this camera's f/stops and
filming speeds. Switch-over from electric eye
mechanism to manual operation is easily done by
shifting the master switch.
Bright Viewfinder with Prism Screen View
3
finder: Bright, easy-to-see single-lens reflex
viewfinder eliminates parallax displacement and
the Scoopic incorporates a prism screen range
Page 9

finder to assure accurate focusing. All the nec
essary information, f/stops, over/under exposure
warning marks and manual aperture control marks,
are visible inside the viewfinder. The rubber-
hooded eyecup, which effectively cuts out extra
neous light, is movable from left to right or vice
versa and is adjustable from —4 to -I-1 diopters.
Powerful NiCd Battery Power Supply : A 12 v
4
nickel cadmium rechargeable battery is used as
the power source for film drive and the electric eye
circuit. This small and high performance battery
can be used semipermanently. A fully charged
battery will provide power for filming 800 feet at
24 fps. The battery can be completely recharged
in 14 hours with the exclusive battery charger.
Semiautomatic Fiim Loading Mechanism :
5
This is one of the mechanisms that has made
Canon Scoopic 16 easier to handle and eliminates
misleading. Insert the film leader into the in
sertion guide, press the shutter release button,
and the film will automatically feed through the
various guide elements.
Page 10

Procedures tor Electric Eye Operation
Charge the battery.
Page 10
Load the battery.
Page 12
Page 11
Check the power level
of the battery.
Adjust the eyepiece to
your eyesight.
Page 13
Page 12

4
5
Load the filr
Page 27
Set the film speed dial.
Page 13
Set the filming speed
at 24 fps.
Page 14
Set the master switch
at "AUTO".
Page 15
Page 13

8
9
Remove the lens cap.
Hold the camera and
look into the viewfinder.
Page 17
Focus at telephoto.
Page 20
Decide the composition
of the picture by turning
the zoom lens.
Page 18
Page 14
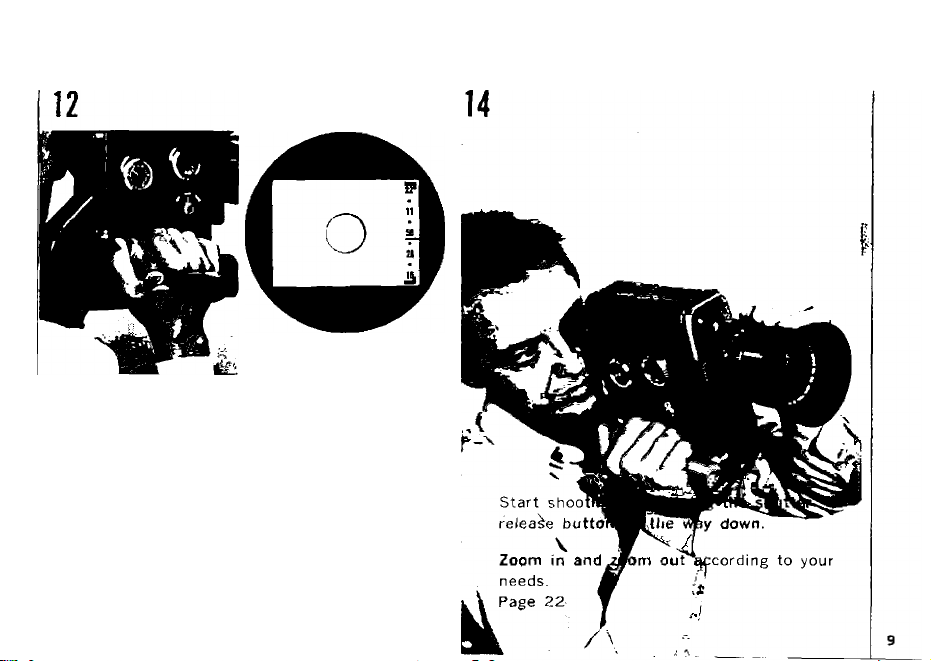
13
Press the shutter
release button lightly.
Page 22
Check the position of the
exposure meter needle.
Page 21
Page 15
Page 16

How to Charge the Battery
An exclusive type 12 v nickel cadmium recharge
able battery is used in the Scoopic 16 as the
pow/er source for film drive and electric eye. The
camera functions only when this charged battery
is properly loaded. A fully charged battery will
provide power for driving eight reels of 100-foot
(30.5-meter) length film at 24 frames per second.
#Since this battery is not charged when you
purchase it, be sure to charge the battery before
loading it into the camera.
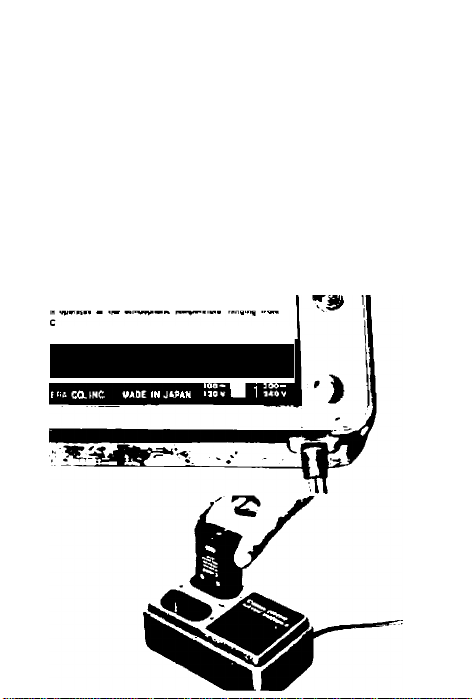
Canon Scoopic Battery Charger-S
The exclusive Battery Charger-S is used for charg
ing the nickel cadmium battery. Each battery
can be charged simultaneously either in a pair or
singly.
Set the voltage switch according to the voltage
I
to be used. For example, in a locale where
the household voltage is 220 v, set the voltage
switch at 200-240 v.
#Be very careful not to make a mistake on the
voltage setting.
Insert the battery after matching the + and
2
— markings on the battery with those on the
charger.
Page 17
The pilot lamp lights up when the charger is
3
connected to the power supply.
Each exhausted battery can be fully charged
4
approximatery in 14 hours. The electronic cir
cuit incorporated inside the charger automatically
switches off when fully charged.
S (Uir or Mng*||
SCOOPiC BATTERY CHARGER-S
7 A AXX 50-6054 5VA
Page 18

4 Recharge the battery if it has not been used
for over one month.
r
11
Page 19
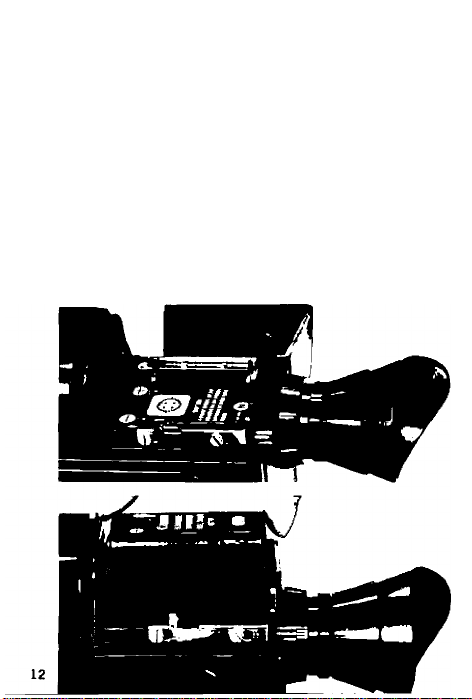
How to Load the Battery
Press the battery chamber release button.
1
This releases the lock and frees the cover.
Open the cover and load the battery, matching
2
the + and — markings on the battery with
those in the battery compartment.
#Take the battery out of the camera when it is
not to be used for a prolonged period of time.
#lt is best to always carry extra batteries for
worry-free shooting.
Page 20

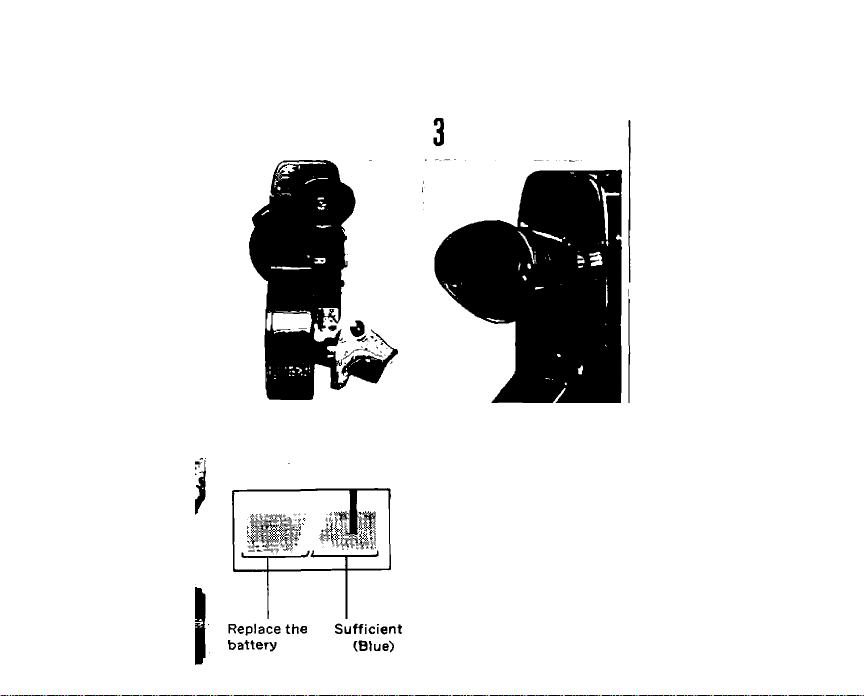
Checking the Battery
Check the power level of the battery regularly.
Press the battery test button and check the posi
tion of the needle in the battery tester window.
If the needle reaches the blue zone, it means
the battery has sufficient power level. Otherwise,
replace the battery.
Page 21
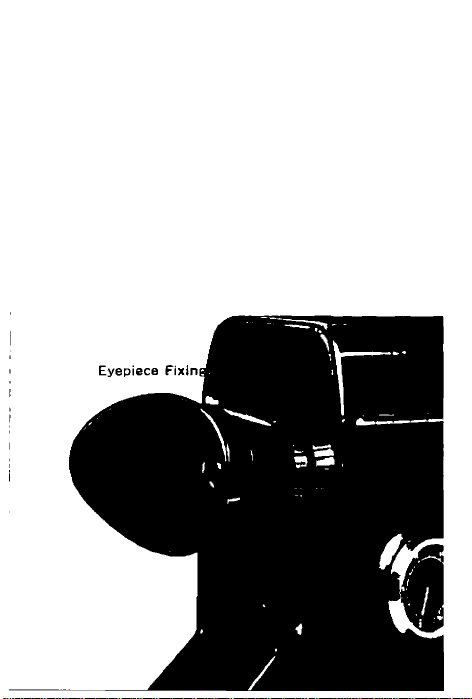
How to Adjust Eyepiece to Eyesight
Remove the lens cap and aim the camera in the
direction of a bright subject and look into the
viewfinder. Turn the eyepiece adjustment ring
and adjust so that the lines of the round prism
screen rangefinder can be seen most distinctly.
Then tighten the eyepiece fixing ring.
Page 22

How to Set the Film Speed
The electric eye of Scoopic 16 is completely
coupled to the film speed, filming speed and
automatic aperture mechanism. Be sure to set
the film speed dial after loading film so as to
obtain the correct exposure. Set the film speed
dial to the click-position ASA/DIN index of the
film to be used.
4 The film speed dial is indicated in both ASA
and DIN indexes.
Page 23

How to Set the Filming Speed Selector
The filming speed selector sets the number of
frames to be fed per second. Turn the filming
speed selector and set the desired filming speed
graduation to the index. 24 frames per second
is the standard filming speed for 16mm movie
cameras.
4 When shooting at 48 or 32 frames per second,
the motor consumes a considerable amount of
power and requires sufficient power level.
4 Do not turn the filming speed selector while
pressing the shutter release button.
4 The shutter opening angle is 135 degrees.
The relations between the number of frames per
second and the exposure time are as follows :
Frames per Second I 16 24
Exposure Time
in Seconds
1/43 1/64
4 The camera will function properly only at the
graduations on the filming speed selector.
4 Avoid operating the camera at high filming
speeds when film is not loaded.
32 48
1/86 1/128
Page 24

Filming Speeds and Projection Effects
Film shot at filming speeds other than 24 frames
per second will have varying effects when pro
jected,
When shooting at high filming speeds of 48
I
or 32 frames per second, the projected pictures
will have a slow-motion effect. For example,
when a film is shot at 48 frames per second
and then projected at a standard 24 frames per
second, the projecting time will be lengthened
by two times, thereby slowing down the speed
of motion by one-half. High filming speed is,
thus, very effective when slowing down fast
moving subjects or when analyzing movements.
Exposure time is also speeded up and is, there
fore, effective for eliminating blurring during
panning,
When shooting at slow filming speed of 16
2
frames per second, the opposite effect of high
filming speed is obtained. In other words, by
dropping the filming speed the projected pictures
will have a fast-motion effect. This method is
used when stressing the movement of a subject.
Page 25

when a realistic effect in the movement of a
distant subject is desired, or for humorous ef
fects. The slow filming speed is also used in
order to widen the proper exposure range for
overcoming under exposure conditions, that is,
when it is too dark for shooting at 24 frames
per second even at maximum aperture opening.
4 Avoid shooting subjects that show normal
movements when using the slow filming speed
for controlling exposure.
Page 26

Master Switch
When the master switch is set at "OFF", the
electric eye circuit is disconnected and the shut
ter reiease button is locked. When the master
switch is turned to "AUTO”, the electric eye and
power circuits are connected and shooting with
automatic exposure control becomes possible. The
electric eye circuit will function when the shutter
release button is pushed in. When shooting with
manual aperture control for special effects, set
the switch at "MANU.". See page 23.
W
Page 27

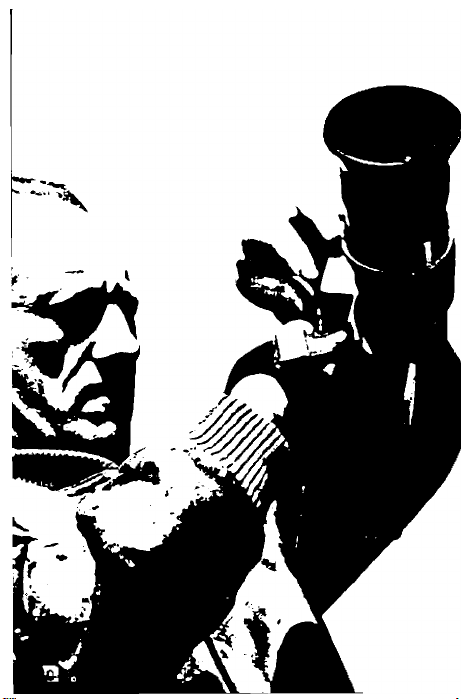
How to Hold the Camera
Firmly grasp the handgrip with the right hand.
The shutter release button is pressed with the
right thumb. Focusing, zooming and steadying
of the camera are performed with the left hand.
The camera should be held steady, especially
when shooting in telephoto or when zooming. The
use of a tripod is recommended in these cases.
Handstrap
Open the handstrap buckle and adjust the length
of the handstrap according to your hand.
Page 28

Eyecup
The eyecup is of the revolving type and is revolvable from left to right or vice versa. Adjust
it to fit your eye.
4 Do not take your eye away from the eyecup
during shooting. This is because, if strong light
shouid enter the viewfinder through the eyepiece,
the light will flow in reverse direction through
the viewfinder optical system and cause fogging
of the film.
Page 29

Viewfinder
The viewfinder of'Scoopic 16 is of the single-lens
reflex type in which the field-of-view and the
picture frame are identical. Therefore, the pictures
can be composed within the maximum field-ofview. The following information is available in
side the viewfinder: exposure meter needle,
f/stop scale, over/under exposure warning marks
and prism screen rangefinder.
PS®
''(¡¿I
Page 30

Zooming
When you wish to zoom or want to decide the
size of the subject in the picture area, turn the
zoom lens by using the zooming ring. The image
seen through the viewfinder will change in mag
nification and the field-of-view will also change.
The zoom lens eliminates the necessity of inter
changeable lenses or the turret and very effective
expressions become possible.
Page 31

# The focal point does not change by turning
the zooming ring.
# When you wish to keep the subject always in
the center of the picture while zooming, fix the
camera in a stationary position, set the subject
in the center of the viewfinder at the maximum
focai length of 76mm, and focus. Zooming can
be performed from any desired focal length after
that.
Page 32

f = 13mm
f = 76mm
19
Page 33

Focusing
Look into the viewfinder and turn the focusing
ring until the image in the central prism screen
rangefinder can be seen most distinctly. The
aligned image can be seen more accurately and
easier the longer the focal length of the lens.
Therefore, first focus at the maximum focal
length of 76mm and then return the lens to the
desired magnification. The lens can be zoomed
to any focal length and still maintain a sharp-
focused image.
Page 34

Size of Subject at 1.5m (5 ft.):
(mm)
Focal Langth
(cm) 72 k 100 36x50
Picture Area
Picture Area
(in )
13 25 36
2'4?ì’'k3'3H"
1'2U"k l'7?i"
24X33
9¡ A " x l' l'
Out of Focus
In Focus
Page 35

Checking the Exposure Meter Needle
Aim the camera at the subject and check the
position of the exposure meter needle inside the
viewfinder. When you siightly press the shutter
release button down approximately 1mm, the
electric eye circuit operates and the exposure
meter needle indicates the f/stop.
♦ The black dots in between indicate f/16, f/8,
f/4 and f/2 respectively.
lf the exposure meter needle is within the range
I
of the f/stop scale, you can press the shutter
release button down all the way and the film
will advance.
If the exposure meter needle points to the upper
2
red mark, it indicates over-exposure. Shoot
after attaching a neutral density filter to lower
the light intensity.
When the exposure meter needle points to the
3
lower red mark, it indicates under-exposure.
This condition must be corrected before shooting
by adding auxiliary light.
-Over-Exposure Warning Mark
-------
f/stop Scale
-------
Exposure Meter Needle
■
-----
^Prism Screen Rangefinder
-------
Under-Exposure Warning Mark Add auxiliary light.
Use ND filter.
21
Page 36

Shutter Release Button
Push the shutter release button all the way down
for film drive.
# When the shutter release button is pressed only
lightly, the operating sound of the electric eye
can be heard but the film will not advance.
4 Set the master switch at "OFF” when not shoot
ing. The battery will not be consumed even if
the switch is not set at "OFF”, but it is a pre
caution to prevent film drive when the shutter
release button is inadvertently pressed.
Page 37

Lens Hood
Always use a lens hood. Better quality pictures
can be obtained because the lens hood cuts out
harmful light. There are two types of hoods —
use screw-in type filters in the case of the one
type and Series IX filters for the another.
Page 38

Manual Control of Aperture
Observe the following procedures when shooting
with manually controlled aperture.
Set the master switch at “MANU.”. The letter
I
“M" will appear in the upper part of the view
finder.
Turn the aperture control ring and set the
2
exposure meter needle inside the viewfinder to
the desired f/stop.
4 The aperture control ring moves only when the
master switch is set at "MANU.”.
AUTO
' V
Page 39

Zooming and focusing is performed in the same
manner as in electric eye operation.
23
Page 40

Filters and Exposure Compensation
When using filters the exposure must be adjusted
according to the exposure factor of the filter to
be used.
Adjustment by Changing the Film Speed Dial
Setting
Divide the ASA index of the loaded film with the
exposure factor of the filter to be used. The figure
obtained is the ASA index of the film when the
filter is used. Therefore, set the film speed dial
to this ASA figure.
For example, when a Y3 (exposure factor 2) filter
is used with an ASA 100 film, the compensation
ASA number would be: 100^2 = 50. In other
words, the film speed dial should be reset at ASA
50,
24
Page 41

Adjustment by Changing the f/Stop
Turn the master switch to ''MANU.". Adjust the
f/stop by turning the aperture control ring accord
ing to the exposure factor of the filter to be used.
The f/stop graduations are indicated in multiple.
Therefore, when using a filter with an exposure
factor of 2, the f/stop is increased by 1 gradua
tion. When the exposure factor is 4, it is increased
by 2 graduations.
Adjustment by Using Compensating Filter for
CdS Meter
When using an ND4 filter, a compensating ND 4
filter to be attached onto the CdS window is
available. In this case, there is no need to change
the film speed dial setting or the f/stop.
Page 42

Filters
A wide variety of Canon Filters 72mm (screw-in
type) and Series IX are available. When using
filters, exposure time must be increased accord
ing to the exposure factor of the filter to be used.
A lens hood attachment screw is also available.
Canon Filters 72mm/Series No. 9
Type
uv
» o*
Y1
Y3
R1
. 0
ND4
o#
ND8
SKYLIGHT
m •
CCA4
CCA8
•
CCAil2j
CCB4
•
CCB8
•
« •
CCBC12)
O For black and white film. # For color filn
' Exposure Factor
1
1.5
2
6
4
8
1
1.5
2
2
1.5
2
3
Absorbs only ultra-violet rays. Especially effective at seaside, and high
mountains. Recommended for use in color photography.
Increases contrast of black and white film,
the blue sky. Brightens red and yellow.
Makes strong contrasts. May also be used with infrared film.
ND4- reduces light values by 1/4, ND8 by 1/8. No effect on the reproduc
tion of colors.
Acts to harmonize the blue sky and shade.
For use with daylight type film under the cloud.
For use with universal type (color negative) film under the cloud or
tungsten type film under the morning sun or sunset.
For use with tungsten type film under sunlight.
For use with daylight type film under the morning sun or sunset.
For use with daylight type film and clear flash bulb.
For use with daylight type film under tungsten light.
Compensation Filter ND4 for CdS Window
The compensation filter ND4 for the CdS wind
ow is available.
Effectiveness of Filters
Enhances clouds, darkens
25
Page 43

26
Mm Ouïde Release Pin
Film Inseftjon Gujde
ait
Page 44

How to Load Film
Any standard 16mm, single or double perforated,
100-foot (30.5-meter) long film spool can be used.
Film is loaded by the semiautomatic loading sys
tem and can be easily performed once you know
how. Make a habit of loading film correctly, since
carelessness may cause racing or fogging of the
film.
4 As the film is wound naked around the reel,
always load film in the shade. An extra length of
leader Is attached to the film for protection
against the entry of light, but direct sunlight or
Page 45

strong lighting may cause fogging of the film if
it is loosely wound.
Flip up the side cover latch, turn it in the direc
I
tion of the arrow and remove the side cover.
Place the film spool on the feeding spool shaft
2
as indicated by the diagram inside the camera.
# Some spools can be placed on the shaft only
when they are inserted in the correct direction.
27
Page 46

Cut the tip of the film leader at a right angle,
3
using the built-in film cutter. Cut the tip of
the film leader in between the perforations by
matching a perforation and a pin on the cutter.
^ Set the filming speed selector at ‘'16” or ‘‘24”.
Insert the tip of the film leader into the film
5
insertion guide. Be careful to keep the film
tightly wound on the reel.
Page 47

Be sure that the film holder on the feeding
6
spool shaft is at the proper position. Press the
shutter release button while pushing the film lea
der into the film insertion guide.
Page 48

The film will automatically proceed through the
film guide and the aperture section and come out
from the bottom sprocket. Stop pressing the
shutter release button when 15 to 20cm of film
leader has passed through the bottom sprocket.
Have the take-up spool ready. Check and see
7
that the top side of the spool is facing upwards.
Page 49

Bend the tip of the film leader towards the
8
emulsion side and insert into the take-up spool
as indicated by the diagram inside the camera.
Wind the film leader tightly 3 or 4 times around
the spool.
Place the take-up spool on the take-up spool
9
shaft.
4 Be sure to check that the pressure plate and
the film holder are in the normal positions and the
knobs are dropped in. (See the picture in the
following page.)
30
Page 50

in Press the shutter release button, while press-
I U ing the film guide release pin (the film guide
is in open condition), and check to see that the
top and bottom film loops are uniform. About
one second, or 10 to 15cm, of film feed is suffi
cient.
Put the side cover back on, turn the film side
n
cover latch and flip it down.
4 The film holder on the take-up sprocket must
be at the correct position in order to close the side
cover properly.
Page 51

10 Press the shutter release button and feed
the film until the footage counter moves from
“S" to "0”. Start shooting from "0” position.
Various Releases
As the various parts can be opened, they are
convenient for correcting an improperly loaded
film. Moreover, as the pressure plate can be
removed by unscrewing the tightening screw, it
is very convenient for removing the film or clean
ing the aperture section.
Page 52

The film guide opens when the film guide release
I
pin is pressed and closes when the shutter
release button is pressed.
The film holder and the pressure plate open
2
when their respective release knobs are lifted
up.
31
Page 53

How to Unload Film
Footage Counter
As shooting proceeds, the footage counter indica
tes the length of exposed film in feet. The
footage counter has graduations for every five
feet, starting from "O", and figures are inscribed
for every 20 feet. The "S” to "0” and "lOO"
to "F” portions are both lengths for leaders.
The footage counter automatically resets to "S”
when the side cover Is opened.
32
Page 54

After the footage counter reaches "lOO”, continue
feeding the film until “F” and then unload the
film. Make certain that the film does not loosen
and put it into the film container. Send the ex
posed film to an authorized developing laboratory.
Page 55

Close-Up Lenses
The 72mm Close-Up Lenses 2100 and 1100 are
available. 2100 and 1100 indicate the distances
in millimeters from the tip of the lenses to the
subject when the distance scales of the Close-Up
Lenses are set at infinity.
Canon Close-Up Lens 2100
Focal Lsngth
Distane* Seal*
Film P1an»-to-Subj«et
Distane*
Picture Araa
Canon Close-Up Lens 1100
«1
2.am
(7'S-B/d‘J
1720a IZaOmm
limm
0.98m :
0'2-5/8'l
610x440mm I
C2'xl'5-3/8'} 1
1.5m i
(5') 1
2. am
l7'6-9/8')
560a4)0mm
{l’9 B.Va rS-l/B'j
3Smm
1.5m
(5')
D.9Sm
200 k 150mm
(7-7/8*x6'l
ÍT'6-5/^*)
220 X 200mm
(ll'sT-T.'S'J
76mm
«
?,am
l.fim
(S'}
0.9Am
i3'2-9rt';
too a 70mm
'4* X 2-3,'4'j
Distane* Scat*
Film Plan»4a-$ubiact
Dittane*
Picture Aral
Canon Close-Up Lens
Focal Length
Distance Scale
Film Plane-to-Subject
Distance
Picture Area
1
i 1.3m
^ t4"3-t/4'J 1
1 900M640mm
1 (2'll-f/Z'«2'M/4'k 1
2100+1100
I
i 0.91m 1
1 569 X 421mm
! (ril-l/4'xl'4-5/8*) !
13mm
I.Sm
yi
0.77m
(2'6-a/8")
480 * 330mfn
ll'5-J4's:i'J
1.9m
(S')
0.99m
riO'i
391 X Sfifimm
12-1«'« ]Q-1yQ*)
-
1,3m
(4’3-1/4'j
2Ma210mm
m-3 «"xB I '4'j
fi»
0.9lm
(3')
192 a 141mm
«M/2'*54/2*1
I.Sm
n
3Smm
ÍB')
□,77m
(2‘«-3/B')
190 X 110mm
t9'x4.3fi'j
1.5m
(S')
0,56m
{I'lO’)
119 X B6mm
(4-3/4'X 3-3/8*)
-
1.3m
i4'34/4'i
ISOs llOmm
r6'a4-a/B'
-
o.9lm
(3')
99 ■ /Omm
(3-V4'*2-3.Vj
76mm
1.9m
iS'l
0.77m
(2'e-3''r'
BO* 90mm
(M.'B'xS'j
1.5m
(S')
0 S6m
(rio*)
59x42mrn
(2-3/8* X 1-5/B*)
33
Page 56

How to Use the External Battery Box
When the separately available External Battery
Box is used, approximately 16 reels, or double
the number of reels can be shot at normal tem
peratures than when using the single battery
loaded in the camera. This is because it is com
posed of two 12V nickel cadmium batteries in
parallel. The performance of the batteries drop
at temperatures of approximately 0°C (32°F) or
under. Stabilized photography is possible, how
ever, if the External Battery Box is kept warm by
the body temperature of the user.
Page 57

Remove the battery loaded in the camera when
1
using the External Battery Box.
Plug the cord of the External Battery Box into
2
the external battery box socket on the back
side of the camera.
The power level for the external batteries are
3
checked with the battery tester in the same
manner as when checking the battery inside the
camera.
# Be sure to charge the two batteries simultane
ously with the Scoopic Battery Charger-S.
Page 58

4 The External Battery Box has a hook so that
it can be conveniently hooked onto a waist belt.
Page 59

Tape Recorder Starting Socket
The tape recorder starting socket is coupled to
the shutter release button. If the remote control
cord of a portable battery-powered tape recorder
is connected to this socket, the tape recorder
starts recording simultaneously with the shooting
of the camera for recording the sounds of the
surrounding to add more reaiism to the movie.
Acceptabie tape recorder: 24 v 0.3A max.
Page 60

Cleaning the Aperture Section
It is important that the aperture section always
be kept clean. The aperture section (the section
where the film is held by the pressure plate),
through which the film passes, is liable to accu
mulate dust or grit from the film. If left alone,
these will scratch or soil subsequent reels of
film. The aperture section can be kept suffi
ciently clean with a brush. It is best to clean
this section whenever new film is loaded. Do not
use anything hard, such as a metal brush.
Page 61

Your Camera Body Number_
Date of Purchase
Dealer's Name
________
__________
Page 62

Page 63

CdS Window 1
Чйг
Page 64

Page 65

Case
37
Page 66

CANON INC.
9-9, Ginza 5-chome, Chuo-ku, Tokyo 104, Japan
CANON U.S.A., INC.
64-10 Queens Blvd., Woodside, New York 11377, U-S.A.
CANON OPTICS & BUSINESS MACHINES CO„ INC.
636 South Serrano Ave., Los Angeles. California 90005, U.S.A.
CANON AMSTERDAM N.V.
Gebouw 70, Schiphol Oost, Holland
CANON LATIN AMERICA, INC.
Apartado 7022, Panama 5, Panama
PUB NO 5281E
PRINTED IN JAPAN
Page 67

 Loading...