


Software Guide
This guide explains the installation method and features of the software for loading and
processing images shot with a Canon PowerShot Pro70 Digital Camera on a computer.

READ CAREFULLY BEFORE USING!
CANON SOFTWARE LICENSE AGREEMENT
IMPORTANT-READ THIS AGREEMENT BEFORE USING THE SOFTWARE ON THE CD-ROM IN THIS BOX! BY USING THE
SOFTWARE,YOU ARE DEEMED TO AGREE TO BE BOUND BY THIS AGREEMENT.
This legal document is a license agreement between you and Canon Inc. (“Canon”).
IF YOU DO NOT AGREE TO THE TERMS AND CONDITIONS OF THIS AGREEMNT, DO NOT USE A SOFTWARE PROGRAM
ON THE CD-ROM AND A USER MANUAL IN THIS BOX (COLLECTIVELY THE “SOFTWARE”) AND PROMPTLY RETURN
THE SOFTWARE TO THE PLACE WHERE YOU OBTAINED THE SOFTWARE FOR A REFUND.
In consideration of the right to use the SOFTWARE, you agree to abide by the terms and conditions of this
Agreement.
1. LICENSE: Canon grants you the non-exclusive right to use the SOFTWARE only on a single computer. You may
physically transfer the SOFTWARE from one computer to another one; provided that the SOFTWARE is used on
only one computer at a time. You shall not install or use the SOFTWARE on a network, multiple CPU, multiple
site arrangement, or any other hardware configuration where the SOFTWARE is accessible to more than one
CPU or to more than one user.
YOU SHALL NOT ASSIGN, SUBLICENSE, RENT, LEASE, LOAN, CONVEY, OR OTHERWISE USE, TRNSFER, COPY,
TRANSLATE, CONVERT TO ANOTHER PROGRAMMING LANGUAGE, ALTER, MODIFY, DECOMPILE OR DISASSEMBLE
THE SOFTWARE, IN WHOLE OR IN PART, EXCEPT AS EXPRESSLY PROVIDED IN THIS AGREEMENT.
2. BACK-UP COPY: You may make one copy of the SOFTWARE solely for a back-up purpose, or copy the
SOFTWARE onto the permanent storage device (e.g. a hard disk) of your computer and retain the original for a
back-up purpose. Any other copying of the SOFTWARE is a violation of this Agreement. You must reproduce
and include the copyright notice on the back-up copy.
3. SUPPORT AND UPDATE: Canon is not responsible for maintaining or supporting you to use the SOFTWARE. No
updates, fixes or support will be made available for the SOFTWARE.
4. LIMITED WARRANTY AND WAIVER OF INDEMNIFICATION: It is your responsibility to choose and maintain the
SOFTWARE. Canon will not guarantee uninterrupted service or absence or correction of errors. Therefore, the
SOFTWARE is licensed to you on an “AS IS” basis without warranty of any kind. The CD-ROM storing the
SOFTWARE is warranted only against defective material under normal use for a period of ninety (90) days from
the date you purchased the same as evidenced by a receipt or other evidence. The limited warranty does not
apply if the failure of the CD-ROM resulted from accident, abuse or misapplication of the SOFTWARE and shall
not extend to anyone other than the original user of the SOFTWARE.
CANON, CANON’S SUBSIDIARY, DERLER OR DISTRIBUTOR DISCLAIMS ALL WARRANTIES, INCLUDING ANY WARRANTY
OF MERCHANTABILITY OR FITNESS FOR A PARTICULAR PURPOSE, WITH RESPECT TO THE SOFTWARE EXCEPT FOR THE
GUARANTY FOR THE CD-ROM STATED ABOVE.
NEITHER CANON, CANON’S SUBSIDIARY, DISTRIBUTOR NOR DEALER IS LIABLE FOR ANY CONSEQUENTIAL OR
INCIDENTAL LOSS OR DAMAGE, INCLUDING LOSS OF PROFITS, EXPENSE OR INCONVENIENCE, WHATSOEVER CAUSED
BY OR ARISING OUT OF THE SOFTWARE OR THE USE THEREOF.
CANON, CANON’S SUBSIDIARY, DISTRIBUTOR OR DEALER SHALL HAVE NO OBLIGATION TO INDEMNIFY YOU
AGAINST ANY CLAIM OR SUIT BROUGHT BY A THIRD PARTY ALLEGING THAT THE SOFTWARE OR THE USE THEREOF
INFRINGES ANY INTELLECTUAL PROPERTY OF SUCH THIRD PARTY.
5. TERM: This Agreement is effective upon your using the SOFTWARE and remains in effect until expiration of all
copyright interests in the SOFTWARE unless earlier terminated. You may terminate this Agreement by
destroying the SOFTWARE. This Agreement will also terminate if you fail to comply with any of the terms of
this Agreement. In addition to enforcement of Canon’s legal right, you must then promptly return to Canon,
Canon’s Subsidiary or Canon’s distributor or dealer, or destroy the SOFTWARE and you shall not use the
SOFTWARE thereafter.
6. U.S. GOVERNMENT RESTRICTED RIGHTS NOTICE: The SOFTWARE is provided with RESTRICTED RIGHTS. Use,
duplication or disclosure is subject to restrictions as set forth in either subparagraph ( c )( l )( ii ) of the Rights in
Technical Data and Computer software clause at DFARs 252.227-7013 or subparagraph ( c )( l ) and ( 2 ) of the
Commercial Computer Software Restricted Rights Clause at FAR 52.227-19, as applicable.
7. SEVERABILITY: In the event that any provision of this Agreement is declared or found to be illegal by any court
or tribunal of competent jurisdiction, such provision shall be null and void with respect to the jurisdiction of
that court or tribunal and all the remaining provisions of this Agreement shall remain in full force and effect.
8. ACKNOWLEDGEMENT: BY USING THE SOFTWARE, YOU ACKNOWLEDGE THAT YOU HAVE READ THIS
AGREEMENT, UNDERSTOOD IT, AND AGREE TO BE BOUND BY ITS TERMS AND CONDITIONS. YOU ALSO AGREE
THAT THIS AGREEMENT IS THE COMPLETE AND EXCLUSIVE STATEMENT OF AGREEMENT BETWEEN YOU AND
CANON CONCERNING THE SUBJECT MATTER HEREOF AND SUPERSEDES ALL PROPOSALS OR PRIOR
AGREEMENTS, VERBAL OR WRITTEN, AND ANY OTHER COMMUNICATIONS BETWEEN THE PARTIES RELATING
TO THE SUBJECT MATTER HEREOF. NO AMENDMENT TO THIS AGREEMENT SHALL BE EFFECTIVE UNLESS
SIGNED BY A DULY AUTHORIZED OFFICER OF CANON.

Introduction
Thank you for purchasing a Canon PowerShot Pro70 Digital Camera. A number of software
tools have been bundled with the camera to enable you to load images onto a computer
for retouching and editing. These tools are all you need to enjoy connecting with a
computer and retouching, editing and organizing your images.
Please read this guide and the Hardware Guide to get the most out of your new PowerShot
Pro70 and the wonderful world of high-quality digital imaging.
• Please refer to the guides that accompanied your Windows or Macintosh operating system for
instructions on their basic operation.
• This guide explains how to connect to a computer and load images with the driver software.
For instructions past this stage, such as image retouching, please refer to the quick start guides
for each individual software program, which have been provided as electronic manuals (PDF
files that can be read with Adobe Acrobat Reader).
Disclaimer
1. While every effort has been made to ensure that the information contained in this guide is accurate
and complete, no liability can be accepted for any errors or omissions. We respectfully request that
you notify the nearest Canon Customer Support Help Desk if you have any questions or suggestions
about this guide. Canon Inc. reserves the right to change the specifications of the hardware and
software described herein at any time without prior notice.
2. No part of this guide may be reproduced, transmitted, transcribed, stored in a retrieval system, or
translated into any language in any form, by any means, without the prior written permission of
Canon Inc.
3. Canon Inc. makes no warranties for damages resulting from corrupted or lost data due to a mistaken
operation or malfunction of the software or equipment.
Trademark Acknowledgments
• Canon and PowerShot are trademarks of Canon Inc.
• Adobe, Acrobat and Photoshop are trademarks of Adobe Systems Incorporated.
• CompactFlash is a trademark of SanDisk Corporation.
• IBM is a registered trademark of International Business Machines Corporation.
• Macintosh, Power Macintosh, QuickTime and QuickTime VR are trademarks of Apple Computer Inc.
• Microsoft, Windows and Windows NT are registered trademarks of Microsoft Corporation in the U.S. and
other countries.
• PhotoImpact is a trademark of Ulead Systems, Inc.
• Other names and products not mentioned above may be trademarks or registered trademarks of their
respective companies.
Copyright © 1998 Canon Inc. All rights reserved.
1

Table of Contents
List of Supplied Accessories for Connecting to a Computer 3
Optional Accessories 3
Software Overview 4
2
Chapter 1
Chapter 2
Loading Images onto a Windows Computer 5
The Software Programs 6
Loading Images from a Digital Camera onto a Computer 6
Composing Slide Shows on a Computer 6
Searching for Images Using the Shooting Date/Time as a Clue 7
Merging Several Images to Create a Panorama 8
Organizing Large Numbers of Images Intuitively 8
Image Processing: From Retouching to Web Site Design 9
Installing the Software 10
Computer System Requirements 10
Installation Procedures 10
Connecting the Camera to the Computer to Load Images 13
Connecting to the Computer 13
Precautions to Observe while Connected 14
Loading Images with TWAIN-Compliant Application Programs 14
Loading Images Directly from a CF Card 20
Installing the CF Card 20
Precautions to Observe while Connected 21
Loading Images with TWAIN-Compliant Application Programs 21
How to Read the Quick Start Guides for Application Programs 22
Loading Images onto a Macintosh Computers 23
The Software Programs 24
Loading Images from a Digital Camera onto a Computer 24
Searching for Images Using the Shooting Date/Time as a Clue 24
Merging Several Images to Create a Panorama 25
Installing the Software 26
Computer System Requirements 26
Installation Procedures 26
Connecting the Camera and Computer to Load Images 28
Precautions to Observe while Connected 29
Loading Images Directly from a CF Card 30
Precautions to Observe while Connected 30
Loading Images into Application Programs 31
How to Read the Quick Start Guides for Application Programs 33
Supplied Accessories for Connecting to a Computer
The following items, which are bundled with your PowerShot Pro70 Digital Camera, are
required to connect to a computer.
• PC Interface Cable IFC-100PC
• Macintosh Interface Cable IFC-100MC
• PowerShot Pro70 Solution CD-ROM
• Software Guide (this guide)
Optional Accessories
The following optional item is available for use with the PowerShot Pro70 to
load images onto a computer. Purchase it according to your needs.
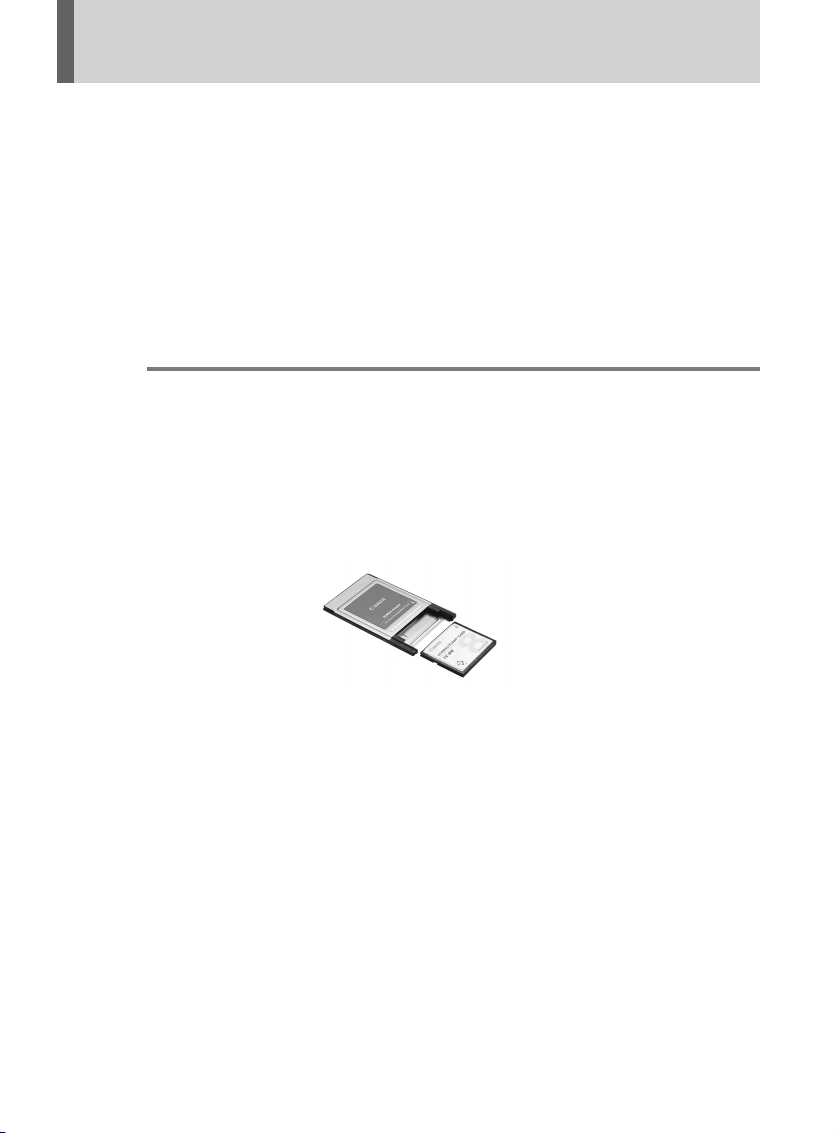
PCMCIA Card Adapter
This device enables you to insert a CF card into a PC card slot or reader.
Purchase this item if your computer is equipped with a PC card slot or reader
to achieve even faster image transfers.
3
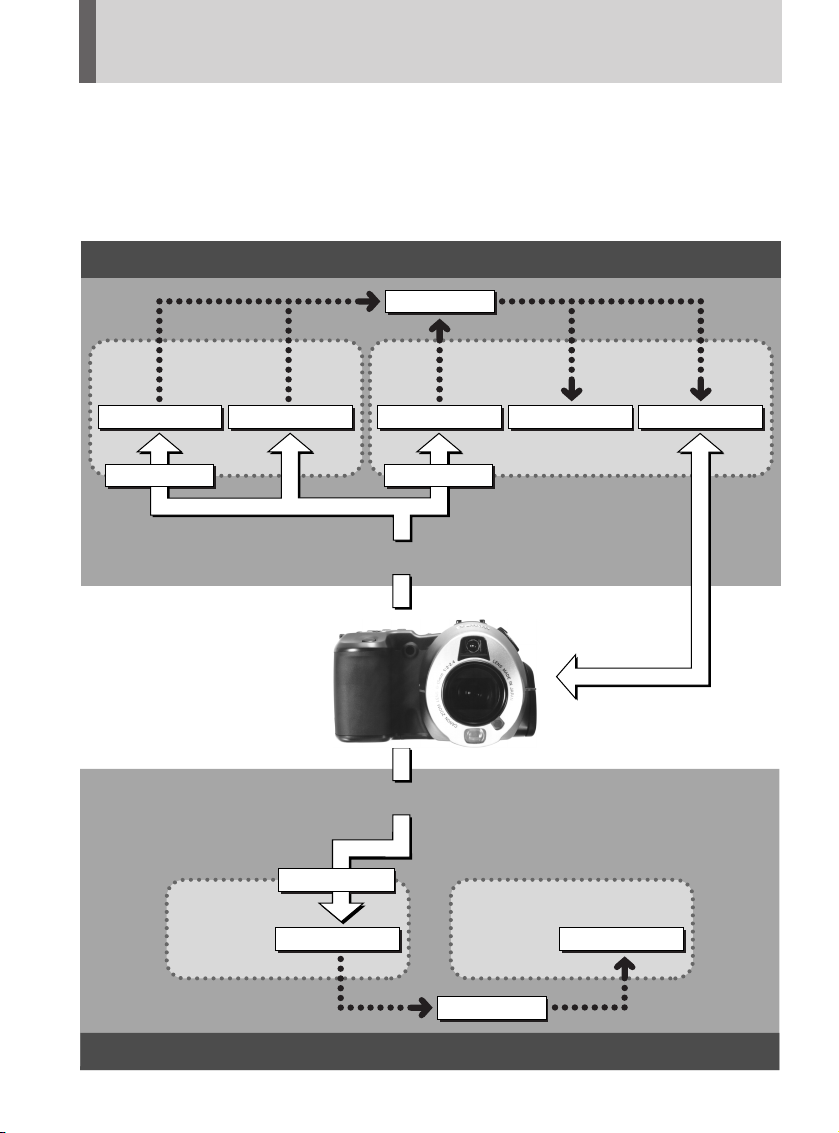
Software Overview
The PowerShot Solution CD-ROM contains application programs featuring a host of
capabilities with which to process images, ranging from data transfer to advanced image
retouching. Install the programs as required to satisfy your individual needs.
Windows Platform
Save to Disk
Display
on
Computer
TimeTunnelZoomBrowser PhotoImpact PhotoStitch SlideShowMaker
PowerShot Pro70
Display
on
Computer
Plug-In Module
TimeTunnel
TWAIN DriverTWAIN Driver
Load Images
Load Images
Process
with
Computer
Process
with
Computer
PhotoStitch
Save to Disk
Macintosh Platform
4
Chapter 1
Loading Images onto
a Windows Computer
○○○○○○○○○○○○○○○○○○○○○○○○○○○○○○○○○○○○○○○
○○○○○○○○○○○○○○○○○○○○○○○○○○○○○
This chapter introduces the
application programs for Windows
that are contained on the
PowerShot Solution CD-ROM. In
addition to explaining how to
install the software, it describes
the techniques for loading images
onto the computer.
○○○○○○○○○○○○○○○○○○○
5
The Software Programs
Loading Images from a Digital Camera onto a Computer
Loading Images onto a Windows Computers
TWAIN Driver
Driver software is required to transfer image data from your camera so that it
can be processed and edited on your computer. The PowerShot Pro70 software
package includes a TWAIN Driver for Windows that serves this purpose.
The TWAIN Driver can be used with various TWAIN-compliant application
programs, such as PhotoImpact and ZoomBrowser, to load images directly into
the application program from the camera.
Use the TWAIN Driver in conjunction with your TWAIN-compliant applications.
PhotoImpact and ZoomBrowser are two such programs bundled with the
PowerShot Pro70.
TWAIN is an acronym for a set of standards used to transfer graphic data between
computers and digital cameras, scanners or other digital imaging devices. The
TWAIN Driver supplied with your camera conforms to these standards.
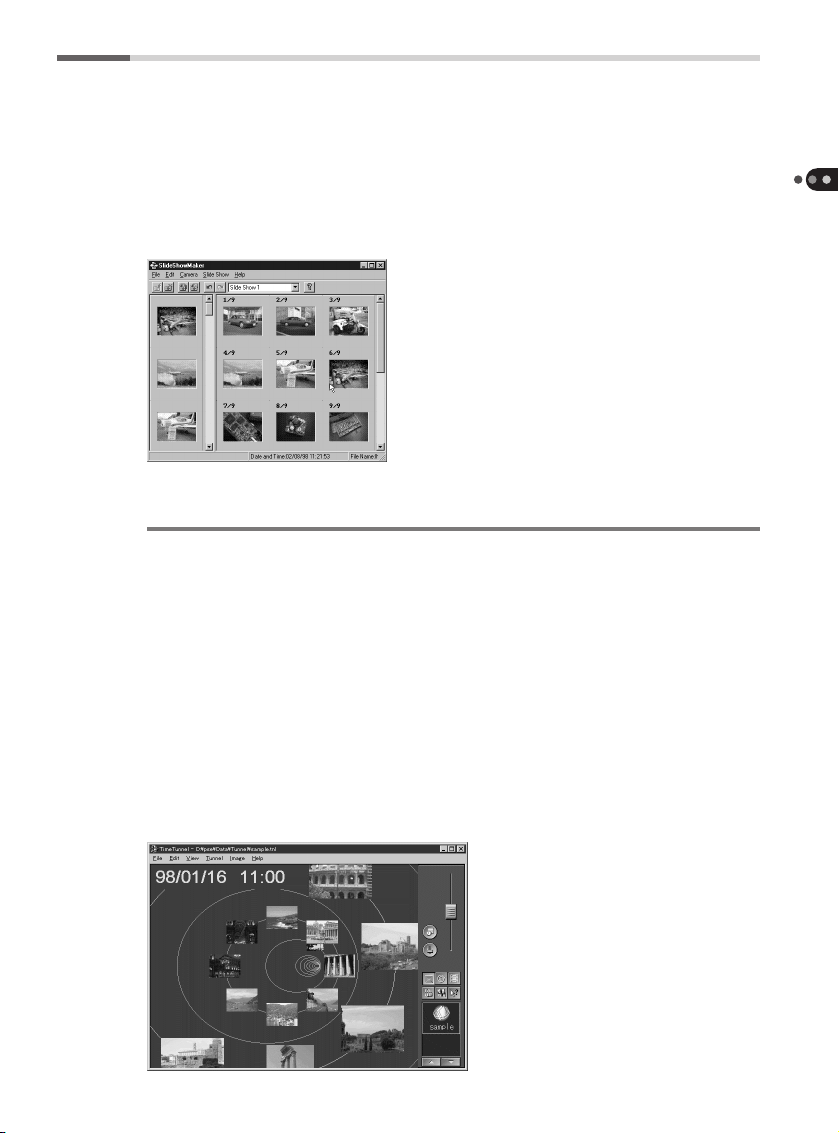
Composing Slide Shows on a Computer
PowerShot Utilities SlideShowMaker
PowerShot Pro70 is equipped with a slide show function that permits the
selective viewing of the images shot by the camera. SlideShowMaker is an
application program that allows you to edit slide shows on a computer
running Windows. The program makes it simple to specify slide order and edit
existing slide shows.
6
SlideShowMaker also simplifies the process of copying slides to the camera that
have been created or retouched with a computer, a feature that is handy for
making sophisticated slide show presentations complete with title screens. After
editing the slide show, you can copy it back to the camera for presentation.
Loading Images onto a Windows Computers
Searching for Images Using the Shooting Date/Time as a Clue
PowerShot Utilities TimeTunnel
“I’d like to find that photo. Lets see... Maybe it was last summer...”
“I want to find that picture of that scene we saw on the third or fourth day of
our trip two years ago...”
TimeTunnel is the browser utility that makes such searches possible. When
you shoot an image with your PowerShot Pro70, it automatically records the
date and time of shooting. TimeTunnel uses this data to organize and display
tiny versions of your images, called thumbnails, in chronological order on
rings so that you can easily search and find specific images. As you watch the
images scroll past on the screen, you receive the impression of being in a time
tunnel. When you find the target thumbnail, all you need do is double-click it
to view the original image.
7

Merging Several Images to Create a Panorama
Loading Images onto a Windows Computers
PhotoStitch
Ever tried to capture a panoramic scene with a camera only to find it doesn’t
fit a single frame? Or had difficulty photographing a document so it fits a
single frame and can still be read?
PhotoStitch is the powerful application program that remedies these situations, allowing you to capture an entire scene and assemble legible photographic documents. Using PhotoStitch, you can create one large image by
merging several images or documents photographed in horizontal or vertical
sequences, or in a matrix format. PhotoStitch is also furnished with an
electronic manual, the PhotoStitch Shooting Guide, with hints on how to
shoot to obtain better images for merging.
Organizing Large Numbers of Images Intuitively
ZoomBrowser
ZoomBrowser is a digital image database program with powerful features for
organizing and searching the image files that soon proliferate as you discover
the joys of digital imaging. File names alone do not reveal much about
images. That’s where ZoomBrowser shines. It permits you to display all of the
registered images simultaneously on the screen. Use the zoom function to
expand and shrink sets of images to instantly sort through them visually. Its
almost like having all of your images spread out on a table so that searching
and organizing becomes easy. ZoomBrowser is also equipped with a range of
advanced search functions.
8
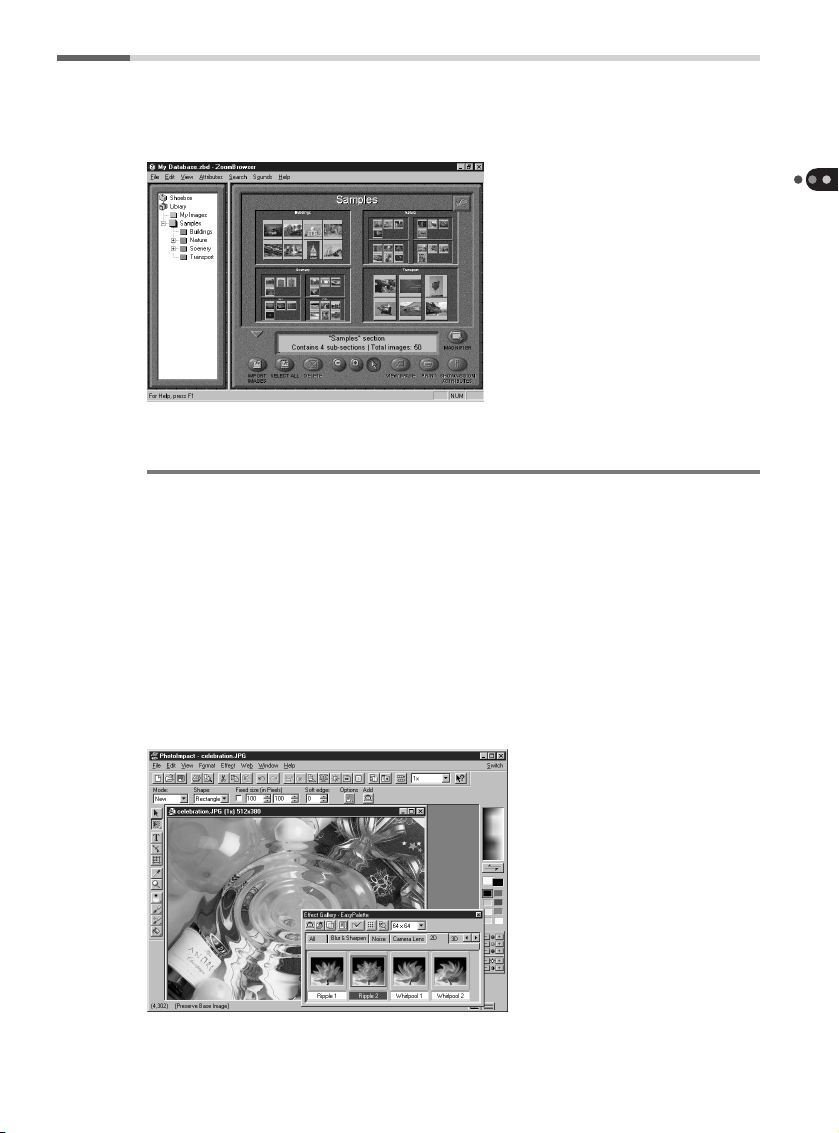
Image Processing: From Retouching to Web Site Design
Ulead PhotoImpact
“Since I have entered the delightful world of digital imaging with my
PowerShot Pro70, why stop at just viewing my images? Why not try some
special effects?” If you have shared these thoughts, the PhotoImpact photo
retouching application program is your answer. It features an abundant array
of special effects and retouching, processing and editing functions that can be
performed with a single click using such innovations as the ‘EasyPalette.’
Discover how to broaden your horizons in digital imaging with PhotoImpact,
which even makes web site design easy with its deceptively simple but farreaching capabilities.
Loading Images onto a Windows Computers
9

Installing the Software
Installing the software contained on the PowerShot Solution CD-ROM is the first procedure
Loading Images onto a Windows Computers
to complete before you can start loading images onto your computer.
Computer System Requirements
Your computer system must satisfy the following requirements to operate the
bundled software.
Operating System: Windows 95, Windows 98 or Windows NT 4.0
CPU: 486DX2/66 MHz or higher (Pentium recommended)
RAM: 24 MB or more (32 MB or more recommended)
32 MB or more recommended for Windows NT
Free Disk Space: TWAIN Driver 2.3: 15 MB or more
ZoomBrowser 1.1: 30 MB or more
SlideShow Maker 1.2: 20 MB or more
TimeTunnel 2.3: 30MB or more
PhotoStitch 2.2: 40 MB or more
PhotoImpact 4.0: 130 MB or more
Ports: Standard RS-232C interface (PowerShot Pro70)
D-SUB 9-PIN connector
Monitor: 640 x 480 pixels, 256 colors or more
(1,024 x 768 pixels, 32,000 colors or more recommended)
Sound Card: Required to play sound annotations
• CD-ROM Drive is required for software installation.
• QuickTime Version 3.0 or later is required to save PhotoStitch images in
QuickTime VR format.
Installation Procedures
The following programs can be installed from the PowerShot Solution CD-ROM.
• TWAIN Driver 2.3
Install this program if you intend to use PhotoImpact, ZoomBrowser or
other TWAIN-compliant application programs to load images from the
camera.
• Slide Show Maker 1.2
• TimeTunnel 2.3
10

• PhotoStitch 2.2
• ZoomBrowser 1.1
• Ulead PhotoImpact 4.0
• Adobe Acrobat Reader 3.0
Install this program if it is not already installed on your computer to read the
electronic manuals for each application program (p. 12).
1. Start you computer. If you have any application programs running,
close them now.
2. Place the CD-ROM in the computer drive.
The list of software on the disk will automatically display. Use this window to
select the programs you wish to install.
• The install window will not automatically display if the CD-ROM drive’s auto run
function is turned off. If this occurs, use the following procedures to display the
window.
1. Double-click the [My Computer] icon on the Windows desktop to open its folder,
and double-click the [CD-ROM] icon.
2. Double-click the [Setup] icon.
3. Click the names of the programs you wish to install.
Loading Images onto a Windows Computers
Click the programs you wish to
install.
Click here when you have
completed your selection.
A window with an explanation of the programs you have chosen will display.
11

4. Click the button at the top of the window bearing the program
Loading Images onto a Windows Computers
name.
Installation will start.
• To proceed without installing the software, click the [Return to Software List]
button, which will return you to the window in Step 3.
5. When the installation finishes, the explanatory window will display
again. Click the [Return to Software List] button at the bottom of the
window.
6. Repeat steps 3 to 5 to install the required programs.
Click here to install the program.
Click here.
12
7. When you have finished installing programs, click the [Exit] button at
the bottom of the window to close the installation window.
About Adobe Acrobat Reader
An electronic manual for each program that explains the basic functions and
procedures has been provided as a PDF file that can be read by Adobe
Acrobat Reader 3.0. If this program is not already installed on your computer,
click [Acrobat Reader] in Step 3 and install the program.

Connecting to the Computer to Load Images
Now that you have finished installing the required software, connect the camera to the
computer and try your hand at uploading images.
Connecting to the Computer
Use the IFC-100PC interface cable to connect the camera to the computer.
• When connecting these devices, always ensure that the computer is shut off and
the camera’s mode dial is set to lock.
• Since transferring files between the computer and the camera is relatively powerintensive, it is advisable to power the camera with an AC power source.
1. Turn off the computer and set the camera’s mode dial to lock.
2. Open the camera’s terminal cover and connect the IFC-100PC inter-
face cable to the digital terminal.
Mode Dial
Terminal Cover
Loading Images onto a Macintosh Computers
Digital Terminal
IFC-100PC
Interface Cable
3. Connect the other end of the cable to the computer’s serial port
(COM port).
Serial Port
(COM Port)
IFC-100PC
Interface Cable
4. Turn on the computer.
5. Set the camera’s mode dial to PC.
13

Precautions to Observe while Connected
Loading Images onto a Windows Computers
• Do not turn the camera’s mode dial or disconnect the interface cable while the
camera is connected to the computer.
• Before disconnecting the interface cable, ensure that you turn off the computer and
set the camera mode dial to lock.
Loading Images with TWAIN-Compliant Application Programs
Use the TWAIN Driver to load images into TWAIN-compliant applications, such
as PhotoImpact and ZoomBrowser. The TWAIN Driver is a driver program that
loads into the computer’s memory so that it can be used from within TWAINcompliant applications. Start the TWAIN Driver from within the application
program and load the image data shot by a PowerShot Pro70. Since the
TWAIN Driver does not have a function for saving images, use the application
program to save the loaded images.
The following example demonstrates the procedures for using the TWAIN
Driver with PhotoImpact. The procedures for other applications may vary
slightly.
1. Start PhotoImpact.
2. Choose [File], [Digital Camera] and [Select Source].
14

3. Click [Canon PowerShot] followed by the [Select] button.
This will set the TWAIN Driver as the data source until you change it. You can
skip steps 2 and 4 the next time you load images from the camera.
4. Choose [File], [Digital Camera] and [Canon PowerShot].
The Acquire dialog will display.
Loading Images onto a Windows Computers
5. Click the [ ] button.
The TWAIN Driver window will display.
15

6. Click the [Camera Communication Settings] button.
Loading Images onto a Windows Computers
• Confirm that PowerShot Pro70 is displayed in the Select Camera Model box. If it is
not, click the box’s arrow and select [PowerShot Pro70] from the list.
• Please refer to page 18 for a guide to the TWAIN Driver window.
The Communication Settings dialog will display.
7. Set the port and baud rate settings and click the [OK] button.
This will set the communication settings for the camera. You can skip steps 6
and 7 the next time you load images from the camera.
Select the port to which the camera is attached.
Click this button to automatically detect the
port to which the camera is attached.
Set the baud rate to match your computer’s
capabilities.
Camera Communications
Settings Button
Select Camera Model Box
16
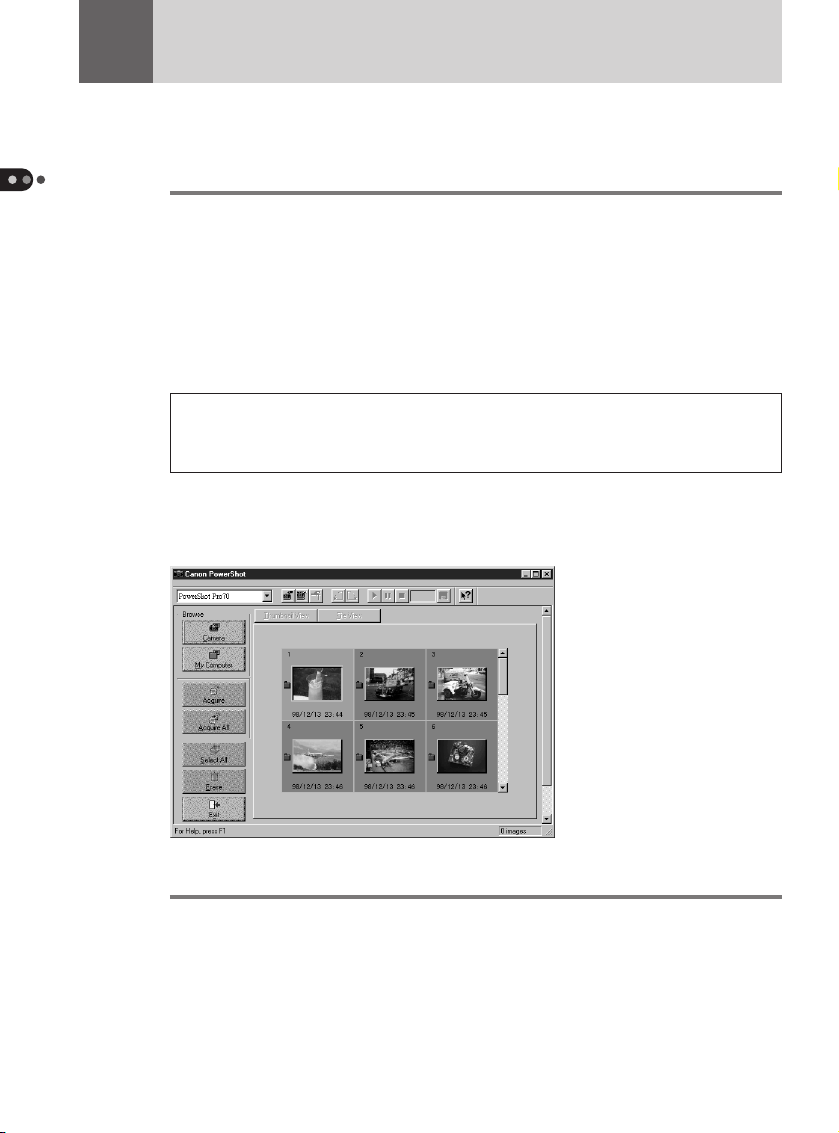
8. Click the [Camera] button.
The thumbnails of the images on the camera’s CF card will display.

A window enabling you to select between CF cards will display if there are two CF
cards installed in the camera. After you have selected a CF card slot, the thumbnails
of the images on that card will display. To change the selection, press the [Camera]
button and select the other CF card.
9. Click the thumbnail of the image you wish to load.
The clicked thumbnail will become selected, which is indicated by the pale
gray frame around the image.
• To select multiple images, press and hold the [Ctrl] key while clicking successive
images.
• To select consecutive images, click the first image, then press and hold the [Shift]
key while clicking the last image in the series.
Loading Images onto a Windows Computers
10. Click the [Acquire] button.
The selected image(s) will load into PhotoImpact.
11. Click the [Exit] button.
The PhotoImpact window will display the image(s). Use PhotoImpact’s [Save]
command under the [File] menu to save the images to disk.
For instructions regarding the steps after loading images, refer to the user’s
manual for PhotoImpact.
17

■ The TWAIN Driver Window
Loading Images onto a Windows Computers
Rotate 90 Degrees Button
Rotates the selected image 90
degrees to the left or right.
Select Camera Model Box
Selects the model of the camera
from the images will be loaded.
Confirm that PowerShot Pro70
is displayed in this box.
Change Display Button
Main Buttons
Buttons for the main functions,
such as Acquire and Exit.
Settings Buttons
Sound Annotation Buttons
These buttons are enabled when
an image associated with a
sound annotation is selected.
Help Button
Thumbnail Display Area
18
Press F1 for Help topics regarding the use of each part of the window. Pressing the
] button changes the cursor into the shape and provides context-sensitive
[
information regarding the part of the window on which you click.

To Listen to a Sound Annotation
The PowerShot Pro70 is equipped with a function that allows you to record sound
annotations and associate them with images. You can play these annotations with
the TWAIN Driver as well as save them as separate files.
mark will display beside images associated with sound annotations. The
The
sound annotation buttons will become enabled when such images are selected.
Save Sound Annotation Button
Saves the sound annotation as a WAVE file.
Remaining Time Indicator
Displays the seconds remaining in a sound annotation in
real-time.
Stop Button
Stops the replay of a sound annotation.
Pause Button
Temporarily pauses the replay of a sound annotation.
Play Button
Plays a sound annotation associated with an image.
Loading Images onto a Windows Computers
19

Loading Images Directly from a CF Card
If your computer is equipped with a PC card slot or PC card reader, you may wish to
Loading Images onto a Windows Computers
purchase the optional PCMCIA card adapter so that you can load images directly from a CF
card onto your computer.
Installing the CF Card
1. Set the camera’s mode dial to lock.
2. Slide open the CF card slot cover in the direction of the arrow.
3. Open the lock lever, press the CF card eject button and remove the CF
card.
Lock Lever
20
CF Card Eject Button
4. Place the CF card in the optional PCMCIA card adapter.
PCMCIA Card Adapter
CF Card
5. Insert the PCMCIA card adapter in the computer’s PC card slot or PC
card reader.

Precautions to Observe while Connected
• Do not remove the CF card or turn off the PC card reader while data is being loaded
from or written to the CF card. Doing so may corrupt the CF card data.
• Always complete the shut down operations on the computer for the PCMCIA card
before removing the PCMCIA card adapter from the PC card slot.
Loading Images with TWAIN-Compliant Application Programs
1. Start the TWAIN Driver according to steps 1 to 5 on pages 14 and 15.
Click the [My Computer] button.
The Computer dialog will display.
Loading Images onto a Windows Computers
2. Select the drive containing the CF card and the [DC97] folder. Click
the [OK] button.
The image data from the CF card will display. For the remaining procedures, start
from Step 9 on page 17. You will select images and click the [Acquire] button.
21

How to Read the Quick Start Guides
for Application Programs
The PowerShot Solution CD-ROM contains quick start guides, electronic manuals in the
Loading Images onto a Windows Computers
form of PDF files, that provide an overview and basis operating instructions for each
software program (There is no quick start guide for the TWAIN Driver. Please refer to its
Help file.) The quick start guides can be displayed and read with the following procedures.
The Adobe Acrobat Reader program is required for displaying the quick start guides.
1. Click the Windows [Start] button on the taskbar, select [Programs]
and chose the [Quick Start Guide] option from the submenu for the
application program under consideration.
A window similar to that below will display. Read the Help topics that will
display whenever you click a button or an item from the index.
22
Index
The selected item
will display
Please refer to the Help file for Adobe Acrobat Reader for more instructions on how
to use this program.
Link (in red)
Jump to a page
with a related
topic
Display Next Page
Display Previous Page
Return to Original Page
Use this to return to the
original page after you have
jumped to a new page
using a link.

Chapter 2
Loading Images onto
a Macintosh
○○○○○○○○○○○○○○○○○○○○○○○○○○○○○○○○○○○○○○○
○○○○○○○○○○○○○○○○○○○○○○○○○○○○○
This chapter introduces the
application programs for
Macintosh that are contained on
the PowerShot Solution CD-ROM.
In addition to explaining how to
install the software, it describes
the techniques for loading images
onto the computer.
○○○○○○○○○○○○○○○○○○○
23

The Software Programs
Loading Images from a Digital Camera onto a Computer
Plug-In Module
Driver software is required to transfer image data from your camera so that it
Loading Images onto a Macintosh Computers
can be processed and edited on your computer. The PowerShot Pro70
software package includes a Plug-In Module for Macintosh that serves this
purpose.
The Plug-In Module can be used with Adobe Photoshop, Adobe PhotoDeluxe
and TimeTunnel to load images directly into the application program from a
PowerShot Pro70.
TimeTunnel is provided on the PowerShot Solution CD-ROM as an application
program compatible with the Plug-In Module.
Searching for Images Using the Shooting Date/Time as a Clue
PowerShot Utilities TimeTunnel
“I’d like to find that photo. Lets see... Maybe it was last summer...”
“I want to find that picture of that scene we saw on the third or fourth day of
our trip two years ago...”
TimeTunnel is the browser utility that makes such searches possible. When
you shoot an image with your PowerShot Pro70, it automatically records the
date and time of shooting. TimeTunnel uses this data to organize and display
tiny versions of your images, called thumbnails, in chronological order on
rings so that you can easily search and find specific images. As you watch the
24

images scroll past on the screen, you receive the impression of being in a time
tunnel. When you find the target thumbnail, all you need do is double-click it
to view the original image.
Merging Several Images to Create a Panorama
PhotoStitch
Ever tried to capture a panoramic scene with a camera only to find it doesn’t
fit a single frame? Or had difficulty photographing a document so it fits a
single frame and can still be read?
PhotoStitch is the powerful application program that remedies these situations, allowing you to capture an entire scene and assemble legible photographic documents. Using PhotoStitch, you can create one large image by
merging several images or documents photographed in horizontal or vertical
sequences, or in a matrix format.
Loading Images onto a Macintosh Computers
25

Installing the Software
Installing the software contained on the PowerShot Solution CD-ROM is the
first procedure to complete before you can start loading images onto your
computer.
Computer System Requirements
Loading Images onto a Macintosh Computers
Your computer system must satisfy the following requirements to operate the
software.
Operating System: Mac OS 7.5.3 or higher
QuickTime 2.1 or higher
CPU: 68LC040 or higher (68K) or Power Macintosh (PPC)
RAM: 24 MB or more (32 MB or more recommended)
Free Disk Space: Plug-In Module 2.3: 15 MB or more
TimeTunnel 1.6: 25 MB or more
PhotoStitch 1.5/2.2: 30 MB or more
Monitor: 640 x 480 pixels, 256 colors or more
(1,024 x 768 pixels, 32,000 colors or more recommended)
• CD-ROM Drive is required for software installation
• QuickTime Version 3.0 or higher or QuickTime Version 2.5 and the QuickTime VR
Extension 2.0.1 or higher are required to save PhotoStitch images in the QuickTime
VR format.
• Plug-In Module 2.3 has been confirmed compatible with Photoshop 3.0 and higer
versions.
Installation Procedures
The following programs can be installed from the PowerShot Solution CD-ROM.
• Photoshop Plug-In Module 2.3
This program must be installed to load images into Photoshop and other
image editing programs.
• TimeTunnel 1.6
• PhotoStitch 2.2 (PPC)/1.5(68K)
• Adobe Acrobat Reader
Install this program if it is not already installed on your computer to read the
electronic manuals for each application program (p. 24).
26

1. Place the CD-ROM in the computer drive.
2. Double-click the [PowerShot] icon.
3. Copy the required software.
Plug-In Module
The [Plug-In] folder contains two versions of the
Plug-In Module: [Canon PowerShot PPC] for
Power PC models, and [Canon PowerShot 68K]
for 68K models. Copy the option appropriate to
your computer system to the [Import/Export]
folder, which is nestled inside the Photoshop
[Plug-ins] folder.
Copy the Plug-In Module Quick Start Guide to a folder of your choice on your
hard drive.
TimeTunnel
Open the [TimeTunnel] folder and double-click
[Installer]. Follow the instructions suggested by the
installer. The TimeTunnel Quick Start Guide will be
automatically copied to your hard disk by the
installer.
Loading Images onto a Macintosh Computers
PhotoStitch
Open the [PhotoStitch] folder and double-click
[Installer]. Follow the instructions suggested by the
installer. The PhotoStitch Quick Start Guide will be
automatically copied to your hard disk by the
installer.
About Adobe Acrobat Reader
An electronic manual for each program that explains the basic functions and
procedures has been provided as a PDF file that can be read by Adobe
Acrobat Reader. If this program is not already installed on your computer,
open the [Acrobat] folder and double-click [Installer] to copy the program to
your hard disk.
27

Connecting the Camera and Computer
Now that you have finished installing the required software, connect the
camera to the computer and try your hand at uploading images. Use the IFC100MC interface cable to connect the camera to your Macintosh.
• When connecting these devices, always ensure that the computer is shut off and
Loading Images onto a Macintosh Computers
the camera’s mode dial is set to lock.
• Since transferring files between the computer and the camera is relatively power-
intensive, it is advisable to power the camera with an AC power source.
1. Turn off the computer and set the camera’s mode dial to lock.
2. Open the camera’s terminal cover and connect the IFC-100MC
interface cable to the digital terminal.
Mode Dial
Terminal Cover
28
Digital Terminal
IFC-100MC
Interface Cable
3. Connect the other end of the cable to the computer’s modem port or
printer port.
Printer Port Modem Port
Connect the interface
cable to the printer or
modem port.
IFC-100MC
Interface Cable

4. Turn on the computer.
5. Select [Chooser] from the [Apple] menu and set AppleTalk to [Inac-
tive].
6. Set the camera’s mode dial to PC.
Precautions to Observe while Connected
• Do not turn the camera’s mode dial or disconnect the interface cable while the
camera is connected to the computer.
• Before disconnecting the interface cable, ensure that you turn off the computer and
set the camera mode dial to lock.
Loading Images onto a Macintosh Computers
29

Loading Images Directly from a CF Card
If your computer is equipped with a PC card slot or PC card reader, you may wish to
purchase the optional PCMCIA card adapter so that you can load images directly from a CF
card onto your computer.
1. Set the camera’s mode dial to lock.
Loading Images onto a Macintosh Computers
2. Slide open the CF card slot cover in the direction of the arrow.
3. Open the lock lever, press the CF card eject button and remove the
CF card.
Lock Lever
CF Card Eject Button
4. Place the CF card in the optional PCMCIA card adapter.
PCMCIA Card Adapter
5. Insert the PCMCIA card adapter in the computer’s PC card slot or PC
card reader.
Precautions to Observe while Connected
• Do not remove the CF card or turn off the PC card reader while data is being loaded
from or written to the CF card. Doing so may corrupt the CF card data.
• Always complete the shut down operations on the computer for the PCMCIA card
before removing the PCMCIA card adapter from the PC card slot.
30
CF Card

Loading Images into Application Programs
Use the Plug-In Module to load images shot with your PowerShot Pro70 into
an application program, such as Photoshop or TimeTunnel. The Plug-In
Module is a driver program that is used in conjunction with graphics application programs. Start the Plug-In Module from within the application program
and load the images from the PowerShot Pro70. Since the Plug-In Module
does not have a function for saving images, use the application program to
save the loaded images.
The following example demonstrates the procedures for using the Plug-In
Module with Photoshop. The procedures for other applications may vary
slightly.
1. Start Photoshop.
2. Choose [File], [Import] and [Canon PowerShot PPC] or [Canon
PowerShot 68K].
Loading Images onto a Macintosh Computers
The Plug-In Module window will display (next page).
3. Read the images on a CF card in a camera or PC card slot and load
selected images into Photoshop.
Please read the Plug-In Module Quick Start Guide for detailed instructions for
these procedures.
31

■ Plug-In Module Window
Image Buttons
Loading Images onto a Macintosh Computers
Settings Buttons
Use these to read the
images on a CF card in a
camera or PC card slot.
Use these to load
images.
Closes the Plug-In
Module.
Sound Annotation Buttons
These buttons are enabled when an
image associated with a sound
annotation is selected.
32
Hints about operations
and buttons are
displayed here.
Thumbnail Display Area
Thumbnails will display in this area
when the images from a CF card in
a camera or CF card slot are read.
To Listen to a Sound Annotation
The PowerShot Pro70 is equipped with a function that allows you to record sound annotations
and associate them with images. You can play these annotations with the Plug-In Module as
well as save them as separate files.
mark will display beside images associated with sound annotations. The sound
The
annotation buttons will become enabled when such images are selected.
The sound annotation buttons will not appear when the thumbnail display area is set to the column mode. To operate these
buttons, switch the display area to the matrix mode.
Save Sound File Button
Saves the sound annotation as an AIFF format file.
Remaining Time Indicator
Displays the seconds remaining in a sound annotation in real-time.
Stop Button
Stops the replay of a sound annotation.
Play Button
Plays a sound annotation associated with an image.

How to Read the Quick Start Guides
for Application Programs
The PowerShot Solution CD-ROM contains quick start guides, electronic manuals in the
form of PDF files, that provide an overview and basis operating instructions for each
software program. The quick start guides can be displayed and read with the following
procedures. The Adobe Acrobat Reader program is required for displaying the quick start
guides (p. 27).
1 Double-click the [Quick Start Guide] icon of the application program
under consideration.
The quick start guides for TimeTunnel and PhotoStitch can be found within
their respective folders.
A window similar to that below will display. Read the Help topics that will
display whenever you click a button or an item from the index.
Loading Images onto a Macintosh Computers
Index
The selected item
will display
• Please refer to the Help file for Adobe Acrobat Reader for
more instructions on how to use this program.
Link (in red)
Jump to a page
with a related
topic
Display Next Page
Display Previous Page
Return to Original Page
Use this to return to the
original page after you have
jumped to a new page
using a link.
33

Canon Customer Support
NORTH AMERICA
Canon Computer Systems, Inc.
Canon U.S.A., Inc.
Computer Systems Customer Care Center
Phone (US): 1-800-423-2366 (Automated Support. 24 hours/day, 7 days/week)
Canon Canada Inc.
Computer Systems Customer Care Centre
Phone (Canada): 1-800-263-1121 (24 hours/day, 7days/week)
EUROPE
OCEANIA
ASIA
Canon (UK) Ltd.
Helpdesk
Tel No.: 0990 143 723 (Calls may be recorded.) Fax No.: 0990 143 340 BBS No.: 0990 143 350
Canon S.A.V. Photo Video France
Hotline: (1) 49 04 01 00 Télécopie: (1) 49 04 01 01
Canon Deutschland GmbH
Canon-Hotline-Service
Customer-Support: 02151/349-555 Telefax: 02151/349-588
Info-Desk: 02151/349-566 Info-Desk Fax: 02151/349-599 Mailbox: 02151/349-577
Cano Italia S.p.A.
Pront Canon: 02 66984383
Canon Australia Pty. Ltd.
Info-Line: (02) 9805 2864
Canon New Zealand Ltd.
Info-Line: 0900-522666
Canon Hong Kong Co., Ltd.
Phone: 852-2739-0802 Fax: 852-2739-6428
Canon Singapore Pte. Ltd.
79 Anson Road, #09-01 / 06, Singapore 079906
Phone: (65) 532 4400 Fax: (65) 221 7577
Canon Marketing Services
2 Alexandra Road, #04-01A, Delta House, Singapore 159919
Phone: (65) 273 5311 Fax: (65) 273 6786
Canon Marketing (Malaysia) Sdn. Bhd.
13A Jalan 219, 46100 Petaling Jaya, Selangor D.E., Malaysia
Phone: (60) 757 7210 Fax: (60) 757 7832
Canon Marketing (Thailand) Co., Ltd.
2nd Floor, Indosuez House, 152 Wireless Road, Bangkok 10330 Thailand
Phone: (662) 651 4000, Ext. 454 Fax: (662) 651 4095
34

Ulead Customer Support
For : Ulead Photolmpact 4.0
INTERNATIONAL
Ulead Systems, Inc. (Taiwan)
Tel: +886-2-8787-6740 Fax: +886-2-8787-6741 E-mail: support@ulead.com.tw
Ulead Systems, Inc. (USA)
Tel: +1-310-523-9393 Fax: +1-310-523-9399 E-mail: support@ulead.com
Germany Ulead Support Center
Tel: +49-2602-917-329 Fax: +49-2602-917-327 E-mail: uleadger@aol.com
France Center d’assistance Ulead
Tel: +33-1-30-76-10-30 Fax: +33-1-30-76-22-87 E-mail: graphics@imaginet.fr
BIT (UK) Limited
Tel: +44-1420-83811 Fax: +44-1420-80657 E-mail: 100111.3424@compuserve.com
Internet: www.bit.co.uk
World Wide Web http://www.ulead.com
35

H-IE-XXX-VXA XX98ABX.X
©CANON INC. 1998 PRINTED IN JAPAN
 Loading...